IKEA · Kids' Furniture
How to assemble IKEA SNIGLAR Changing Table
Step-by-step IKEA SNIGLAR Changing Table assembly: 12 illustrated steps, an animated video, the hardware list and the tools you need — following the official instructions (AA-2089163-2).
- 12 illustrated steps
- 8 steps in the manual
- 1:55 video
- 72×53×87 cm cm
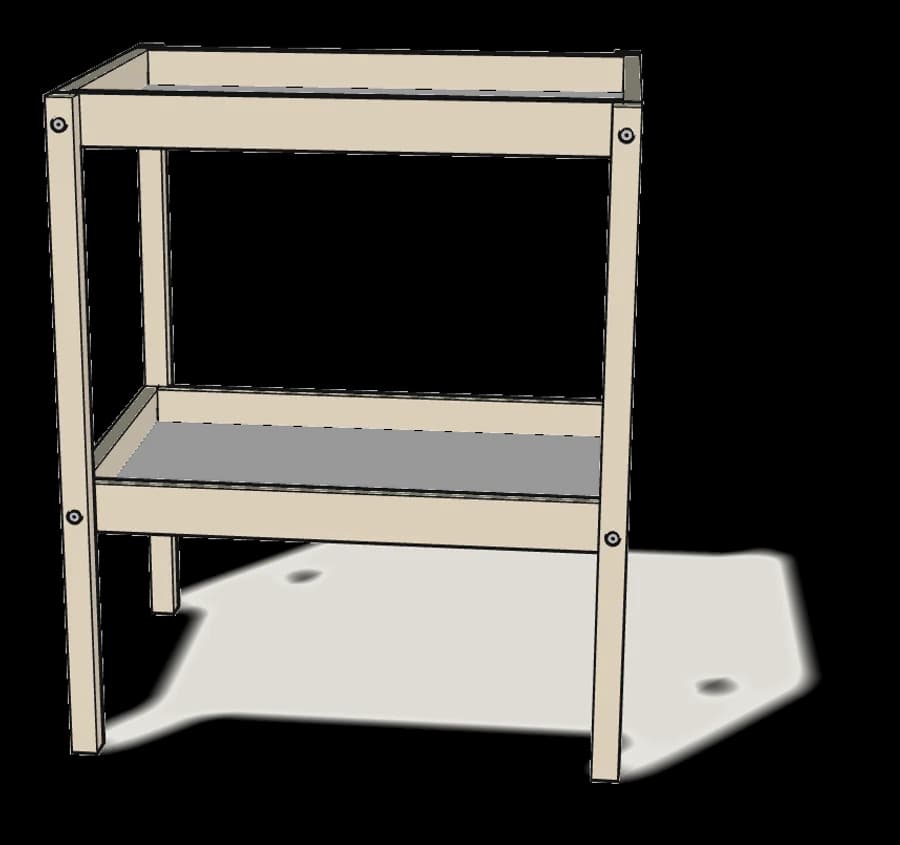
What you need
Tools
- Flat-head screwdriver
- Allen key (included)
Hardware in the box
| Part no. (as printed in the manual) | Qty |
|---|---|
| 10002274 | 8× |
| 121121 | 8× |
| 101350 | 16× |
| 101343 | 16× |
Step-by-step assembly
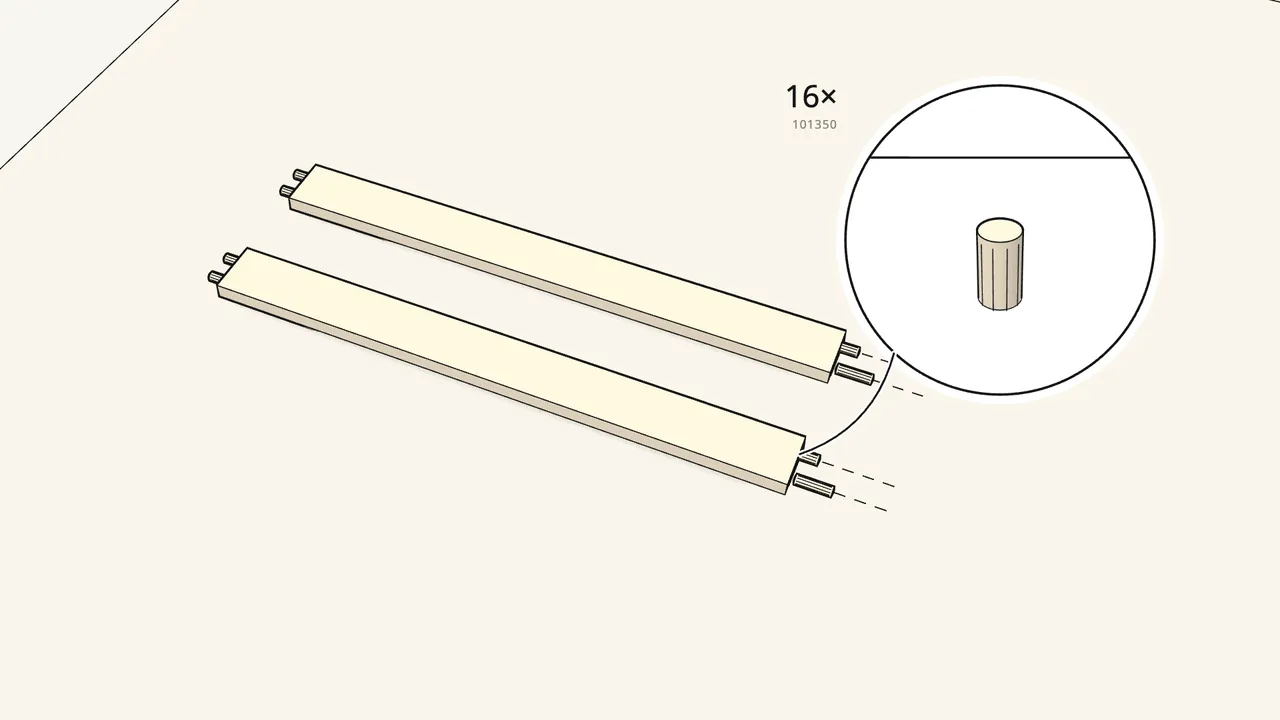
Step 1
Push 4 dowels (101350) into the ends of each long side.
Each tray has 2 long sides — 16 dowels for both trays.
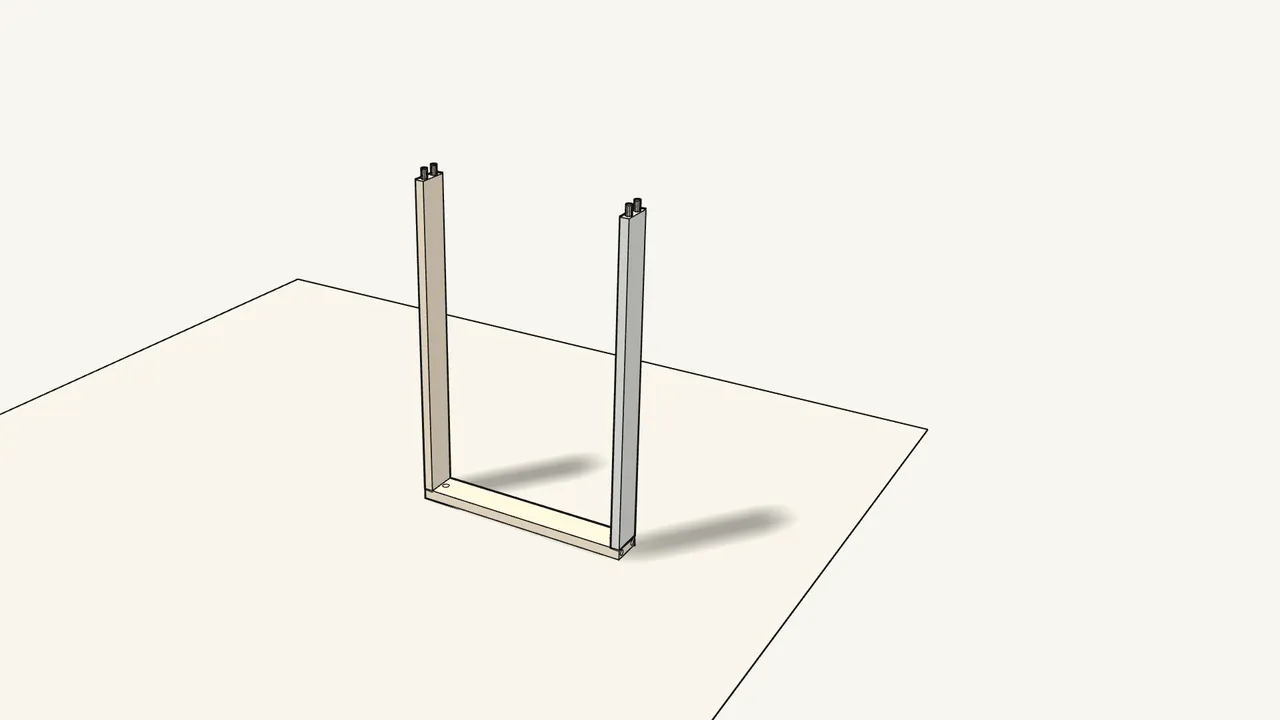
Step 2
Stand both long sides on an end rail.
Their dowels go into the holes in the end rail.
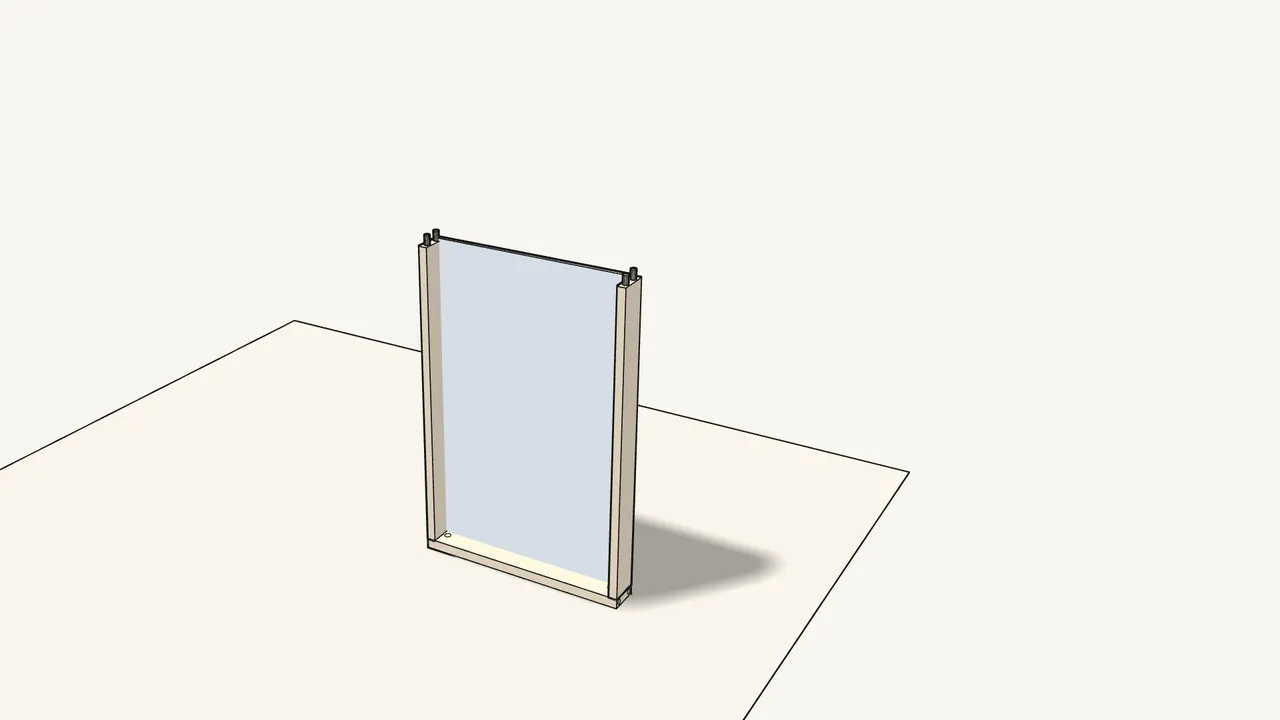
Step 3
Slide the white panel down into the grooves.
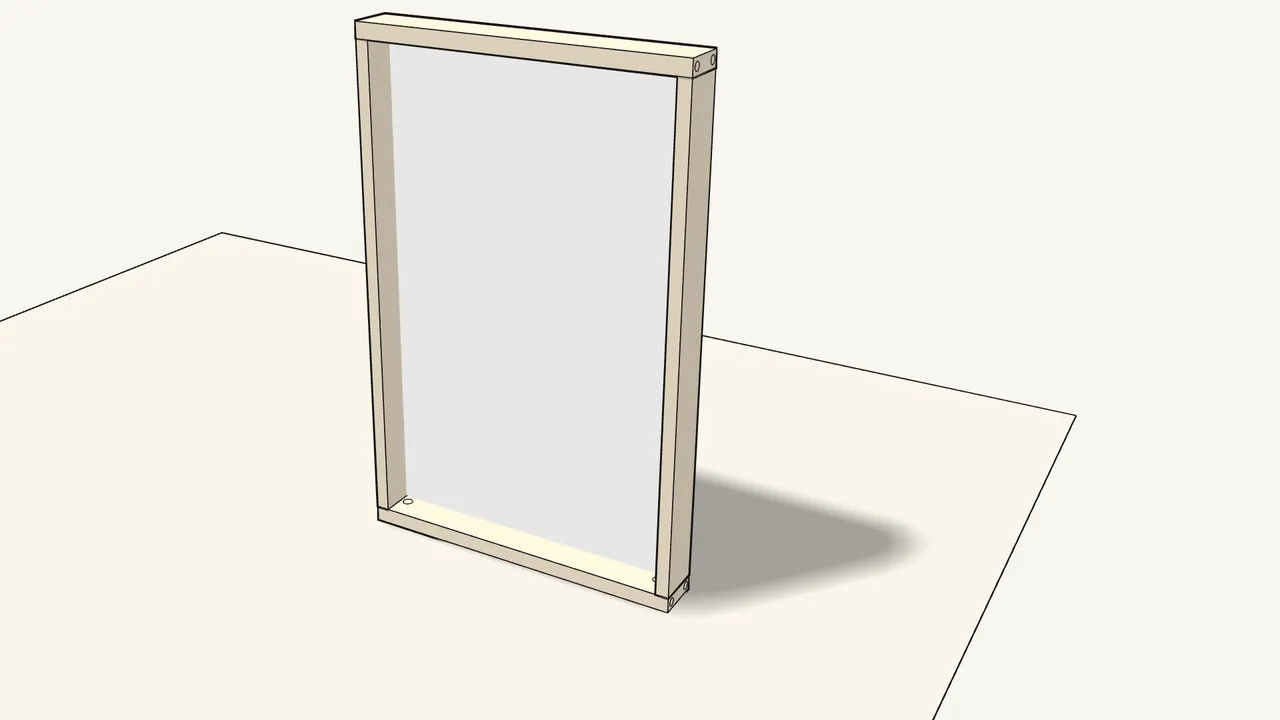
Step 4
Press the other end rail onto the dowels.
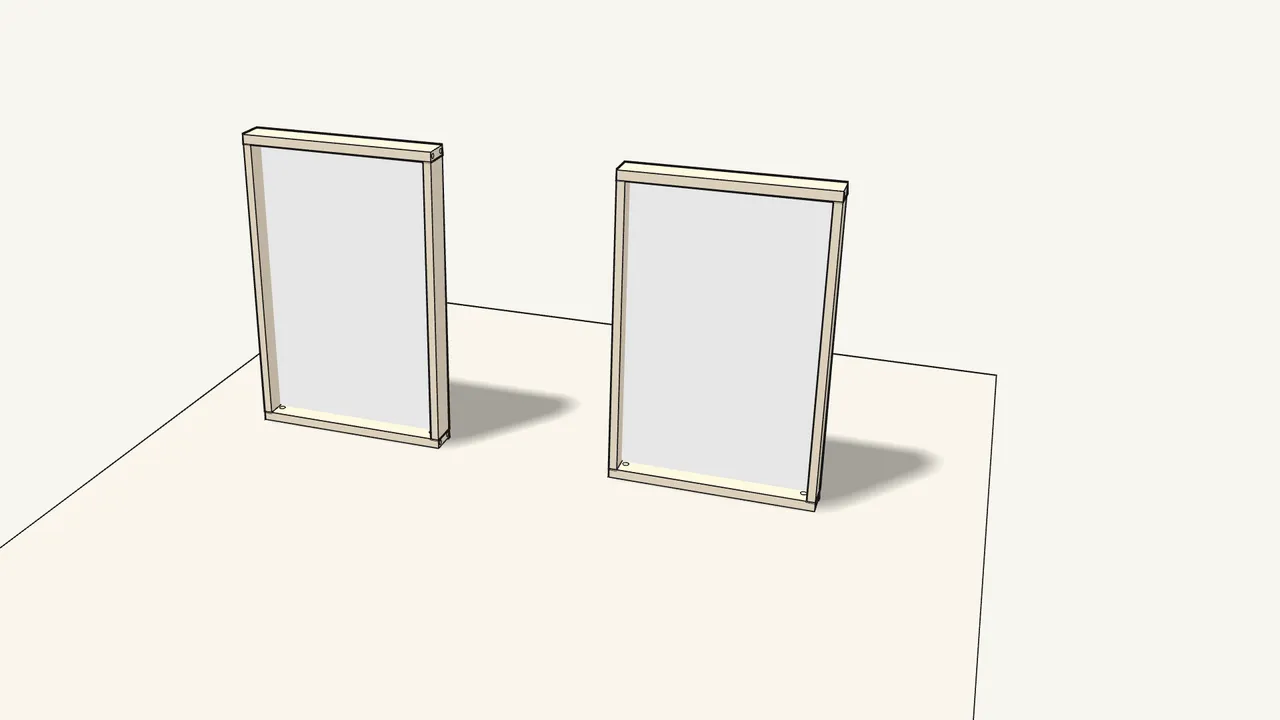
Step 5 · manual step 1–4
Build the second tray the same way.
One tray is the changing top, the other is the lower shelf.
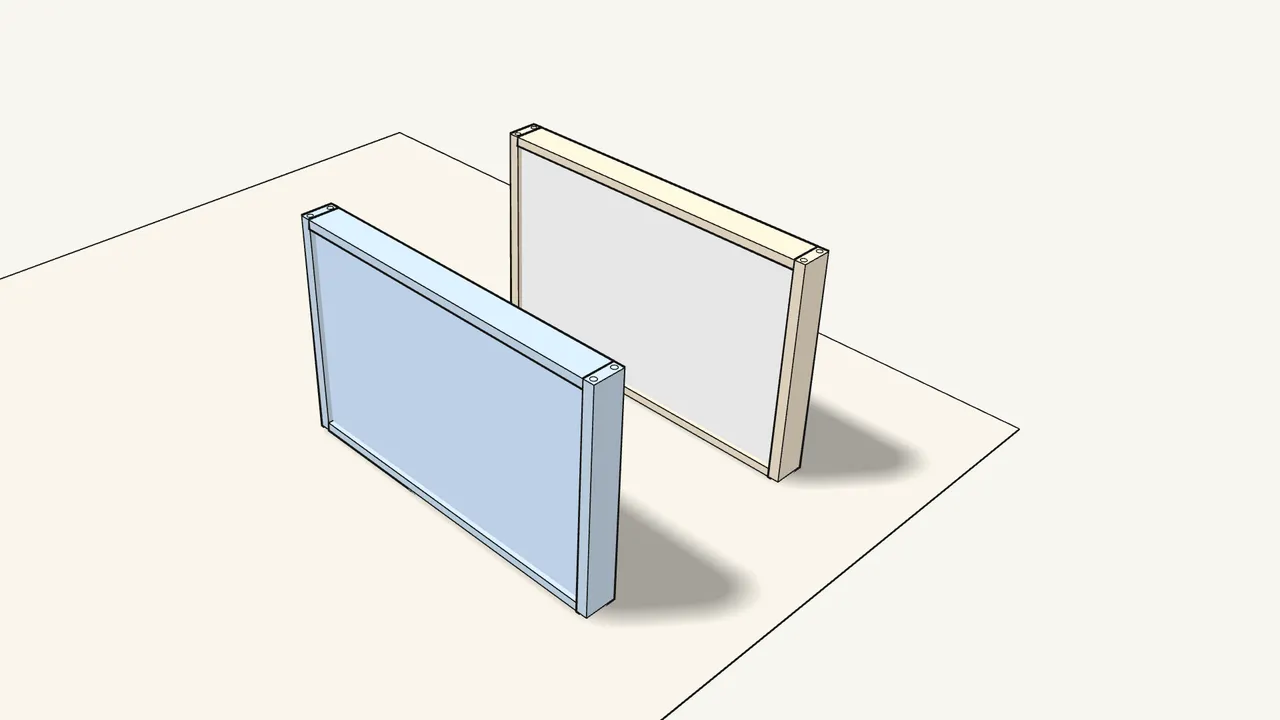
Step 6 · manual step 5
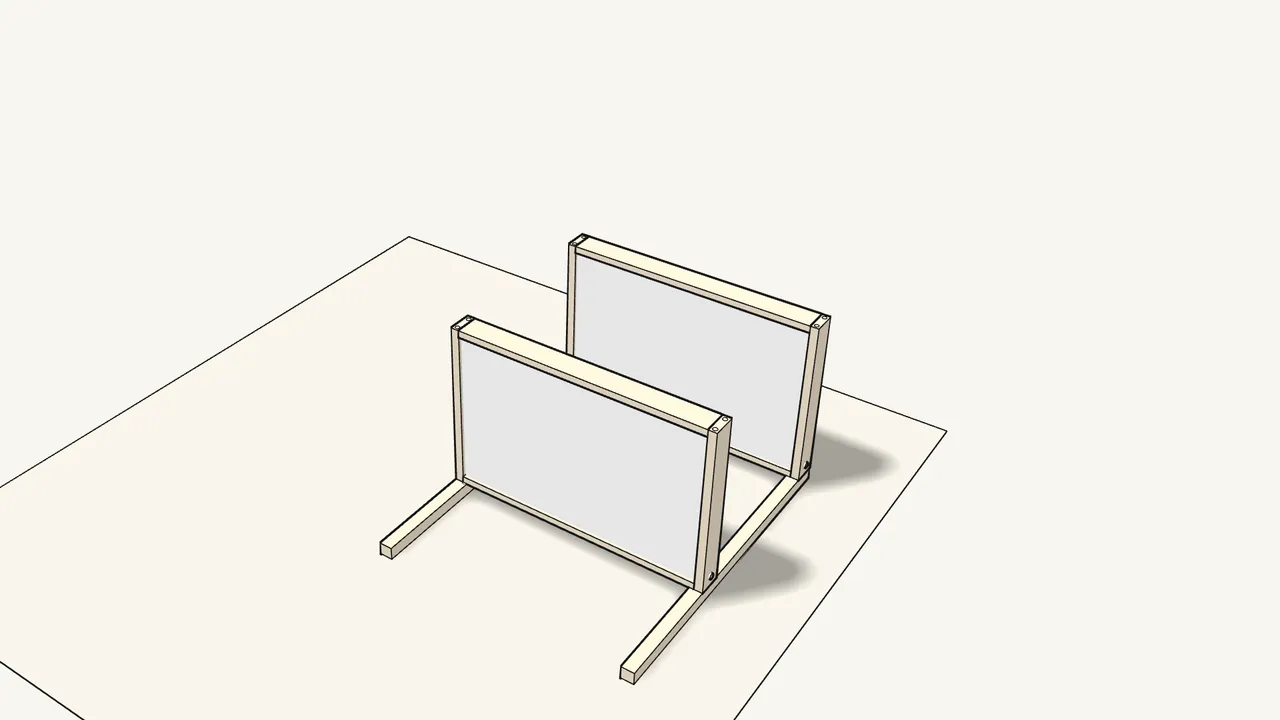
Stand both trays on a long edge, side by side.
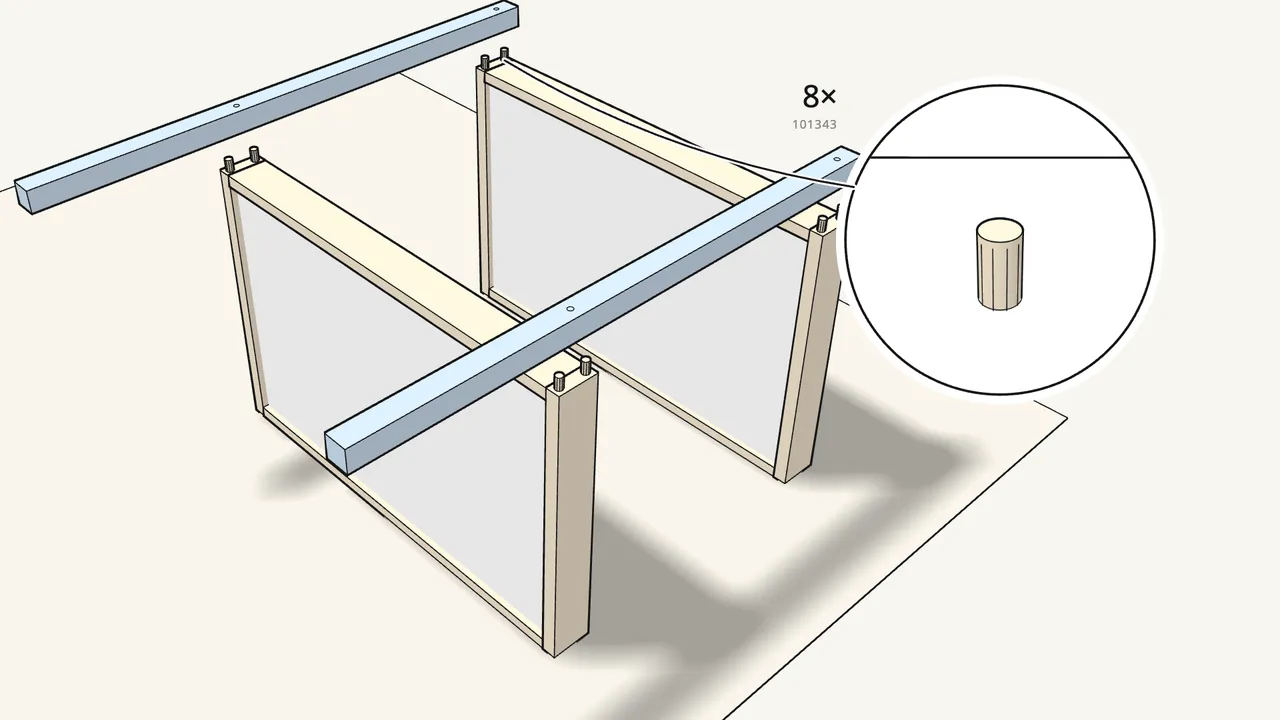
Step 7 · manual step 5
Push 8 dowels (101343) into the end rails, then place 2 legs.
Each leg goes across both trays; the long ends are the feet.
Step 8 · manual step 6
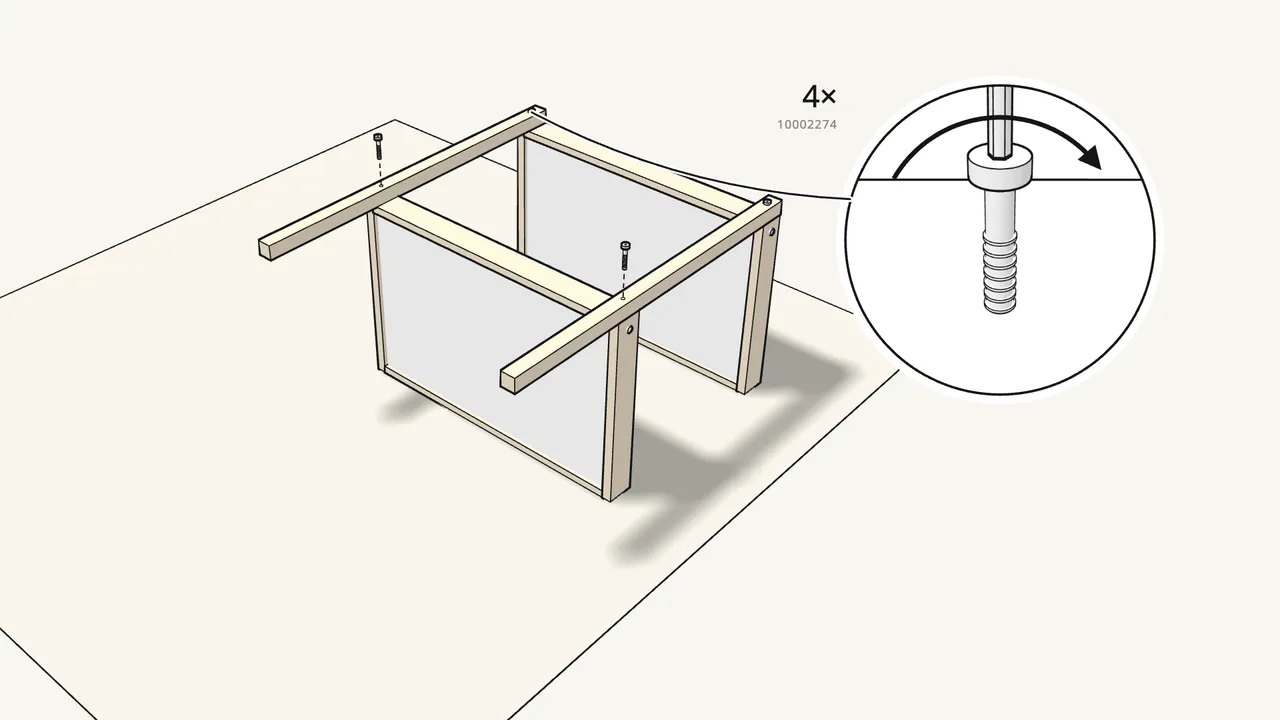
Insert 4 barrel nuts (121121), then tighten 4 bolts (10002274).
Allen key 100001. Line up the barrel nuts with a flat screwdriver.
Step 9 · manual step 6
Turn the frame over.
Step 10 · manual step 7
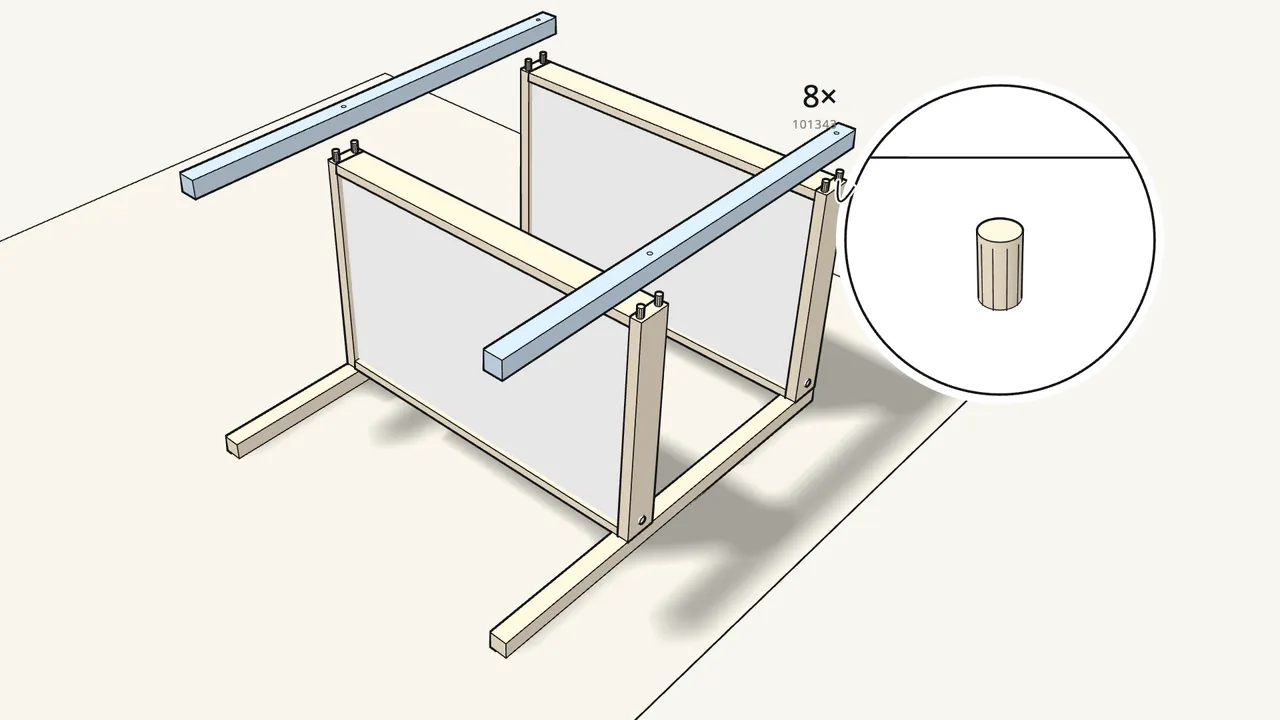
Push 8 dowels (101343) in on this side and place the other 2 legs.
Step 11 · manual step 8
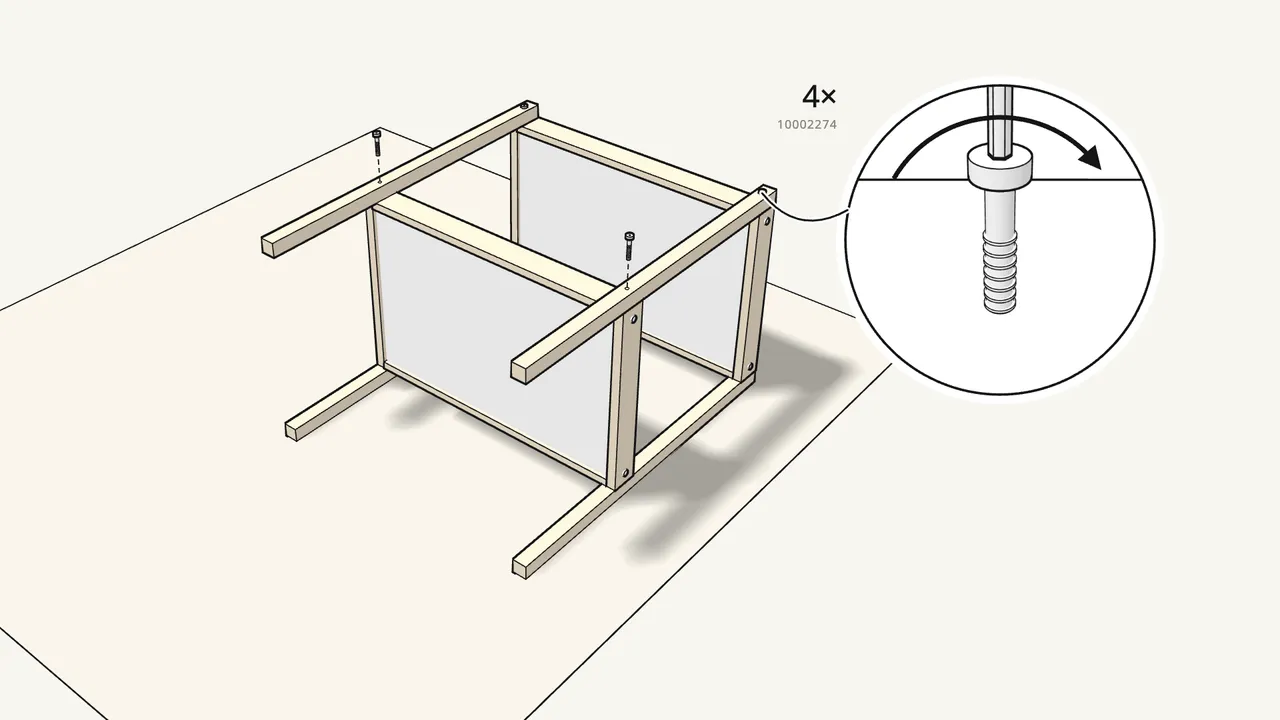
Insert 4 barrel nuts (121121) and tighten 4 bolts (10002274).
Allen key 100001.
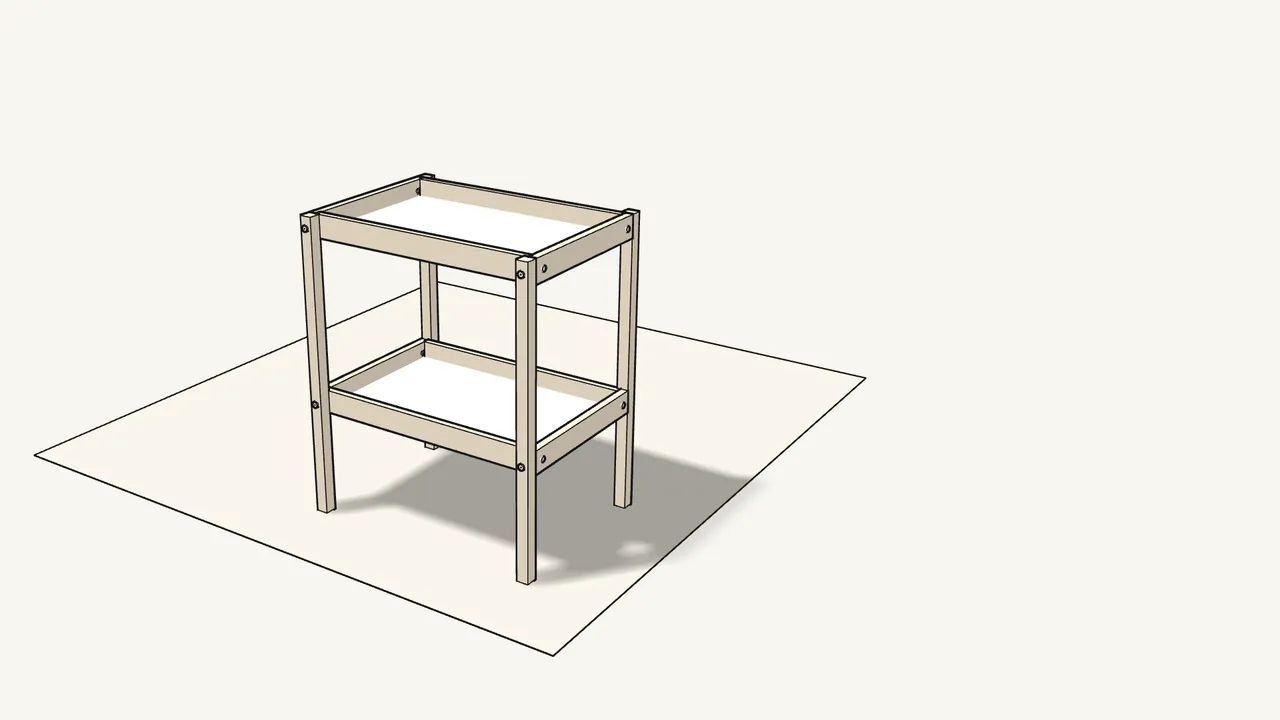
Step 12
Stand the changing table upright.
Tips & safety
- Work on a soft surface. The manual shows the parts laid on a rug so they don’t get scratched.
- Not sure about a step? Check the manual or contact IKEA — the manual shows this on page 2.
Official instructions
This guide follows IKEA’s official assembly instructions (AA-2089163-2). Keep the printed manual to hand — if anything differs, the manual is right.