IKEA · Kids' Furniture
How to Assemble IKEA SNIGLAR Crib
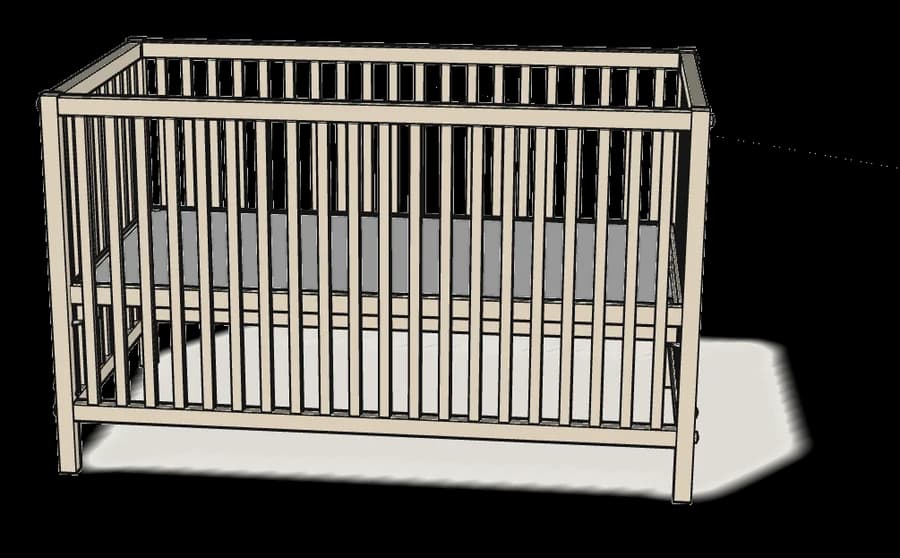
Step-by-step IKEA SNIGLAR crib assembly: 11 illustrated steps, an animated video, the hardware list and the tools you need — following the official instructions (AA-1976314-7).
- 11 illustrated steps
- 6 steps in the manual
- 2:00 video
- 137×74×84 cm
What you need
Tools
- Flat-head screwdriver
- Phillips screwdriver
- Allen key (included)
Hardware in the box
| Part no. (as printed in the manual) | Qty |
|---|---|
| 123756 | 8× |
| 130718 | 4× |
| 121114 | 8× |
| 110301 | 4× |
| 100400 | 2× |
| 100646 | 2× |
| 105657 | 4× |
| 100514 | 4× |
Step-by-step assembly
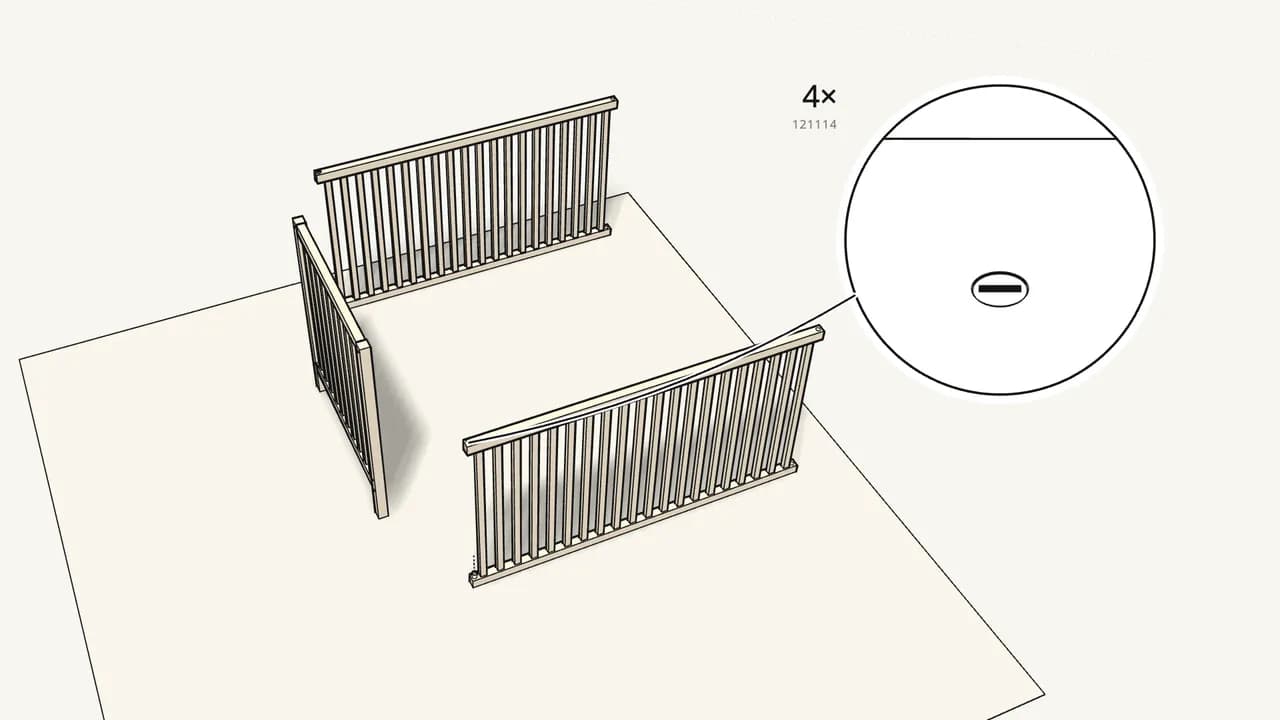
Step 1
Push 4 barrel nuts (121114) into the ends of the long sides.
Into the top and bottom rail, at the same end of each side.
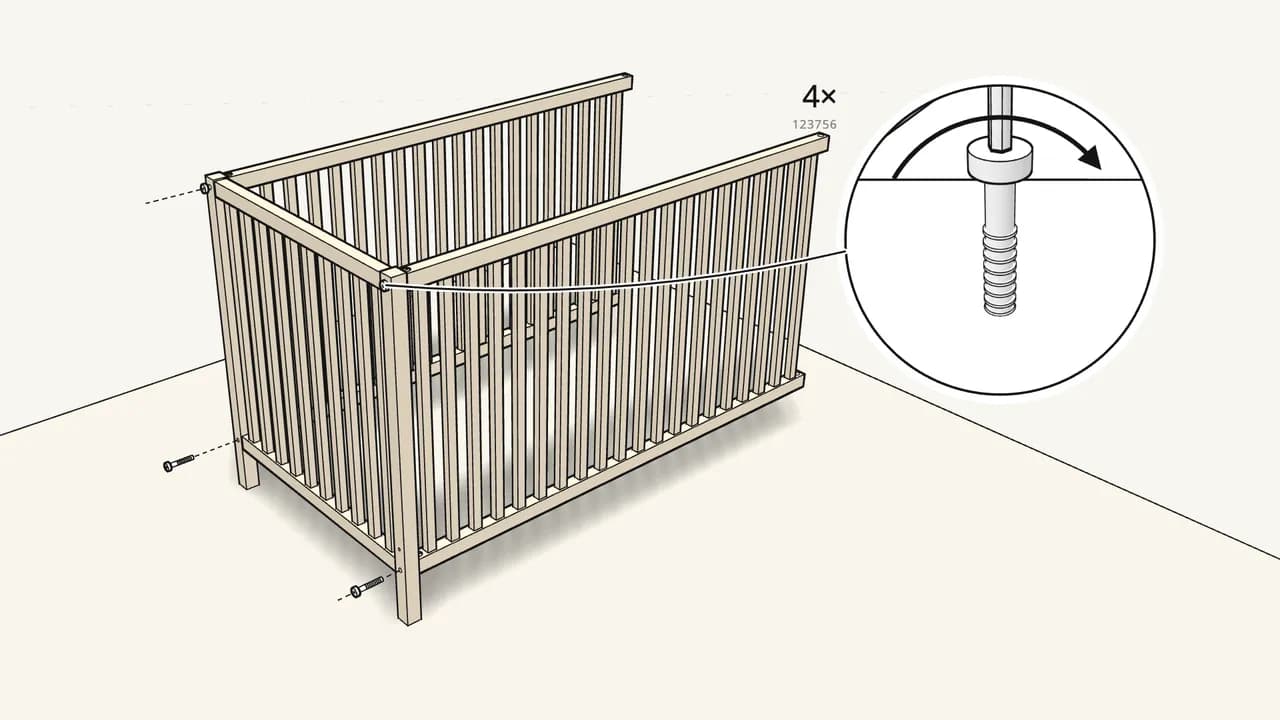
Step 2 · manual step 1
Bolt both long sides to one end panel: 4 bolts (123756).
Allen key 100001. Line up the nut slots with a flat screwdriver.
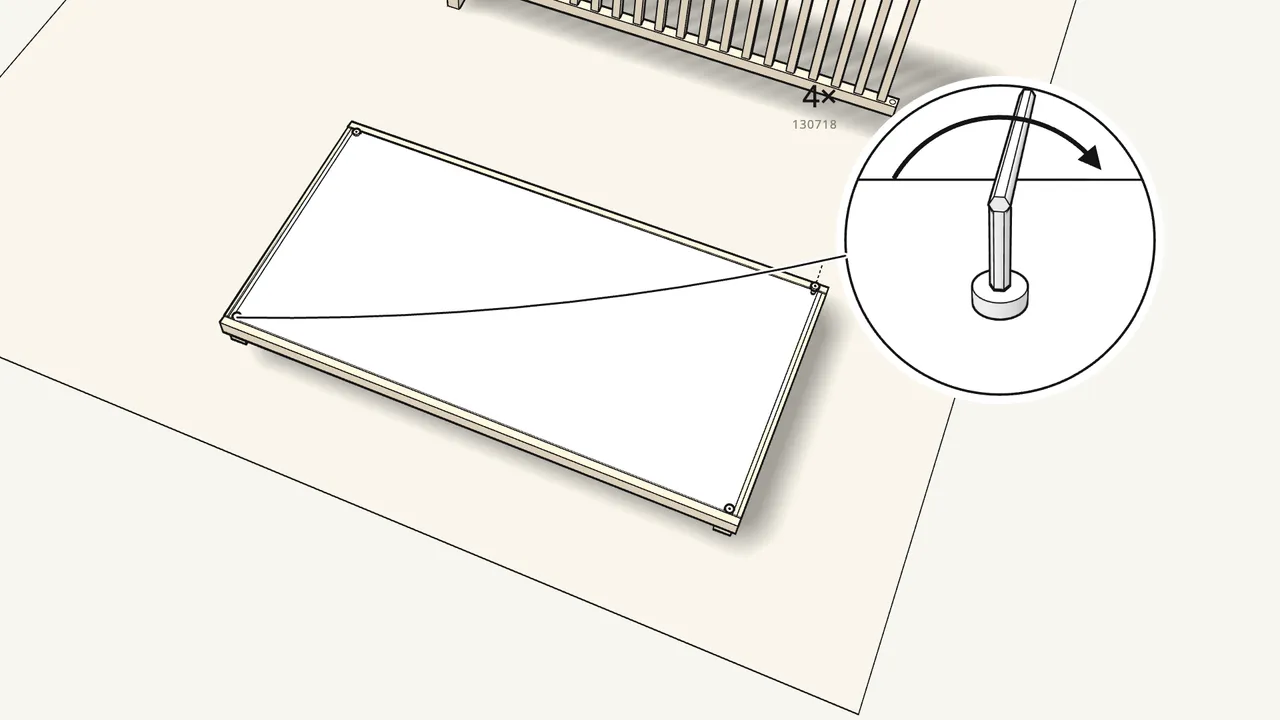
Step 3 · manual step 2
Push 4 bolts (130718) down through the base’s corner blocks.
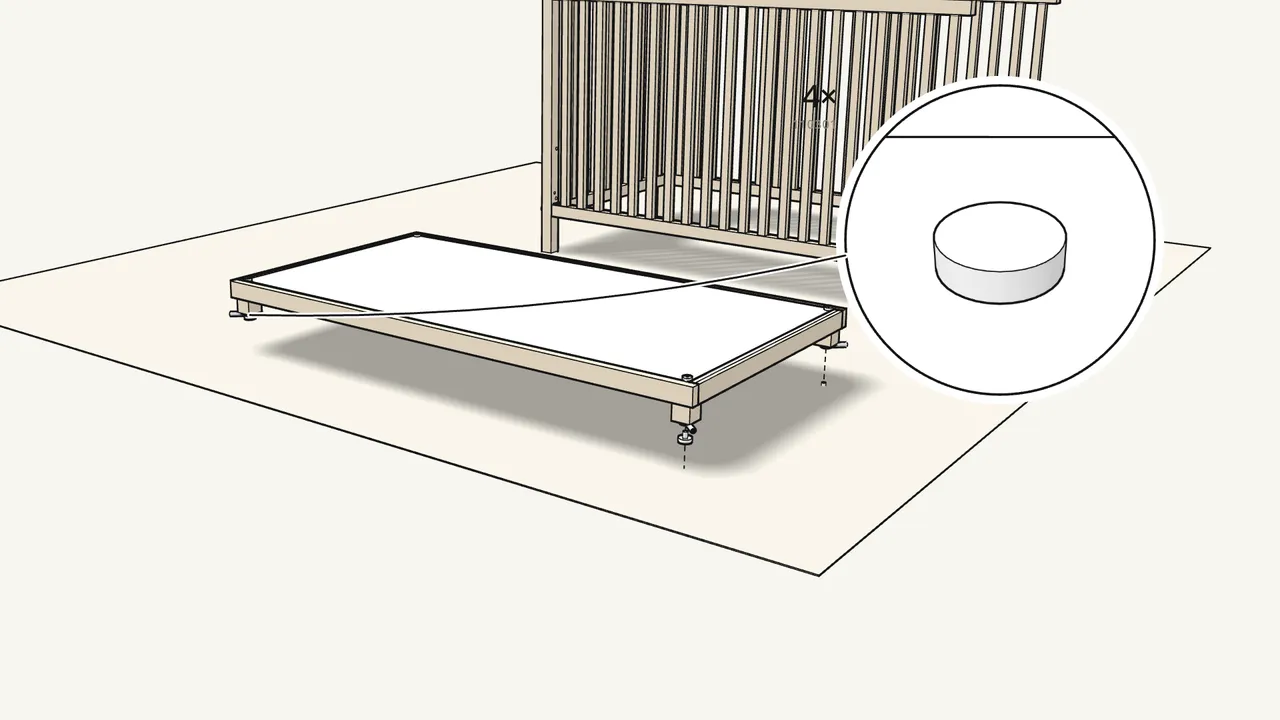
Step 4 · manual step 2
Underneath: an arm (105657) and a cap nut (110301) on each bolt.
Hold with Allen key 100092, tighten with 100001. The arms point out at the ends.
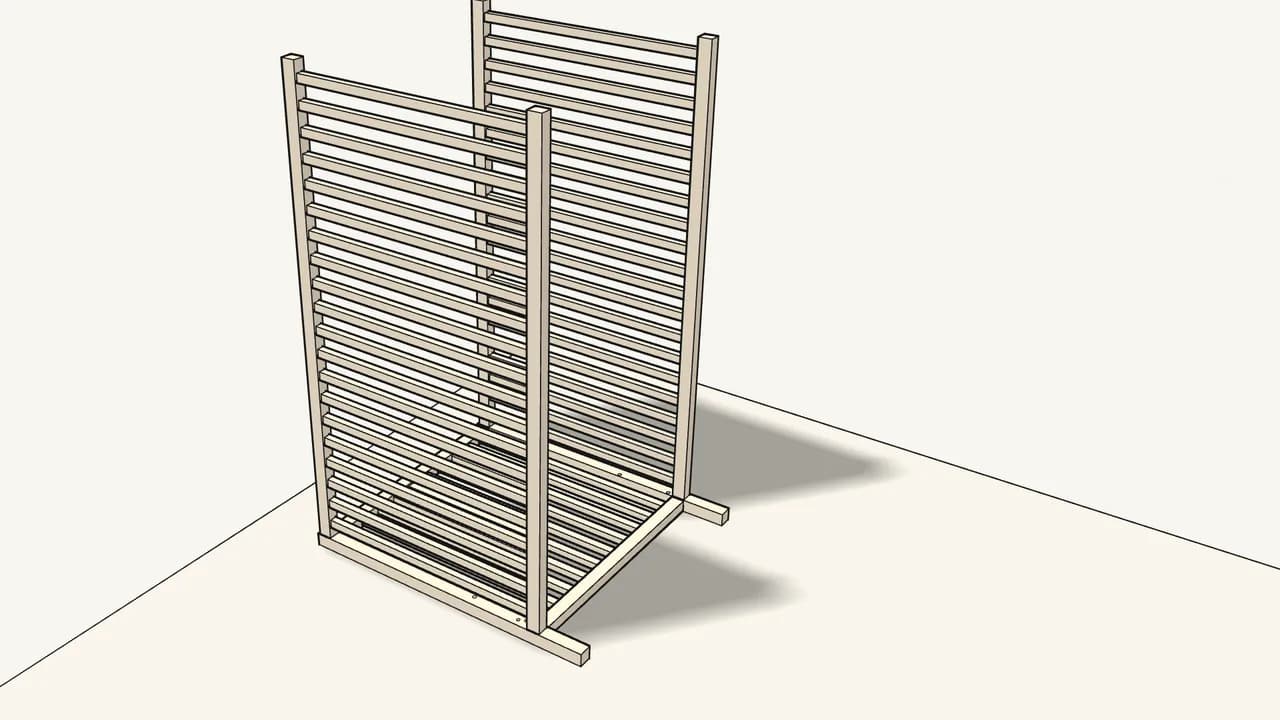
Step 5 · manual step 3
Stand the frame on its end.
The end panel you just fixed lies on the floor.
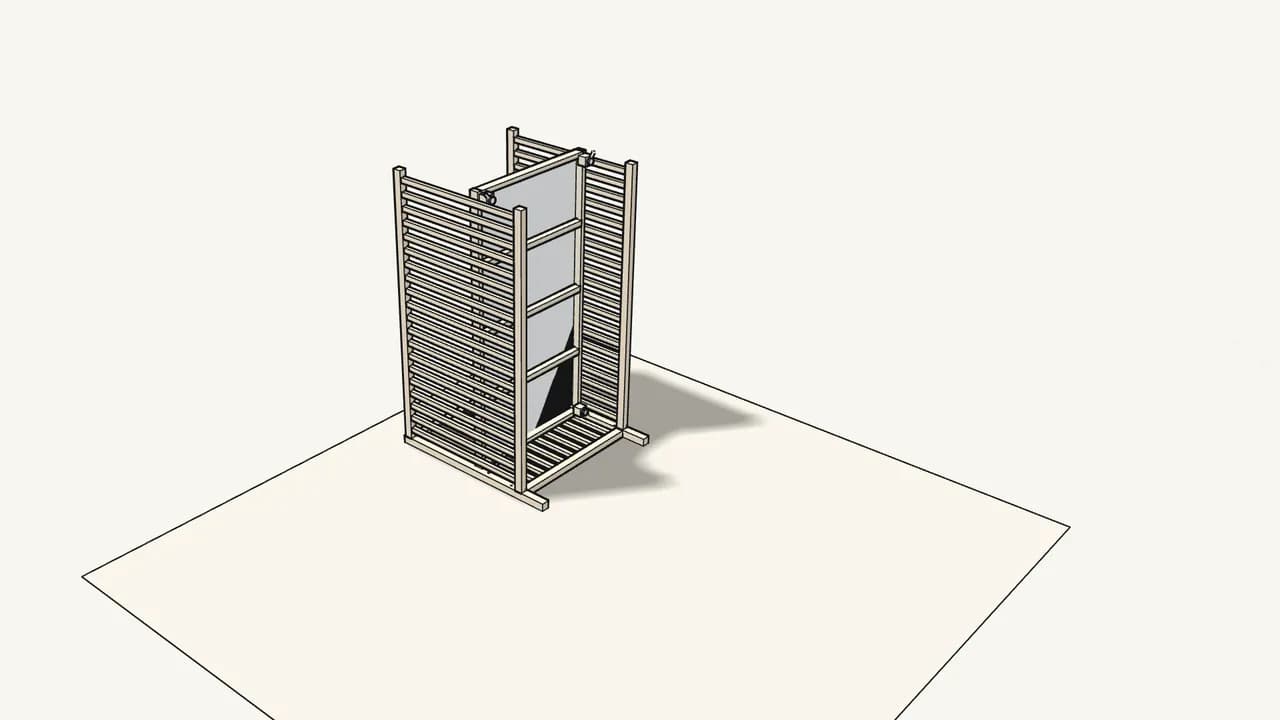
Step 6 · manual step 3
Lower the base in: its 2 arms go into the holes in the legs.
Upper holes for a small baby, lower holes once the baby can stand up.
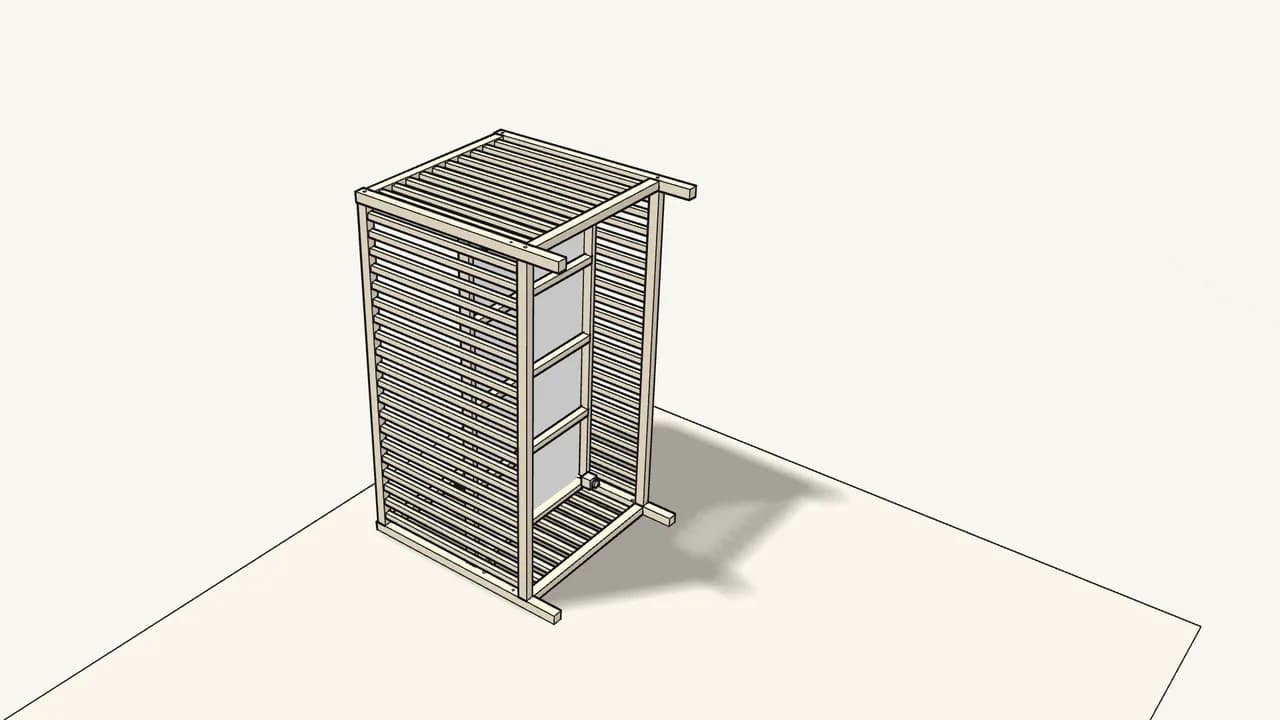
Step 7 · manual step 4
Put the other end panel on top, onto the 2 upper arms.
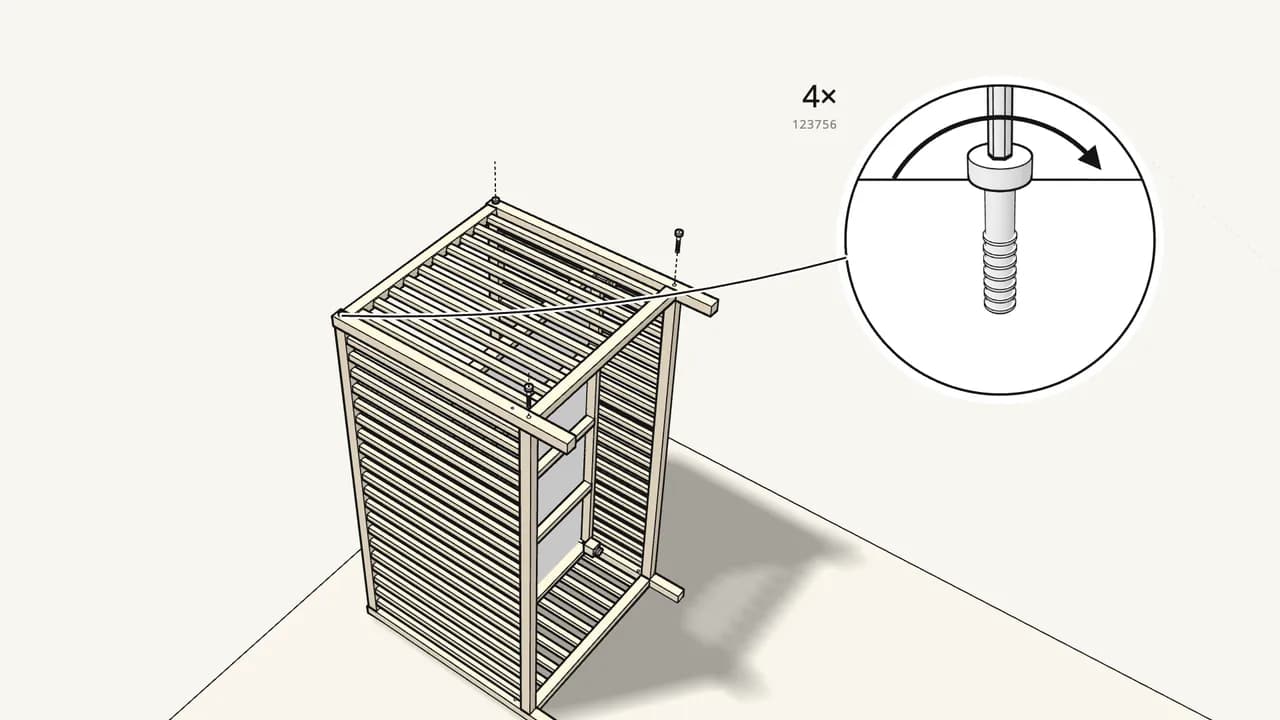
Step 8 · manual step 5
Fit 4 barrel nuts (121114) and tighten 4 bolts (123756).
Allen key 100001; line up the nut slots with a flat screwdriver.
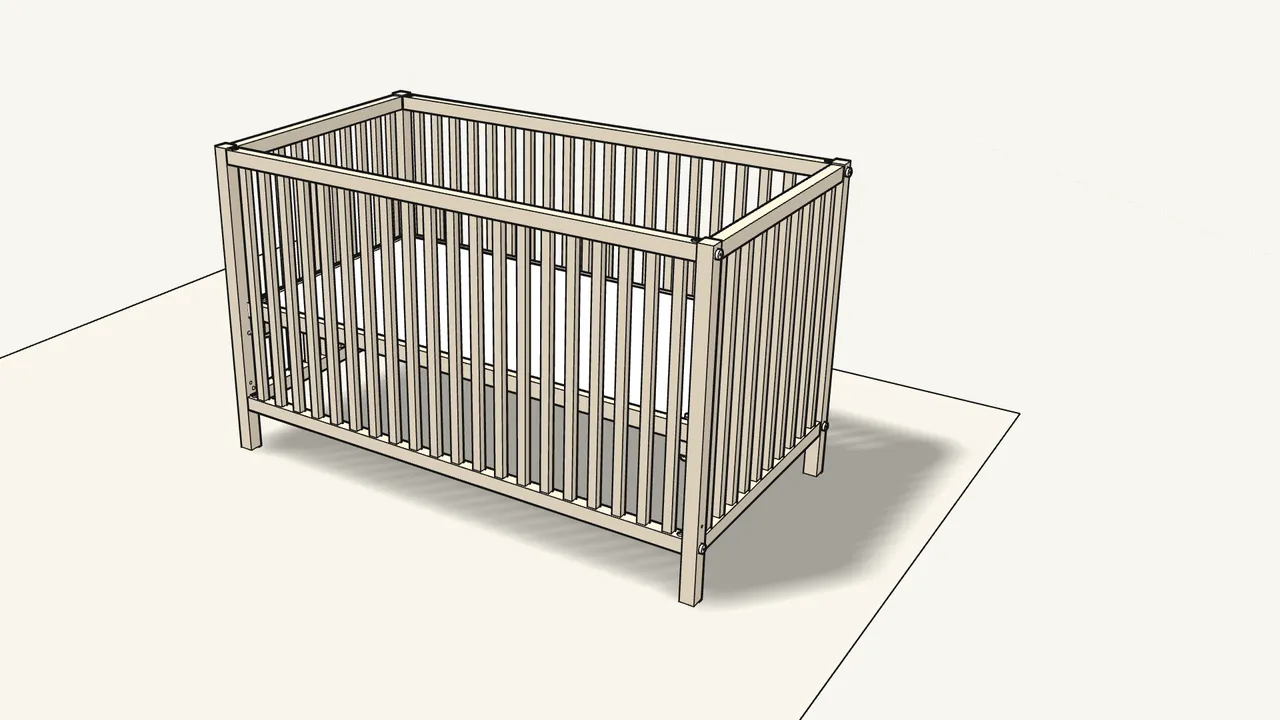
Step 9 · manual step 6
Turn the crib upright.
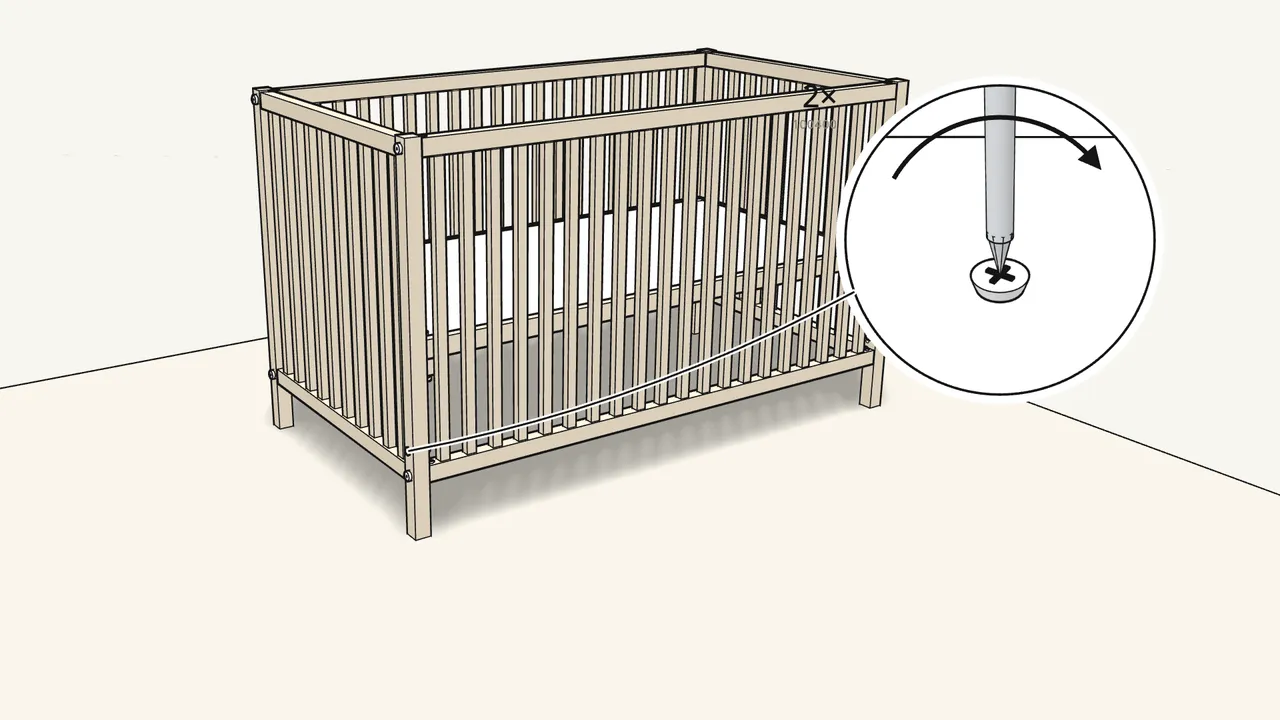
Step 10 · manual step 6
Fix 2 screws (100400) with sleeves (100646) in the front legs.
Just above the lower bolt. Use the Phillips screwdriver.
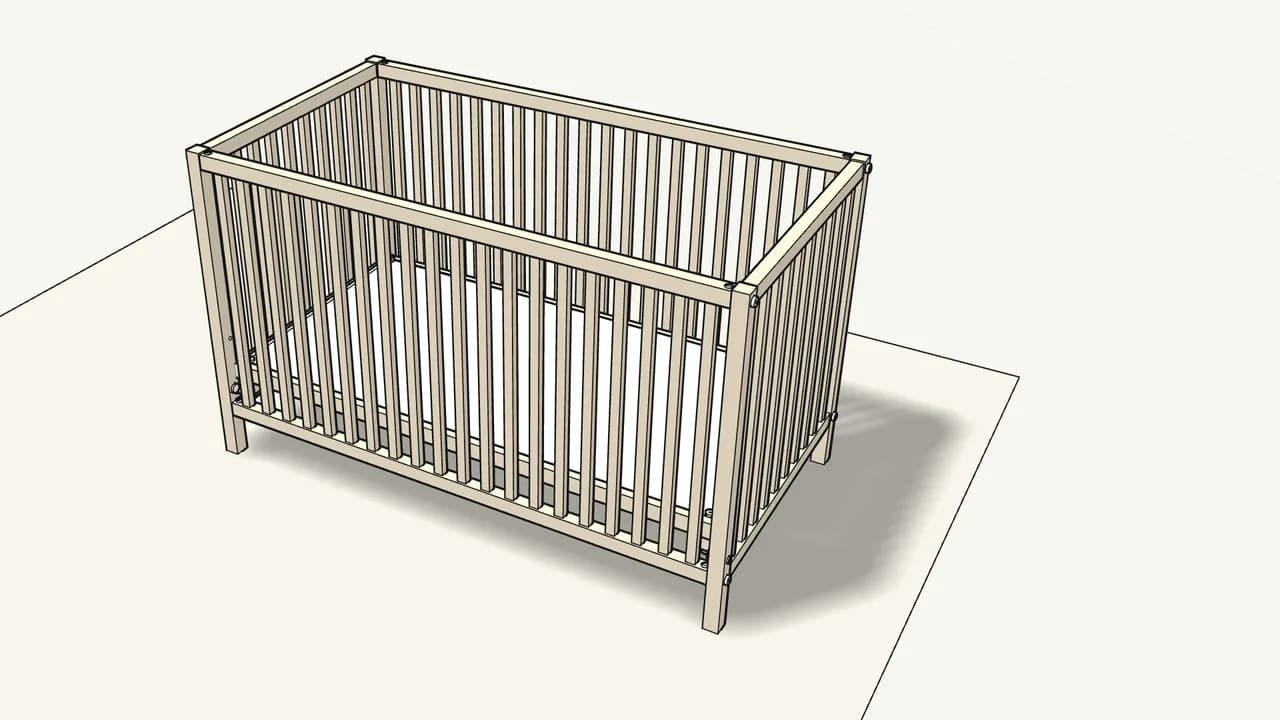
Step 11
Later: move the base down.
Once your baby can stand up. Take off one end panel to do it — manual p. 10–12.
Tips & safety
- Two base heights. Upper position for a small baby; lower position once your baby can stand up (manual p. 4 and 10–12).
- Toddler bed: base in the lower position only. To turn it into a toddler bed, one long side is opened up (manual p. 13–20). The manual warns against doing this with the base in the high position.
- Assemble with two people. The manual shows two people and a soft surface on the floor.
Official instructions
This guide follows IKEA's official assembly instructions (AA-1976314-7). Keep the printed manual to hand — if anything differs, the manual is right.