IKEA · Kids' Furniture
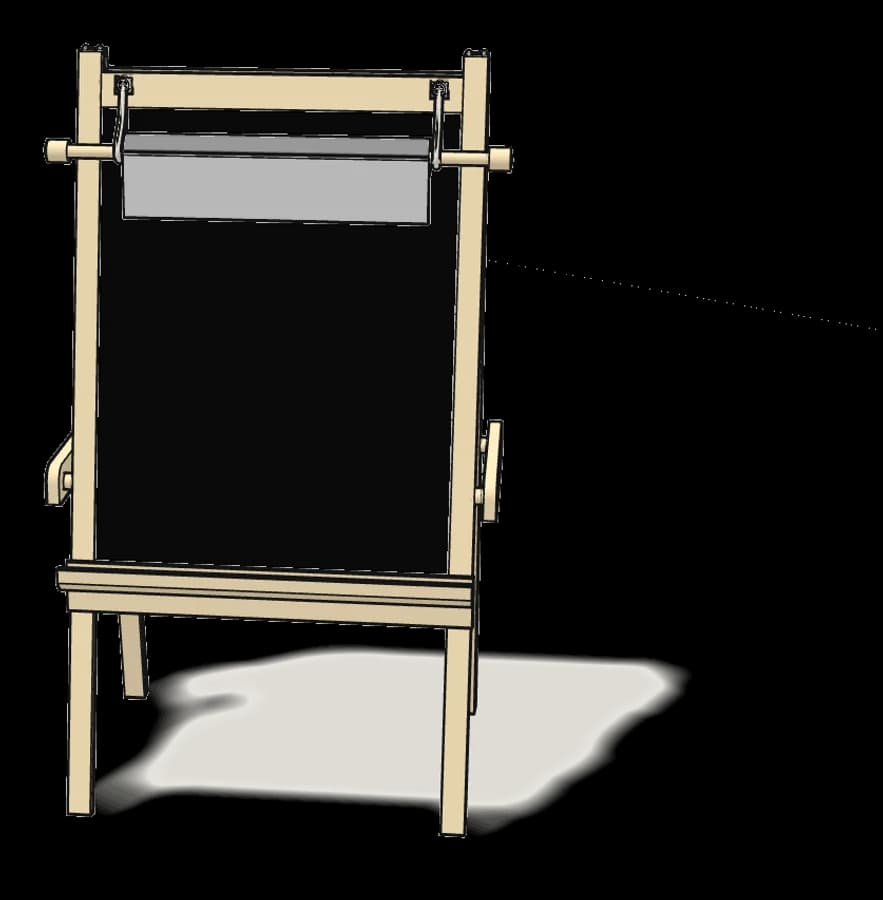
How to Assemble IKEA MÅLA Easel
Step-by-step IKEA MÅLA easel assembly: 10 illustrated steps, an animated video, the hardware list and the tools you need — following the official instructions (AA-2344062-1).
- 10 illustrated steps
- 9 steps in the manual
- 1:48 video
- 66×48×112 cm
What you need
Tools
- Phillips screwdriver
You’ll need: a Phillips screwdriver.
Hardware in the box
| Part no. (as printed in the manual) | Qty |
|---|---|
| 109536 | 4× |
| 10048943 | 6× |
| 157725 | 6× |
| 128261 | 2× |
| 128270 | 2× |
Step-by-step assembly
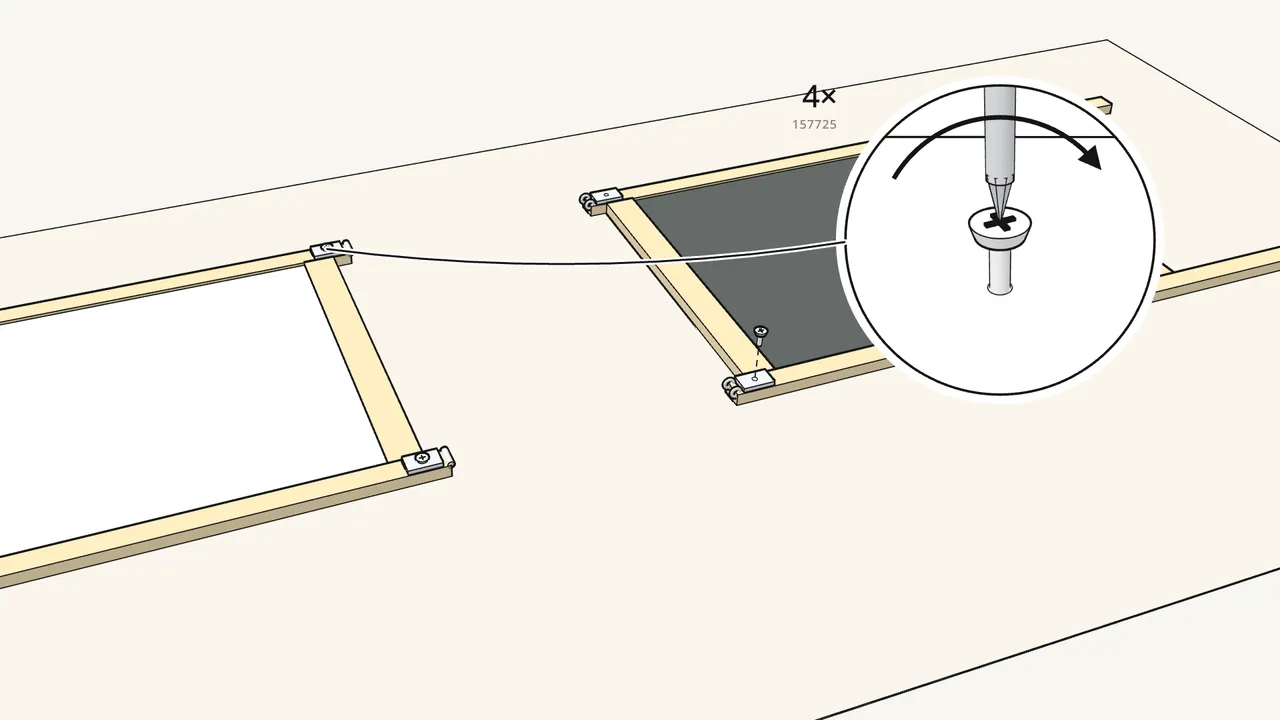
Step 1
Screw the hinge fittings to the top ends of the frames.
128261 on one frame, 128270 on the other — 1 screw 157725 each.
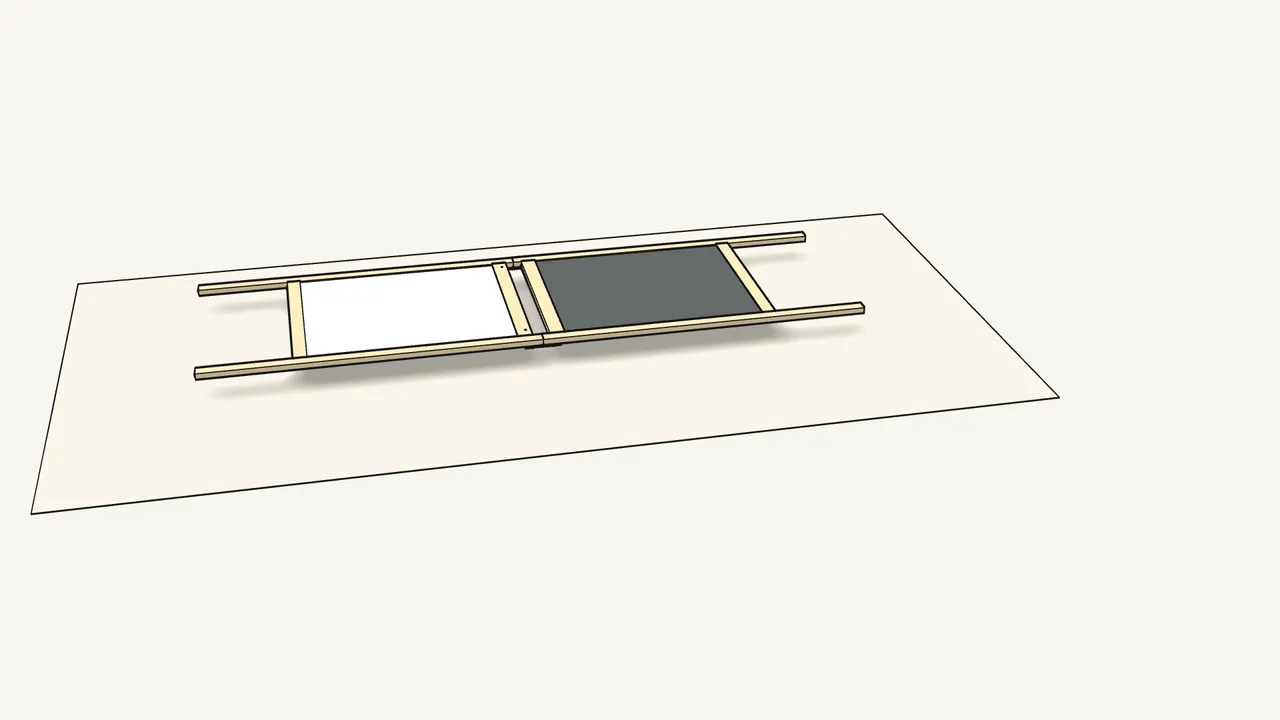
Step 2
Slide the frames together until the fittings click.
Then turn the whole frame over.
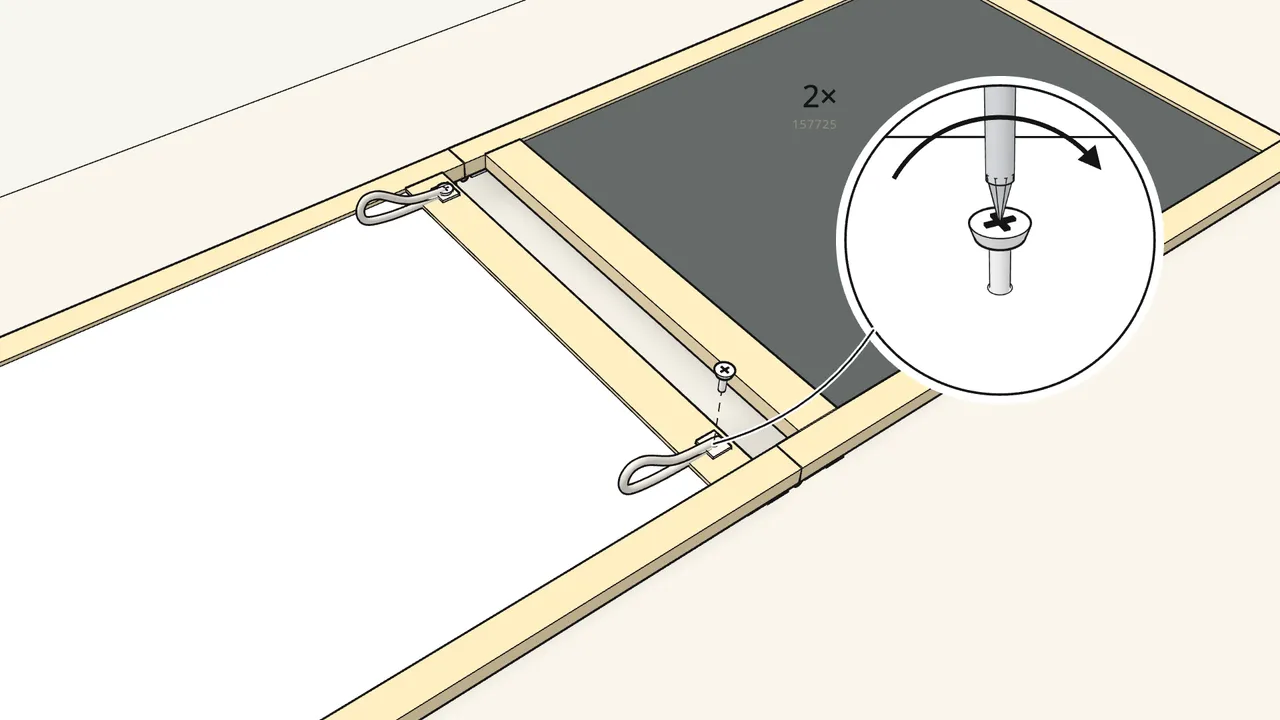
Step 3
Screw the 2 straps to the top rail.
Use screws 157725. Don’t use a drill.
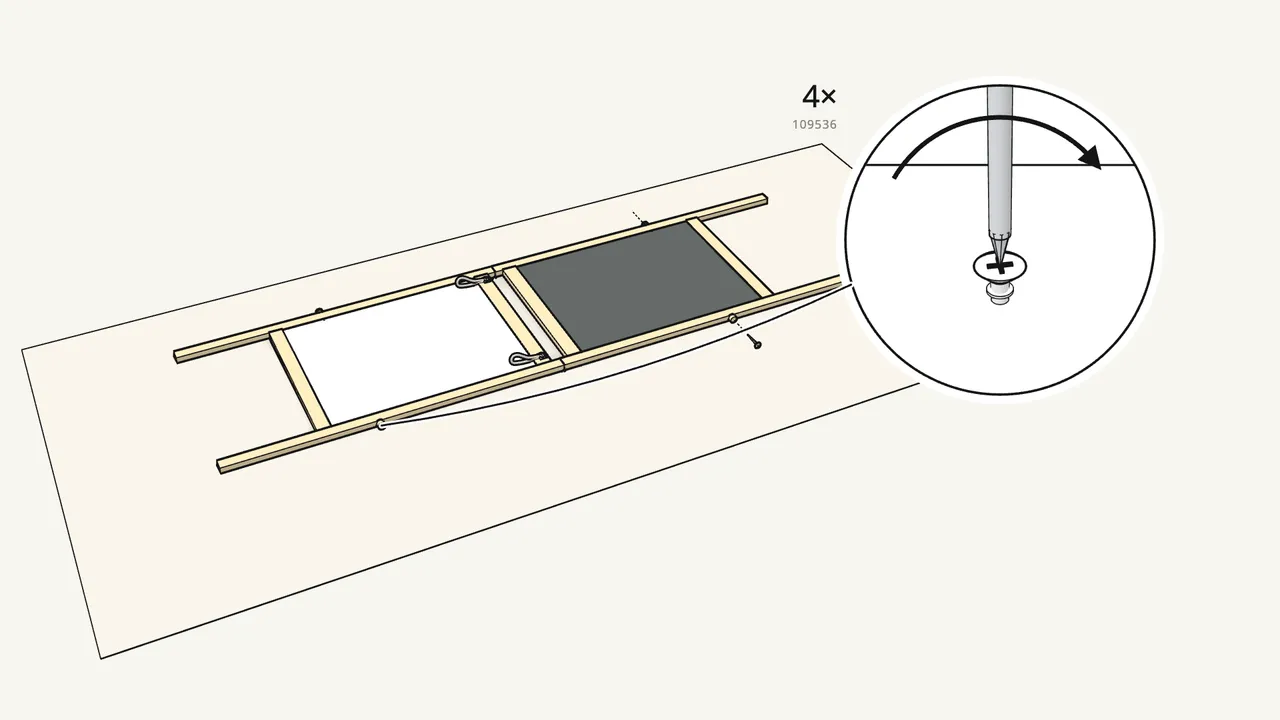
Step 4
Screw a peg to the outside of each leg.
4 screws 109536, each through a spacer.
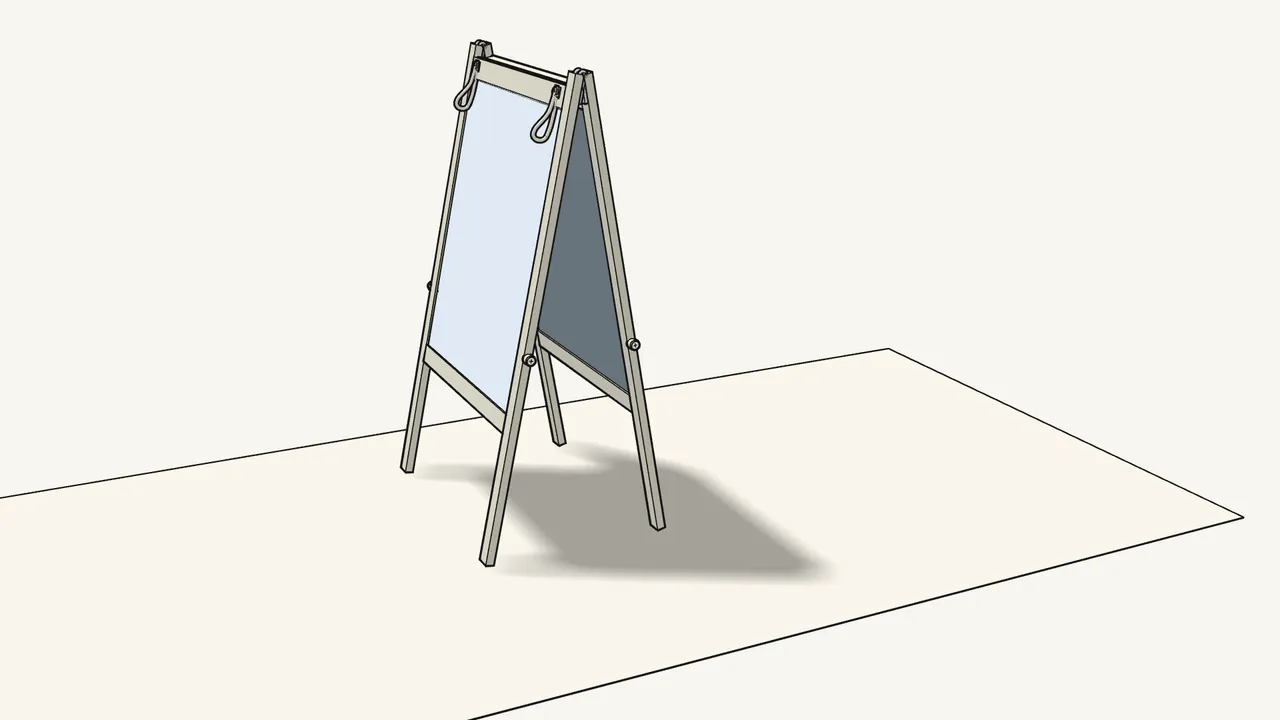
Step 5
Stand the easel up.
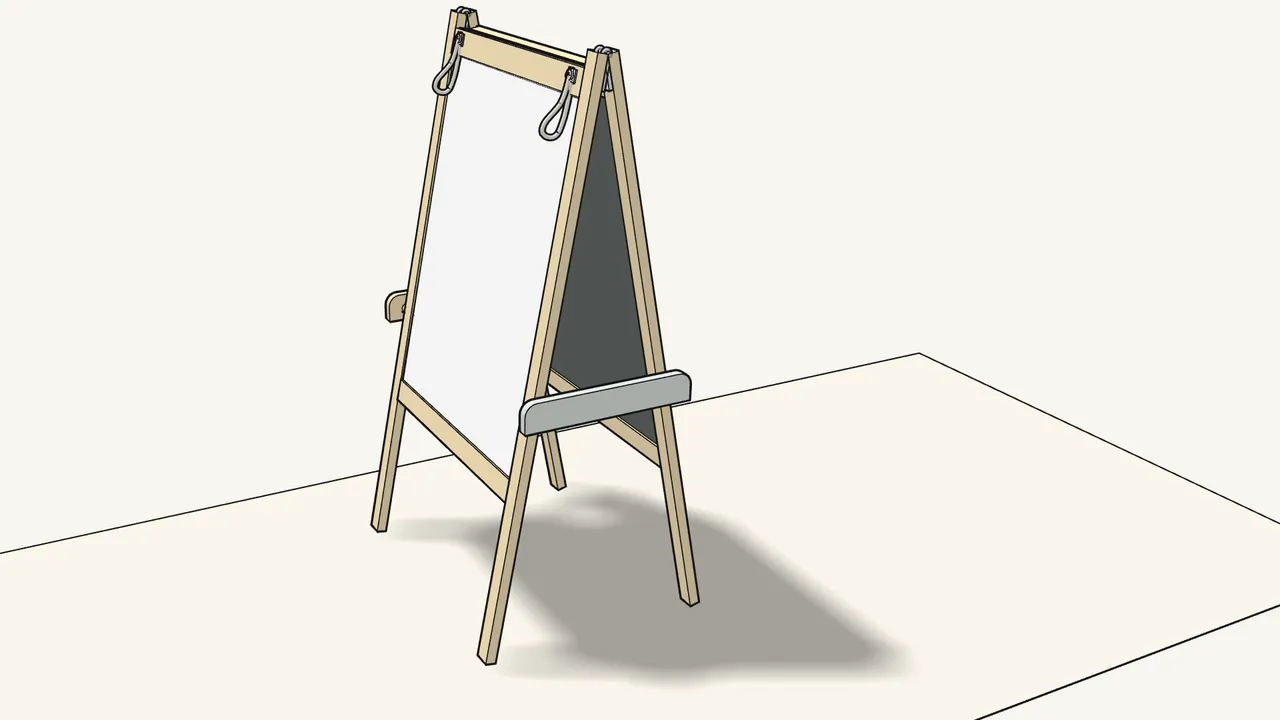
Step 6 · manual step 5
Hook the 2 side bars onto the pegs until they click.
Press the bar down onto the pegs on both legs.
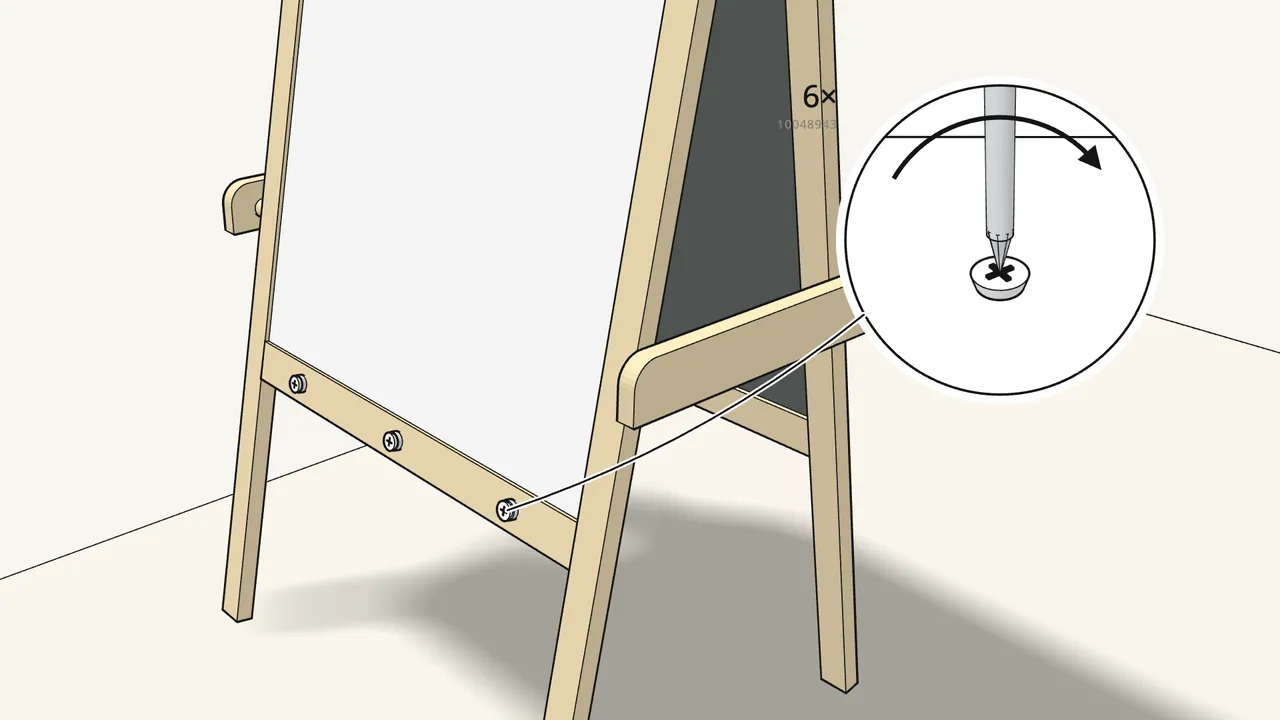
Step 7 · manual step 6
Screw 3 screws with washers into each bottom rail.
6 screws 10048943 — front and back. Leave the heads out.
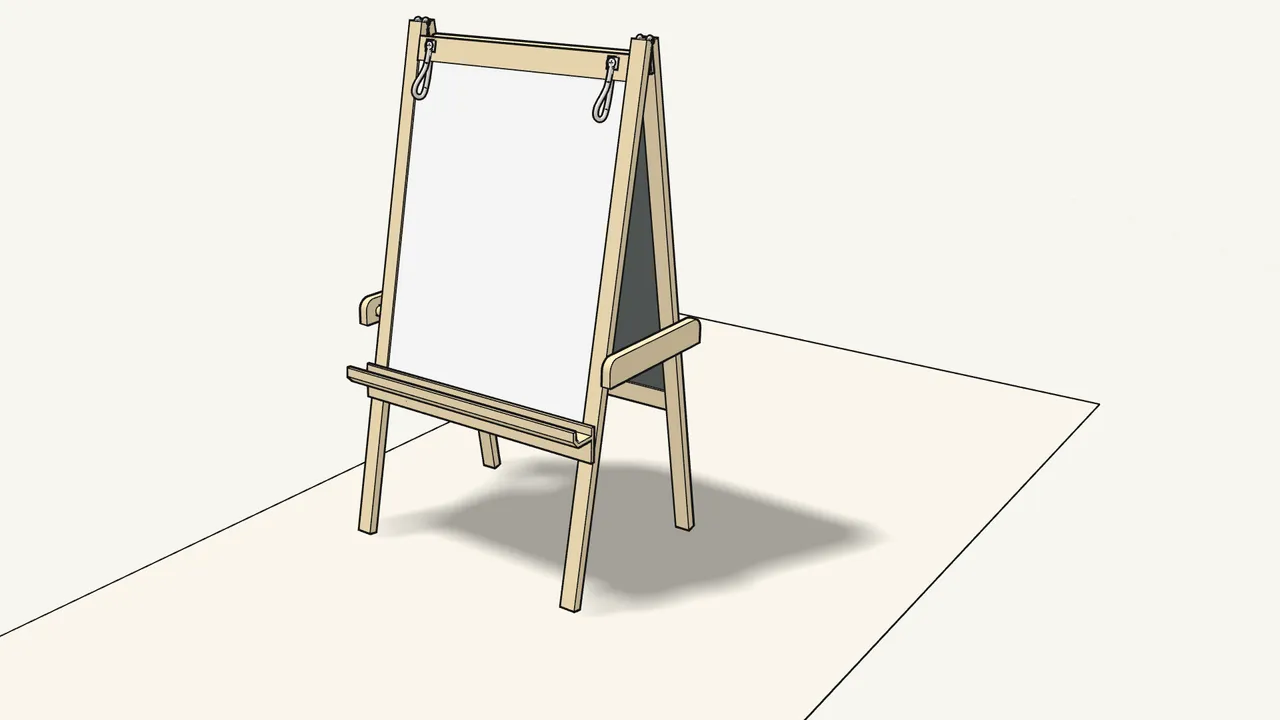
Step 8 · manual step 7
Hang the tray on the screws.
It fits on either side of the easel.
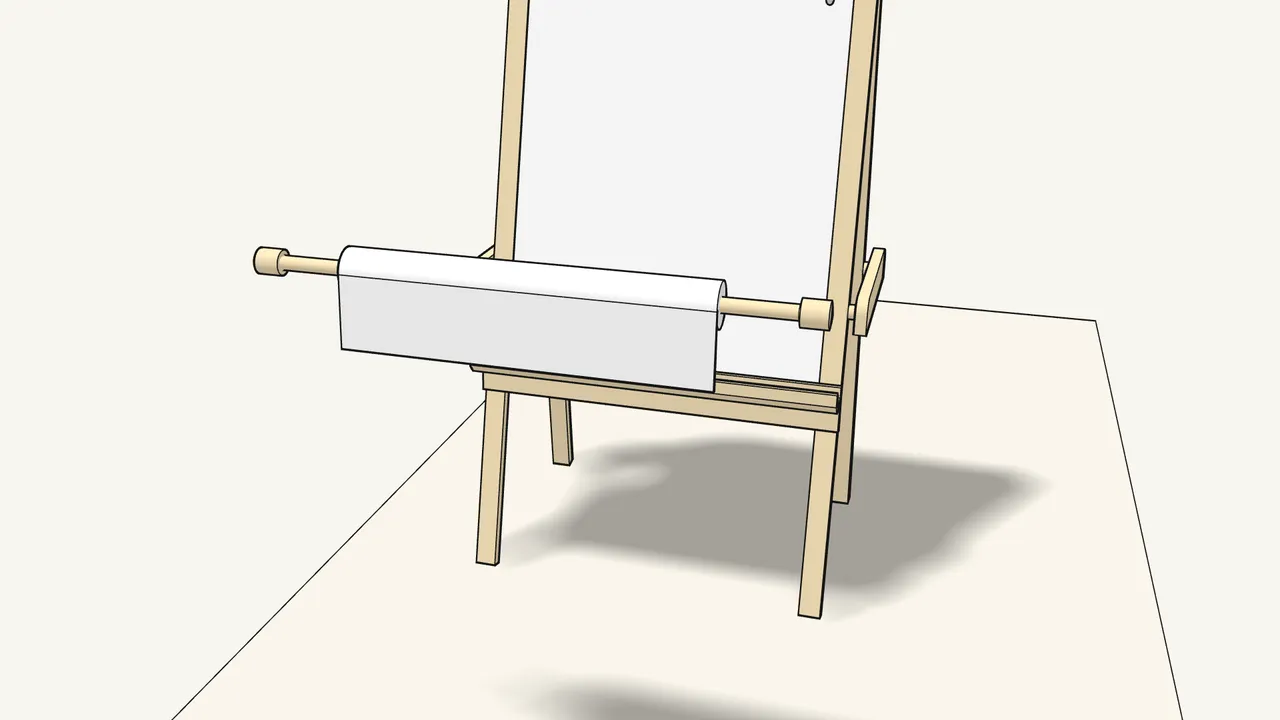
Step 9 · manual step 8
Slide the paper roll onto the rod.
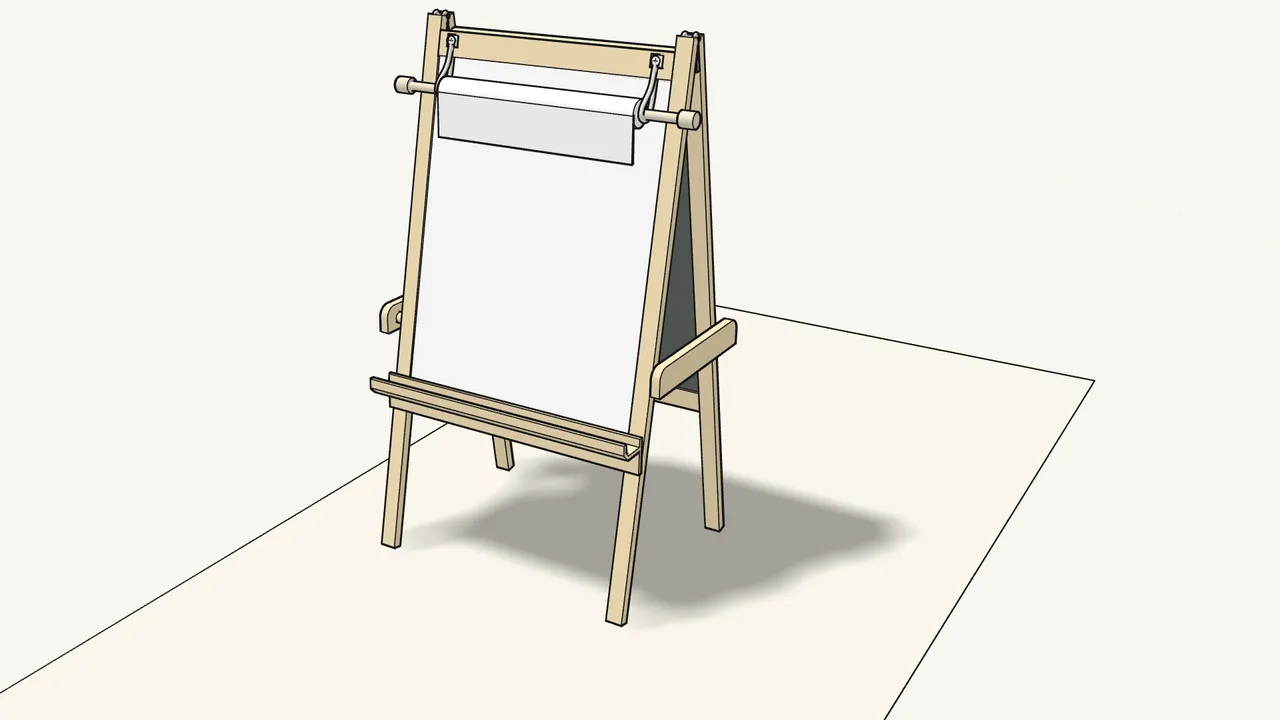
Step 10 · manual step 9
Press the rod down into the two straps.
Tips & safety
- Don’t let children climb on the easel. The manual’s warning page shows this crossed out.
- Pull the paper down over the board. It reaches down to the tray.
Official instructions
This guide follows IKEA's official assembly instructions (AA-2344062-1). Keep the printed manual to hand — if anything differs, the manual is right.