IKEA · Kids' Furniture
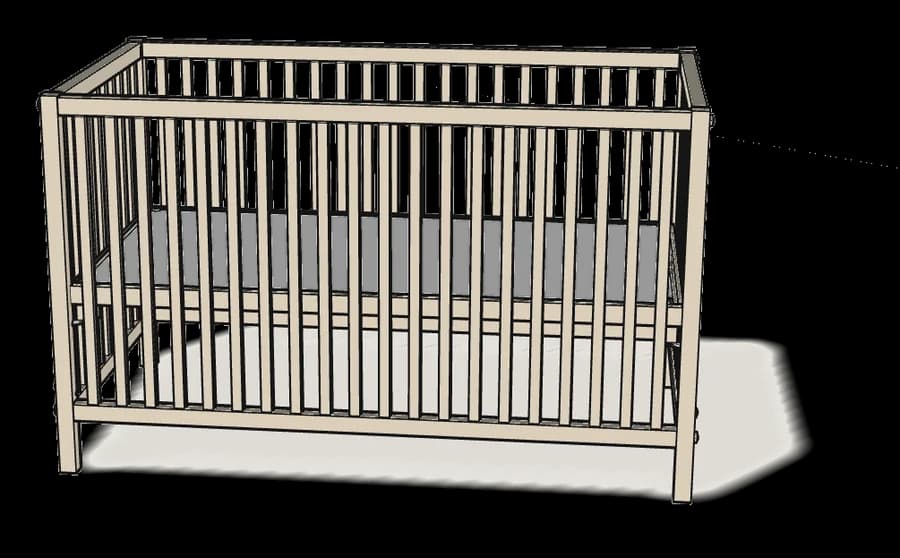
How to assemble IKEA SNIGLAR Bed Frame with Slatted Bed Base
Step-by-step IKEA SNIGLAR Bed Frame with Slatted Bed Base assembly: 13 illustrated steps, an animated video, the hardware list and the tools you need — following the official instructions (AA-169638-12).
- 13 illustrated steps
- 10 steps in the manual
- 2:16 video
- 77×167×66 cm
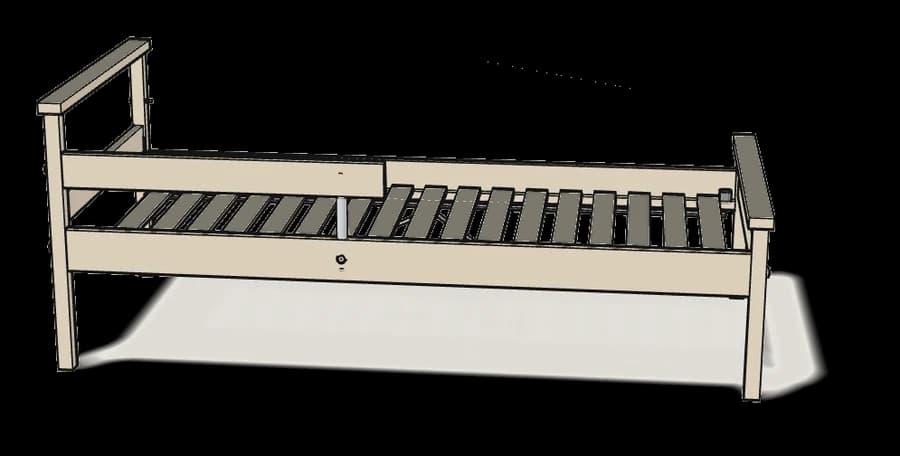
What you need
Tools
- Flat-head screwdriver
- Phillips screwdriver
- Allen key (included)
Hardware in the box
| Part no. (as printed in the manual) | Qty |
|---|---|
| 105236 | 5× |
| 119045 | 4× |
| 110459 | 4× |
| 191315 | 4× |
| 118860 | 2× |
| 119046 | 4× |
| 121115 | 4× |
| 108445 | 4× |
| 121116 | 1× |
Step-by-step assembly
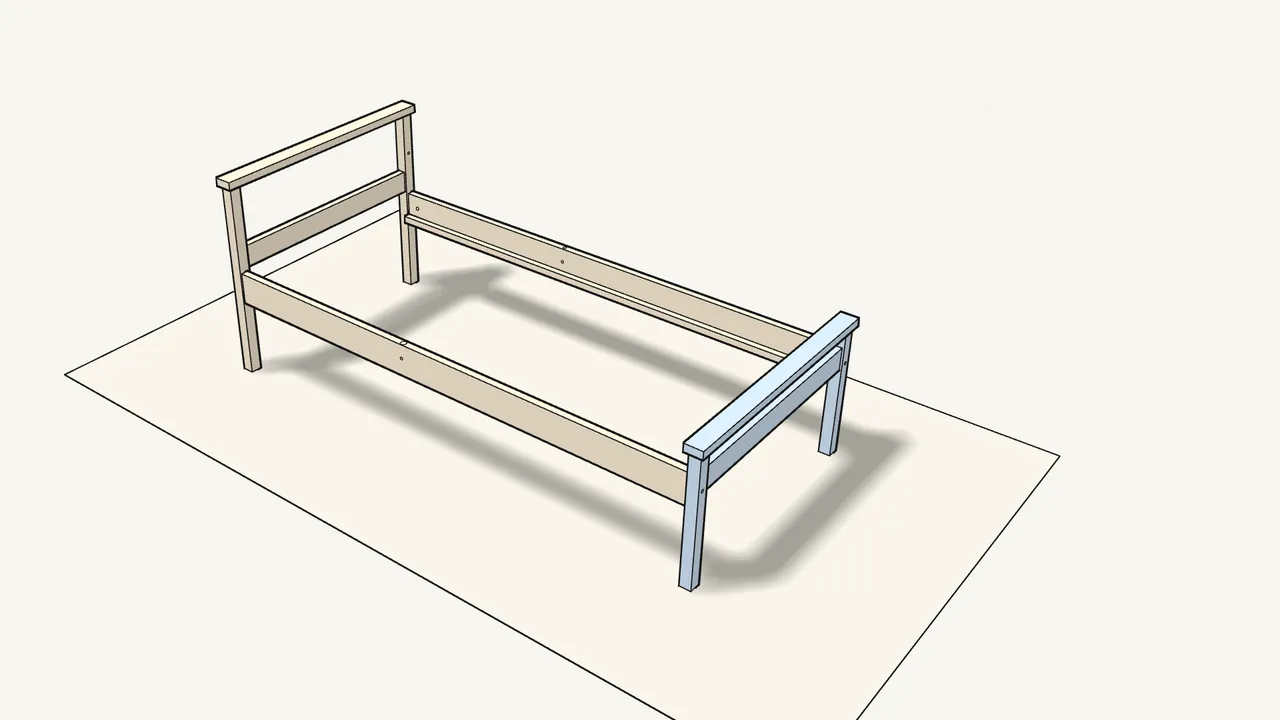
Step 1
Push both side rails onto the headboard, then fit the footboard.
The rail ends go onto the wooden dowels in the posts.
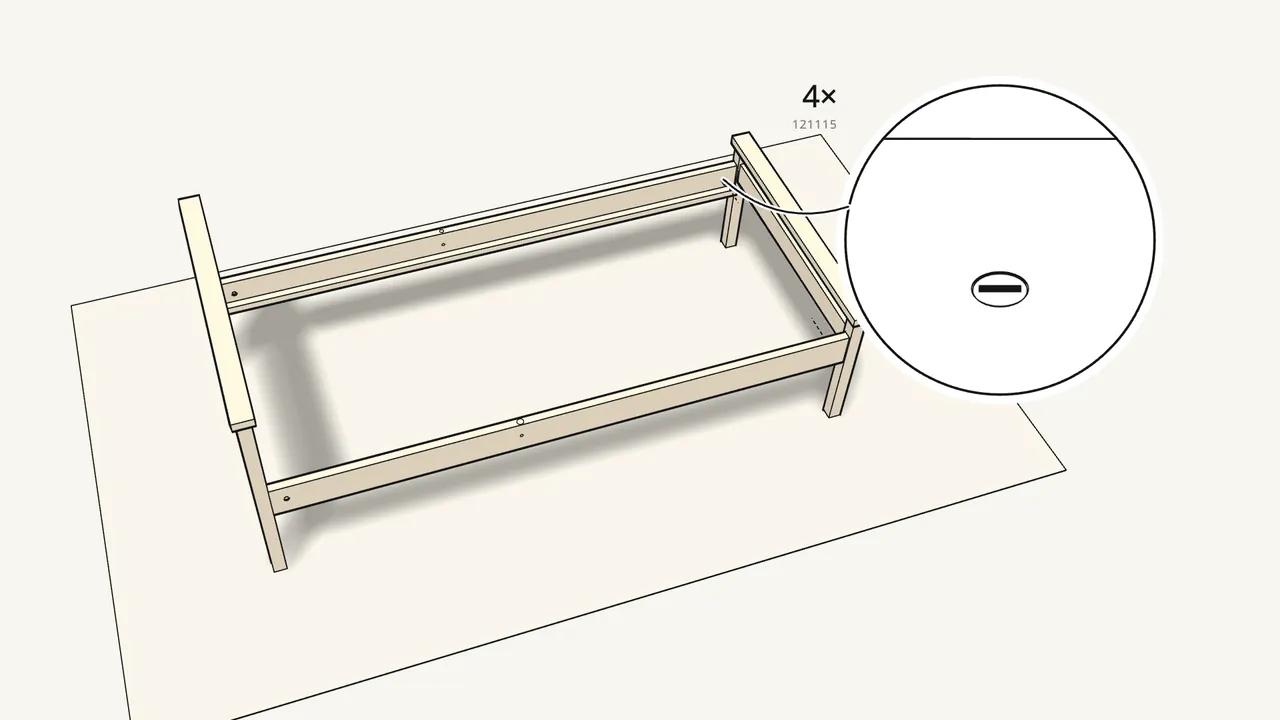
Step 2
Push 4 barrel nuts (121115) into the side rails.
Into the holes on the inside, near each end.
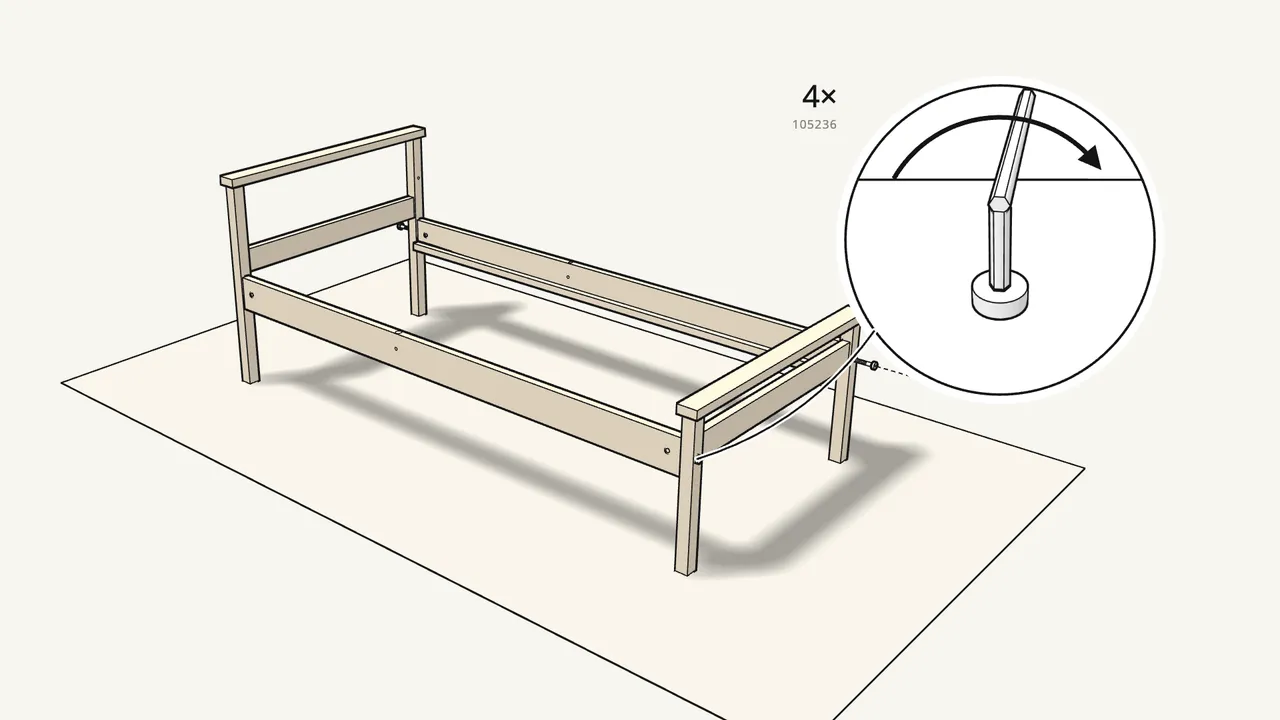
Step 3 · manual step 2
Tighten 4 bolts (105236) through the posts into the nuts.
Use Allen key 100001.
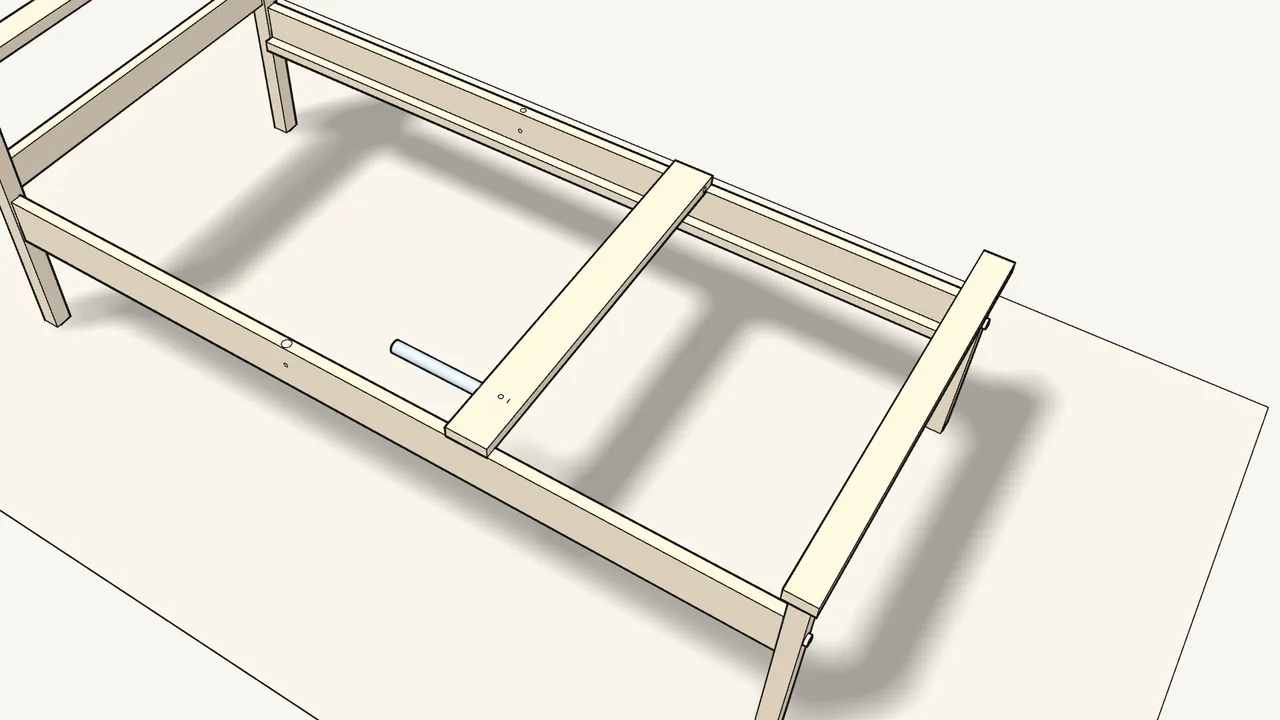
Step 4 · manual step 3
Guard rail: slide the metal rod (130730) into its bottom edge.
Guard-rail version, manual p. 7. The holes in the rod must face the bolt holes.
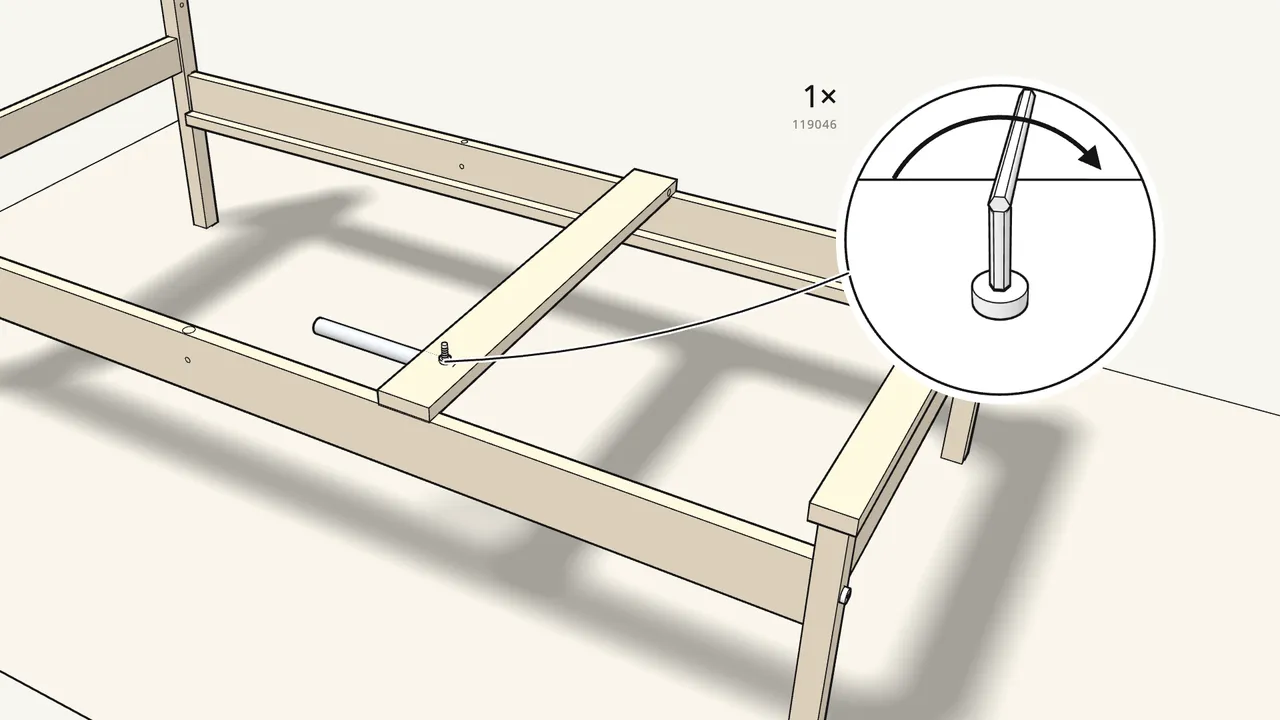
Step 5 · manual step 3
Lock the rod with a bolt (119046) and sleeve (119045).
Bolt from the top, sleeve from below. Allen keys 100001 and 100002.
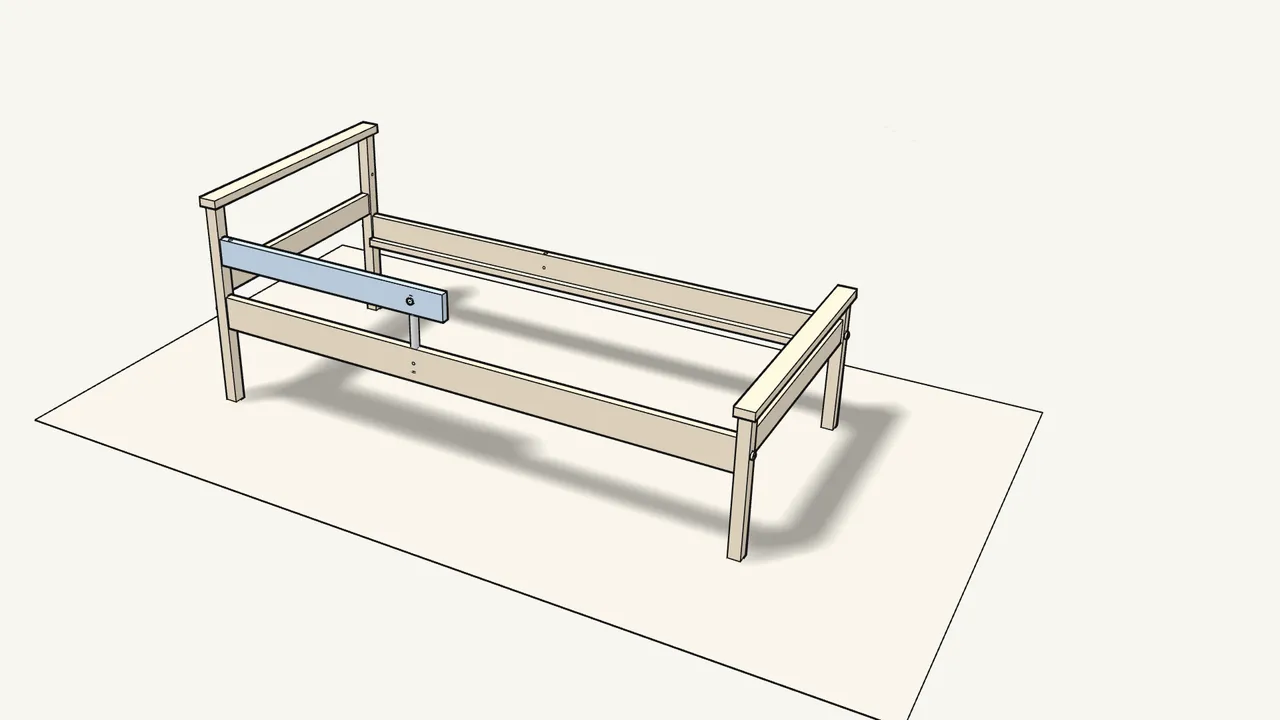
Step 6 · manual step 4
Lower the guard rail onto the side rail at the headboard end.
The rod goes down into the hole in the top of the rail.
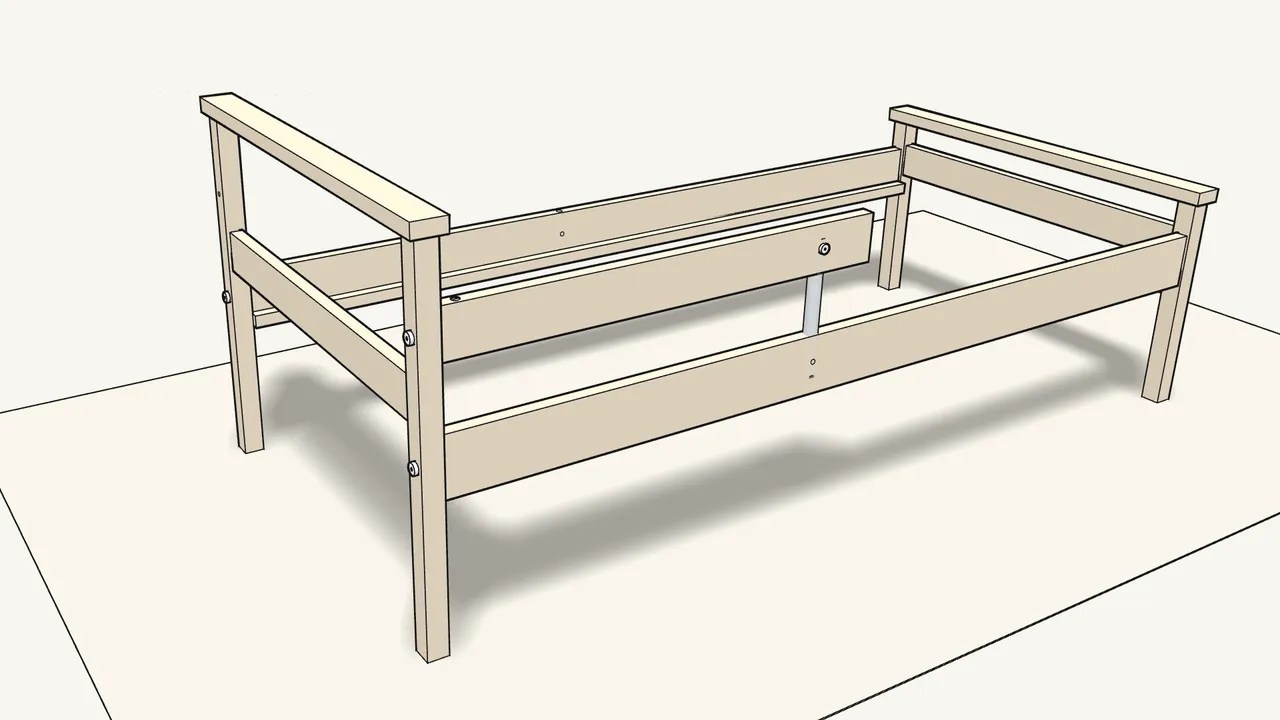
Step 7 · manual step 4
Fix it to the headboard: 1 bolt (105236) and barrel nut (121116).
Push the barrel nut into the top of the guard rail, then tighten the bolt.
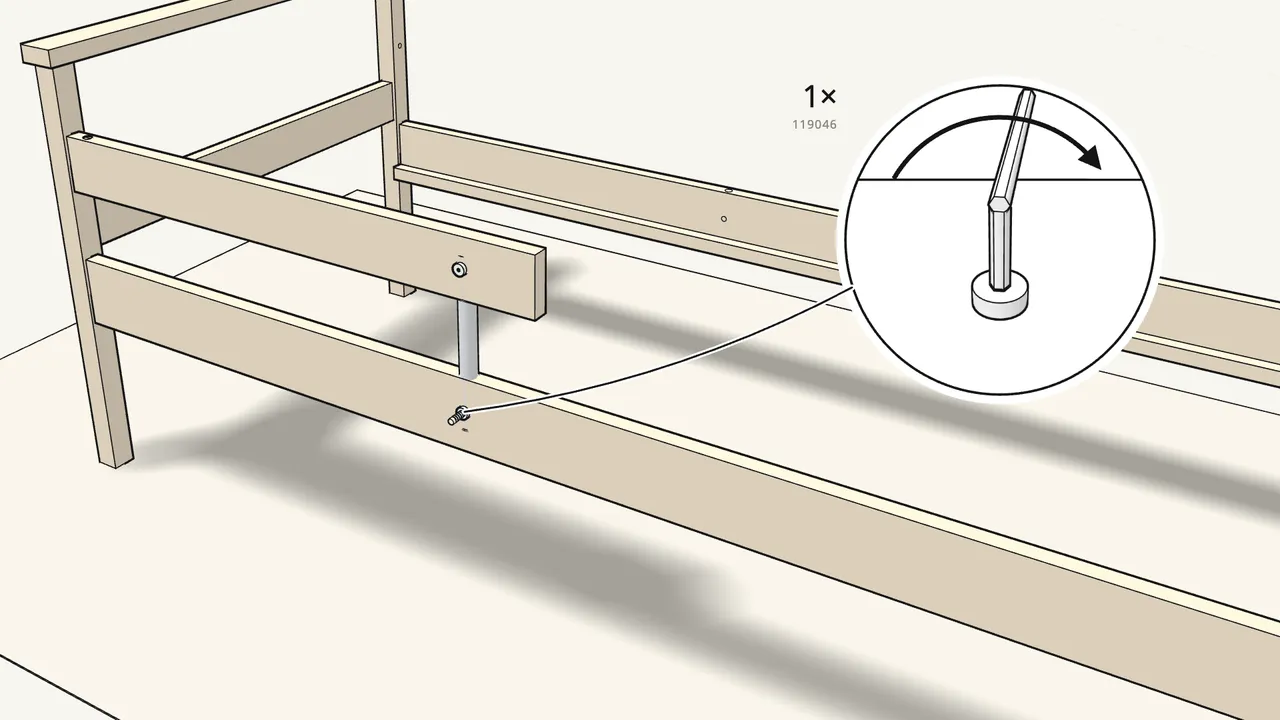
Step 8 · manual step 5
Lock the rod in the side rail: sleeve 119045 + bolt 119046.
Sleeve from the inside, bolt from the outside. Allen keys 100002 and 100001.
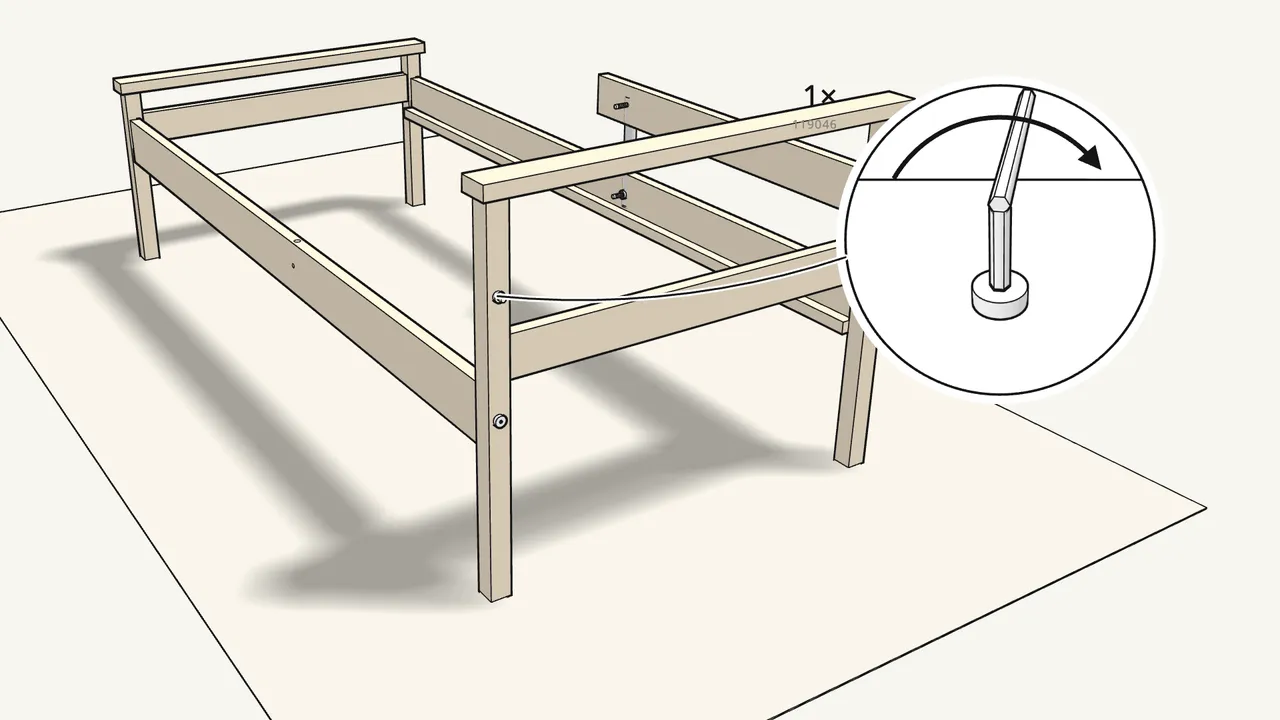
Step 9 · manual step 6
Plug the guard-rail hole in the other headboard post.
Bolt 119046 from the outside, sleeve 119045 from the inside.
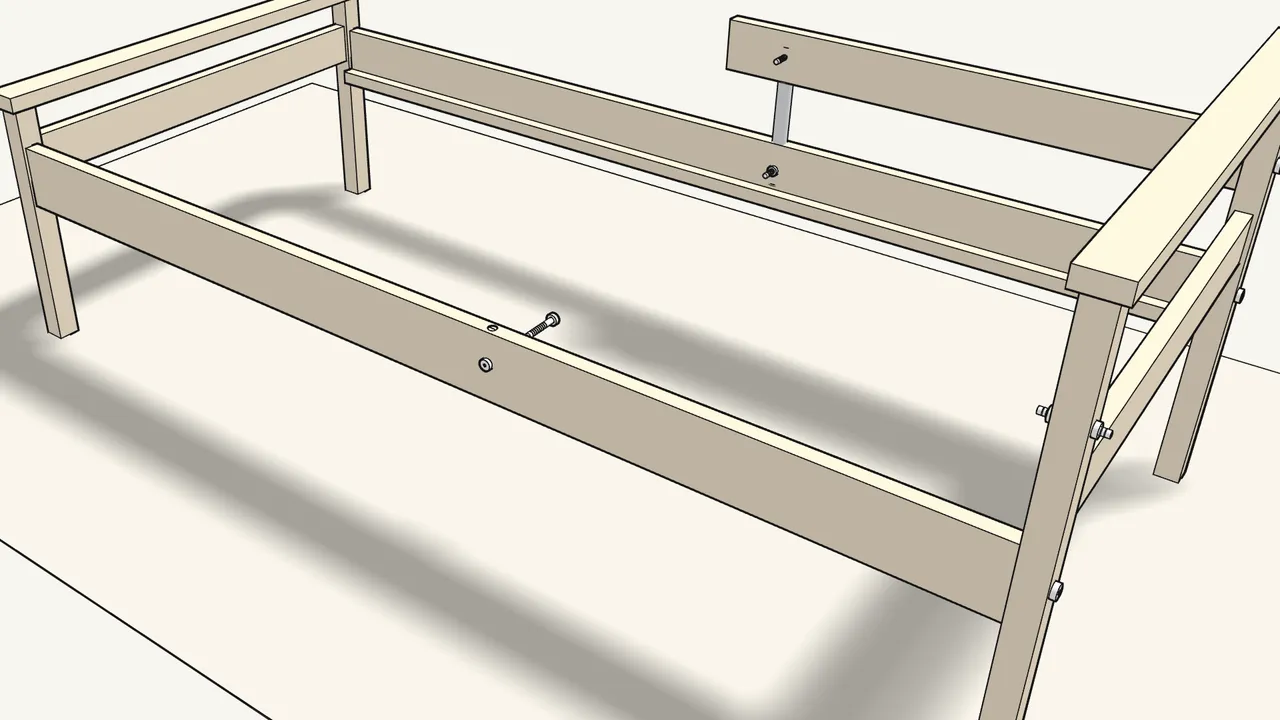
Step 10 · manual step 7
Other side rail: cross dowel 118860 into the hole on top.
Then bolt 119046 and sleeve 119045 through the rail. Allen keys 100002 and 100001.
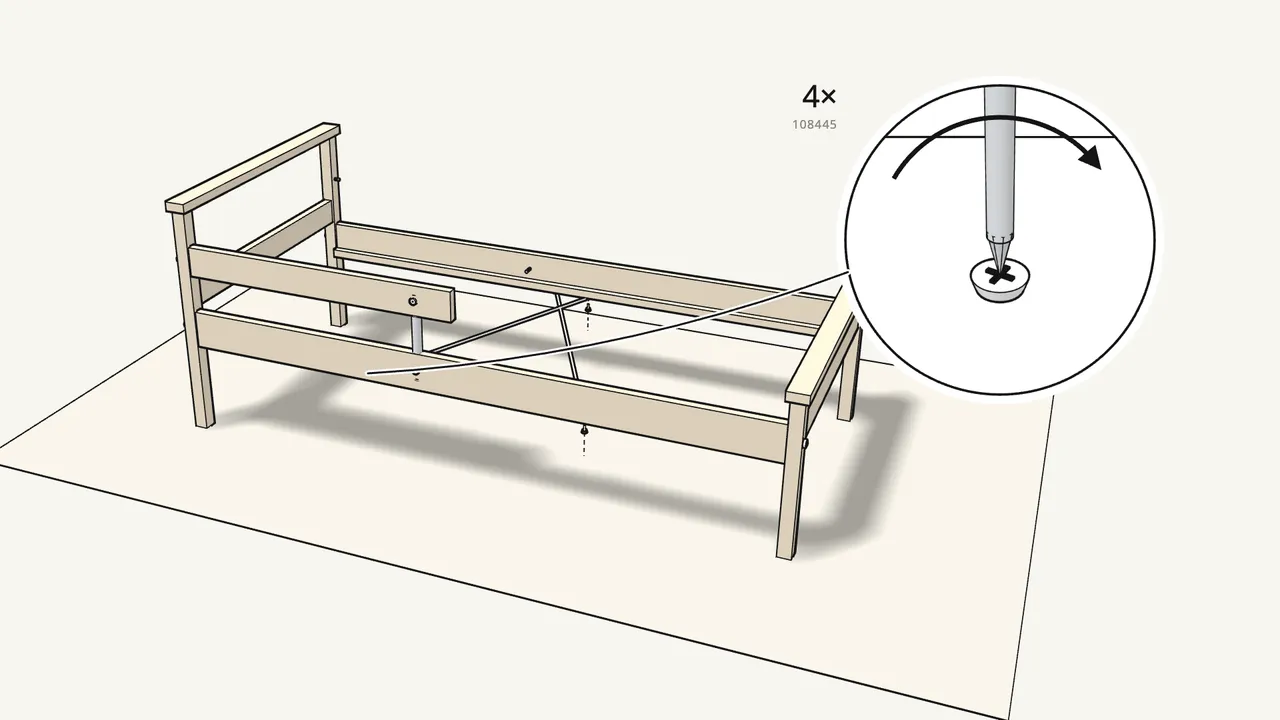
Step 11 · manual step 8
Screw the tension wire under the side rails: 4 screws (108445).
Phillips screwdriver.
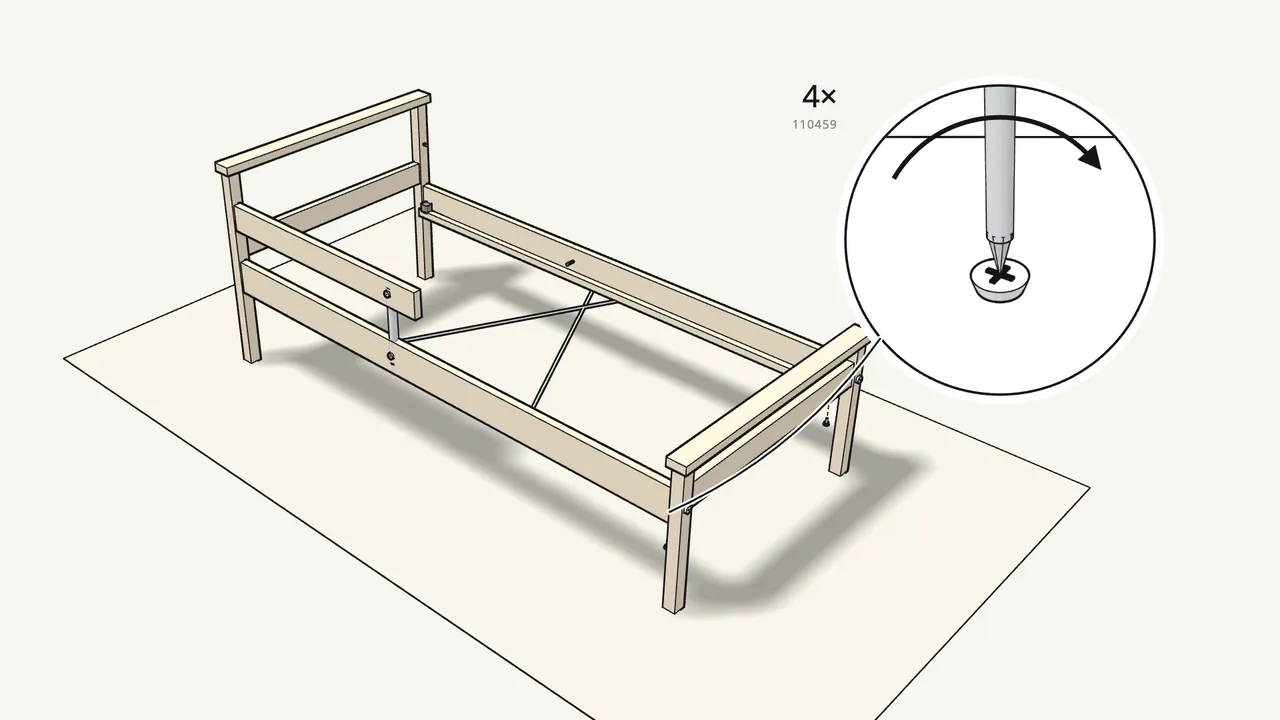
Step 12 · manual step 9
Put 4 stops (191315) on the ledges at the ends of the rails.
Fix each one from below with a screw (110459).
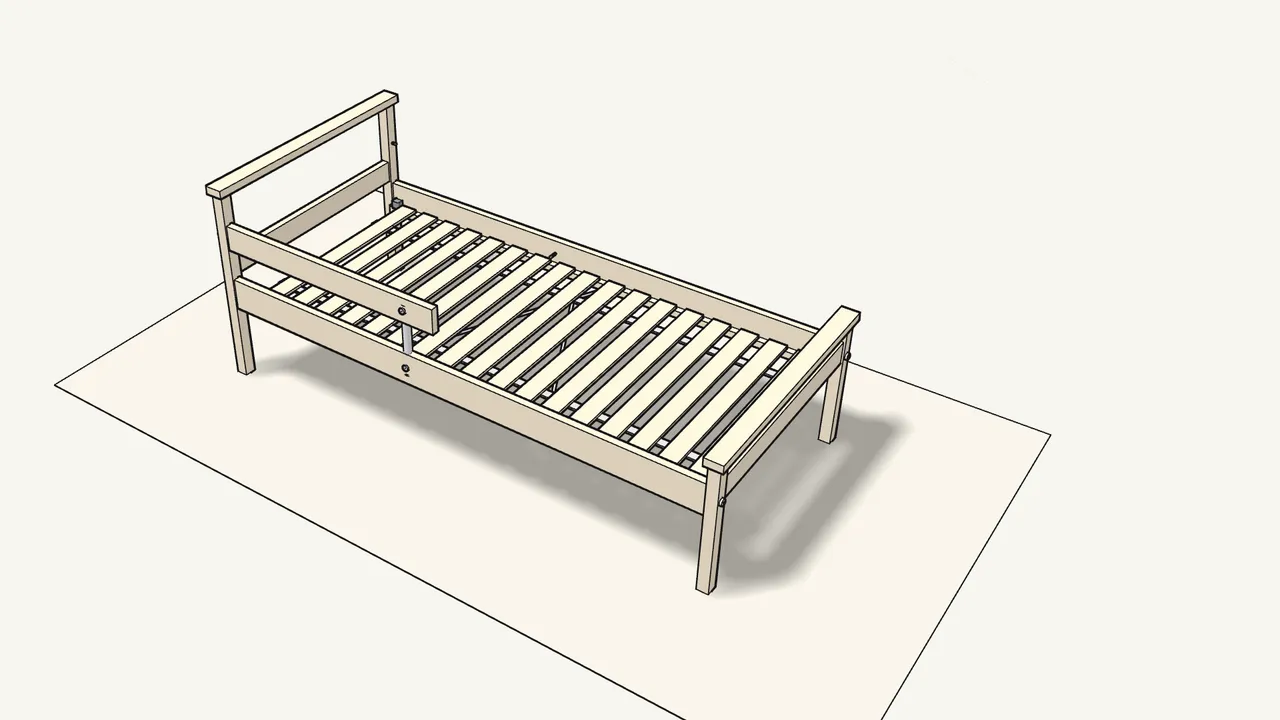
Step 13 · manual step 10
Lay the LURÖY slatted base in.
It rests on the ledges between the 4 stops.
Tips & safety
- Building it without the guard rail? Follow manual p. 5–6 instead of steps 3–7: plug both side rails and both headboard holes, then continue at step 8.
- For a 70×160 cm (27 1/2×63") mattress. The LURÖY slatted base sits on the ledges inside the side rails, held at the ends by the 4 stops.
- Assemble on a soft surface — two people help. As shown on page 2 of the manual.
Official instructions
This guide follows IKEA’s official assembly instructions (AA-169638-12). Keep the printed manual to hand — if anything differs, the manual is right.