IKEA · Kids' Furniture
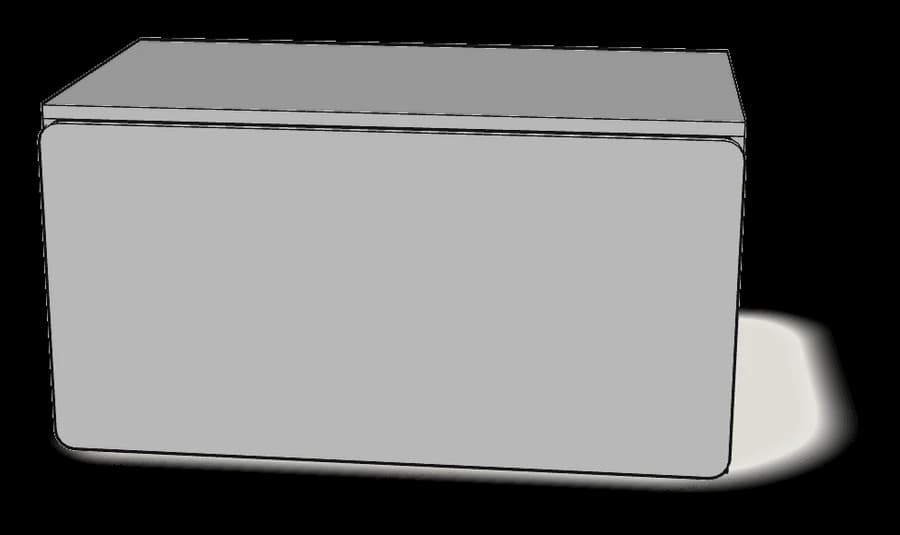
How to assemble IKEA SMÅSTAD Bench with Toy Storage
Step-by-step IKEA SMÅSTAD Bench with Toy Storage assembly: 26 illustrated steps, an animated video, the hardware list and the tools you need — following the official instructions (AA-2203659-1).
- 26 illustrated steps
- 12 steps in the manual
- 3:21 video
- 90×52×48 cm
What you need
Tools
- Flat-head screwdriver
- Phillips screwdriver
- Spirit level
Hardware in the box
| Part no. (as printed in the manual) | Qty |
|---|---|
| 114613 | 10× |
| 119253 | 10× |
| 100349 | 12× |
| 152642 | 4× |
| 145718 | 4× |
| 118331 | 4× |
| 101350 | 8× |
| 101345 | 6× |
| 146113 | 8× |
| 119030 | 8× |
Step-by-step assembly
Step 1
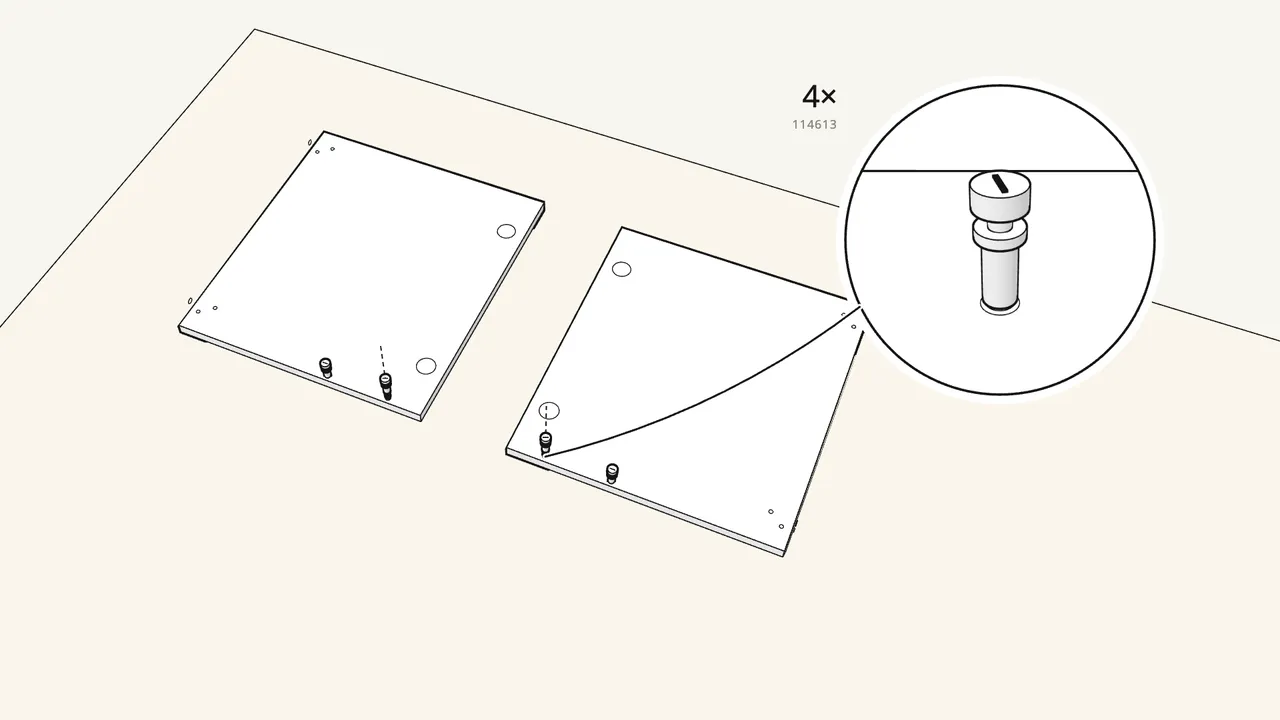
Screw 4 cam bolts (114613) into the two side panels.
2 in each panel, with the Phillips screwdriver.
Step 2
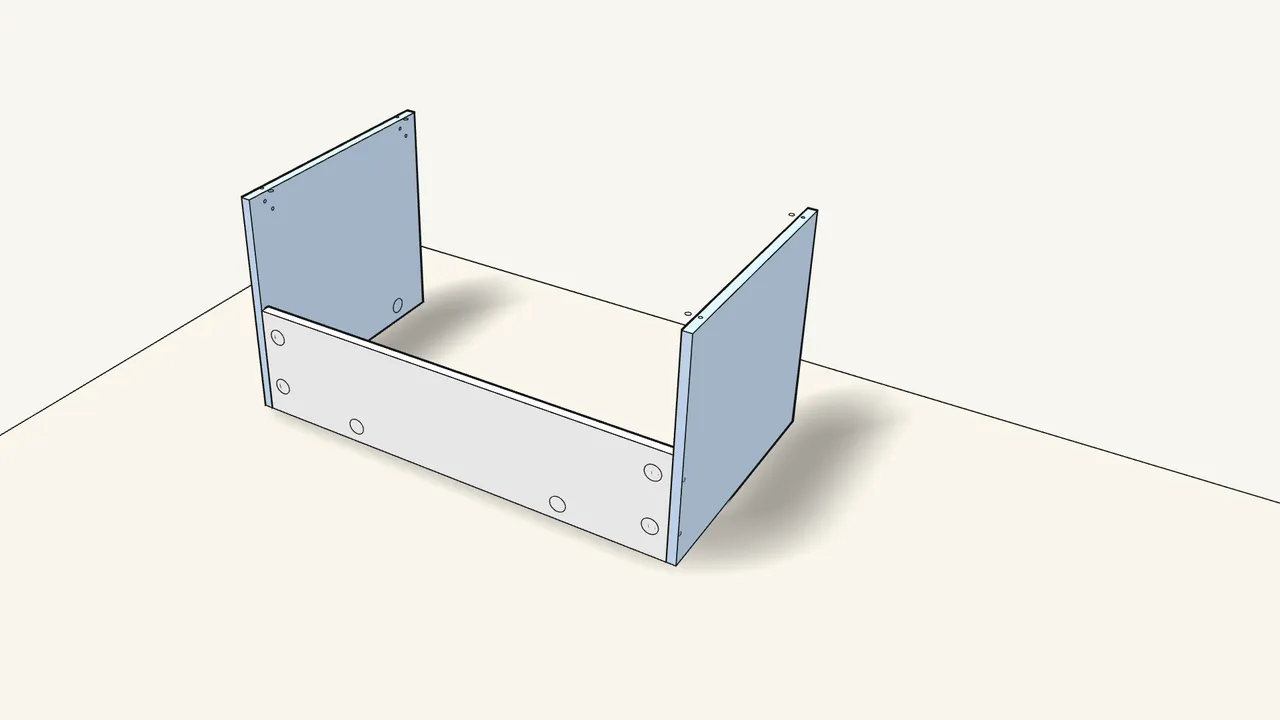
Stand the sides up on their top edges and fit the back rail.
The cam bolts go into the holes in the ends of the rail.
Step 3
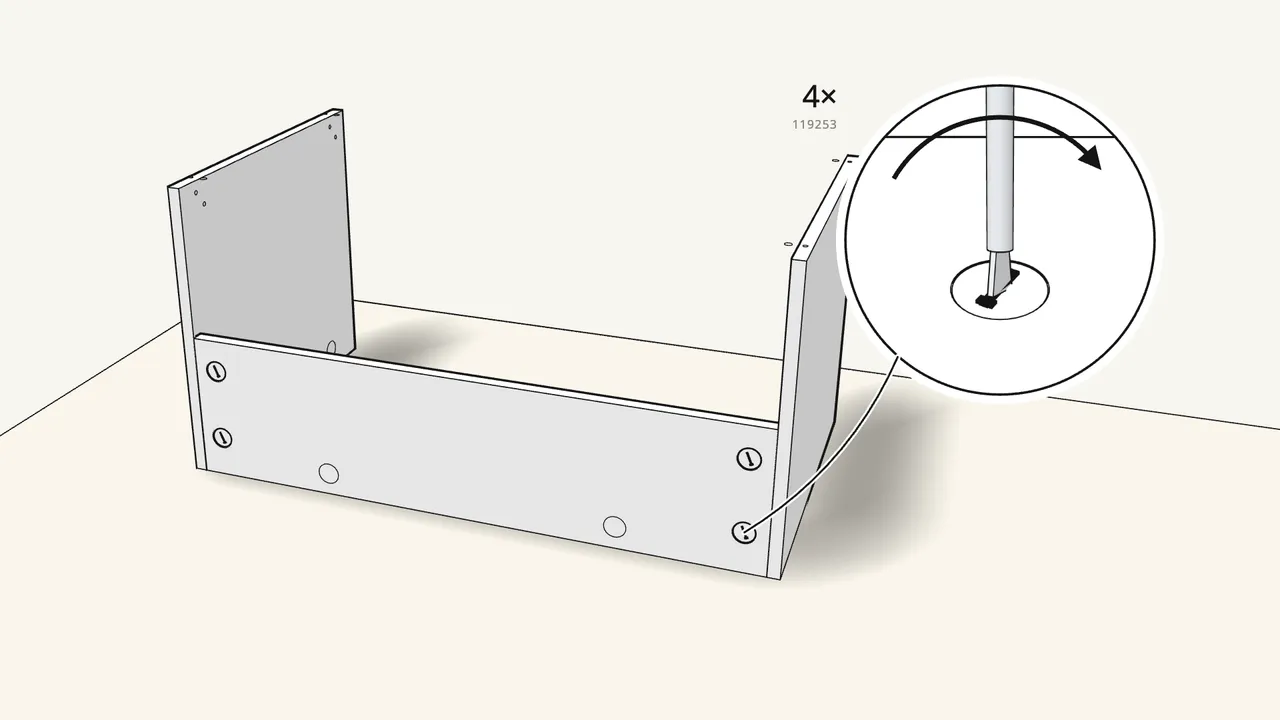
Insert 4 cam locks (119253) and turn them clockwise.
Use the flat screwdriver.
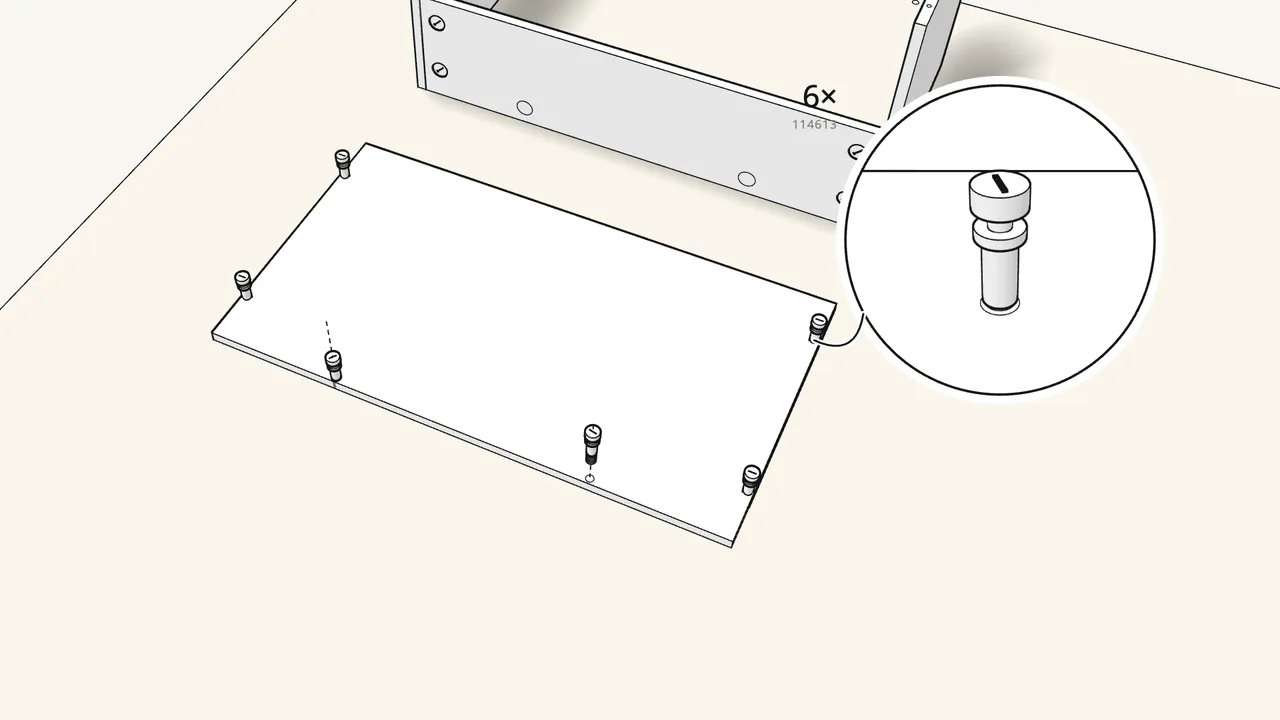
Step 4
Screw 6 cam bolts (114613) into the underside of the seat.
Lay the seat face-down on the rug.
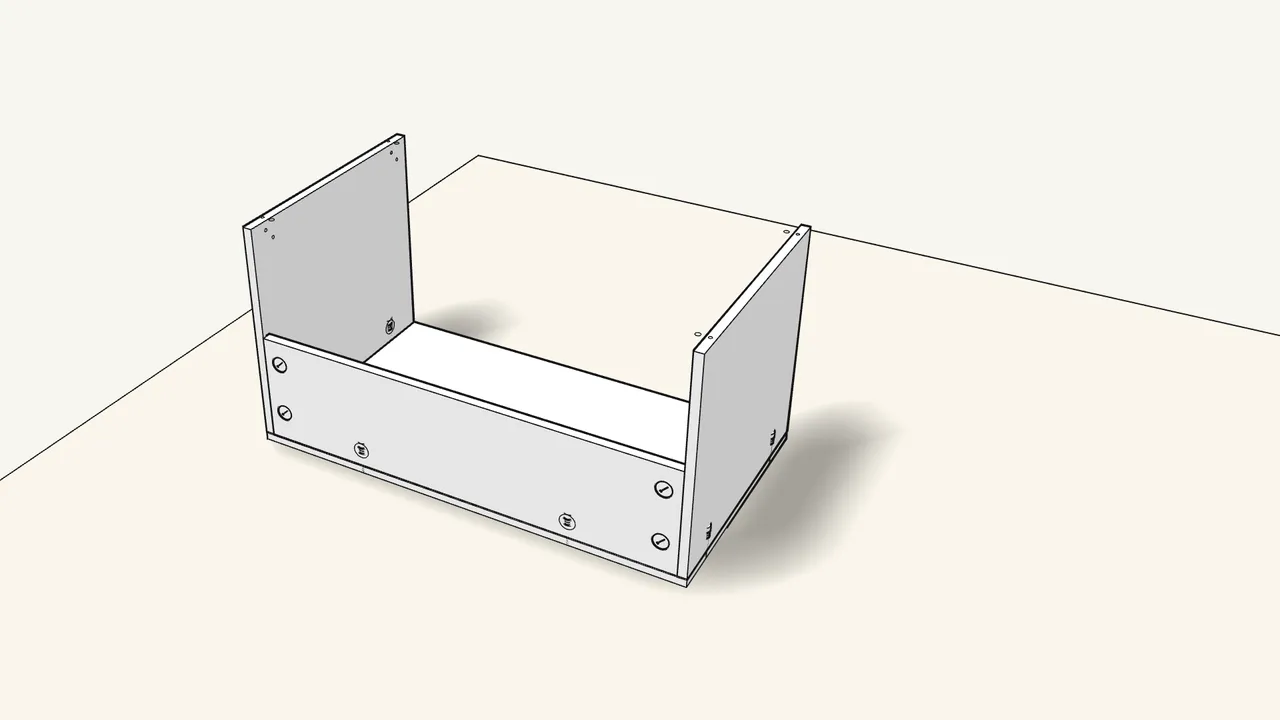
Step 5
Lower the sides and rail onto the seat.
The cam bolts go into the holes in the top edges.
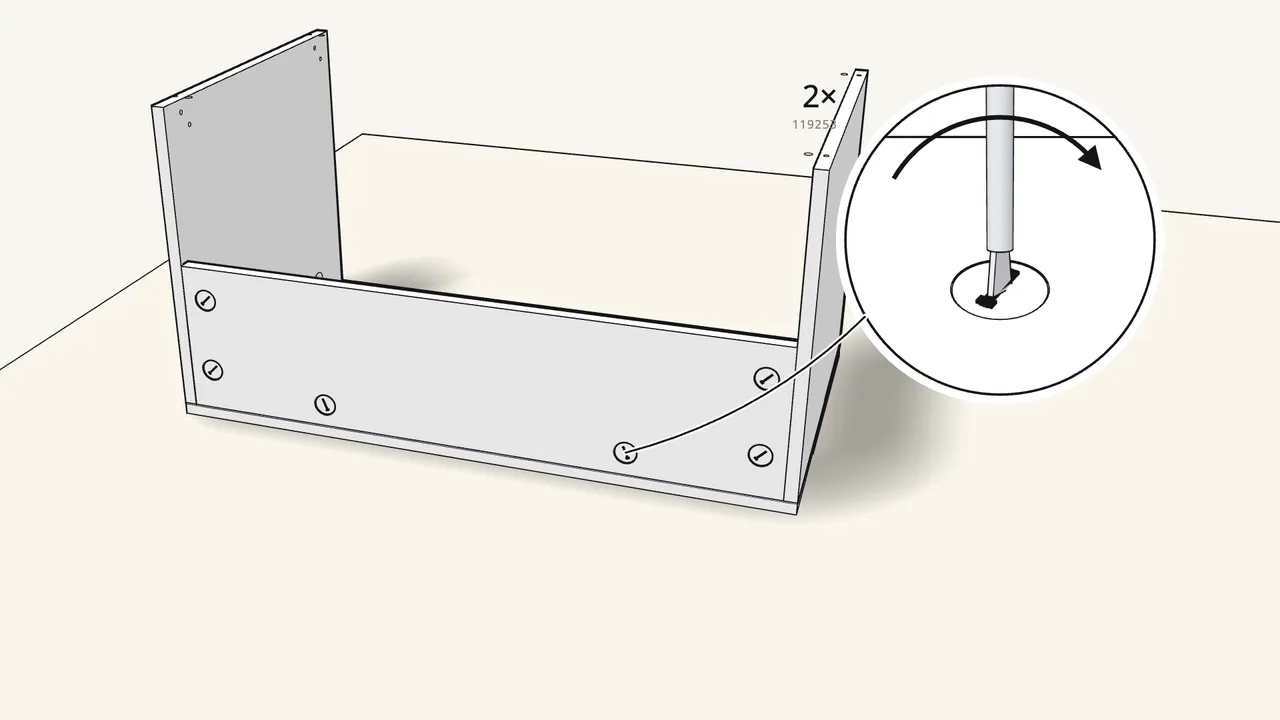
Step 6
Insert 2 cam locks (119253) in the rail and turn them.
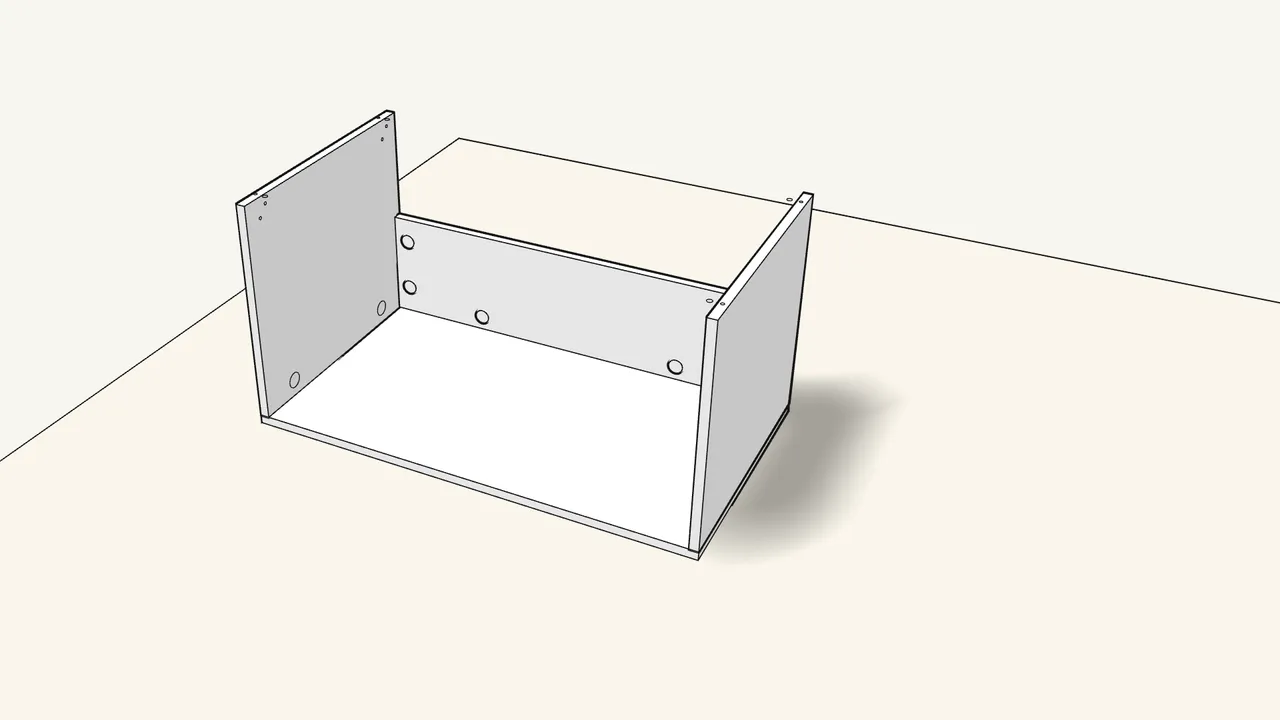
Step 7
Turn the bench around.
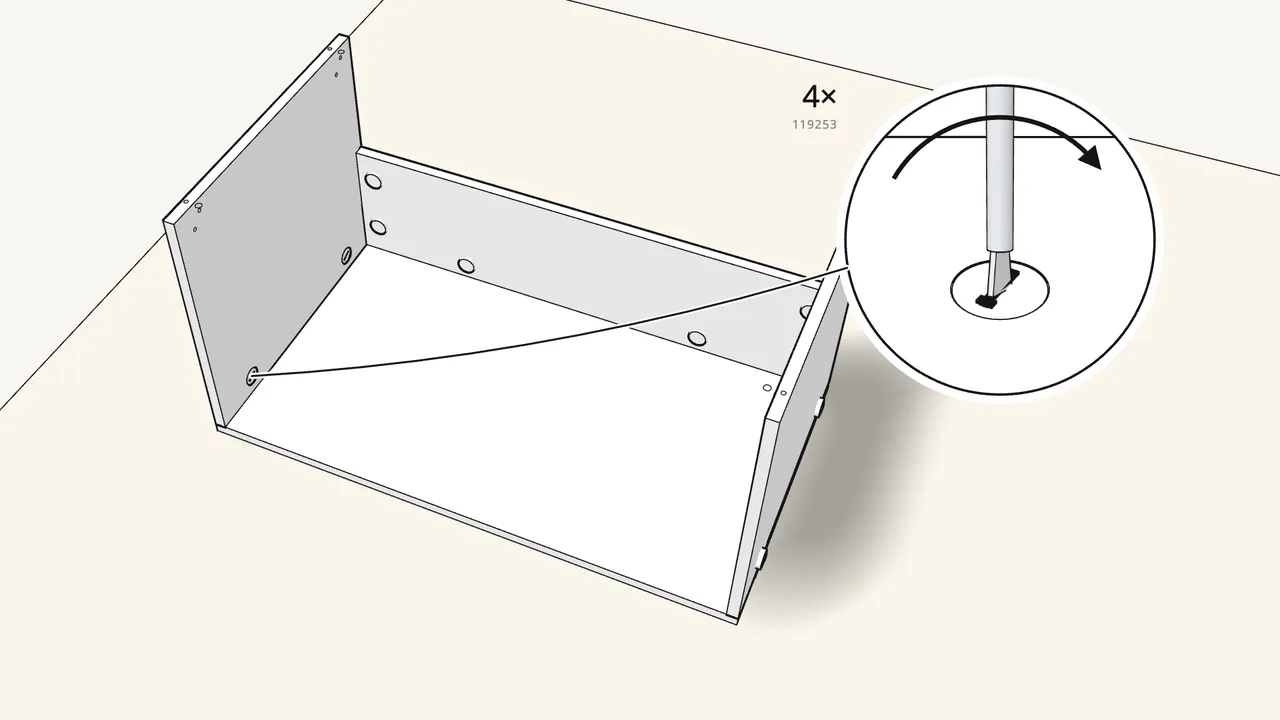
Step 8 · manual step 7
Insert 4 cam locks (119253) in the side panels and turn them.
They lock the sides to the seat.
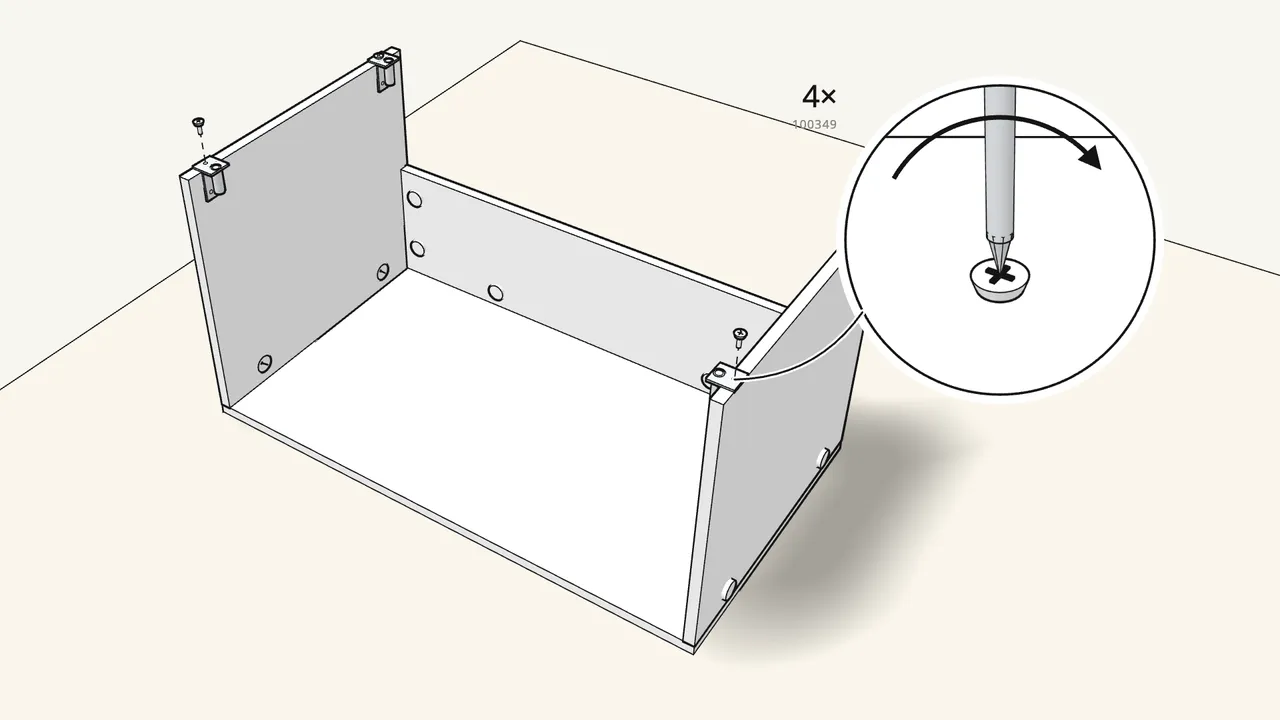
Step 9 · manual step 8
Fix a bracket (119597) to each corner with a screw (100349).
The screw goes into the edge of the side panel.
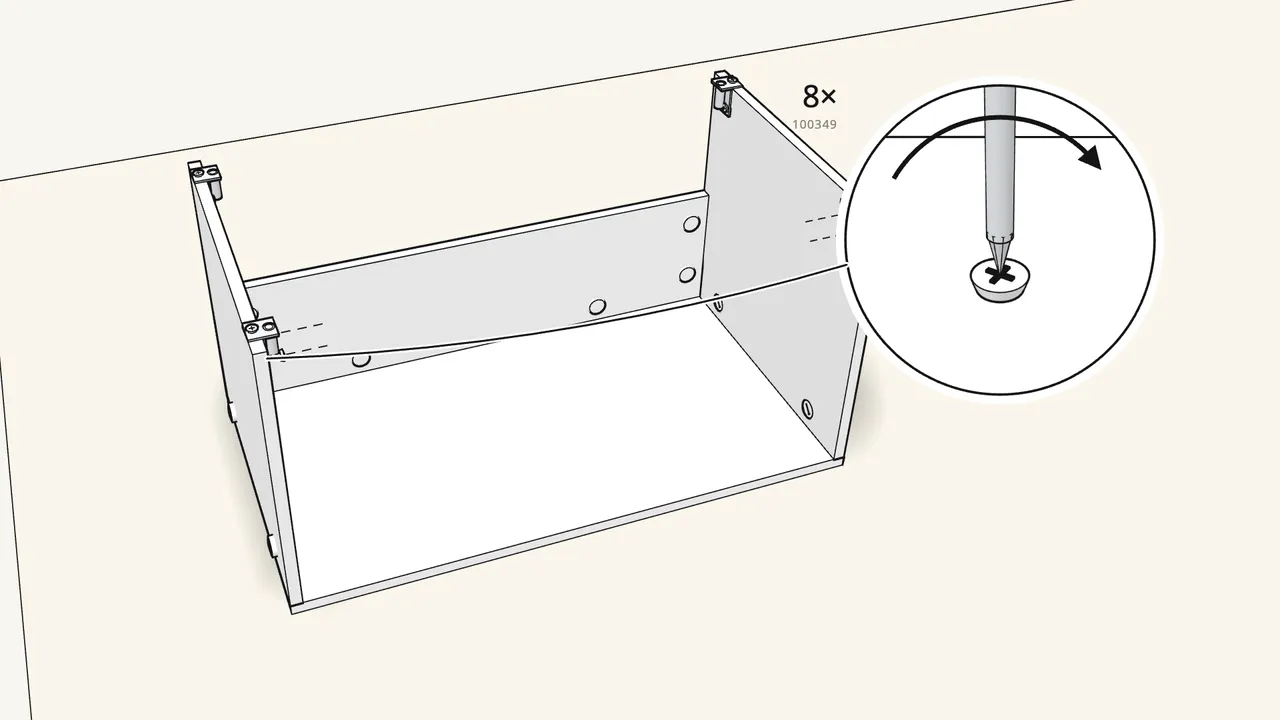
Step 10 · manual step 9
Add 2 more screws (100349) to each bracket.
8 screws, into the inside of the side panels.
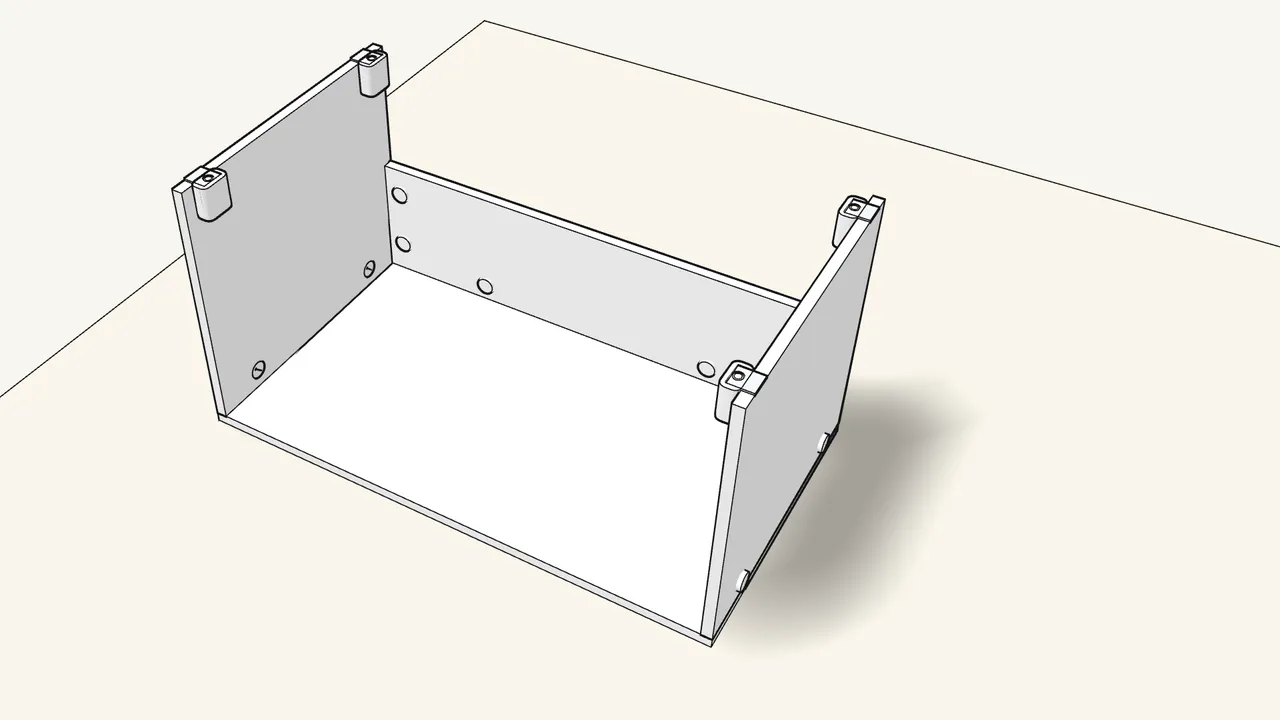
Step 11 · manual step 10
Slide a cover (119596) onto each bracket.
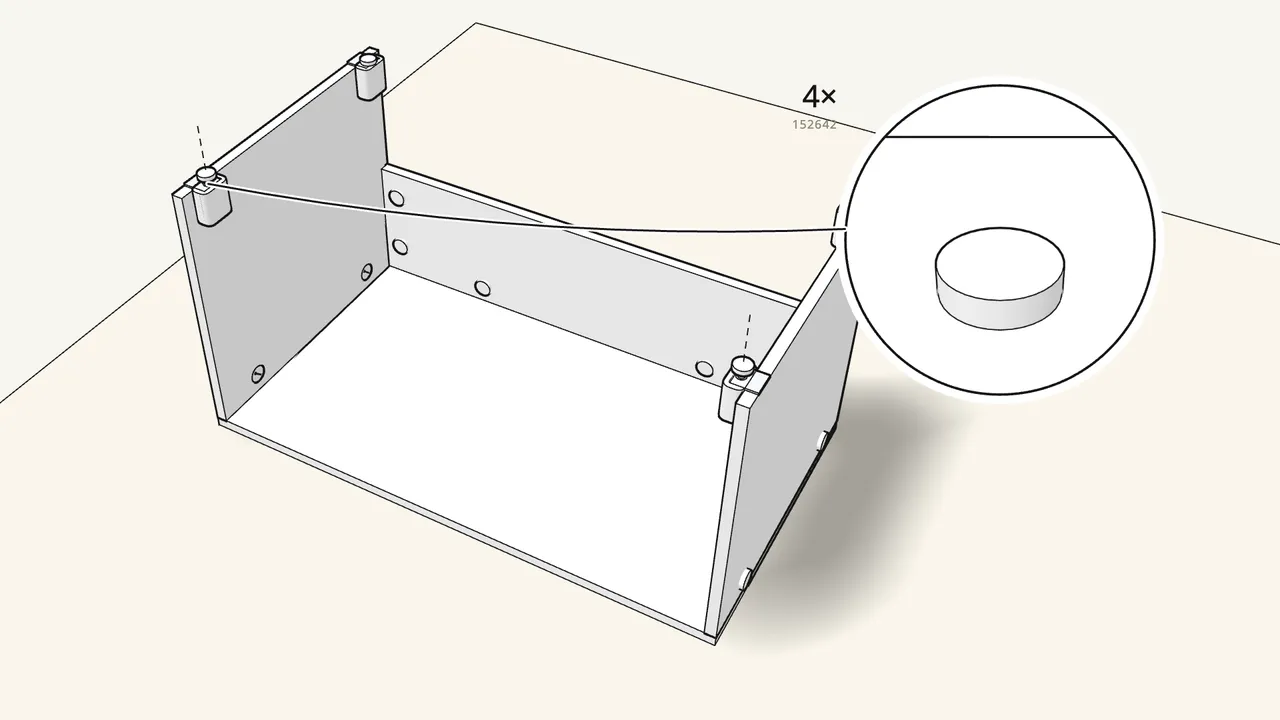
Step 12 · manual step 11
Screw the 4 glides (152642) into the brackets.
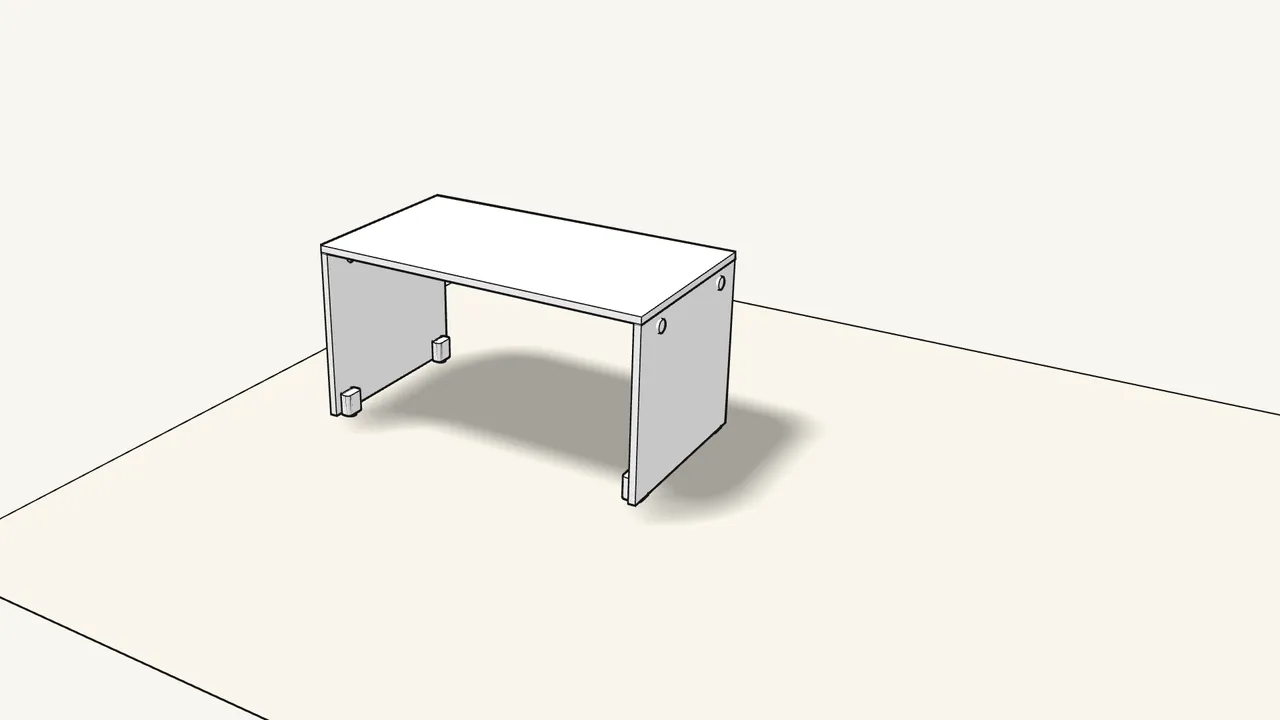
Step 13 · manual step 12
Turn the bench over onto its glides.
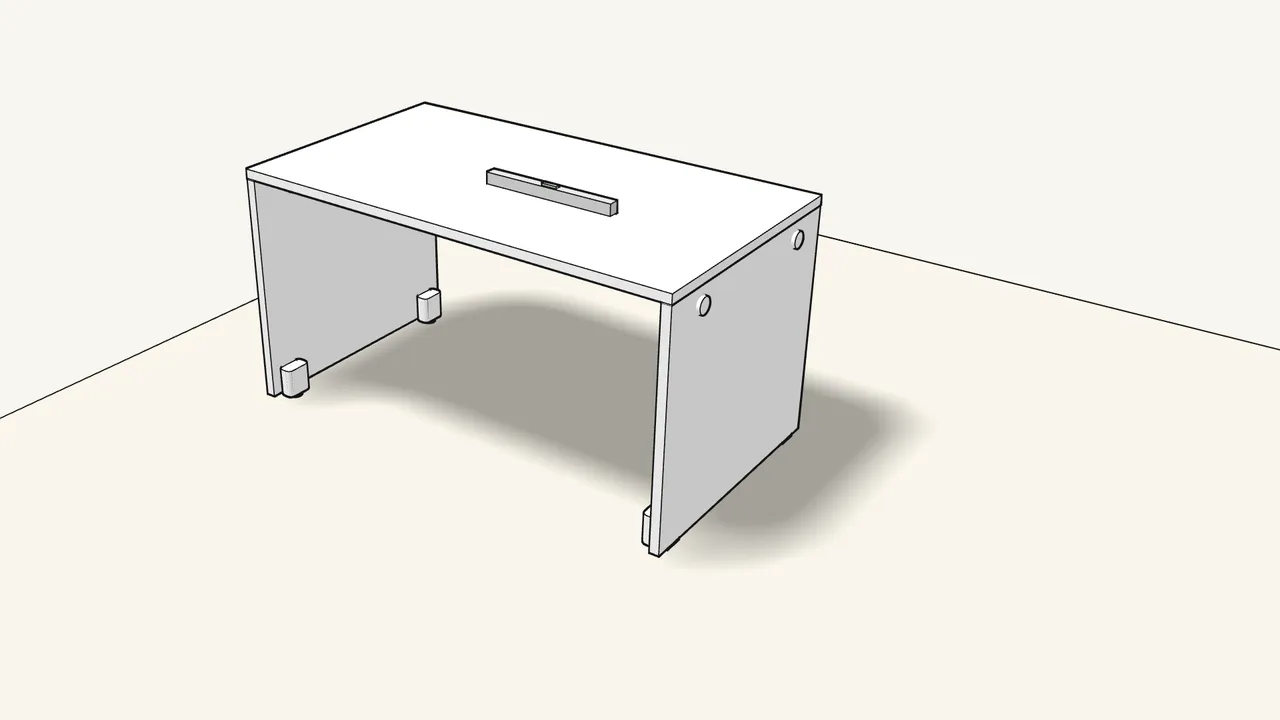
Step 14 · manual step 12
Turn the glides until the bench stands level.
Check with a spirit level on the seat.
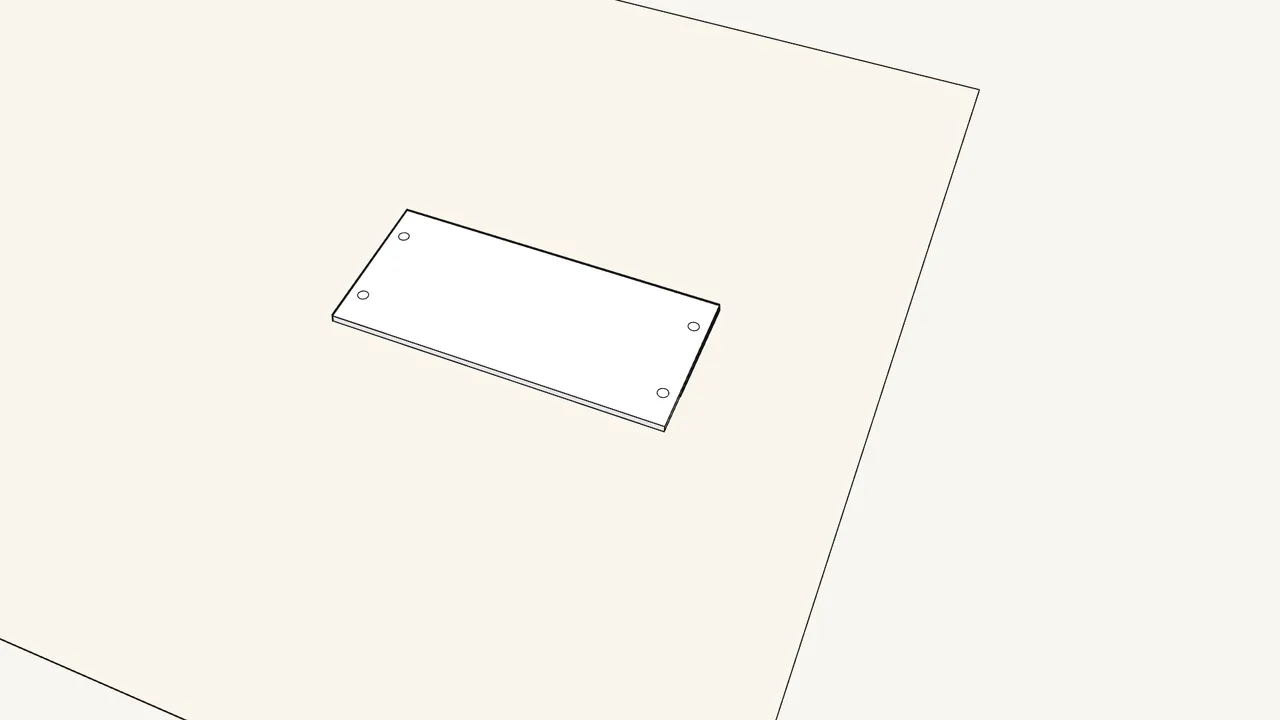
Step 15
Now the toy box.
It has its own manual (AA-2203702) — the steps below use its numbers.
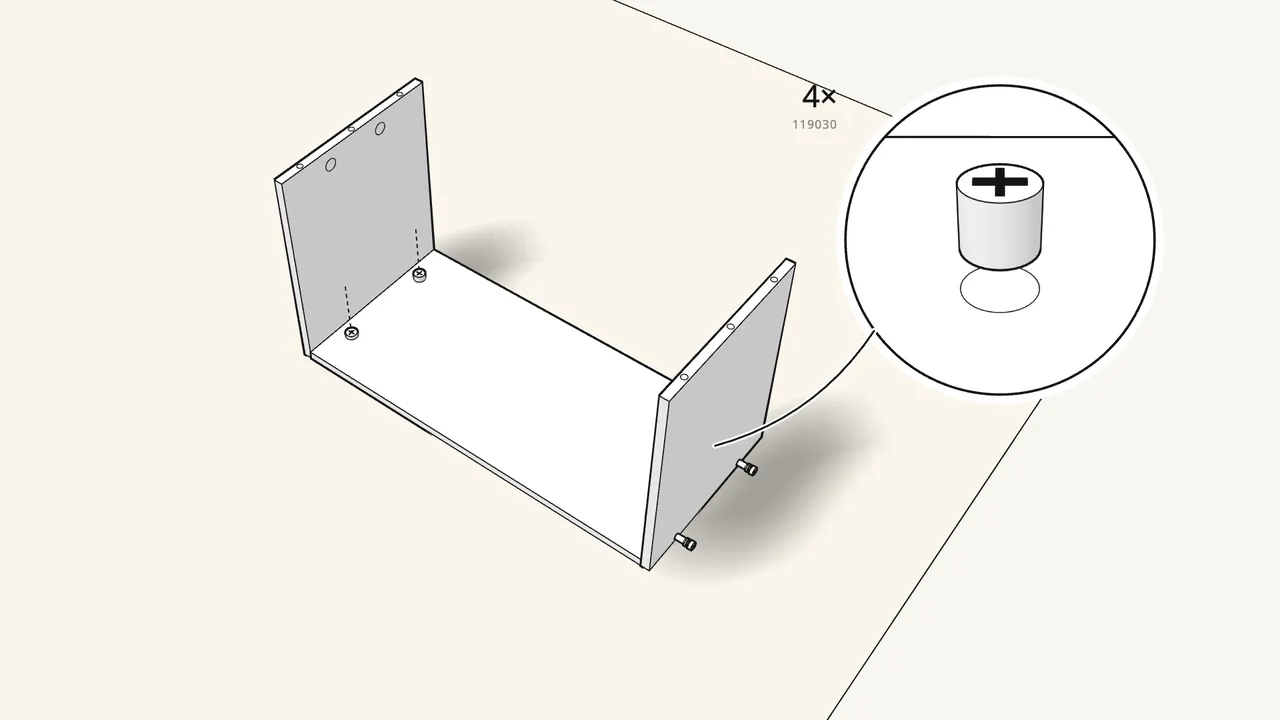
Step 16 · manual step 1–2
Join both box sides to the back panel.
Push 2 pins (145718) through each side, then turn 4 cam locks (119030) in the back panel.
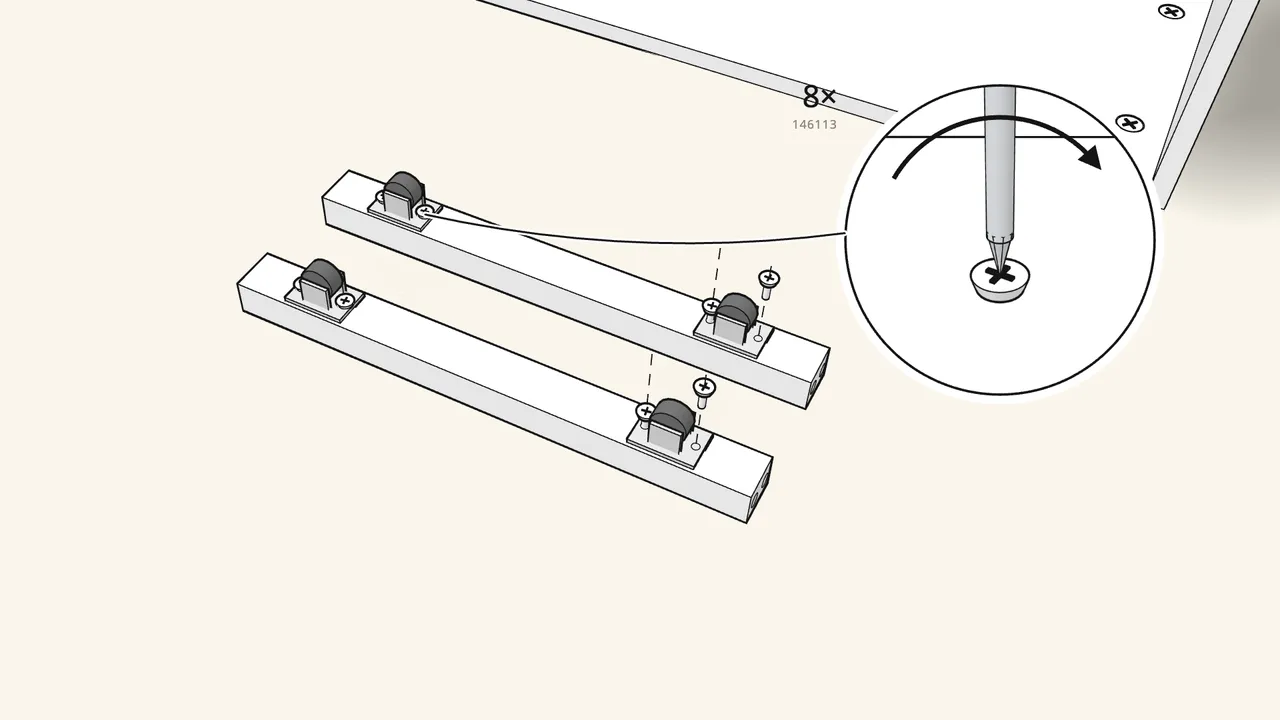
Step 17 · manual step 3
Screw the 4 castors (111401) onto the two runners.
2 screws (146113) per castor.
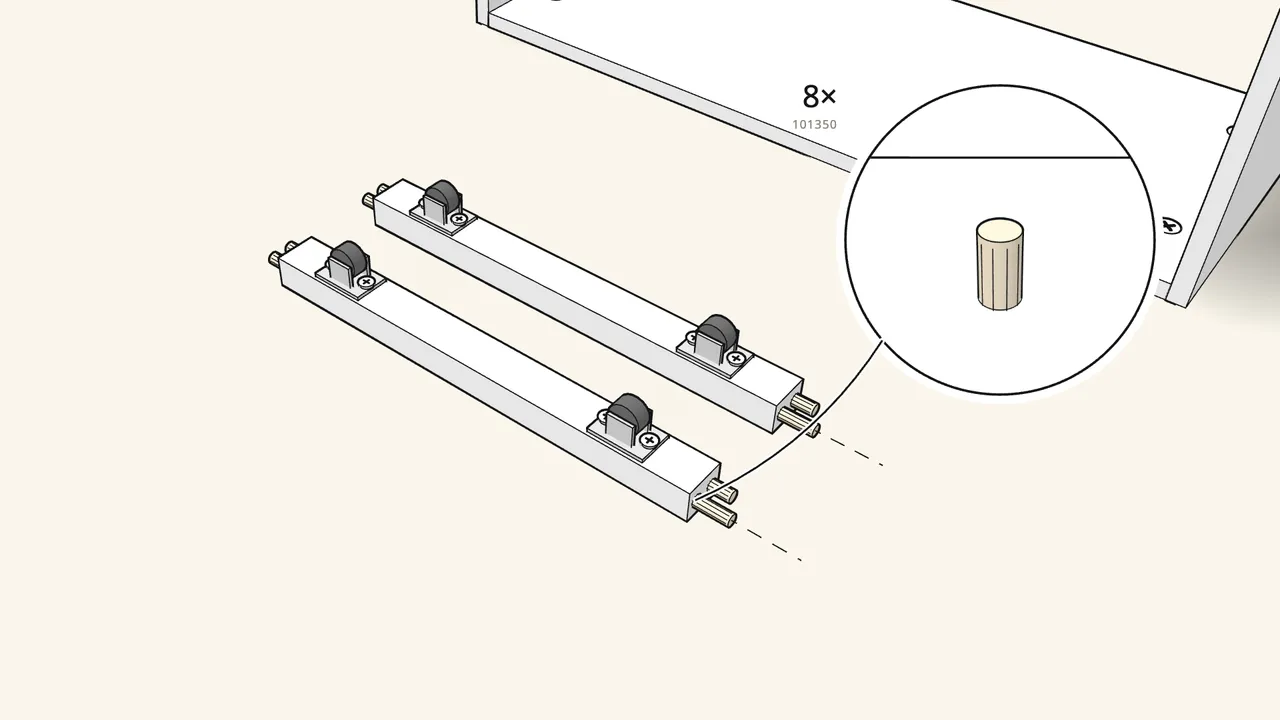
Step 18 · manual step 4
Push 8 dowels (101350) into the ends of the runners.
Use the thicker dowels (101350) here, not 101345.
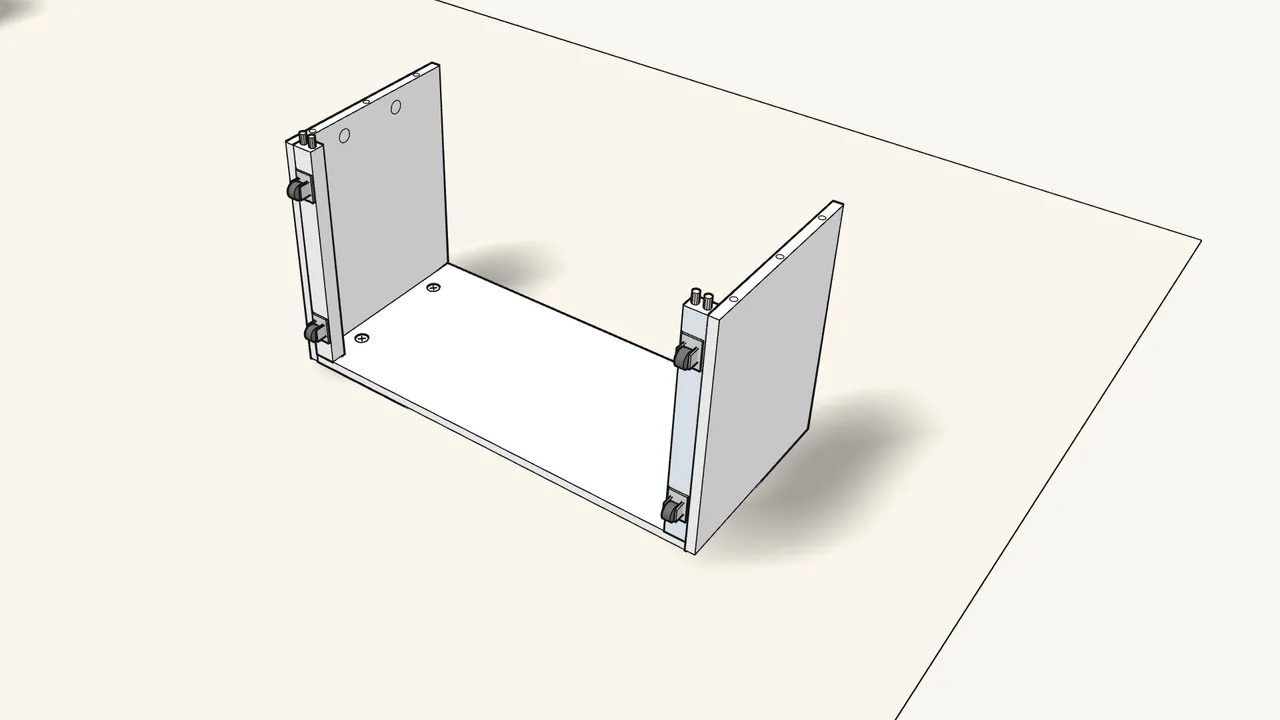
Step 19 · manual step 5
Stand the runners in the back panel, inside the sides.
The castors face outwards, along the bottom edge.
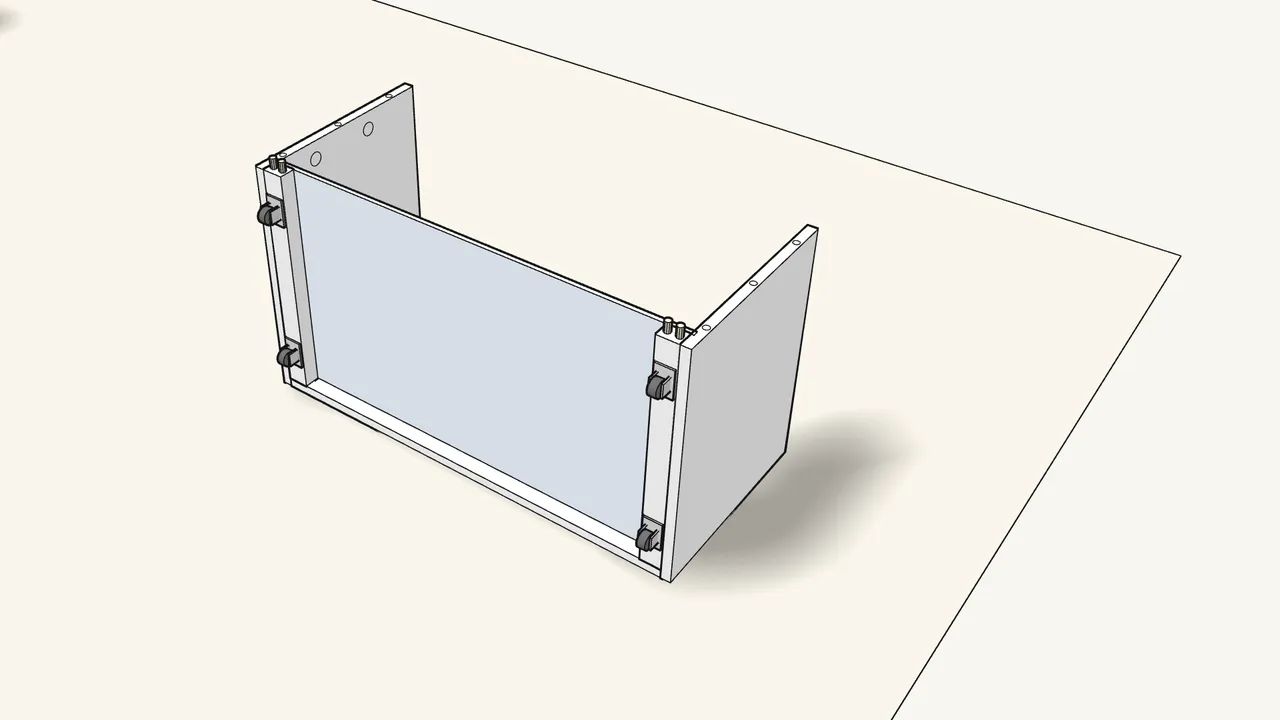
Step 20 · manual step 6
Slide the bottom panel down into the grooves.
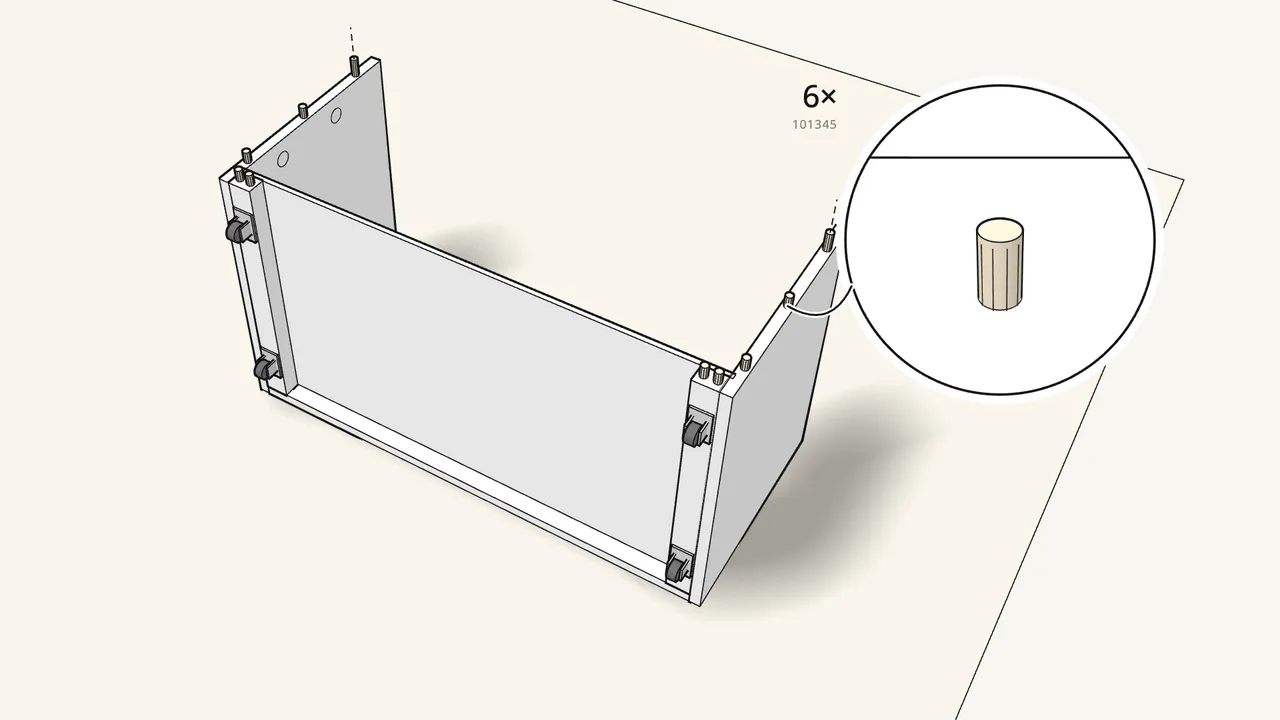
Step 21 · manual step 7
Push 6 dowels (101345) into the edges of the sides.
3 in each side.
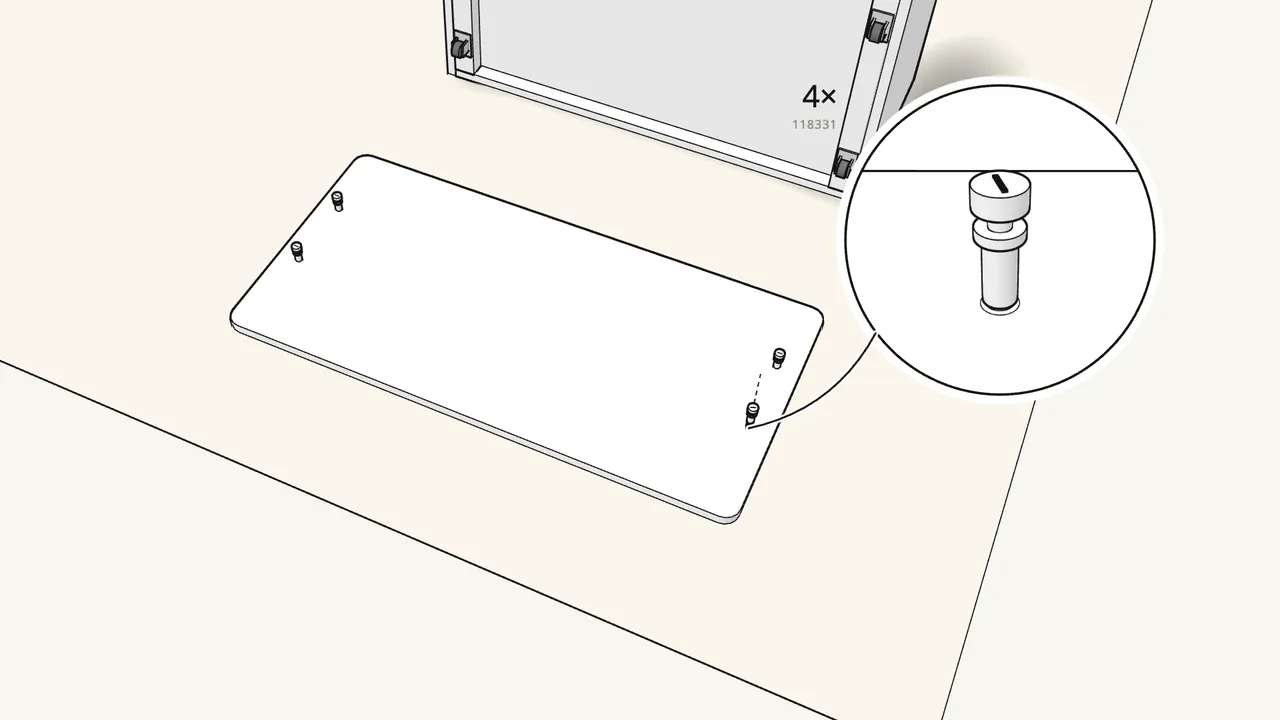
Step 22 · manual step 8
Screw 4 cam bolts (118331) into the front panel.
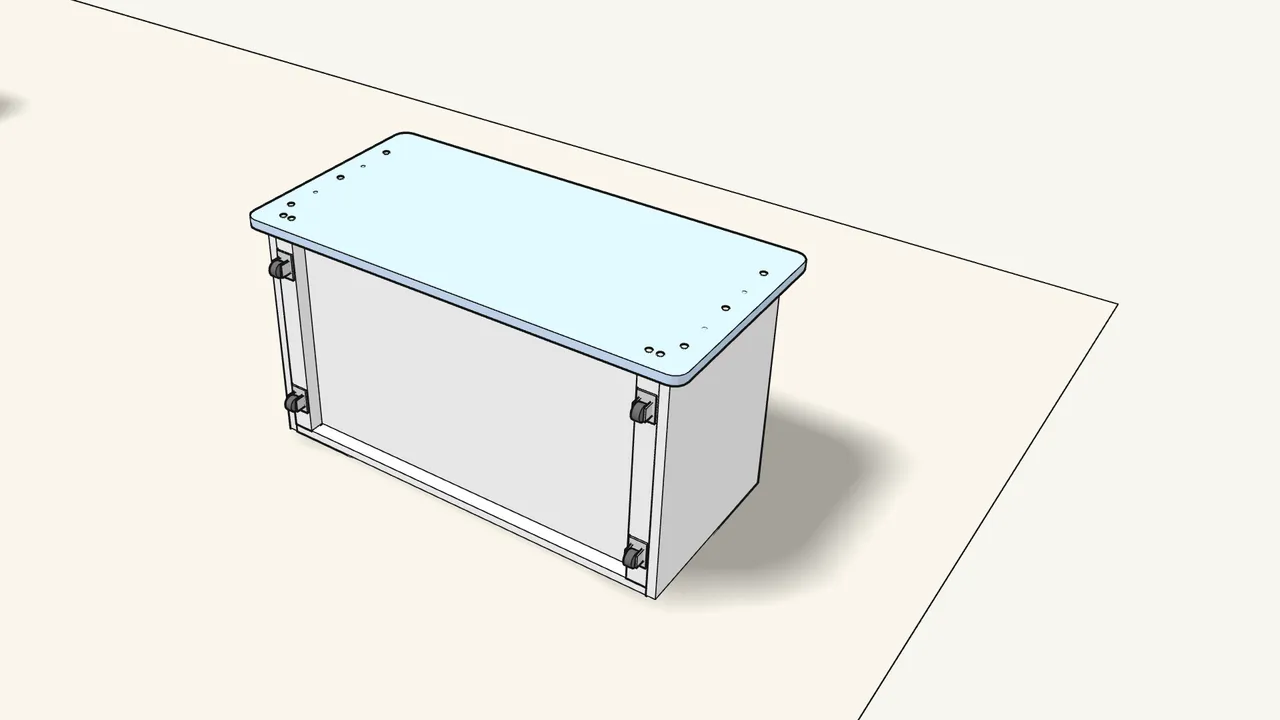
Step 23 · manual step 9
Lay the front panel onto the box.
Bolts and dowels go into the holes in the edges.
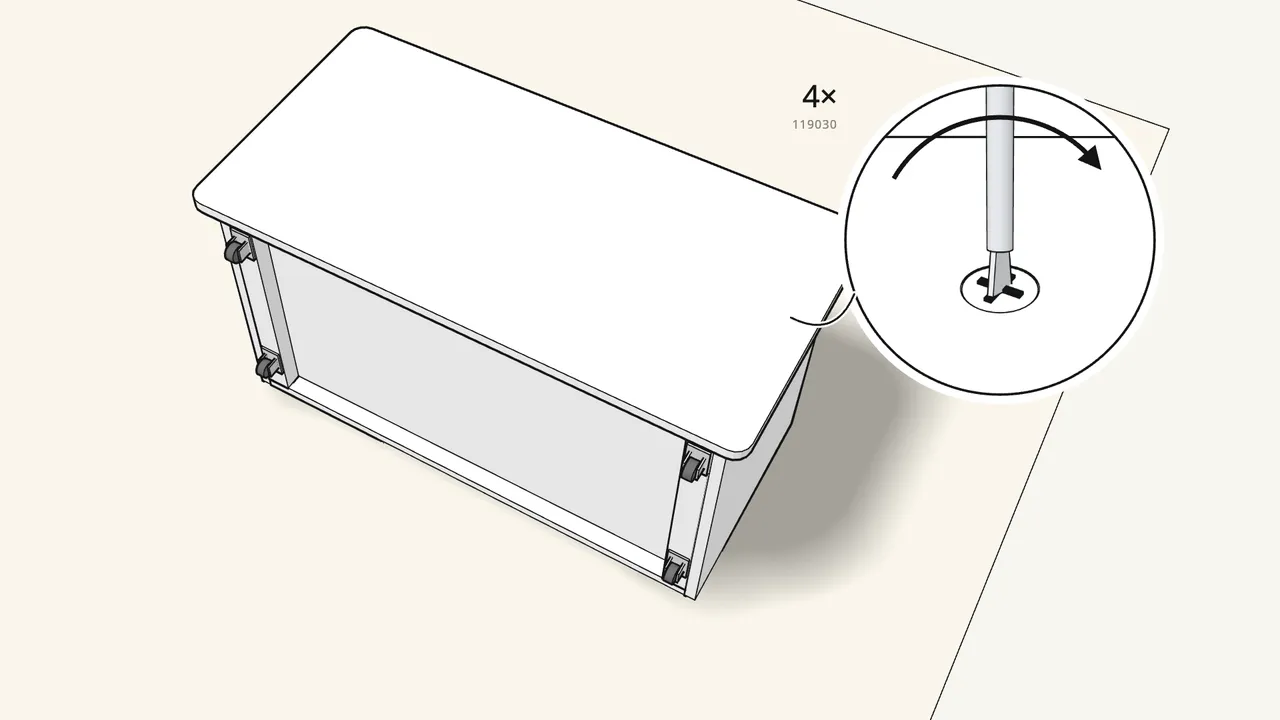
Step 24 · manual step 10
Insert 4 cam locks (119030) and turn them to lock.
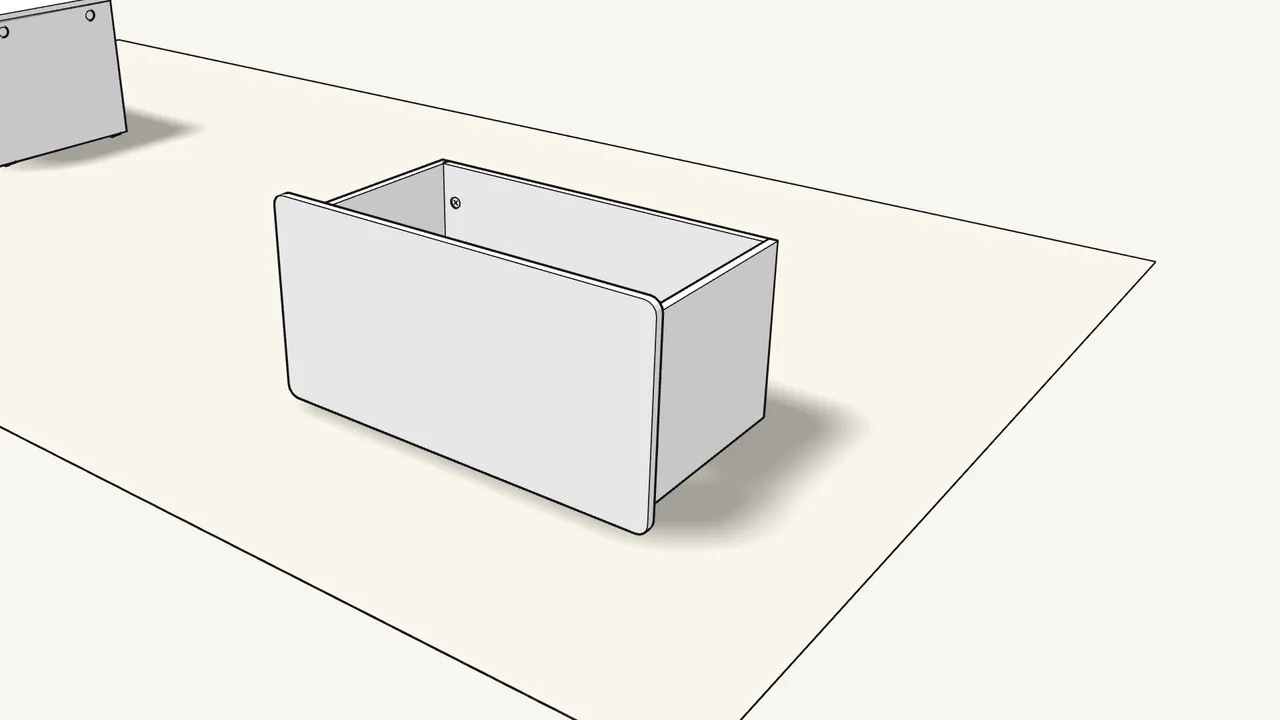
Step 25
Stand the box up on its castors.
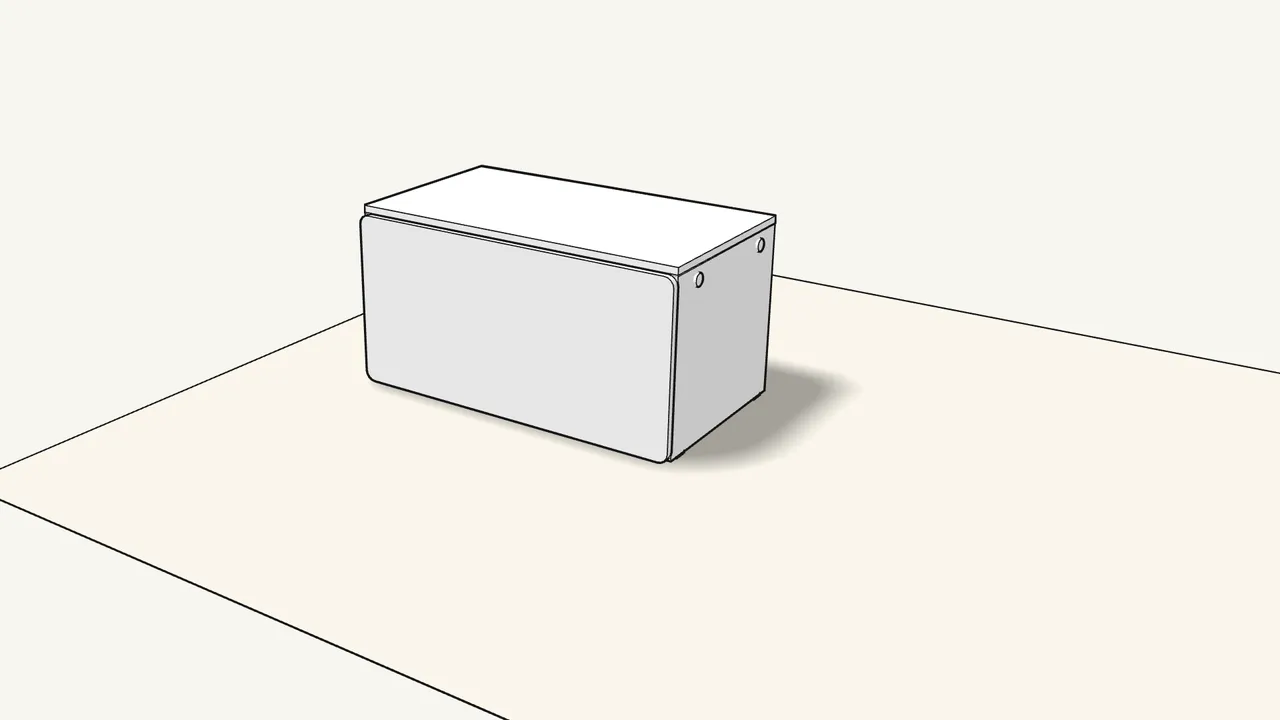
Step 26
Roll the box in under the bench.
See the last page of both manuals.
Tips & safety
- Assemble on a soft surface. The manual shows the parts laid on a rug so they don’t get scratched.
- Bench rocking? Turn the glides under the side panels until it stands level — bench manual, step 12.
Official instructions
This guide follows IKEA’s official assembly instructions (AA-2203659-1). Keep the printed manual to hand — if anything differs, the manual is right.