IKEA · Kids' Furniture
How to assemble IKEA RESÖ Children's Picnic Table
Step-by-step IKEA RESÖ Children's Picnic Table assembly: 9 illustrated steps, an animated video, the hardware list and the tools you need — following the official instructions (AA-754126-5).
- 9 illustrated steps
- 4 steps in the manual
- 1:38 video
- 117×89×50 cm
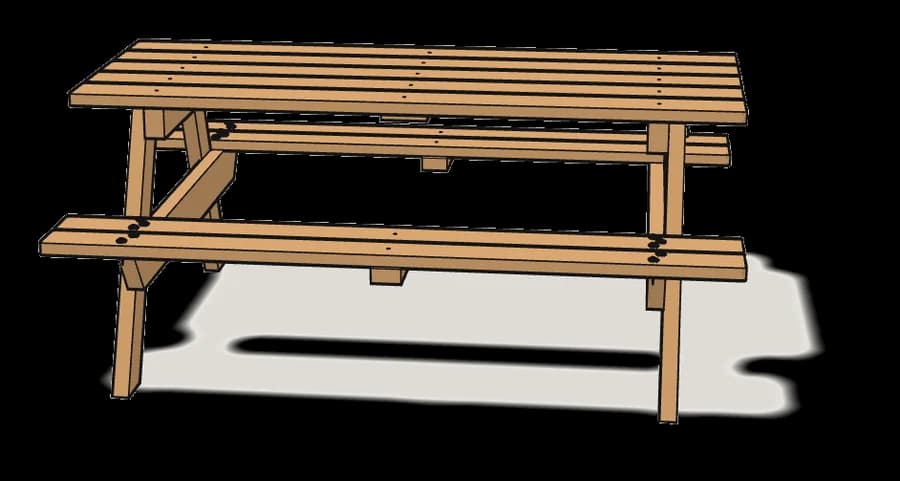
What you need
Tools
- Allen key (included)
- Phillips screwdriver
Hardware in the box
| Part no. (as printed in the manual) | Qty |
|---|---|
| 114575 | 12× |
| 110729 | 20× |
Step-by-step assembly
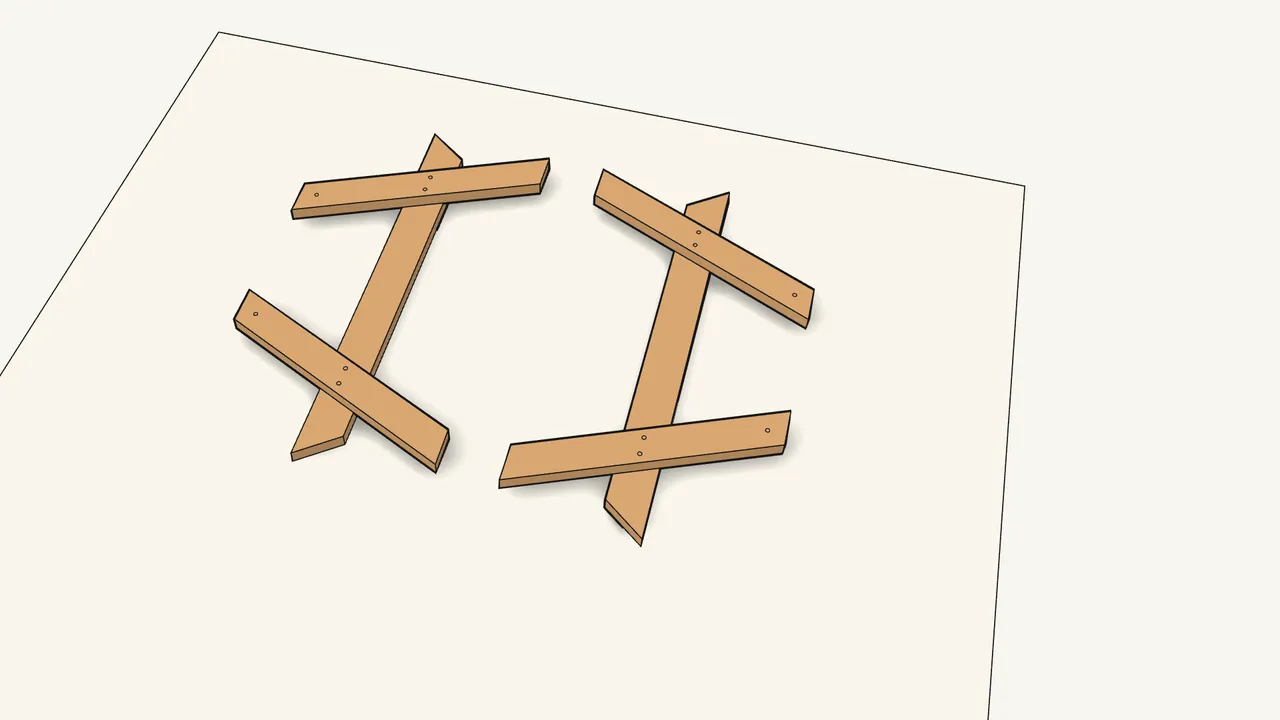
Step 1
Lay the two seat rails flat and place two legs on each.
Check the leg and hole orientation against the manual, step 1.
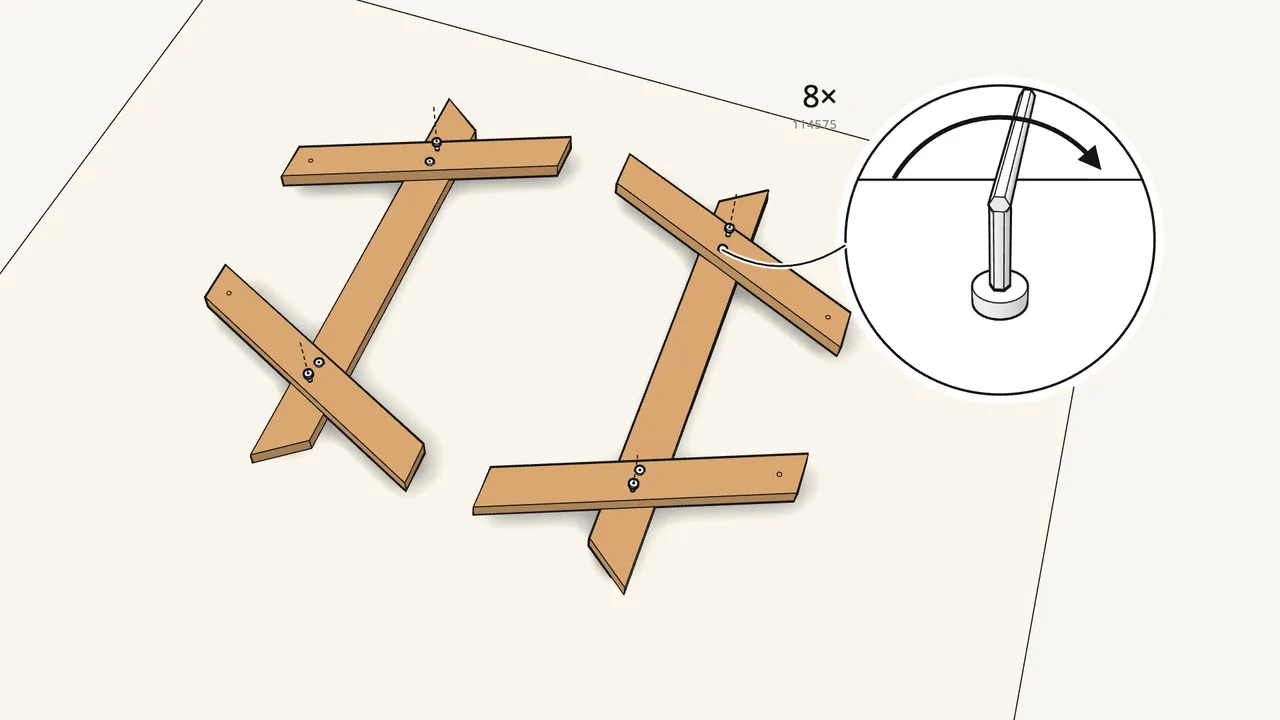
Step 2 · manual step 1
Fix each leg to its rail with 2 bolts (114575).
Use the Allen key — 8 bolts for the two frames.
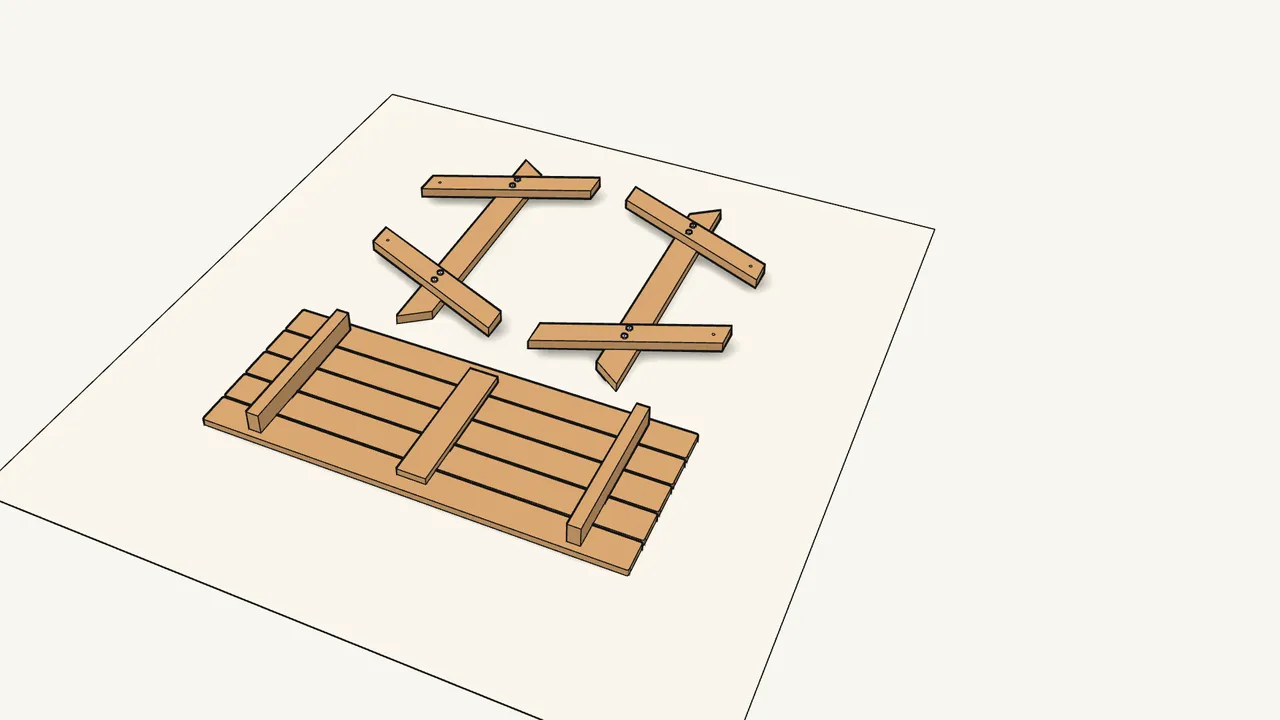
Step 3 · manual step 2
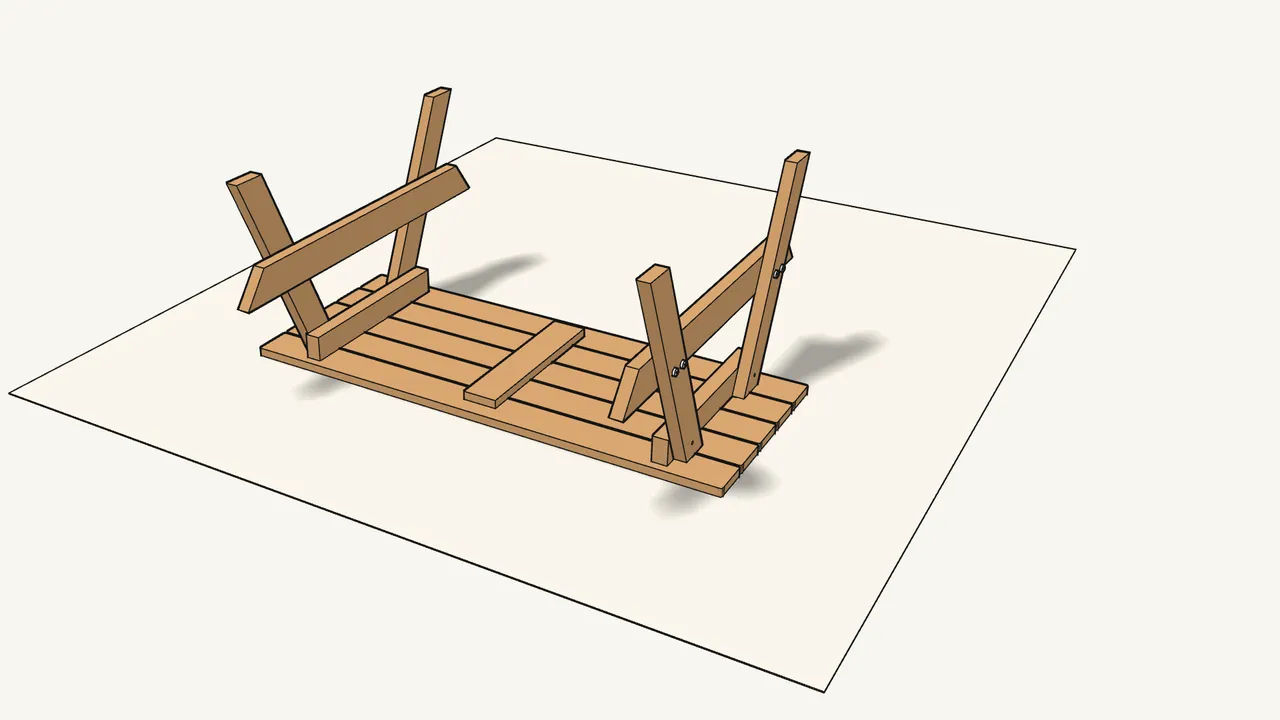
Lay the tabletop upside down on a soft surface.
Step 4 · manual step 2
Fit the two leg frames, feet up, onto the ends of the top.
The legs go on the outside of the cleats under the tabletop.
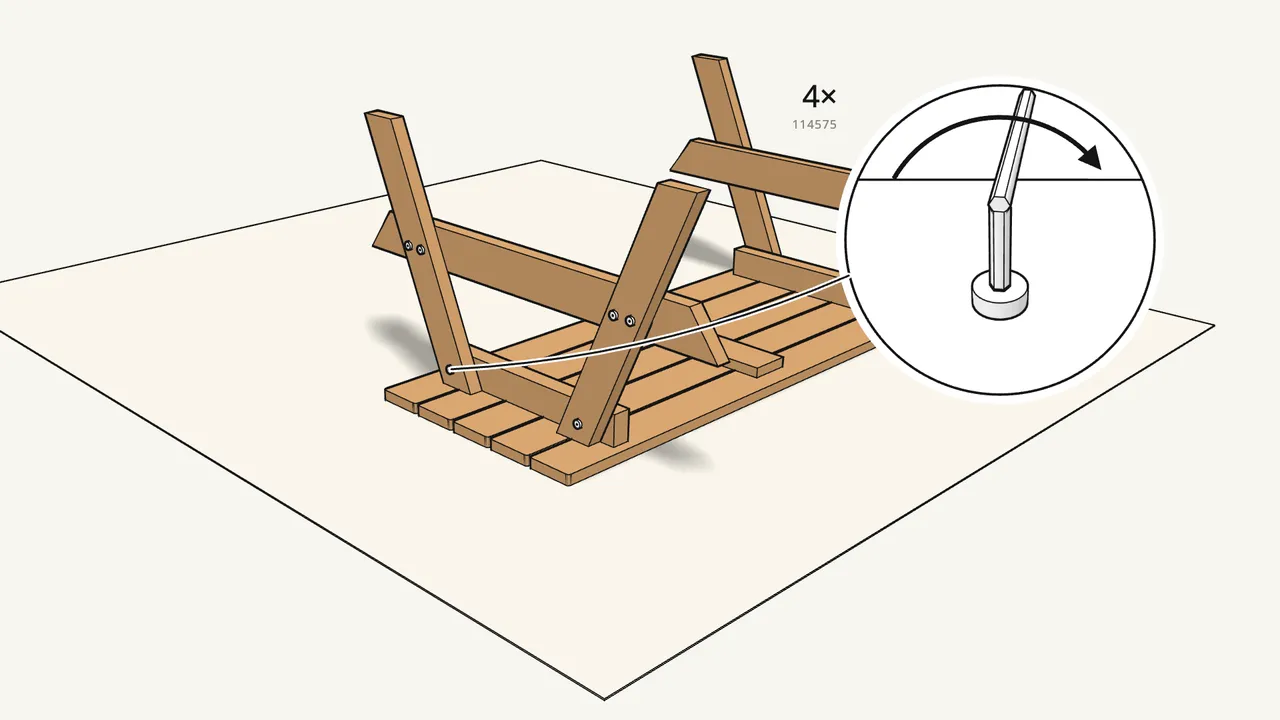
Step 5 · manual step 2
Bolt each leg to the tabletop with 1 bolt (114575).
4 bolts in all, through the top of each leg into the cleat.
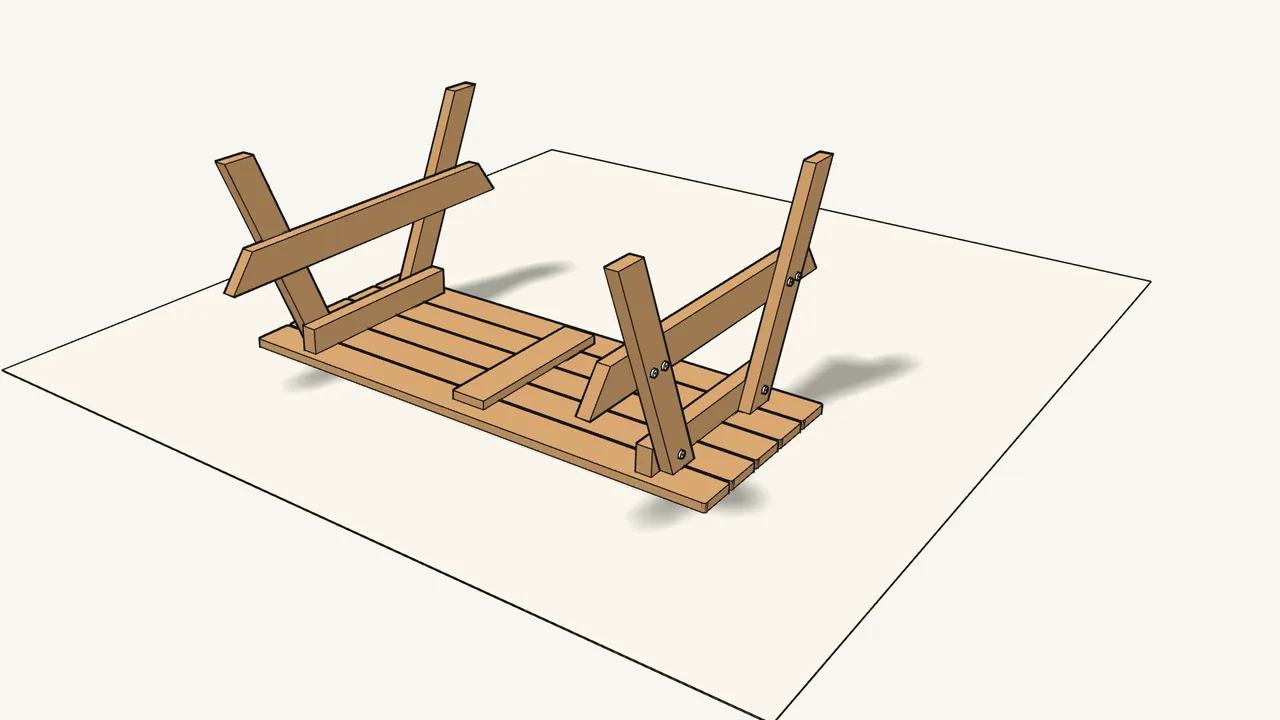
Step 6 · manual step 3
Tighten all 12 bolts firmly with the Allen key.
The bolt heads sit on the surface — don’t sink them into the wood.
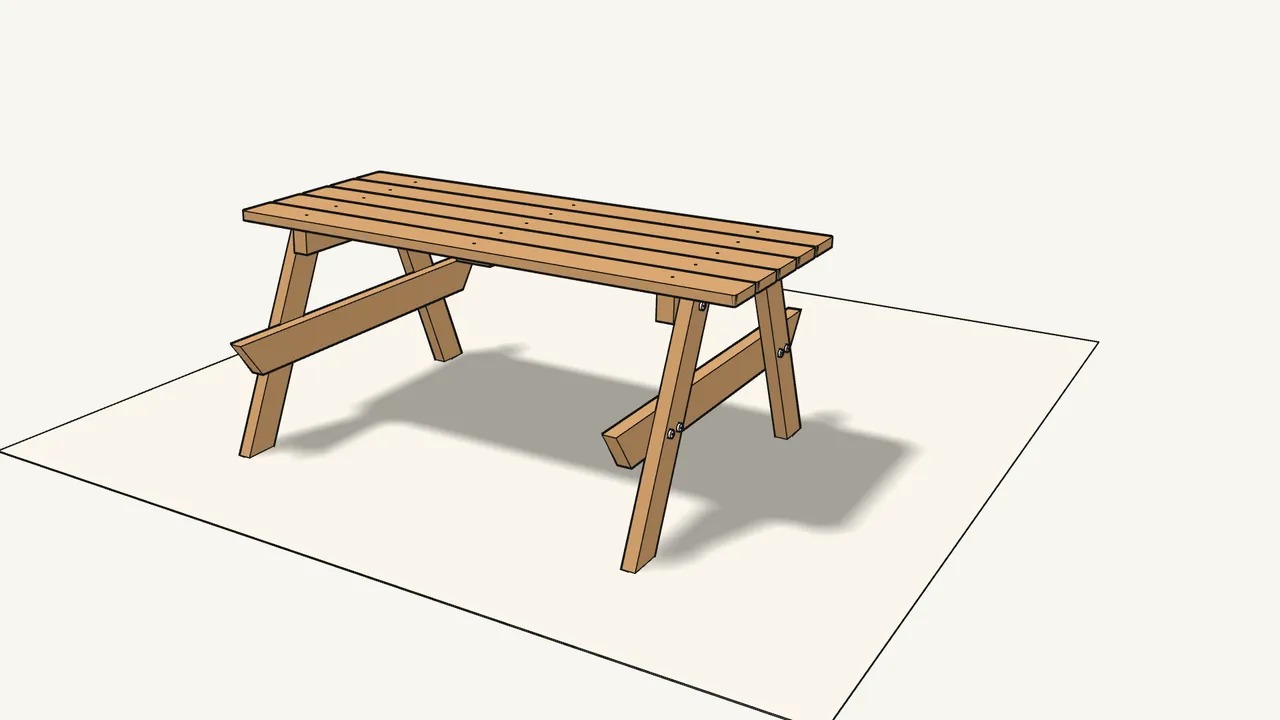
Step 7
Turn the table the right way up.
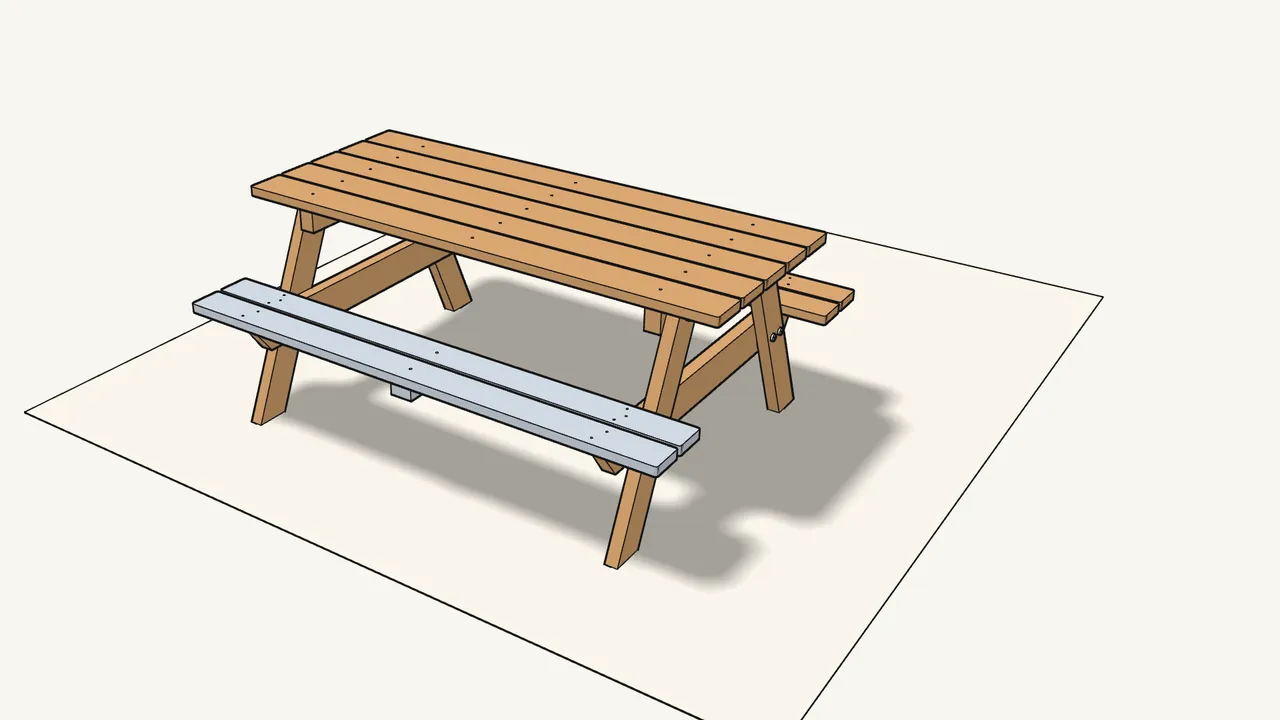
Step 8 · manual step 4
Lay the two benches onto the ends of the seat rails.
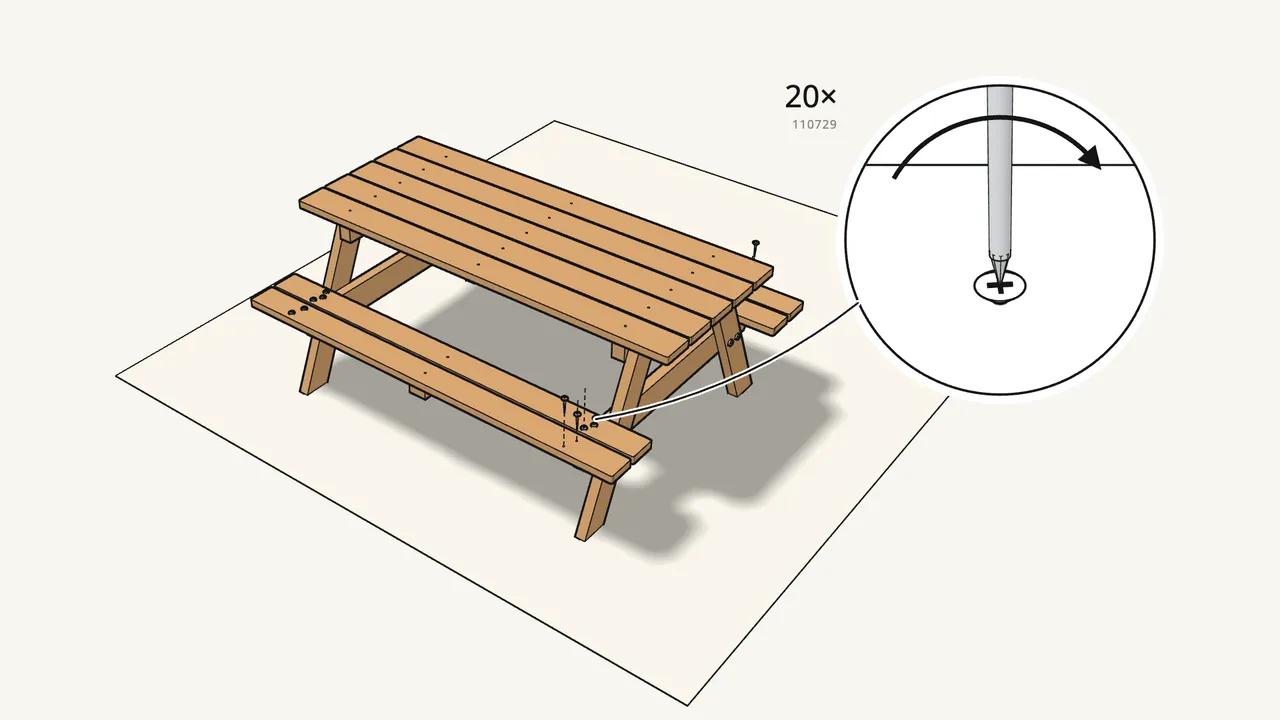
Step 9 · manual step 4
Screw each bench down with 10 screws (110729).
5 at each end, into the seat rail. Drive the heads flush with the surface.
Tips & safety
- Assemble on a soft surface. Lay the tabletop on a rug or the box to avoid scratches (manual page 2).
- Don’t overtighten. Bolt heads should sit on the wood and screw heads flush with it — manual steps 1 and 4.
Official instructions
This guide follows IKEA’s official assembly instructions (AA-754126-5). Keep the printed manual to hand — if anything differs, the manual is right.