IKEA · Kids' Furniture
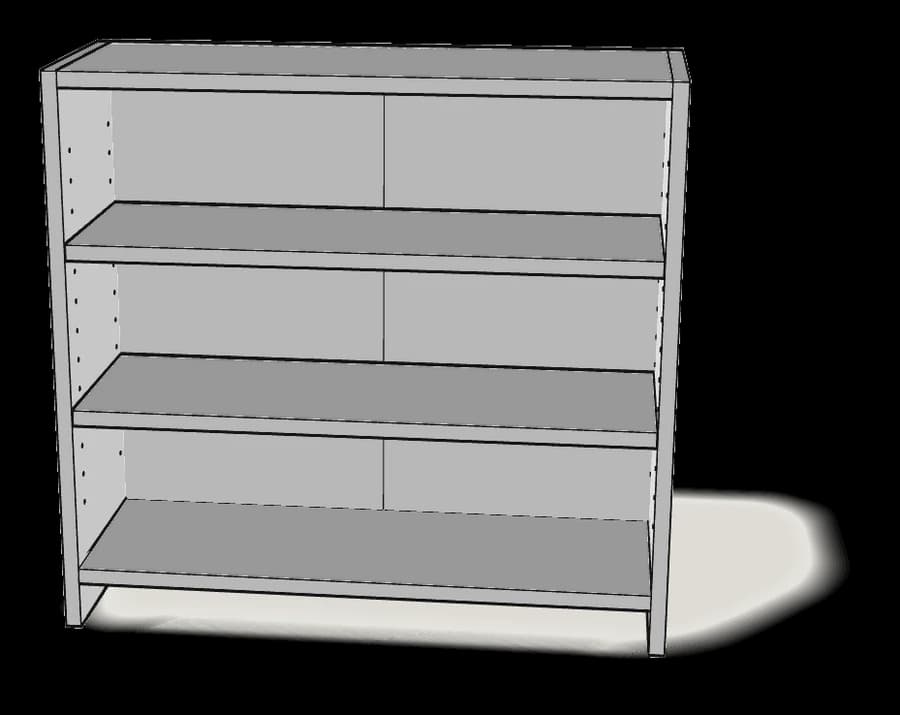
How to assemble IKEA PÅHL Add-On Unit
Step-by-step IKEA PÅHL Add-On Unit assembly: 14 illustrated steps, an animated video, the hardware list and the tools you need — following the official instructions (AA-2282493-1).
- 14 illustrated steps
- 12 steps in the manual
- 2:16 video
- 64×23×60 cm
What you need
Tools
- Phillips screwdriver
- Flat-head screwdriver
You’ll need: a Phillips screwdriver, a flat-head screwdriver and an awl.
Hardware in the box
| Part no. (as printed in the manual) | Qty |
|---|---|
| 118331 | 8× |
| 101344 | 8× |
| 109598 | 2× |
| 119252 | 8× |
| 116664 | 4× |
| 146052 | 2× |
Step-by-step assembly
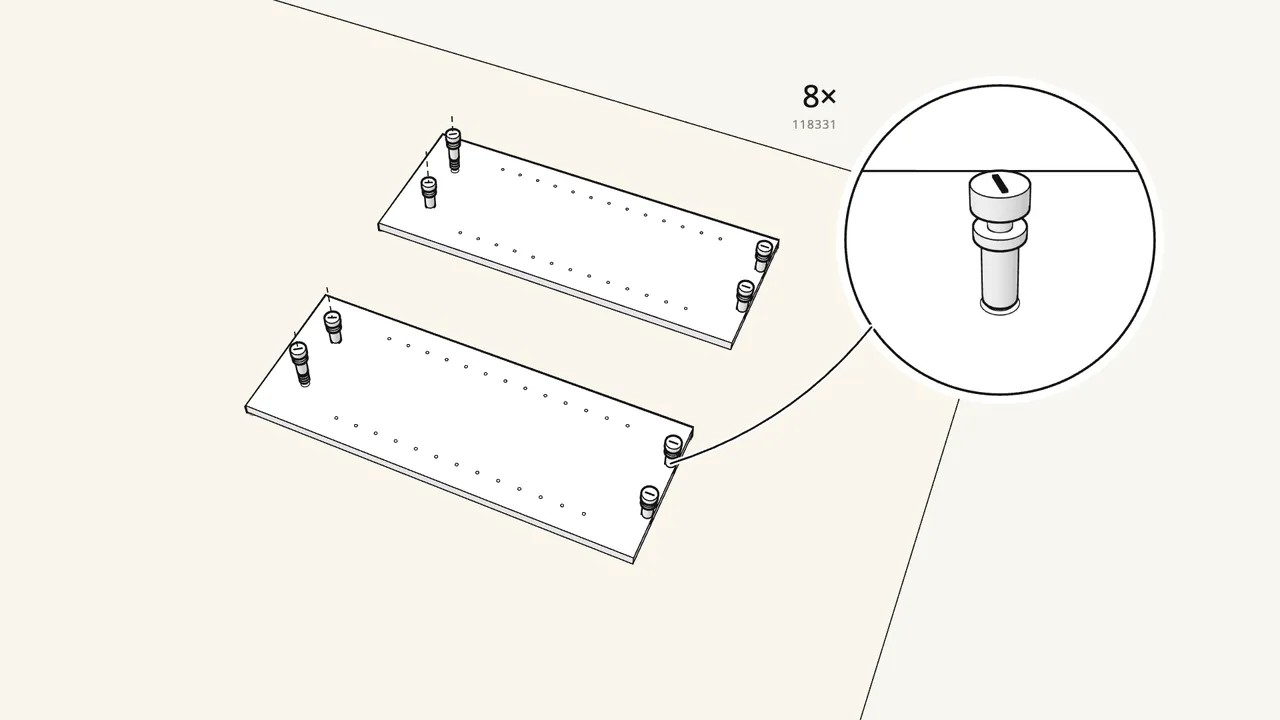
Step 1
Screw 8 cam bolts (118331) into the two side panels.
4 in each side, on the face with the rows of small holes. Phillips screwdriver.
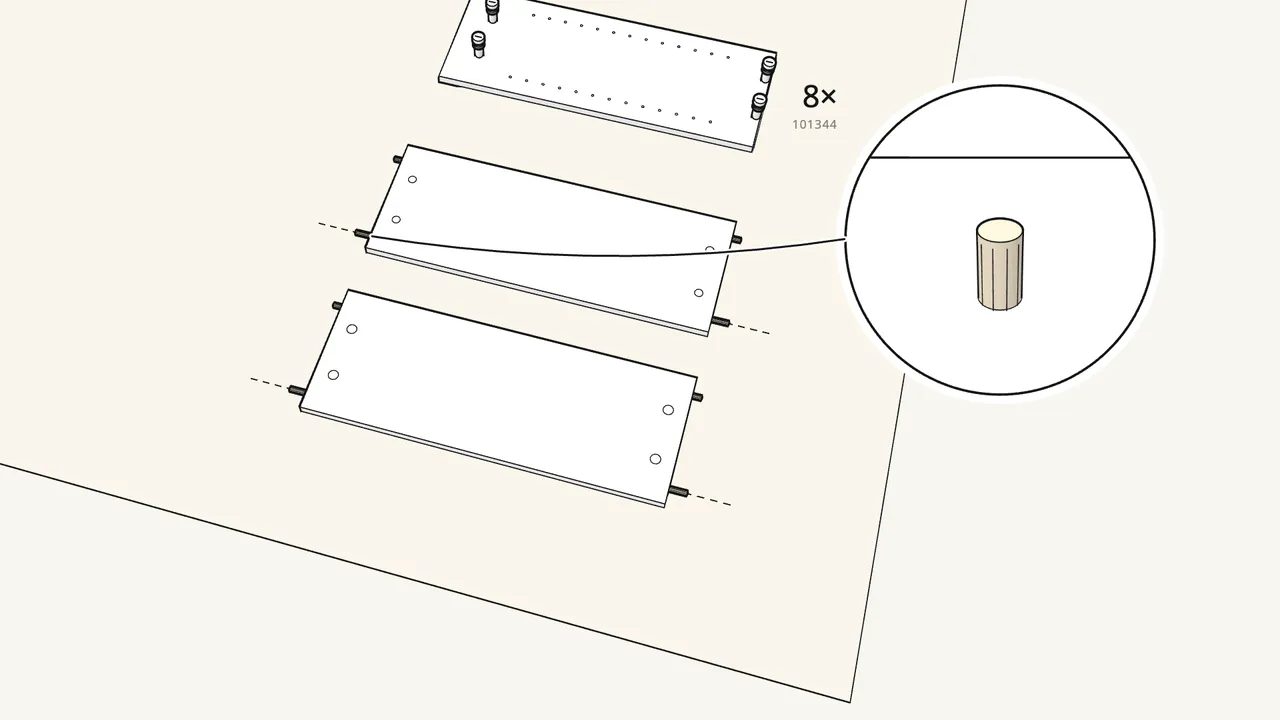
Step 2
Push 8 dowels (101344) into the ends of the top and bottom panels.
2 in each end. The big cam-lock holes face up.
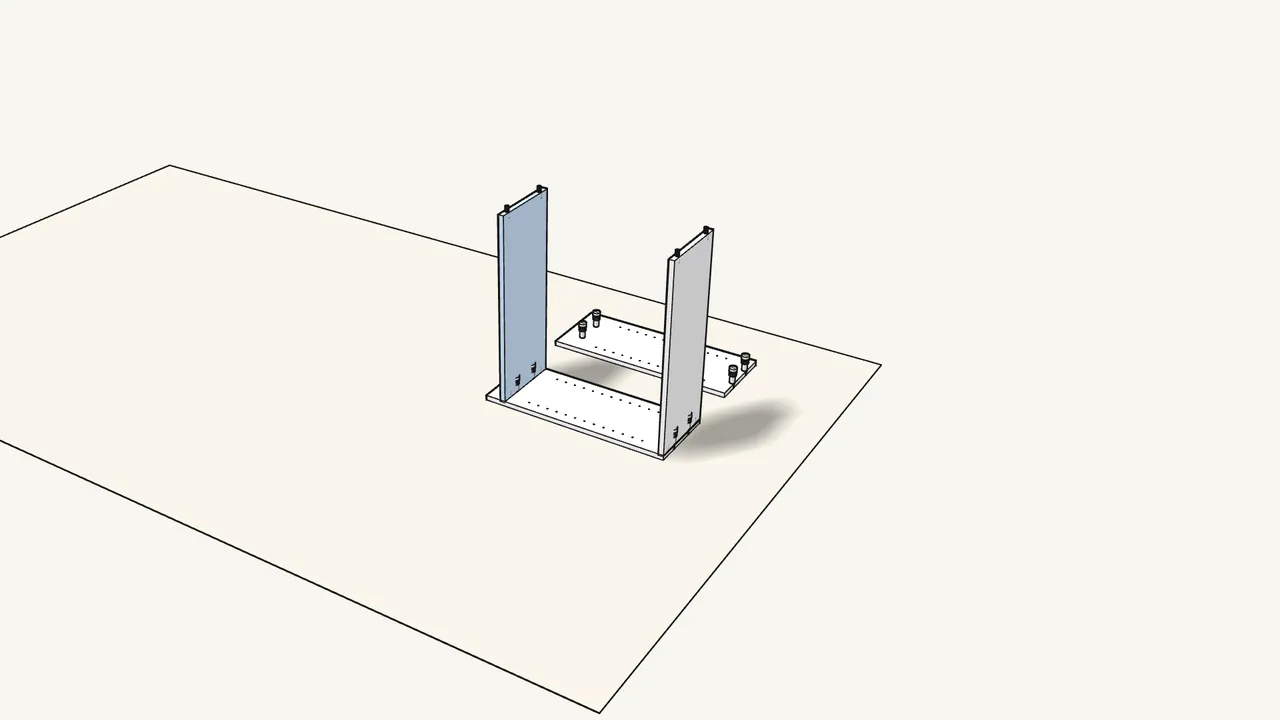
Step 3
Stand the top and bottom panels on one side panel.
The cam bolts and dowels go into the holes in the panel ends. Cam-lock holes face the same way.
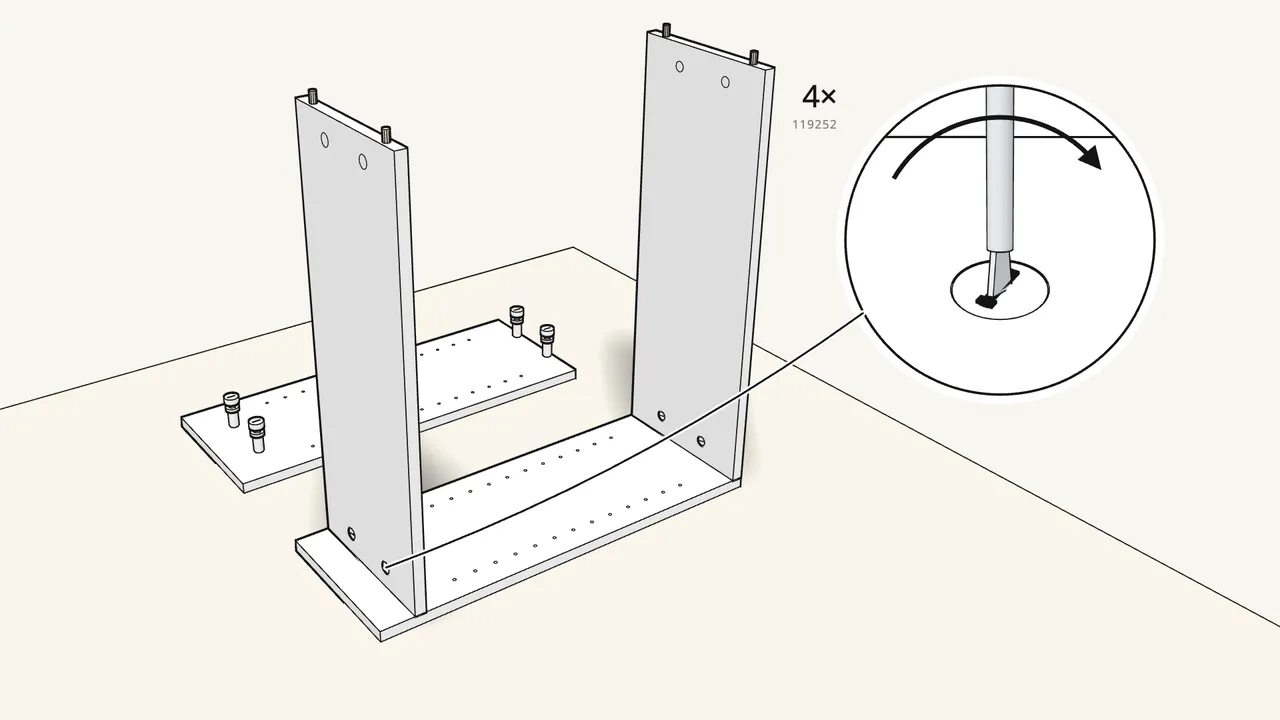
Step 4
Insert 4 cam locks (119252) and turn them clockwise.
Flat-head screwdriver. These lock the panels to the side on the floor.
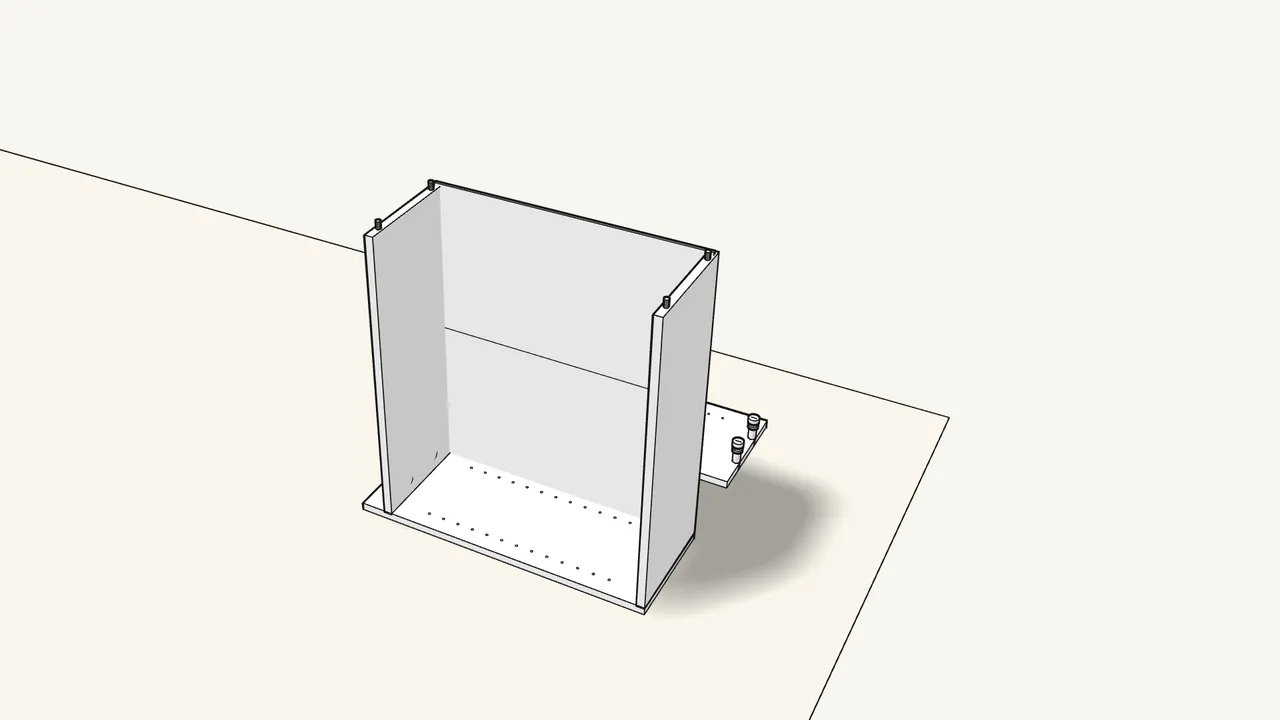
Step 5
Slide the back panel down into the grooves.
Push it all the way in.
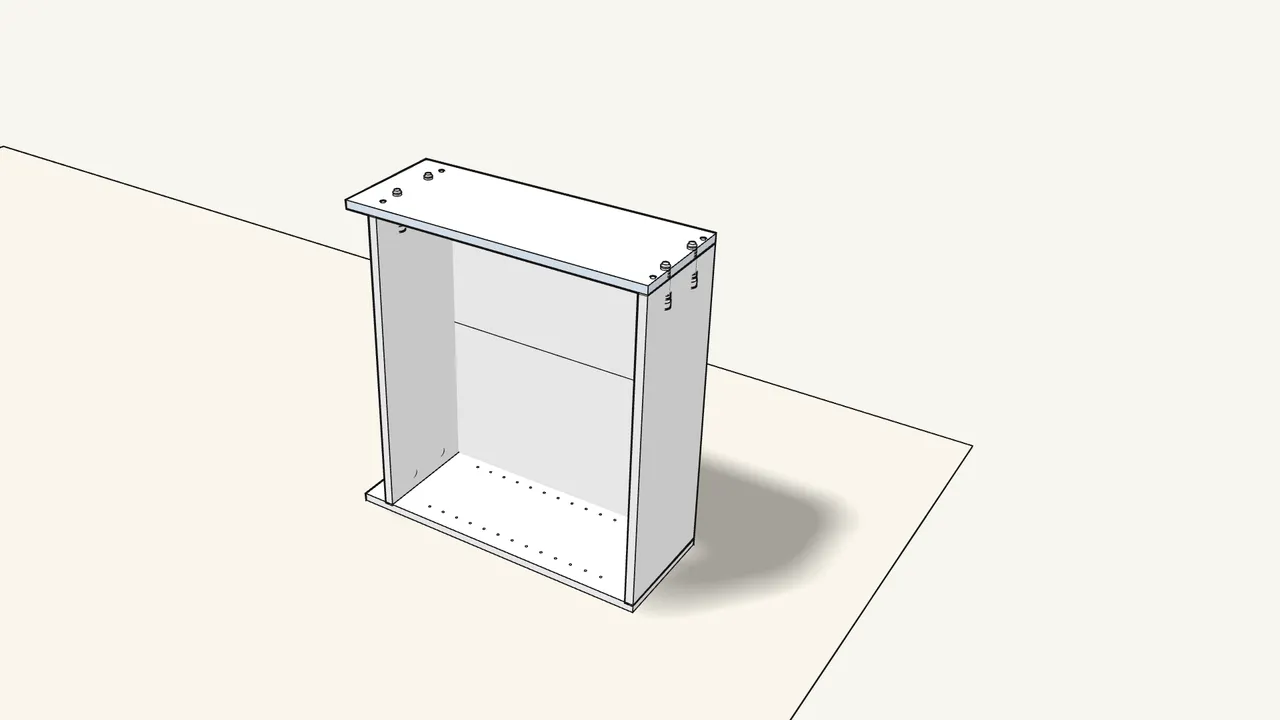
Step 6
Lay the second side panel on top.
Its cam bolts and the dowels go into the holes in the panel ends.
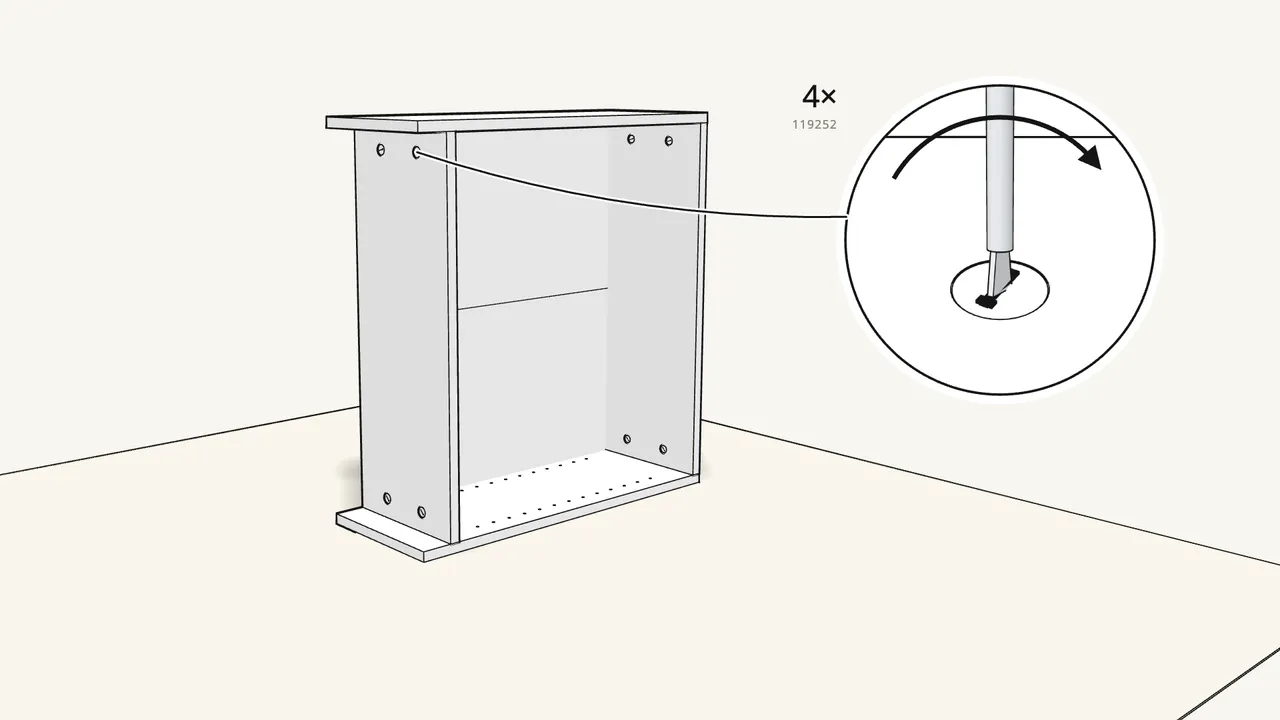
Step 7
Insert 4 cam locks (119252) and turn them clockwise.
Flat-head screwdriver — tighten by hand.
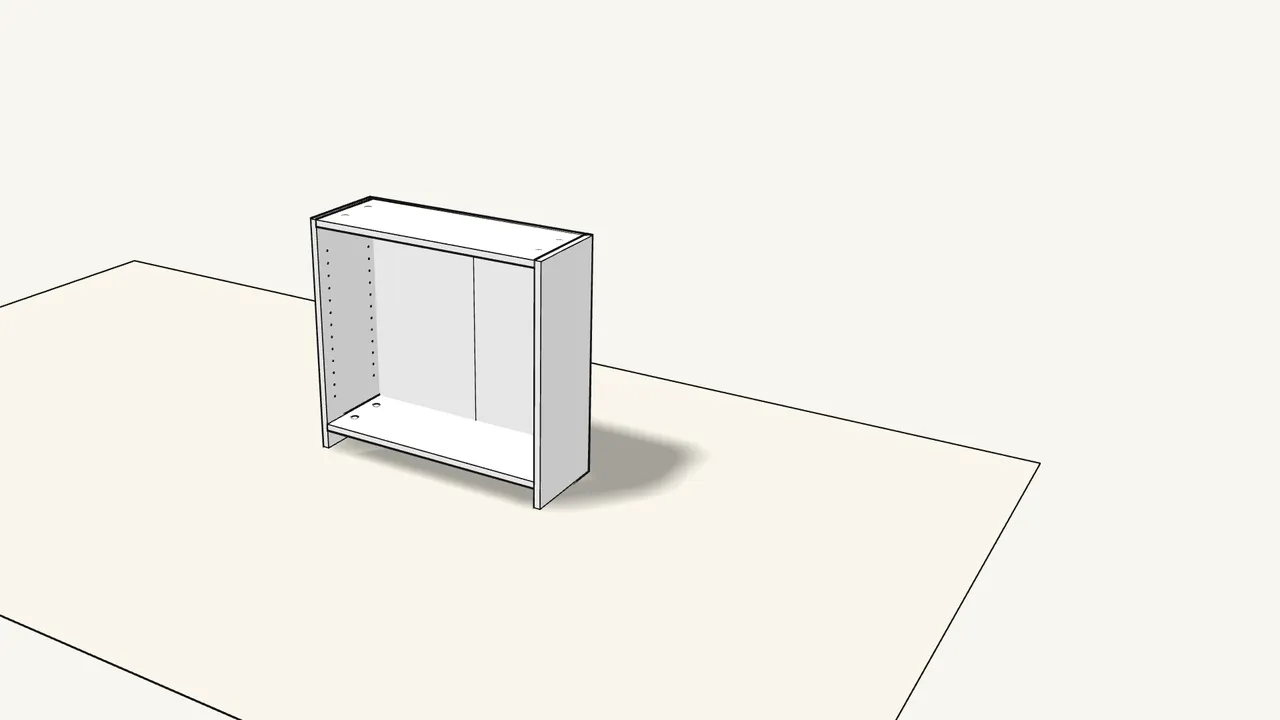
Step 8
Stand the unit upright.
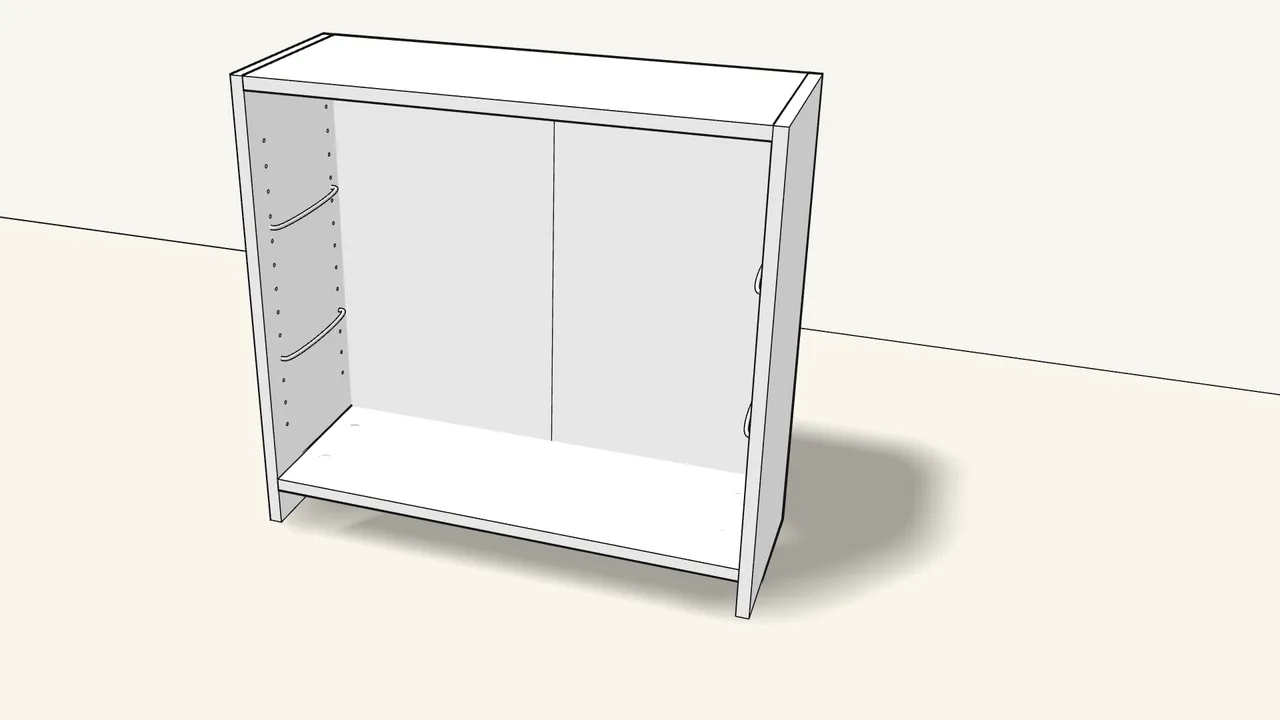
Step 9 · manual step 8
Push the 4 shelf-support wires (116664) into the side holes.
Use the same hole heights on both sides.
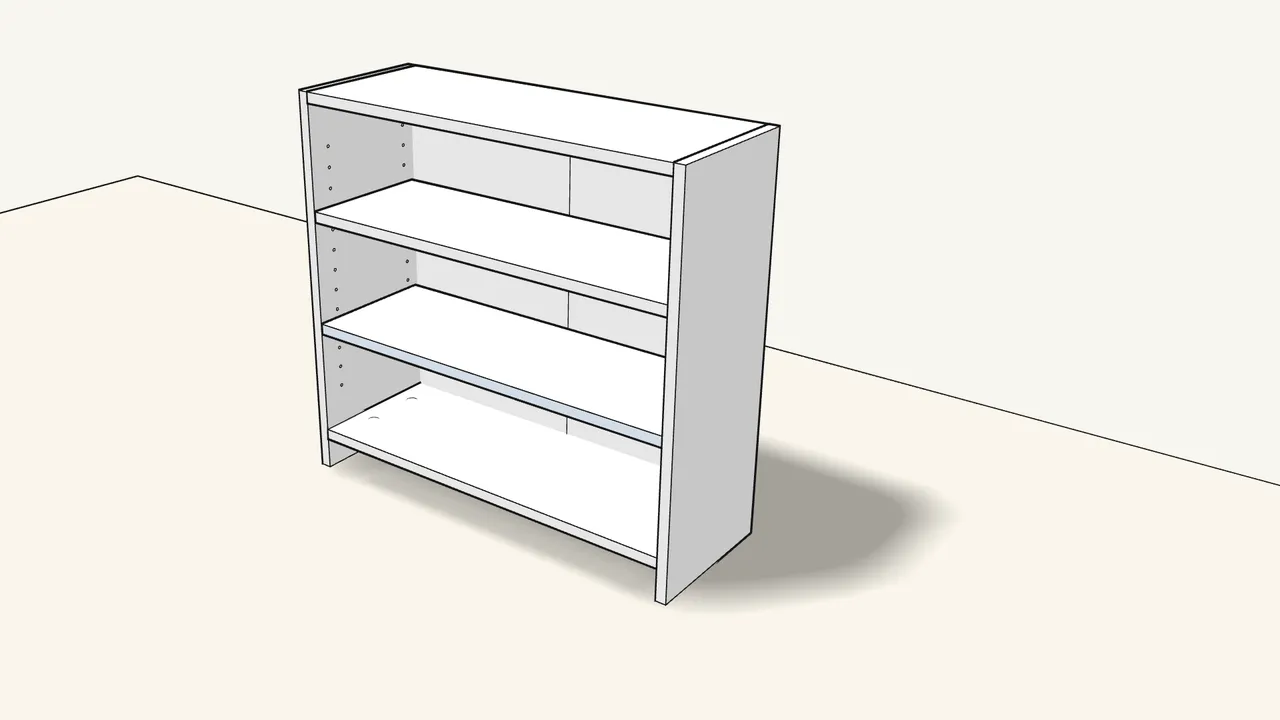
Step 10 · manual step 9
Slide the 2 shelves in onto the wires.
The grooves under the shelf ends sit over the wires.
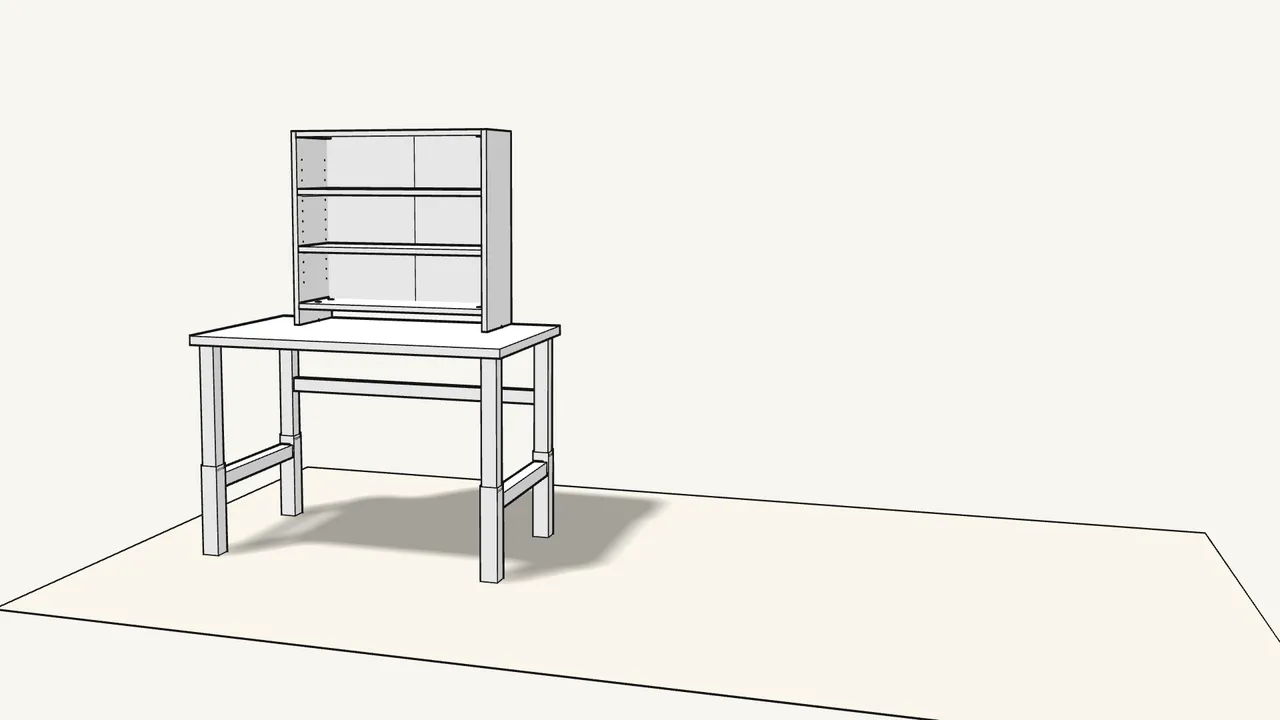
Step 11 · manual step 10
Stick 2 felt pads (108064) under the sides and set the unit on the desk.
Cut them from the strip. The PÅHL desk is sold separately.
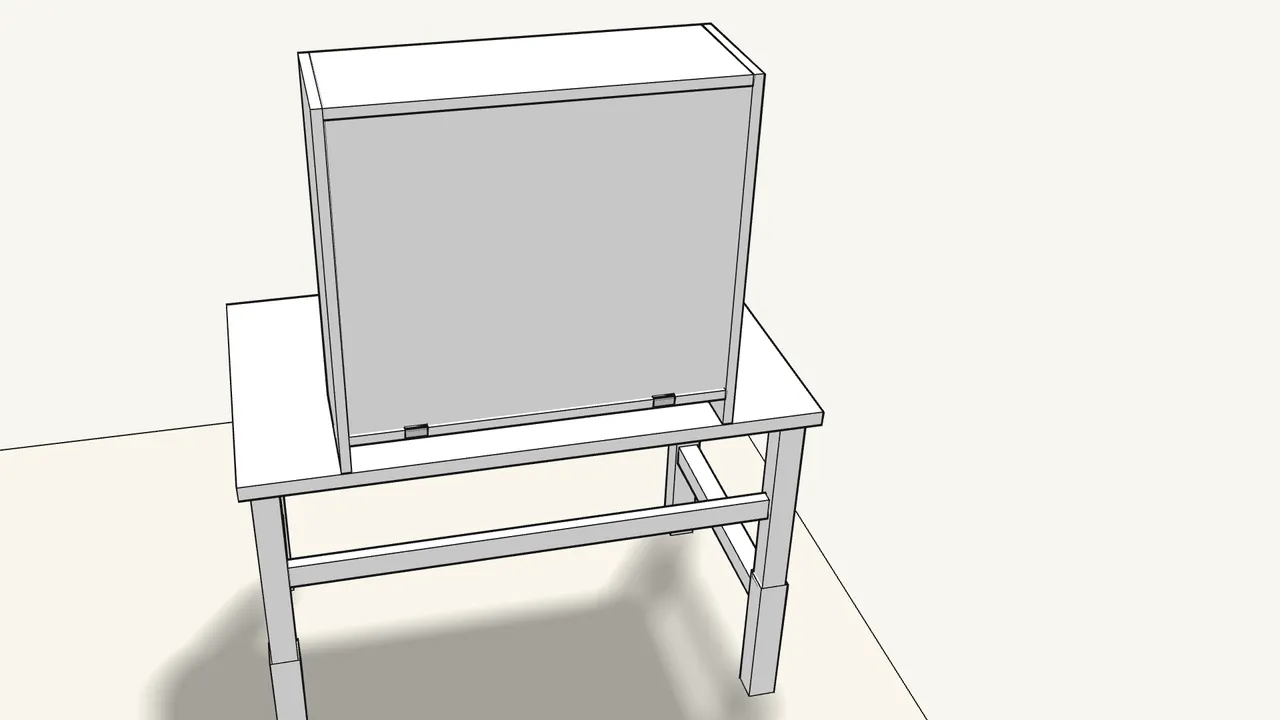
Step 12 · manual step 11
Stick 2 more felt pads on the back edge of the bottom shelf.
Fold them over the edge, at the bracket positions.
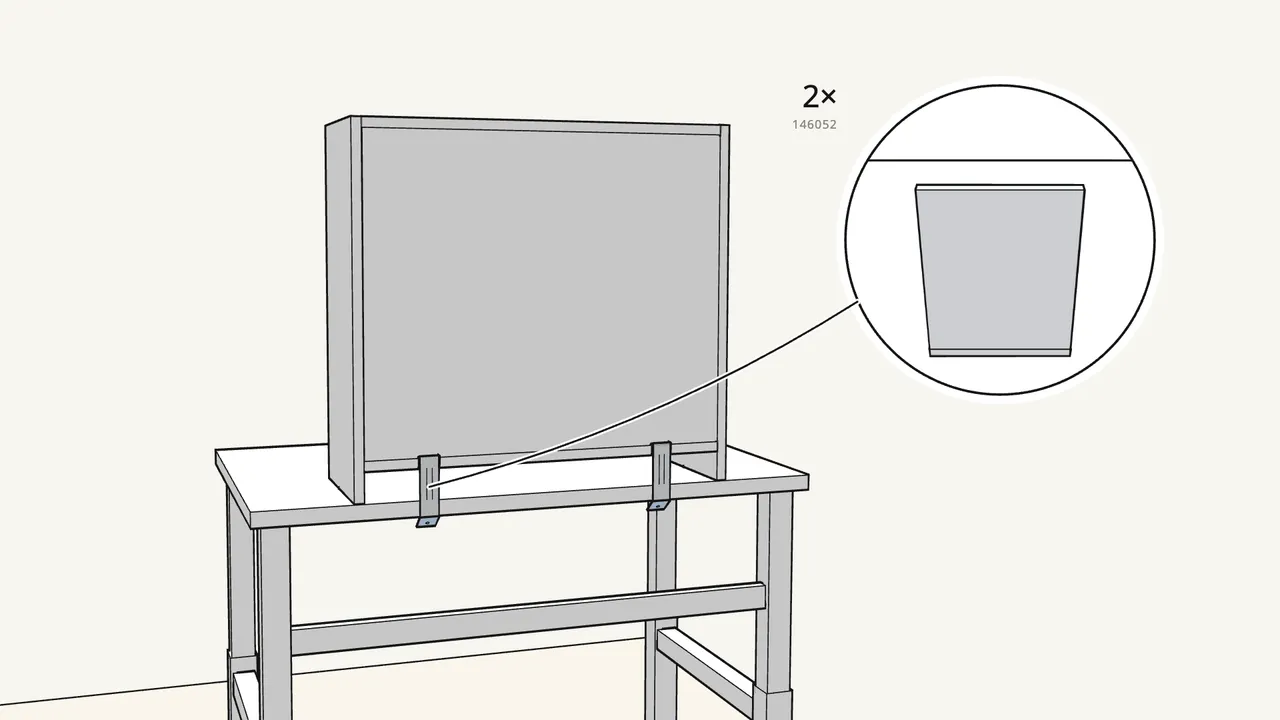
Step 13 · manual step 12
Hook the 2 brackets (146052) over the back edge and bend the tabs.
Bend the lower tab by hand so it lies under the desk top.
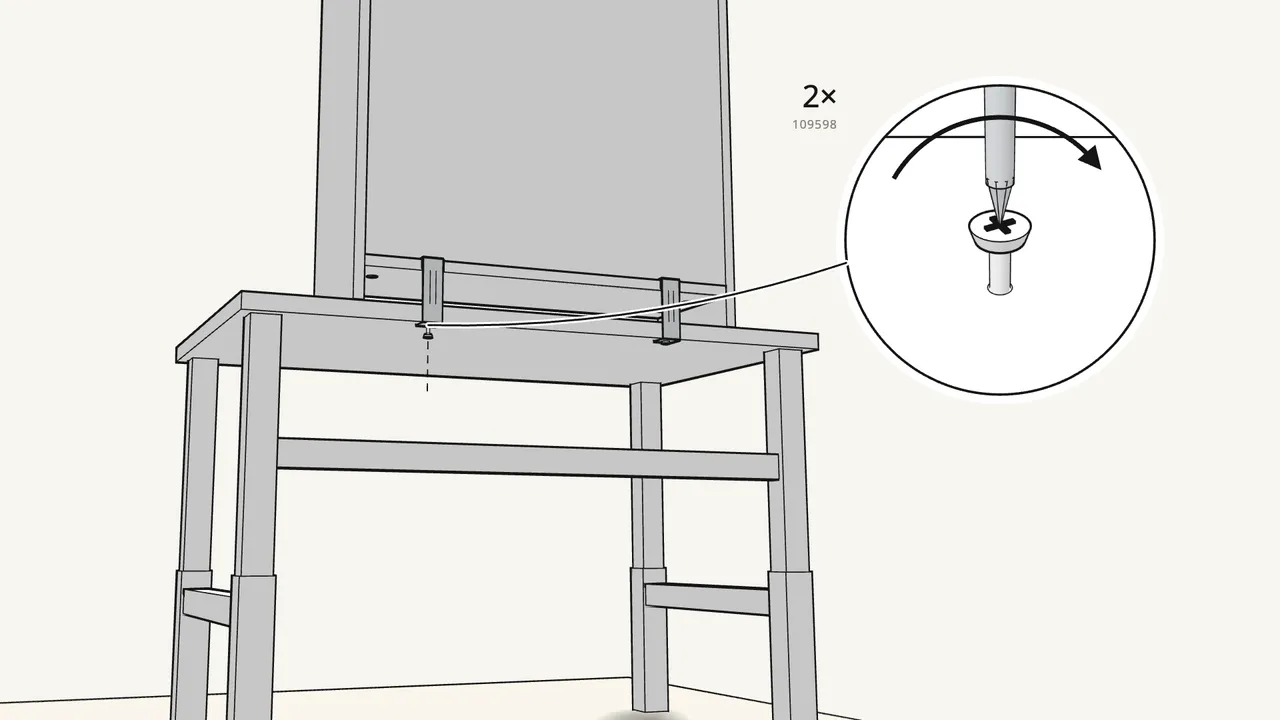
Step 14 · manual step 12
Mark the holes, then screw the tabs to the desk (109598).
Pencil through the tab hole, then 1 screw each with a Phillips screwdriver.
Tips & safety
- Always fix the unit to the desk with both brackets. An unsecured add-on unit can tip over — see the warning on page 8 of the manual.
- Made for the PÅHL desk (sold separately). The unit stands on the desk top, its back along the desk’s back edge.
Official instructions
This guide follows IKEA’s official assembly instructions (AA-2282493-1). Keep the printed manual to hand — if anything differs, the manual is right.