IKEA · Dressers & Drawer Units
How to assemble IKEA TROTTEN Drawer Unit
Step-by-step IKEA TROTTEN Drawer Unit assembly: 16 illustrated steps, an animated video, the hardware list and the tools you need — following the official instructions (AA-2241563-2).
- 16 illustrated steps
- 16 steps in the manual
- 2:25 video
- 34×47×56 cm cm
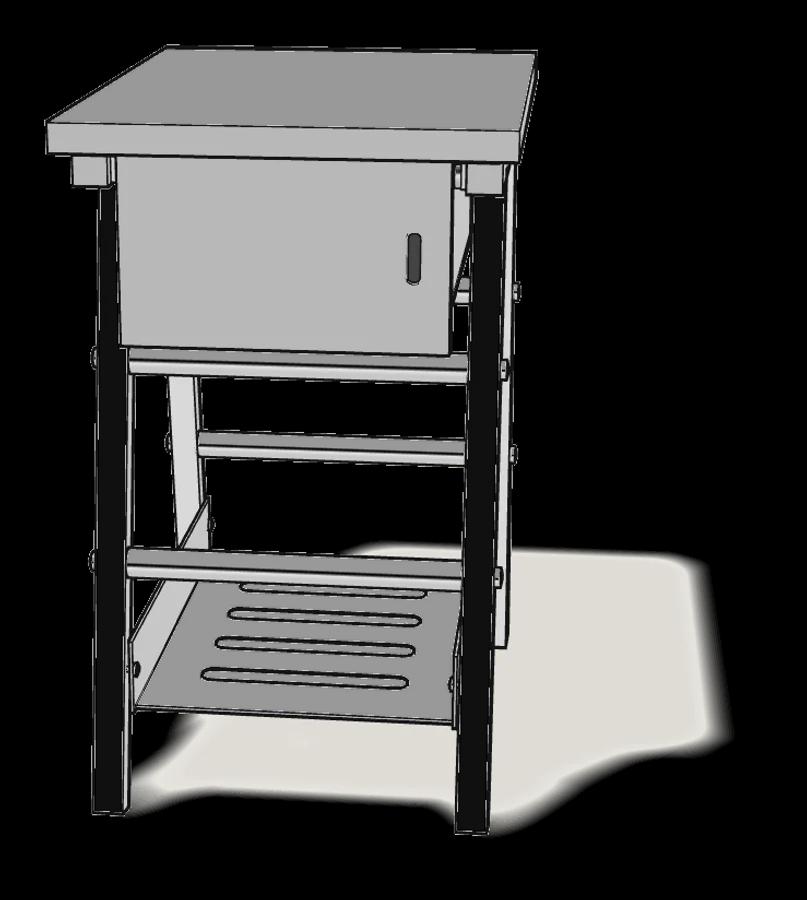
What you need
Tools
- Phillips screwdriver
- Allen key (included)
You’ll need a Phillips screwdriver. The Allen key (100001) is in the box.
Hardware in the box
| Part no. (as printed in the manual) | Qty |
|---|---|
| 105107 | 16× |
| 122305 | 8× |
| 10046570 | 4× |
| 10005471 | 4× |
| 10005485 | 4× |
| 10077854 | 2× |
Step-by-step assembly
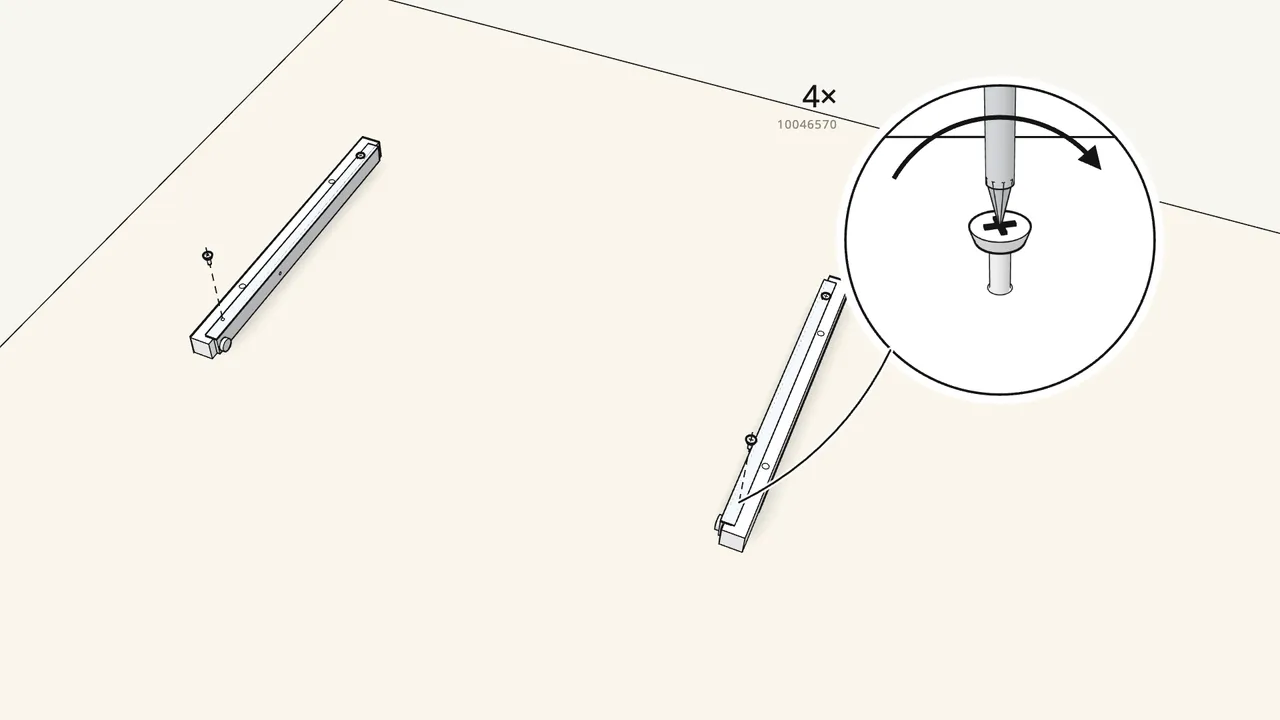
Step 1
Screw the drawer runners onto the 2 top rails.
2 screws (10046570) each. Runner L on one rail, runner R on the other.
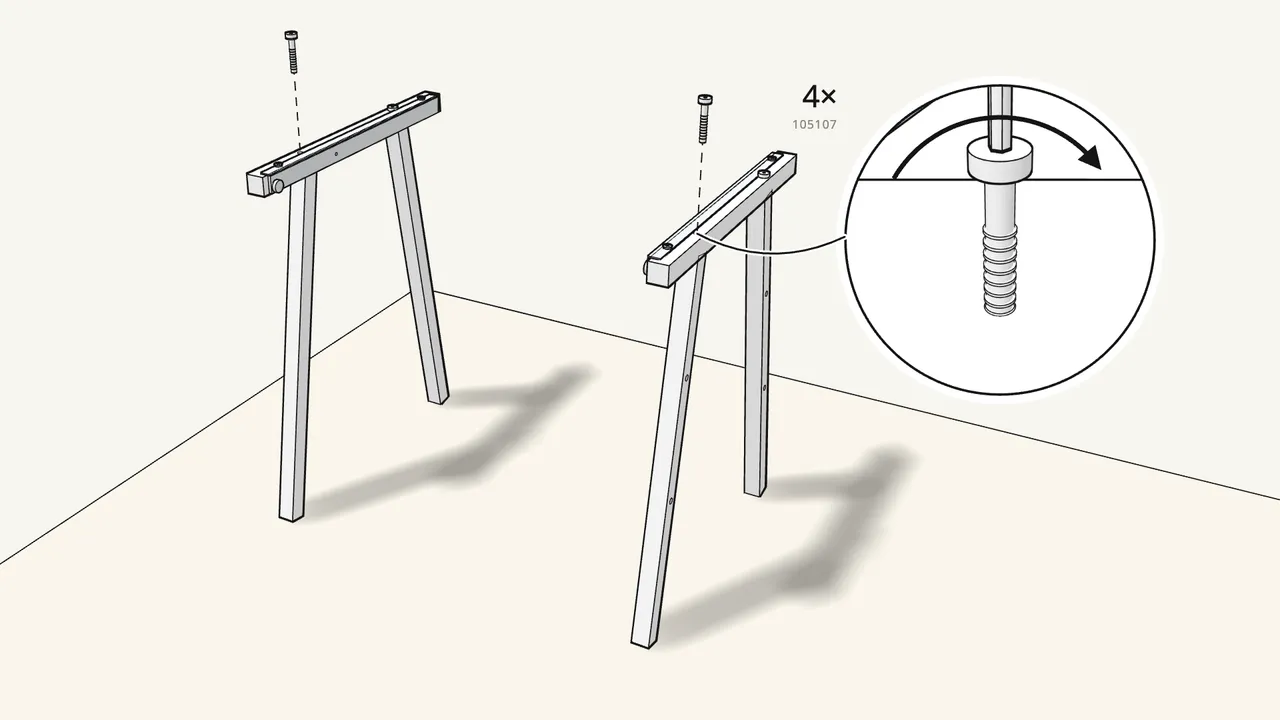
Step 2 · manual step 2–3
Bolt 2 legs under each top rail.
2 bolts (105107) per rail — tighten them with the Allen key.
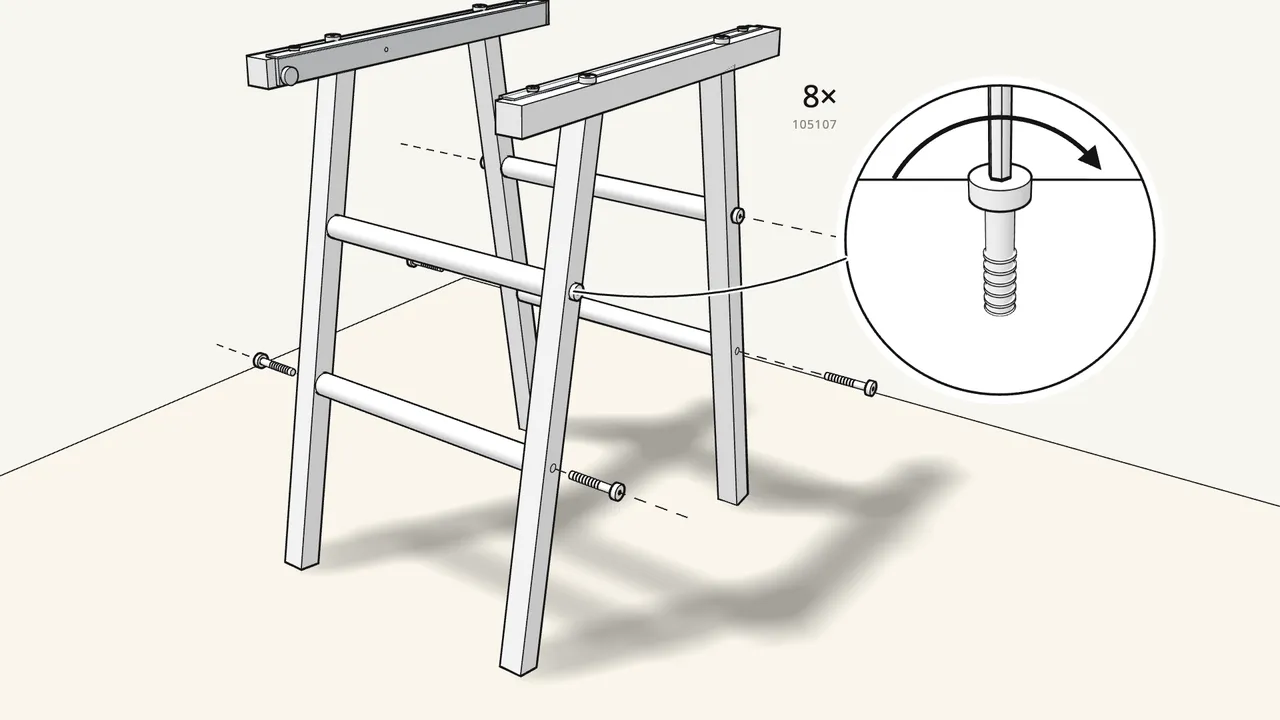
Step 3 · manual step 4
Join the 2 leg frames with the 4 bars.
8 bolts (105107), one at each end of every bar — Allen key.
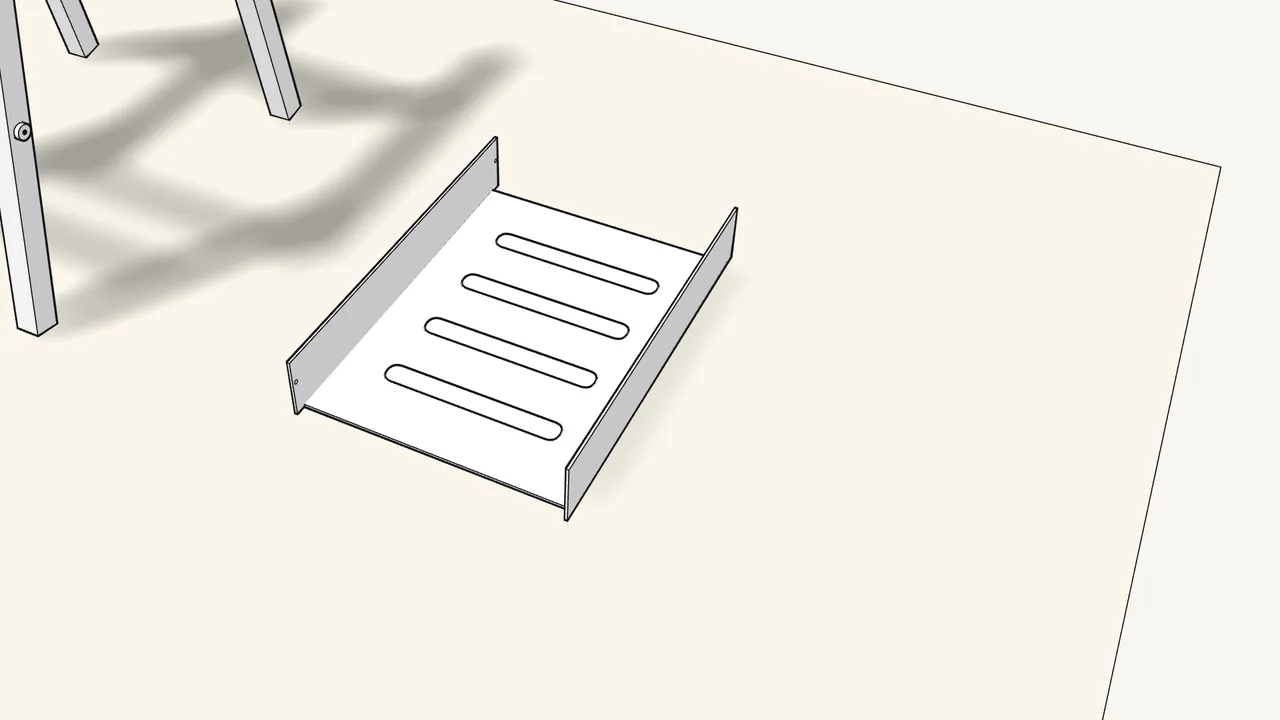
Step 4 · manual step 5–6
Fold up both long sides of the bottom shelf.
Bend along the pressed fold lines — check the detail in step 5 first.
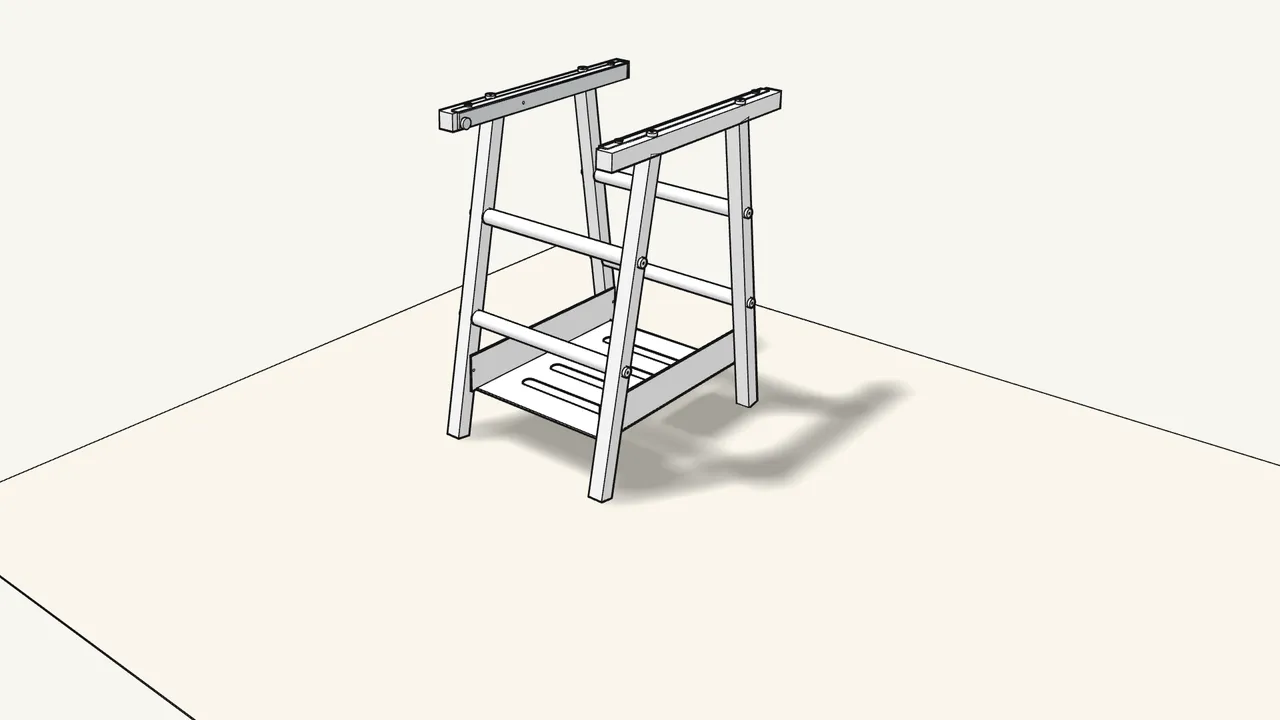
Step 5 · manual step 7
Slide the bottom shelf in between the legs.
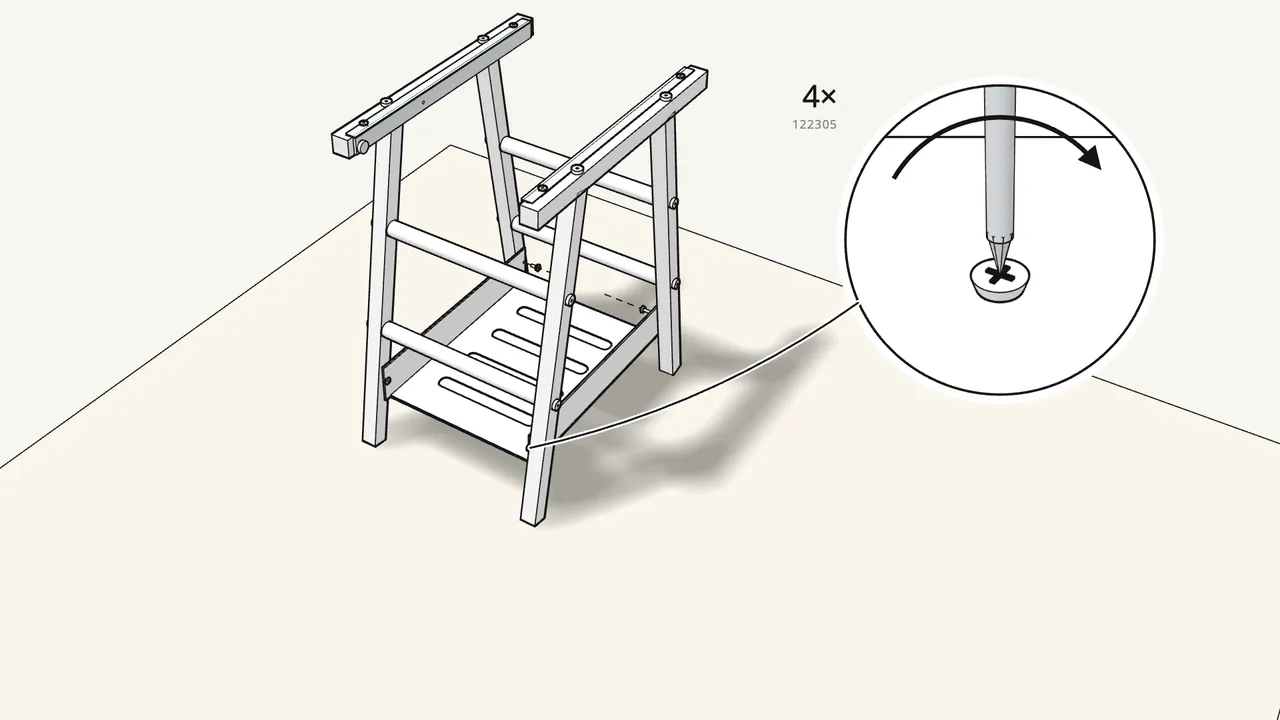
Step 6 · manual step 8
Screw the shelf to the legs with 4 screws (122305).
Phillips screwdriver.
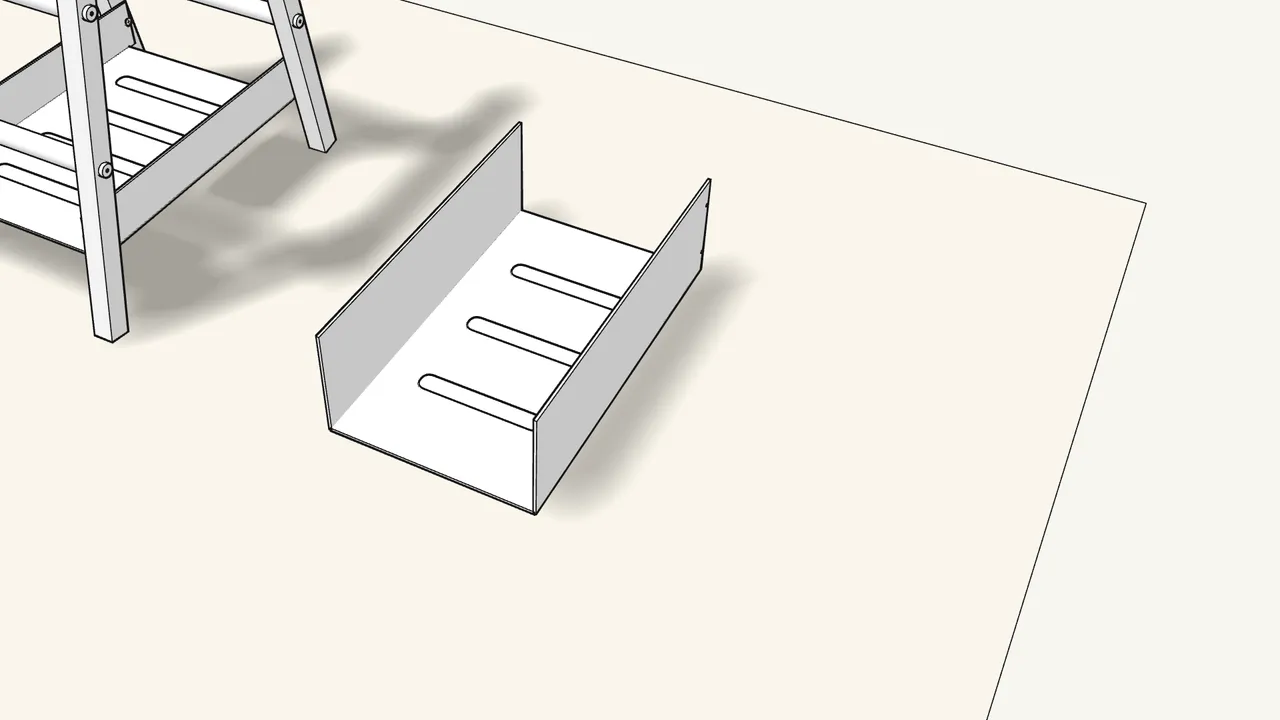
Step 7 · manual step 9
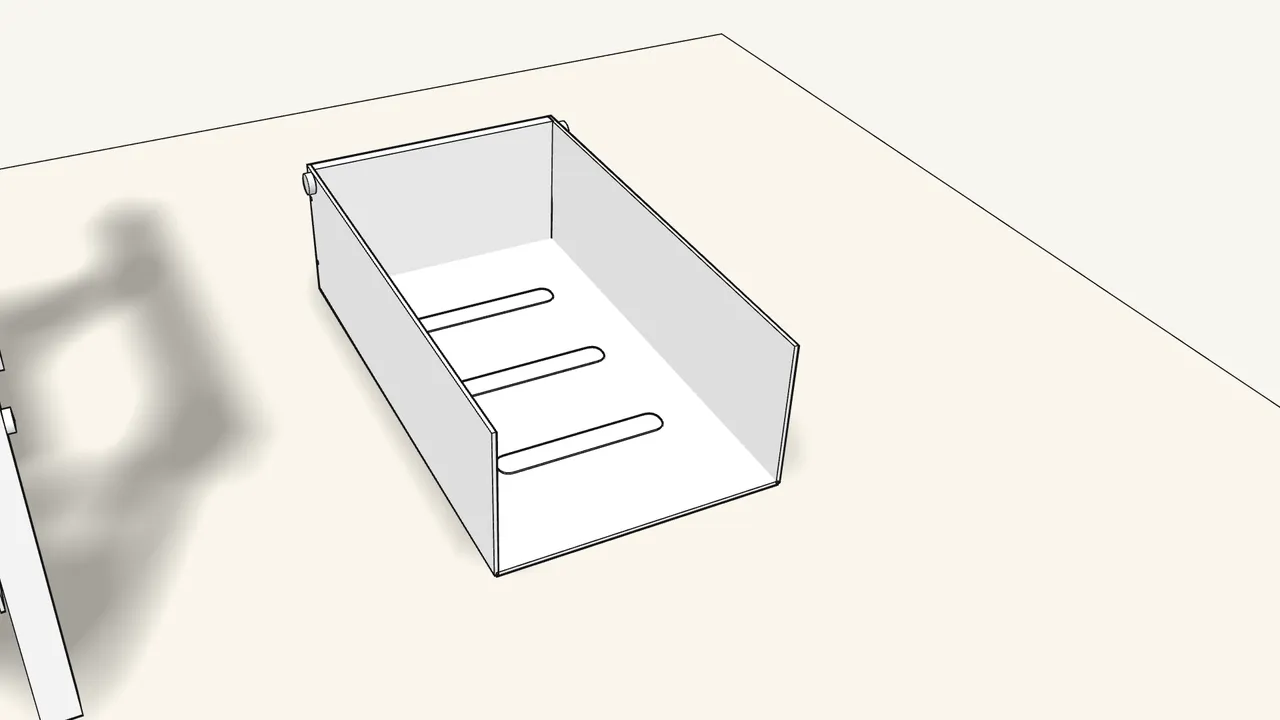
Fold up the sides of the drawer bottom.
Step 8 · manual step 10
Slide the drawer back onto the sides.
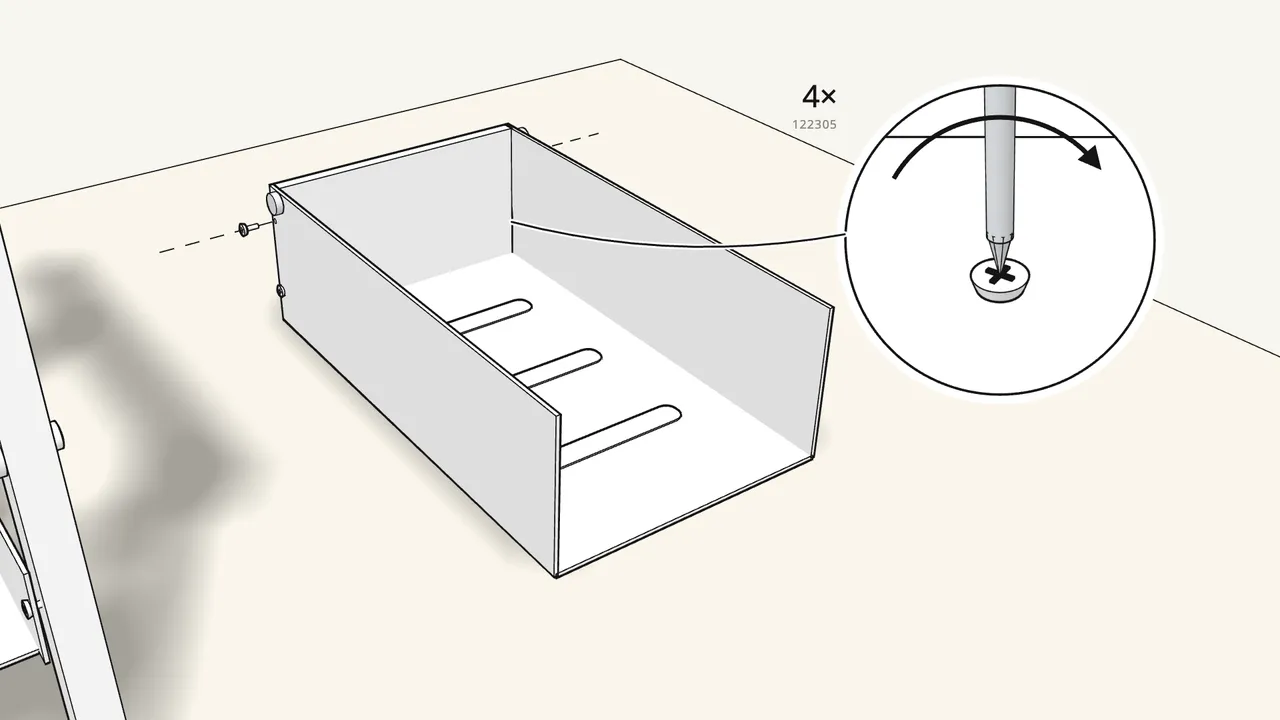
Step 9 · manual step 11
Fix the back with 4 screws (122305).
2 on each side — Phillips screwdriver.
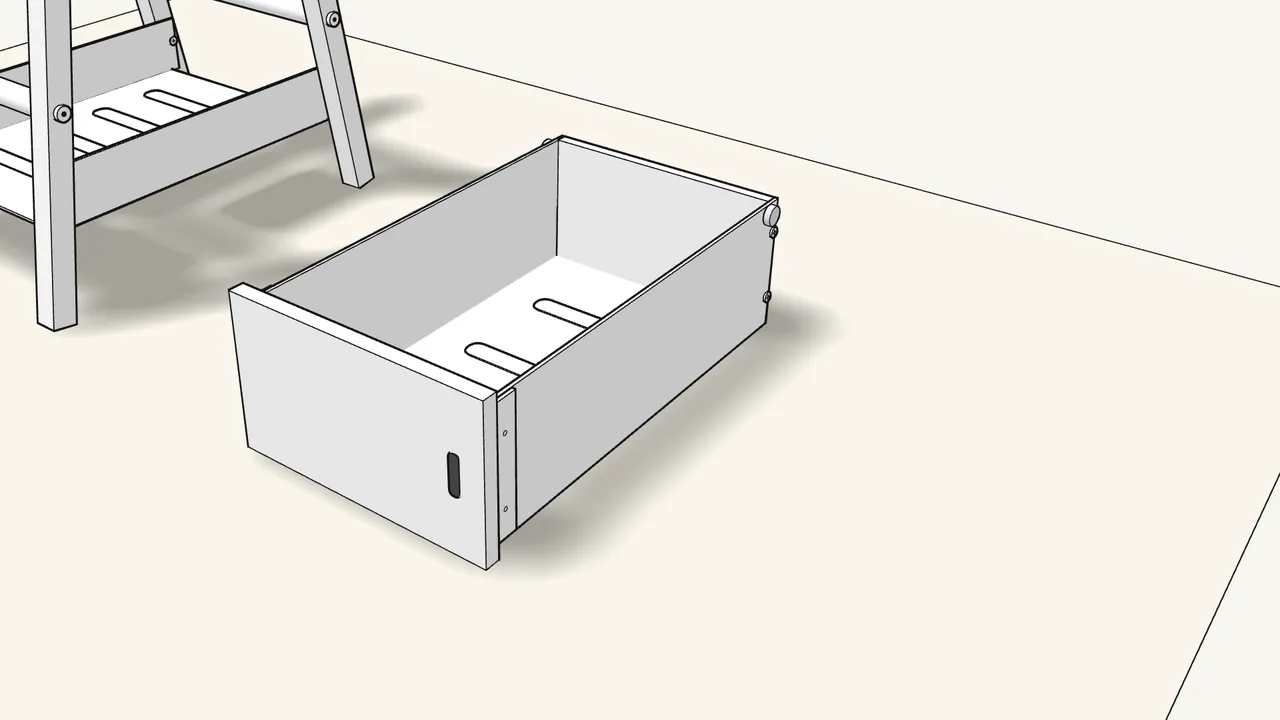
Step 10 · manual step 12
Slide the drawer front onto the sides.
The tabs at the bottom hook in — see the detail in step 12.
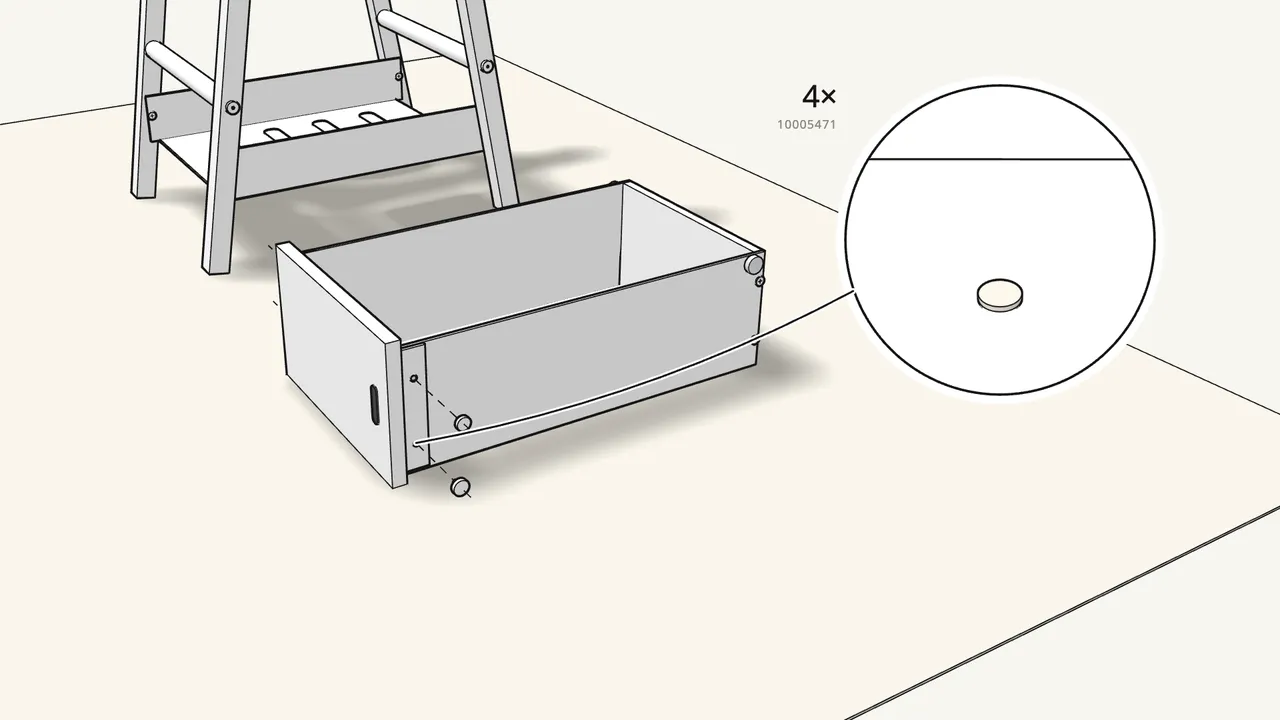
Step 11 · manual step 13
Push in 4 plugs (10005471) until they click.
Then press a cap (10005485) onto each one.
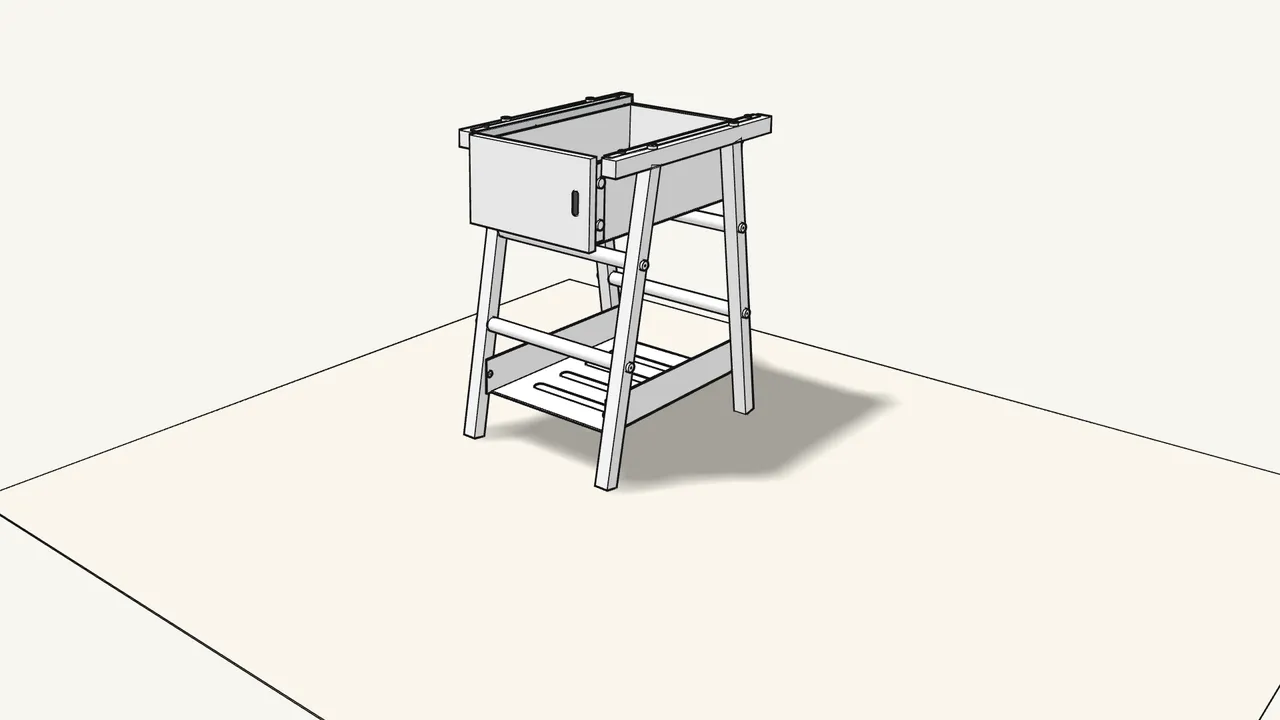
Step 12 · manual step 14
Hook the drawer onto the runners and slide it in.
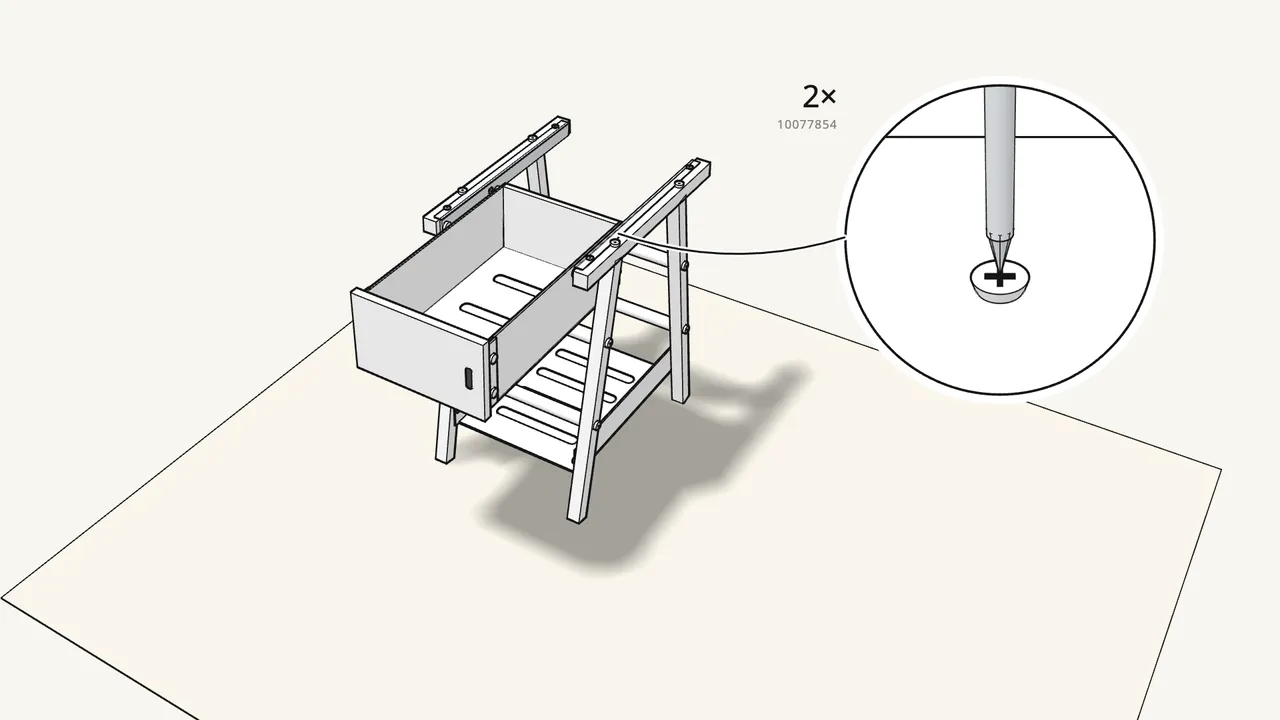
Step 13 · manual step 15
Screw 2 drawer stops (10077854) into the runners.
Pull the drawer out first, one stop per side — Phillips screwdriver. Then push it in.
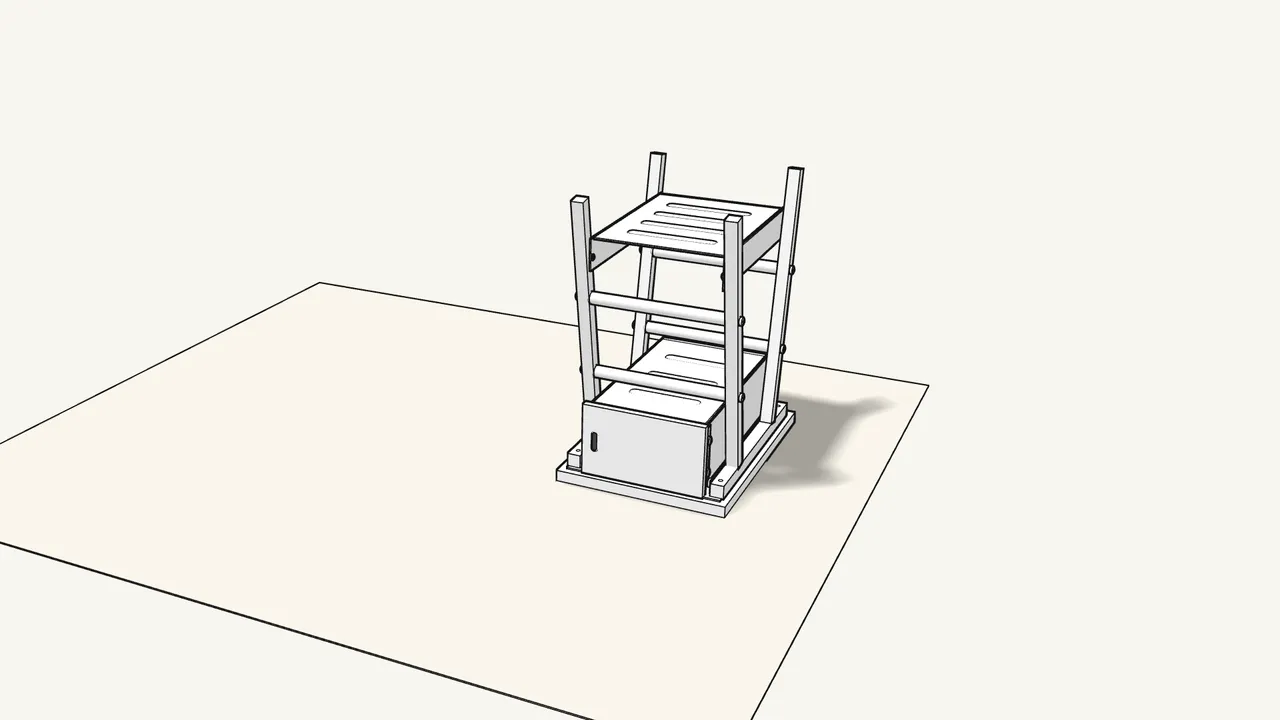
Step 14 · manual step 16
Turn the frame over onto the face-down top.
Line the rails up with the top — see the details in step 16.
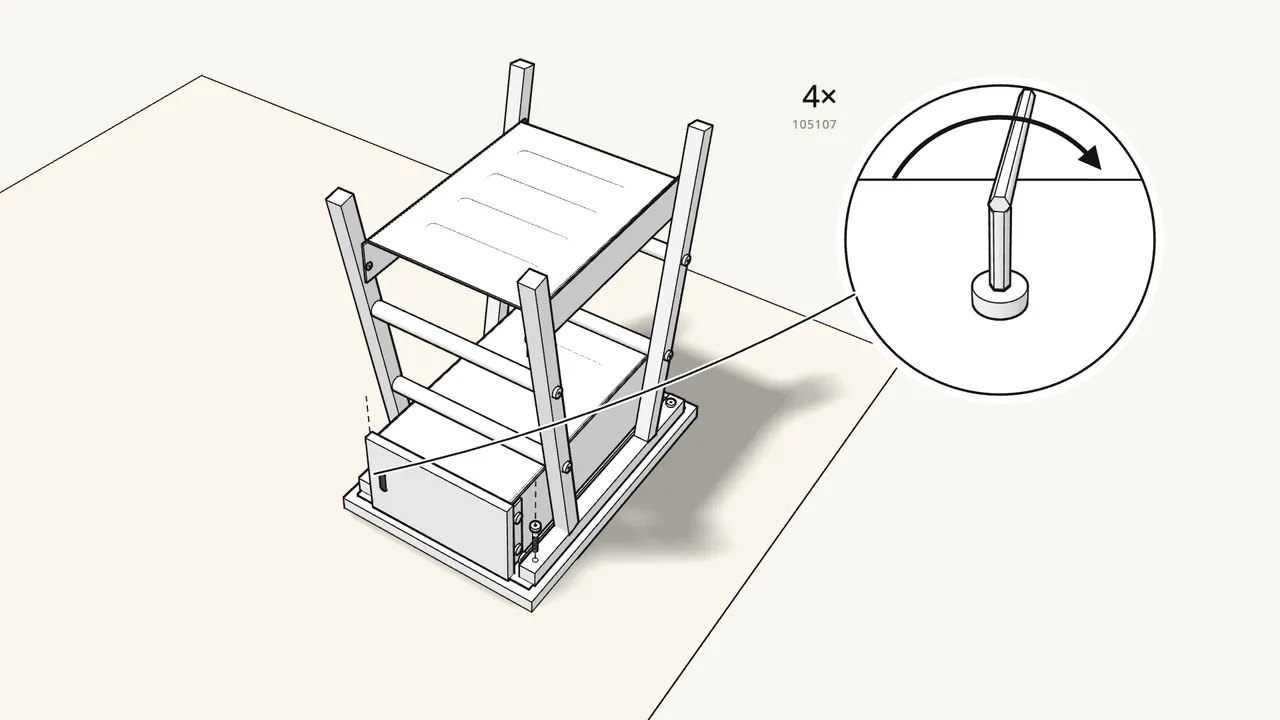
Step 15 · manual step 16
Bolt the top on with 4 bolts (105107).
2 through each rail — Allen key.
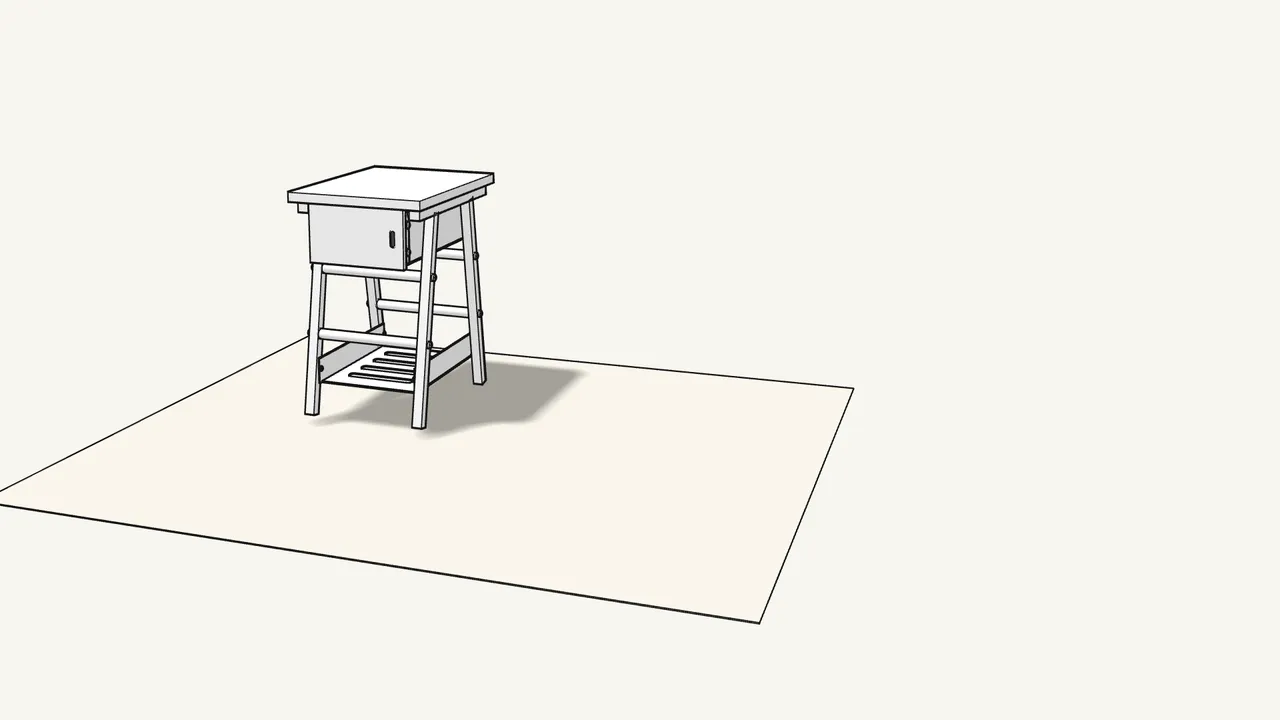
Step 16
Turn the drawer unit upright.
Tips & safety
- Assemble on a rug or the cardboard. It protects the steel parts and your floor — manual page 2.
- Missing a part or unsure about a step? Contact your IKEA store — manual page 2.
Official instructions
This guide follows IKEA’s official assembly instructions (AA-2241563-2). Keep the printed manual to hand — if anything differs, the manual is right.