IKEA · Dressers & Drawer Units
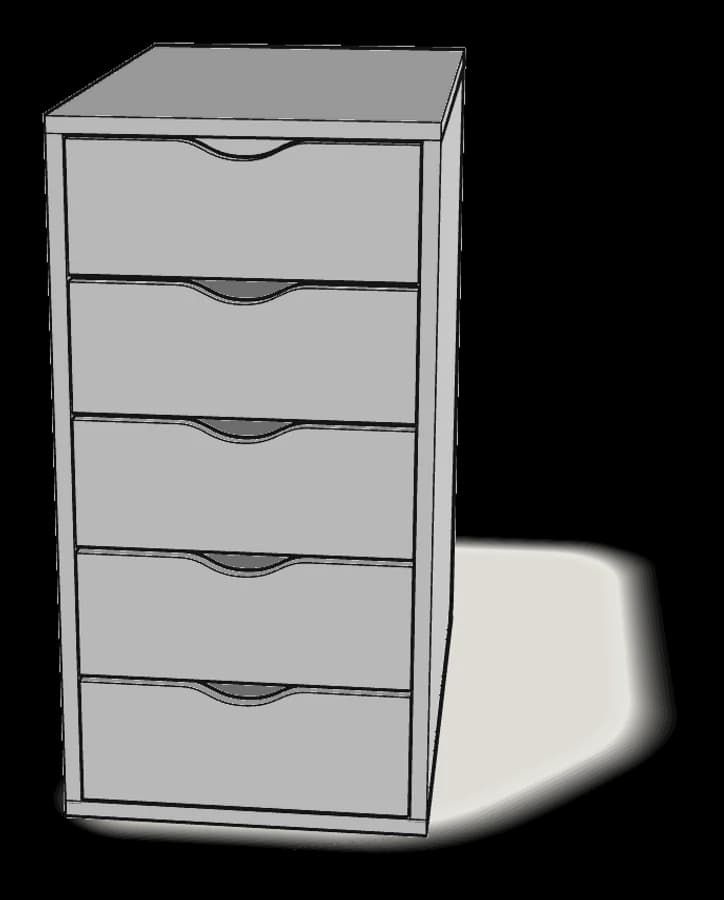
How to Assemble IKEA ALEX Drawer Unit
Step-by-step IKEA ALEX drawer unit assembly: 20 illustrated steps, an animated video, the hardware list and the tools you need — following the official instructions (AA-2242840-5).
- 20 illustrated steps
- 23 steps in the manual
- 2:46 video
- 36×58×70 cm
What you need
Tools
- Flat-head screwdriver
- Phillips screwdriver
- Hammer
Hardware in the box
| Part no. (as printed in the manual) | Qty |
|---|---|
| 110519 | 20× |
| 110907 | 4× |
| 105021 | 10× |
| 118331 | 34× |
| 101345 | 16× |
| 119251 | 18× |
| 103114 | 16× |
| 10061614 | 4× |
Step-by-step assembly
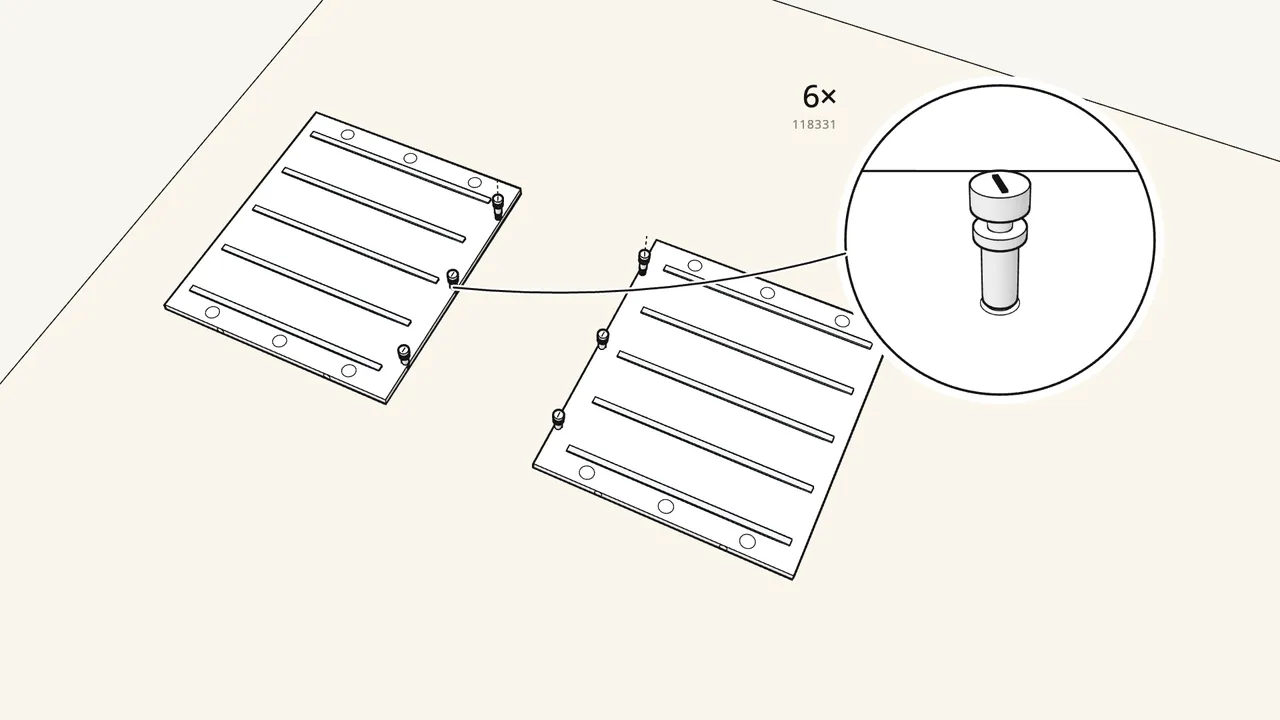
Step 1
Screw 6 cam bolts into the two side panels.
Turn them in by hand, all the way — no gap under the collar.
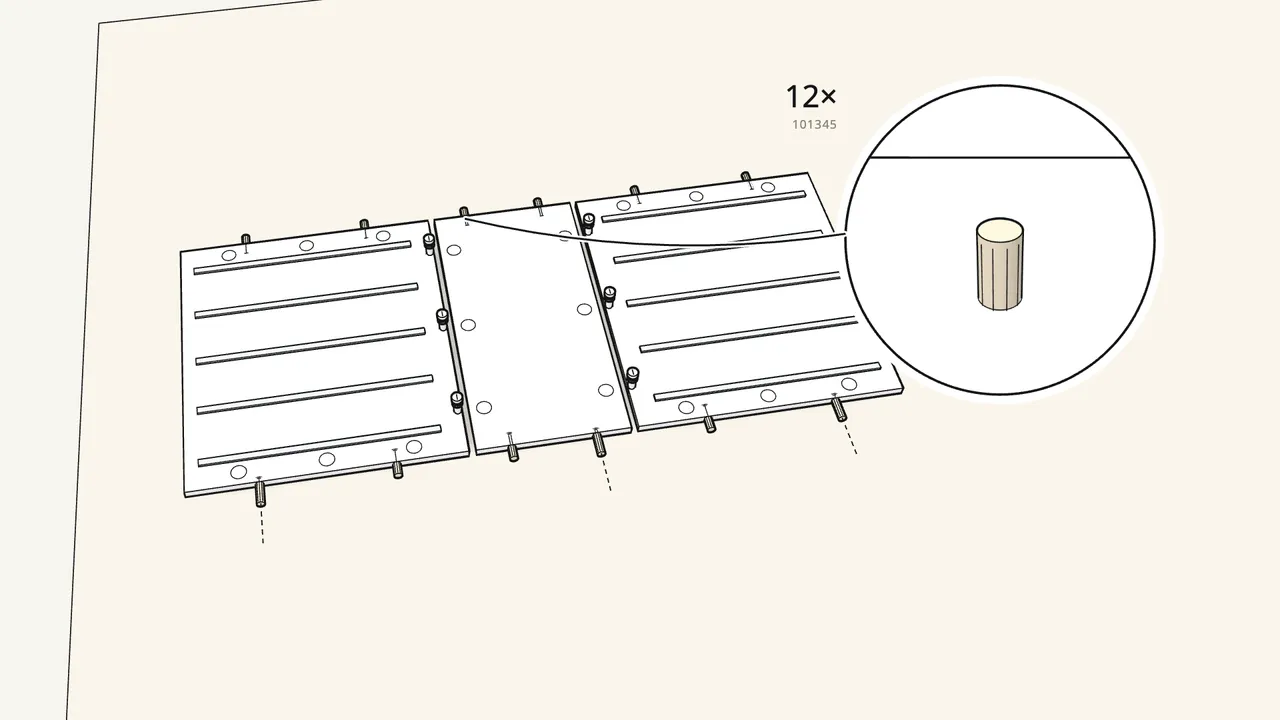
Step 2
Push 12 wooden dowels into the ends of the sides and the back panel.
Half of each dowel stays sticking out.
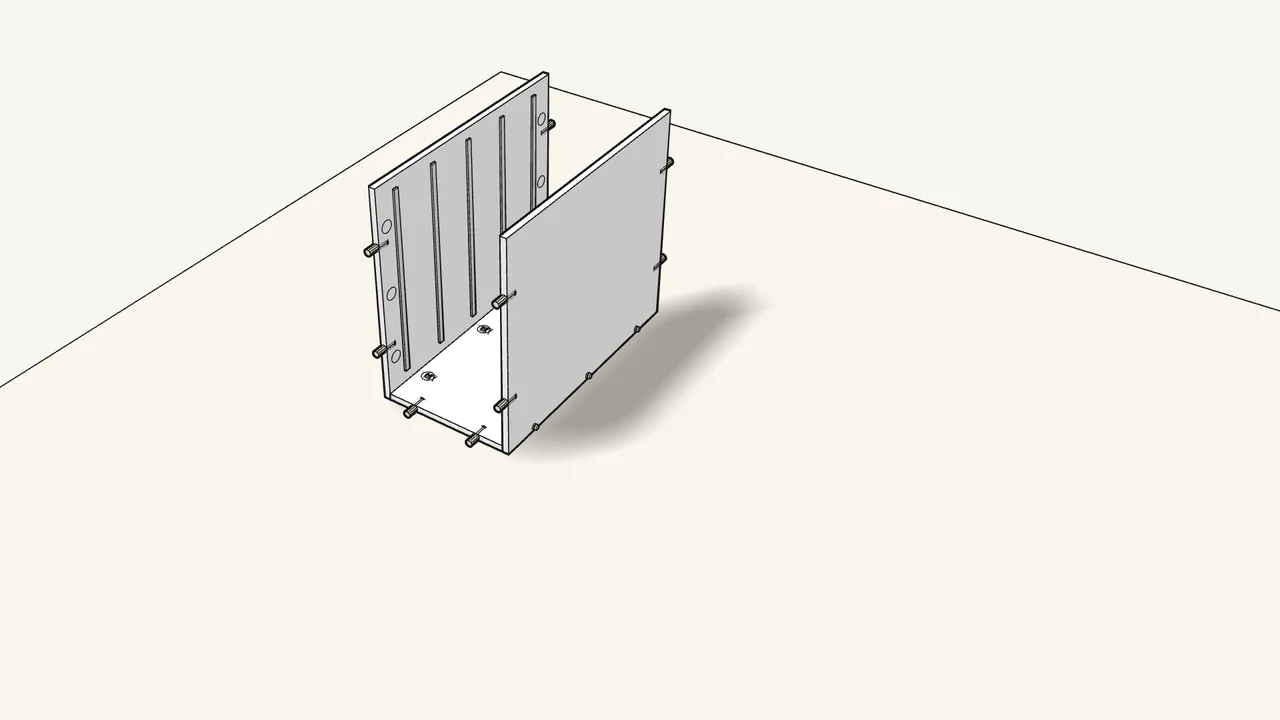
Step 3
Stand both side panels up onto the back panel.
The bolts and dowels slide into the holes along its edges.
Step 4
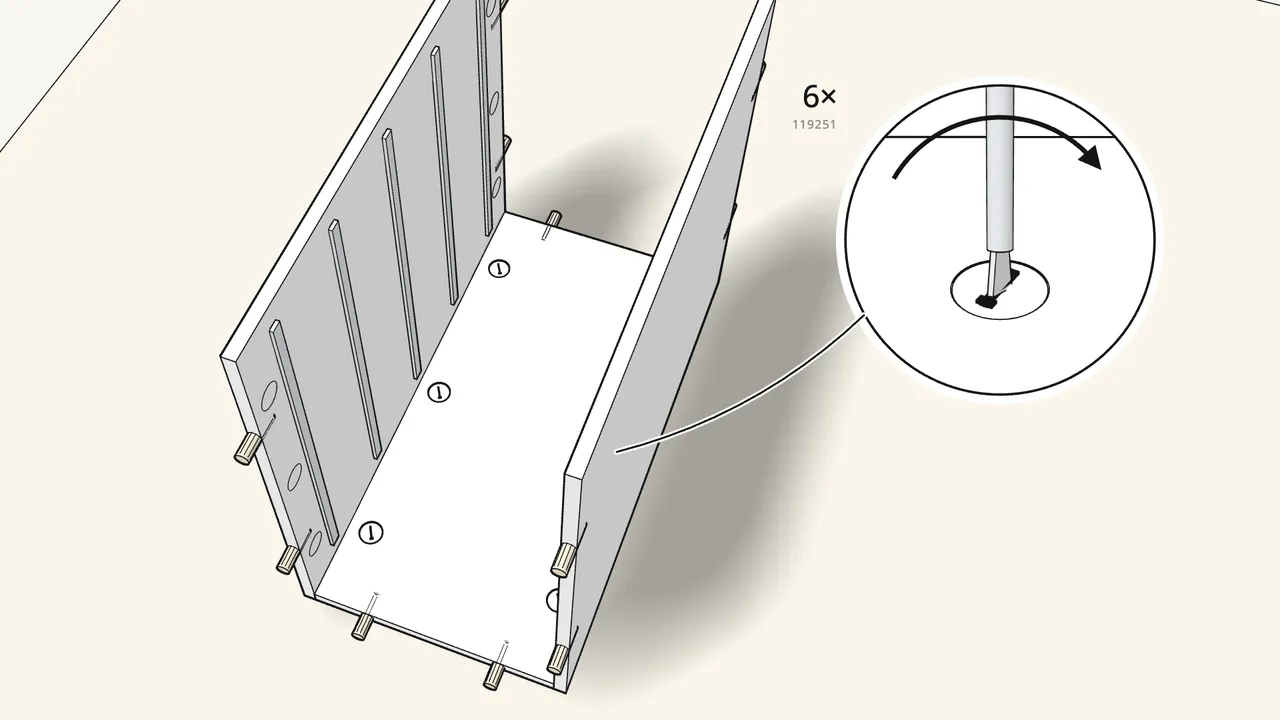
Insert 6 cam locks (119251) and turn them clockwise to lock.
Use the 119251 locks here — the 103114 ones are for the drawers.
Step 5
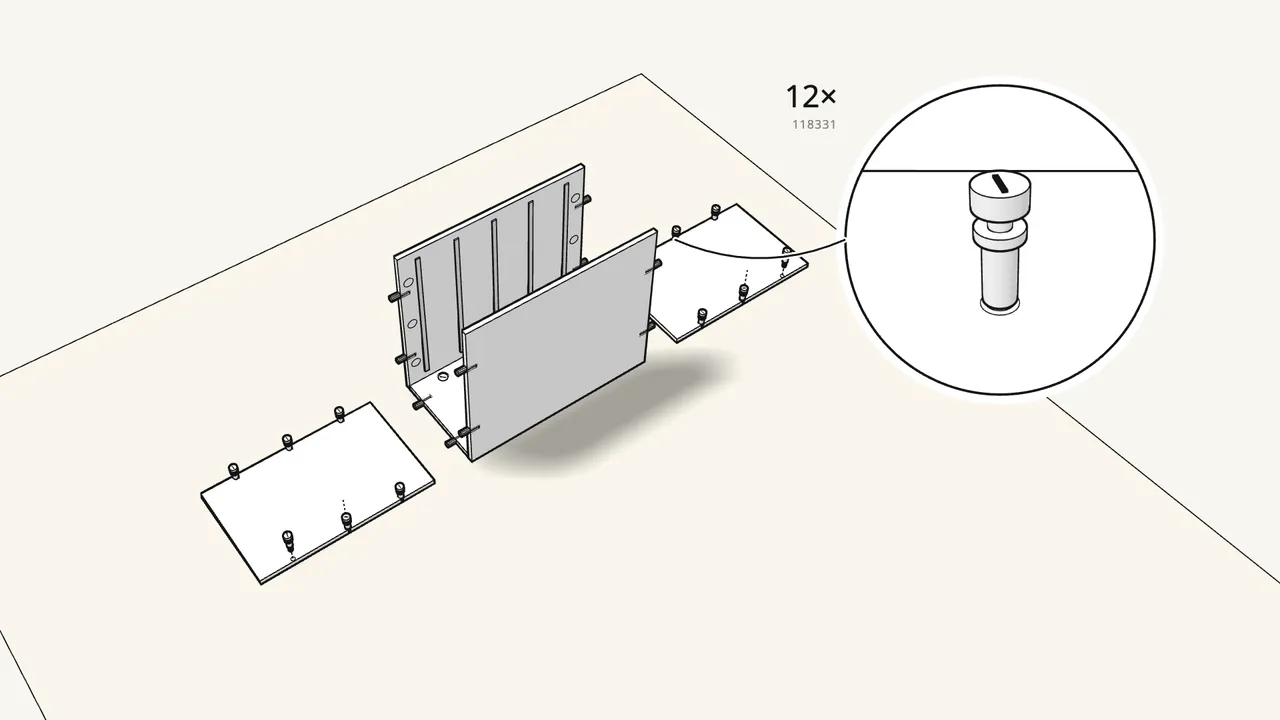
Screw 12 cam bolts into the top and bottom panels.
6 in each panel.
Step 6
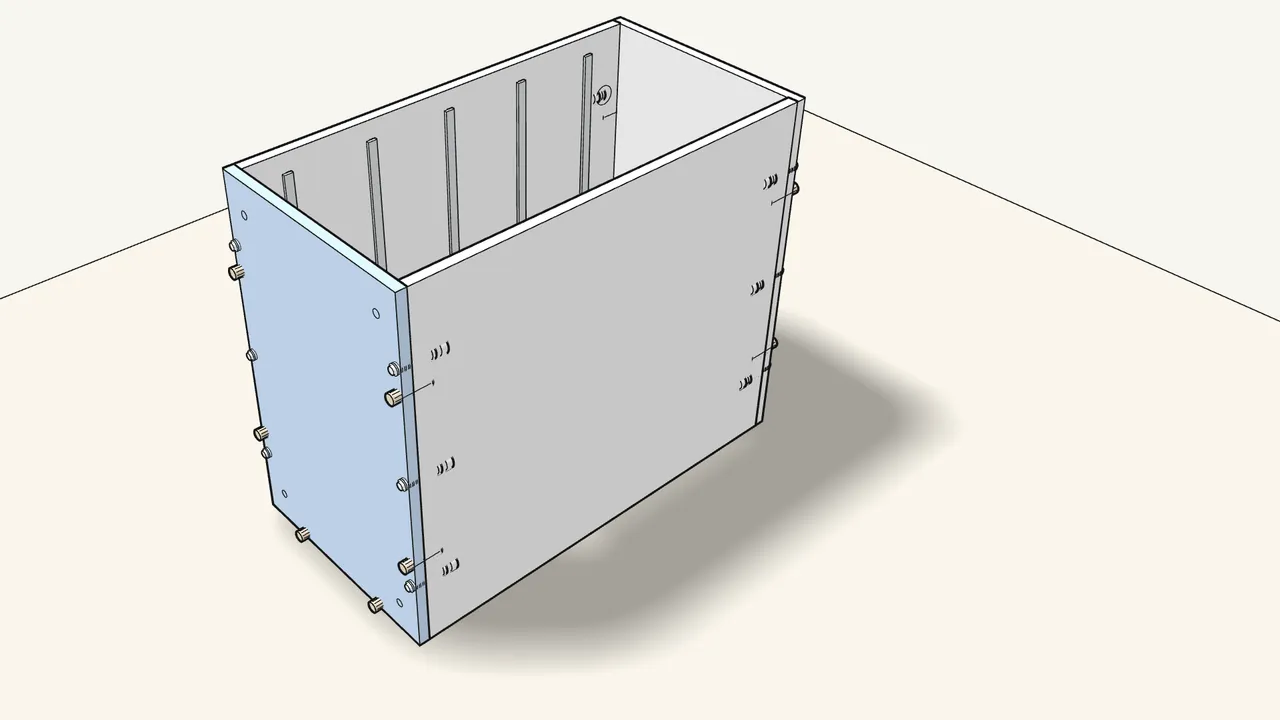
Fit the top and bottom panels onto the ends.
Check which way the top faces — it differs for a freestanding unit vs. under a desk (manual p. 8).
Step 7
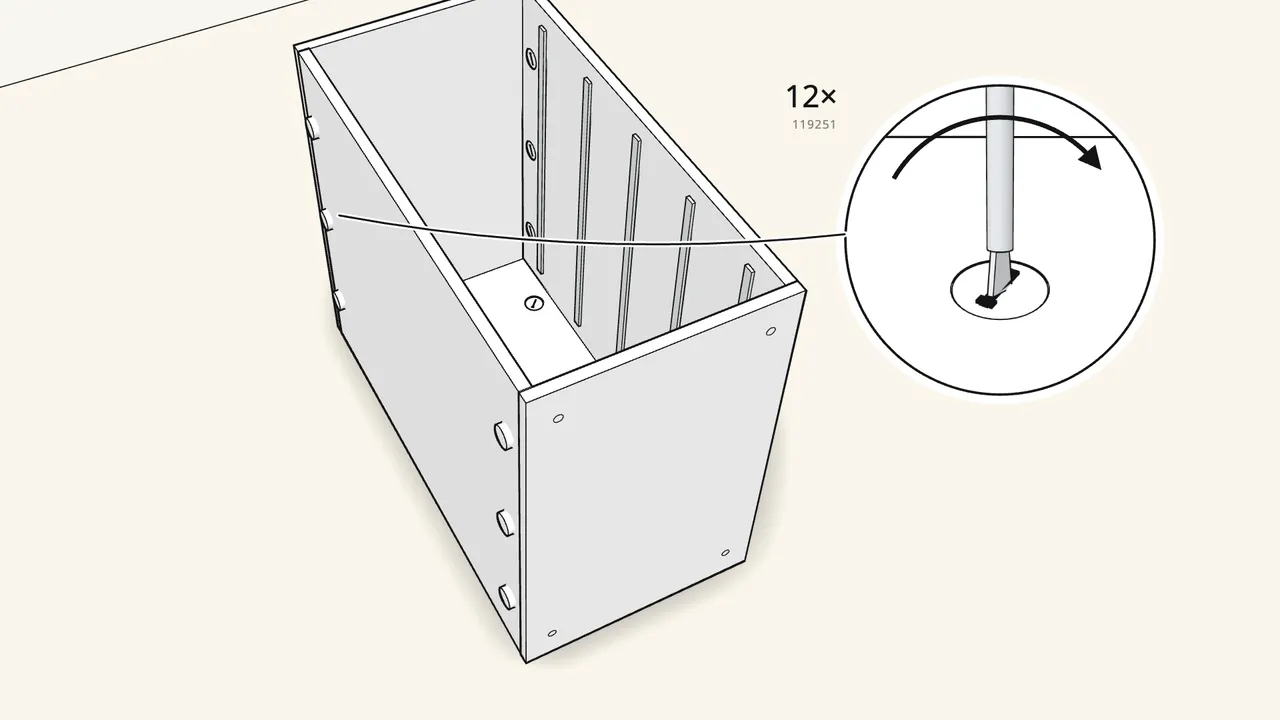
Insert 12 cam locks (119251) in the sides and turn them clockwise.
This pulls the top and bottom tight against the sides.
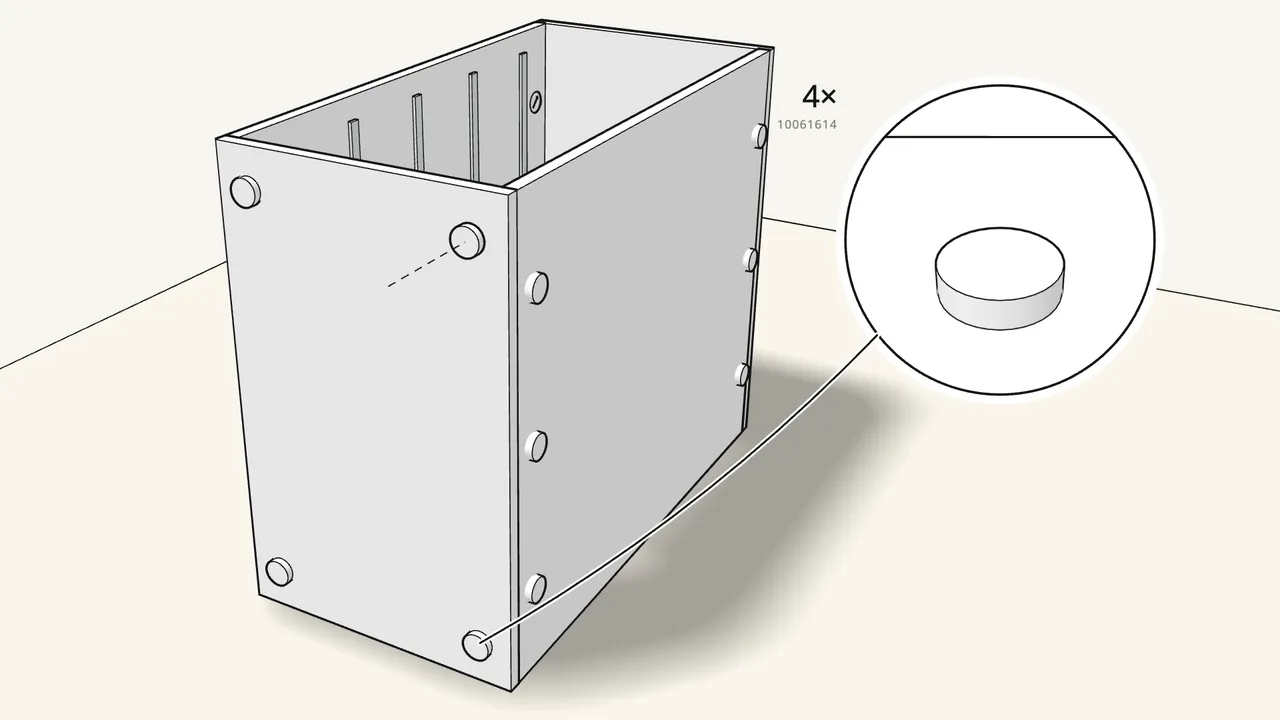
Step 8
Press the 4 glides into the bottom, then stand the unit up.
Using casters instead? They’re sold separately — see manual p. 10–11.
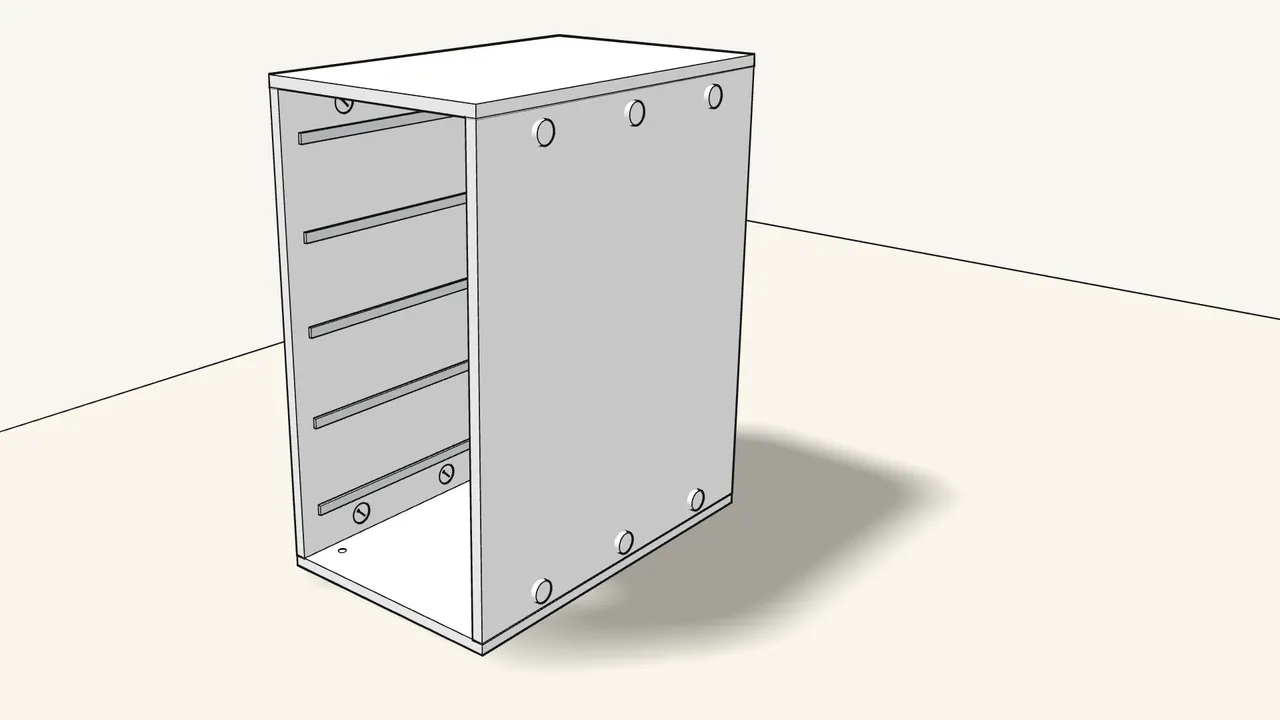
Step 9 · manual step 8
Stand the unit upright.

Step 10
Now the drawers.
There are five. We’ll build one step by step.

Step 11 · manual step 9
Screw 4 cam bolts into the back of the drawer front.
Lay the front face-down on the rug.

Step 12 · manual step 10
Place the two drawer sides onto the bolts.
Runners facing outwards.
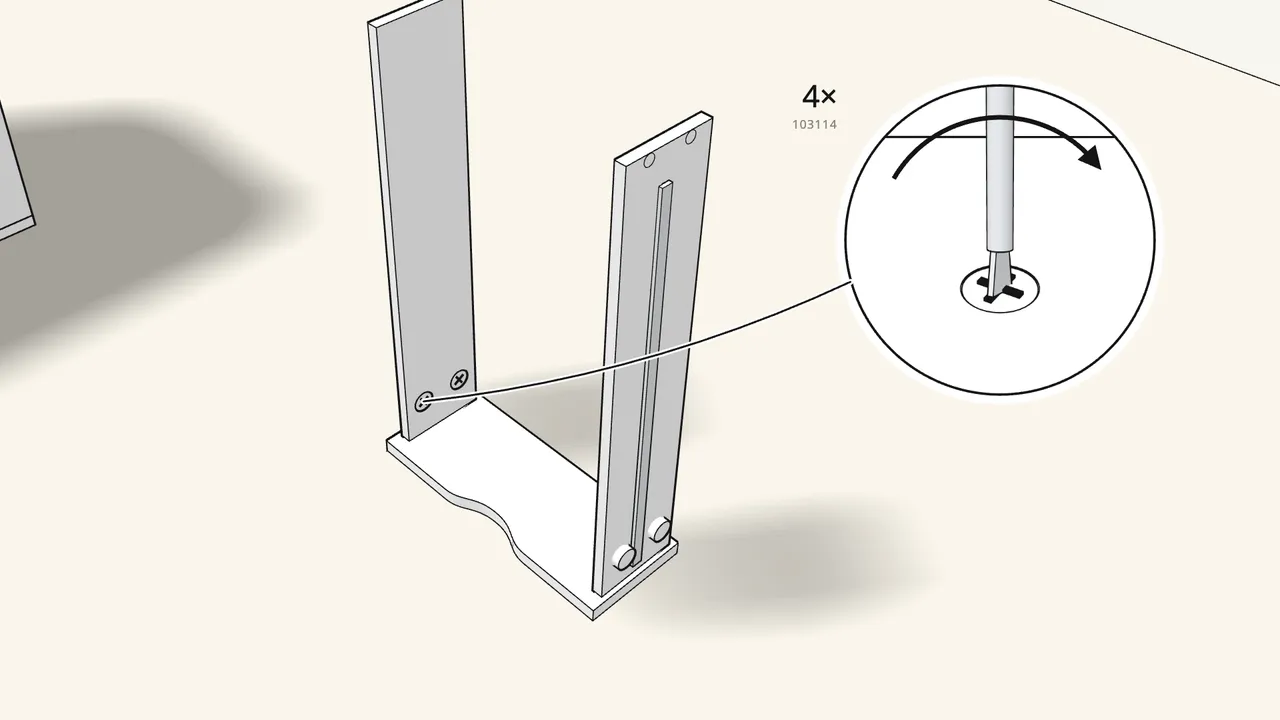
Step 13 · manual step 11
Insert 4 cam locks (103114) and turn to lock.

Step 14 · manual step 12
Slide the drawer bottom into the grooves.
Push it all the way down to the front.
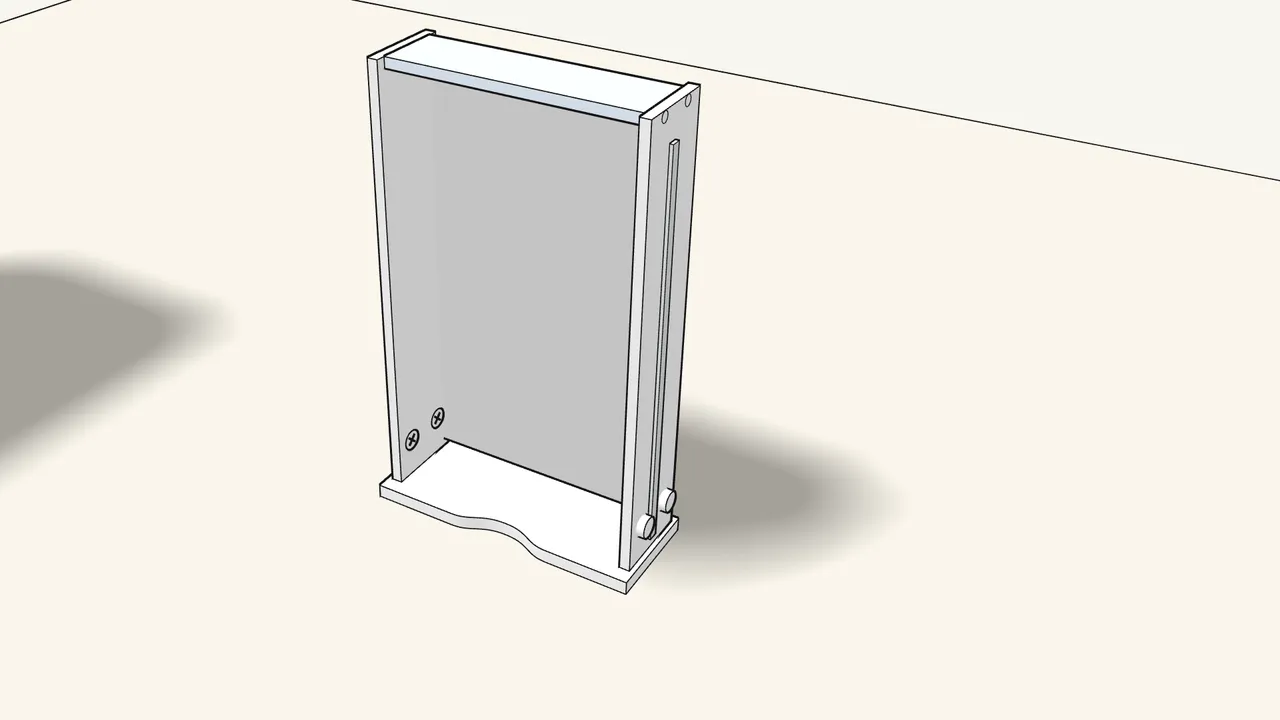
Step 15 · manual step 13
Slide the drawer back in on top of it.

Step 16 · manual step 14
Tap in 4 screw-dowels (110519) with a hammer — 2 each side.

Step 17 · manual step 14
Turn the drawer the right way up.

Step 18 · manual step 9–21
Build all five drawers.
3 are built like this one (steps 9–14). The other 2 have lower sides — follow steps 15–21; the method is the same.

Step 19 · manual step 23
Slide the drawers in until they click.
The 2 low-sided drawers go in the top two slots, the 3 tall-sided ones below.
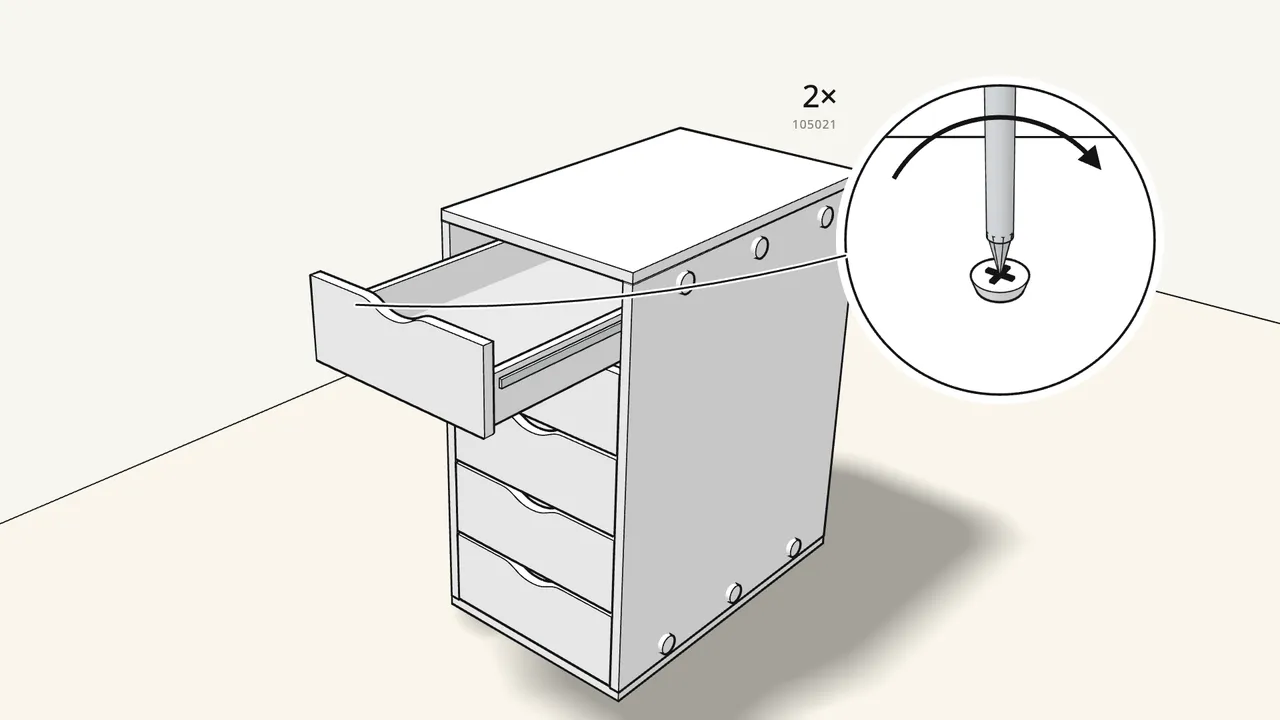
Step 20 · manual step 23
Pull each drawer out and fix it to its runners with 2 screws (105021).
Use the Phillips screwdriver. Push the drawer back in when done.
Tips & safety
- Never stack two units on top of each other. ALEX is not designed to carry another unit.
- Using ALEX to hold up a desk? Screw the desktop onto the top panel with 4 screws (110907) and the Allen key — see step 22 in the manual.
Official instructions
This guide follows IKEA's official assembly instructions (AA-2242840-5). Keep the printed manual to hand — if anything differs, the manual is right.