IKEA · Dressers & Drawer Units
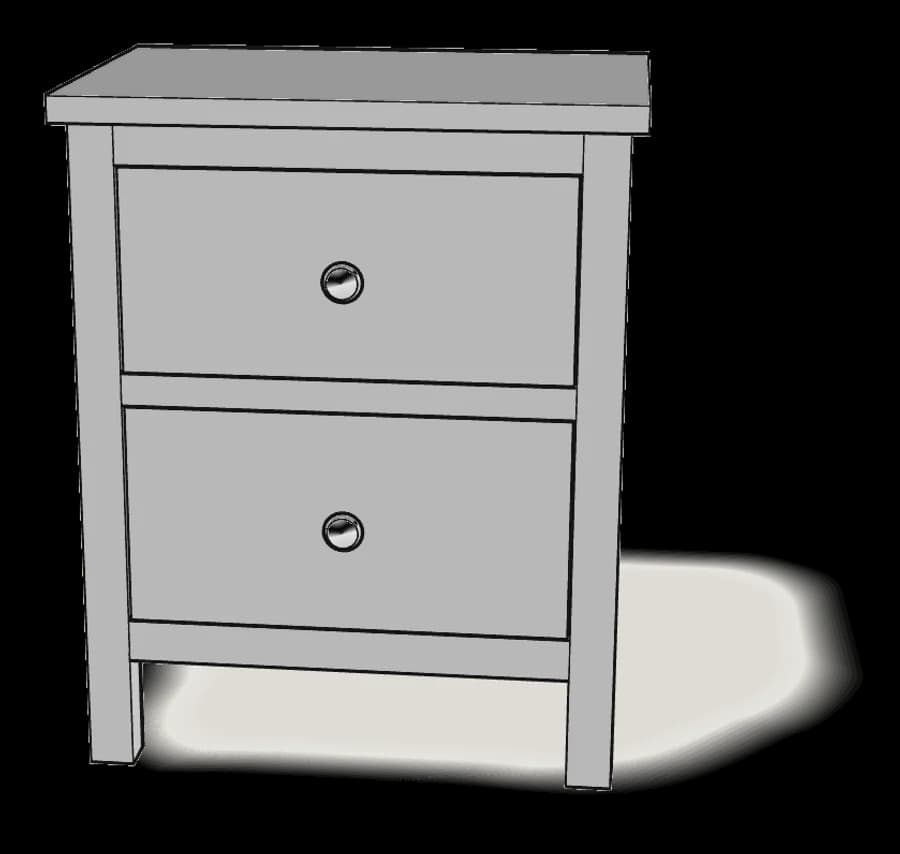
How to Assemble IKEA HEMNES 2-Drawer Chest
Step-by-step IKEA HEMNES 2-drawer chest assembly: 26 illustrated steps, an animated video, the hardware list and the tools you need — following the official instructions (AA-2173989-4).
- 26 illustrated steps
- 39 steps in the manual
- 3:22 video
- 54×38×66 cm
What you need
Tools
- Flat-head screwdriver
- Phillips screwdriver
- Hammer
- Drill (for wall fixing)
You’ll need: flat-head and Phillips screwdrivers, a hammer, a pencil and a tape measure.
Hardware in the box
| Part no. (as printed in the manual) | Qty |
|---|---|
| 118331 | 20× |
| 123492 | 8× |
| 101350 | 20× |
| 101345 | 8× |
| 110630 | 28× |
| 100349 | 8× |
| 100365 | 8× |
| 100214 | 2× |
| 101221 | 16× |
| 110519 | 8× |
| 109053 | 12× |
| 100413 | 2× |
| 117615 | 2× |
| 191064 | 4× |
| 107967 | 1× |
| 109048 | 1× |
| 121714 | 1× |
| 109049 | 1× |
| 100823 | 2× |
Step-by-step assembly
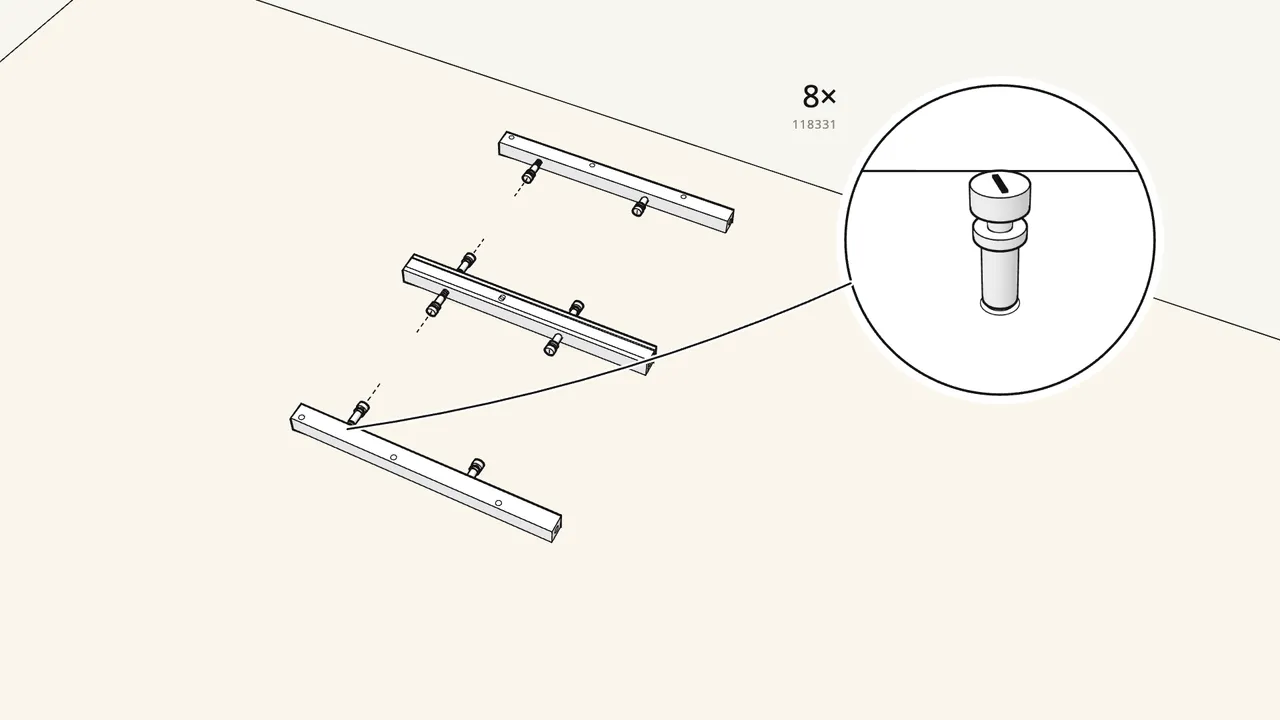
Step 1
Screw 8 cam bolts (118331) into the four legs.
Legs are marked L1, L2, R1, R2. Screw each bolt in fully — no gap under the collar.
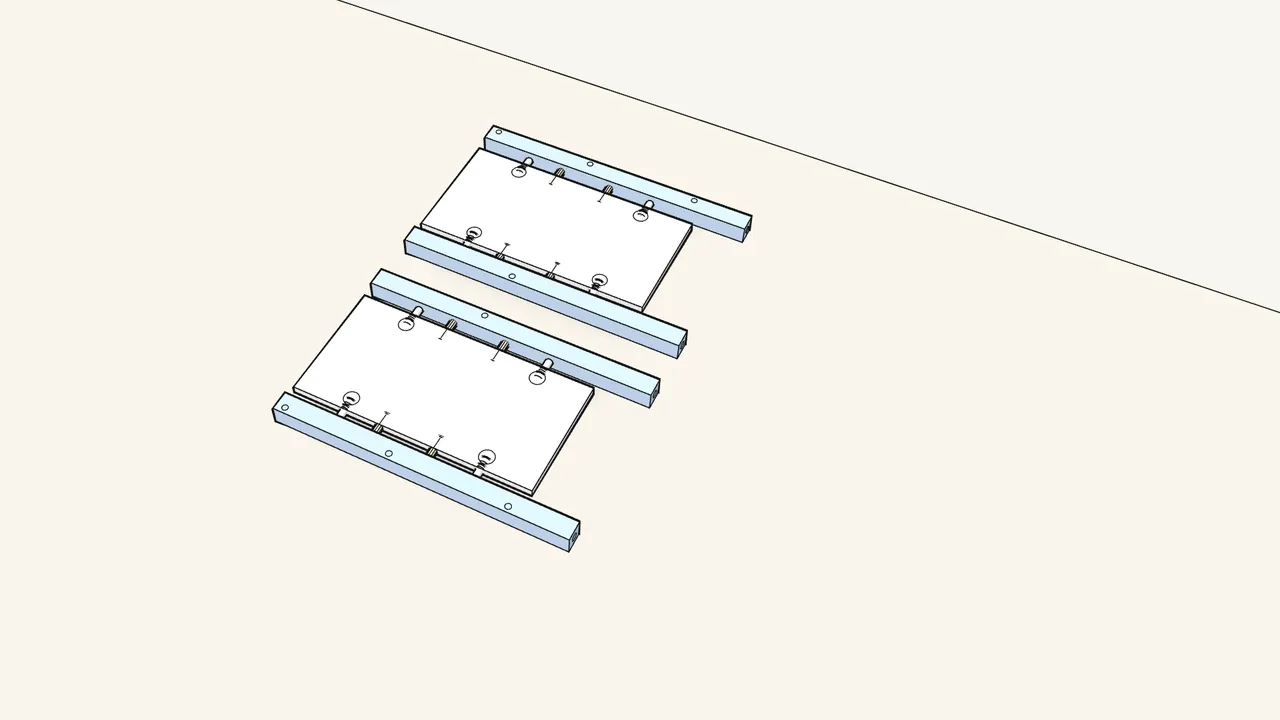
Step 2
Push 8 dowels (101350) into the side panels and fit the legs.
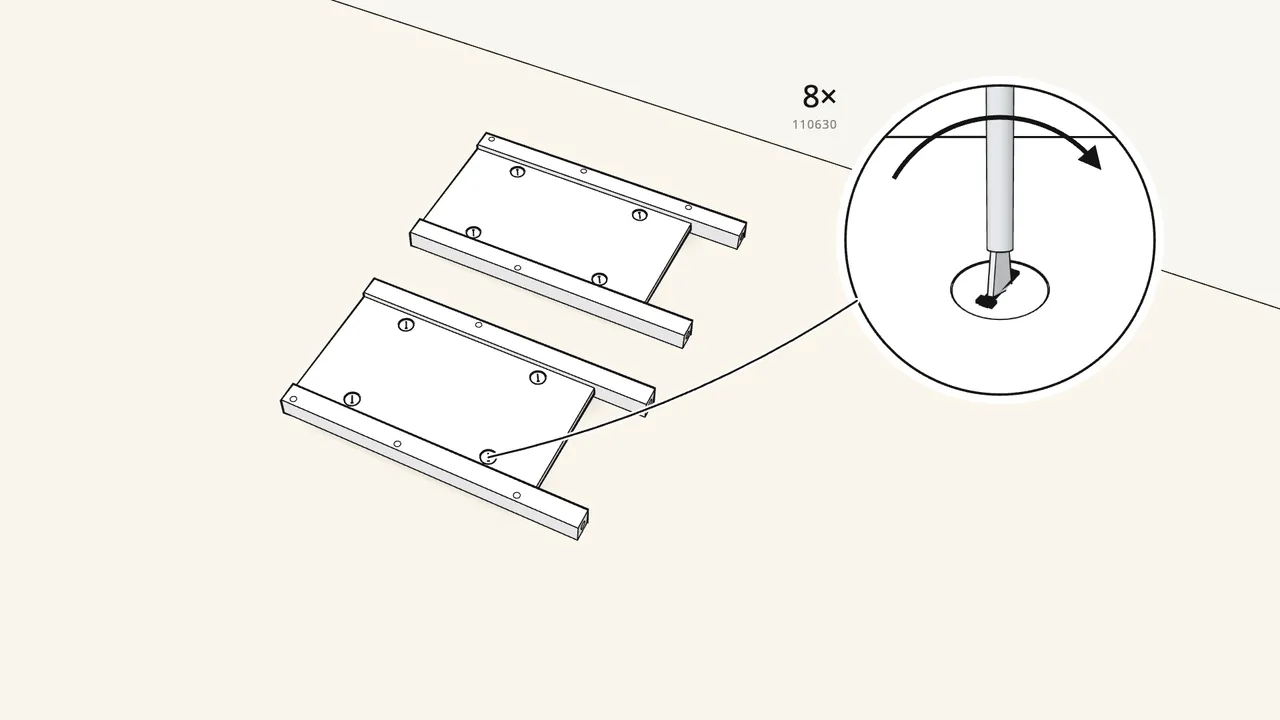
Step 3
Insert 8 cam locks (110630) and turn them clockwise.
Step 4
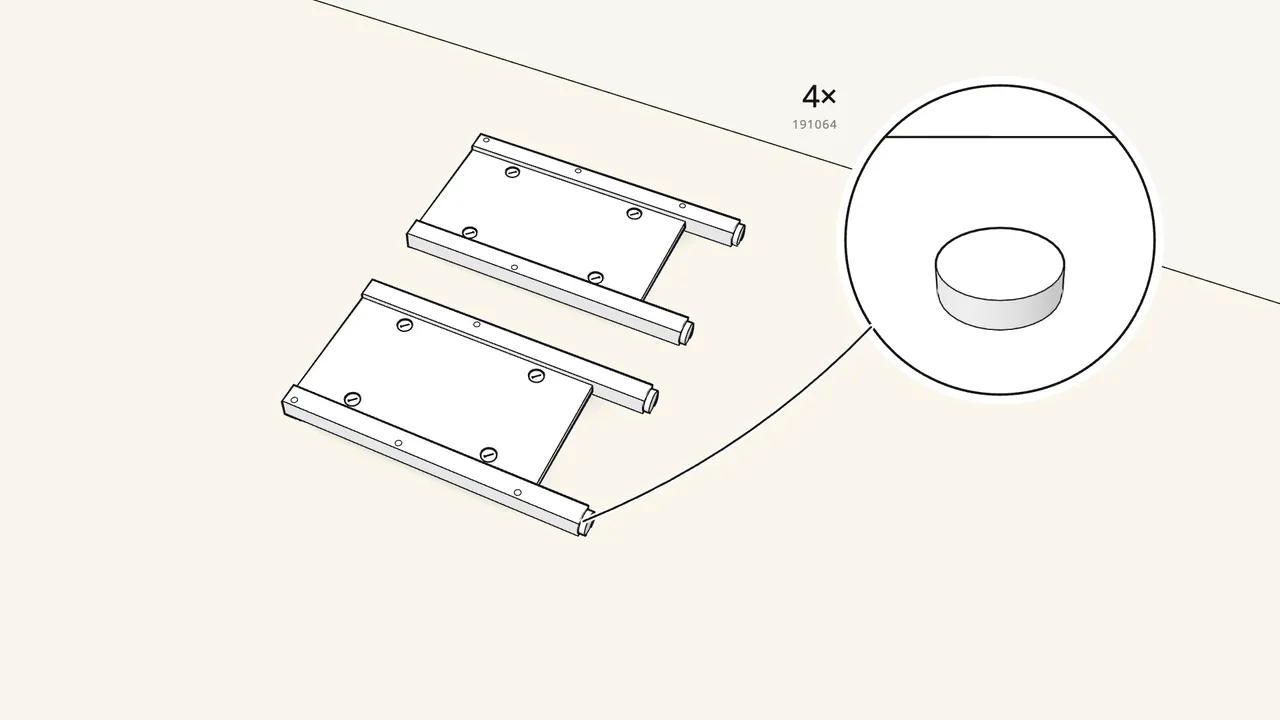
Press the 4 floor pads (191064) onto the leg ends.
Step 5
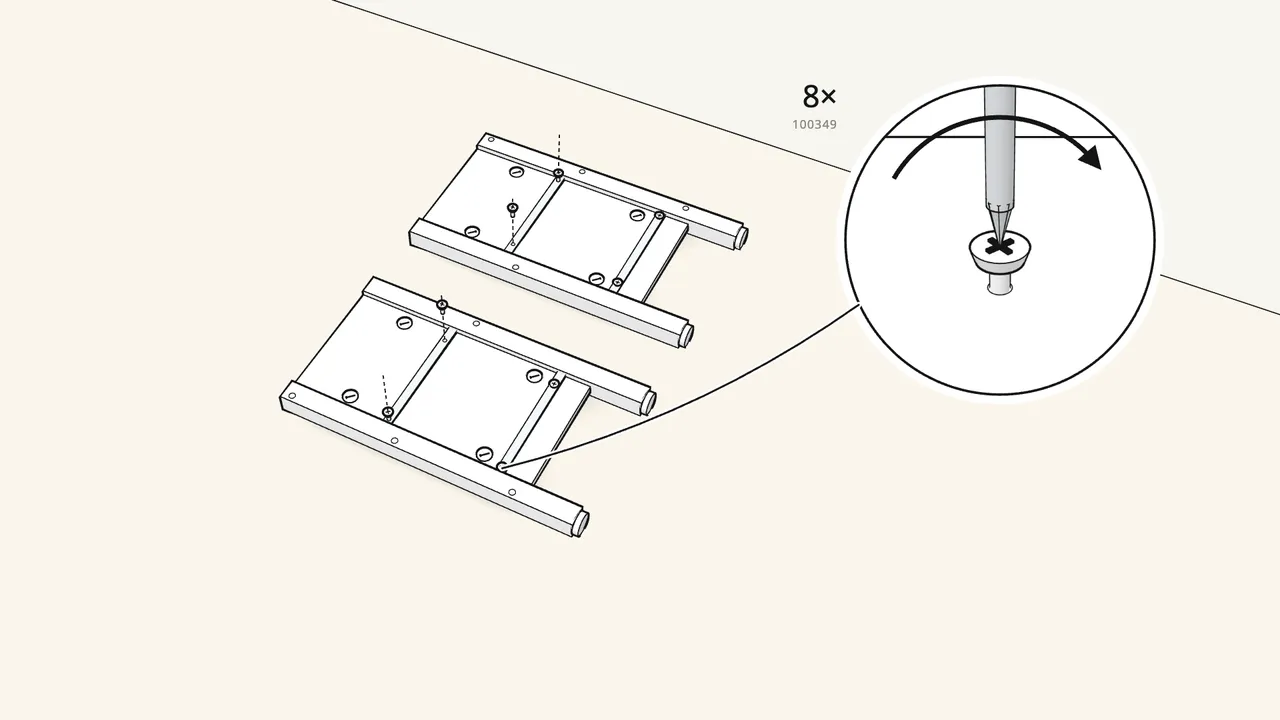
Screw a runner (112479) to each panel: 2 screws (100349) each.
4 runners, 8 screws in total.
Step 6
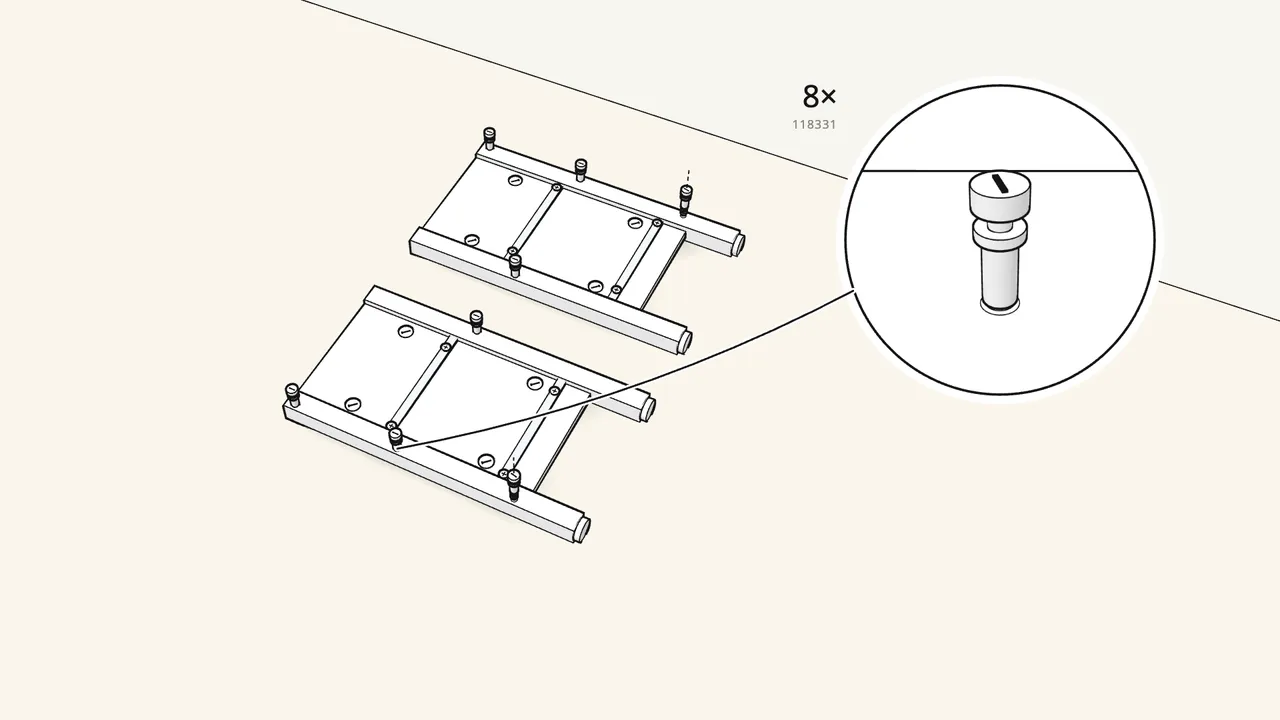
Screw 8 cam bolts (118331) into the inner faces of the legs.
Check that each bolt is screwed in all the way.
Step 7
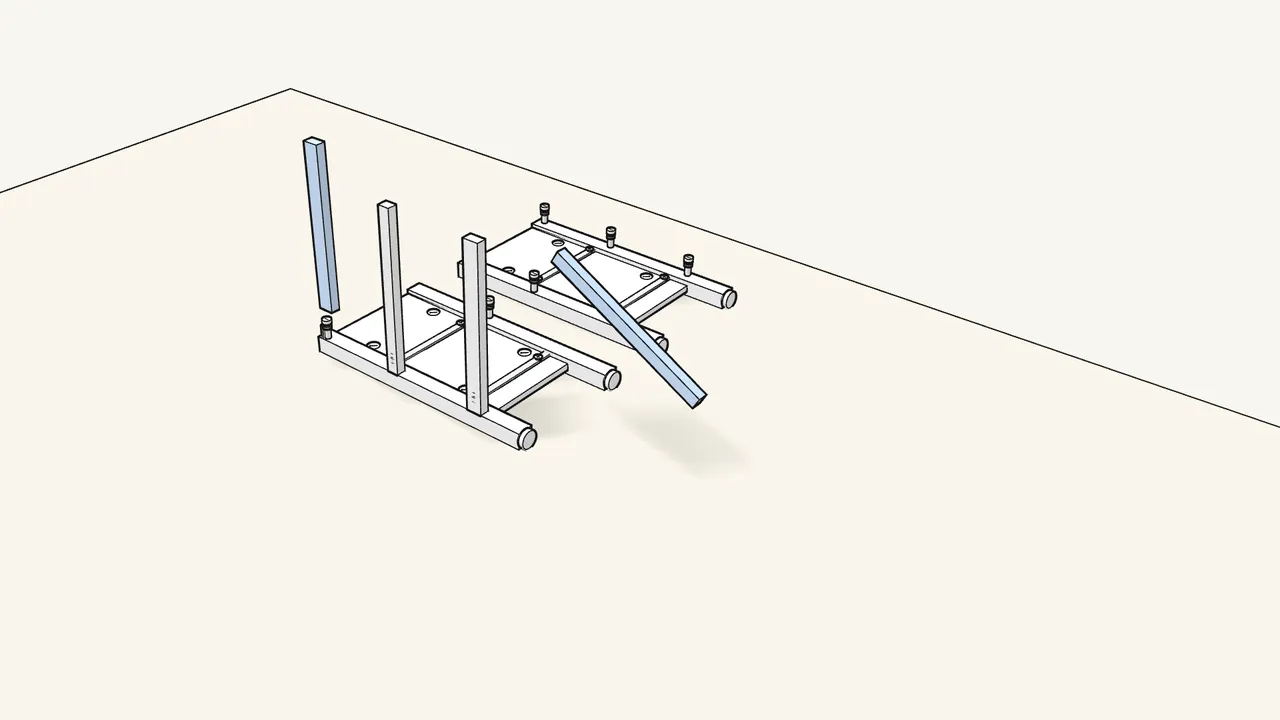
Push 4 dowels (101350) into the rails and stand them in the frame.
Three rails go on the front legs, one on the back leg.
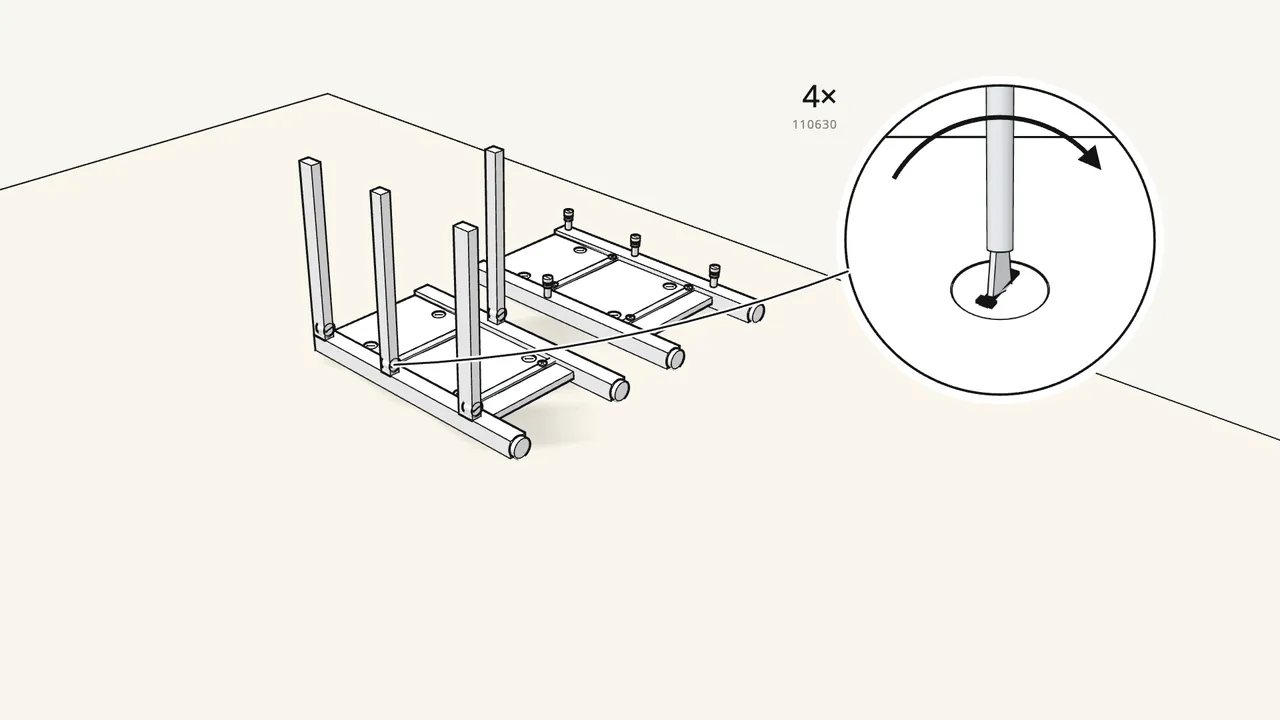
Step 8
Insert 4 cam locks (110630) and turn them clockwise.
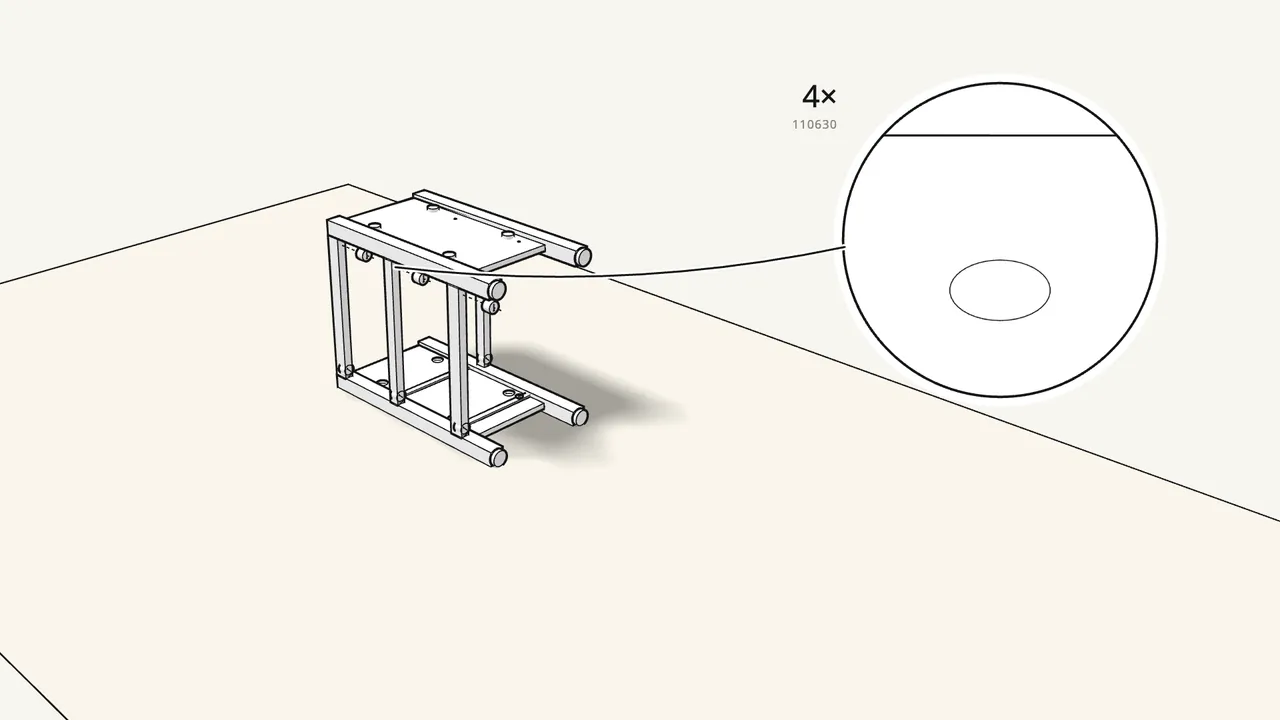
Step 9 · manual step 9–10
Push 4 dowels into the rail tops, lay the second frame on top.
Lock it with 4 cam locks (110630).
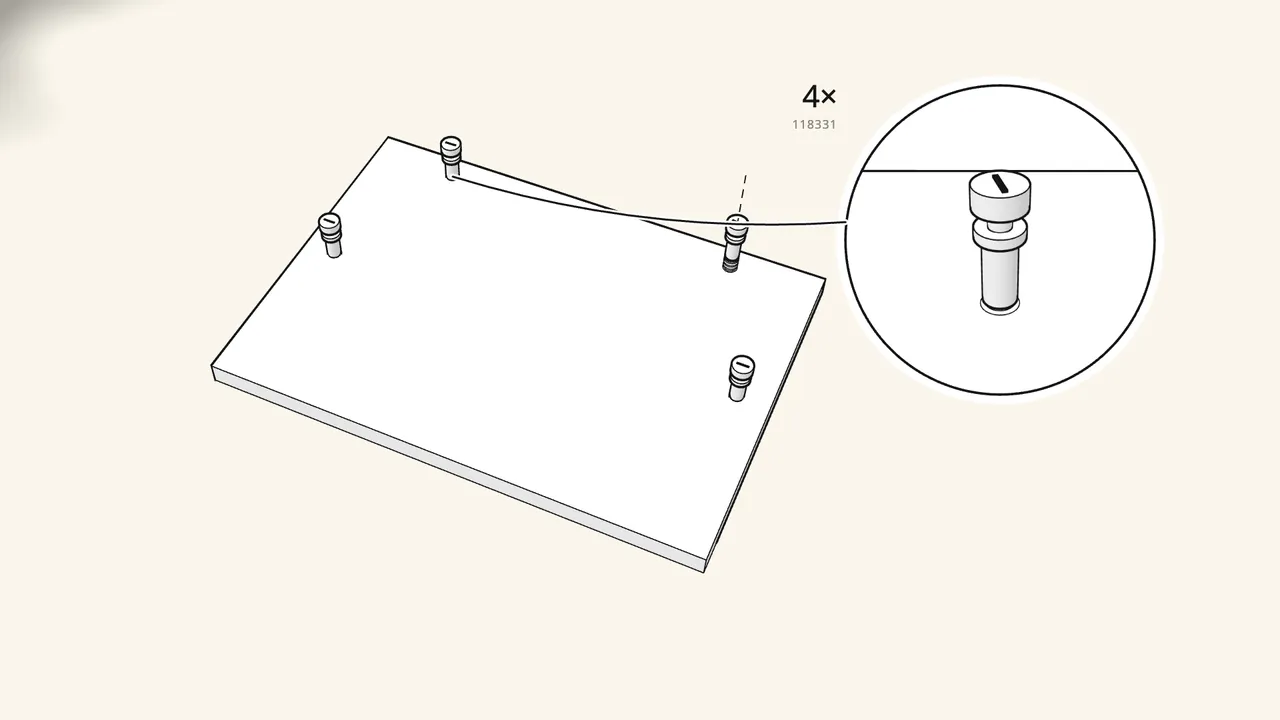
Step 10 · manual step 11
Top, upside down: screw in 4 cam bolts (118331).
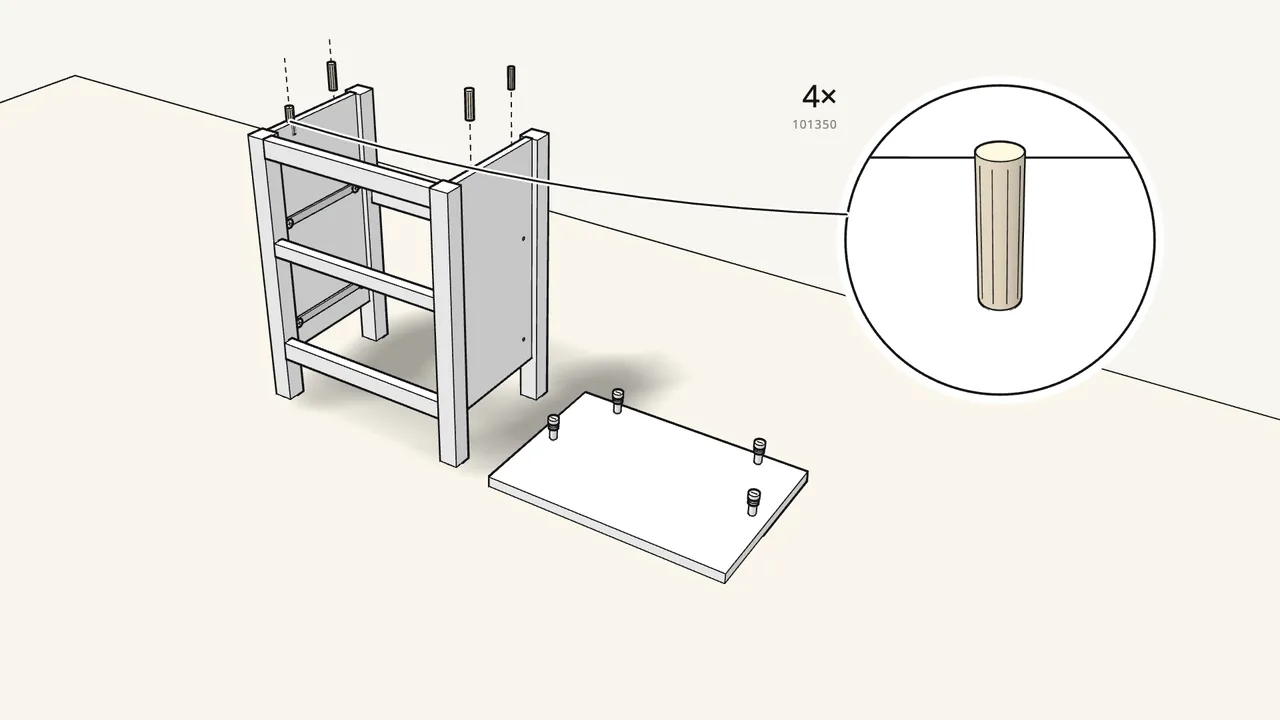
Step 11 · manual step 12
Stand the chest up. Push 4 dowels (101350) into the side panels.
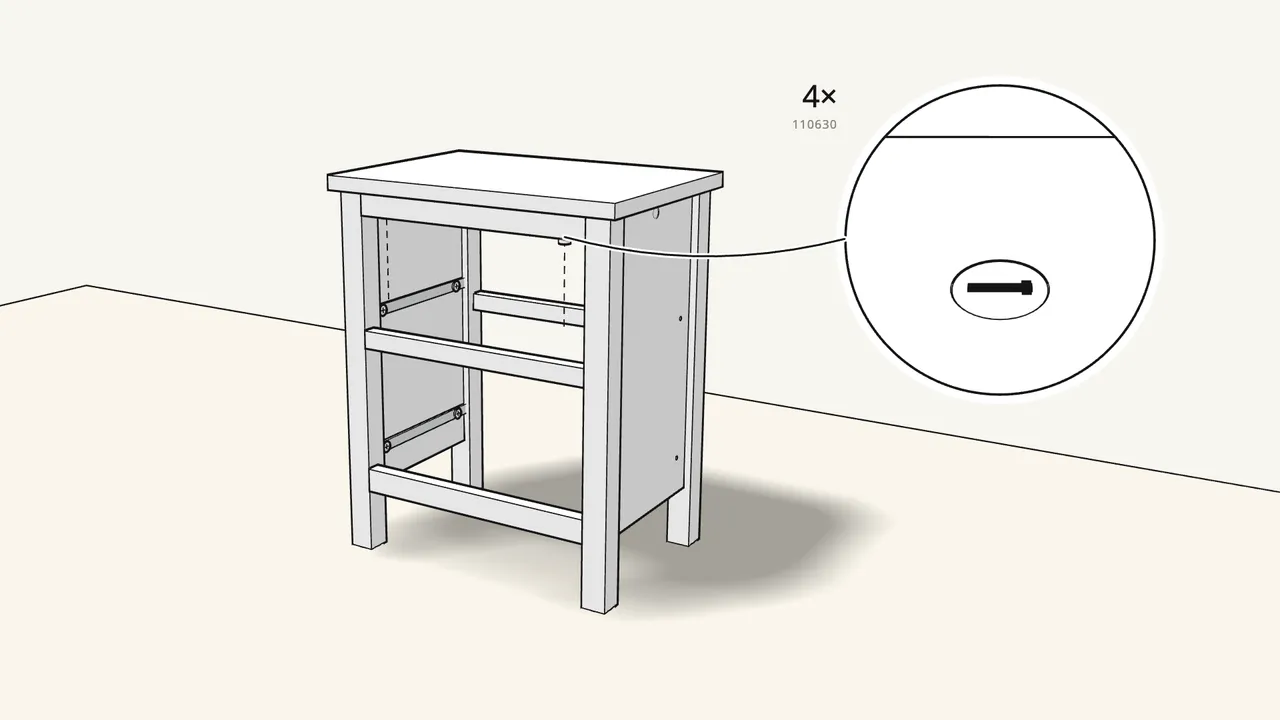
Step 12 · manual step 13
Lower the top on. Lock with 4 cam locks (110630).
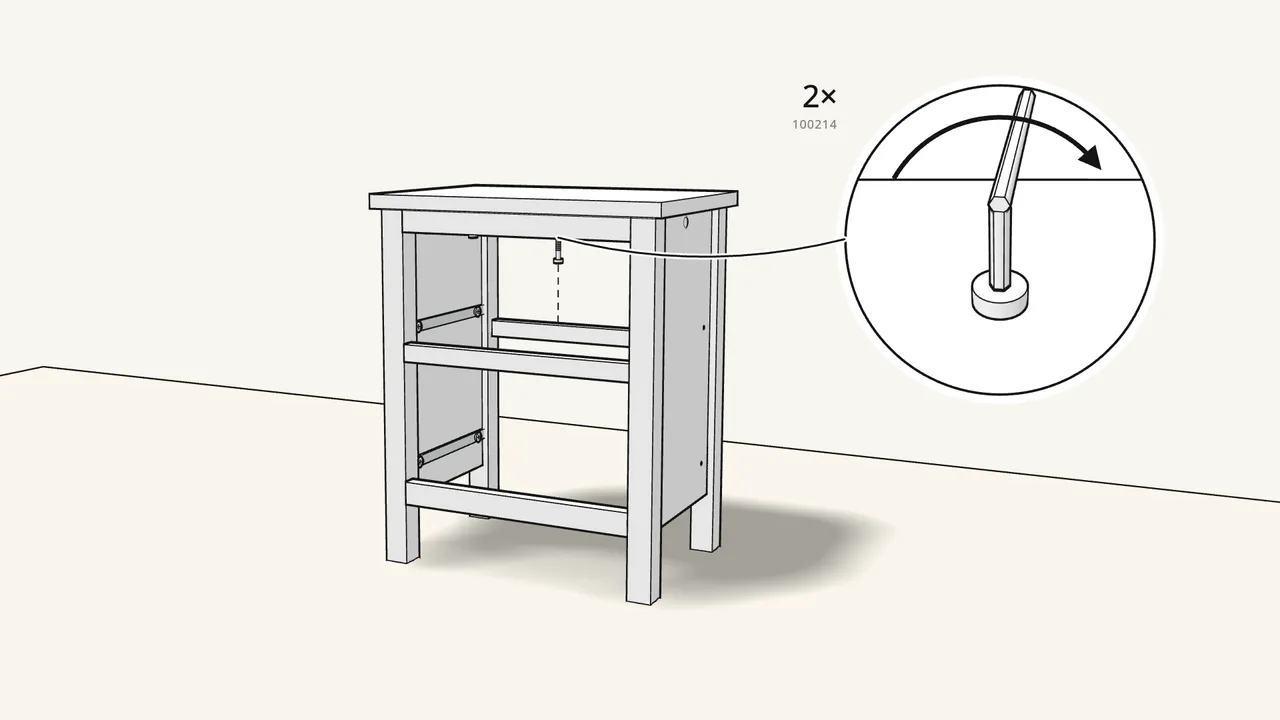
Step 13 · manual step 14
Screw 2 screws (100214) up through the top rail into the top.
Use the Allen key 100001.
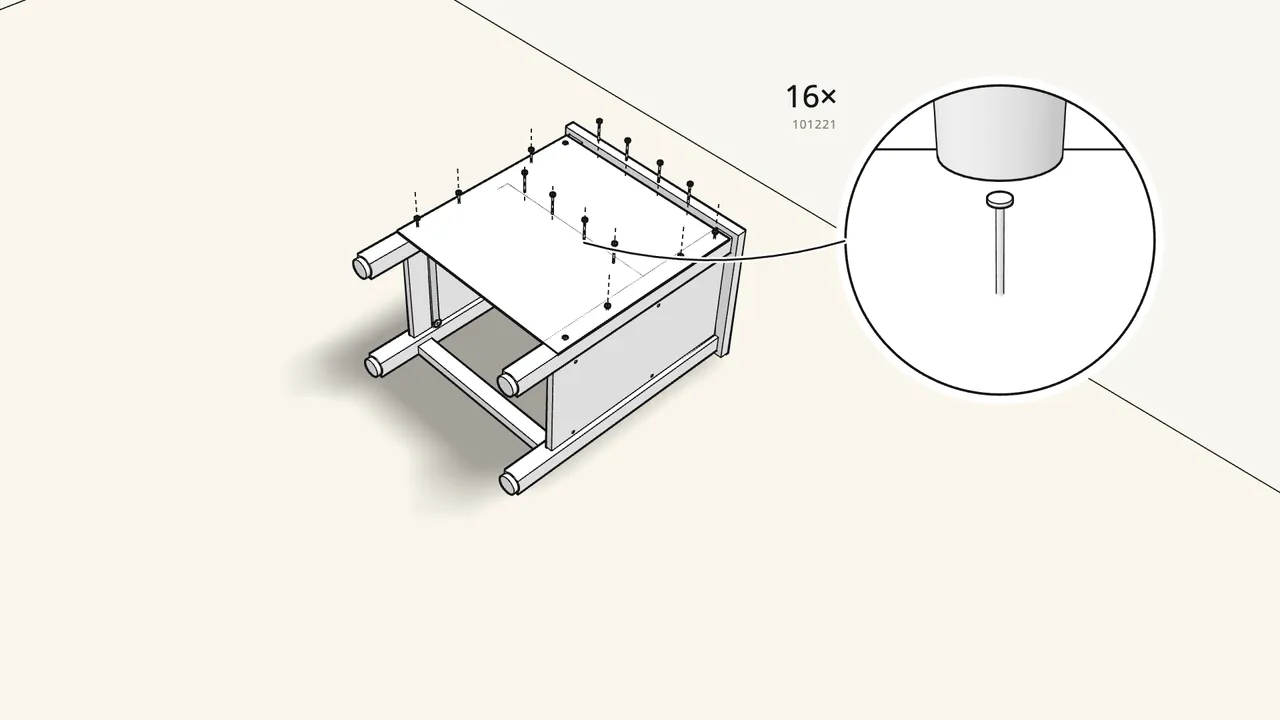
Step 14 · manual step 15–17
Lay the chest on its front. Nail on the back panel: 16 nails (101221).
Line the panel up with the edges, nail one corner, then the opposite corner, then the rest.
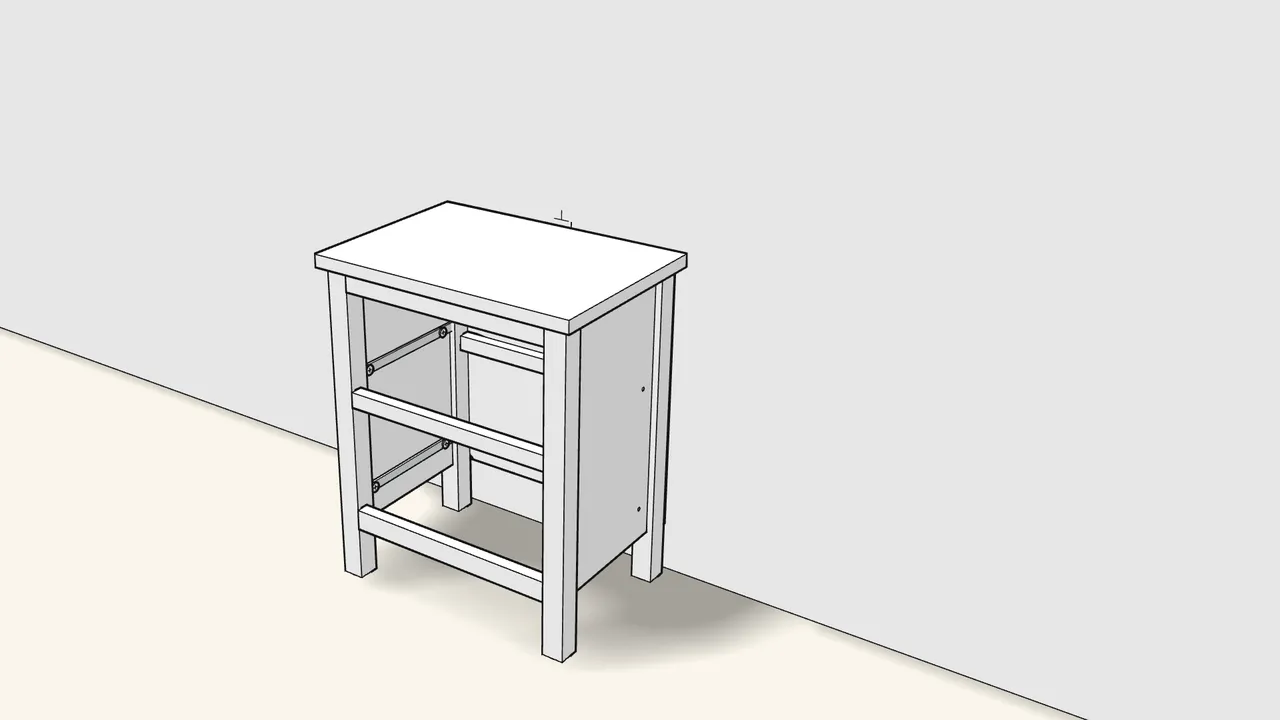
Step 15 · manual step 18–20
Mark the centre of the top on the wall, then 4 cm below it.
Drill for your wall type: Ø 8 mm with a plug, or Ø 3 mm in solid wood.
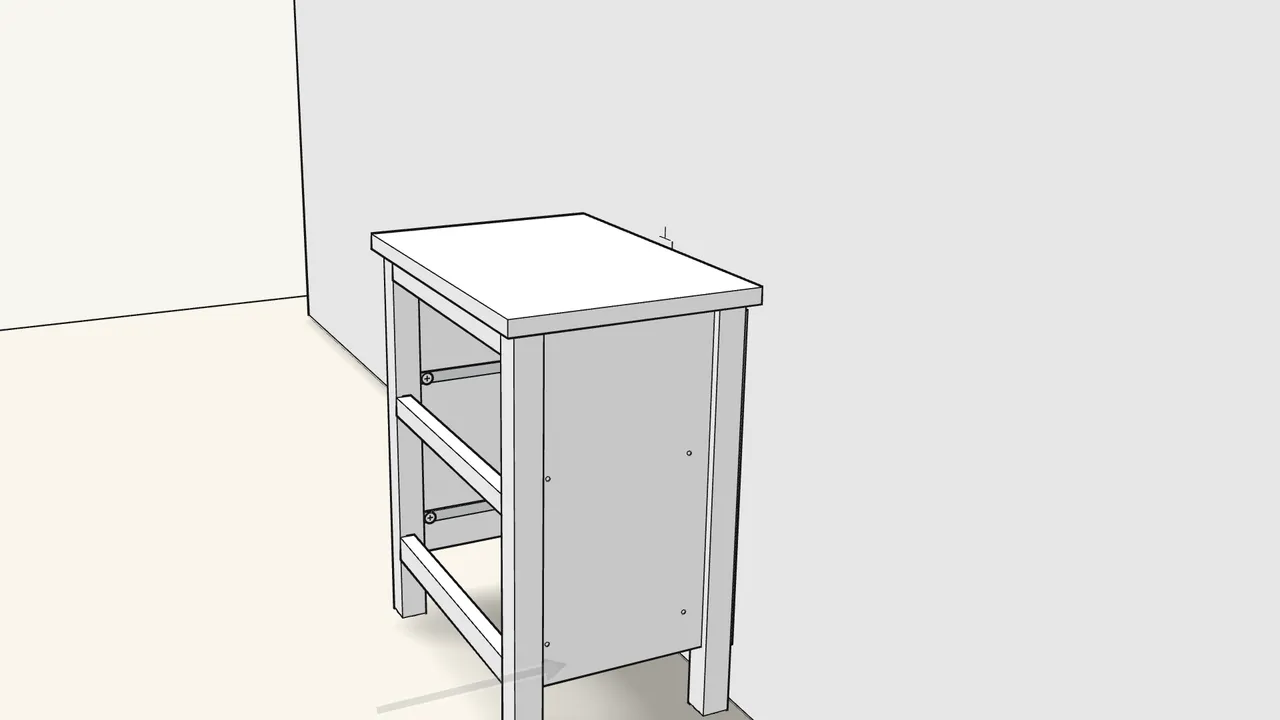
Step 16 · manual step 21–23
Screw the strap to the wall. Push the chest back and screw the strap under the top.
Wall screw 109048 and screw 109049, each with a washer 100823.
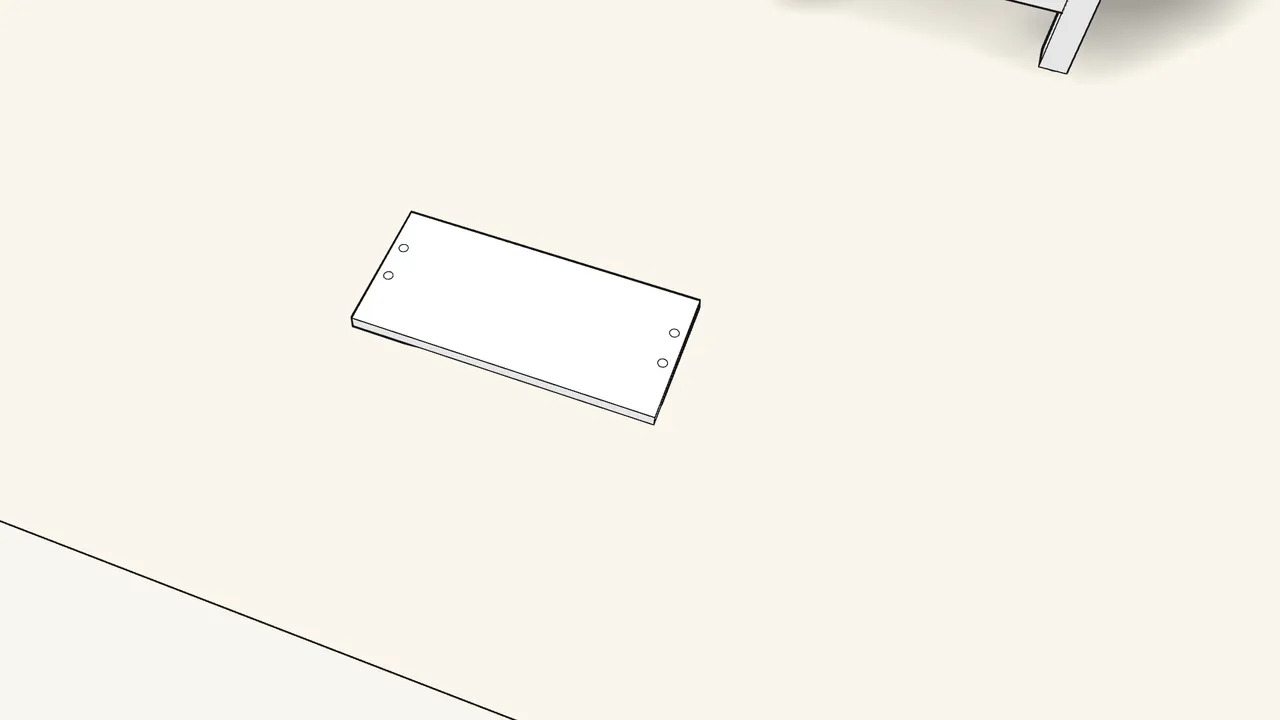
Step 17
Now the two drawers.
Both are built the same way (steps 24–31). We’ll build the upper one step by step.
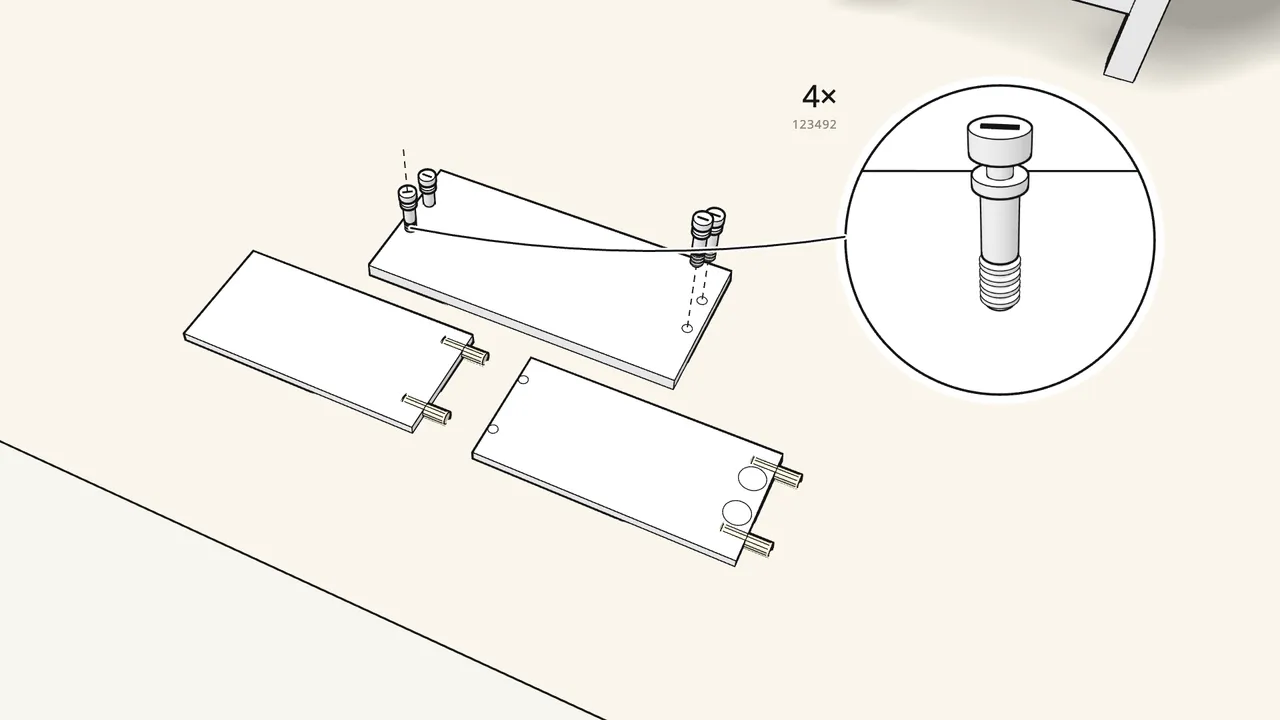
Step 18 · manual step 24–25
Sides: 4 dowels (101345). Drawer front: 4 cam bolts (123492).
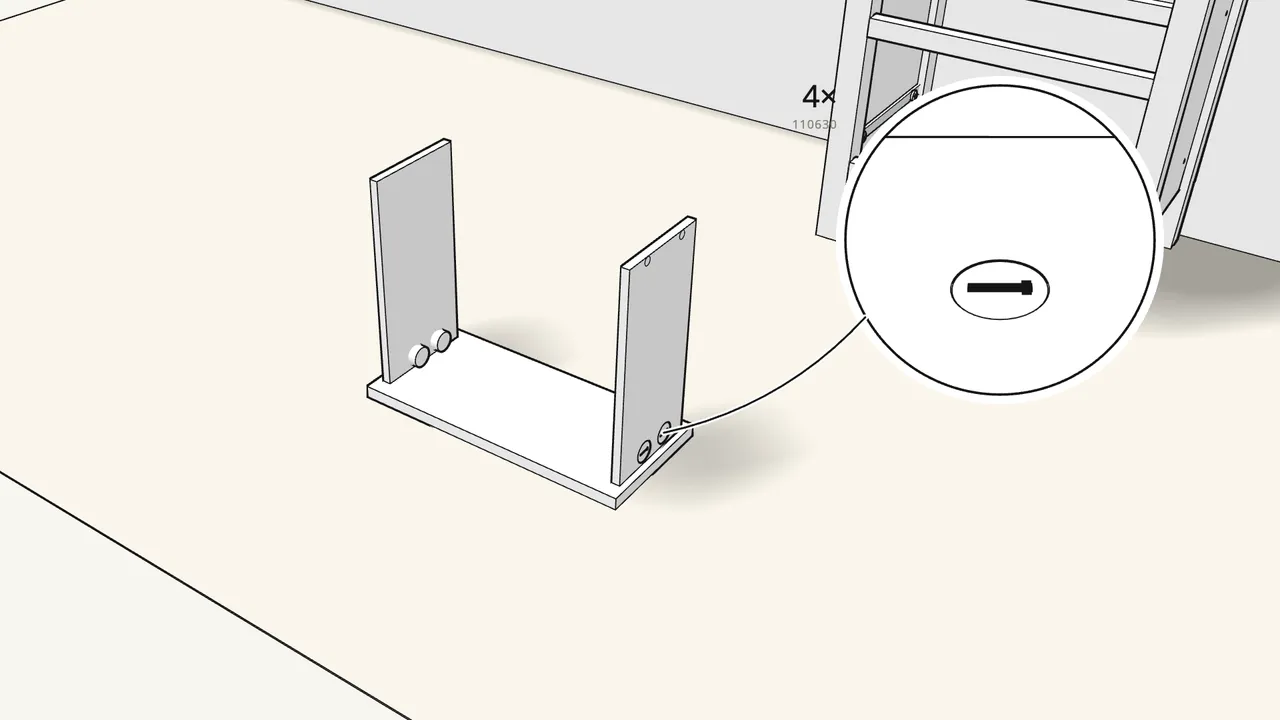
Step 19 · manual step 26–27
Stand the sides on the front. Lock with 4 cam locks (110630).
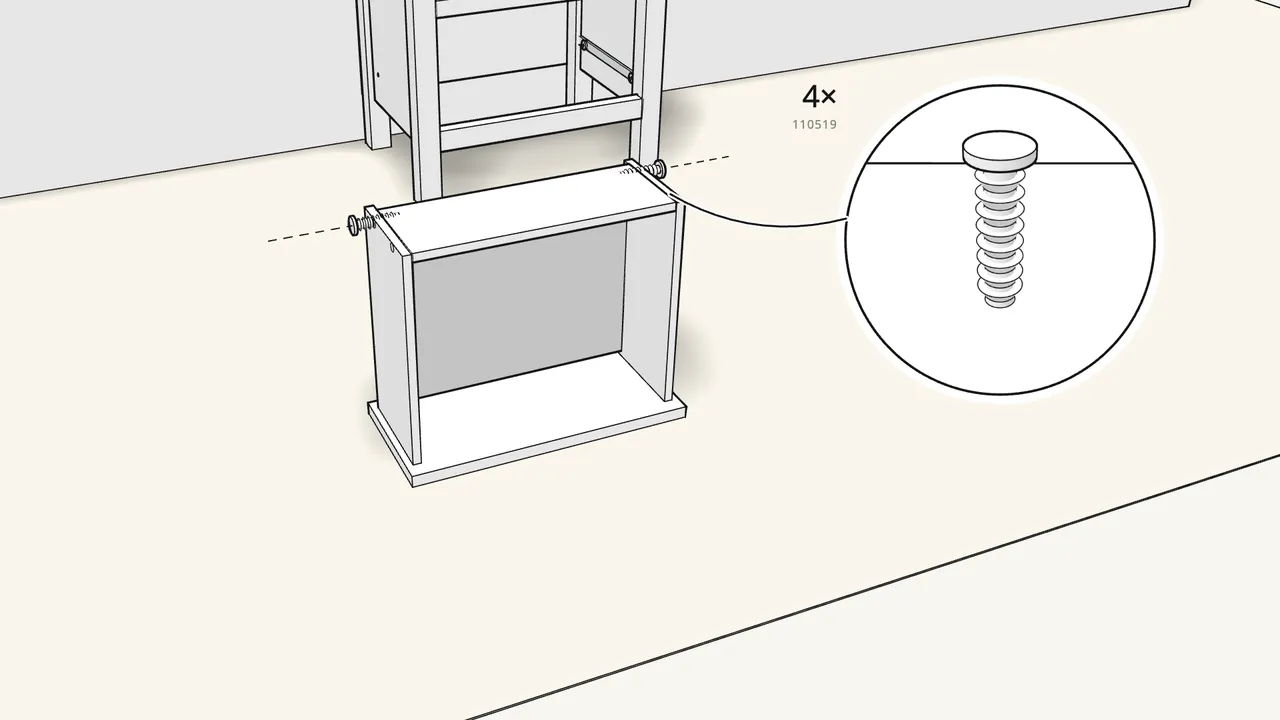
Step 20 · manual step 28–30
Slide in the bottom, add the back and tap in 4 screw-dowels.
Screw-dowels 110519, with the hammer.
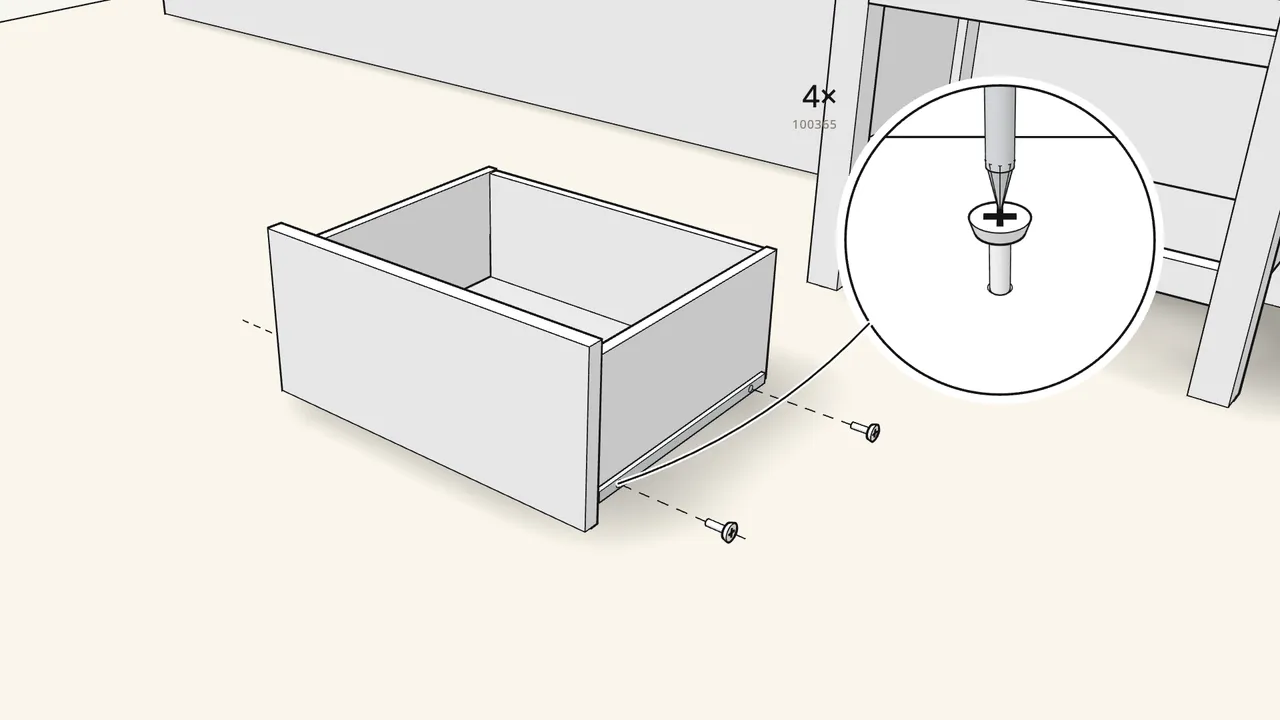
Step 21 · manual step 31
Turn it upright and screw on the 2 runners: 4 screws (100365).
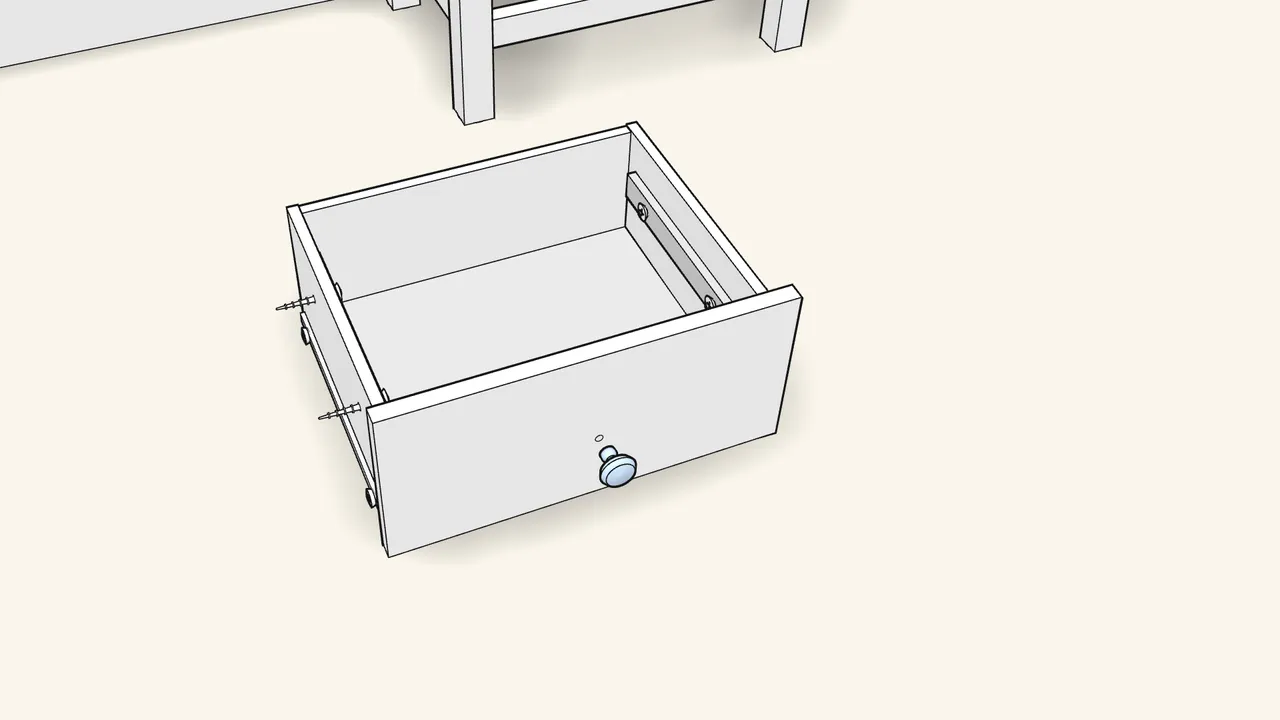
Step 22 · manual step 32–33
Screw the 2 tray strips inside (4 screws 109053). Fit the knob.
Strips flush with the top edge. Knob 117615 with screw 100413 from inside.
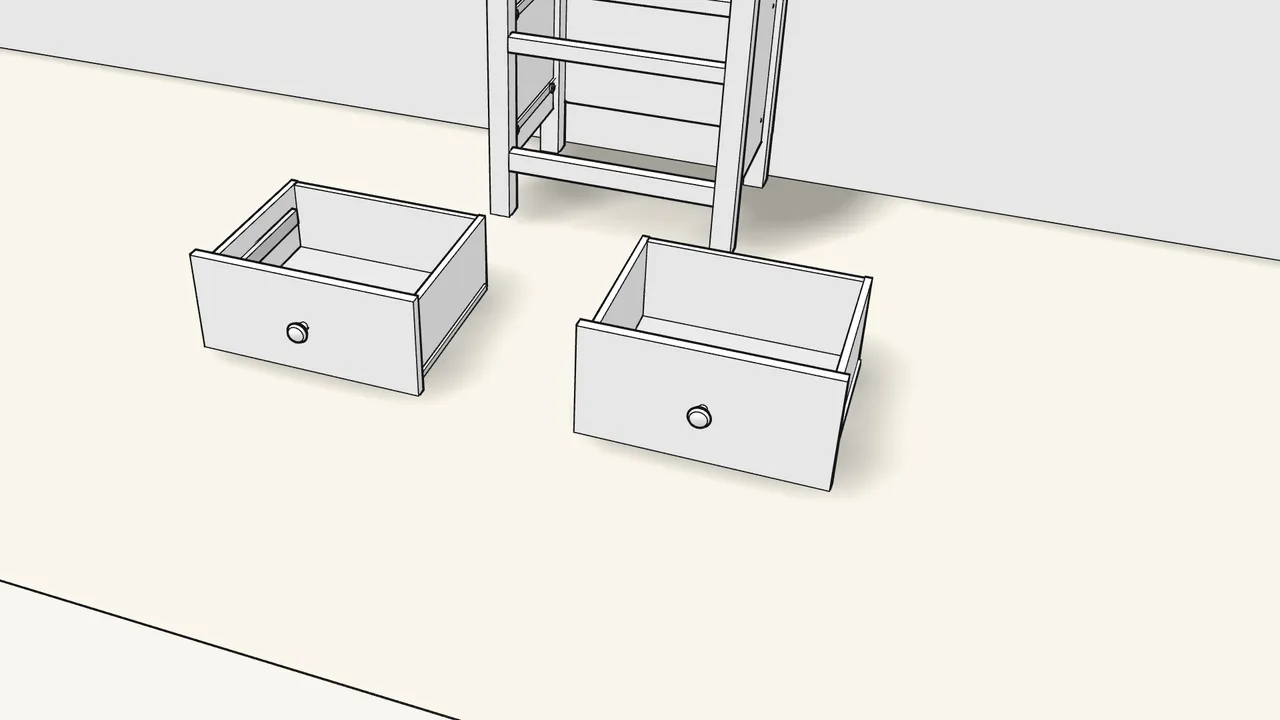
Step 23
Build the second drawer the same way, with its knob.
Only the upper drawer gets the tray strips (step 32).
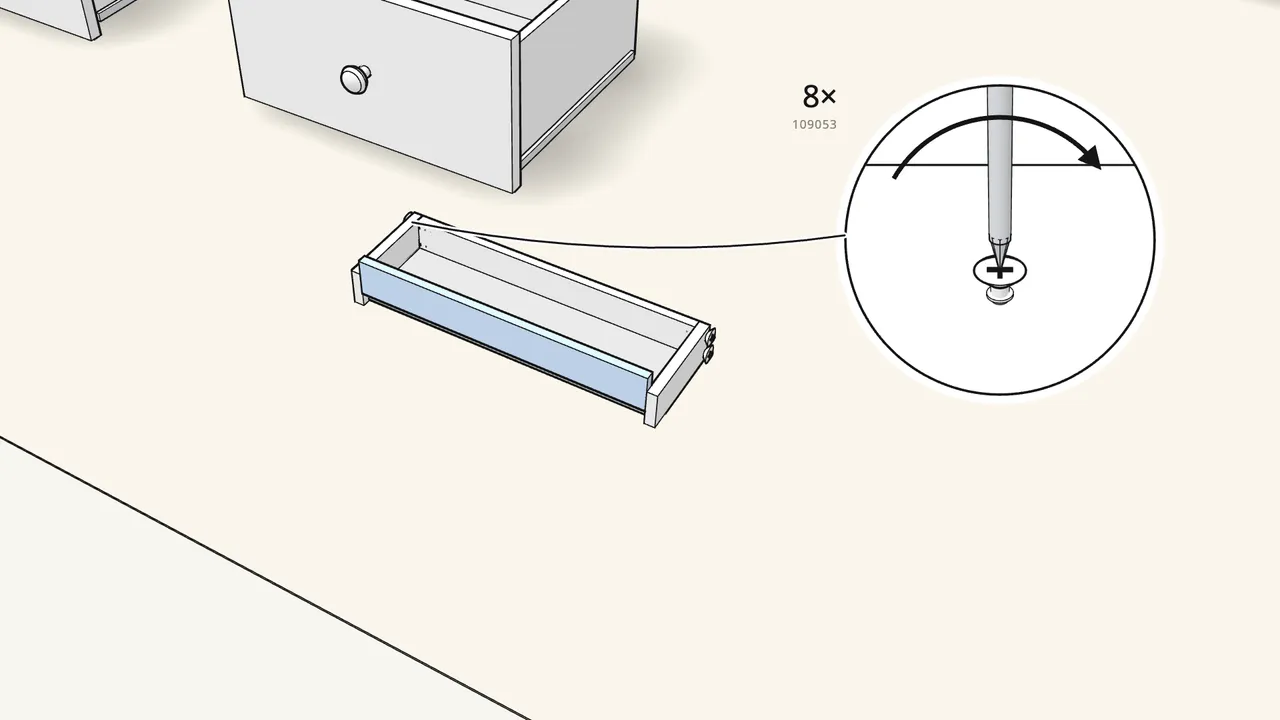
Step 24 · manual step 34–37
Tray: screw the ends to one side, slide in the bottom, add the other side.
8 screws (109053).
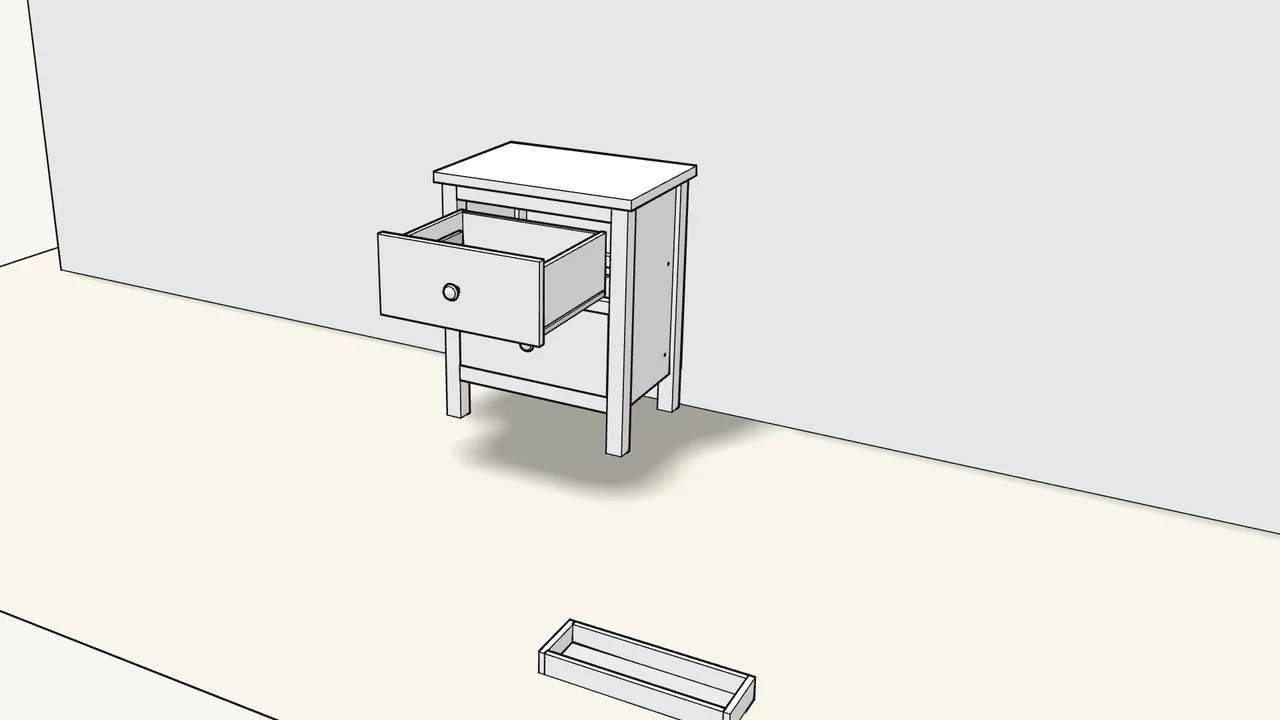
Step 25 · manual step 38
Slide the drawers in: the lower one, then the upper one.
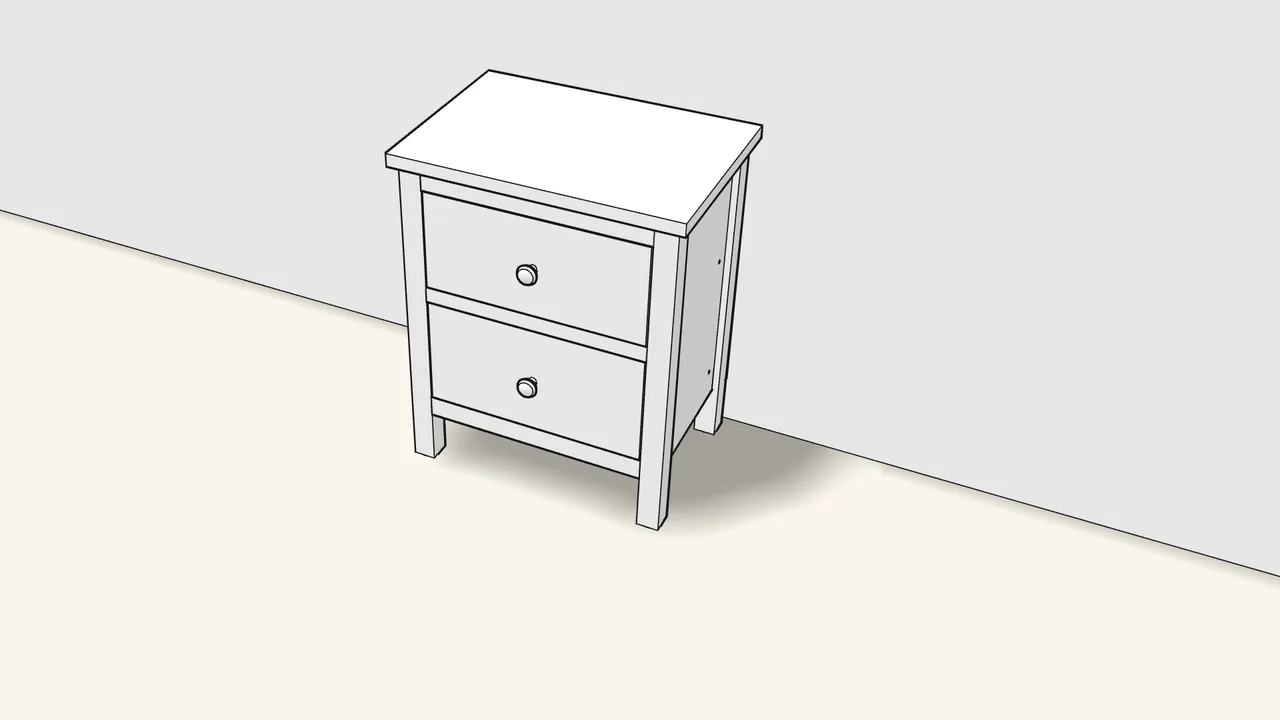
Step 26 · manual step 39
Lay the tray on the strips in the upper drawer.
Tips & safety
- Always fix the chest to the wall. Furniture can tip over. Put the heaviest things in the lowest drawer, never put a TV on it, and never let children climb or hang on it.
- Use the right wall fixing. Wall screws and plugs depend on the wall. Watch out for water pipes, cables and heating pipes when drilling.
Official instructions
This guide follows IKEA's official assembly instructions (AA-2173989-4). Keep the printed manual to hand — if anything differs, the manual is right.