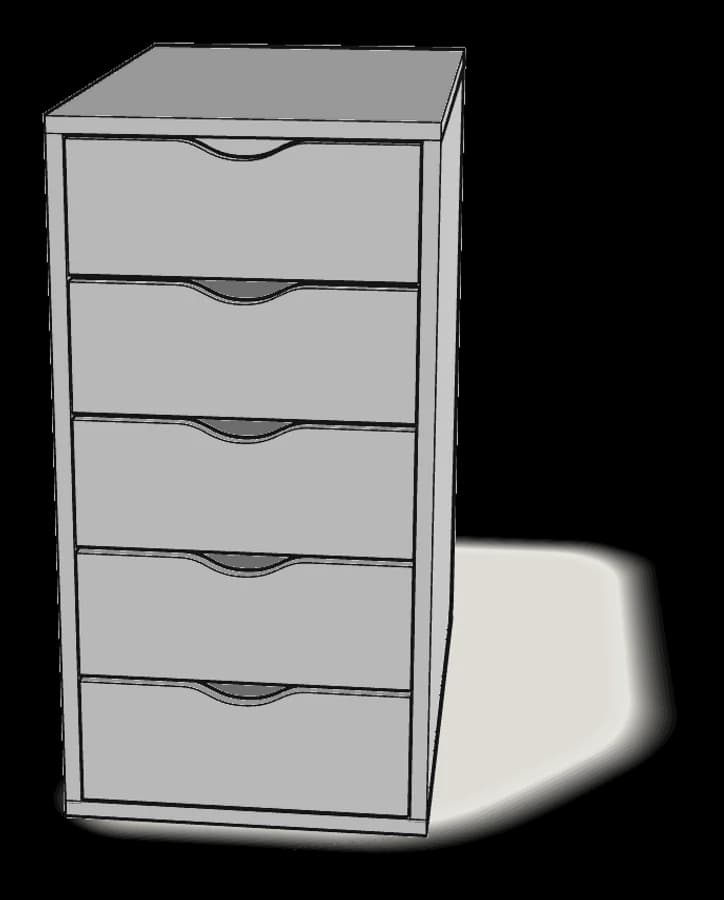
IKEA · Dressers & Drawer Units
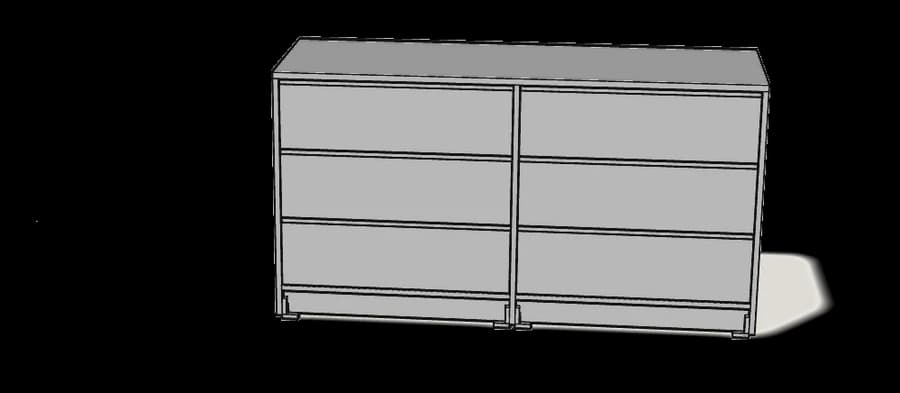
How to Assemble IKEA STORKLINTA 6-Drawer Dresser
Step-by-step IKEA STORKLINTA 6-drawer dresser assembly: 27 illustrated steps, an animated video, the hardware list and the tools you need — following the official instructions (AA-2413736-7).
- 27 illustrated steps
- 45 steps in the manual
- 3:39 video
- 140×48×75 cm
What you need
Tools
- Flat-head screwdriver
- Phillips screwdriver
- Hammer
- Drill (for wall fixing)
You’ll need: flat-head and Phillips screwdrivers, a hammer, a pencil and a drill.
Hardware in the box
| Part no. (as printed in the manual) | Qty |
|---|---|
| 118331 | 38× |
| 119252 | 12× |
| 110126 | 2× |
| 120076 | 48× |
| 101345 | 38× |
| 102553 | 4× |
| 105248 | 8× |
| 146114 | 54× |
| 151931 | 12× |
| 151707 | 7× |
| 151708 | 7× |
| 10093081 | 6× |
| 10093082 | 6× |
| 145718 | 24× |
| 10040242 | 6× |
| 109572 | 2× |
| 10087223 | 2× |
| 10102070 | 2× |
Step-by-step assembly
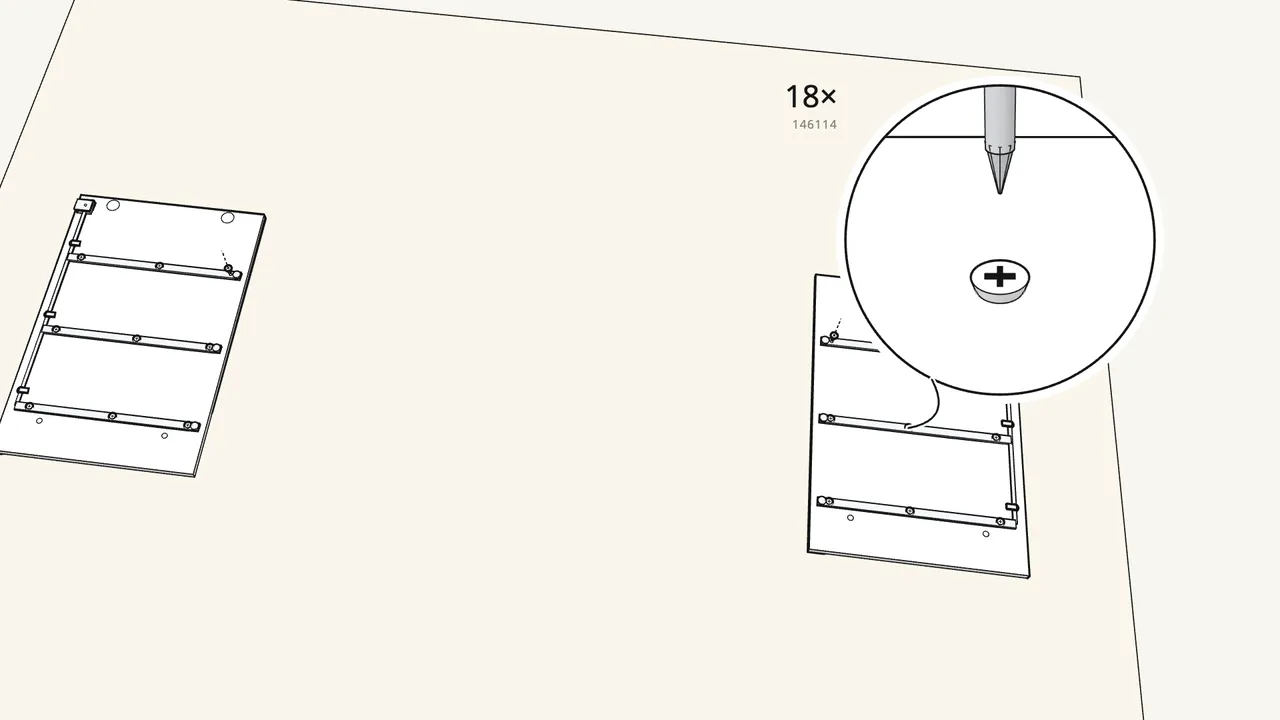
Step 1 · manual step 1–2
Screw the runners onto the two side panels — 18 screws (146114).
CL runners on one side, CR on the other. Then turn the 6 grey latches as shown.
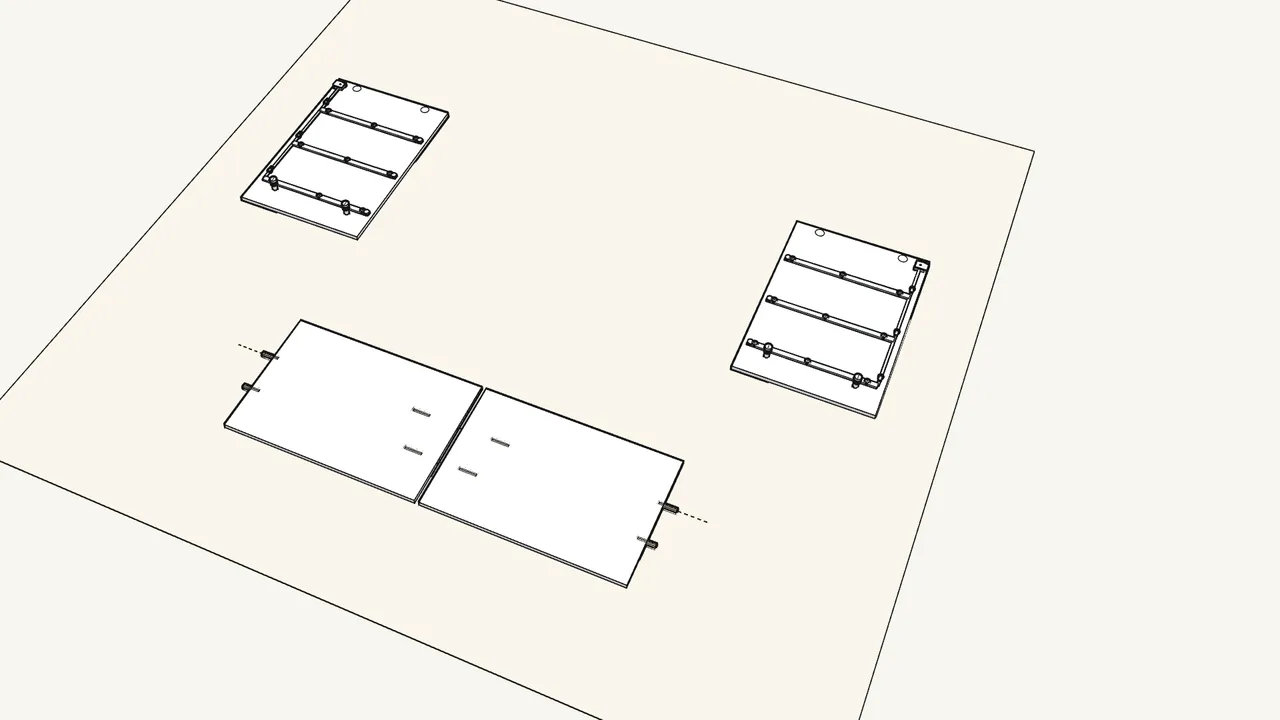
Step 2 · manual step 3–4
Screw 4 cam bolts into the sides; push 8 dowels into the bottom panels.
2 bolts per side. 2 dowels in each end of both bottom panels.
Step 3 · manual step 5–6
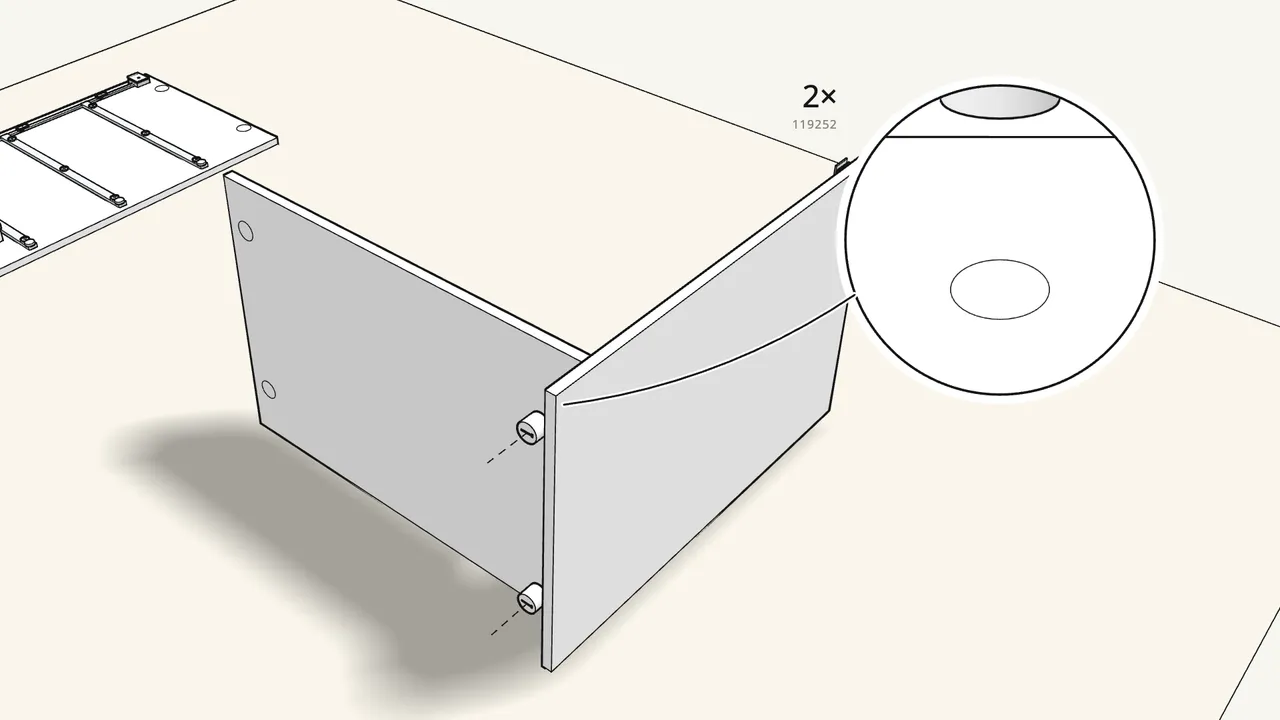
Stand one side on its front edge and push a bottom panel onto it.
Lock with 2 cam locks (119252/119250), turned clockwise.
Step 4 · manual step 7–8
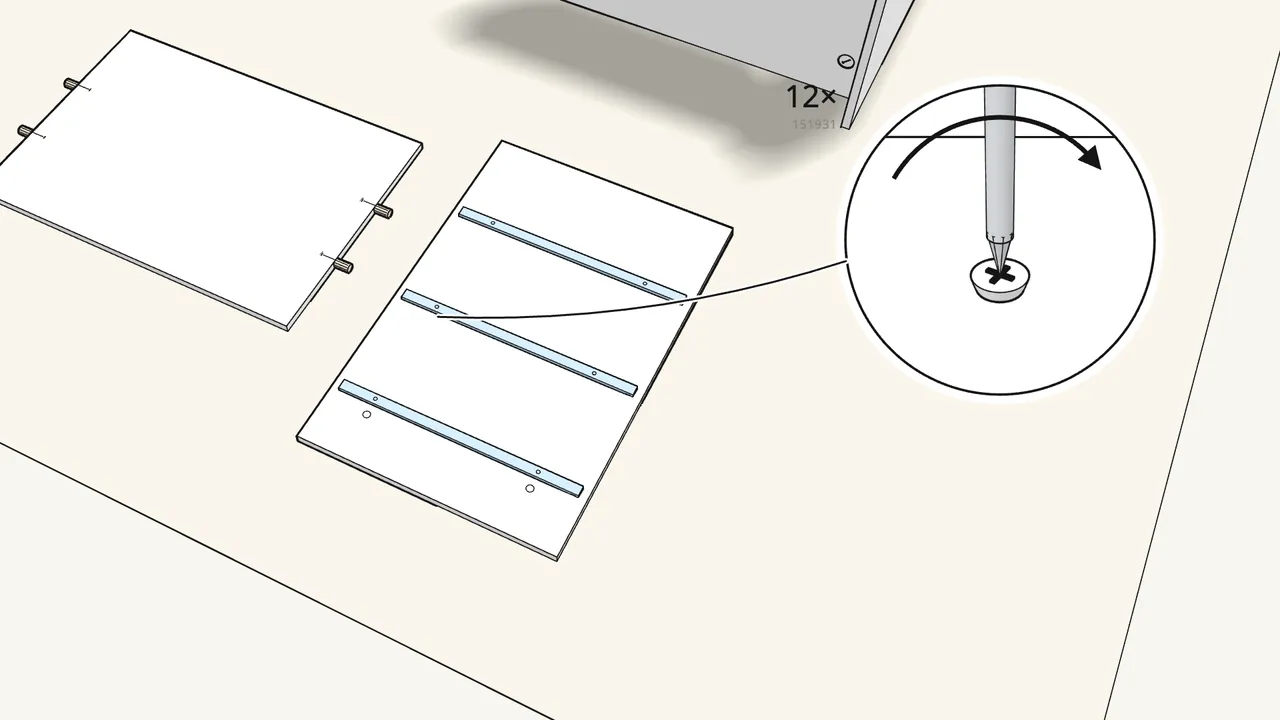
Centre panel: fix the CL runners with 6 screws (151931), turn it over, fix the CR ones.
Use the shorter 151931 screws from bag A here — not 146114.
Step 5 · manual step 9–11
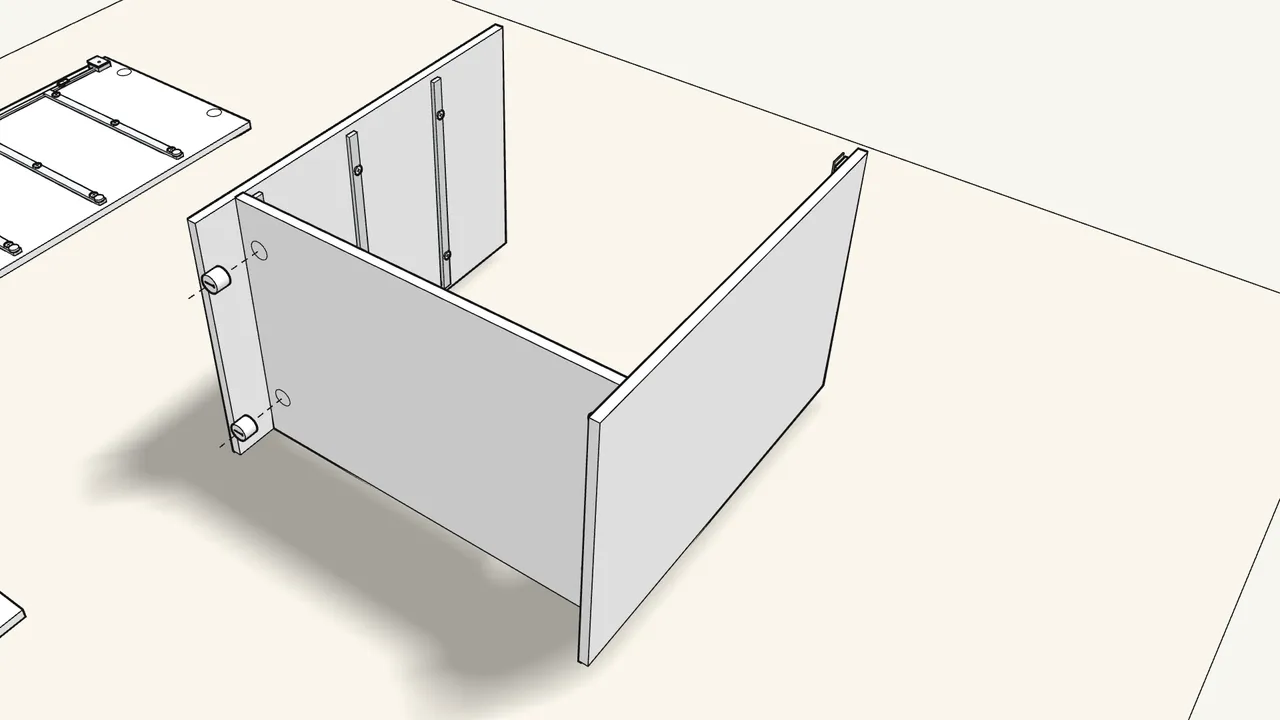
Add 2 cam bolts to the centre panel and fit it to the bottom panel.
Lock with 2 cam locks (119252/119250).
Step 6 · manual step 12–14
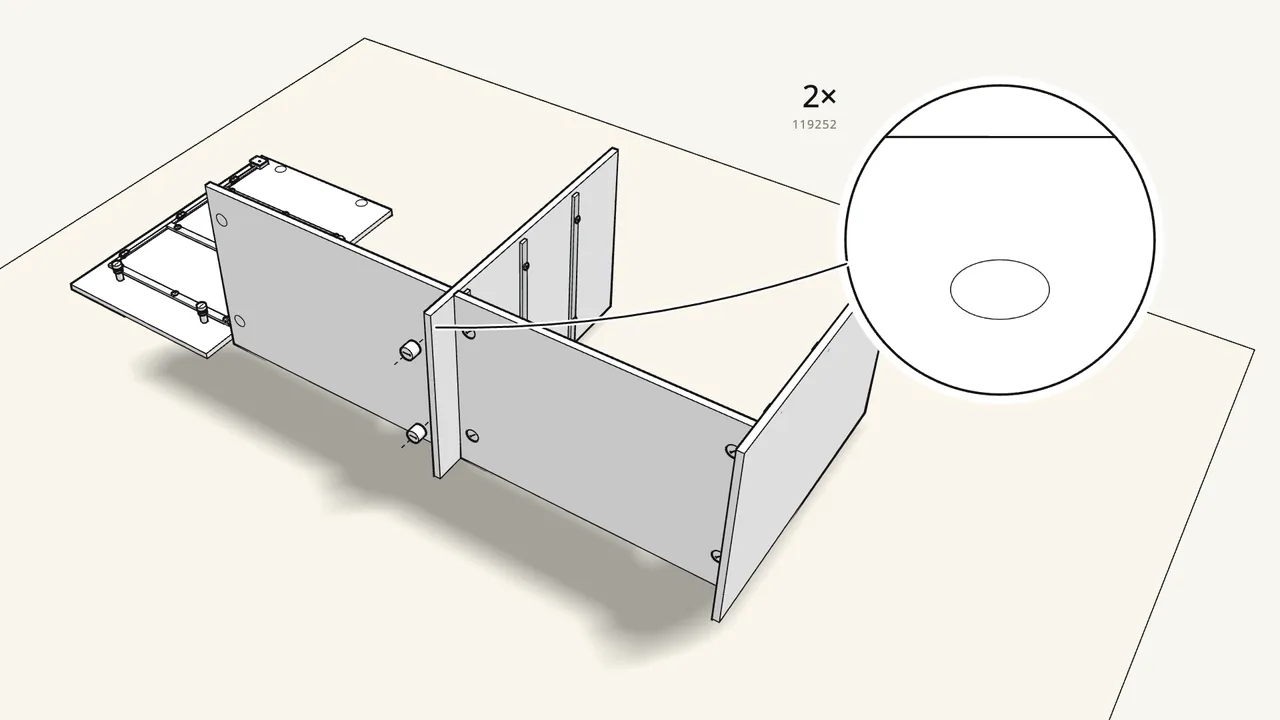
Add 2 more cam bolts, then push on the second bottom panel.
Lock it with 2 cam locks (119252/119250).
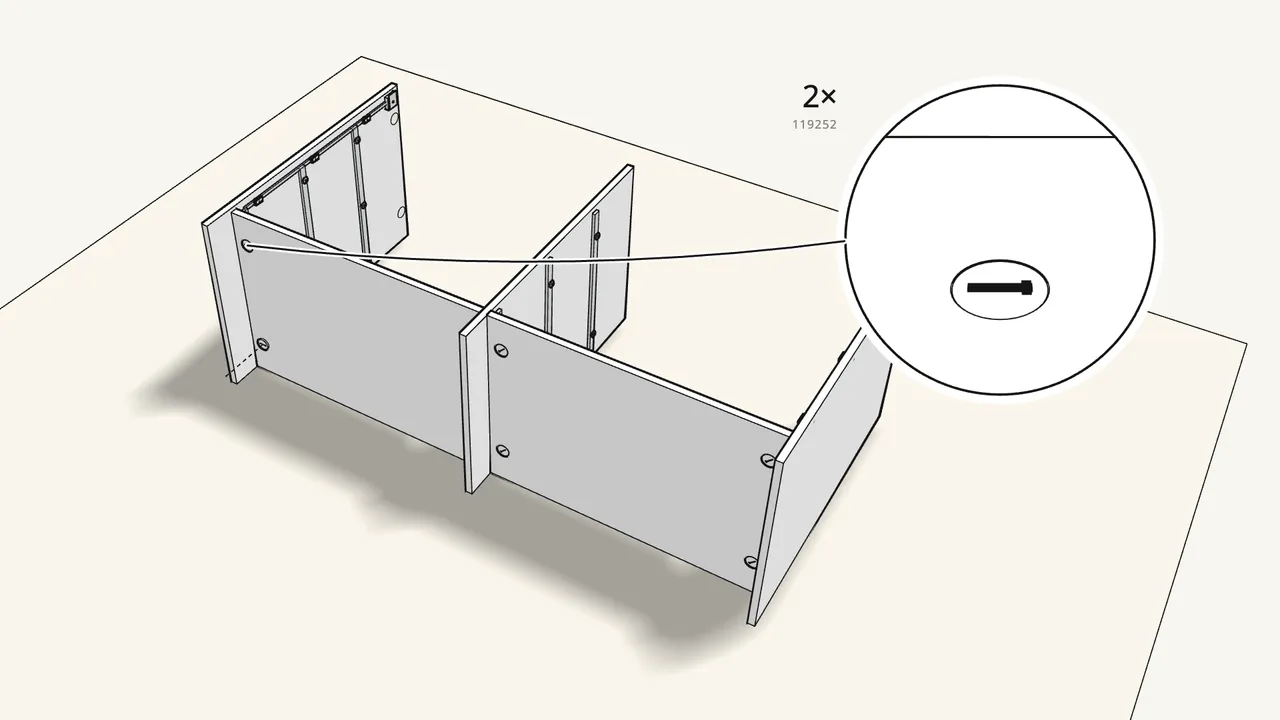
Step 7 · manual step 15–16
Fit the second side panel and lock it with 2 cam locks.
Cam locks 119252/119250, turned clockwise.
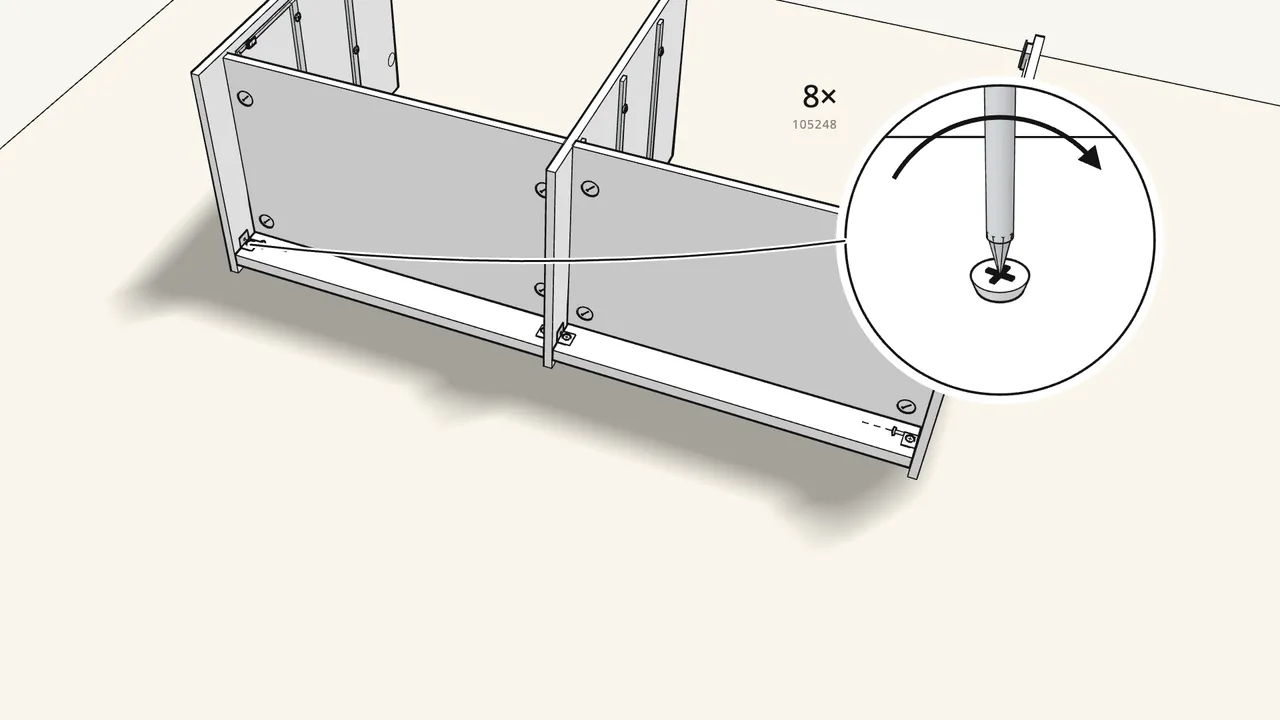
Step 8 · manual step 17–18
Screw 4 brackets (102553) onto the 2 plinth rails, then fix the rails.
8 screws (105248) in total: 4 into the rails, 4 into the panels.
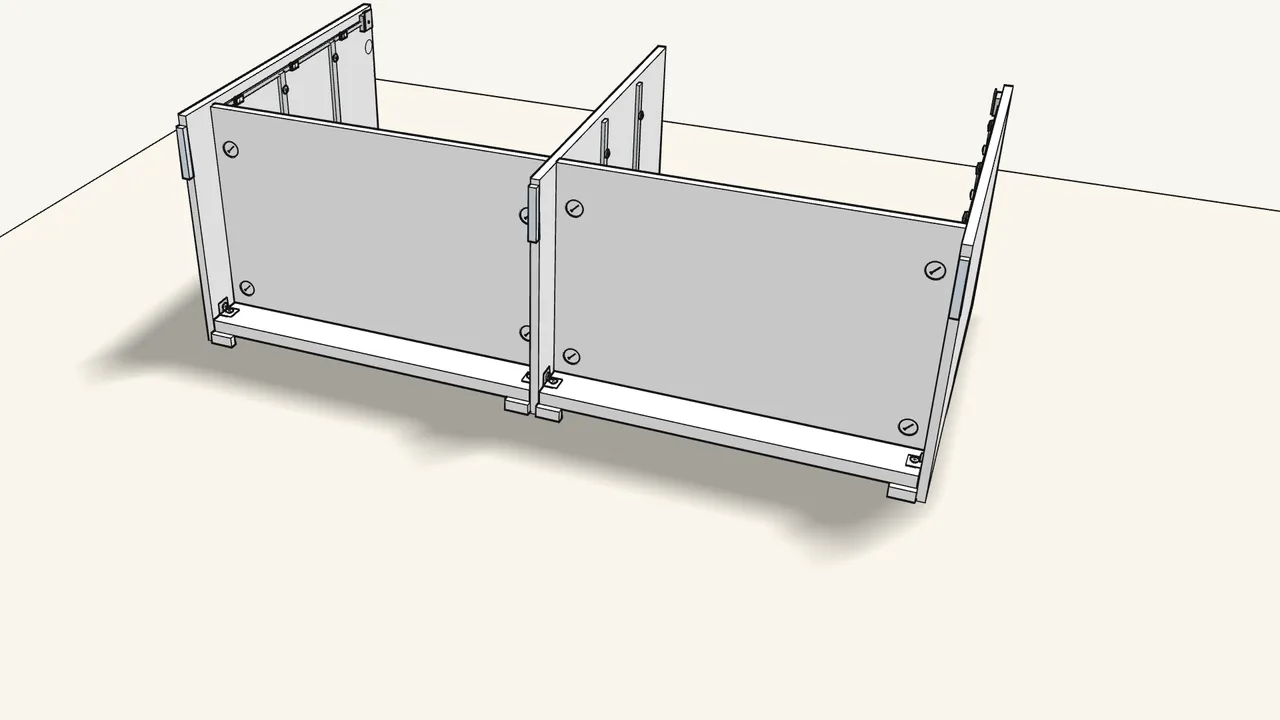
Step 9 · manual step 19–20
Press in the 4 L-shaped feet (10101849) and 3 straight ones (158568).
L-shaped at the plinth corners, straight ones on the other edge of each panel.
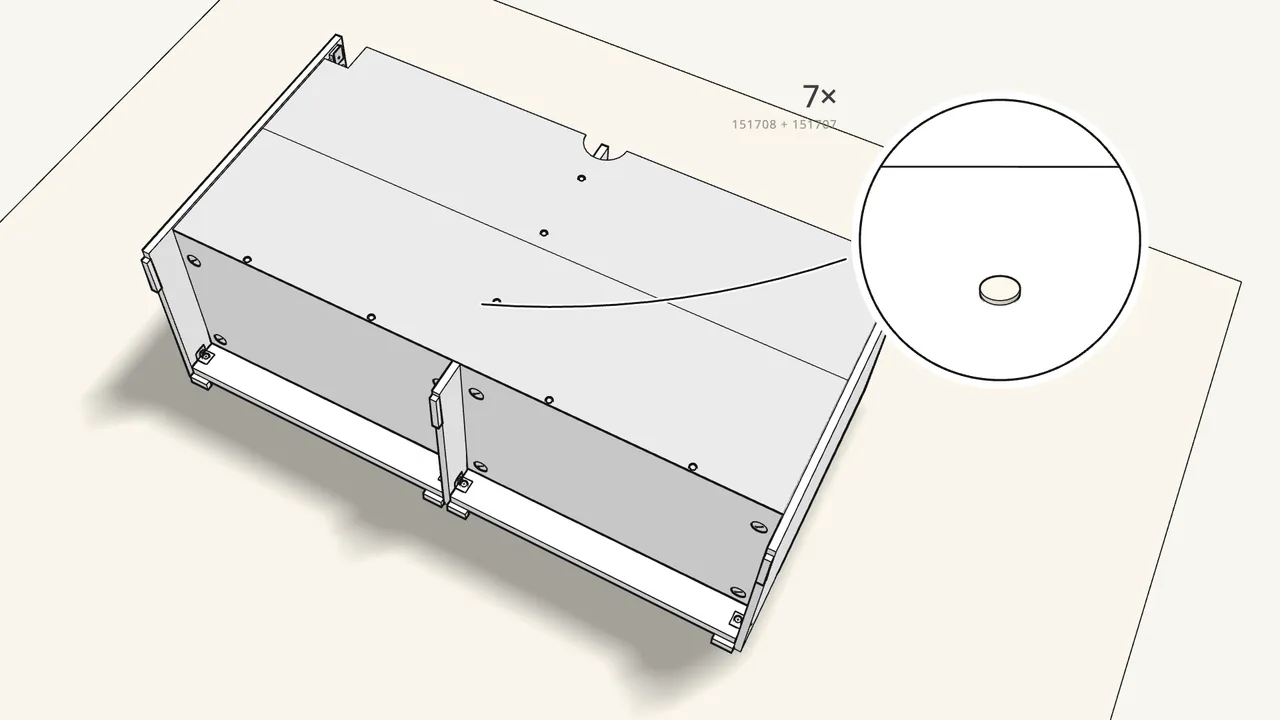
Step 10 · manual step 21–23
Slide in the back panel; fix it with 7 plastic rivets and 4 clips.
Rivet 151708, then press in its pin 151707. Clip 10093081, then its insert 10093082.
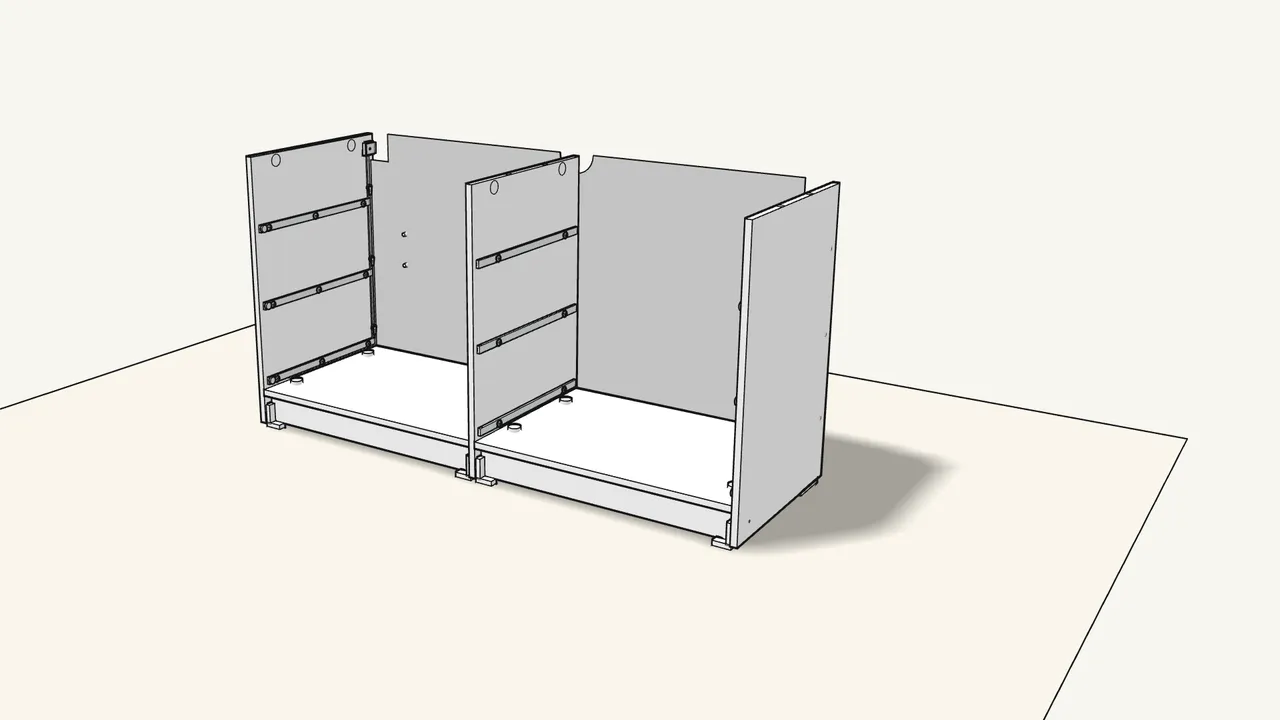
Step 11 · manual step 24
With two people, turn the unit upright.
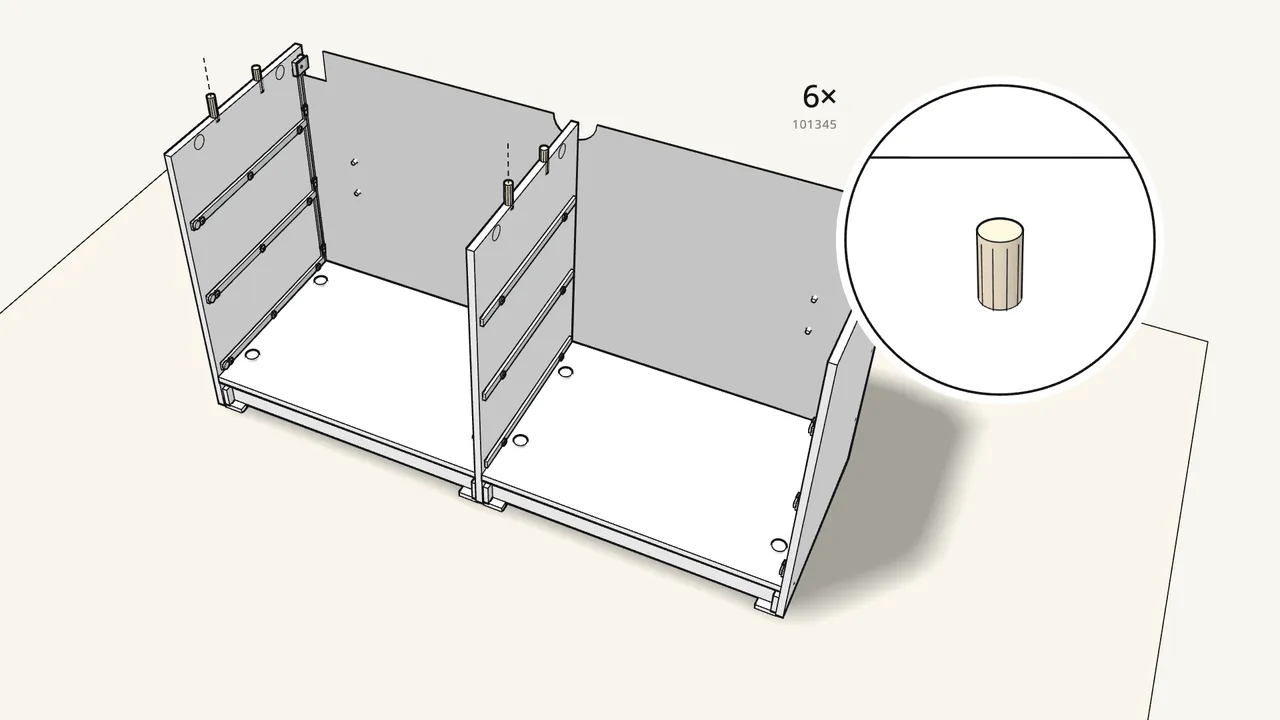
Step 12 · manual step 24
Push 6 dowels into the top edges.
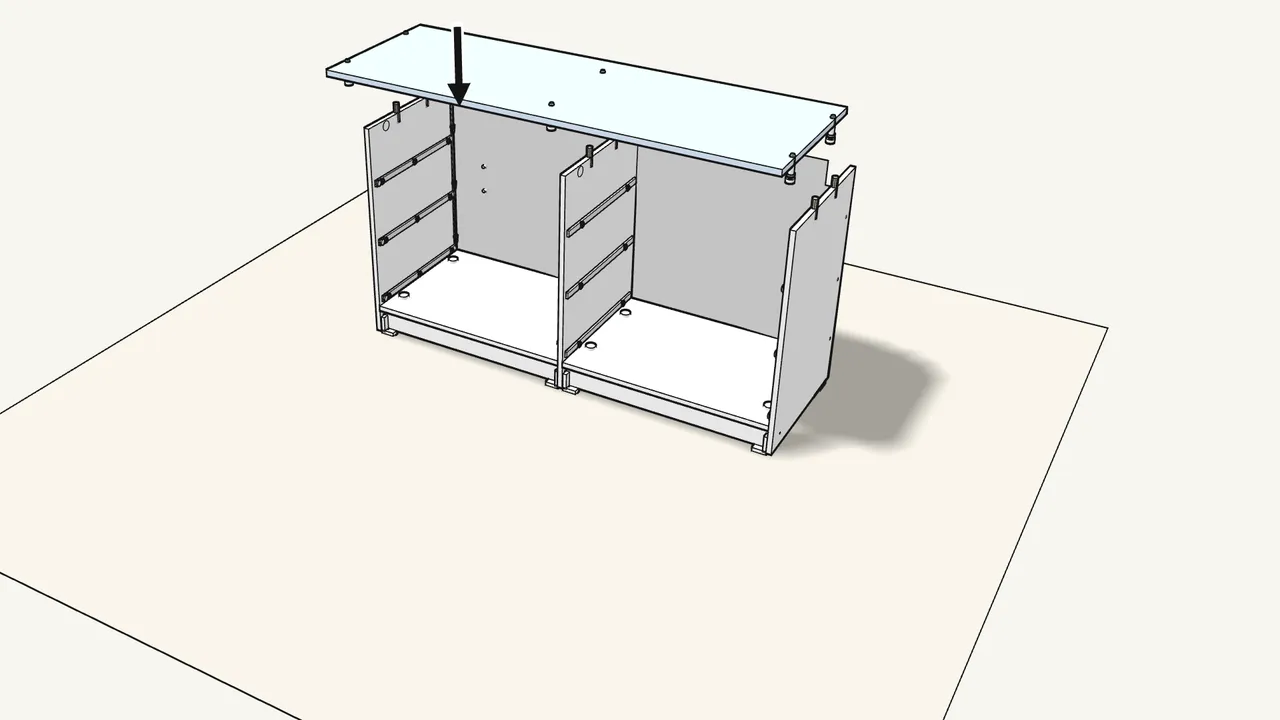
Step 13 · manual step 25–26
Screw 6 cam bolts into the top panel, then lower it into place.
Make sure the back panel goes into the groove in the top.
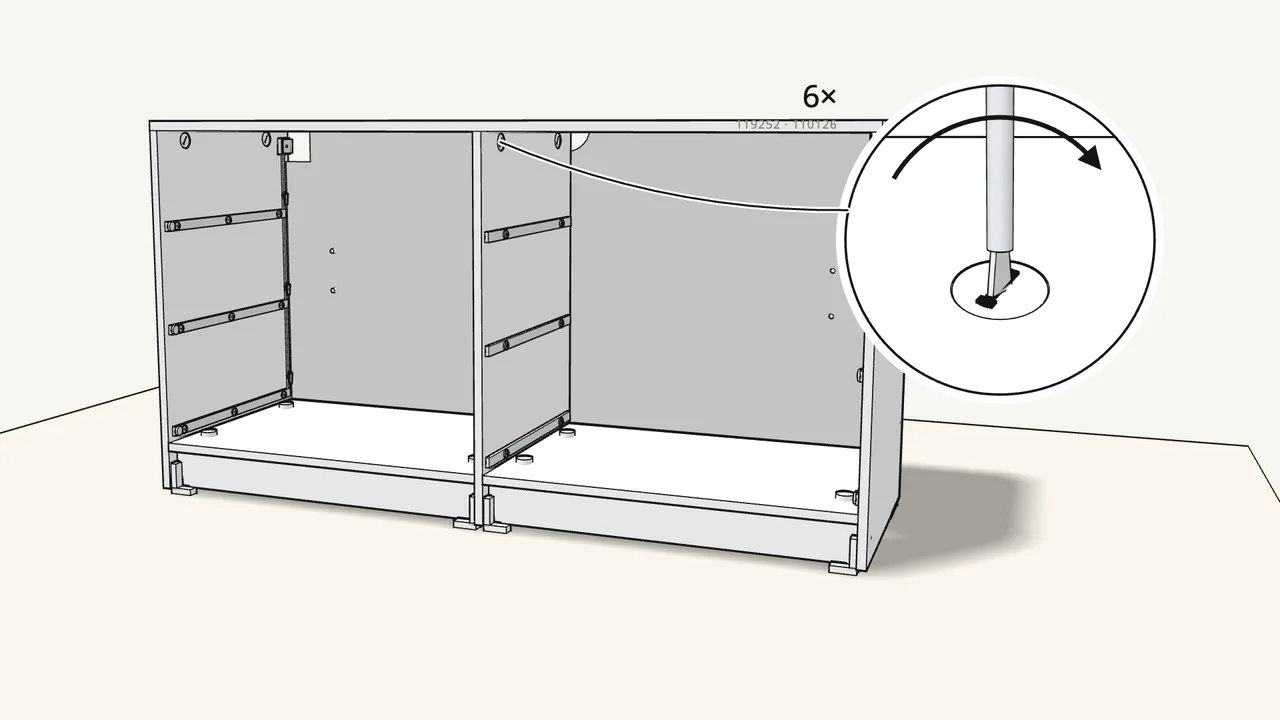
Step 14 · manual step 27–28
Lock the top: 4 cam locks in the sides, 2 in the centre panel.
Sides: 119252/119250. Centre panel: 110126. Turn clockwise.
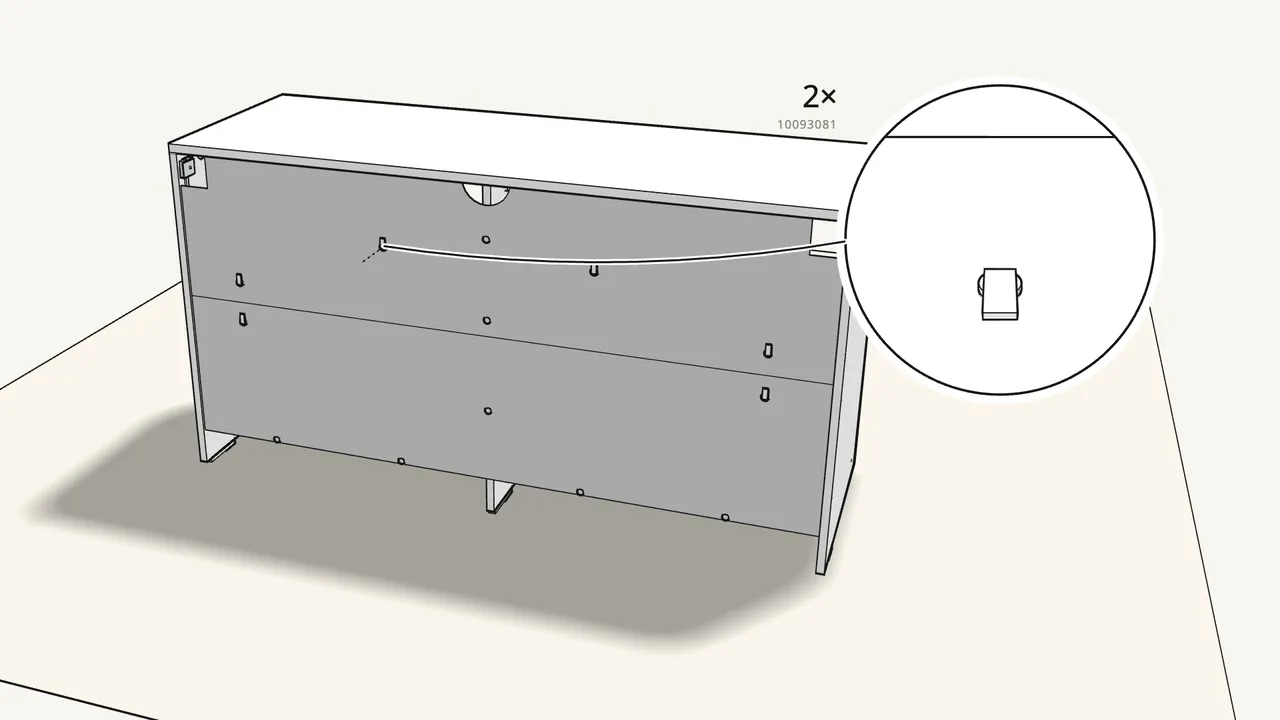
Step 15 · manual step 29
Fit the last 2 clips to the back panel.
Clip 10093081 + insert 10093082.
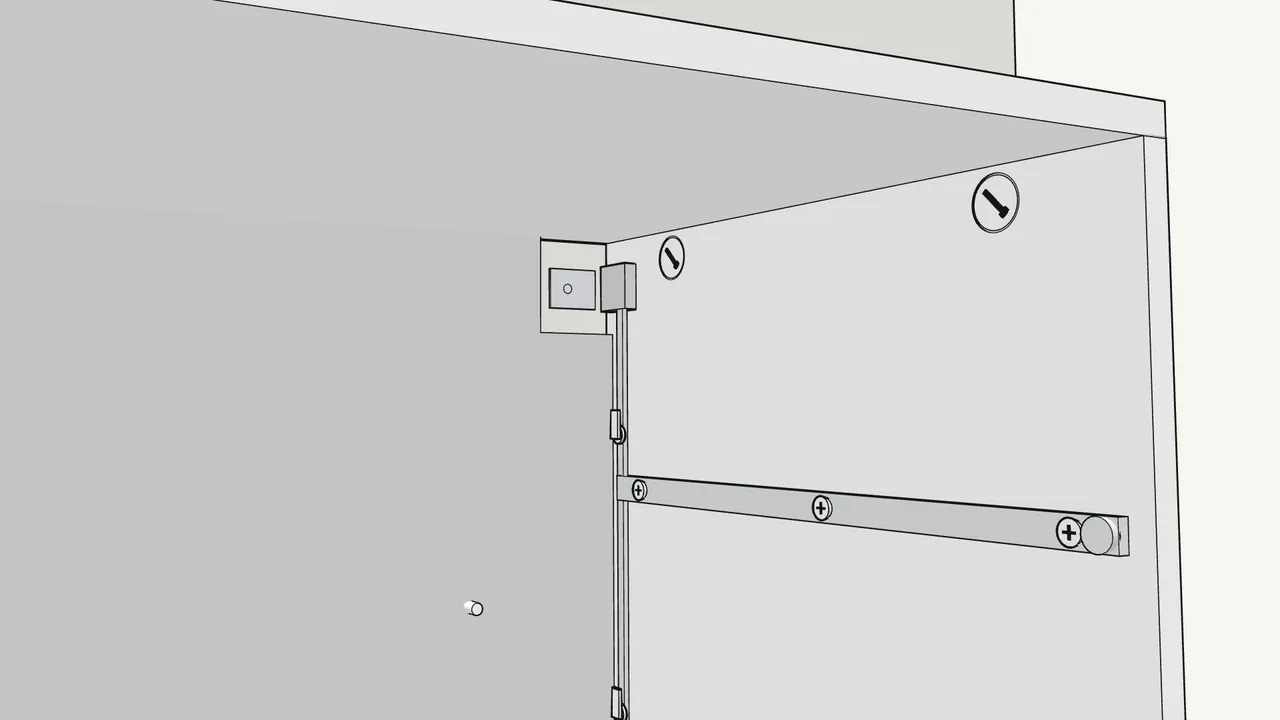
Step 16 · manual step 30
Wall fixing: swing out the 2 anchor fittings.
They sit at the top back corners, inside the side panels.
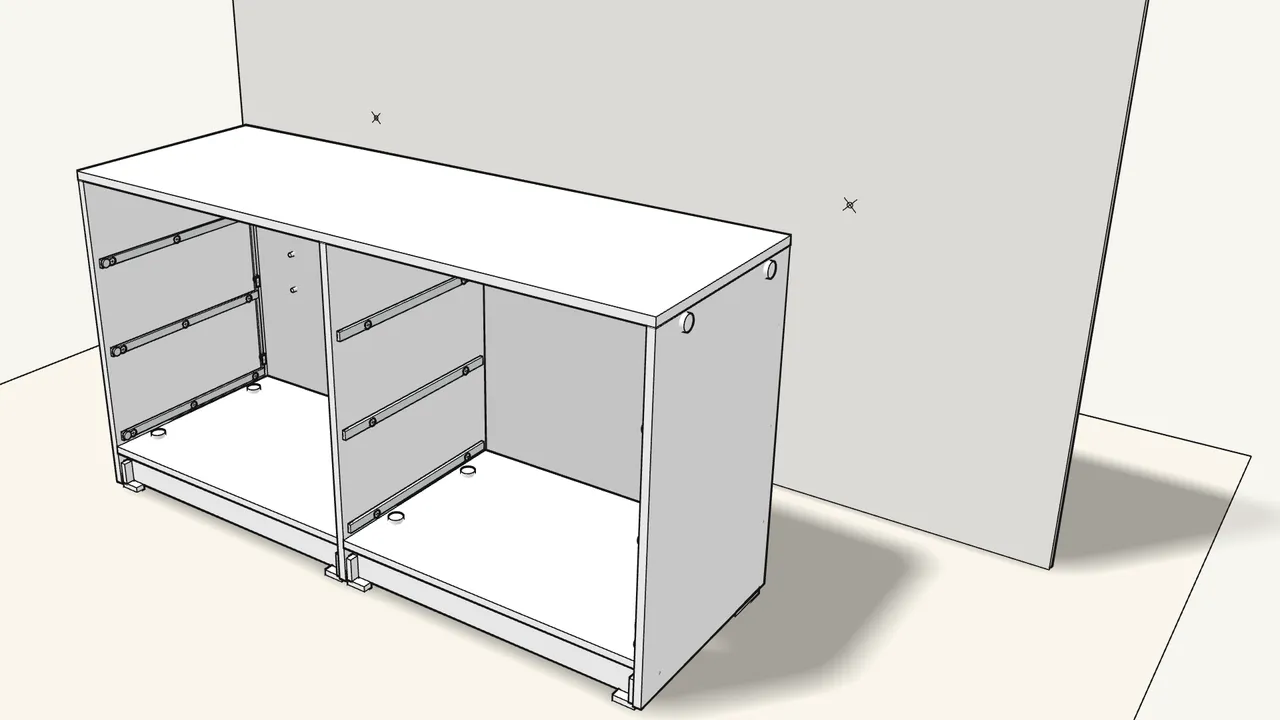
Step 17 · manual step 31
Push the dresser to the wall, mark the holes, then move it away.
Mark through the fittings with a pencil.
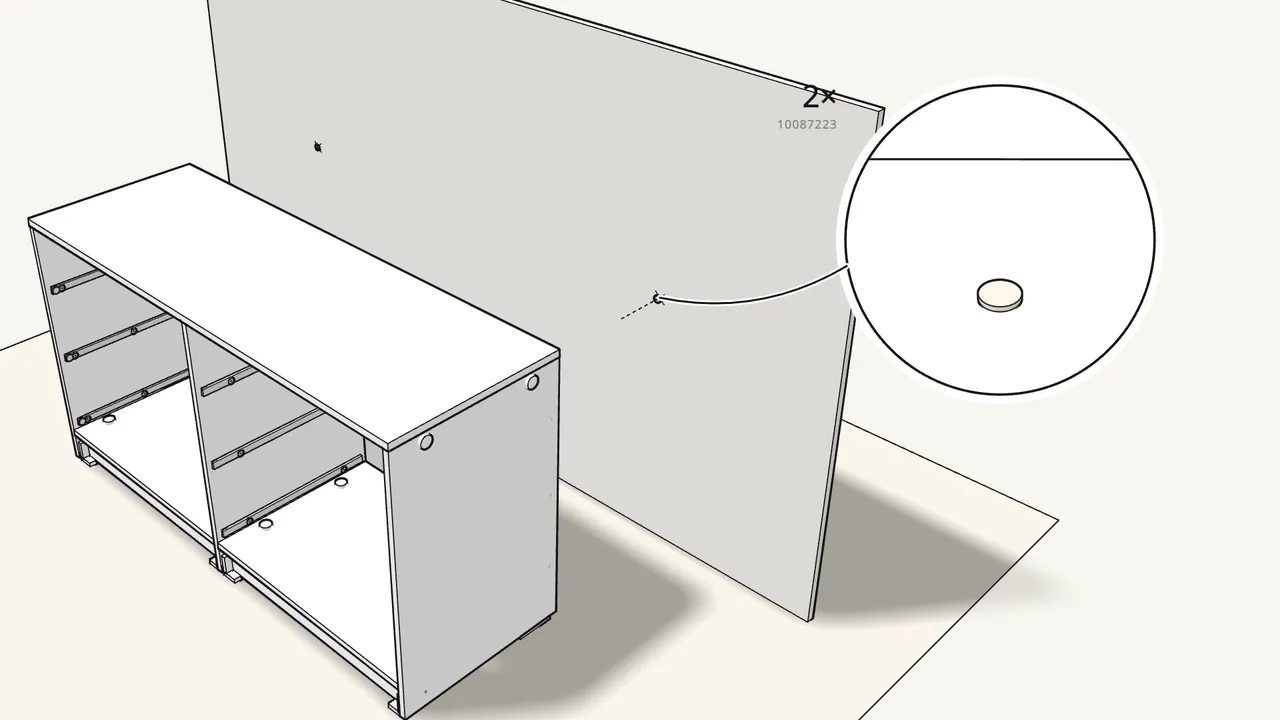
Step 18 · manual step 32
Drill the 2 holes and fit the plugs (10087223).
The plugs suit most solid and hollow walls. For solid wood, use the screws without plugs.
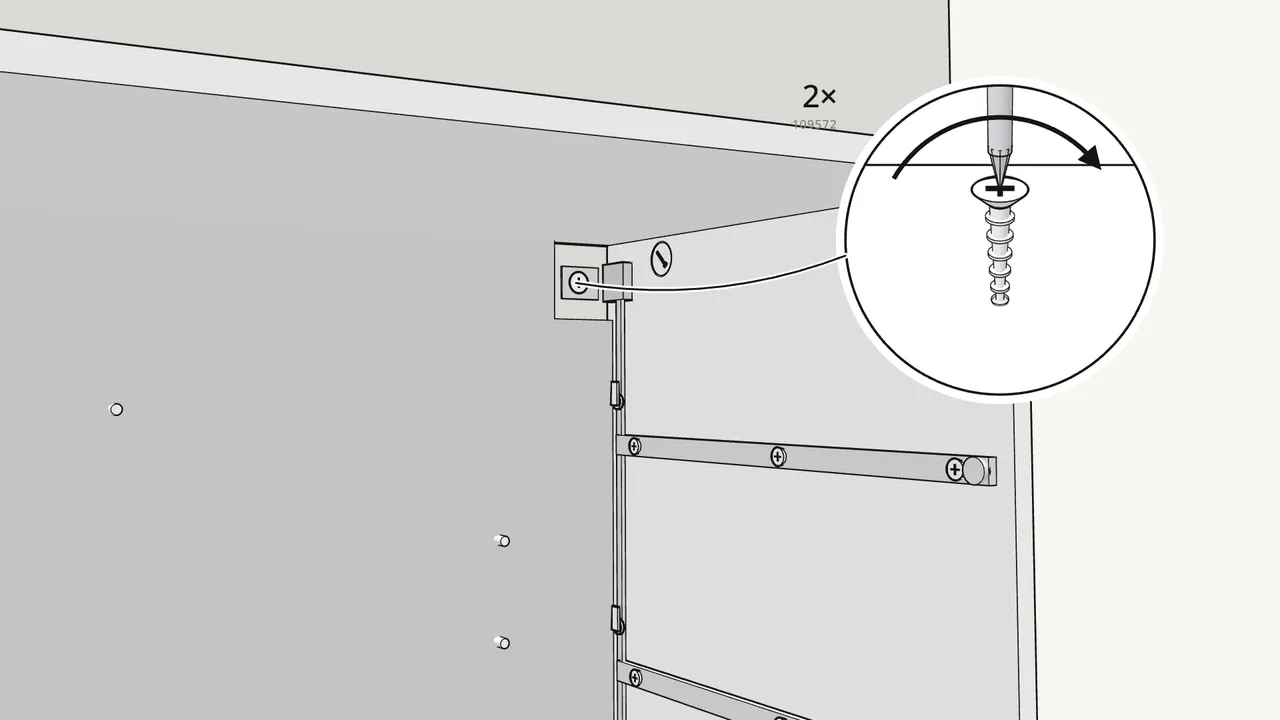
Step 19 · manual step 32
Push the dresser back and screw both fittings to the wall.
2 screws (109572). Then press the button on each fitting, as the manual shows.
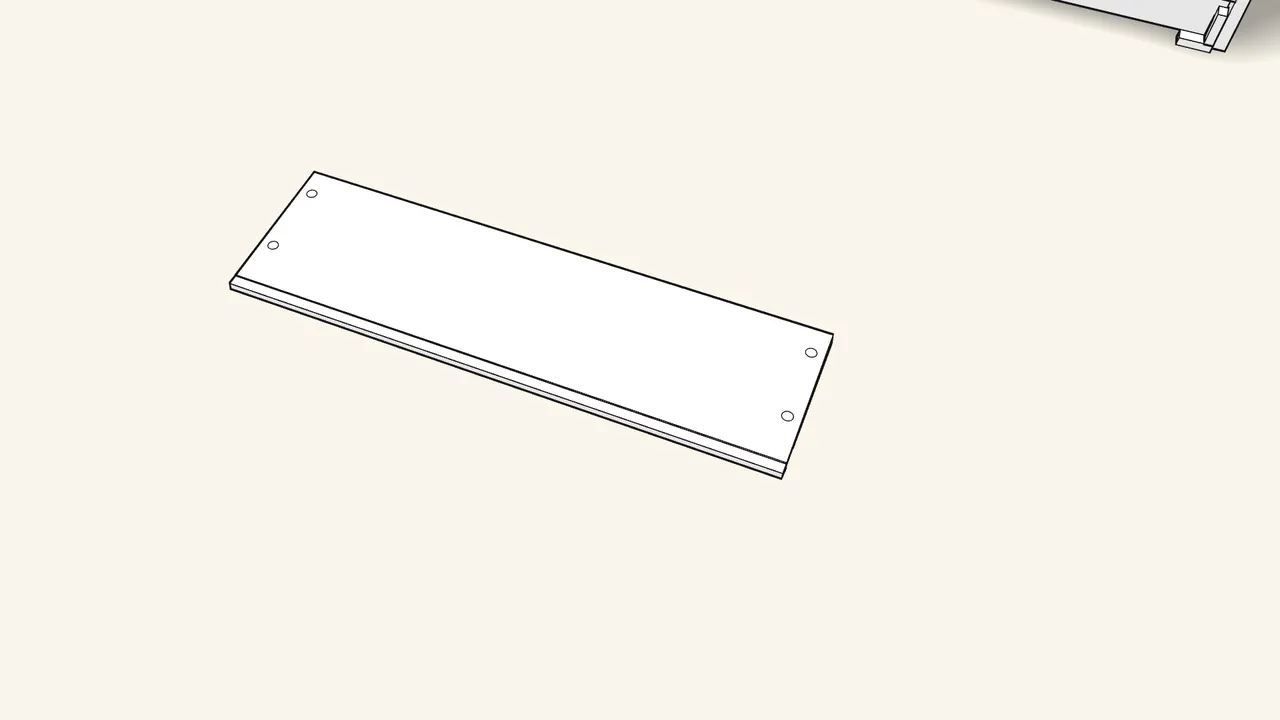
Step 20
Now the 6 drawers.
All six are built the same way — here is one, step by step.
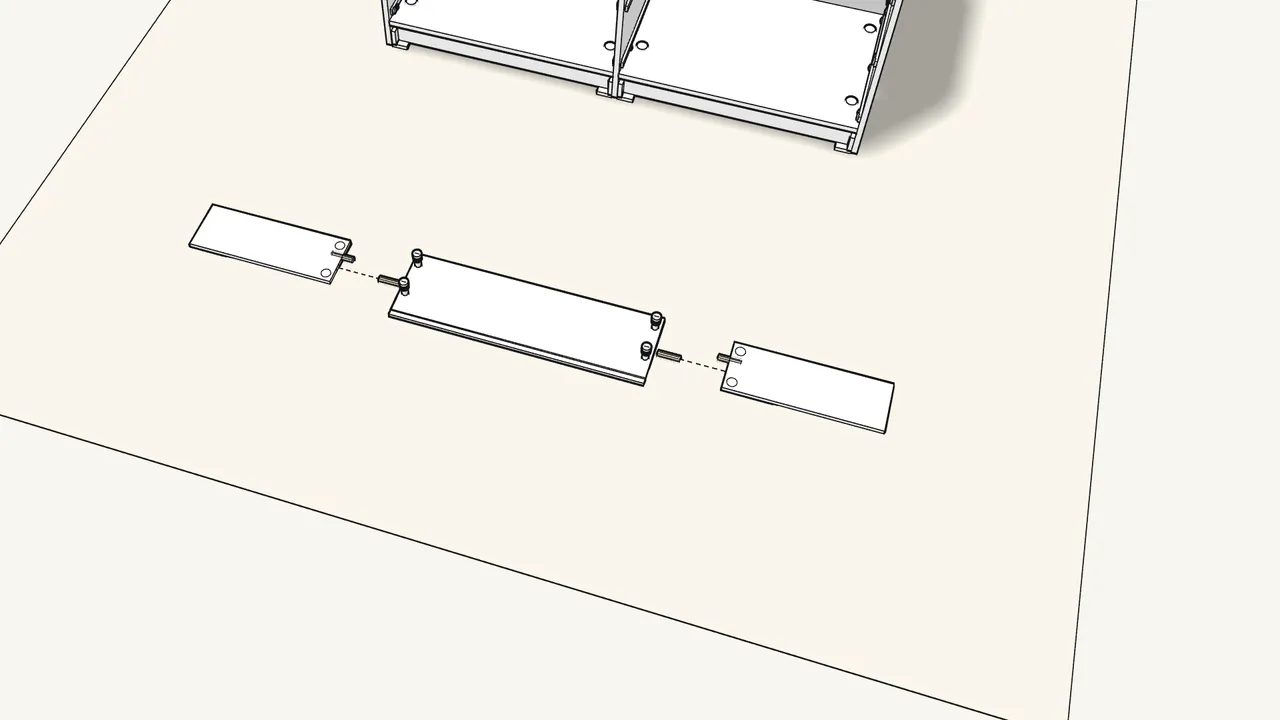
Step 21 · manual step 35–36
Lay the front face-down: 4 cam bolts in the front, 4 dowels in the sides.
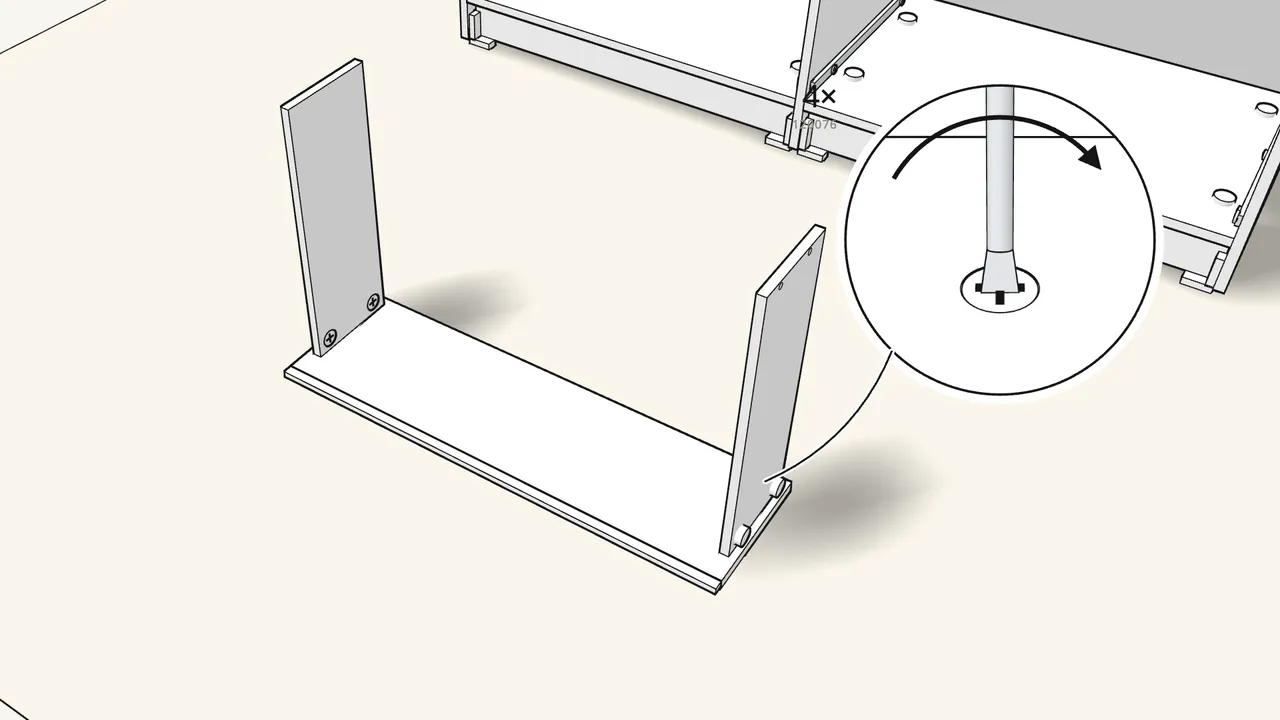
Step 22 · manual step 37–38
Stand the sides on the front and lock with 4 cam locks (120076).
Step 23 · manual step 39–40
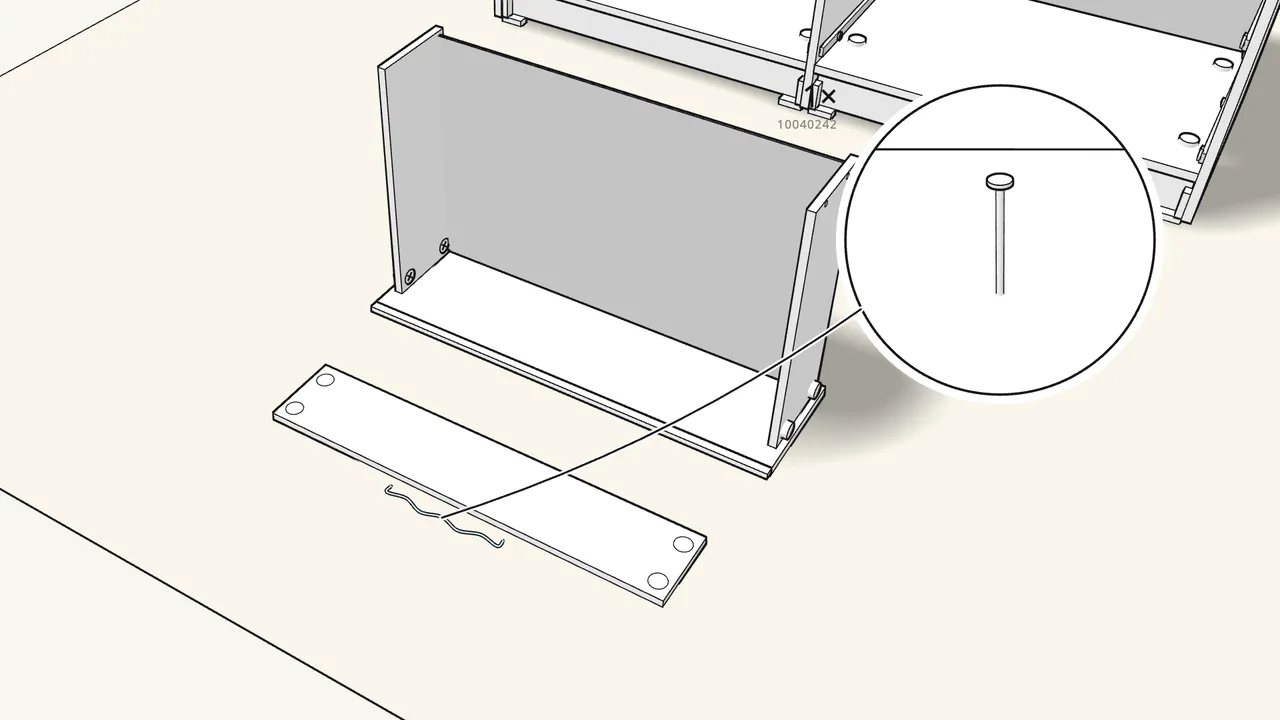
Slide in the drawer bottom; tap the wire (10040242) into the drawer back.
Check the wire’s direction against the manual, step 40.
Step 24 · manual step 41–42
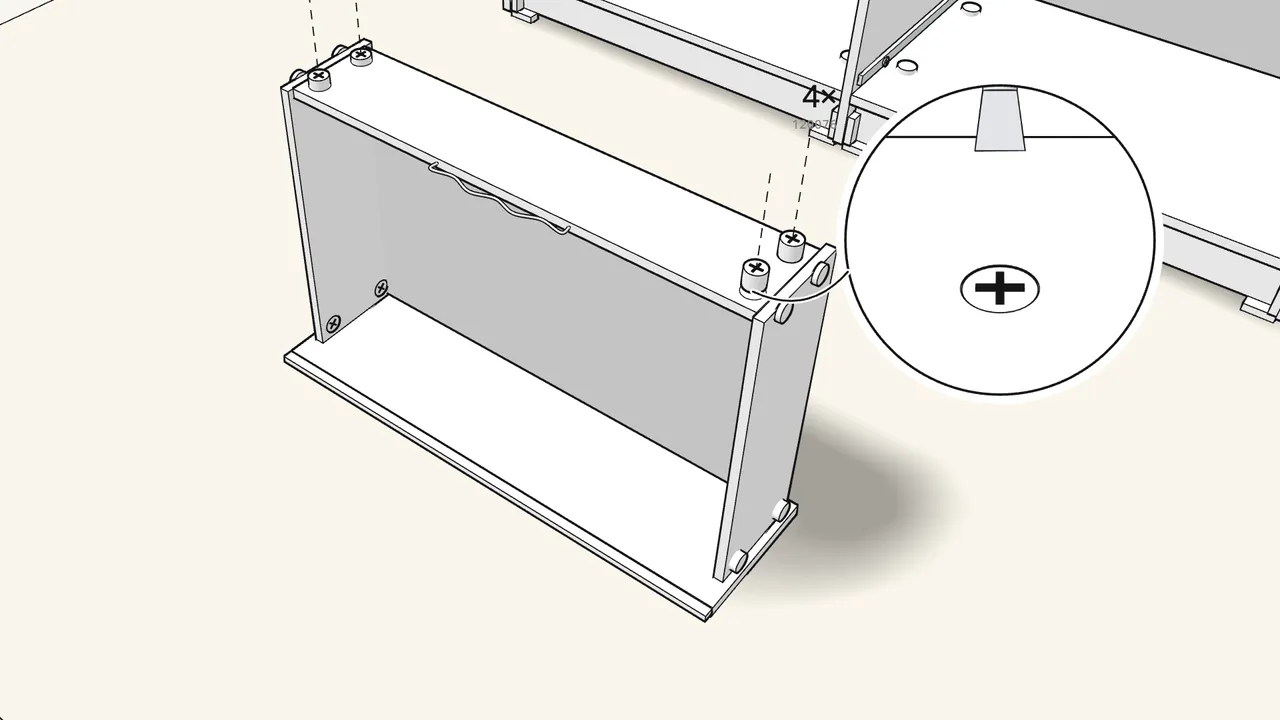
Put the back on; push in 4 pegs (145718) and lock 4 cam locks (120076).
Step 25 · manual step 43
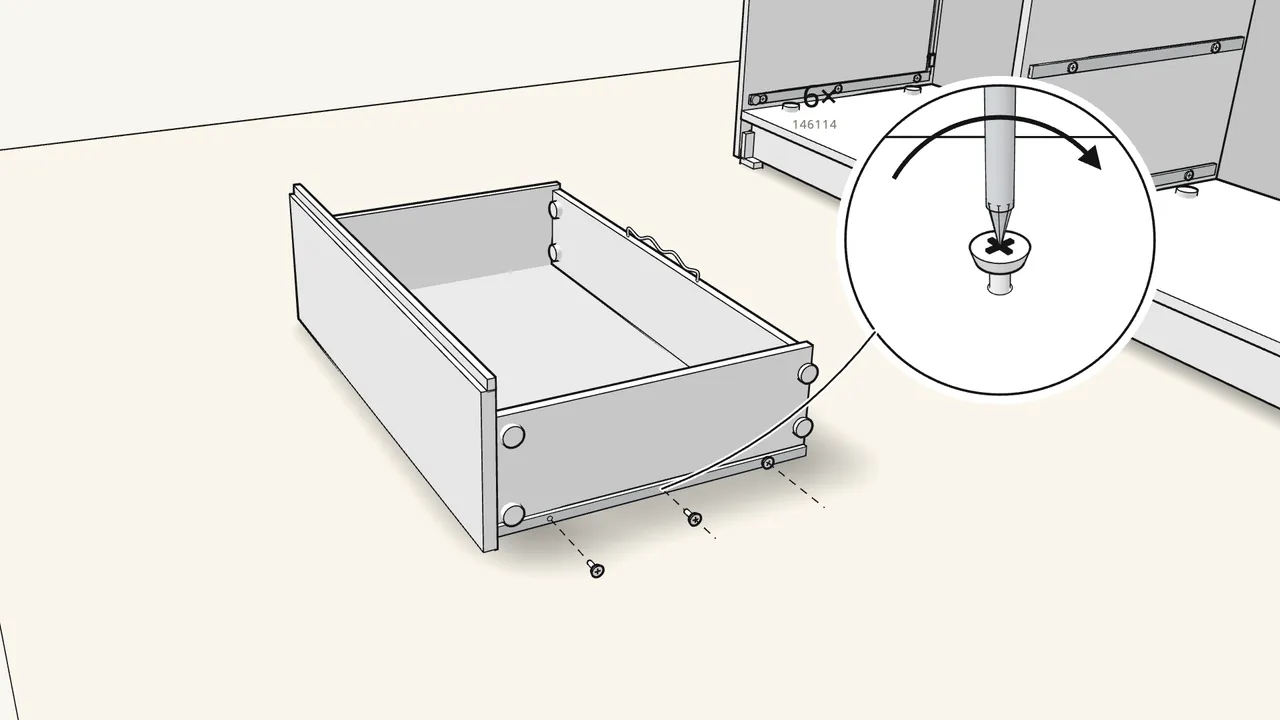
Turn the drawer over and screw on its runners — 6 screws (146114).
Match the drawer runners to the CL / CR runners in the frame.
Step 26 · manual step 35–43
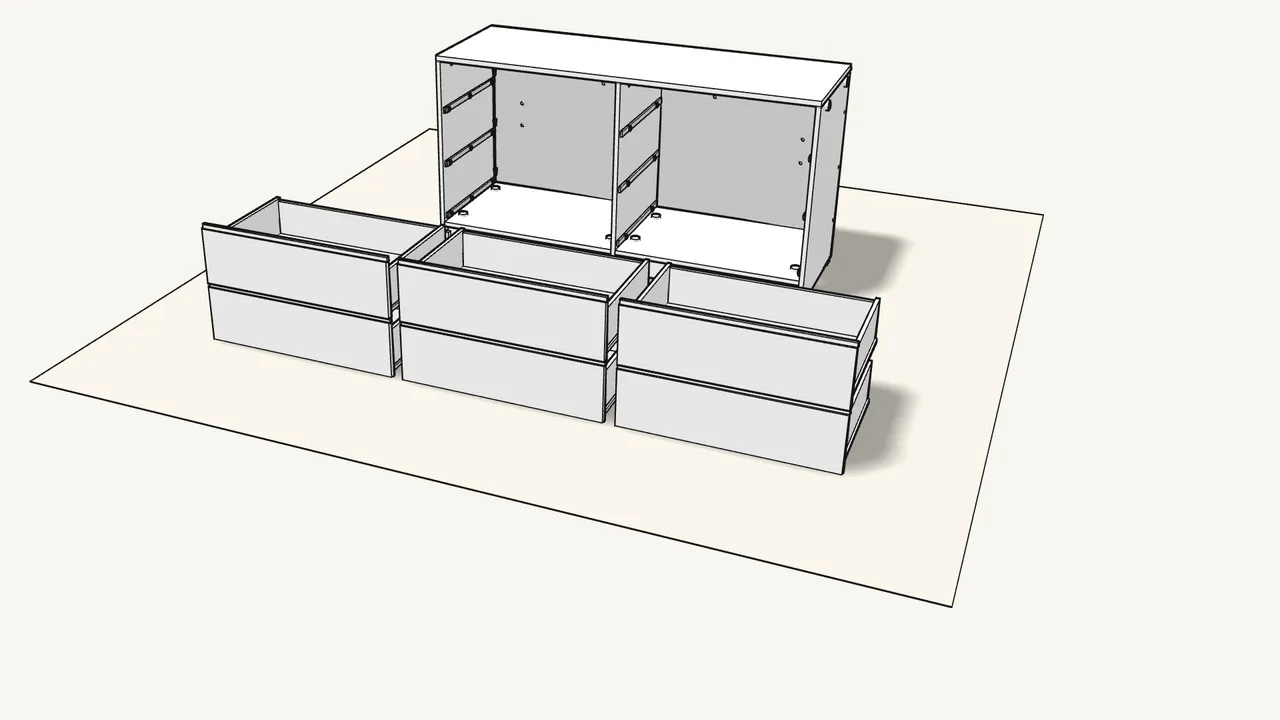
Build the other 5 drawers the same way.
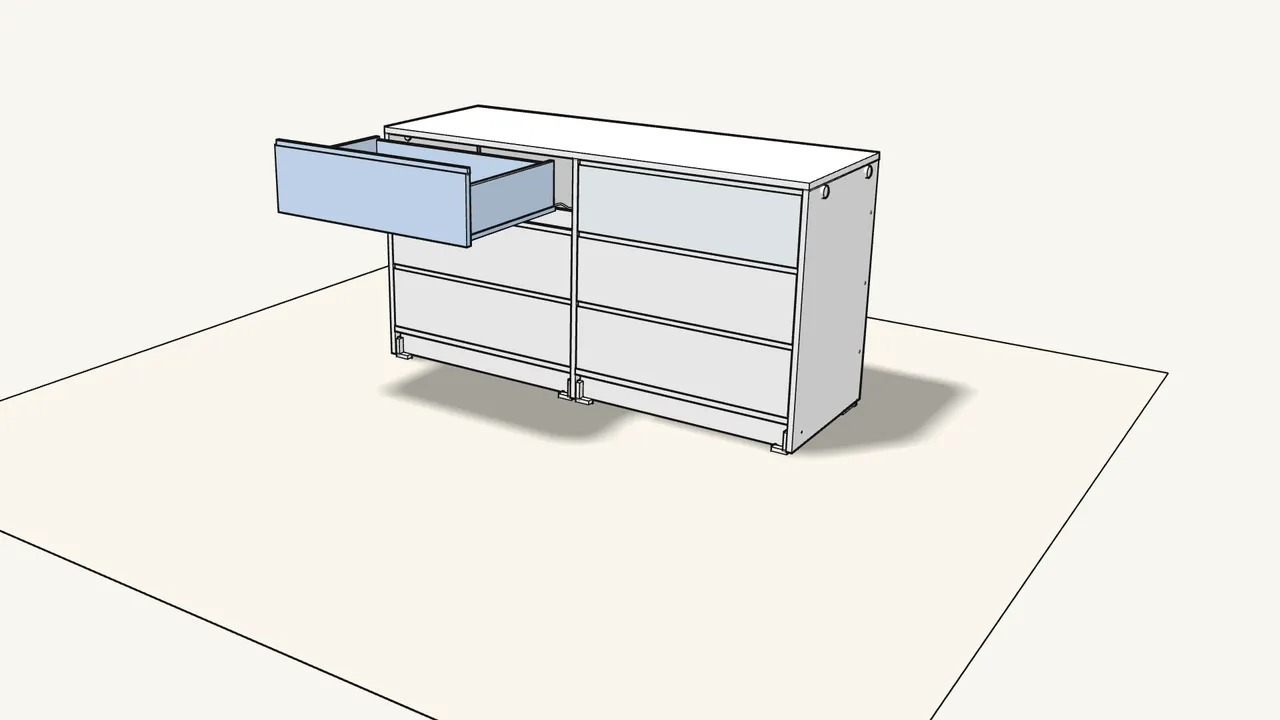
Step 27 · manual step 44–45
Slide the drawers onto the runners.
Heaviest items go in the lowest drawers.
Tips & safety
- Always fix the dresser to the wall. Children have died from furniture tip-over. Use the anti-tip fitting supplied. Never put a TV on this product.
- Open only one drawer at a time. Put the heaviest items in the lowest drawers. Don’t defeat or remove the drawer interlock — it is a safety system.
Official instructions
This guide follows IKEA's official assembly instructions (AA-2413736-7). Keep the printed manual to hand — if anything differs, the manual is right.