IKEA · Dressers & Drawer Units
How to assemble IKEA RÅDMANSÖ 3-Drawer Dresser
Step-by-step IKEA RÅDMANSÖ 3-Drawer Dresser assembly: 23 illustrated steps, an animated video, the hardware list and the tools you need — following the official instructions (AA-2526870-6).
- 23 illustrated steps
- 25 steps in the manual
- 3:15 video
- 90×48×81 cm
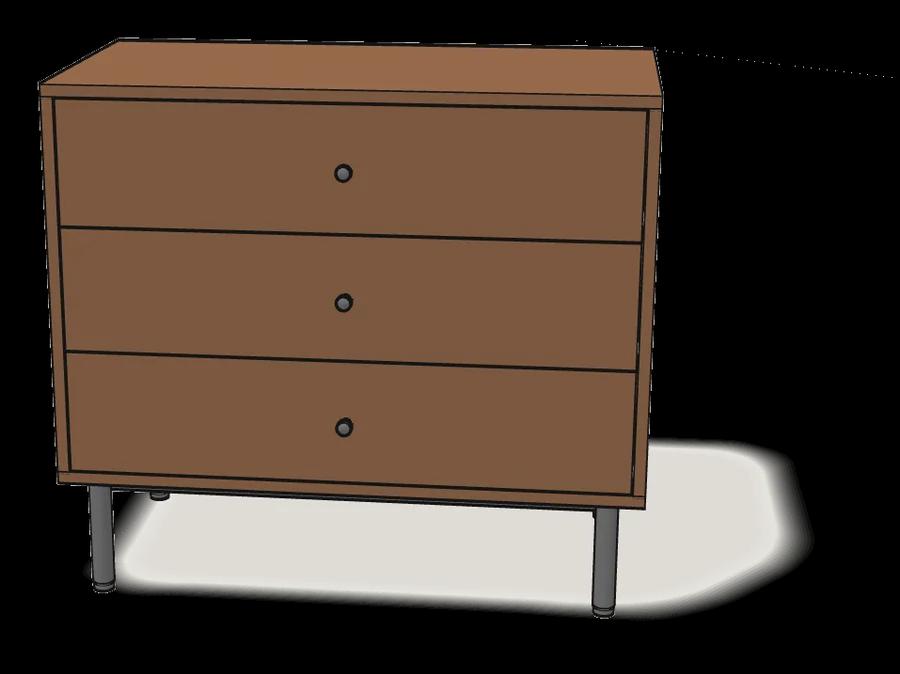
What you need
Tools
- Flat-head screwdriver
- Phillips screwdriver
- Allen key (included)
- Spanner (included)
- Hammer
- Drill (for wall fixing)
- Spirit level
Hardware in the box
| Part no. (as printed in the manual) | Qty |
|---|---|
| 10047245 | 36× |
| 105251 | 2× |
| 10120564 | 4× |
| 10003283 | 4× |
| 101350 | 4× |
| 105811 | 4× |
| 10121698 | 4× |
| 10114605 | 4× |
| 159553 | 12× |
| 117434 | 12× |
| 119976 | 3× |
| 158701 | 2× |
| 151931 | 4× |
| 109572 | 2× |
| 126916 | 2× |
| 10087223 | 2× |
Step-by-step assembly
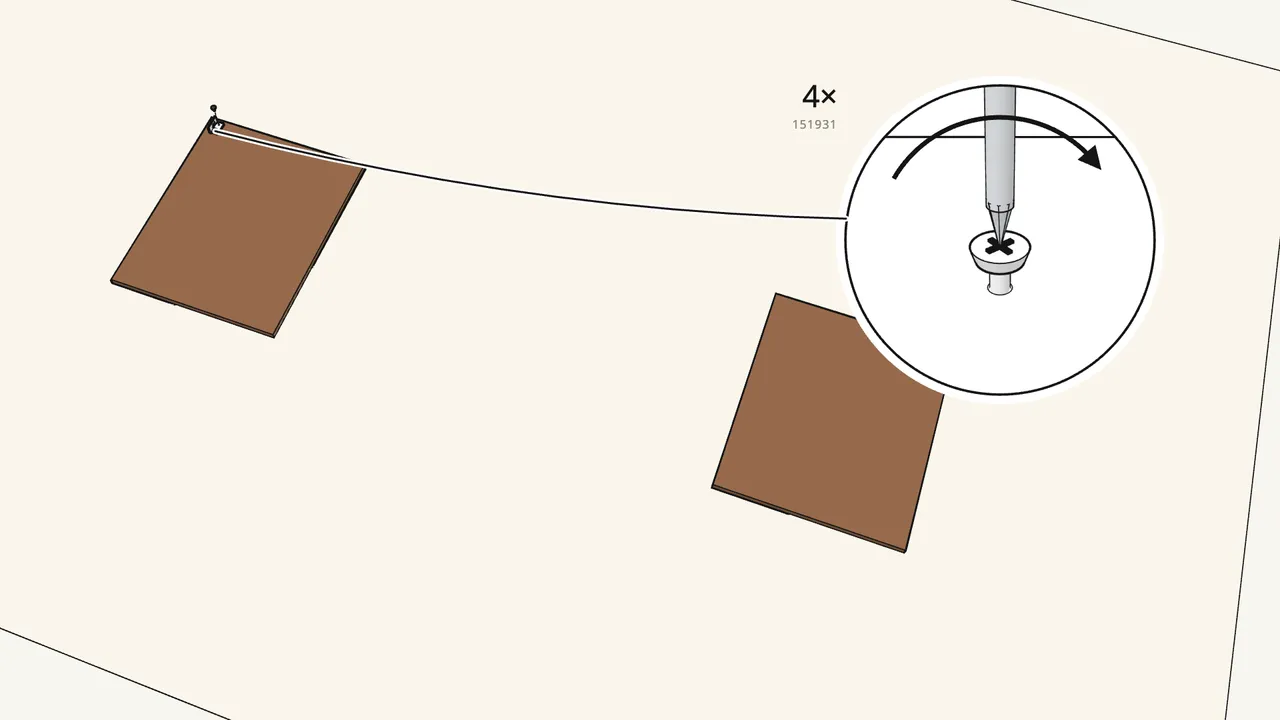
Step 1
Screw a wall bracket (158701) onto each side panel.
2 screws (151931) per bracket, at the top back corner.
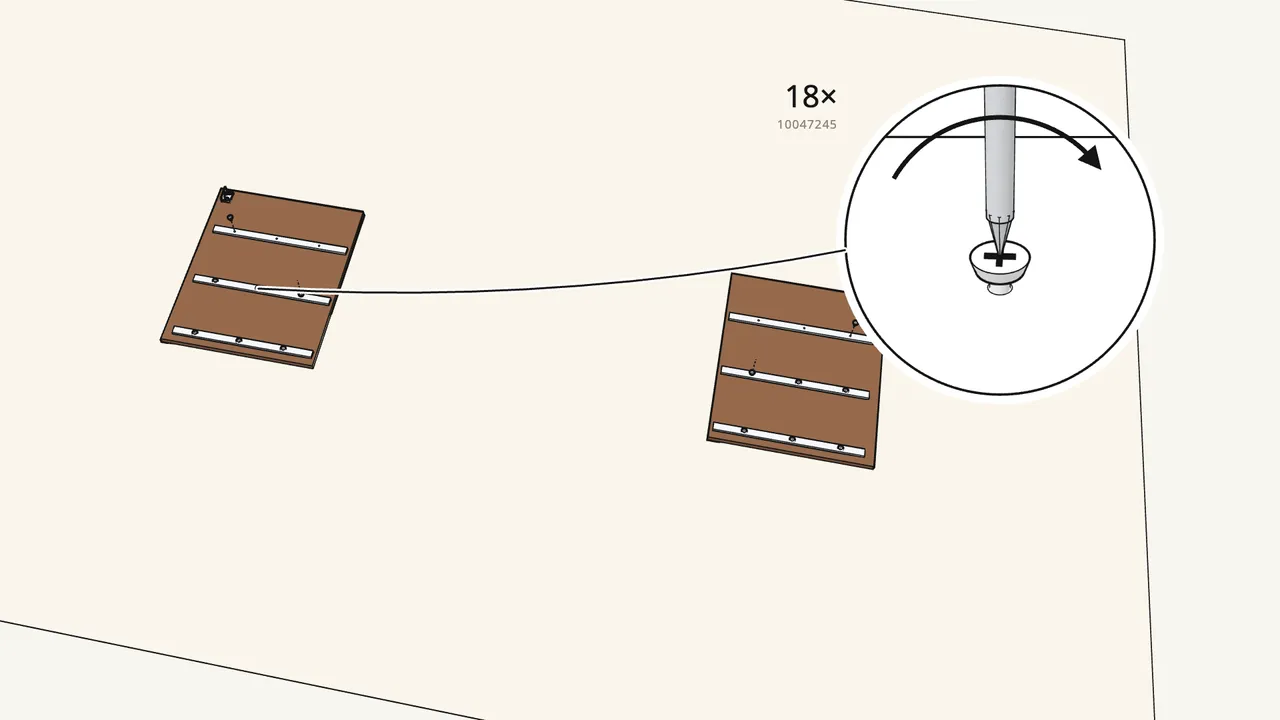
Step 2
Screw 3 runners onto the inside of each side panel.
CR on one side, CL on the other — 9 screws (10047245) each.
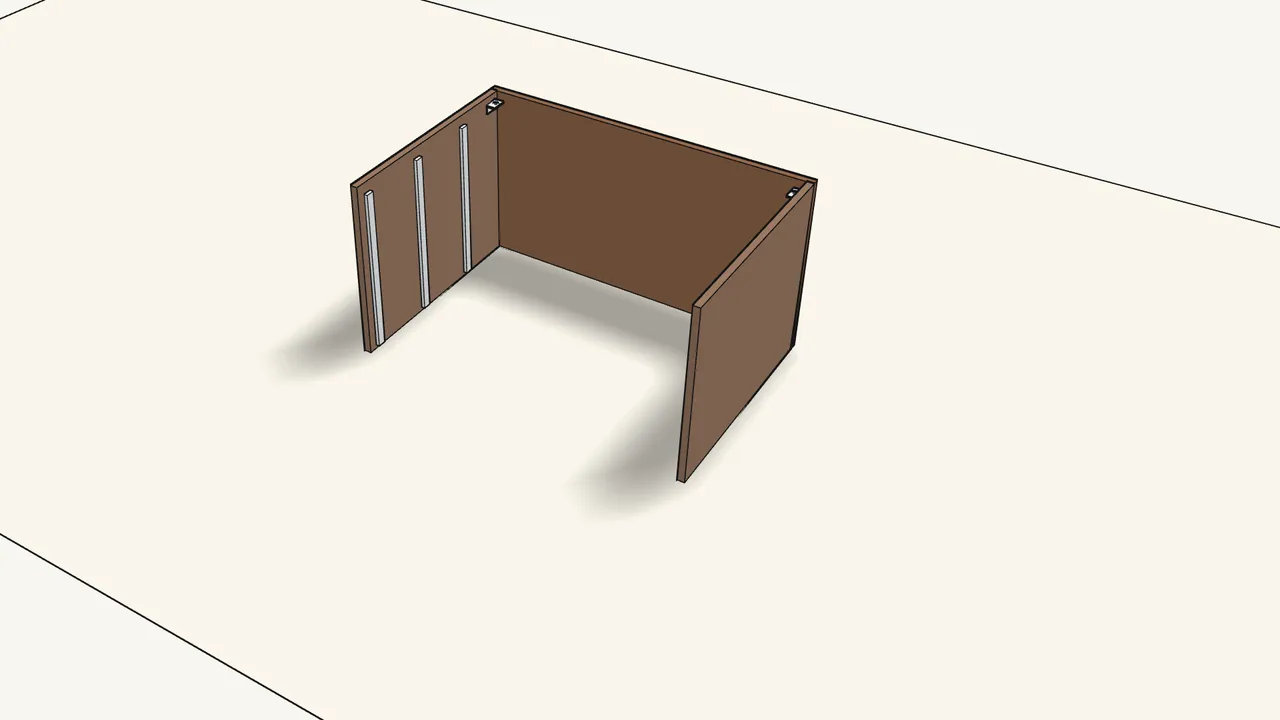
Step 3
Hang both side panels on the ends of the top panel.
Push the pins into the keyholes, then press down until they click.
Step 4
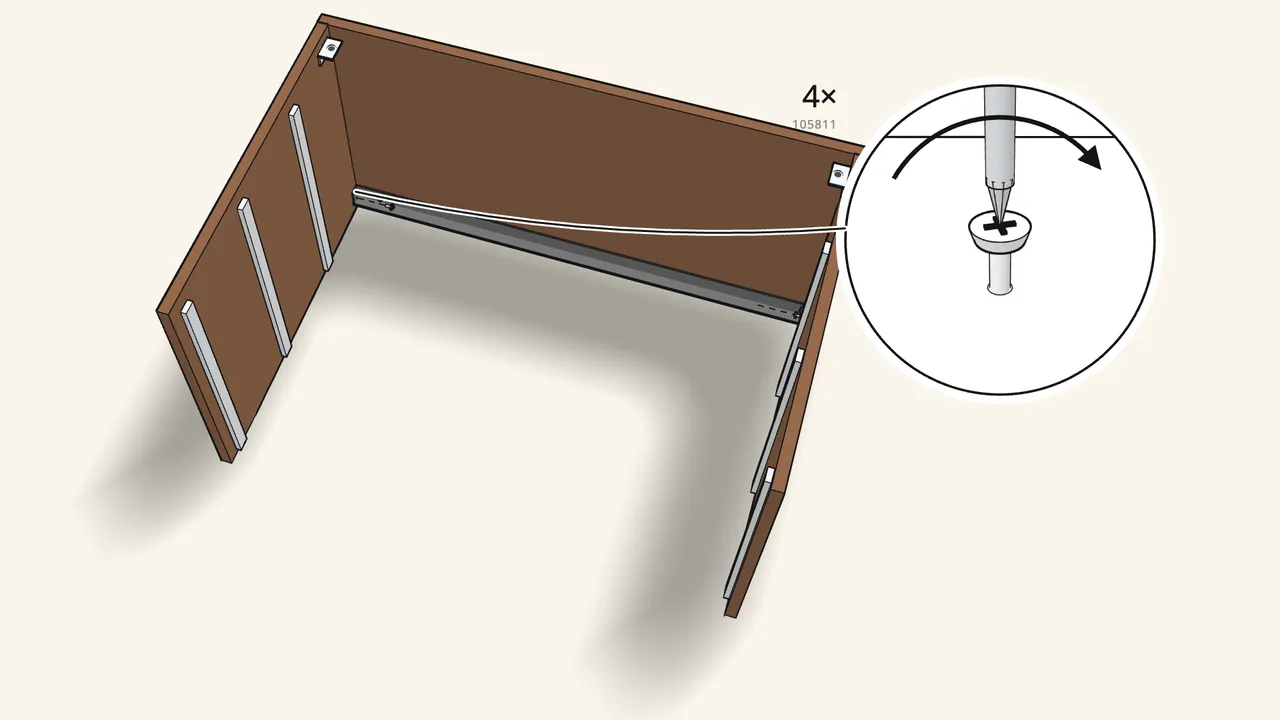
Fit the front rail (10100249) between the sides under the top.
2 screws (105811) at each end.
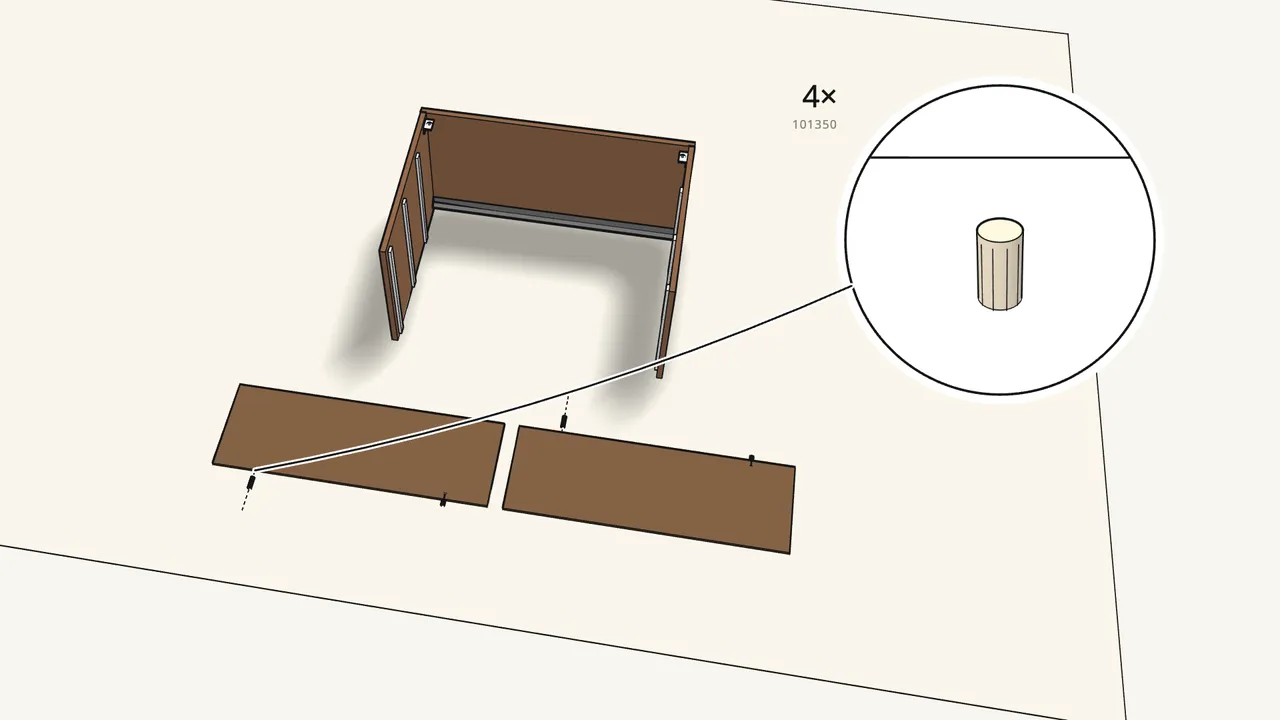
Step 5
Push 2 dowels (101350) into each back panel.
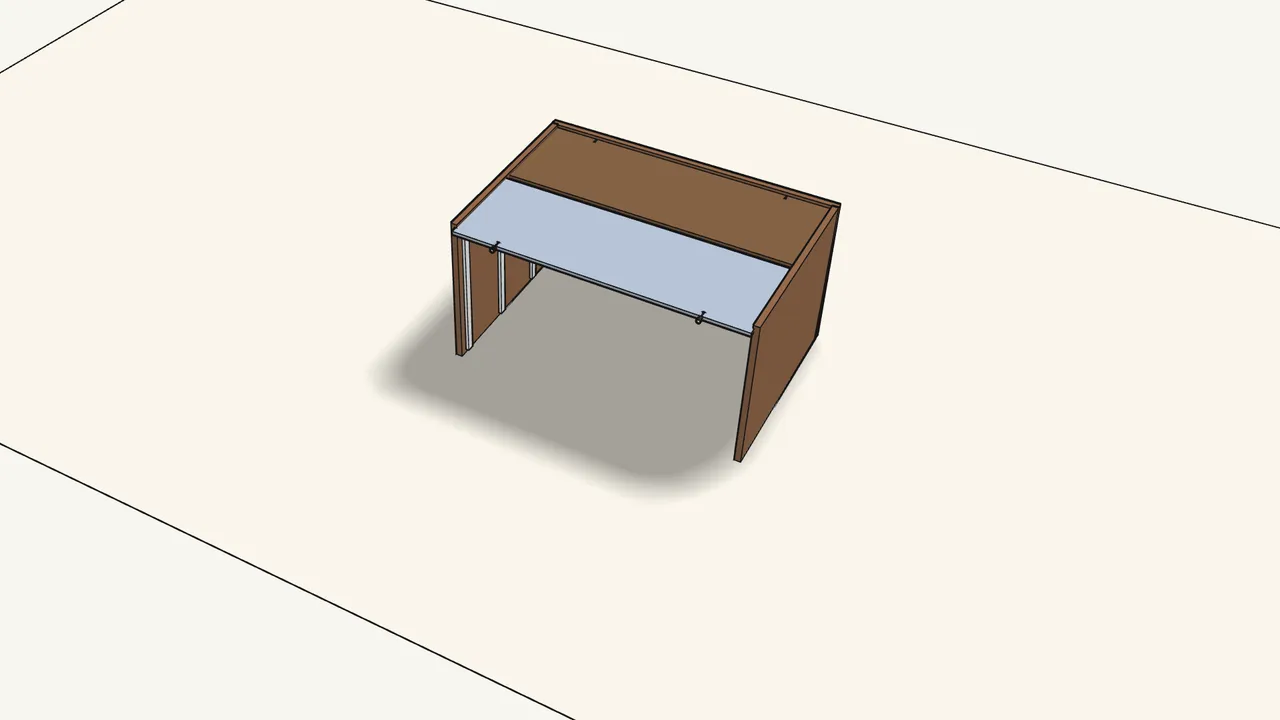
Step 6 · manual step 6–7
Slide the two back panels down the grooves in the sides.
First one panel all the way in, then the second.
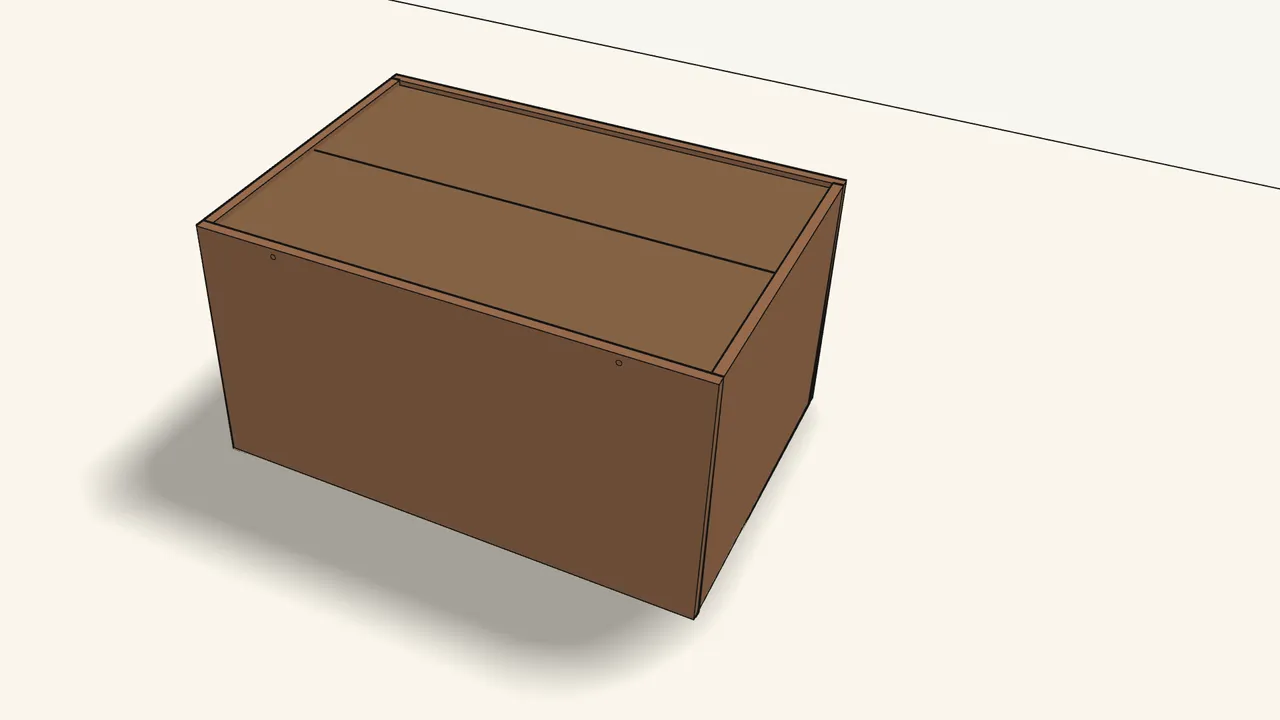
Step 7 · manual step 8
Hang the bottom panel on the sides and press it down until it clicks.
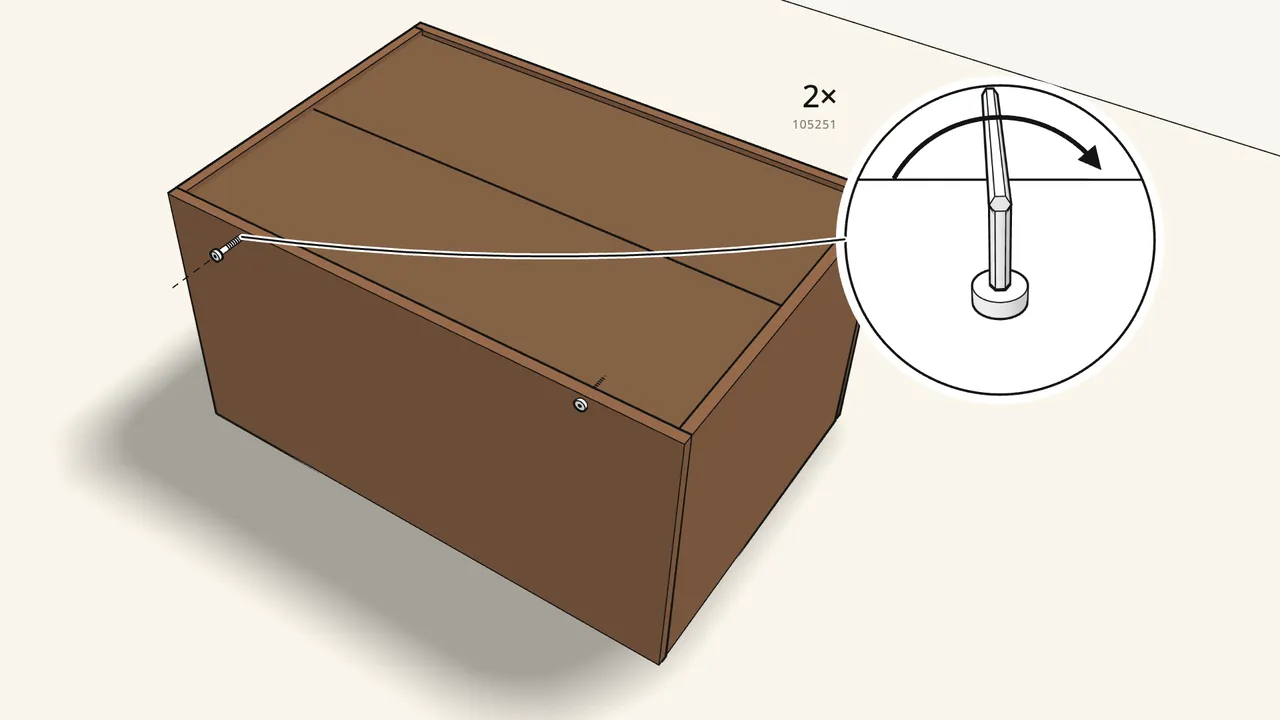
Step 8 · manual step 9
Drive in 2 screws (105251) through the bottom with the hex key.
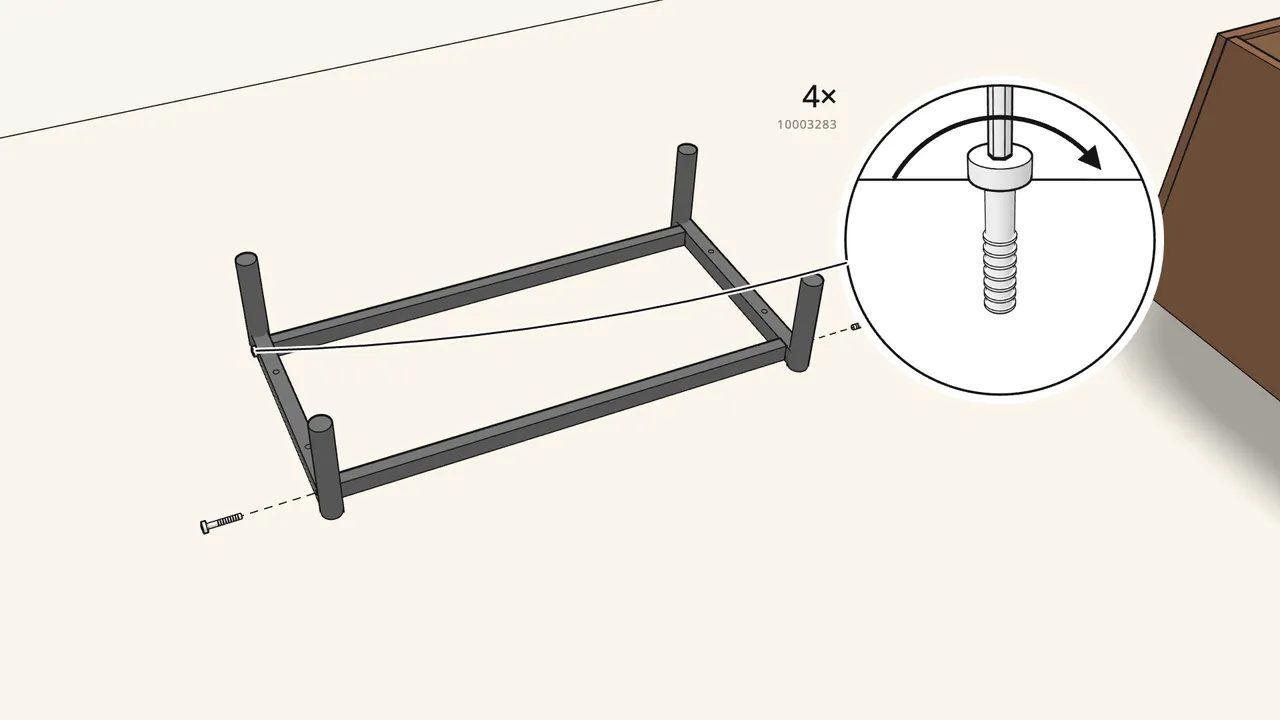
Step 9 · manual step 10
Join the 2 leg frames with the 2 rails — 4 bolts (10003283).
Use the hex key. The frame is upside down.
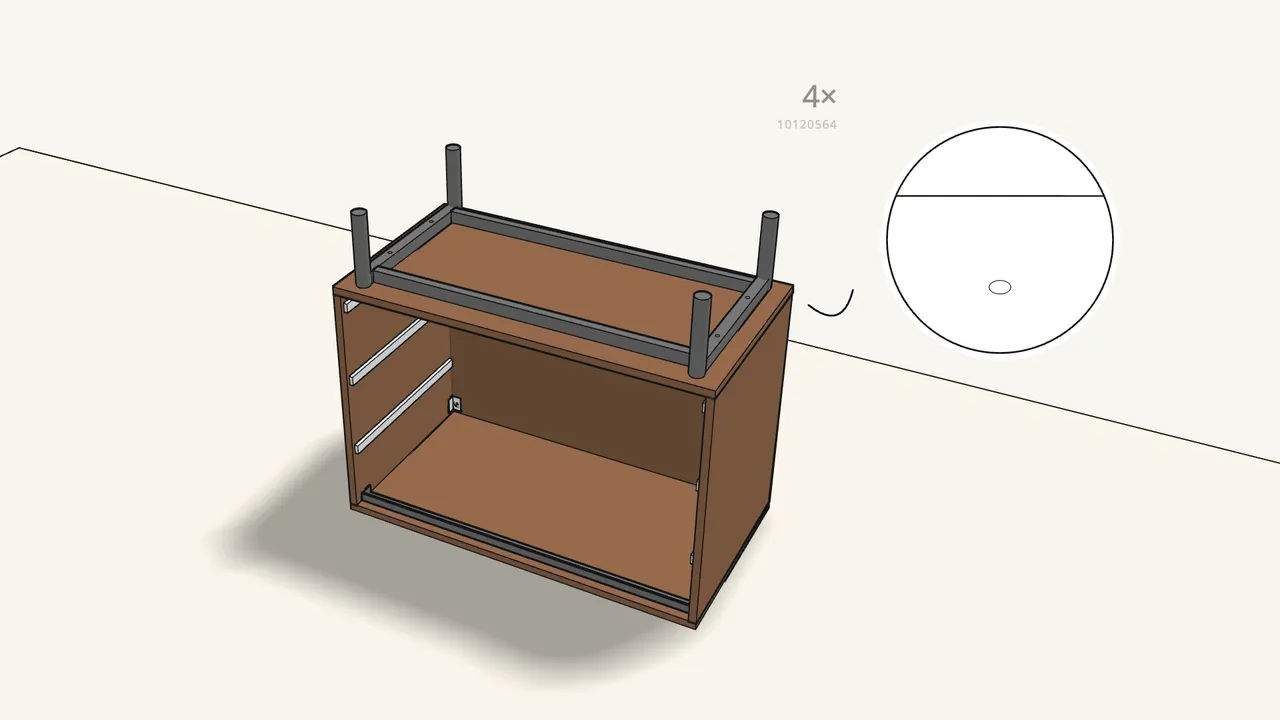
Step 10 · manual step 11
Roll the carcass onto its top. Fix the leg frame with 4 bolts (10120564).
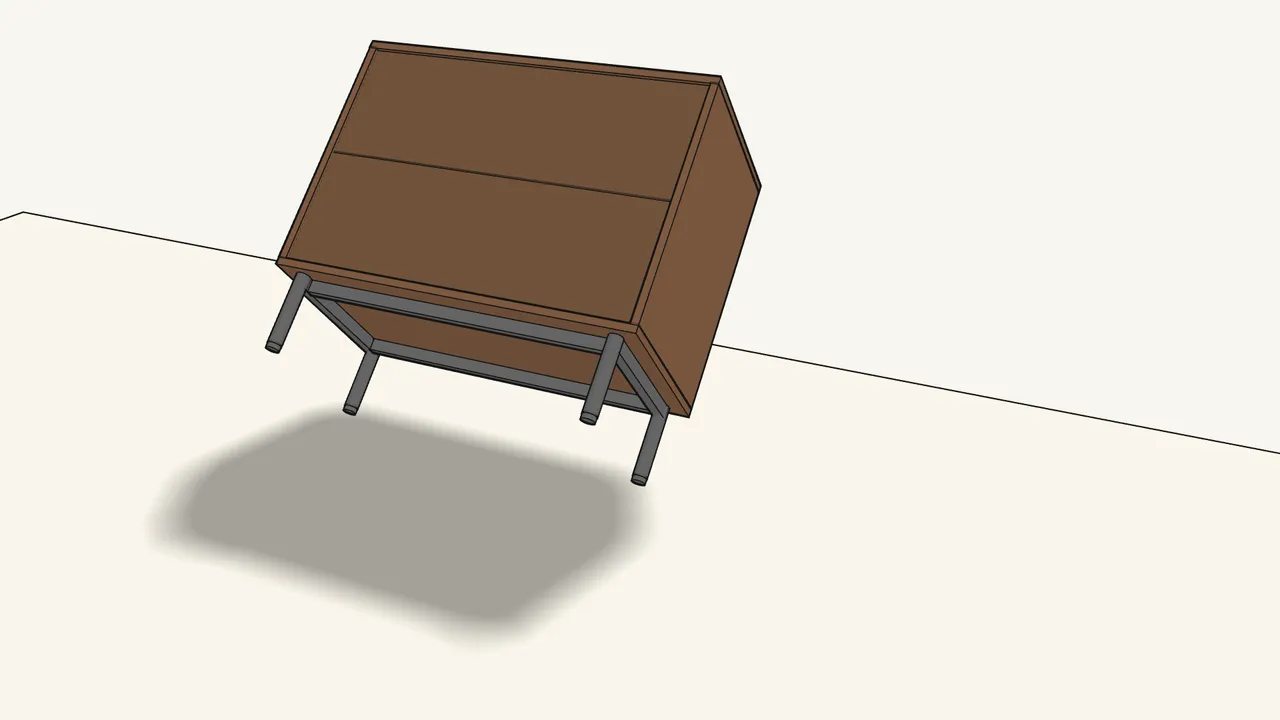
Step 11 · manual step 12
Screw the 4 feet (10121698 + 10114605) into the legs, then turn it upright.
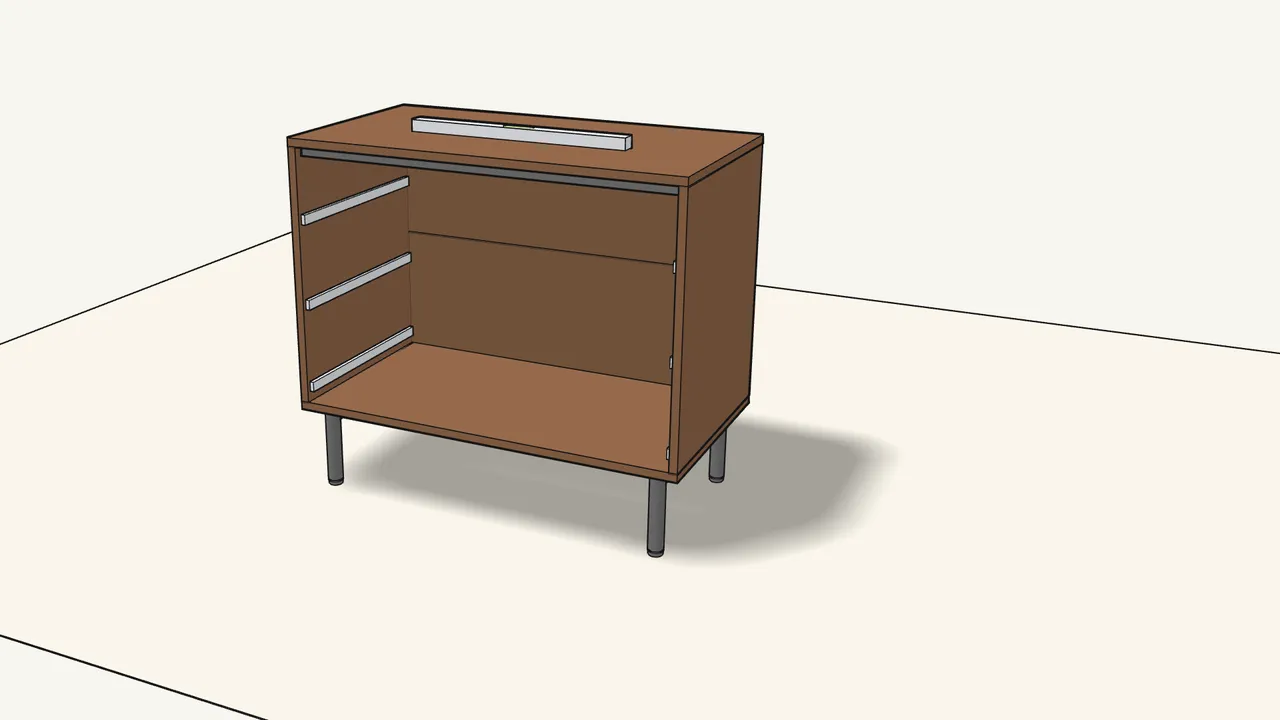
Step 12 · manual step 13
Check it is level. Adjust the 4 feet with the spanner (190459).
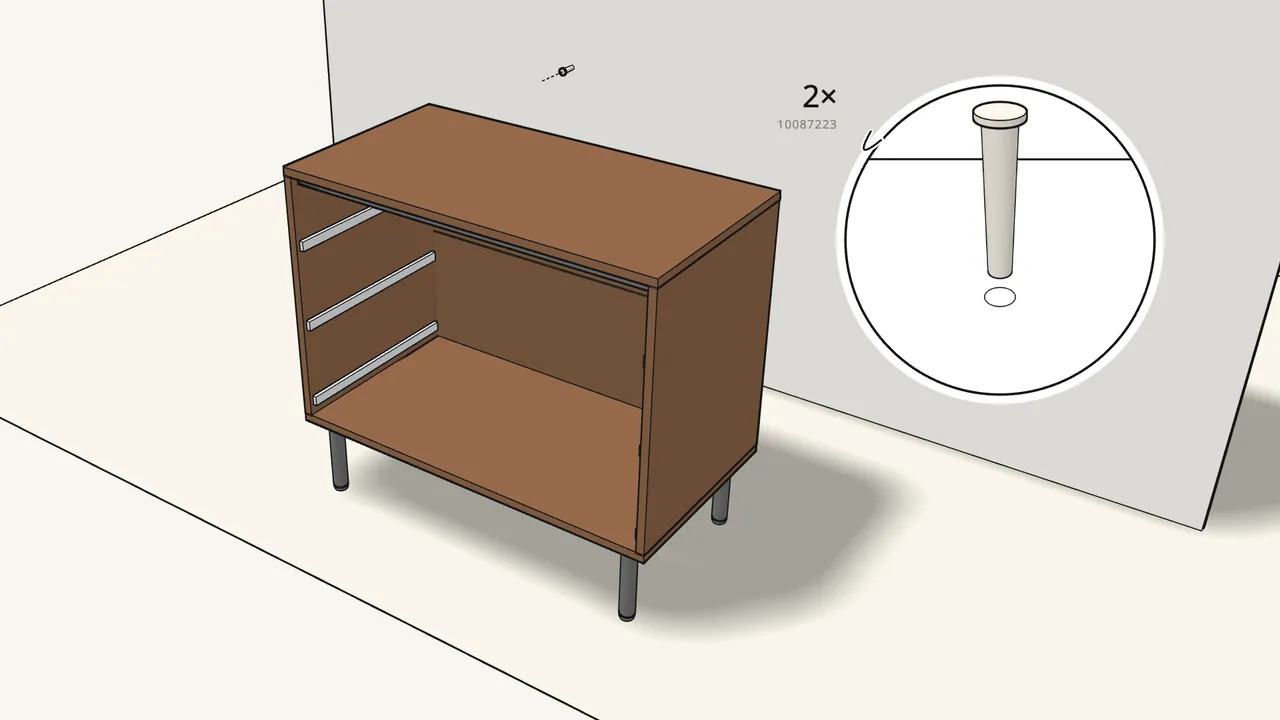
Step 13 · manual step 14–16
Mark the 2 holes through the brackets, move the dresser away and drill.
Ø 8 mm, push in the plugs (10087223). Solid wood: Ø 3 mm, no plugs — see the manual.
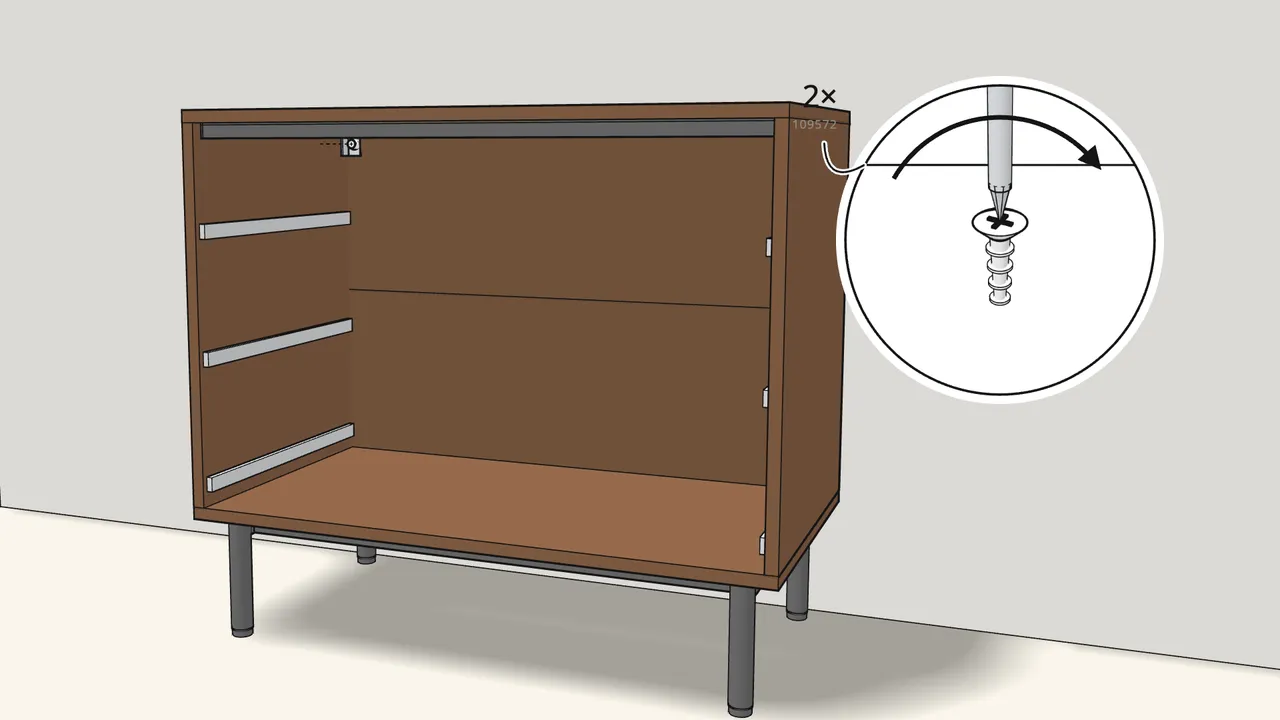
Step 14 · manual step 17
Push it back. Screw it to the wall through both brackets.
2 screws (109572) with washers (126916).
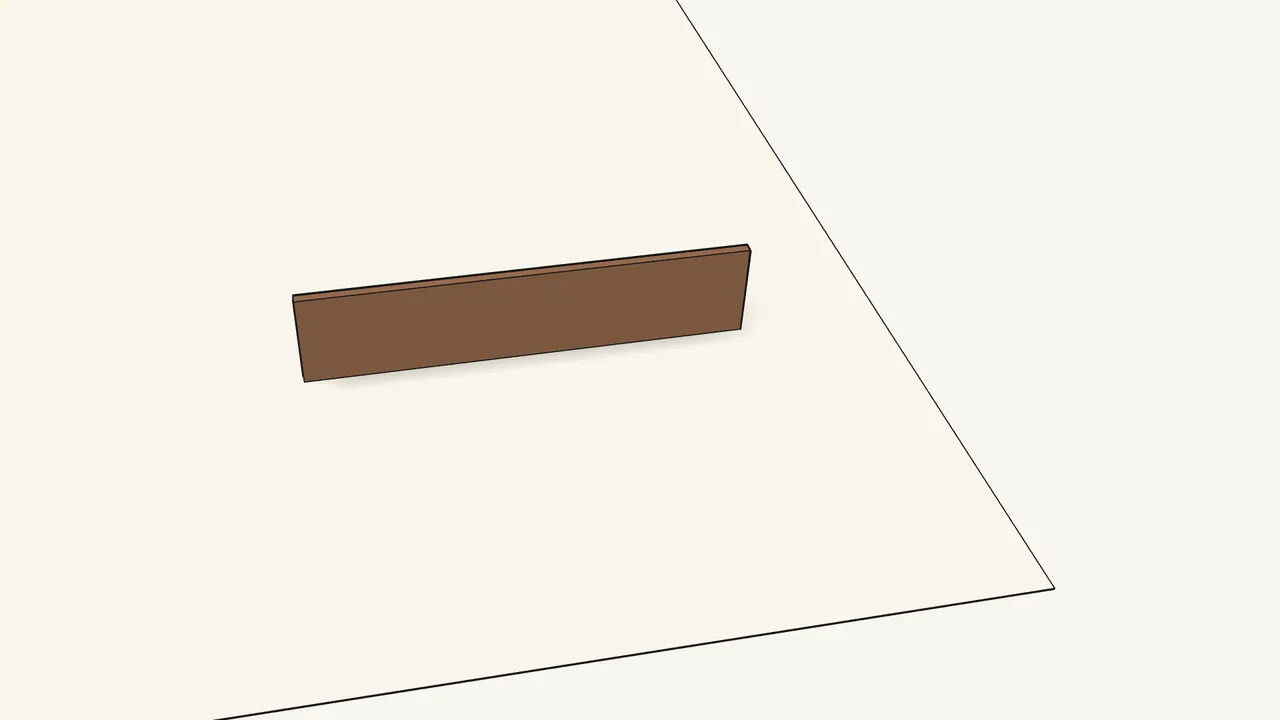
Step 15
Now the 3 drawers.
All three are the same — we build one step by step.
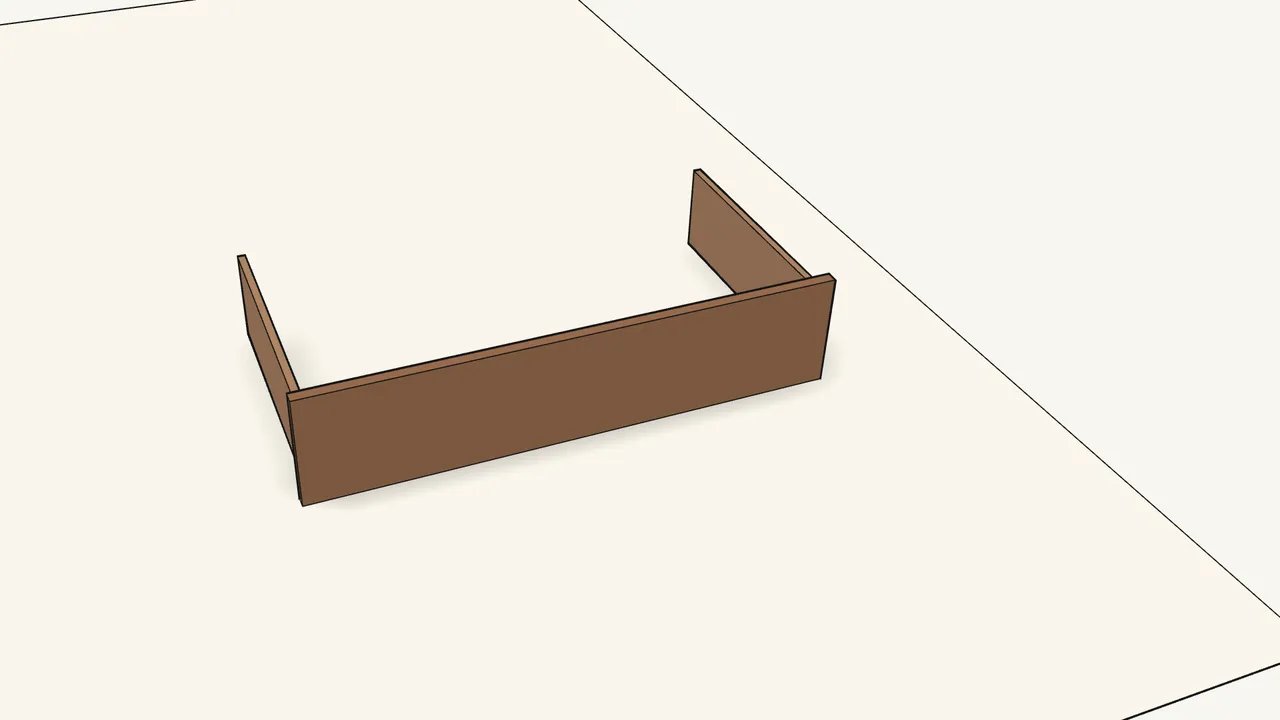
Step 16 · manual step 18
Hang both sides on the drawer front and press them down until they click.
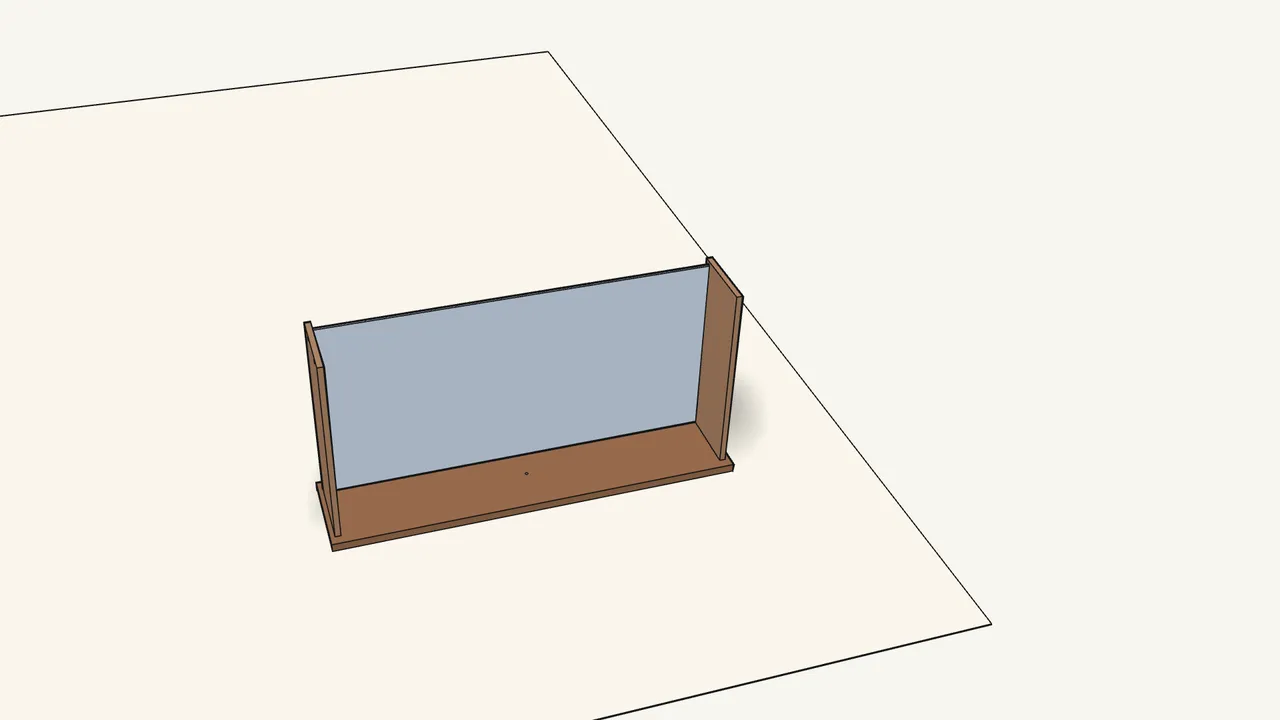
Step 17 · manual step 19
Turn the drawer onto its front. Slide the bottom down the grooves.
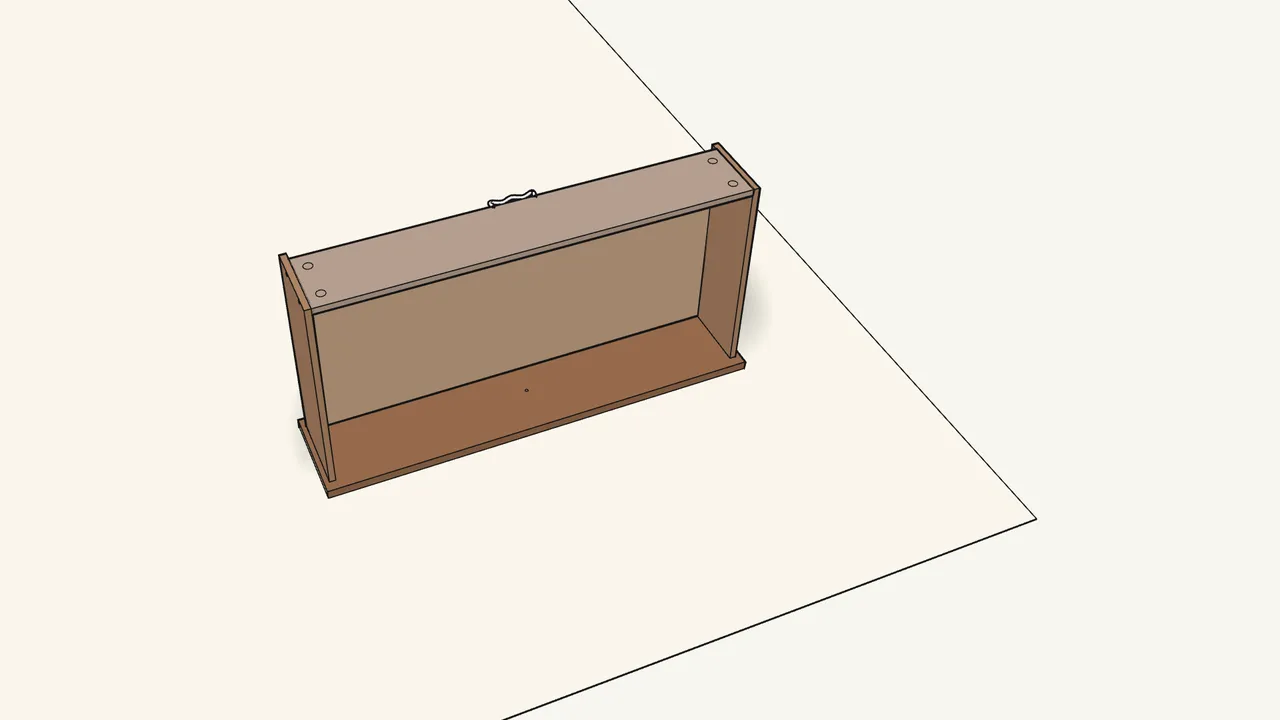
Step 18 · manual step 20–21
Press the wire fitting (10040242) into the back, then fit the back.
It goes between the sides, over the bottom.
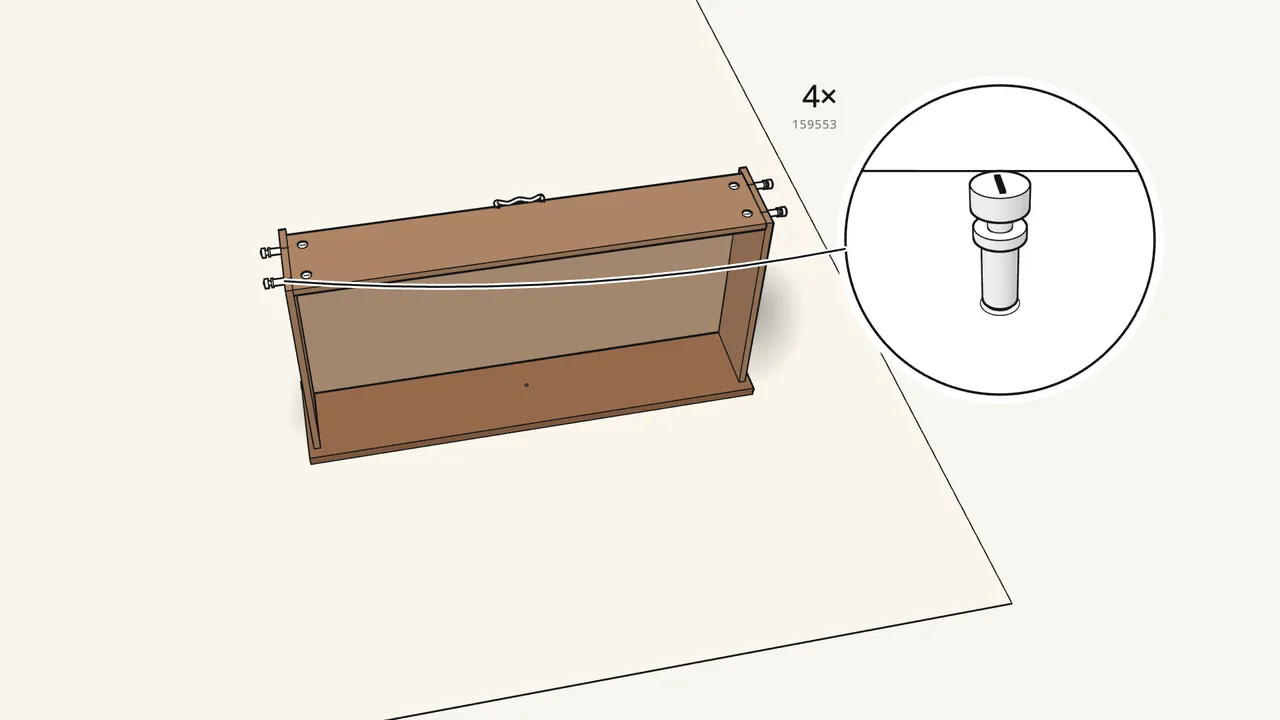
Step 19 · manual step 22
Push in 4 cam dowels (159553), then 4 cam locks (117434).
Turn the cam locks clockwise.
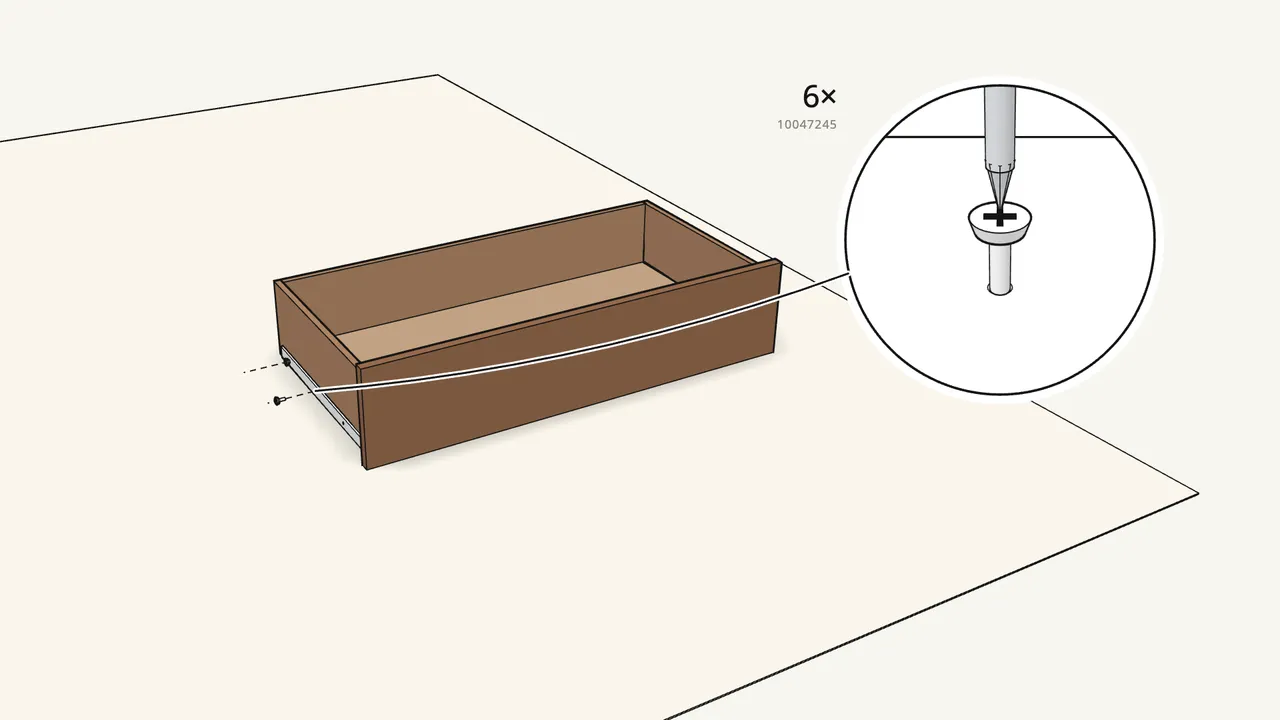
Step 20 · manual step 23
Turn the drawer over. Screw on the runners DL and DR — 6 screws (10047245).
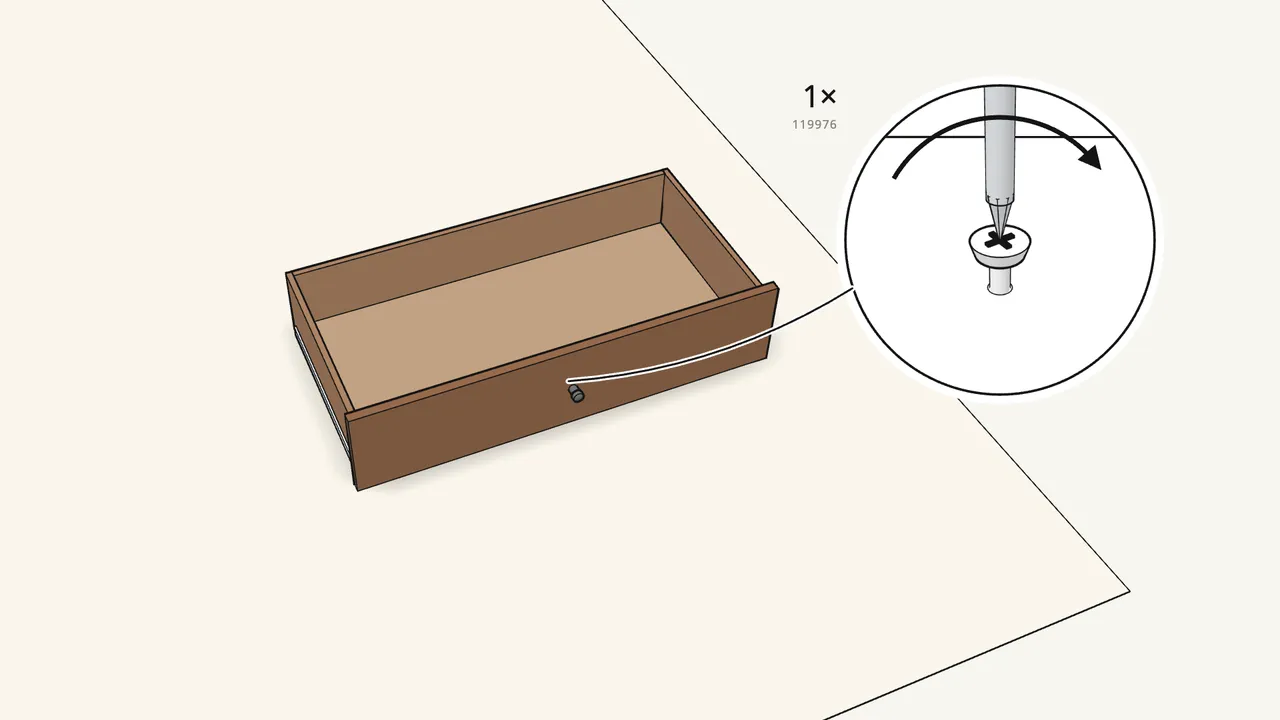
Step 21 · manual step 24
Fit the knob (10109447) with the screw (119976) from the inside.
Use a screwdriver — not a drill.
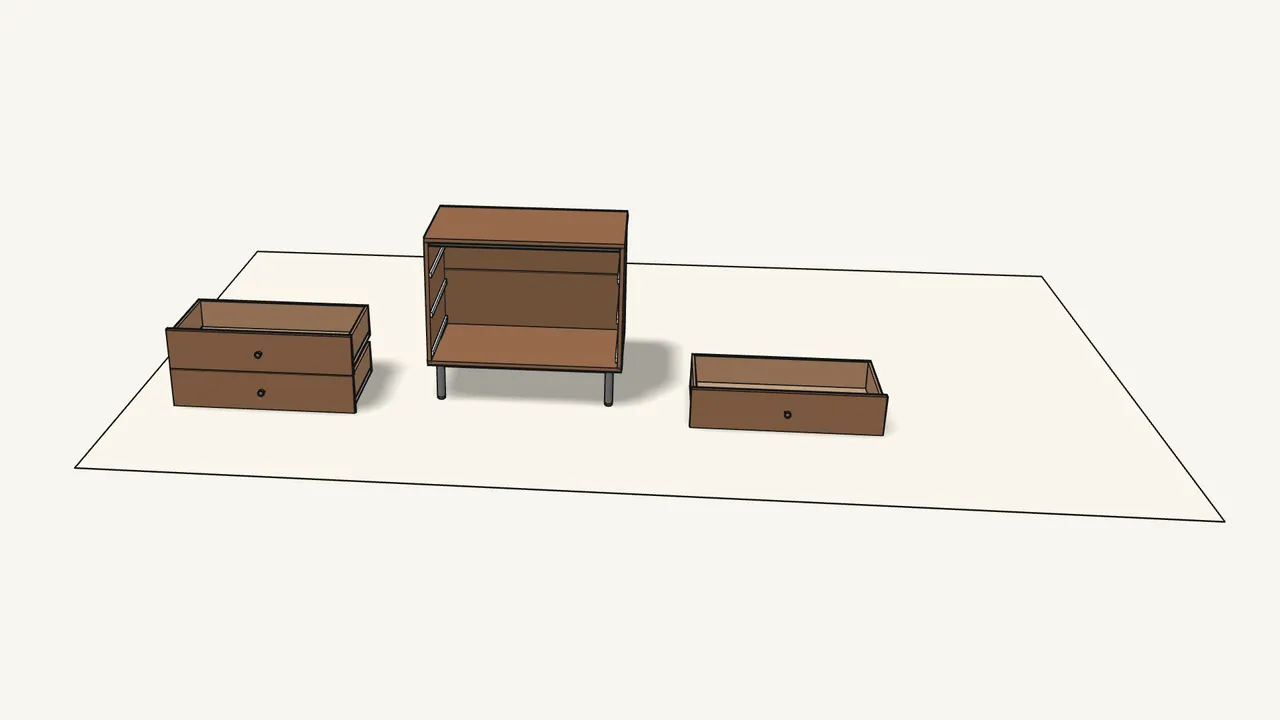
Step 22 · manual step 18–24
Build the other 2 drawers the same way.
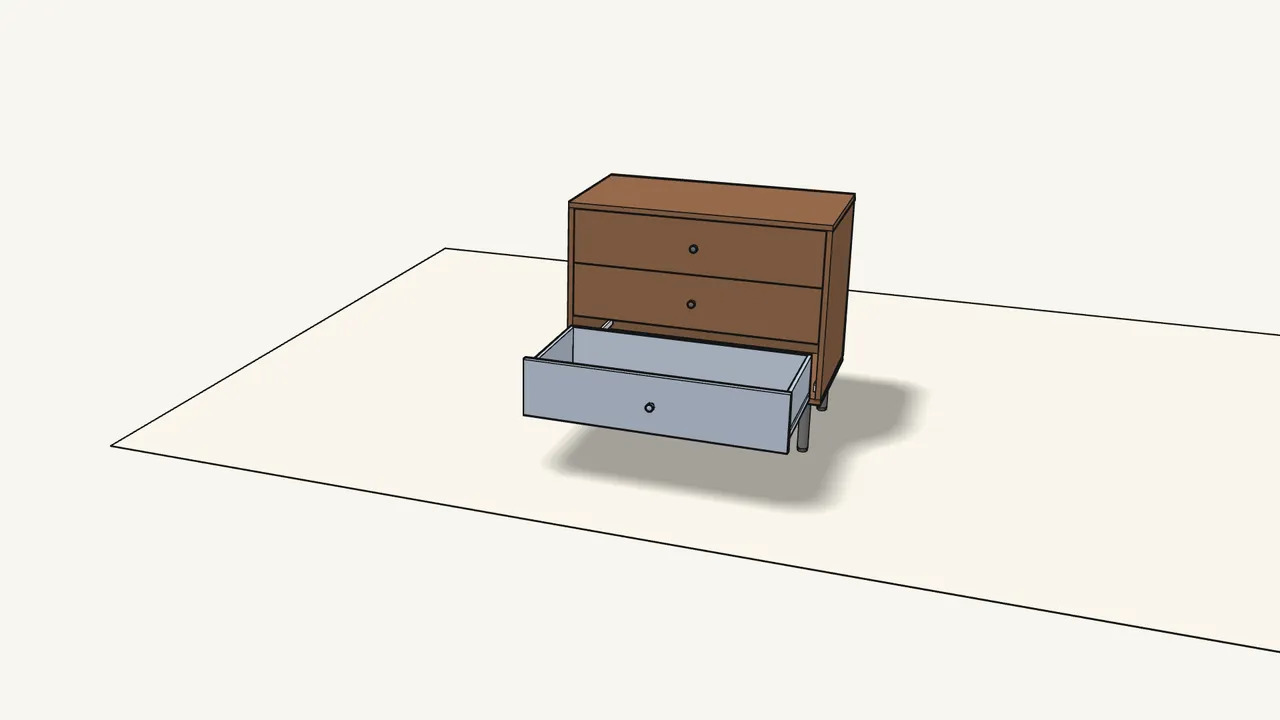
Step 23 · manual step 25
Slide the 3 drawers in on their runners.
Open only one drawer at a time.
Tips & safety
- Always fix the dresser to the wall. Children have died from furniture tip-over. Use the wall brackets supplied — the right plugs depend on your wall.
- Open only one drawer at a time. Put the heaviest things in the lowest drawers. Never put a TV on this dresser, and never let children climb or hang on it.
Official instructions
This guide follows IKEA’s official assembly instructions (AA-2526870-6). Keep the printed manual to hand — if anything differs, the manual is right.