IKEA · Dressers & Drawer Units
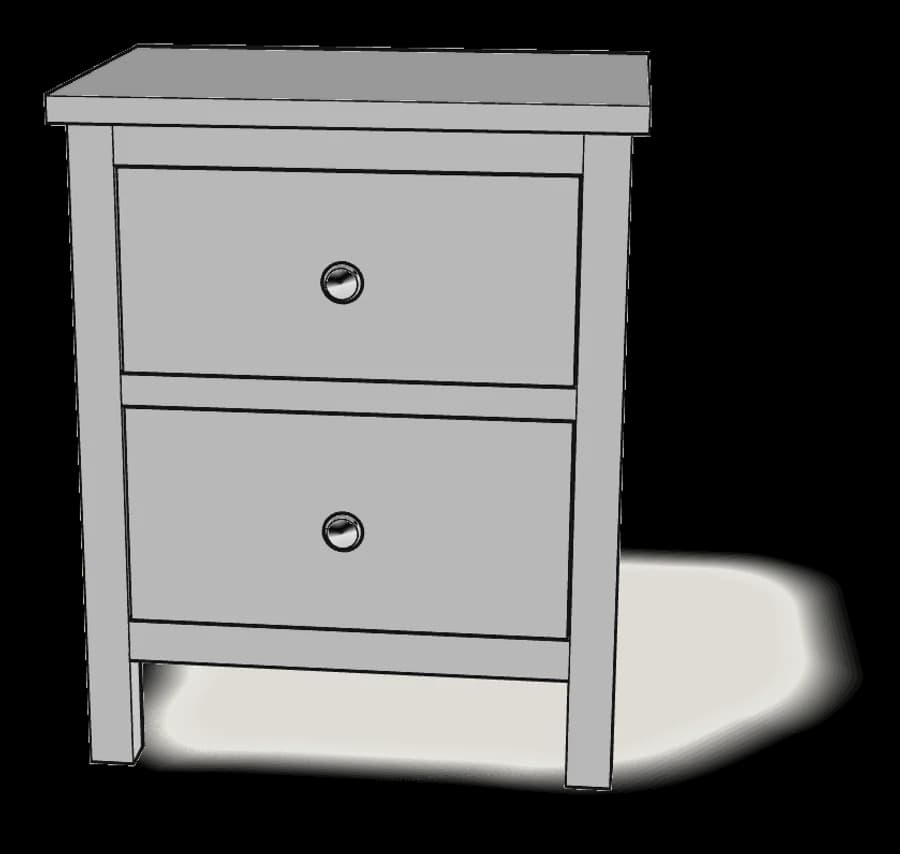
How to assemble IKEA BJÖRKSNÄS Nightstand
Step-by-step IKEA BJÖRKSNÄS Nightstand assembly: 26 illustrated steps, an animated video, the hardware list and the tools you need — following the official instructions (AA-2537390-1).
- 26 illustrated steps
- 25 steps in the manual
- 3:17 video
- 48×38×68 cm cm
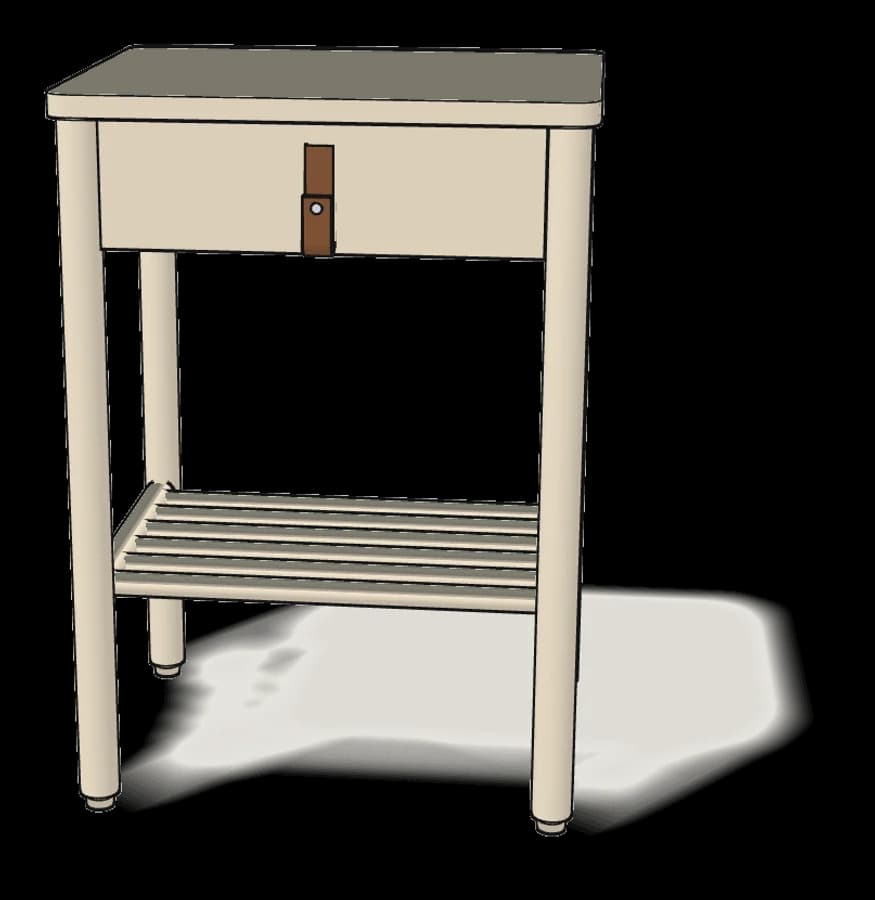
What you need
Tools
- Flat-head screwdriver
- Phillips screwdriver
- Hammer
Hardware in the box
| Part no. (as printed in the manual) | Qty |
|---|---|
| 118331 | 14× |
| 110630 | 14× |
| 101350 | 5× |
| 131360 | 4× |
| 100404 | 3× |
| 110519 | 4× |
| 106562 | 4× |
| 108444 | 1× |
Step-by-step assembly
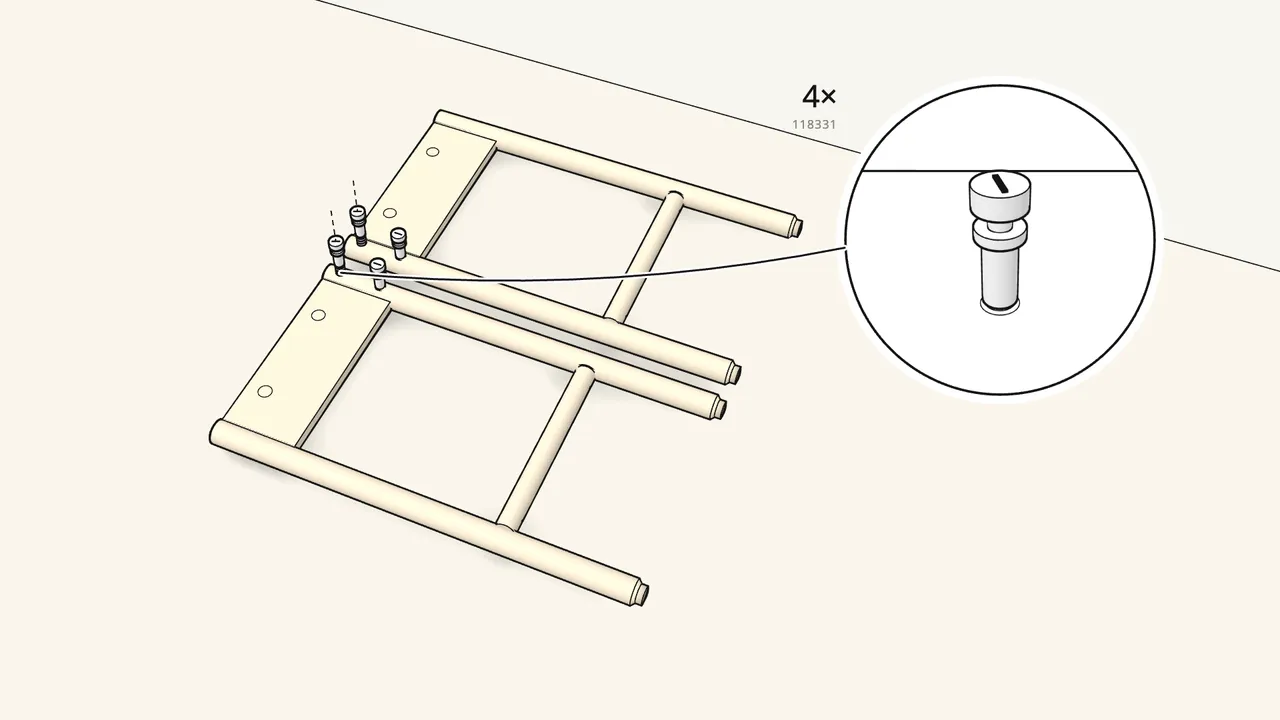
Step 1
Screw 4 cam bolts (118331) into the two side frames.
Lay both frames flat on the rug. 2 bolts in each, next to the back leg.
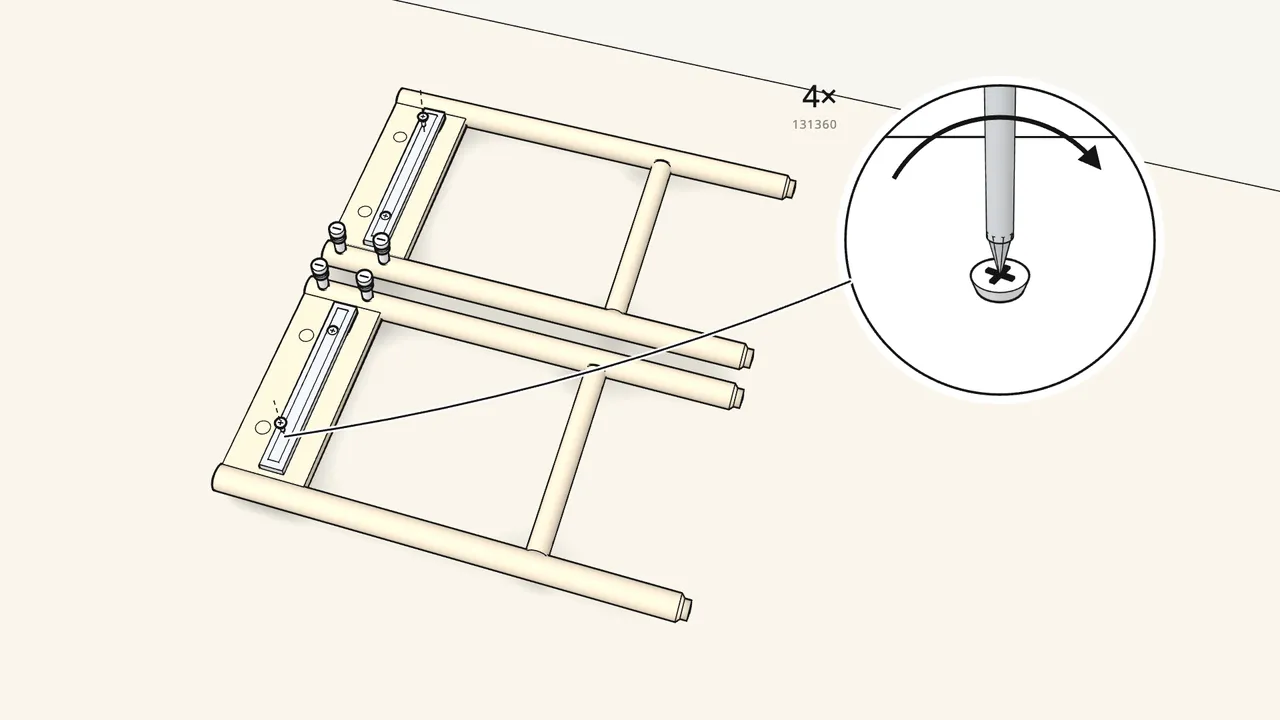
Step 2 · manual step 2–3
Screw a drawer runner onto each frame with 2 screws (131360).
Check the runner direction (arrow on the runner) — see the manual, steps 2–3.
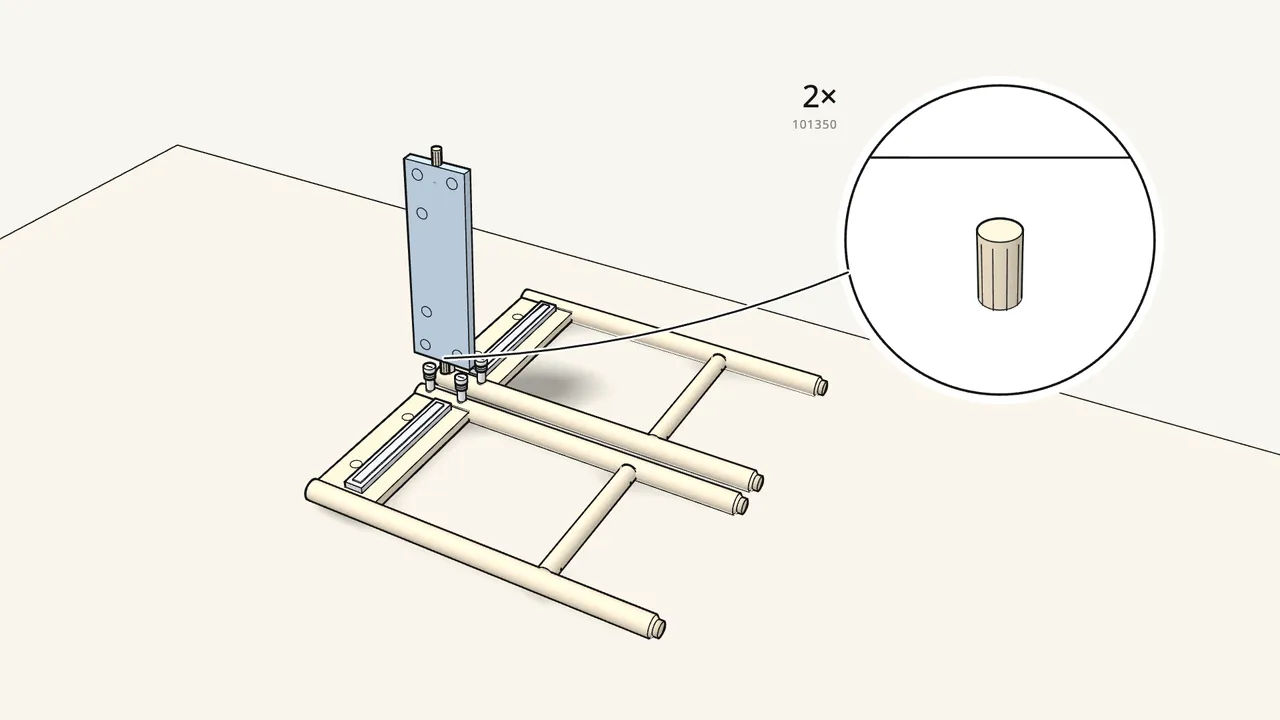
Step 3 · manual step 4
Push 2 dowels (101350) into the back panel and stand it on the frame.
It goes at the back leg, onto the cam bolts.
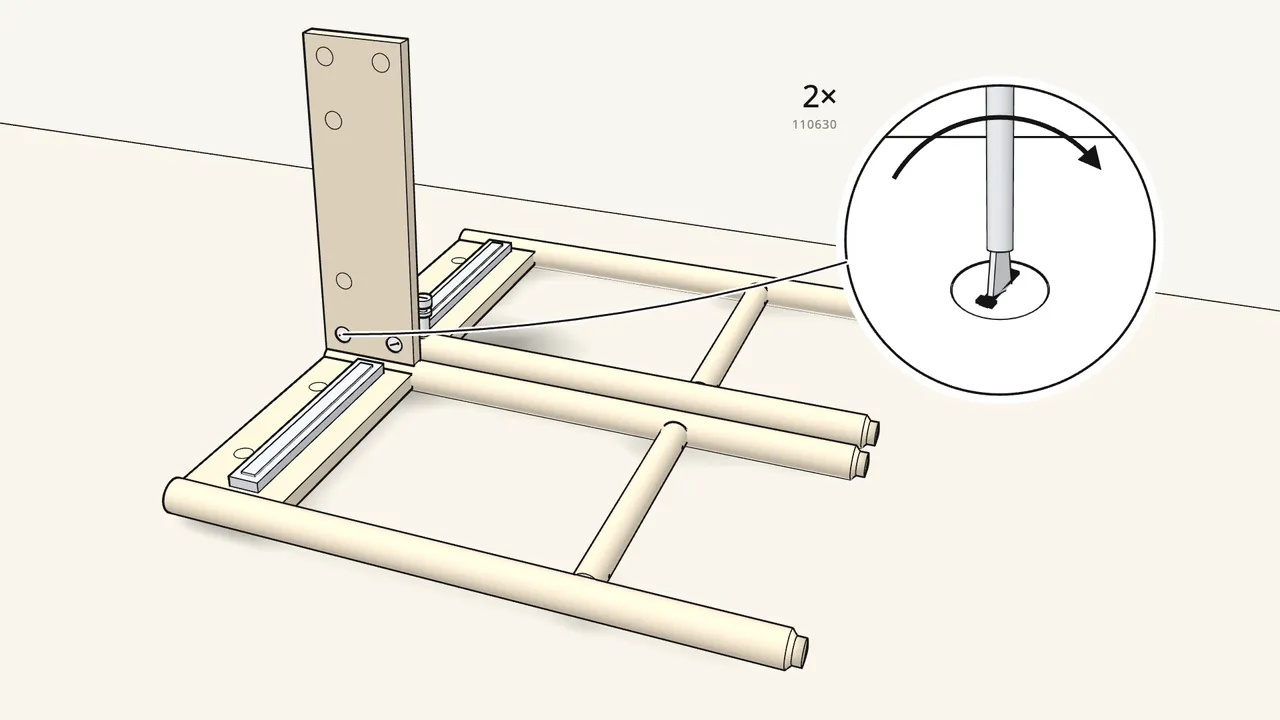
Step 4 · manual step 5
Insert 2 cam locks (110630) and turn them clockwise.
Use the flat screwdriver.
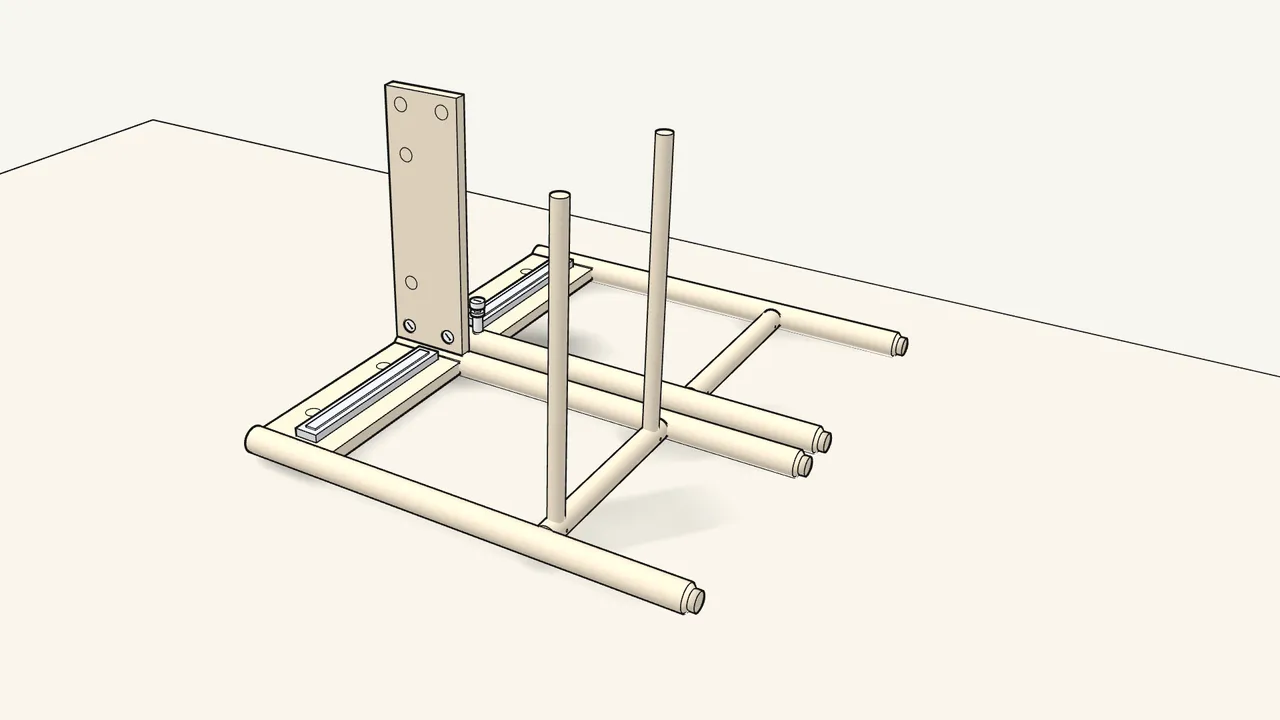
Step 5 · manual step 6
Push the two outer shelf rods into the end holes of the rail.
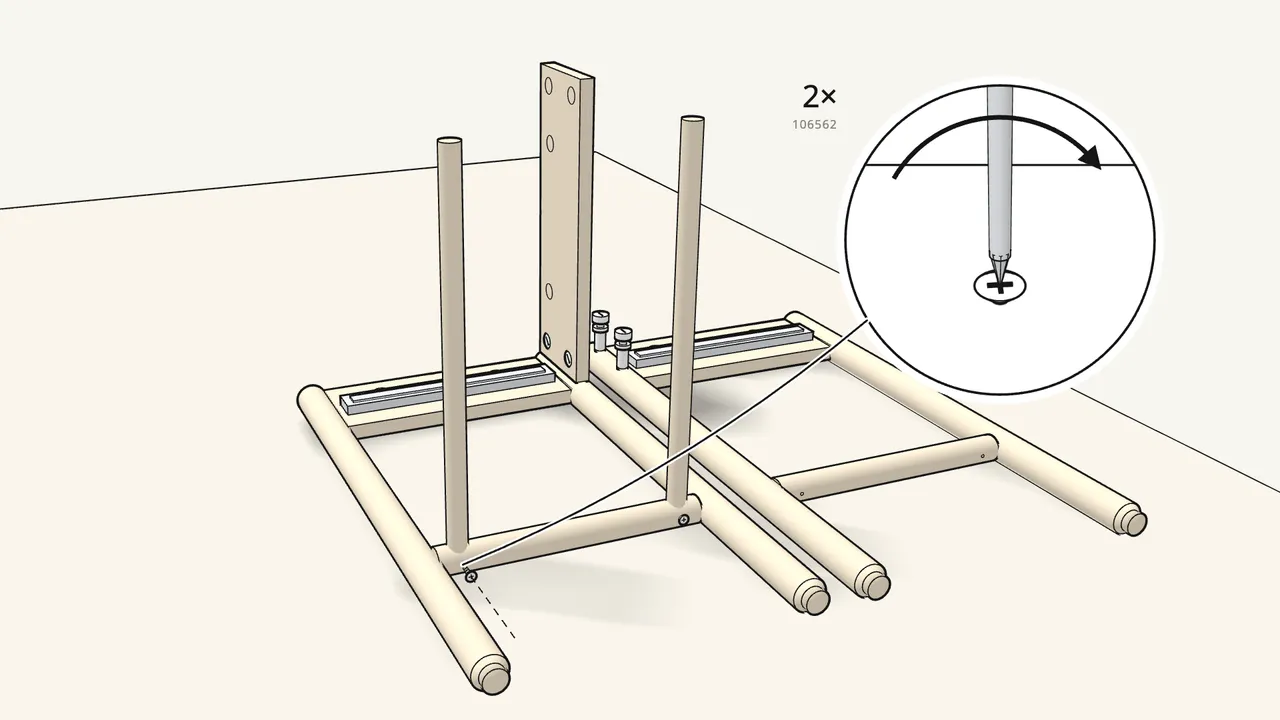
Step 6 · manual step 7
Fix them with 2 screws (106562).
Use the 106562 screws, not 108444. Phillips screwdriver.
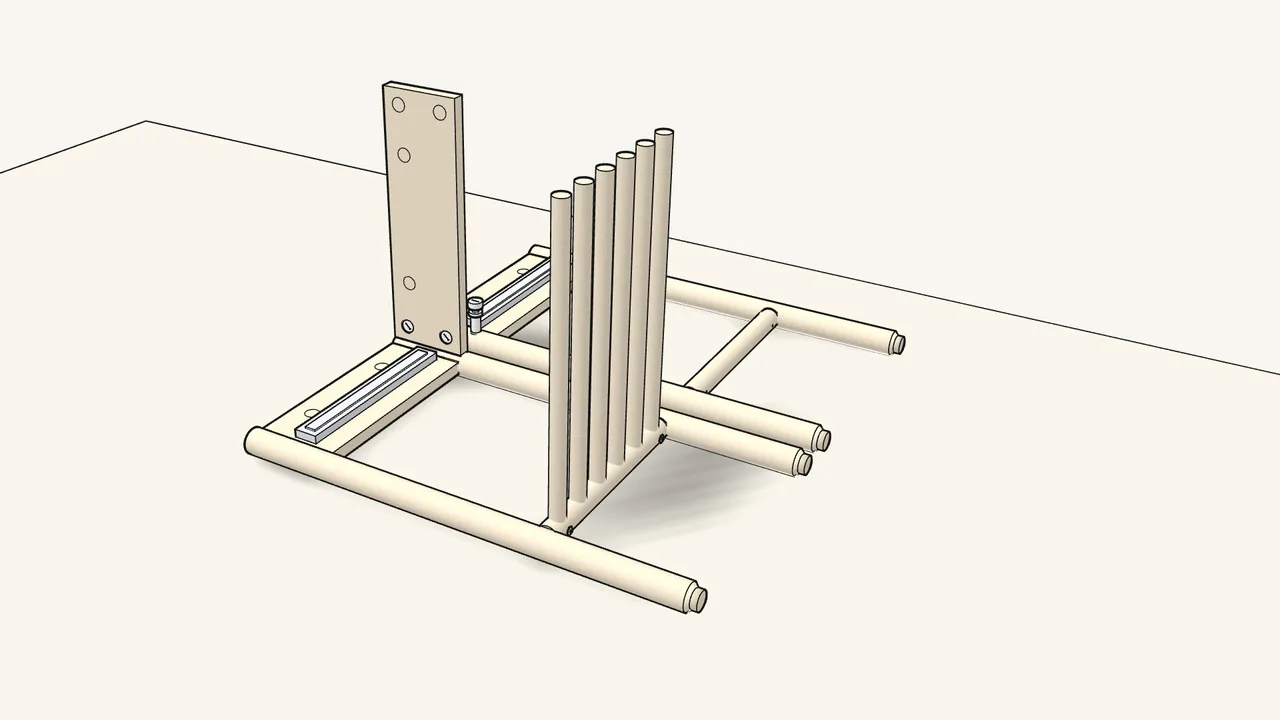
Step 7 · manual step 8
Push the other 4 rods into the rail.
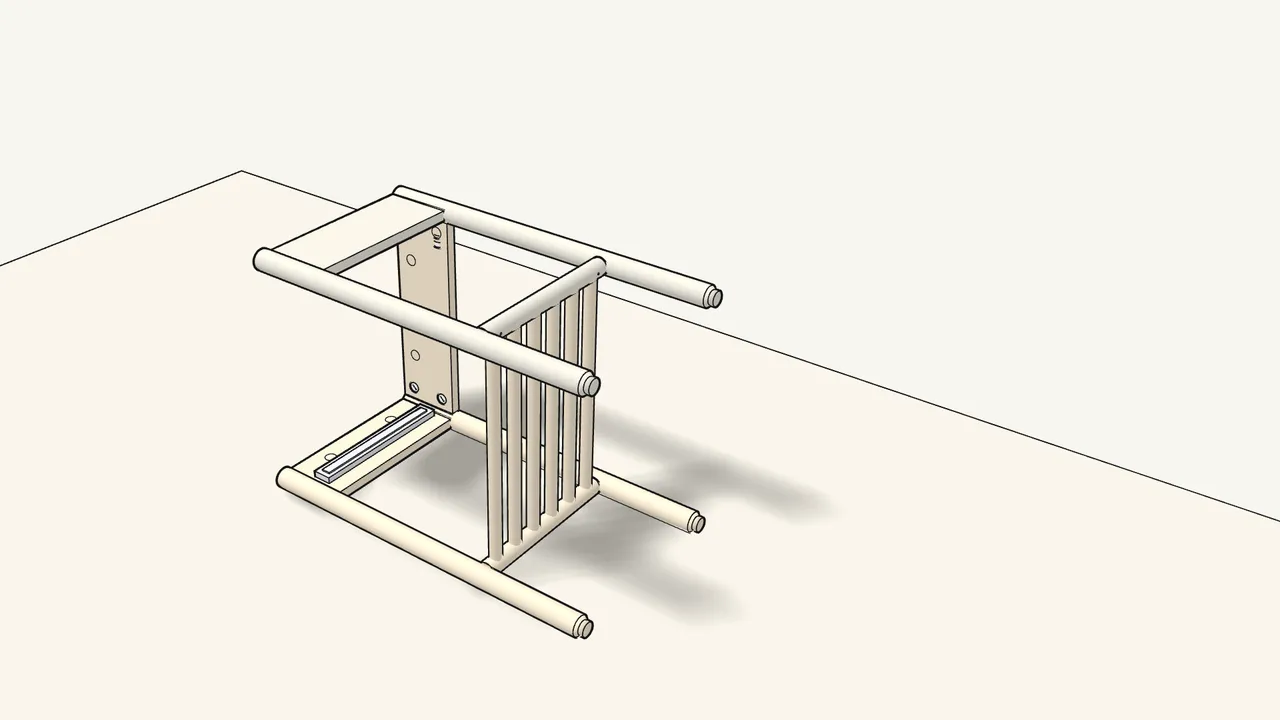
Step 8 · manual step 9
Fold the second frame over onto the rods and back panel.
Runner side down — the bolts go into the back panel.
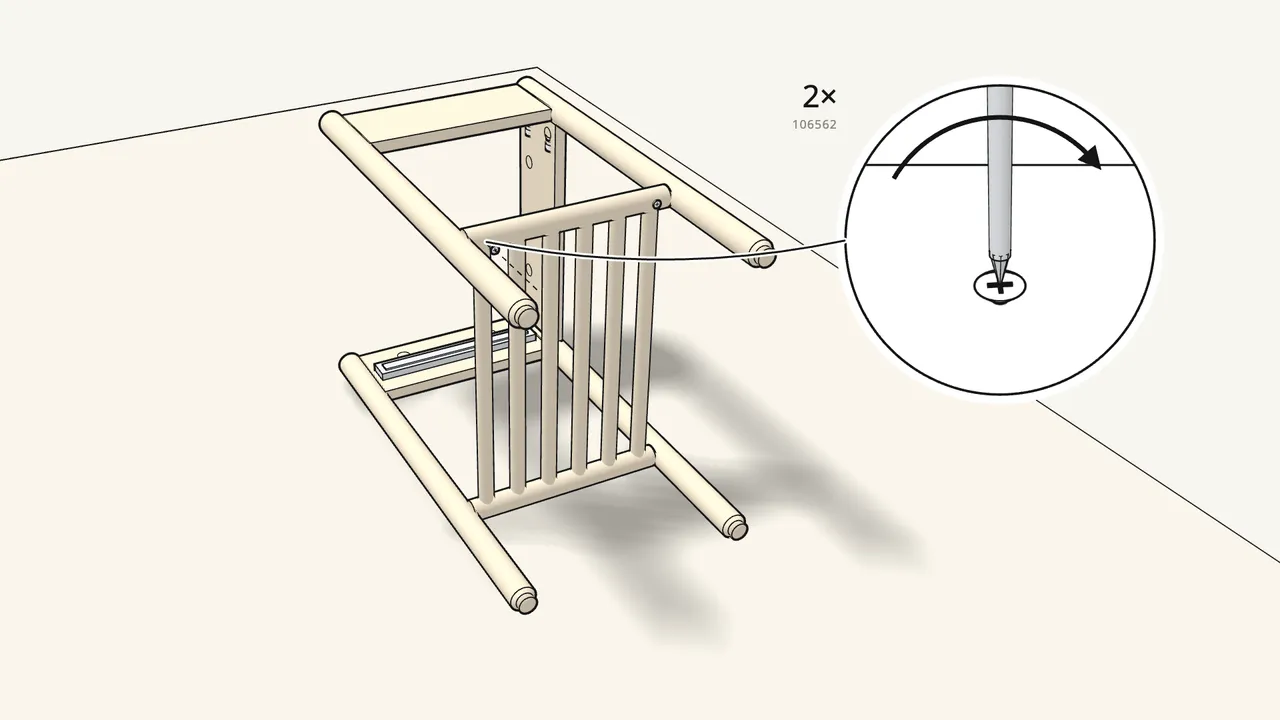
Step 9 · manual step 10
Fix the outer rods with 2 screws (106562).
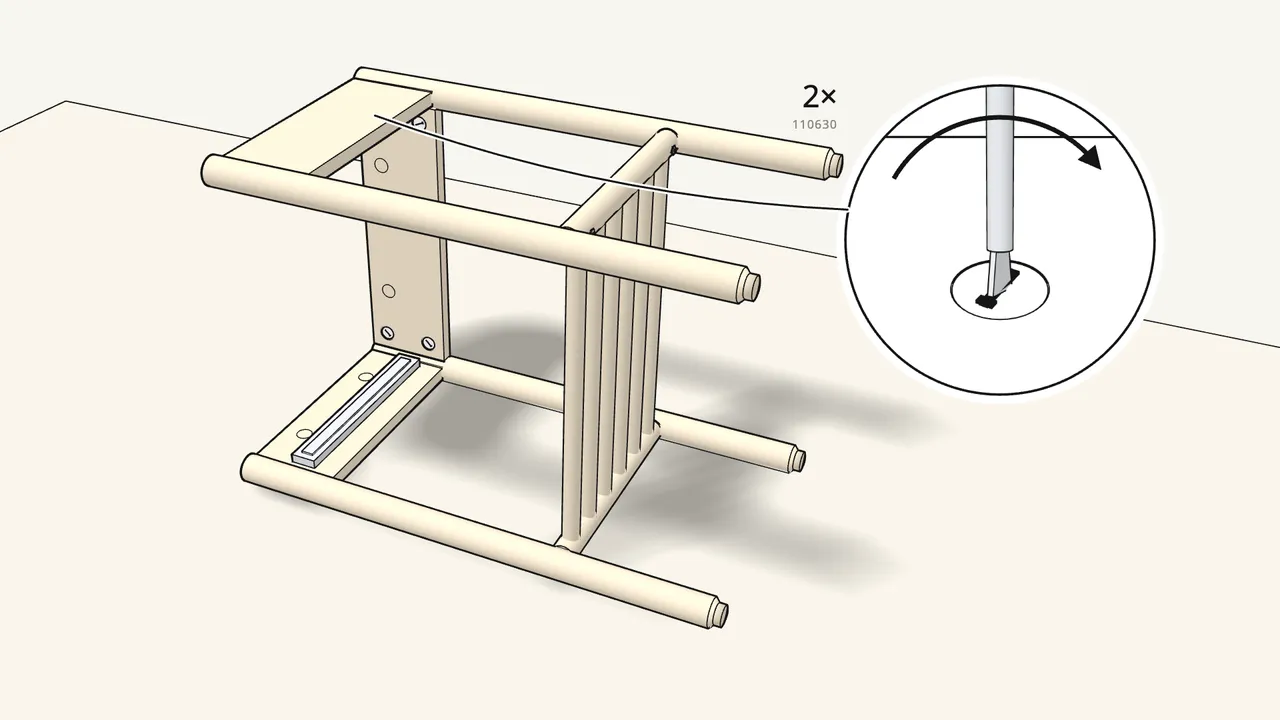
Step 10 · manual step 11
Insert 2 cam locks (110630) and turn them clockwise.
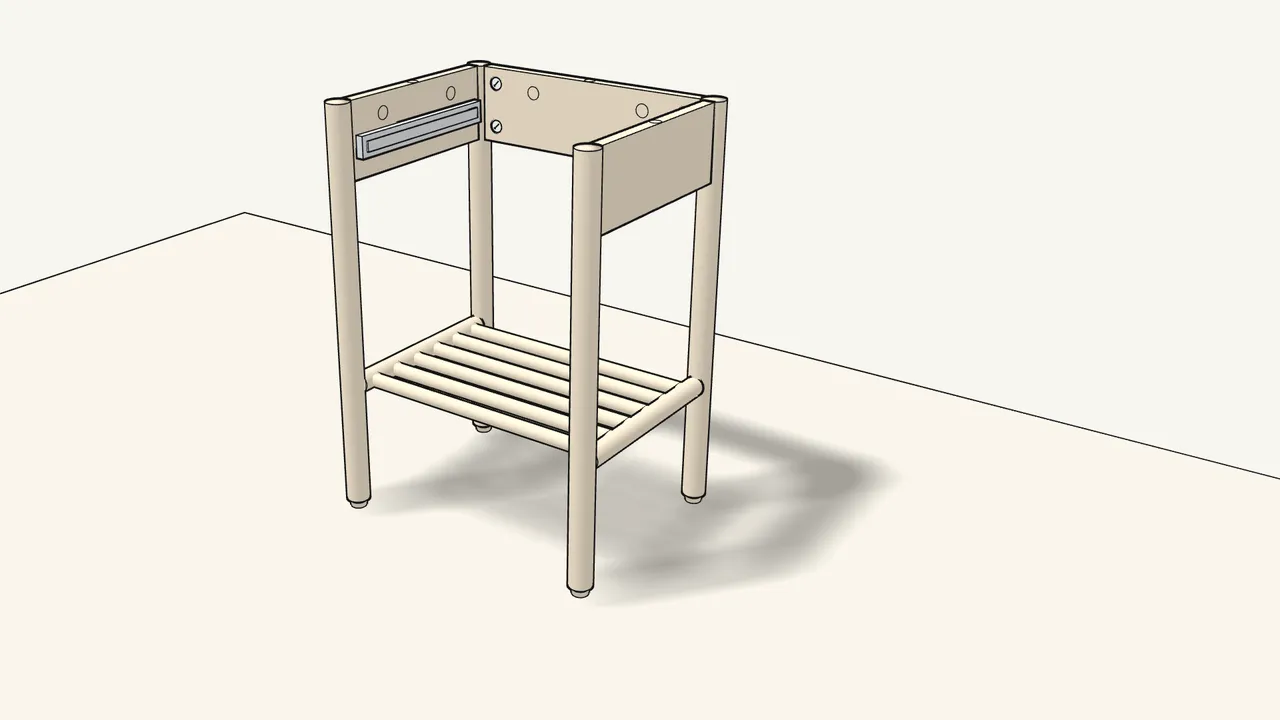
Step 11 · manual step 12
Turn the frame upright.
Get help or lift carefully — it stands on its 4 legs.
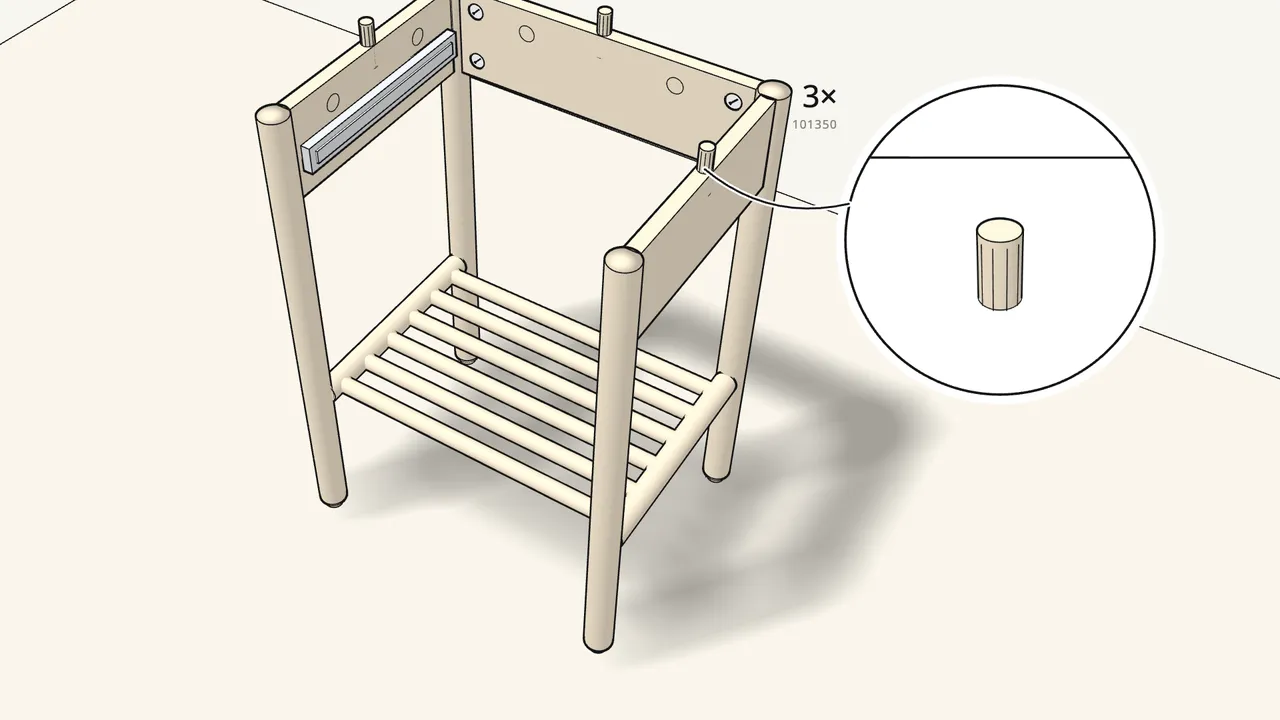
Step 12
Push 3 dowels (101350) into the top edges.
One in each side apron and one in the back panel.
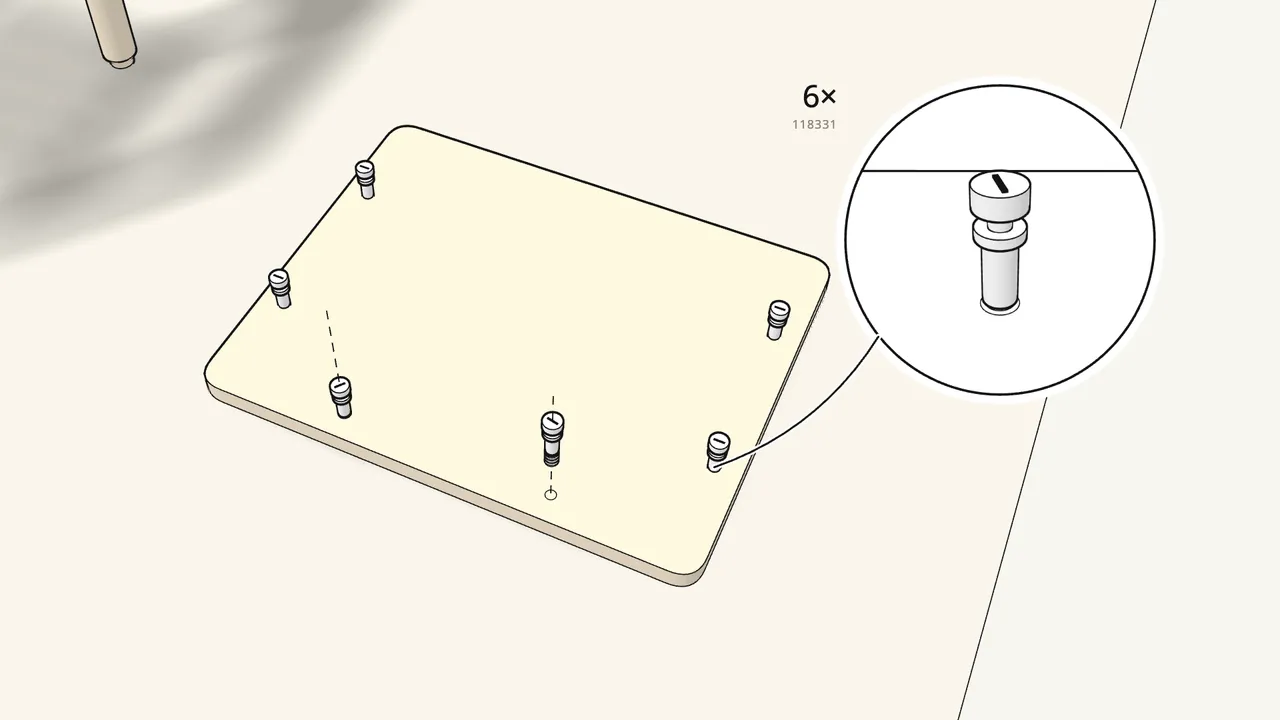
Step 13
Screw 6 cam bolts (118331) into the underside of the top.
Lay the top face-down on the rug.
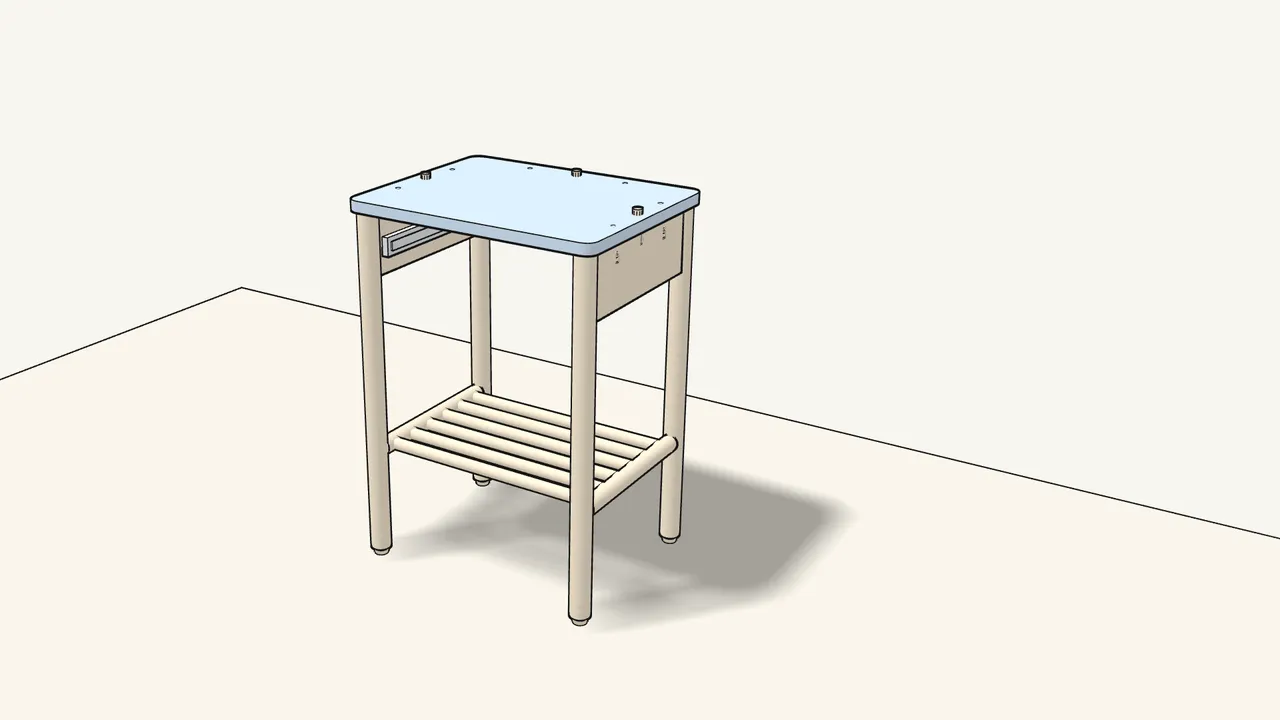
Step 14 · manual step 13
Turn the top over and lower it onto the frame.
Bolts and dowels go into the holes in the aprons and back panel.
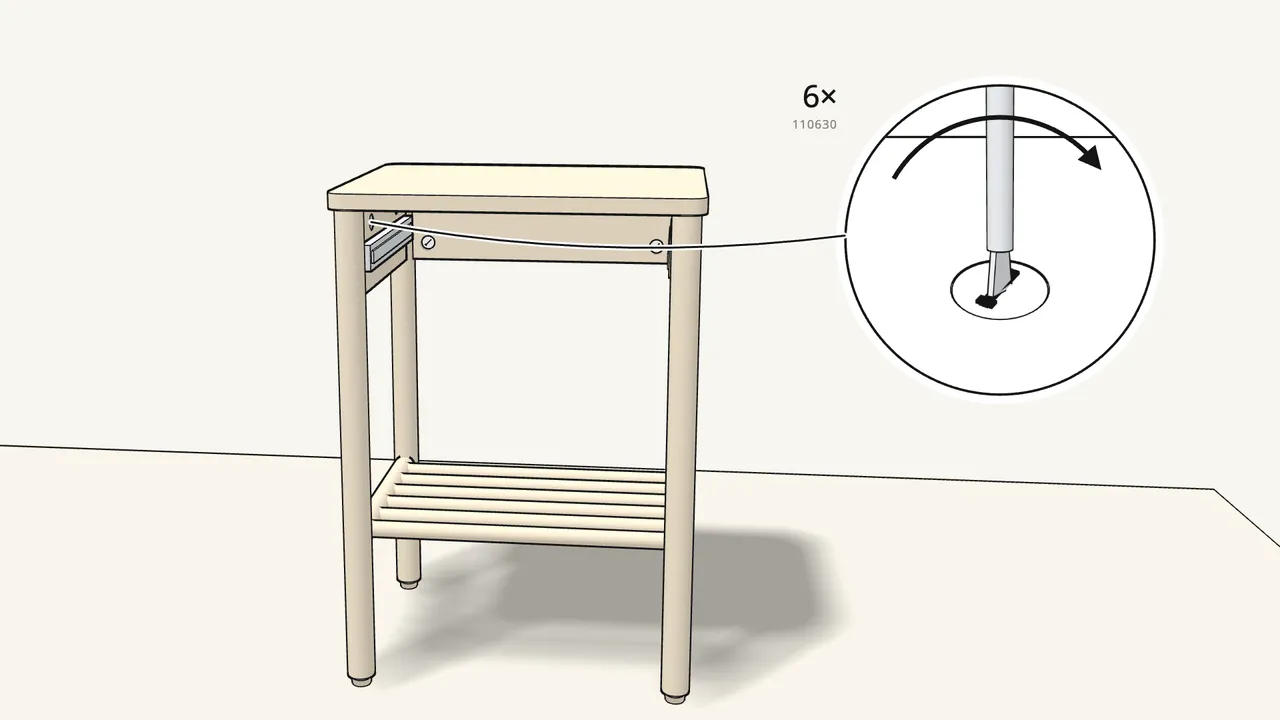
Step 15 · manual step 14
Insert 6 cam locks (110630) and turn them clockwise.
2 in each apron, 2 in the back panel.
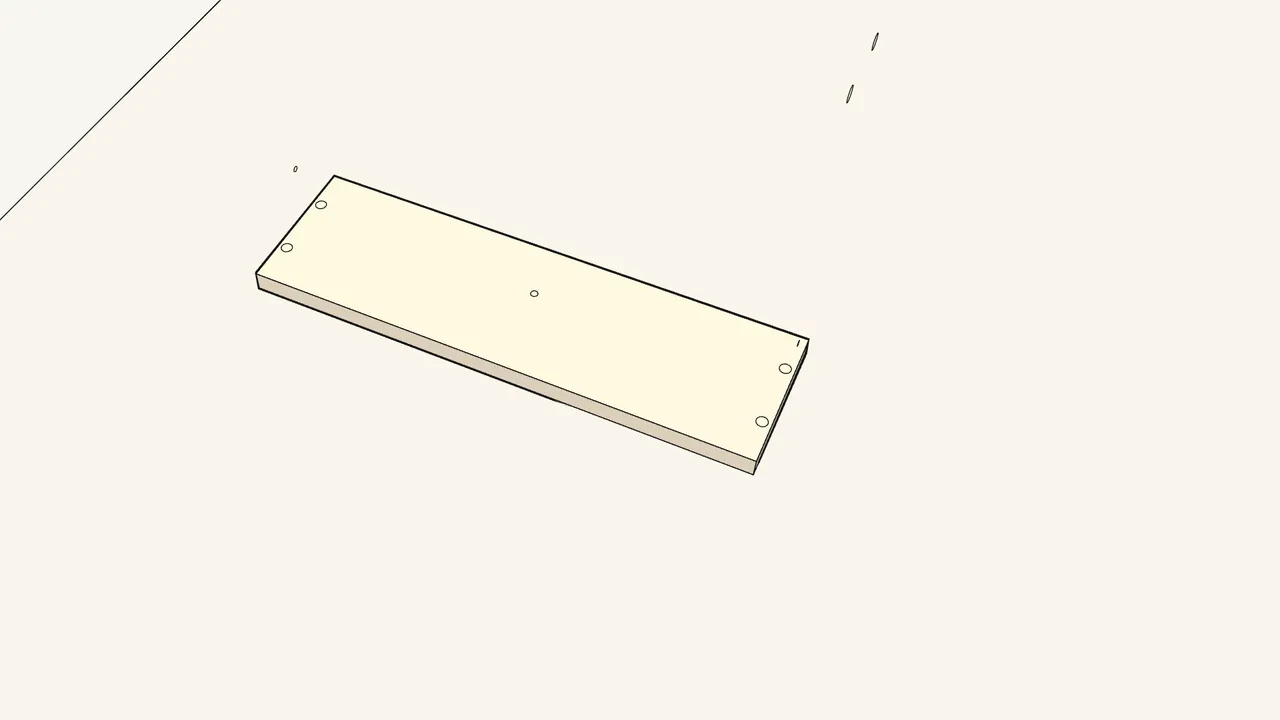
Step 16
Now the drawer.
Build it lying on its front.
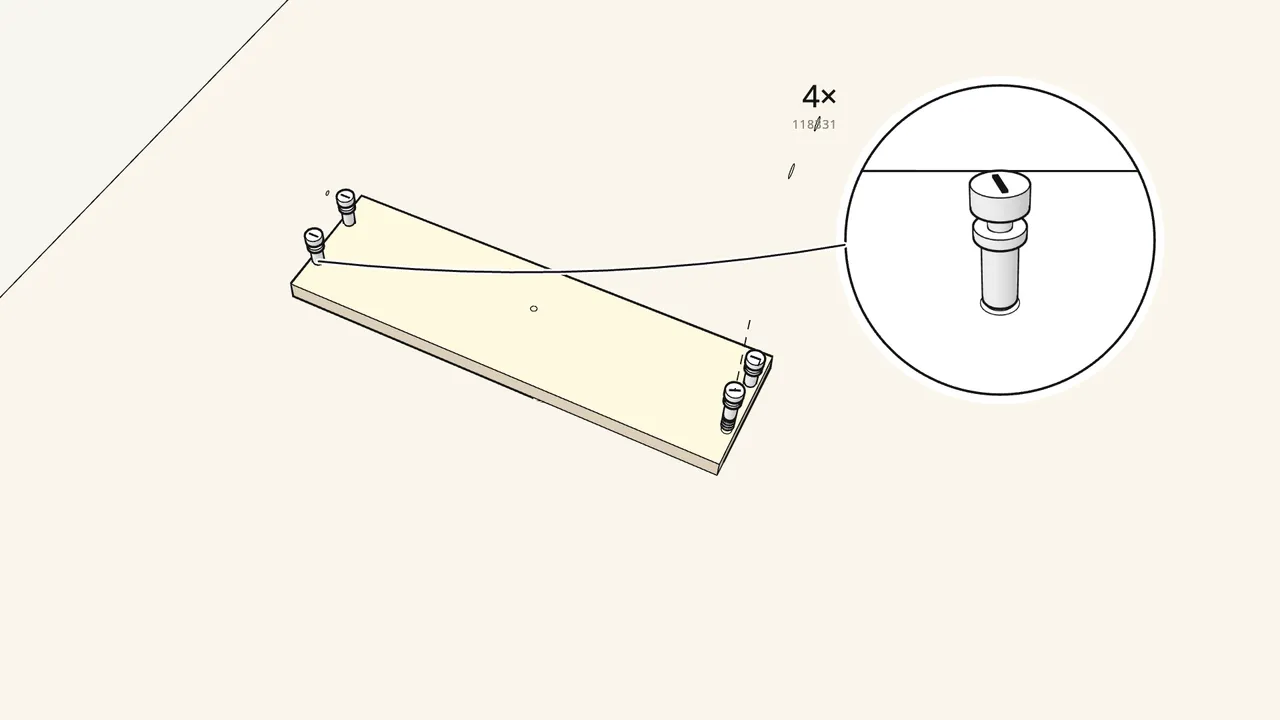
Step 17 · manual step 15
Screw 4 cam bolts (118331) into the drawer front.
2 at each end of the inside face.
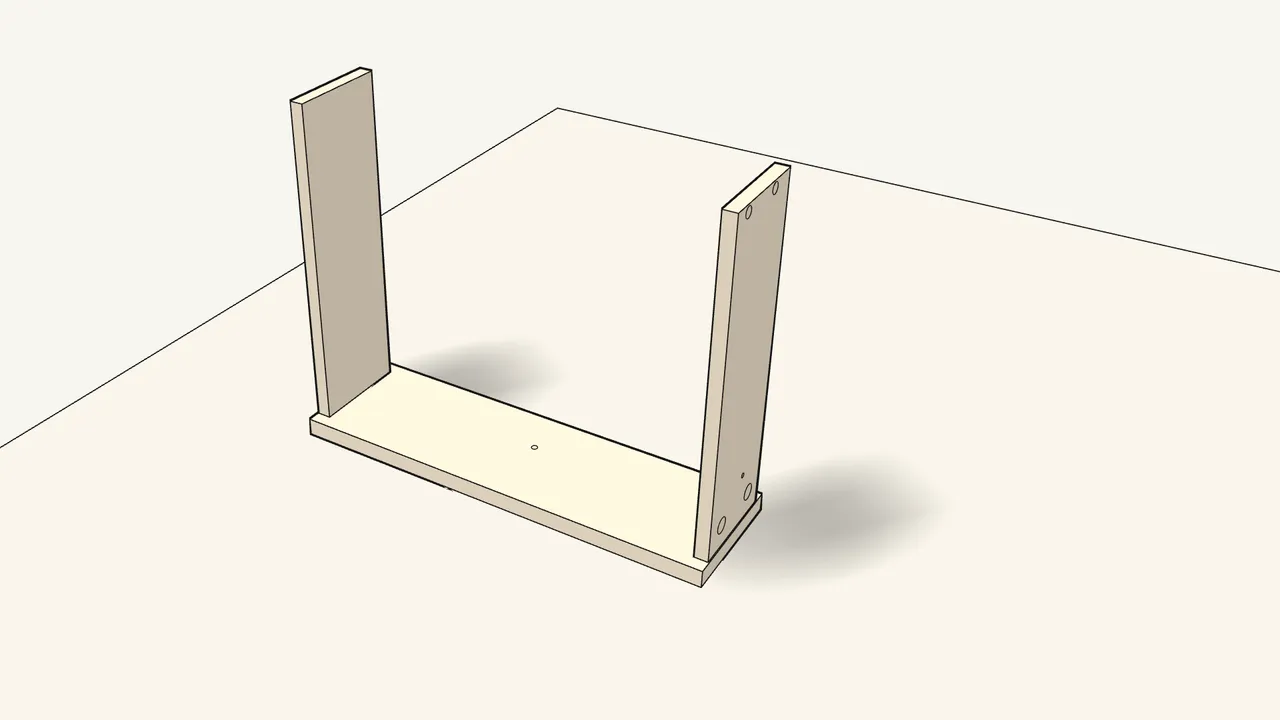
Step 18 · manual step 16
Fit the two drawer sides onto the bolts.
Grooves facing in — see the manual, step 16.
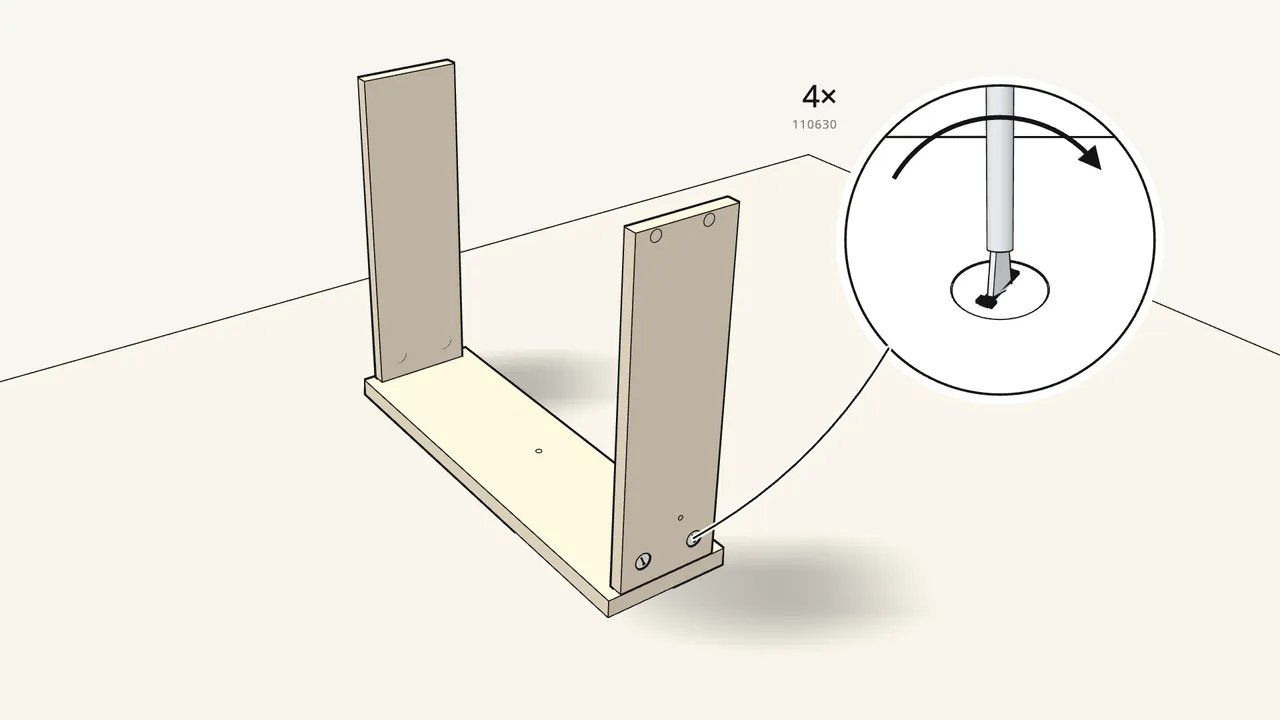
Step 19 · manual step 17
Insert 4 cam locks (110630) and turn them clockwise.
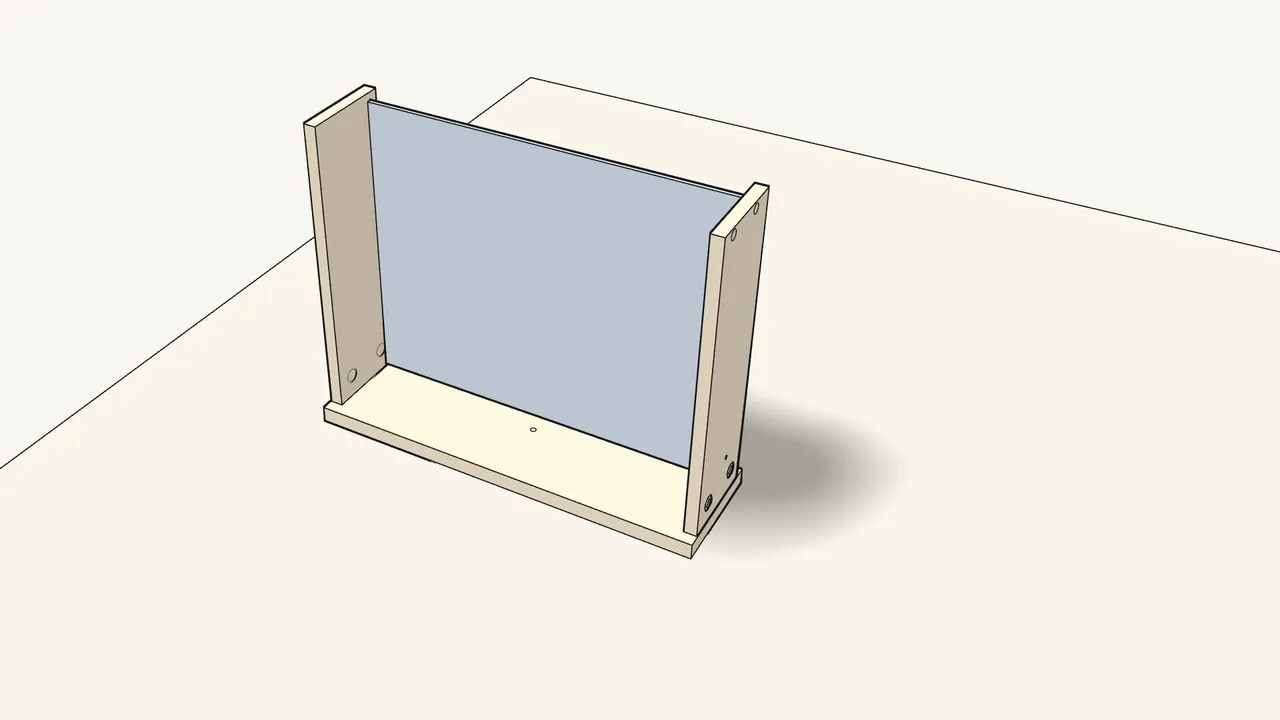
Step 20 · manual step 18
Slide the drawer bottom down into the grooves.
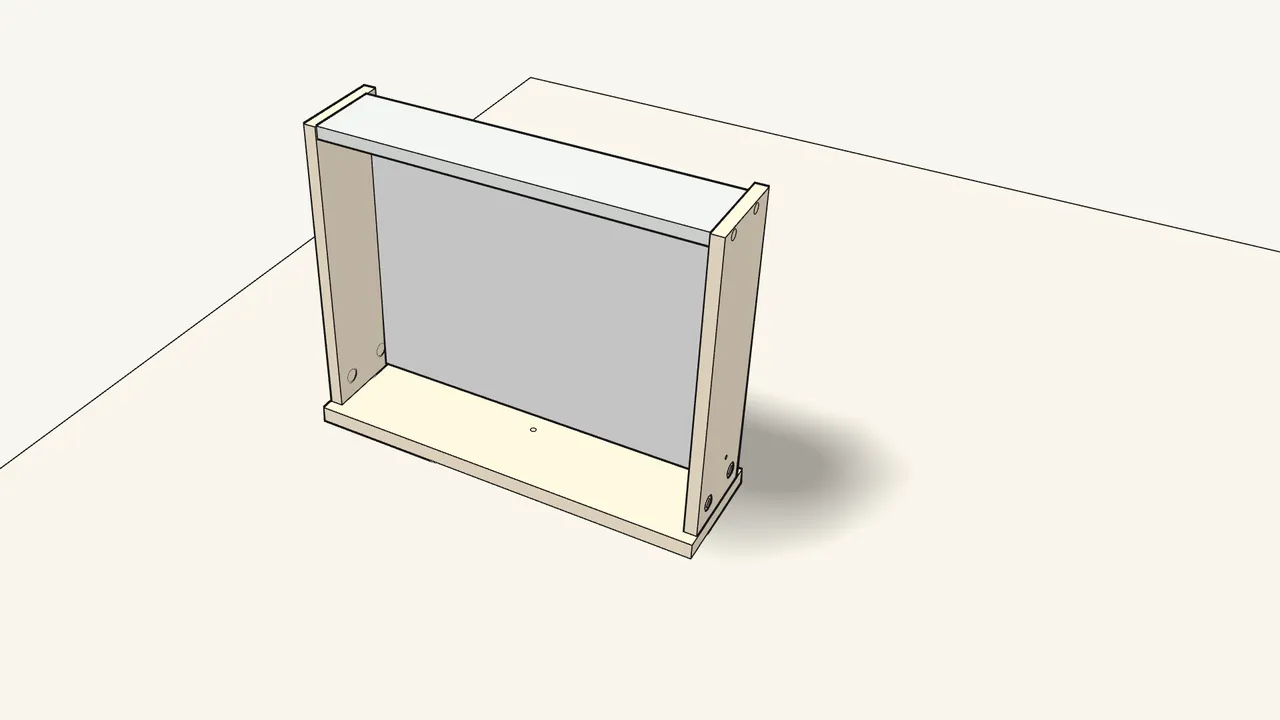
Step 21 · manual step 19
Press the drawer back in on top of it.
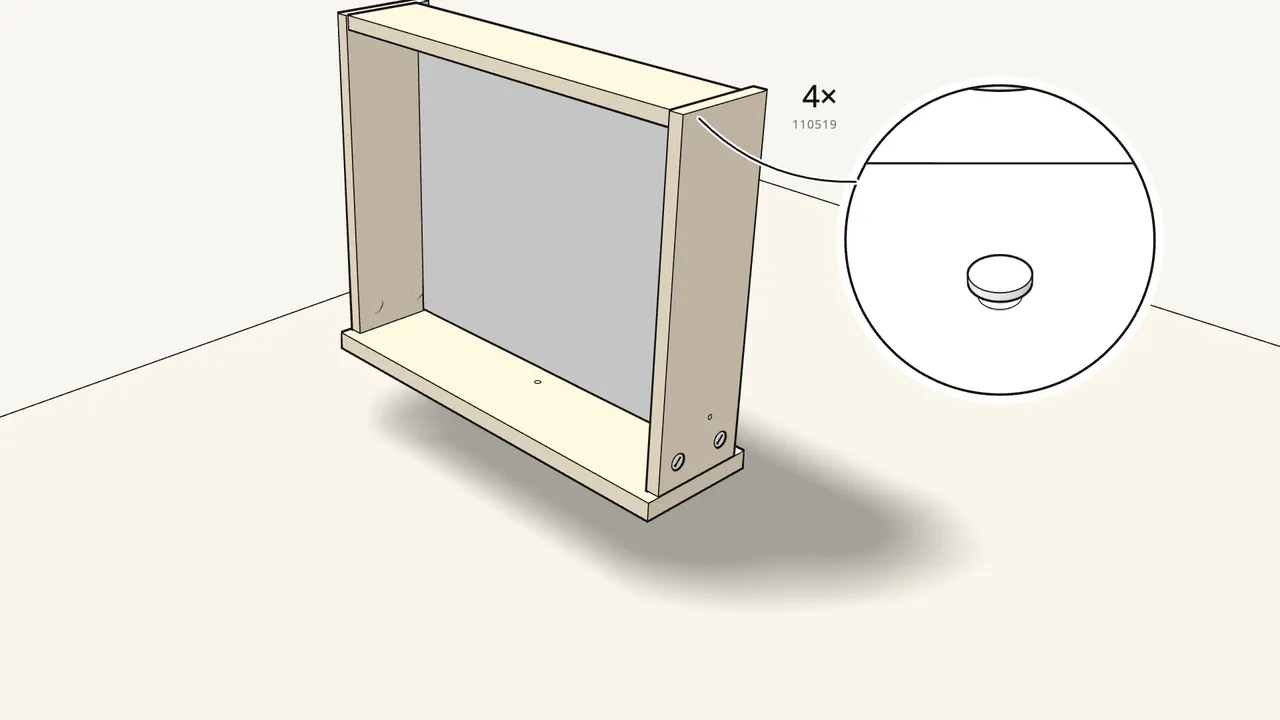
Step 22 · manual step 20
Hammer in 4 screw-dowels (110519), then turn the drawer over.
2 through each side into the back.
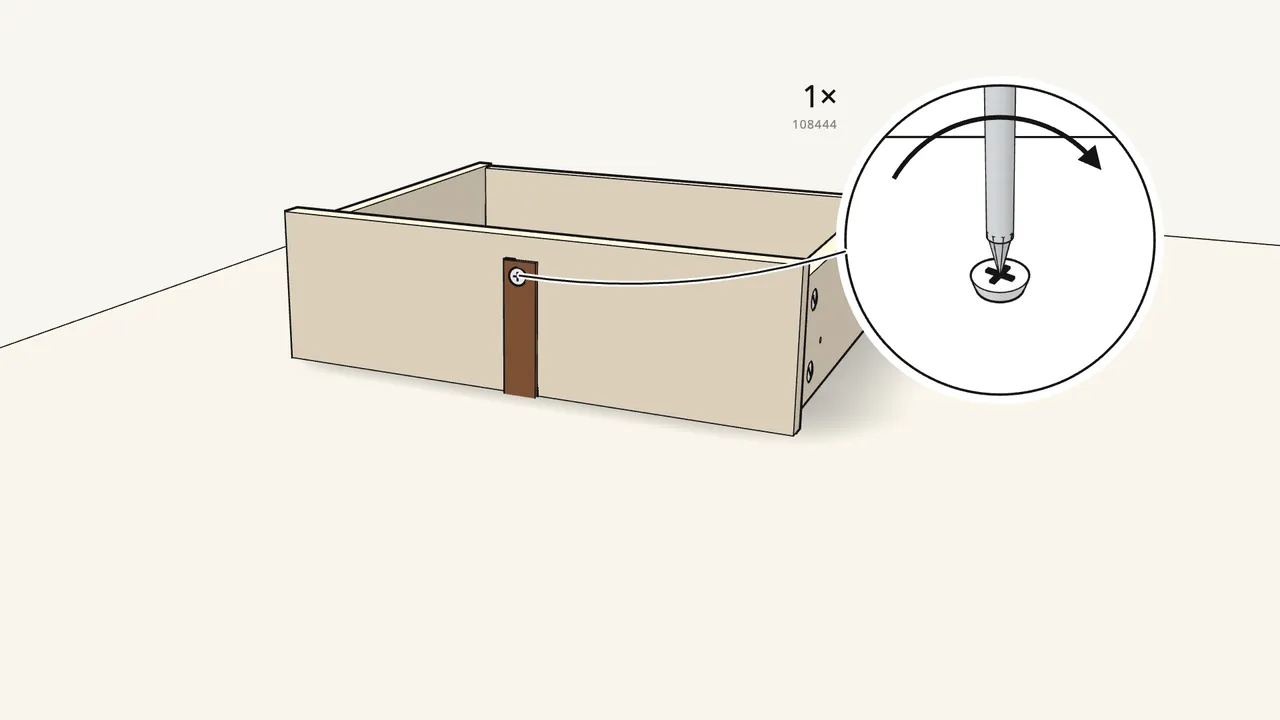
Step 23 · manual step 21
Screw the leather handle onto the drawer front (108444).
Through the top hole of the strap, into the small hole in the front.
Step 24 · manual step 22
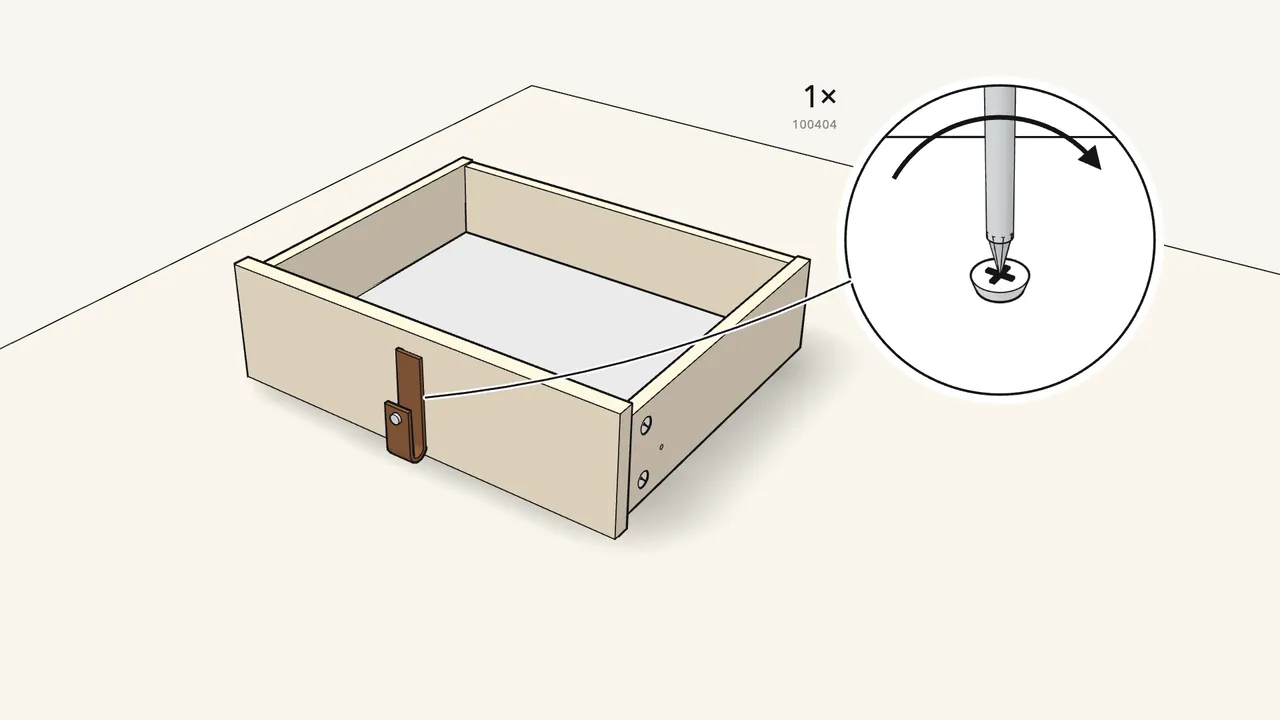
Fold the strap up and fix it with a screw (100404) from inside.
The screw goes through the front into the handle post (191314).
Step 25 · manual step 23–24
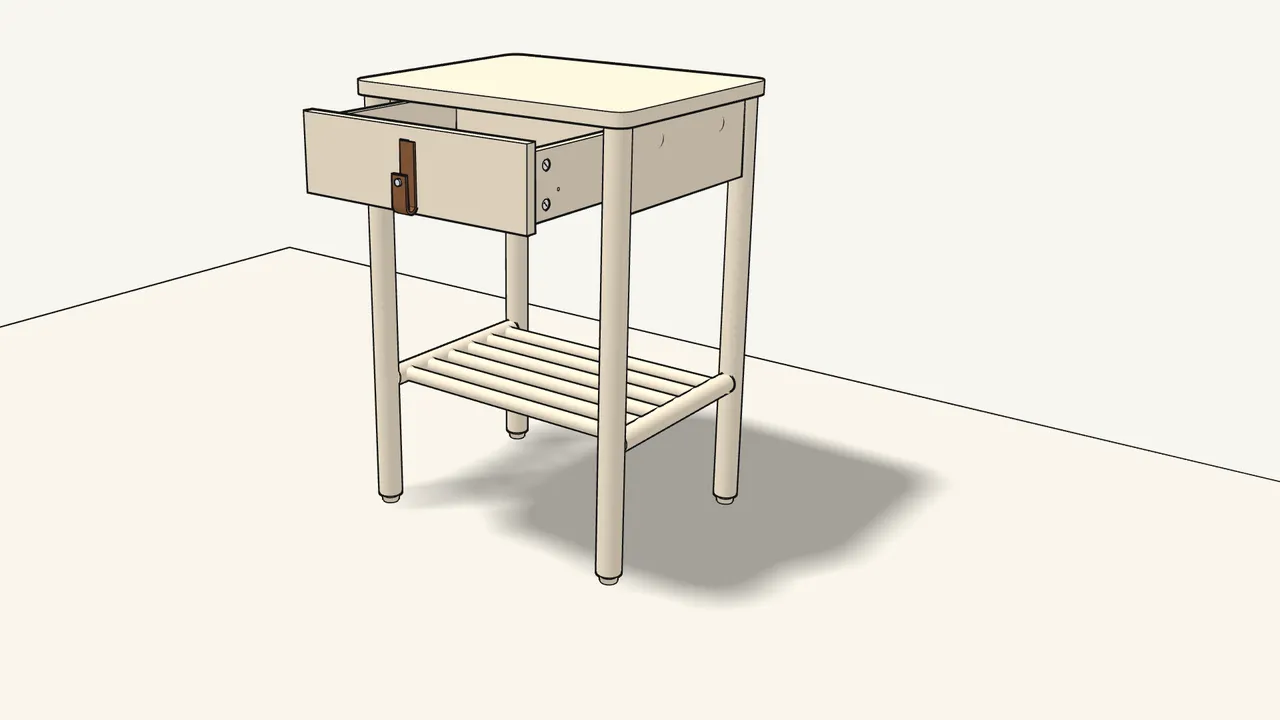
Pull the runners out and slide the drawer in.
Step 26 · manual step 25
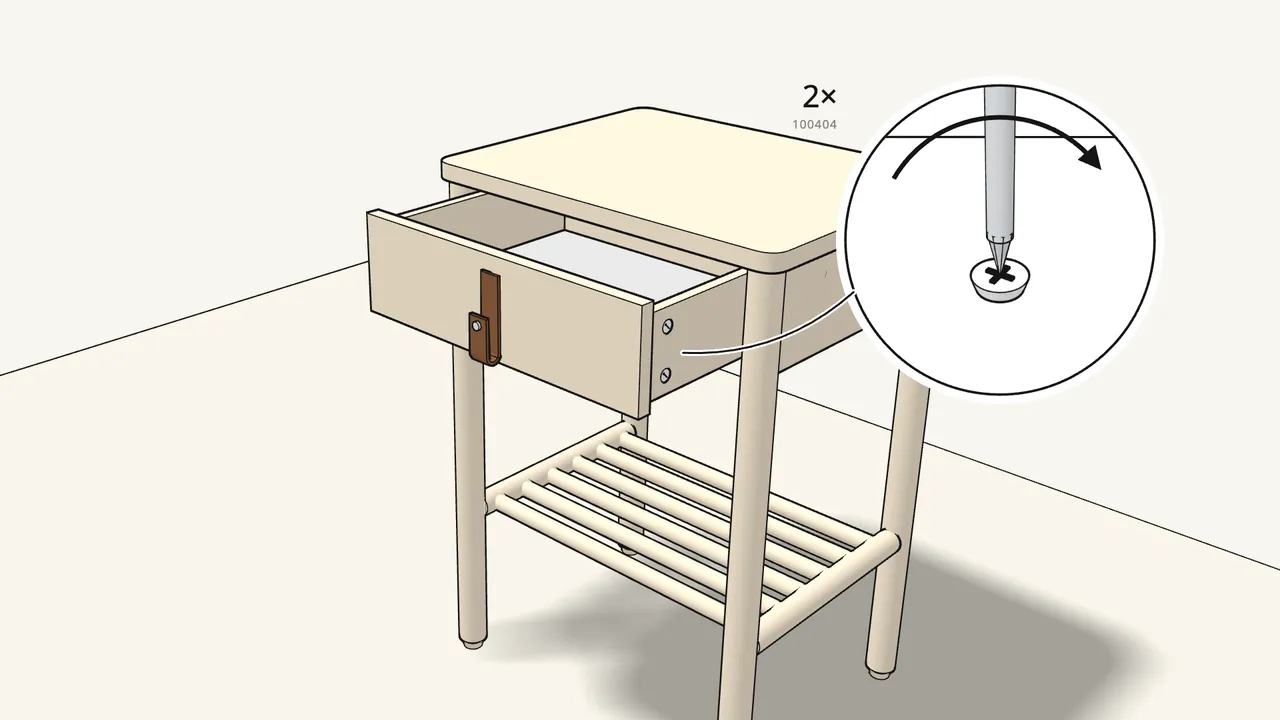
Fix the drawer to the runners with 2 screws (100404).
One each side, with the drawer pulled out. Then push it in.
Tips & safety
- Max load 25 kg (55 lb) — do not sit on it. The warning on manual pages 2–3: it is a delicate table, not a seat or step.
- Assemble on a rug or the flattened box. It protects the birch surfaces from scratches (manual page 4).
Official instructions
This guide follows IKEA’s official assembly instructions (AA-2537390-1). Keep the printed manual to hand — if anything differs, the manual is right.