IKEA · Chairs & Stools
How to assemble IKEA TJUSIG Bench with Shoe Storage
Step-by-step IKEA TJUSIG Bench with Shoe Storage assembly: 20 illustrated steps, an animated video, the hardware list and the tools you need — following the official instructions (AA-354147-1).
- 20 illustrated steps
- 13 steps in the manual
- 2:36 video
- 108×34×50 cm
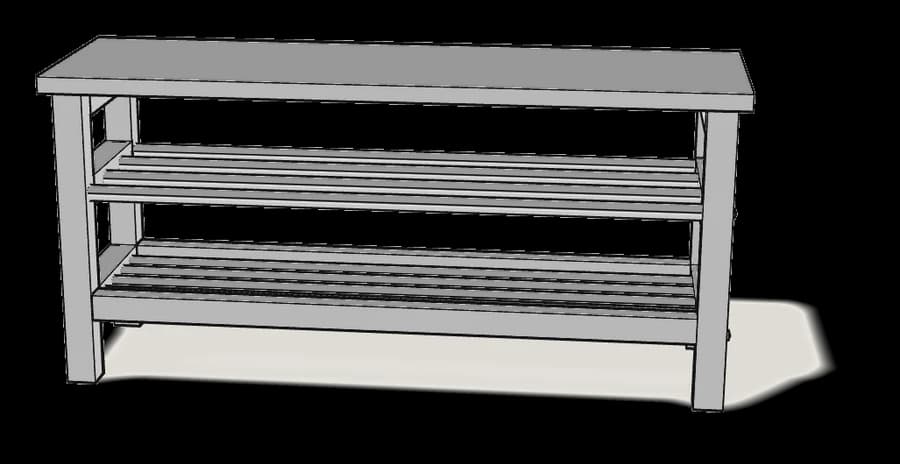
What you need
Tools
- Flat-head screwdriver
- Allen key (included)
A flat-head screwdriver — the Allen key (100001) is included.
Hardware in the box
| Part no. (as printed in the manual) | Qty |
|---|---|
| 100263 | 4× |
| 100214 | 7× |
| 100102 | 4× |
| 101350 | 8× |
| 100505 | 4× |
Step-by-step assembly
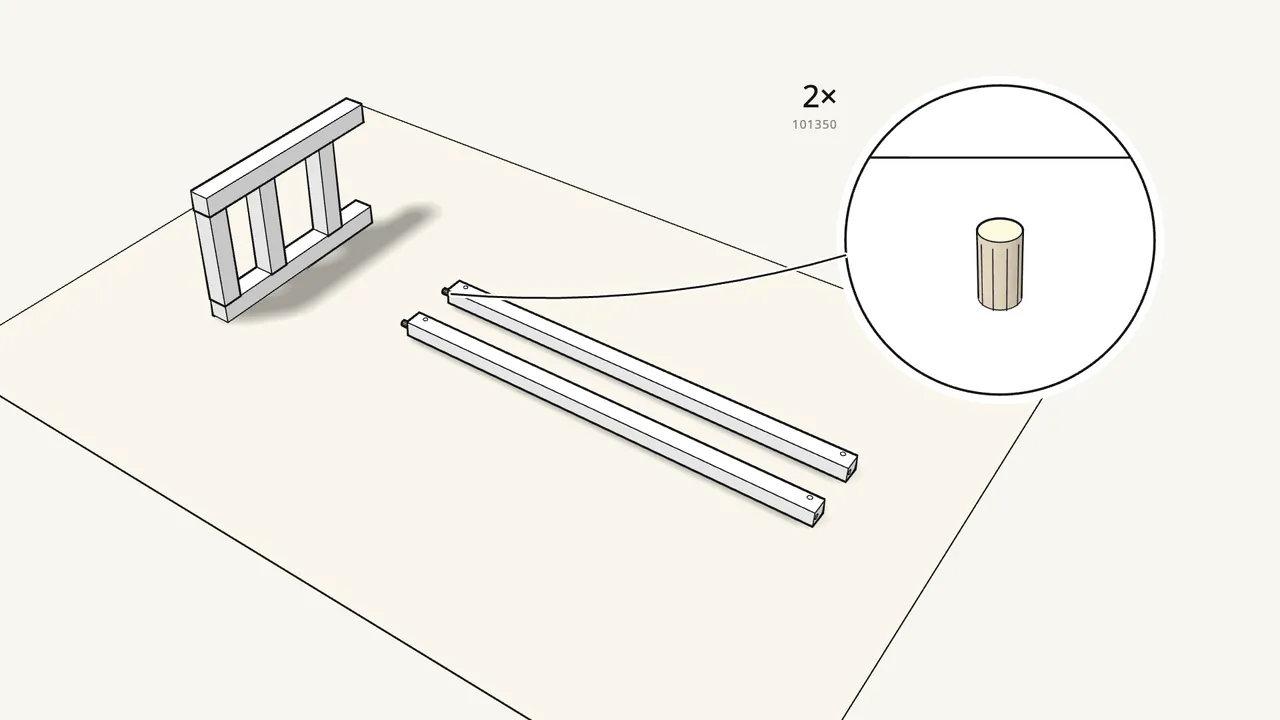
Step 1
Push a dowel (101350) into the end of each long rail.
Lay one end frame on its edge on a rug.
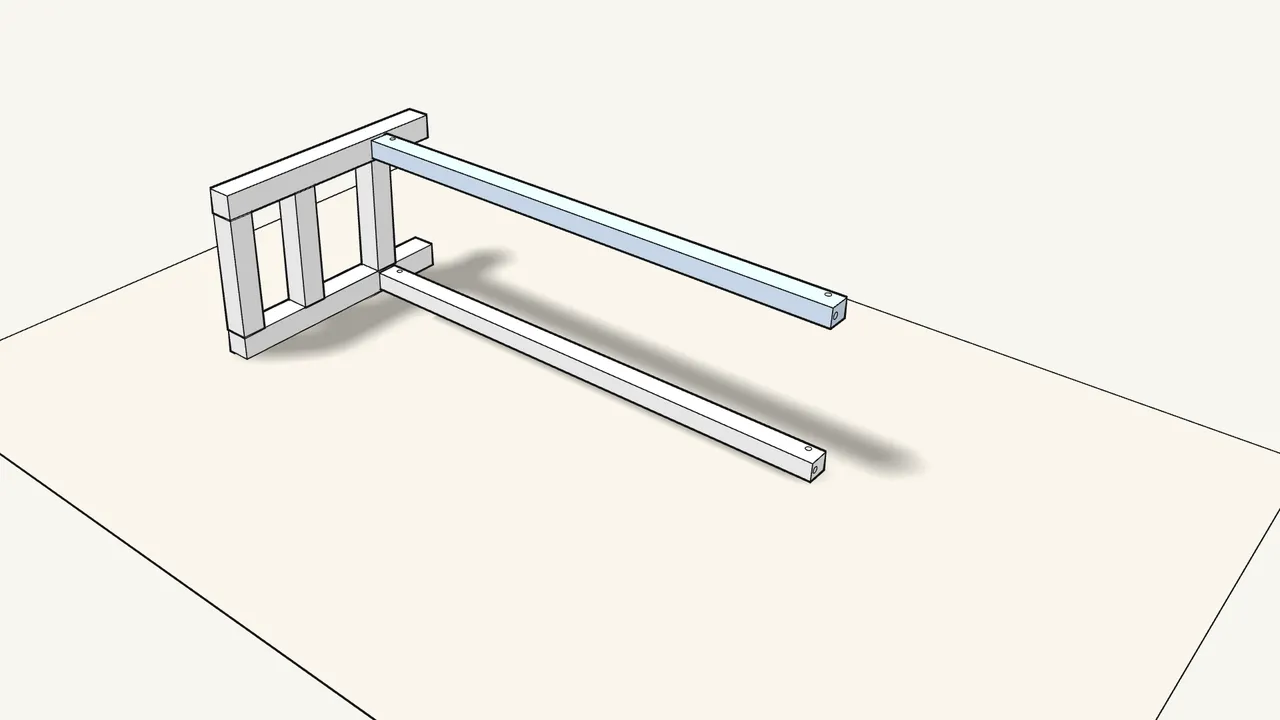
Step 2 · manual step 1
Push both rails onto the end frame.
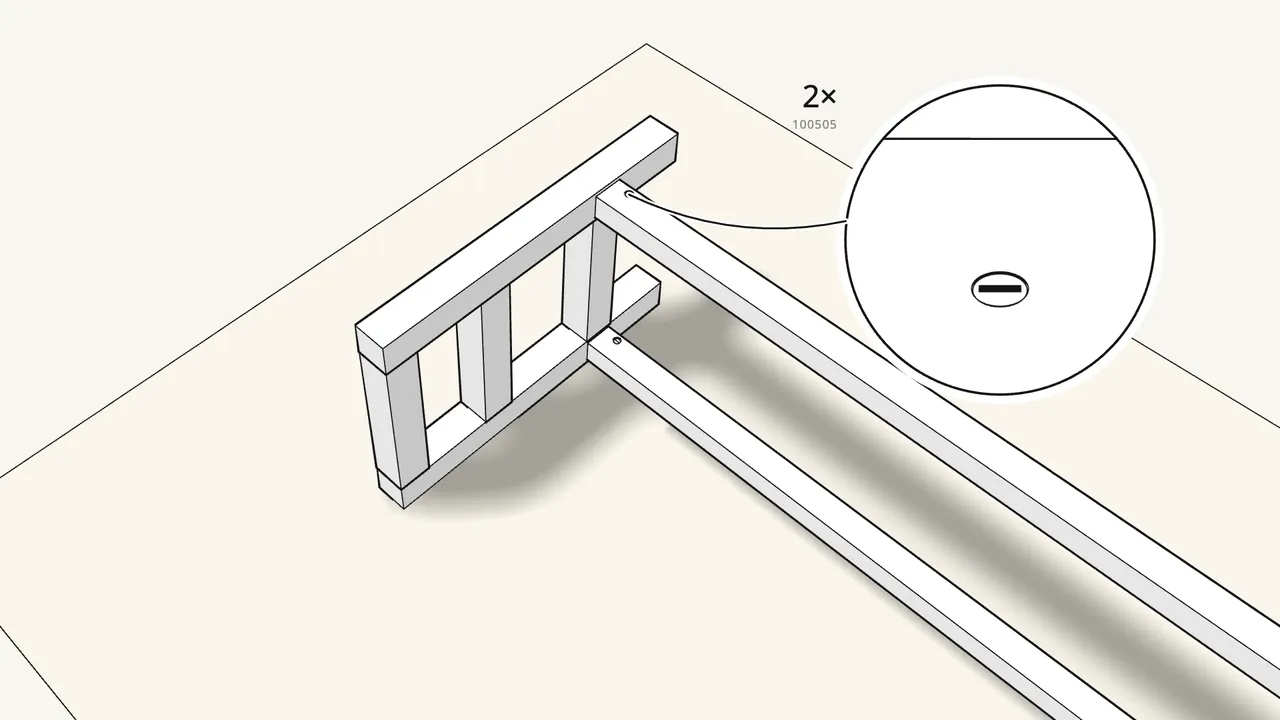
Step 3 · manual step 2
Push 2 barrel nuts (100505) into the rails.
Turn the slot with a flat screwdriver so it lines up with the bolt hole.
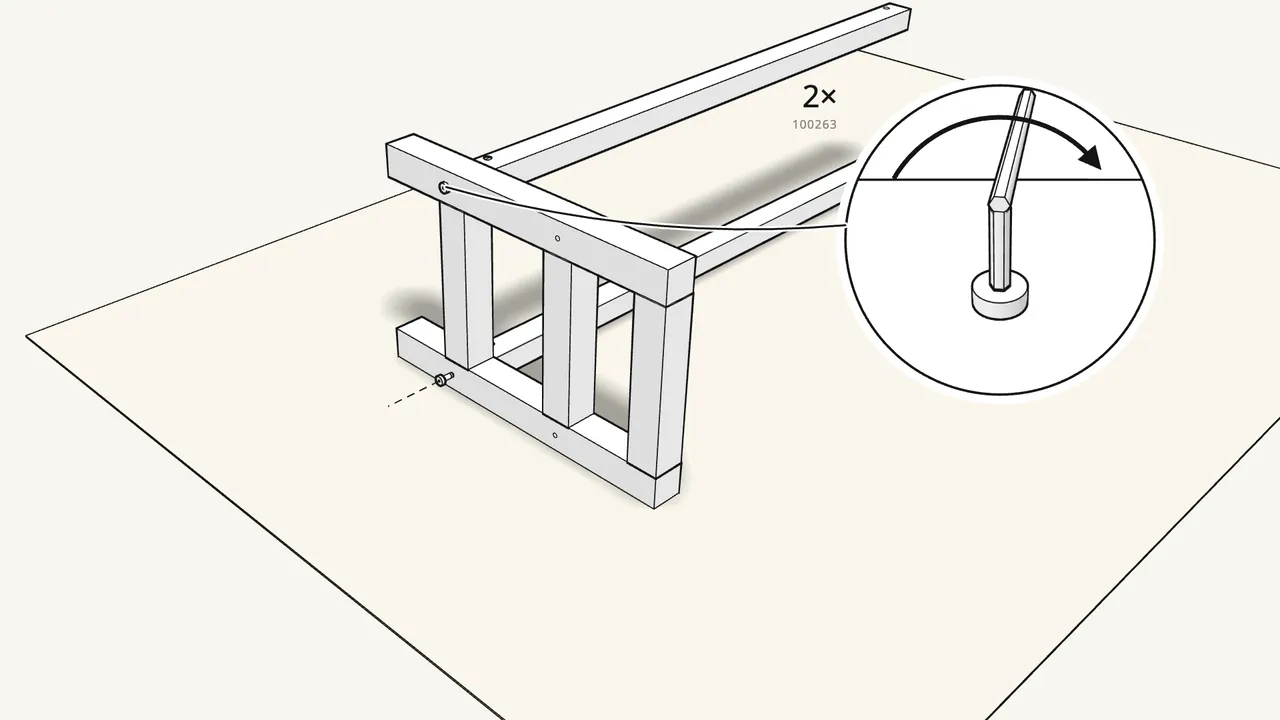
Step 4 · manual step 2
Tighten 2 long bolts (100263) through the end frame.
Use the Allen key — they screw into the barrel nuts.
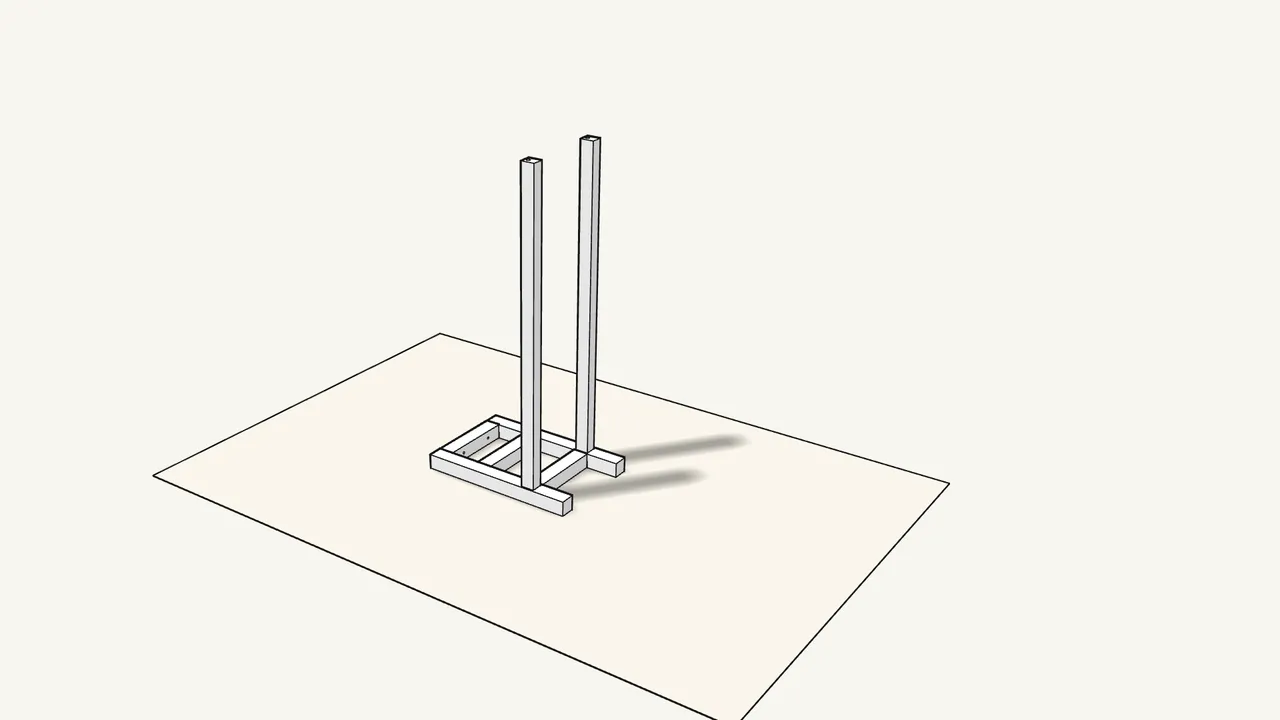
Step 5 · manual step 3
Turn it so the end frame lies flat on the floor.
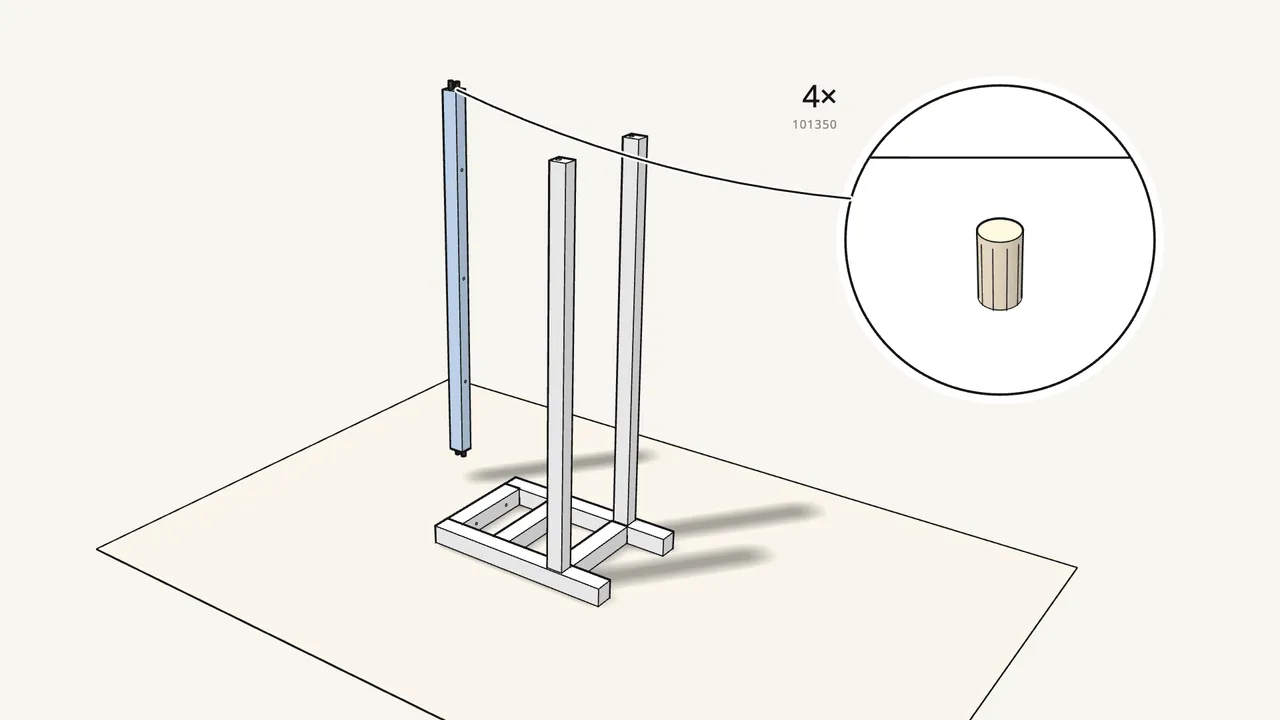
Step 6 · manual step 3
Push 4 dowels (101350) into the third rail and stand it in the frame.
2 dowels in each end.
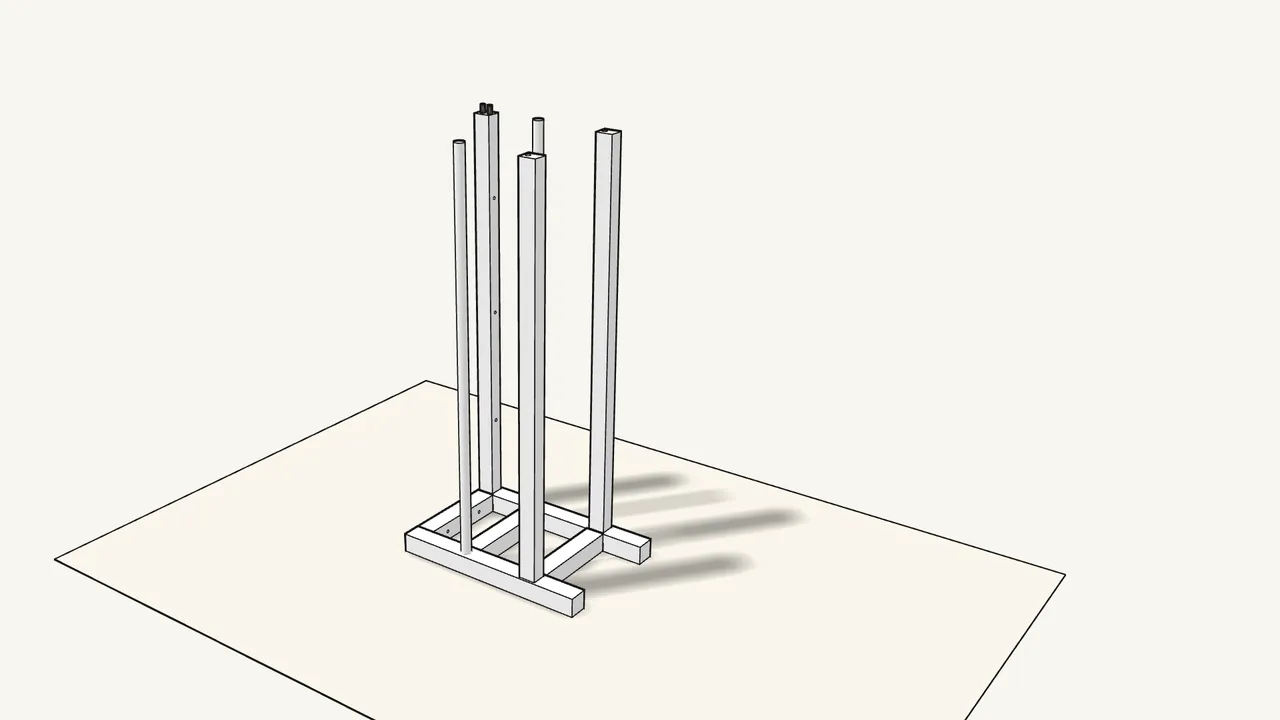
Step 7 · manual step 4
Fit the 2 tubes that have threaded ends.
Check the tube ends — see the inset in step 4.
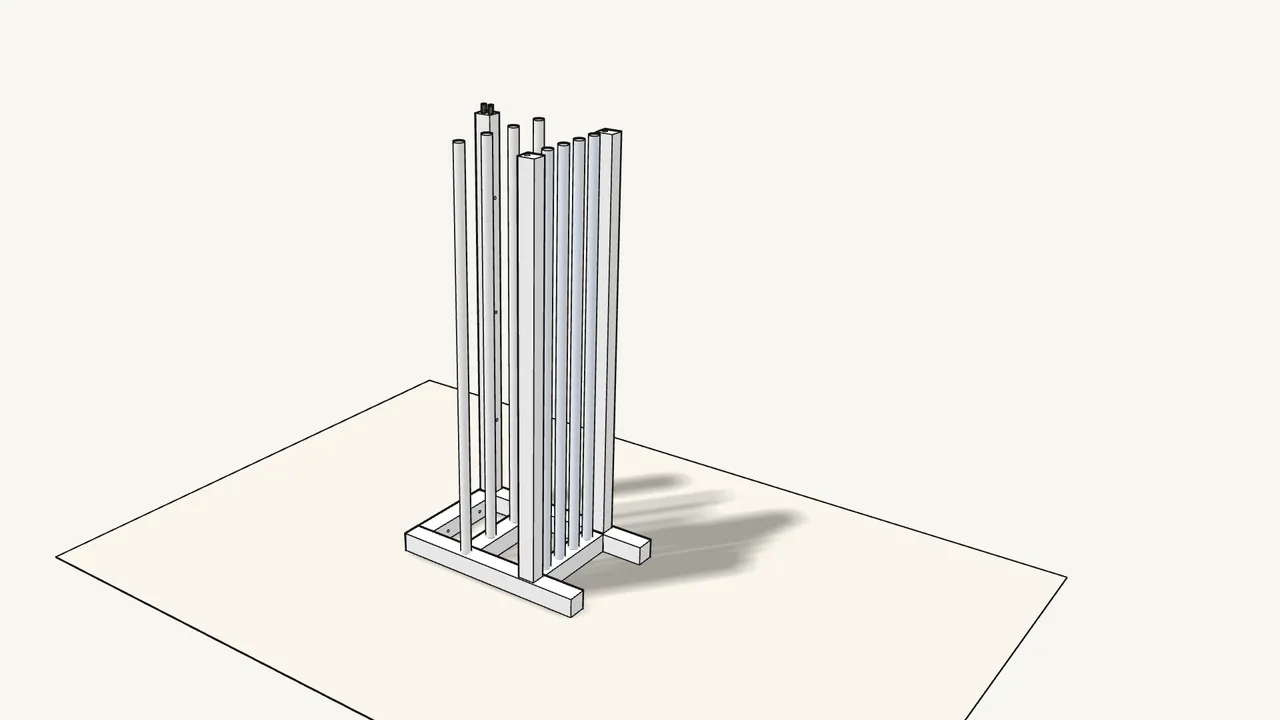
Step 8 · manual step 5
Fit the other 6 tubes into the holes in the end frame.
2 at the upper level, 4 at the lower level.
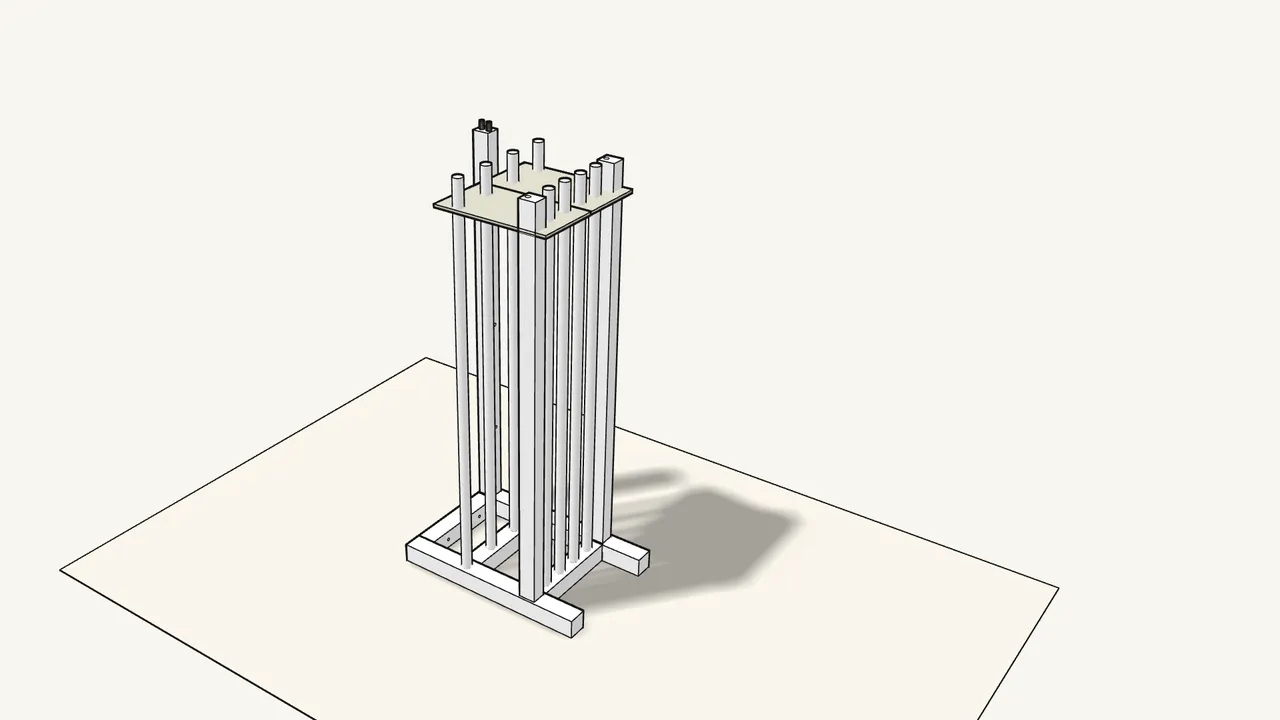
Step 9 · manual step 6–7
Push out the 2 pieces of the cardboard template.
Slide it down over the tops of the tubes and rails.
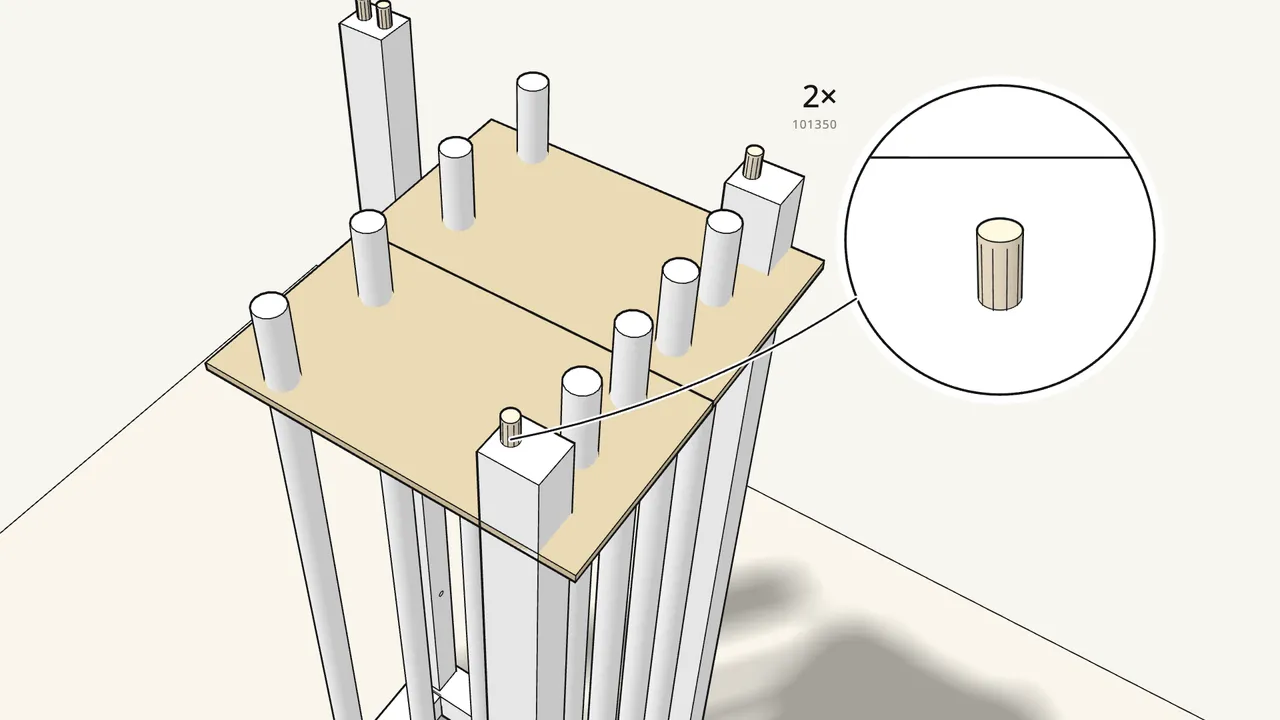
Step 10 · manual step 8
Push a dowel (101350) into the top of each long rail.
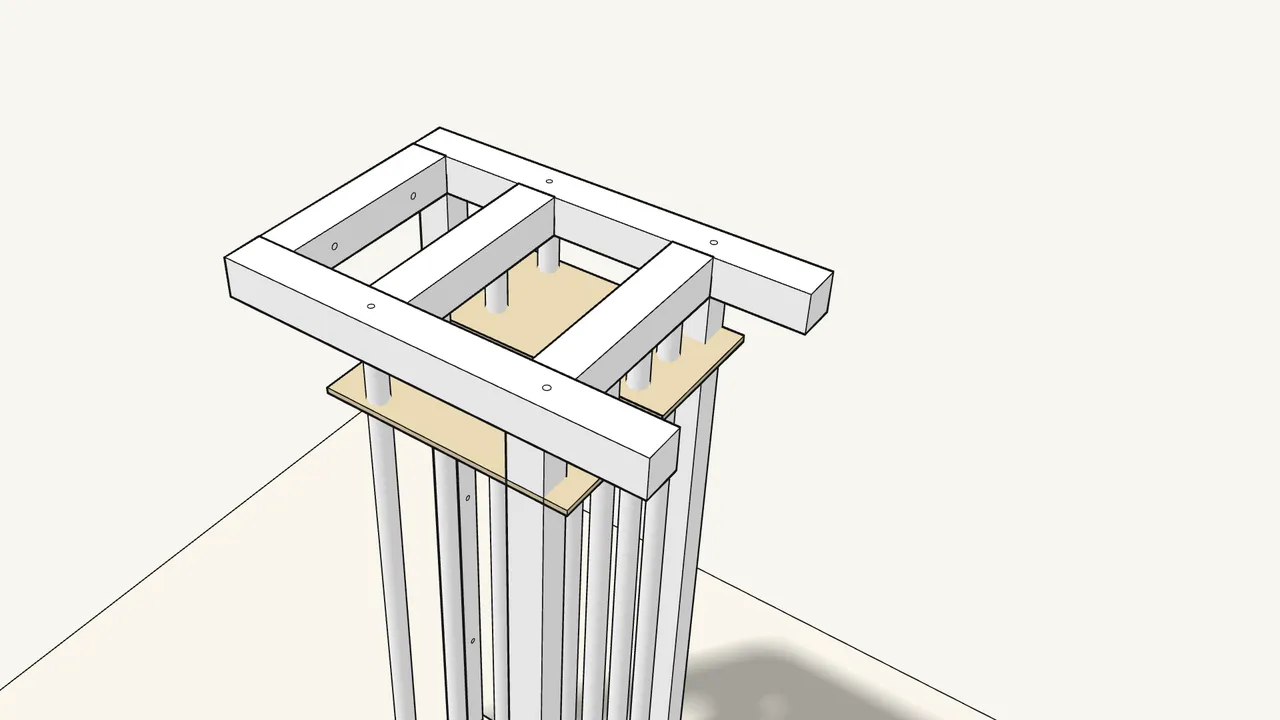
Step 11 · manual step 8
Press the second end frame down onto the dowels.
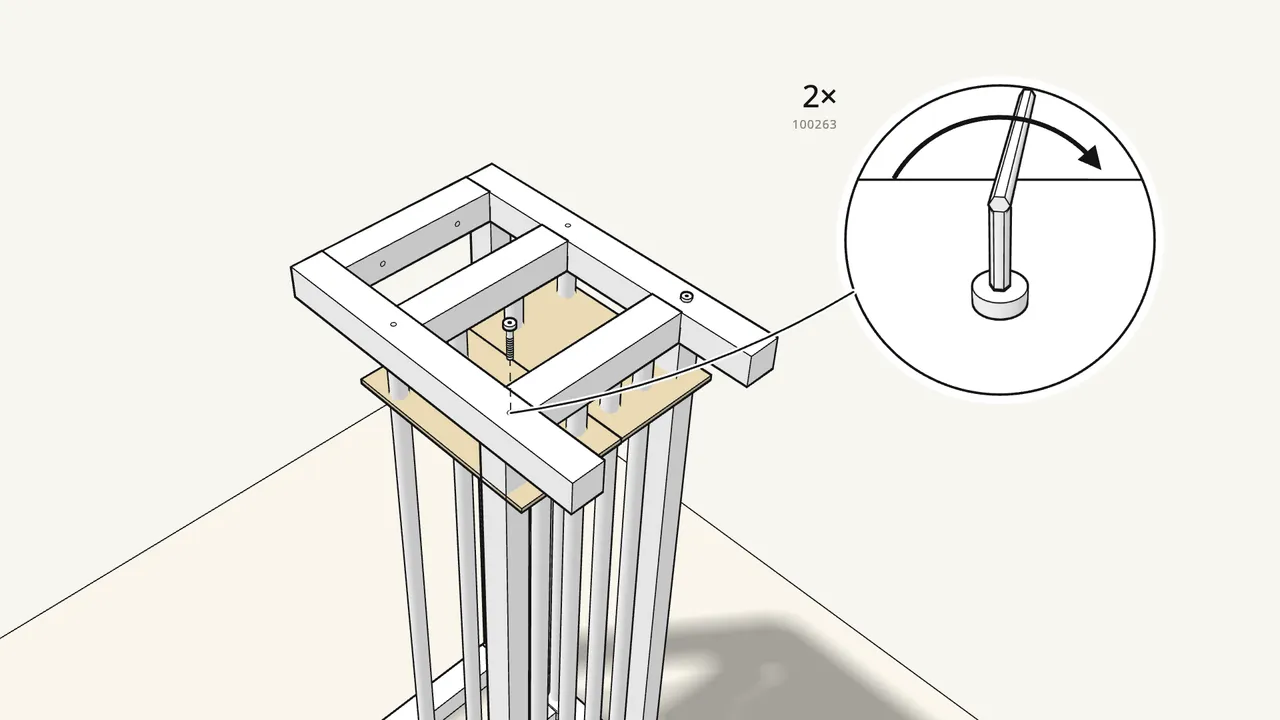
Step 12 · manual step 9
Fit 2 barrel nuts (100505) and 2 long bolts (100263).
Tighten the bolts with the Allen key.
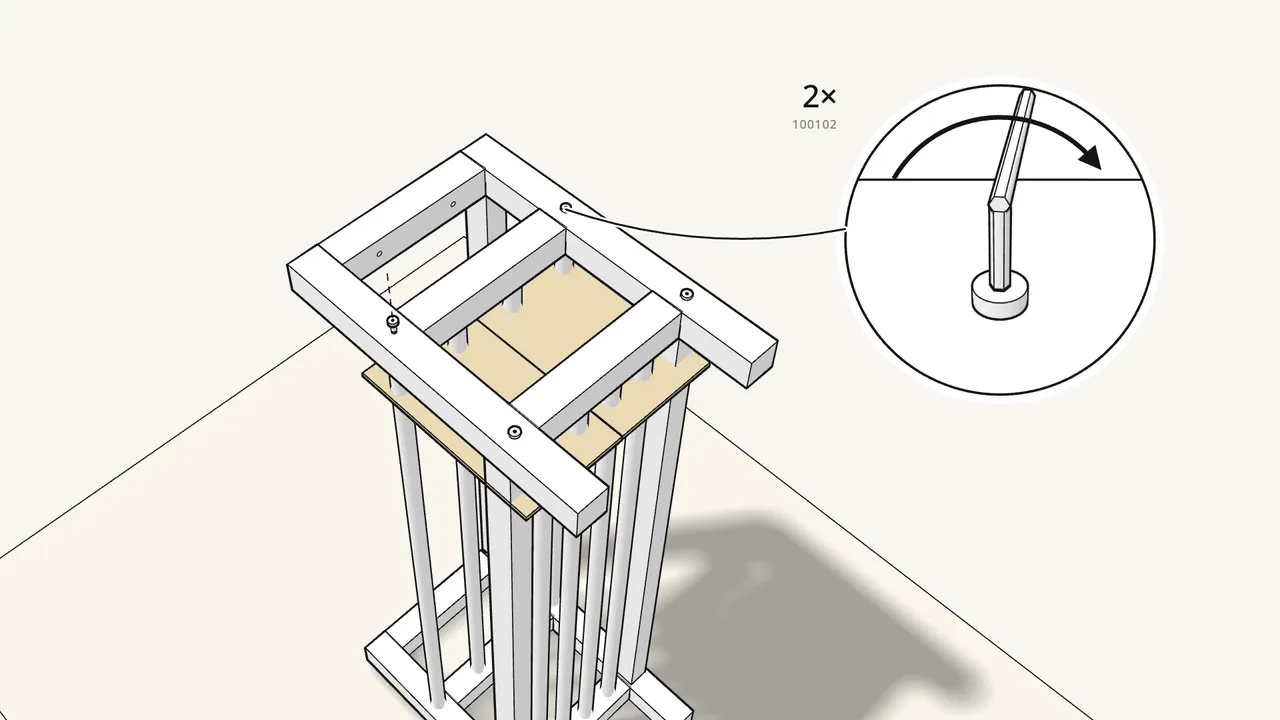
Step 13 · manual step 10
Screw 2 bolts (100102) into the threaded tubes.
Through the end frame, with the Allen key.
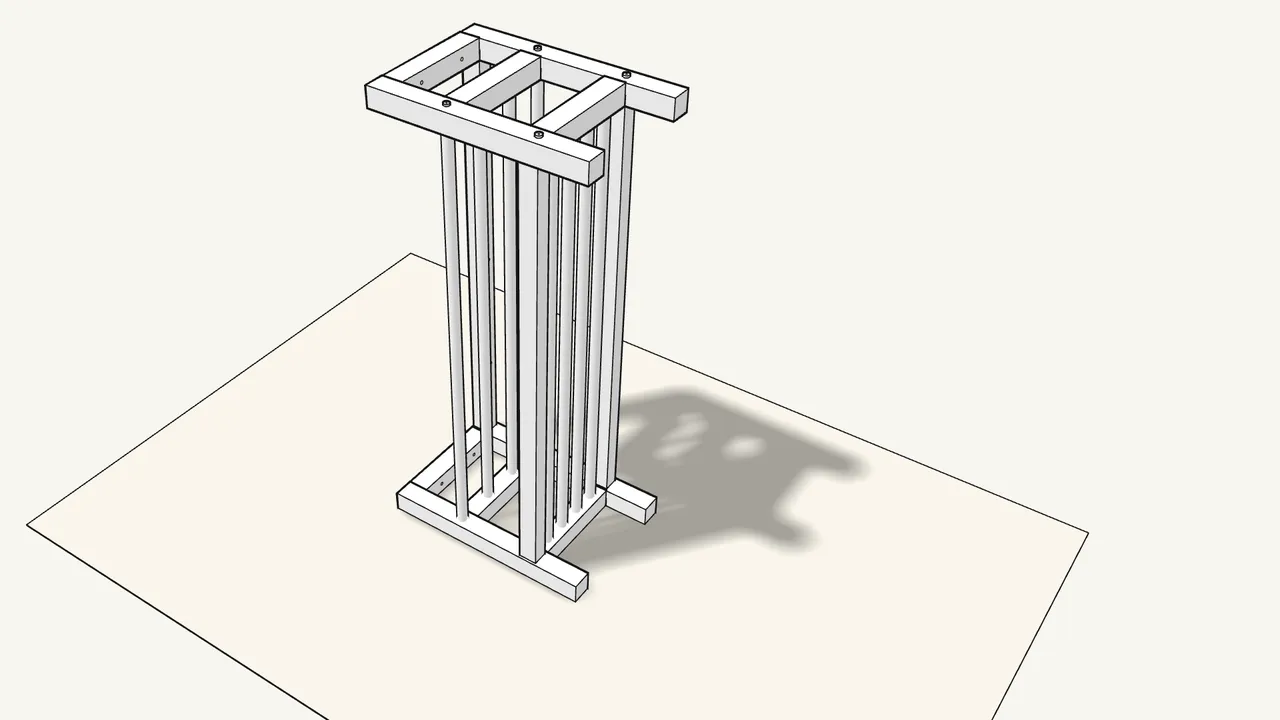
Step 14 · manual step 11
Tear off the cardboard template and throw it away.
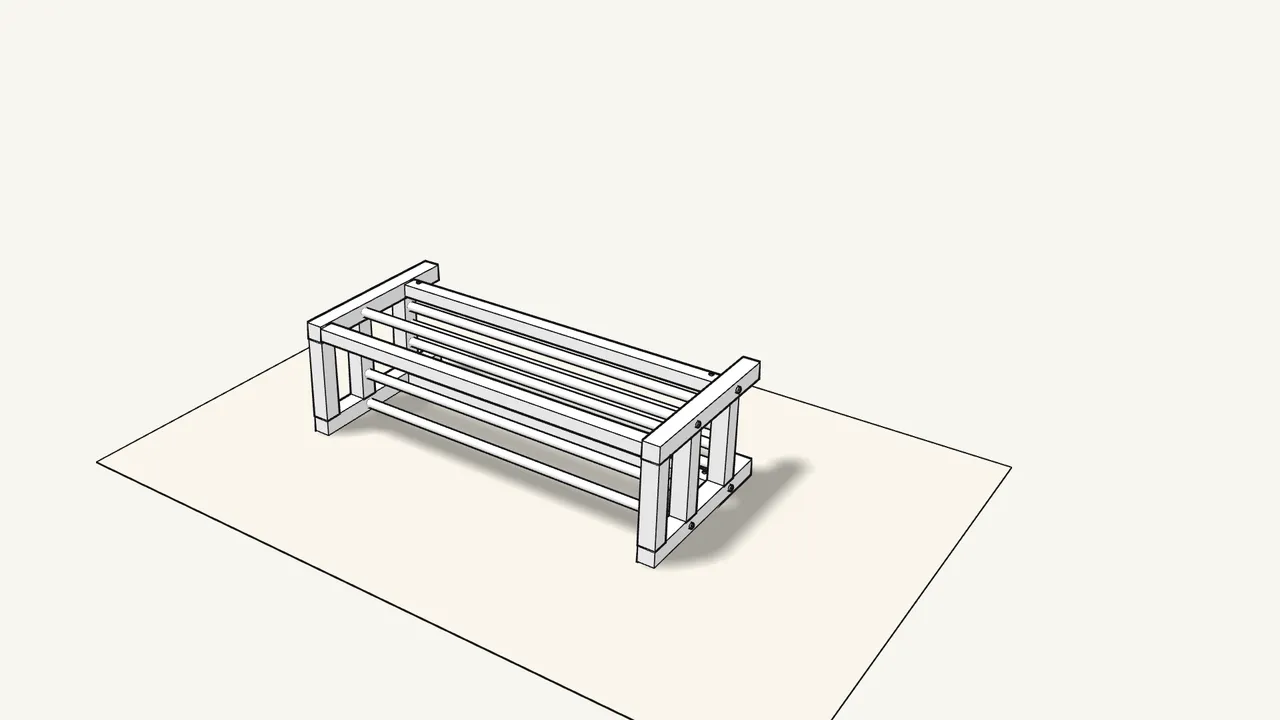
Step 15 · manual step 12
Lay the bench down on its front.
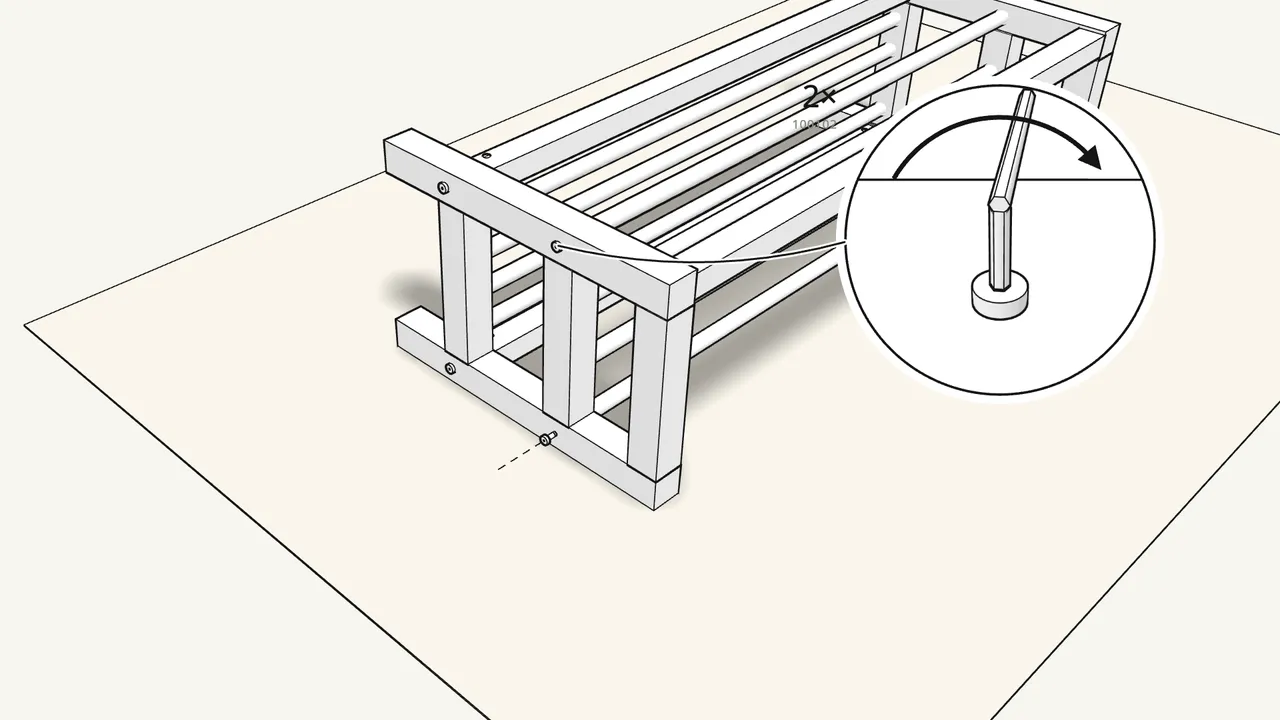
Step 16 · manual step 12
Fix the first end frame with 2 bolts (100102).
They go into the threaded tubes — use the Allen key.
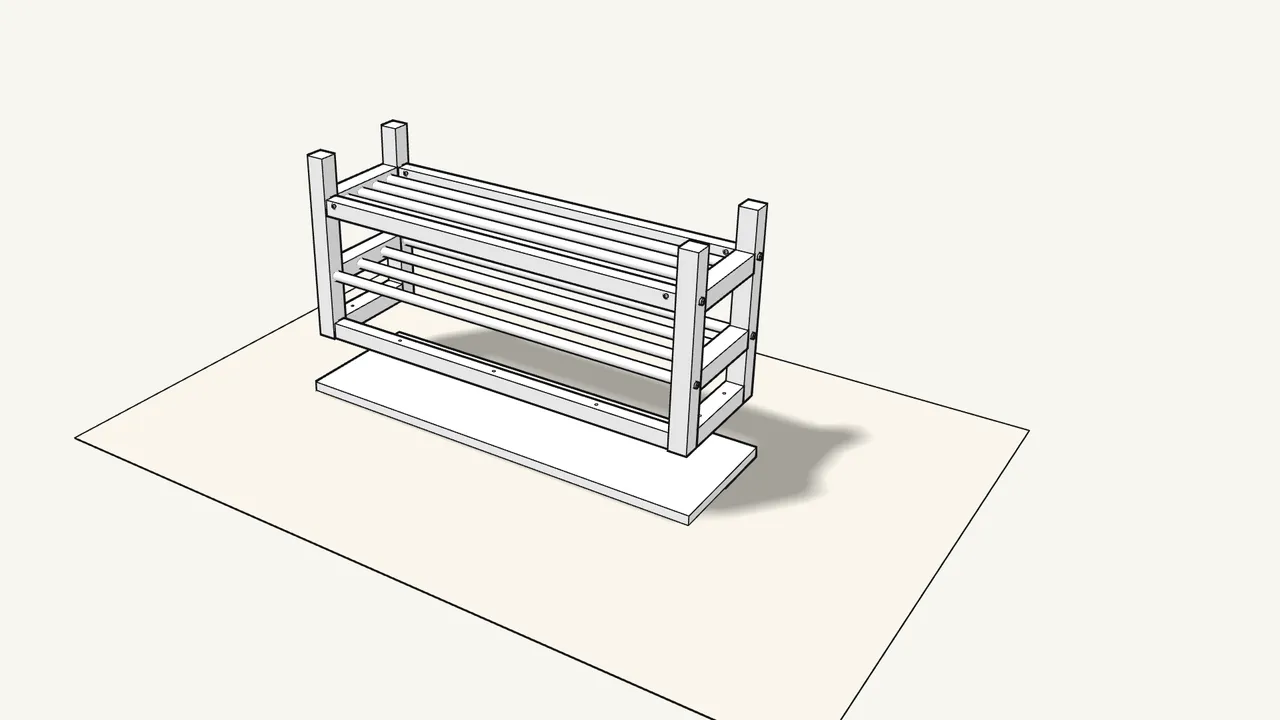
Step 17 · manual step 13
Turn the bench upside down.
The seat lies face-down on the rug.
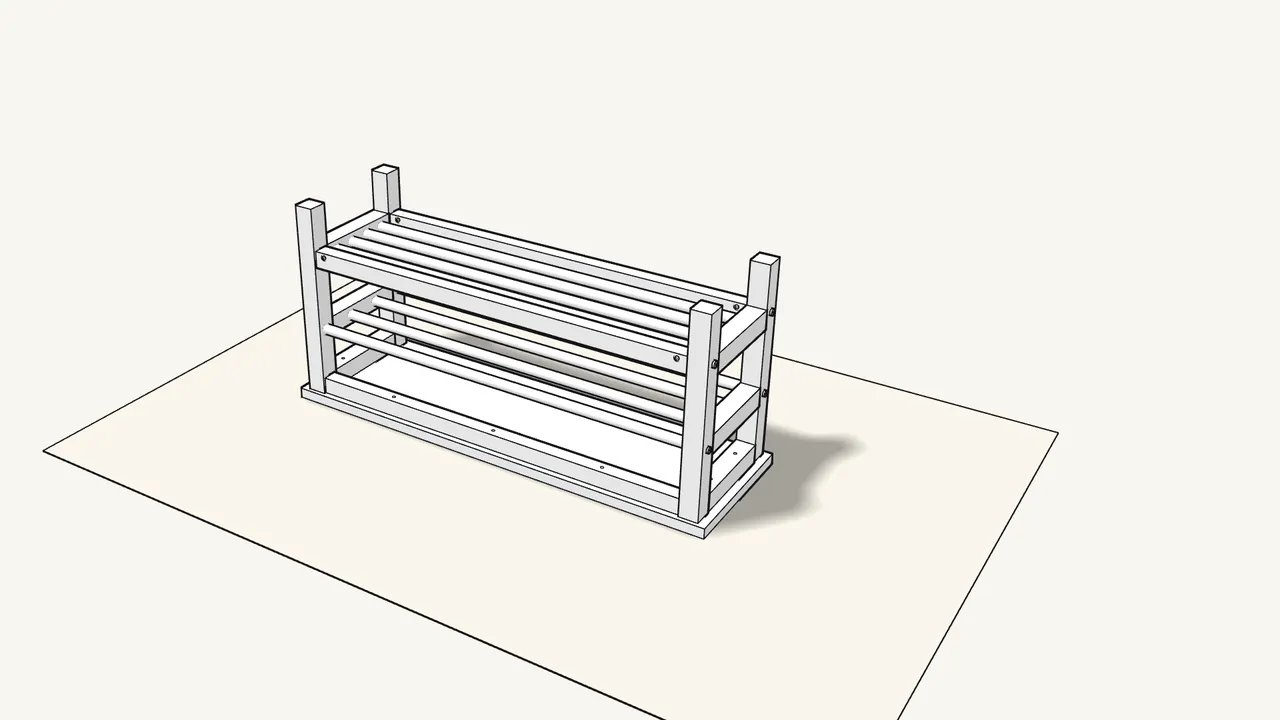
Step 18 · manual step 13
Lower the bench onto the seat.
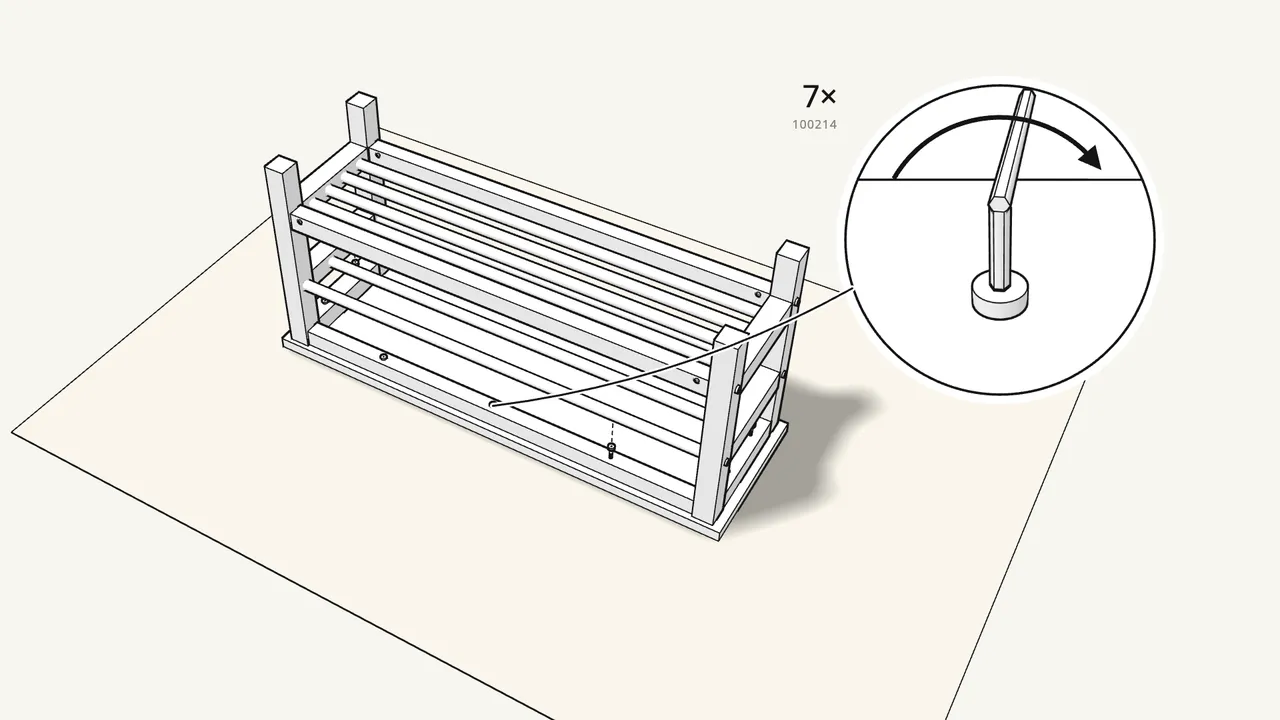
Step 19 · manual step 13
Screw the seat on with 7 screws (100214).
2 through each end frame and 3 through the back rail.
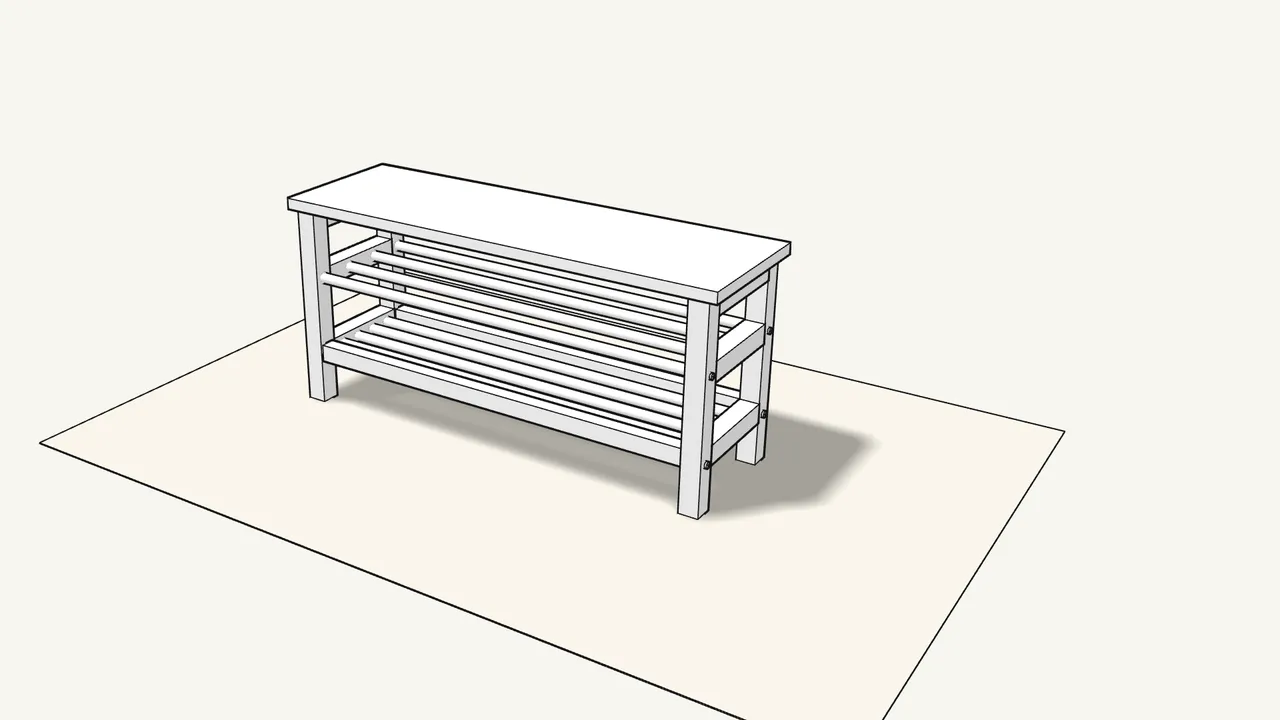
Step 20
Turn the bench over onto its legs.
Tips & safety
- Assemble on a soft surface. The manual shows a rug — it protects the white finish from scratches.
- Missing a part or stuck? The manual says to contact your IKEA store before you continue.
Official instructions
This guide follows IKEA’s official assembly instructions (AA-354147-1). Keep the printed manual to hand — if anything differs, the manual is right.