IKEA · Chairs & Stools
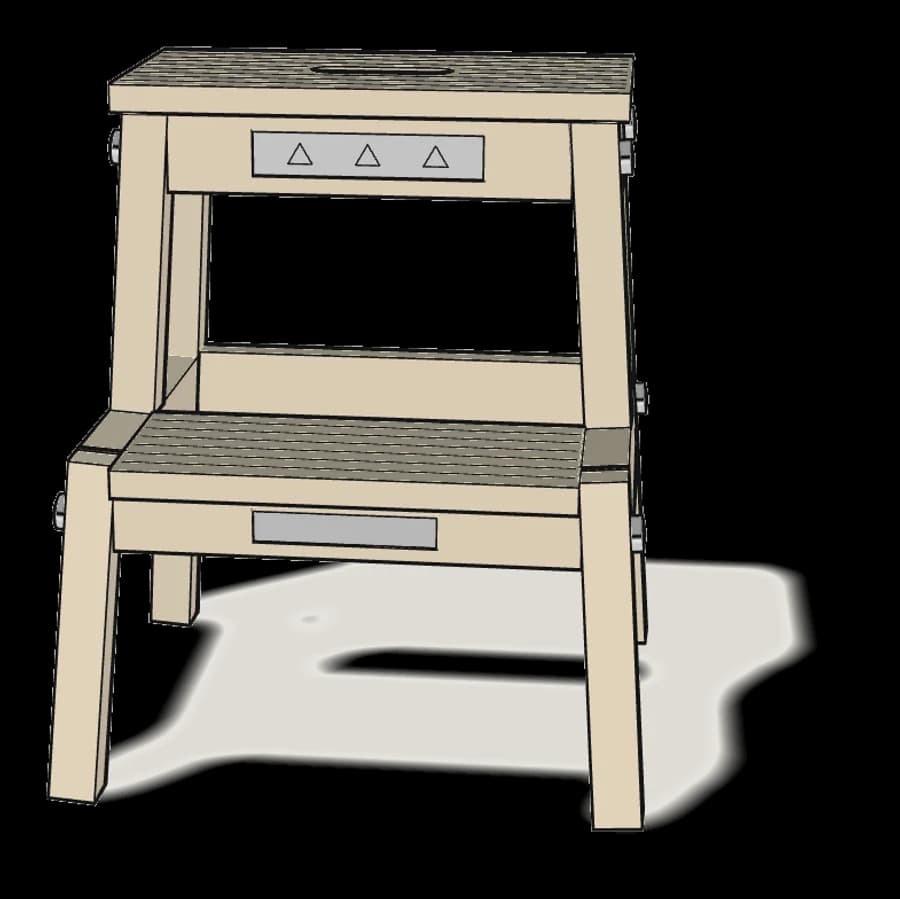
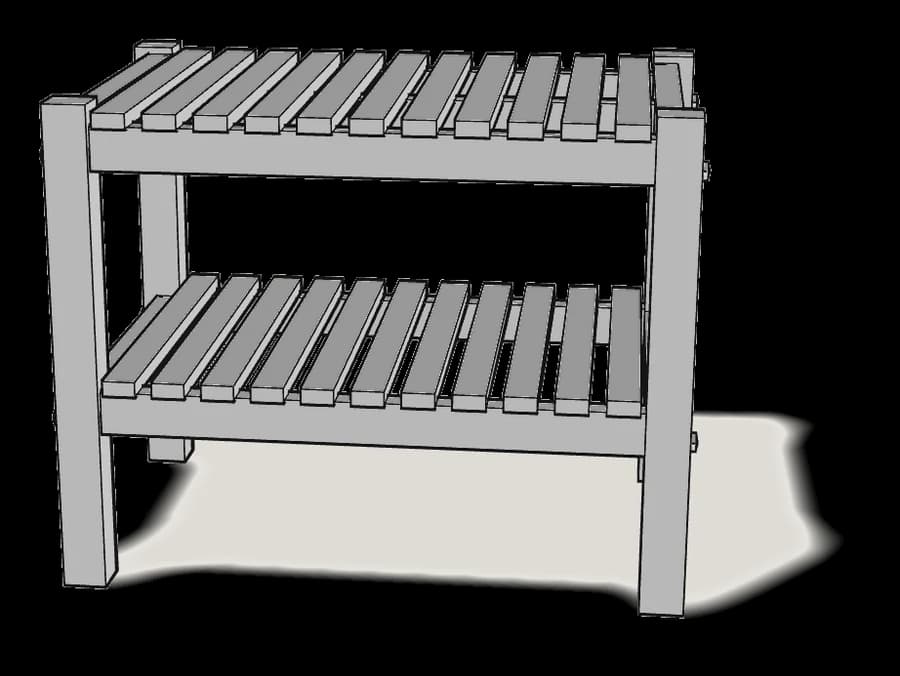
How to assemble IKEA MUSKAN Bench
Step-by-step IKEA MUSKAN Bench assembly: 7 illustrated steps, an animated video, the hardware list and the tools you need — following the official instructions (AA-2009545-2).
- 7 illustrated steps
- 2 steps in the manual
- 1:31 video
- 58×38×46 cm
What you need
Tools
- Allen key (included)
You’ll need: only the Allen key (100092) and the tool (121030) — both are included.
Hardware in the box
| Part no. (as printed in the manual) | Qty |
|---|---|
| 100218 | 8× |
| 101350 | 10× |
Step-by-step assembly
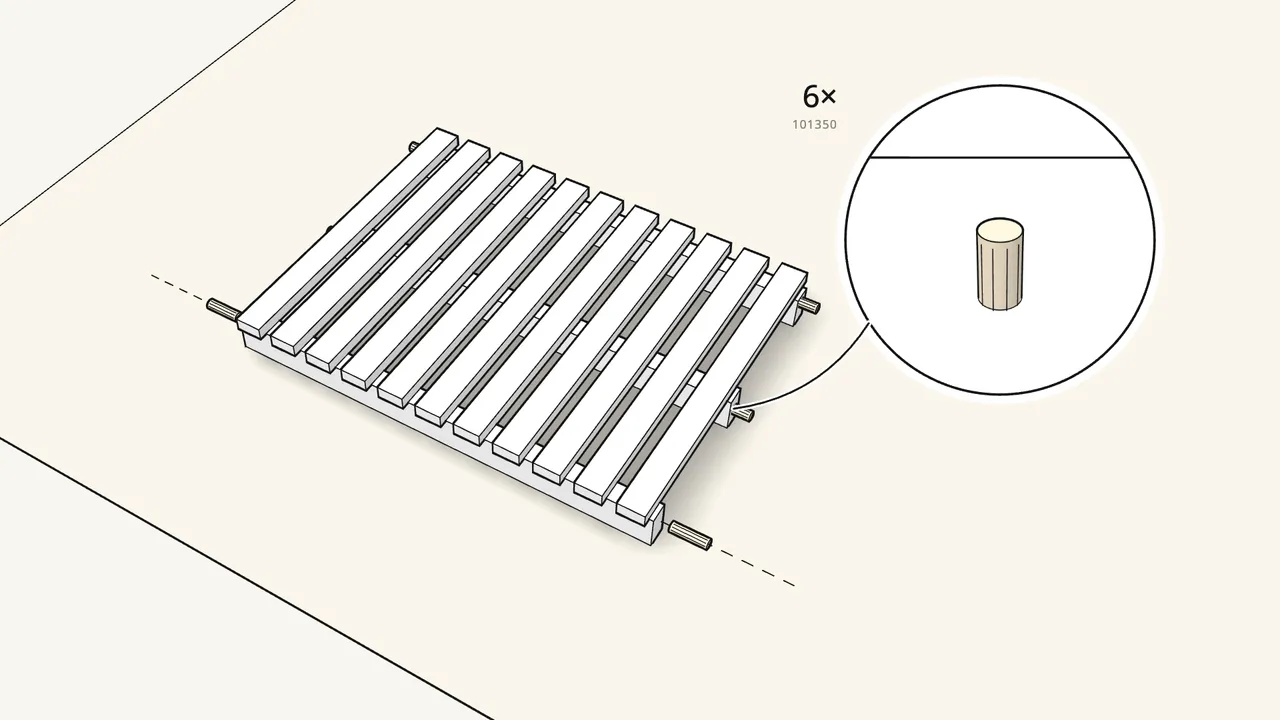
Step 1
Push 6 dowels (101350) into the top shelf.
One in each end of its 3 battens — front, middle and back.
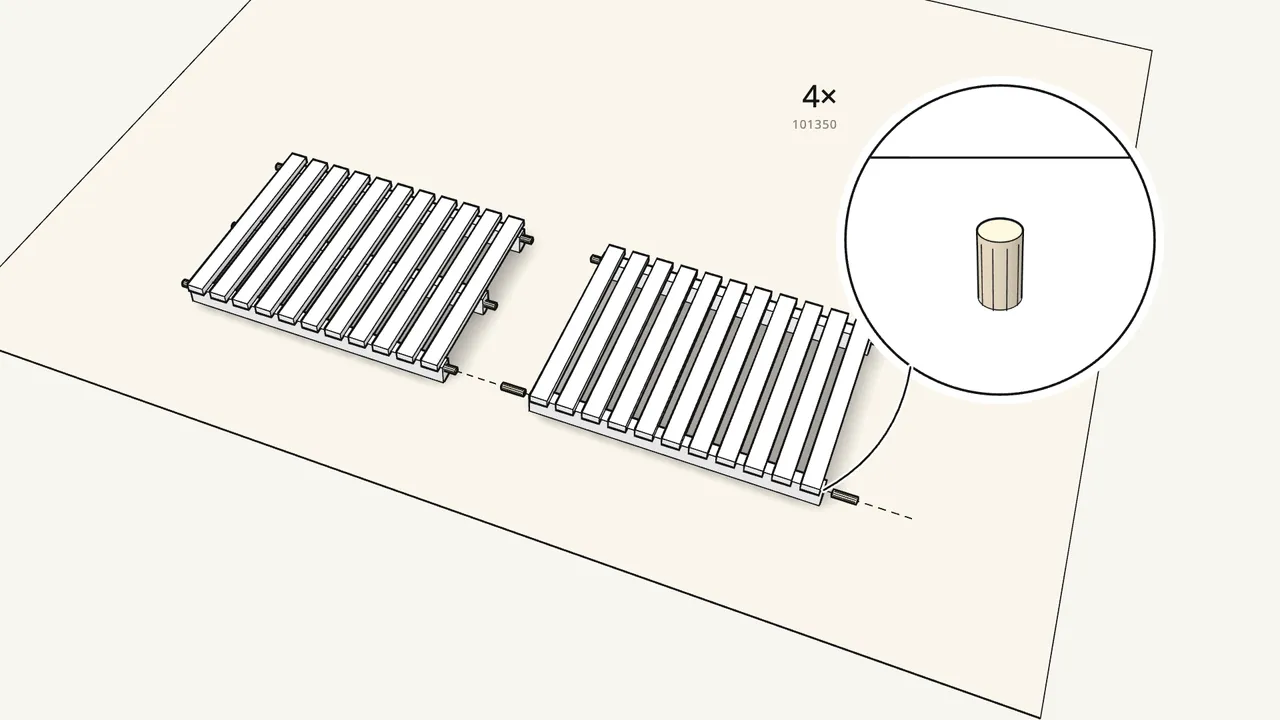
Step 2 · manual step 1
Push 4 dowels (101350) into the bottom shelf.
One in each end of its front and back batten.
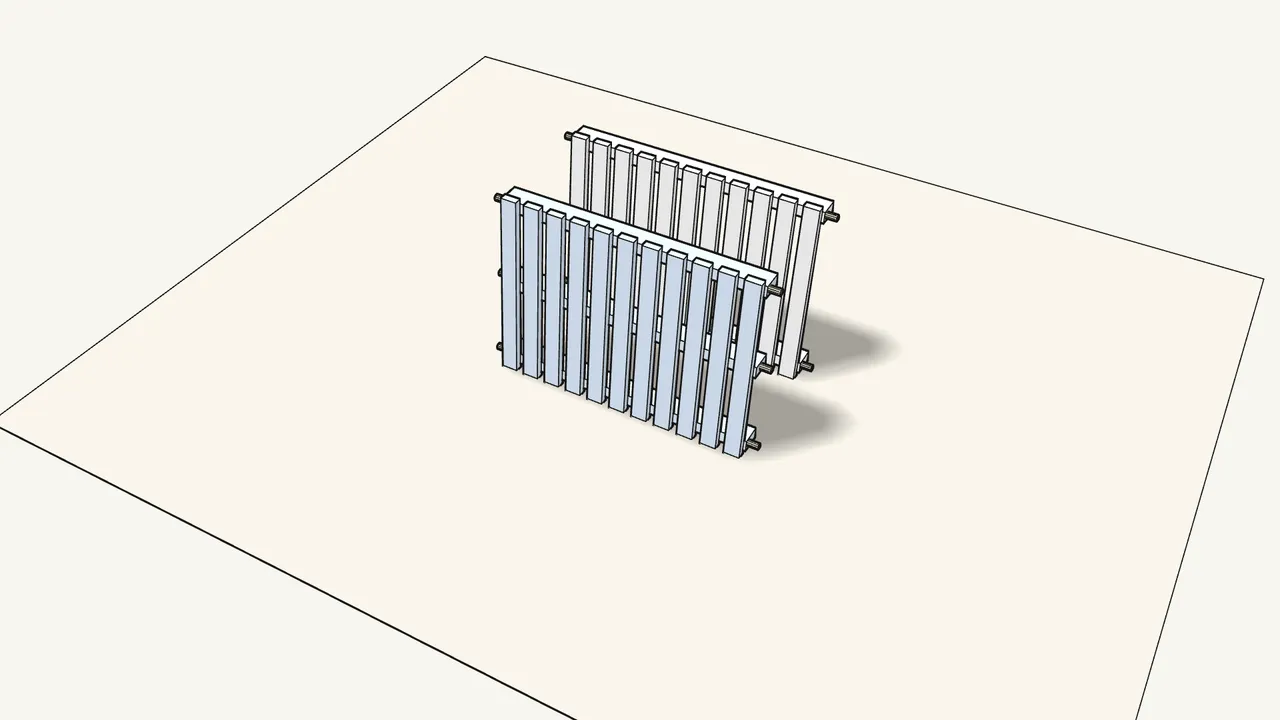
Step 3 · manual step 2
Stand both shelves on their long edge, slats facing you.
The top shelf (3 battens) goes nearest the leg tops.
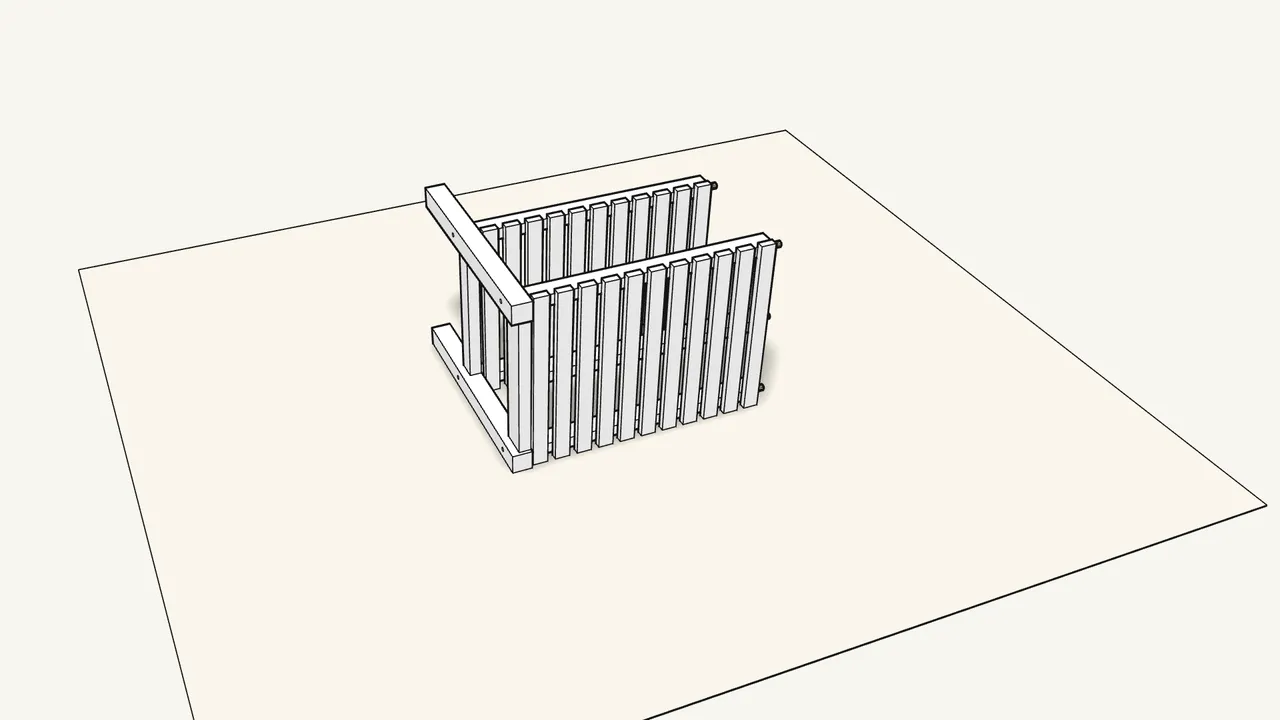
Step 4 · manual step 2
Press a side frame onto the dowels.
The dowels go into the holes in the legs and the top side rail.
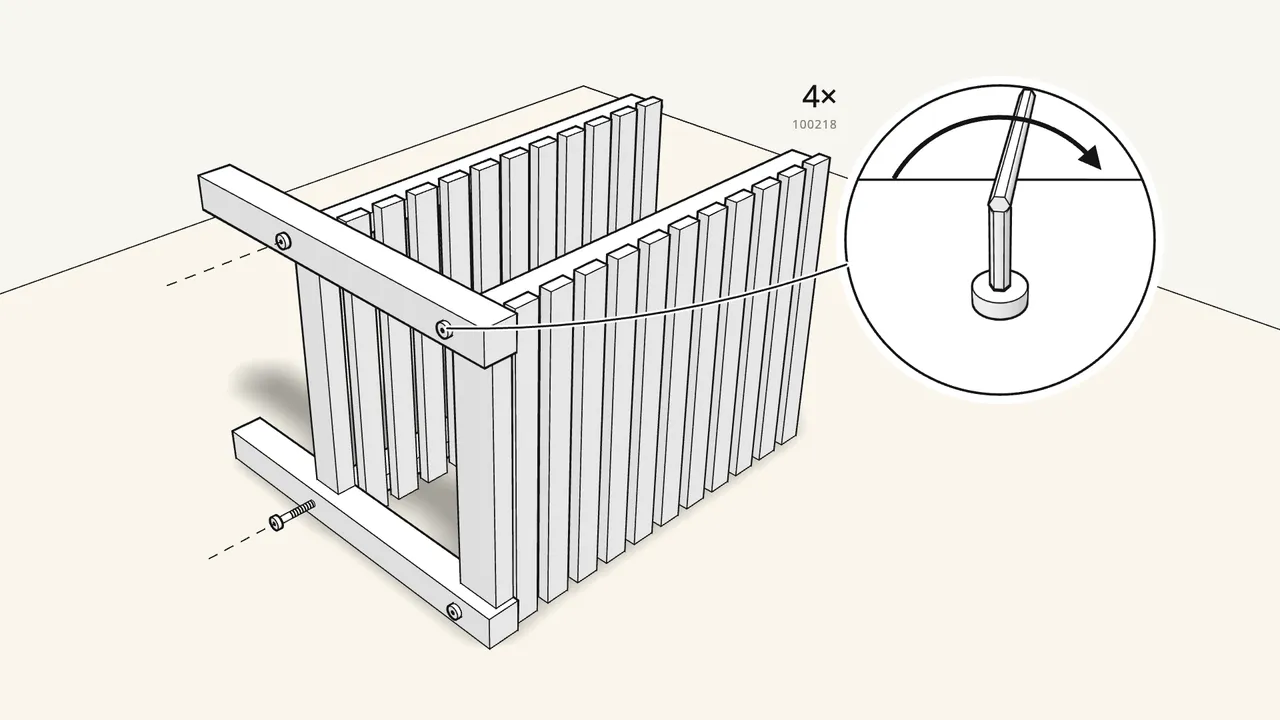
Step 5 · manual step 2
Fix it with 4 bolts (100218) and the Allen key.
Slot the Allen key into the 121030 tool for extra grip, as shown in the manual.
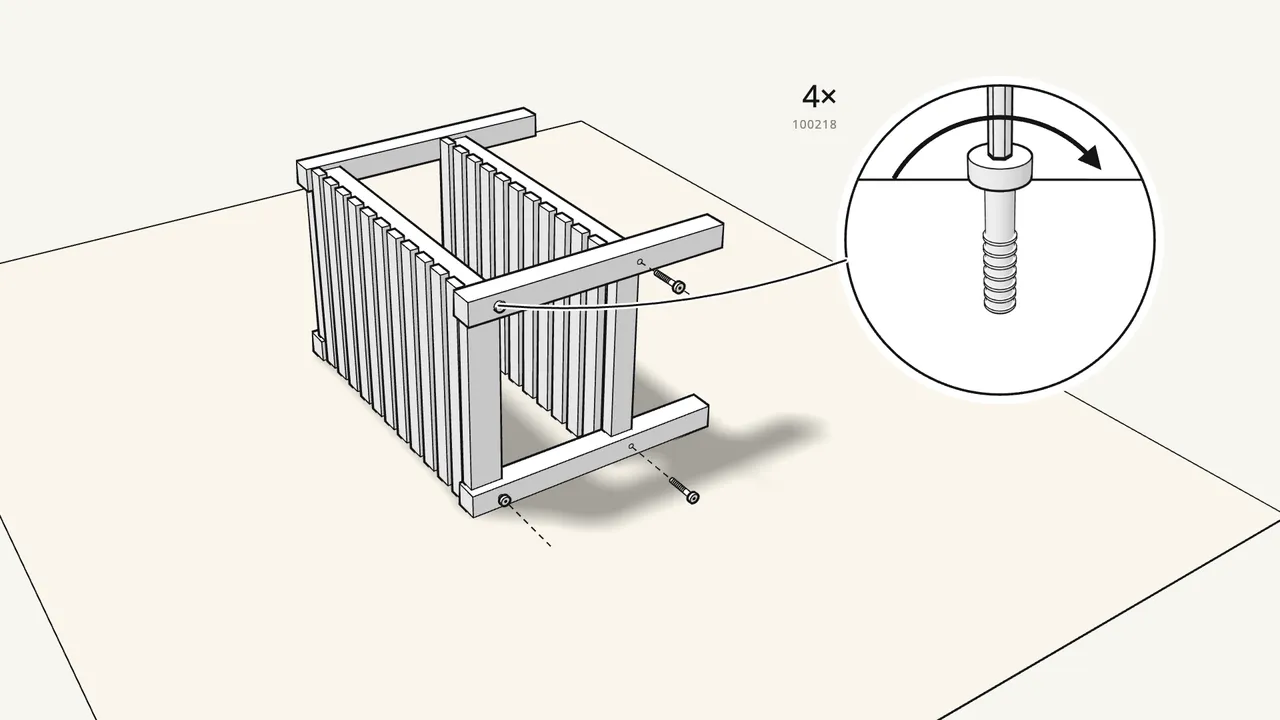
Step 6 · manual step 2
Fit the second side frame and fix it with 4 bolts.
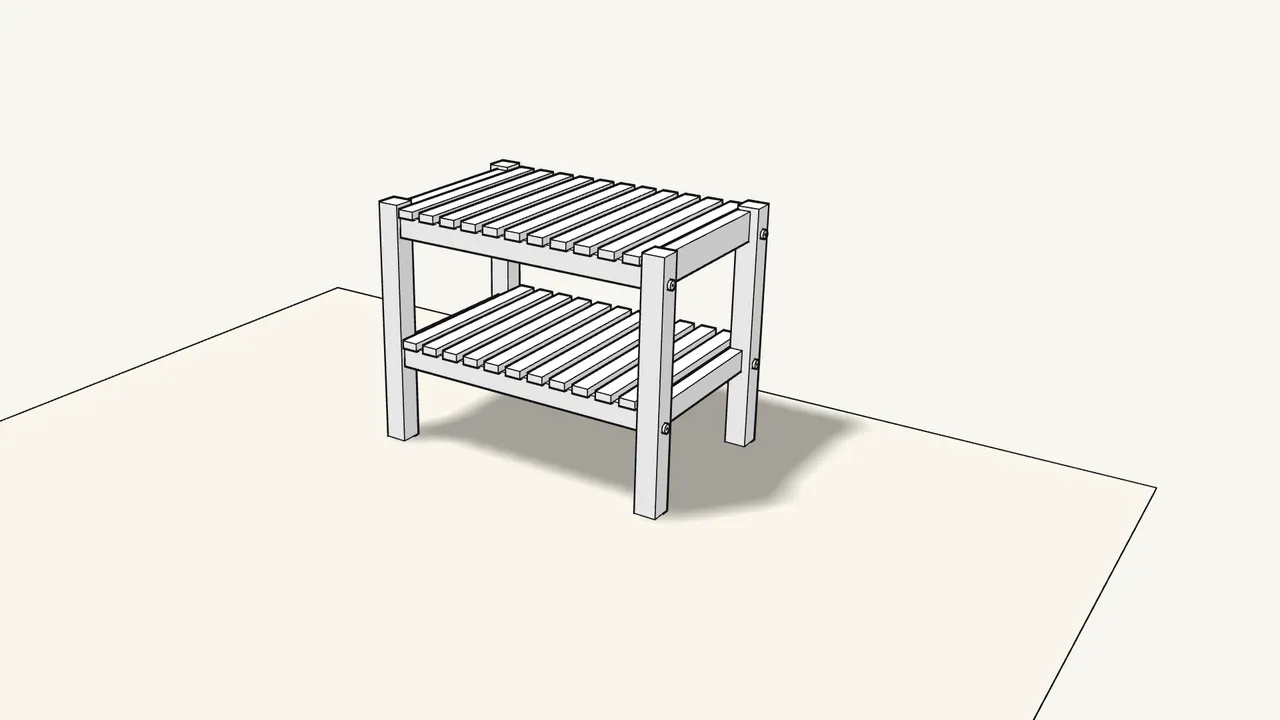
Step 7 · manual step 2
Stand the bench upright on its legs.
Tips & safety
- Check that all 8 bolts are tight. If the bench starts to wobble, tighten them again with the Allen key.
- Keep the Allen key and the 121030 tool. You’ll need them to re-tighten the bolts later.
Official instructions
This guide follows IKEA’s official assembly instructions (AA-2009545-2). Keep the printed manual to hand — if anything differs, the manual is right.