IKEA · Chairs & Stools
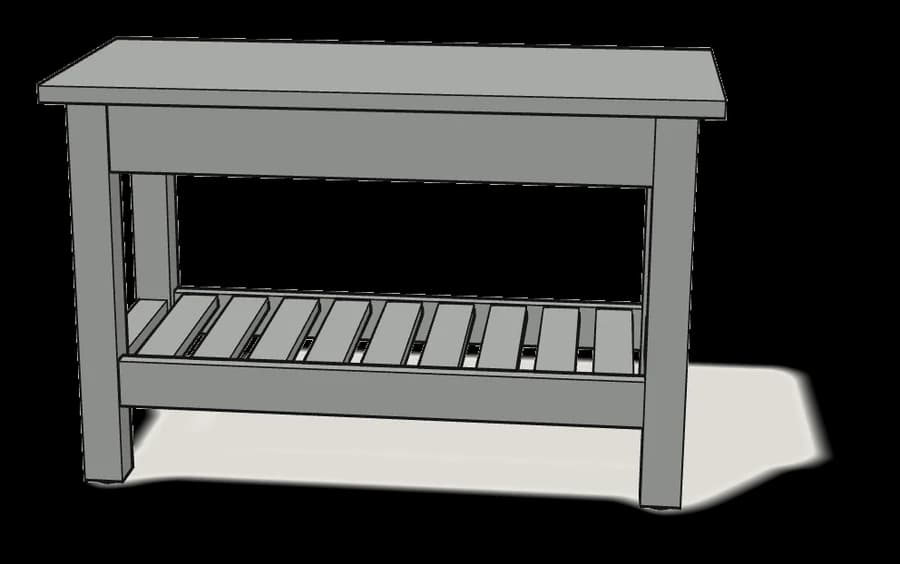
How to assemble IKEA HEMNES Bench
Step-by-step IKEA HEMNES Bench assembly: 16 illustrated steps, an animated video, the hardware list and the tools you need — following the official instructions (AA-568479-2).
- 16 illustrated steps
- 12 steps in the manual
- 2:26 video
- 83×37×53 cm
What you need
Tools
- Flat-head screwdriver
- Phillips screwdriver
- Spirit level
Hardware in the box
| Part no. (as printed in the manual) | Qty |
|---|---|
| 109571 | 10× |
| 118331 | 16× |
| 102533 | 16× |
| 101350 | 24× |
| 157966 | 4× |
Step-by-step assembly
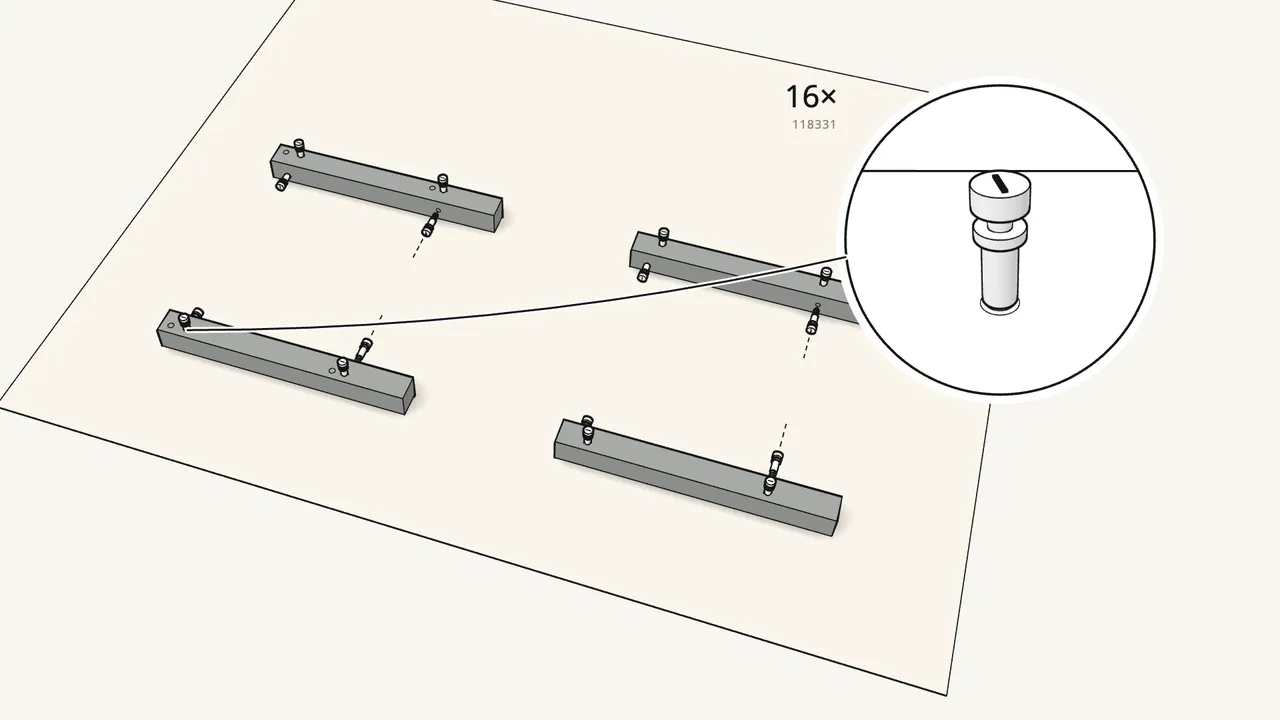
Step 1
Screw 16 cam bolts (118331) into the 4 legs.
4 in each leg — 2 on top, 2 in the side. Turn them in by hand.
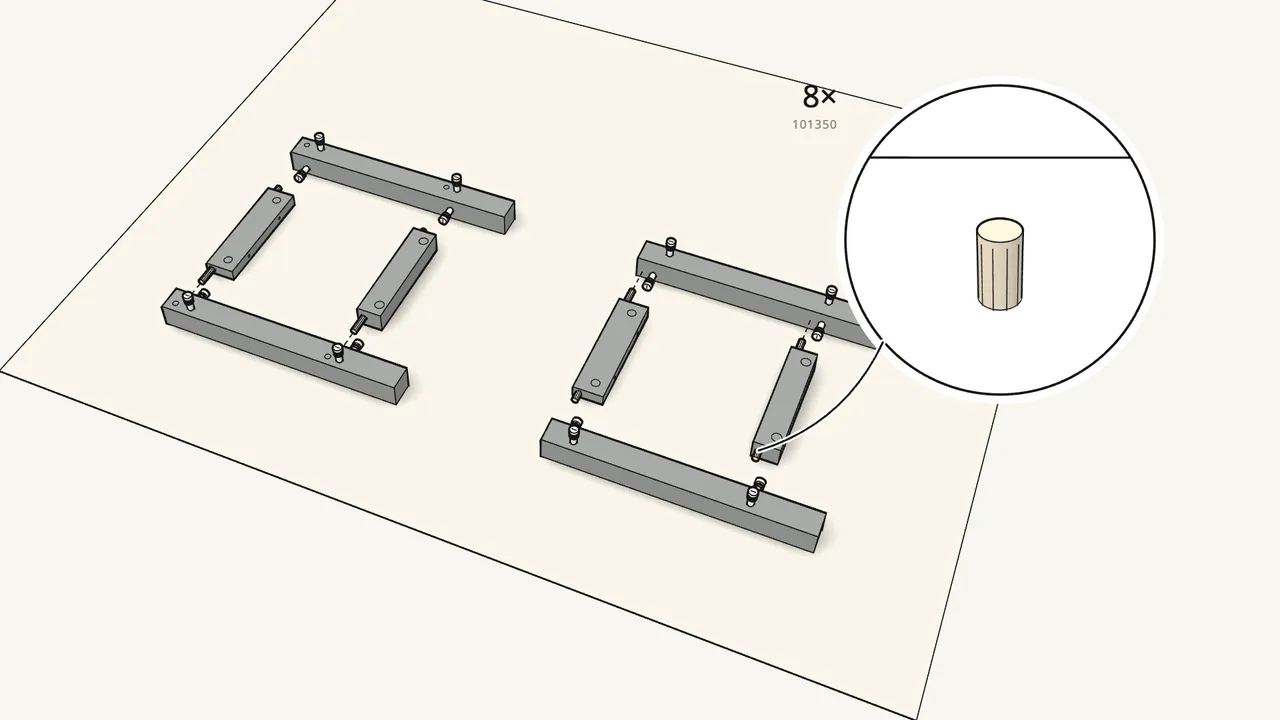
Step 2
Push 8 dowels (101350) into the ends of the 4 short rails.
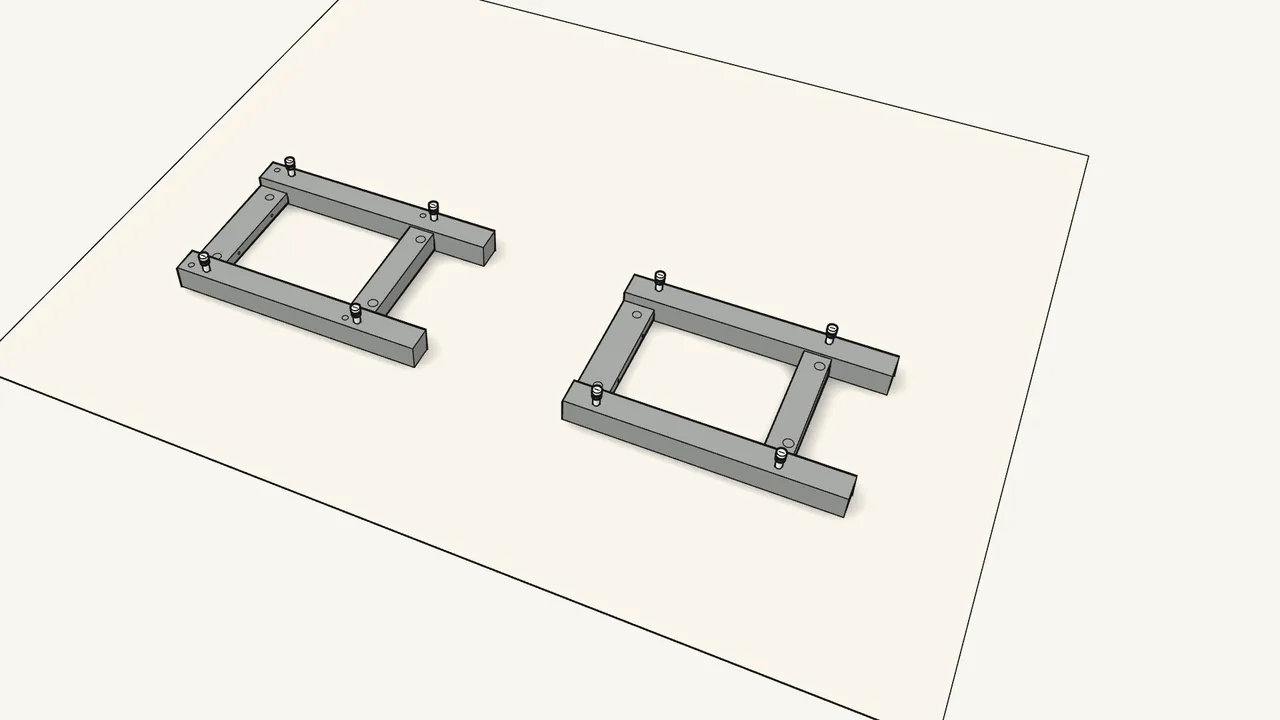
Step 3 · manual step 2
Join 2 legs and 2 short rails into each end frame.
The insets in step 2 show which rail goes where.
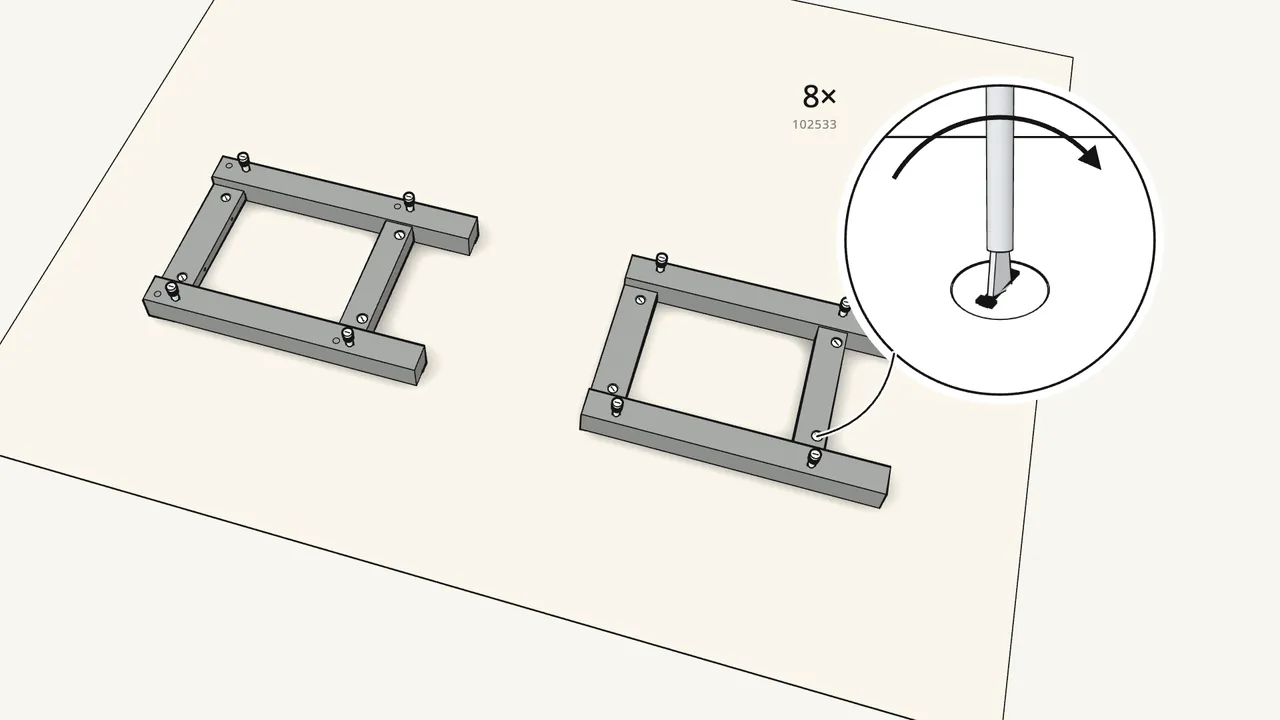
Step 4 · manual step 3
Insert 8 cam locks (102533) and turn them clockwise.
Use the flat screwdriver — 4 in each frame.
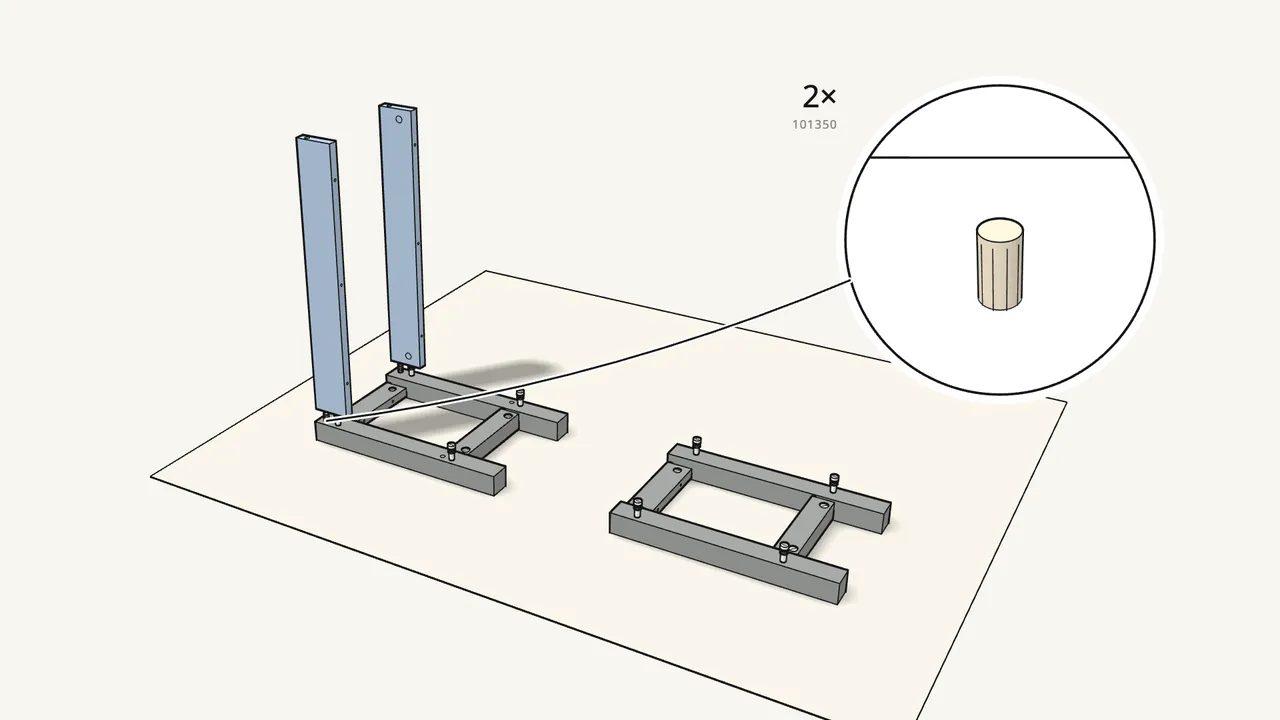
Step 5 · manual step 4
Push 2 dowels into one frame and stand the 2 long rails on it.
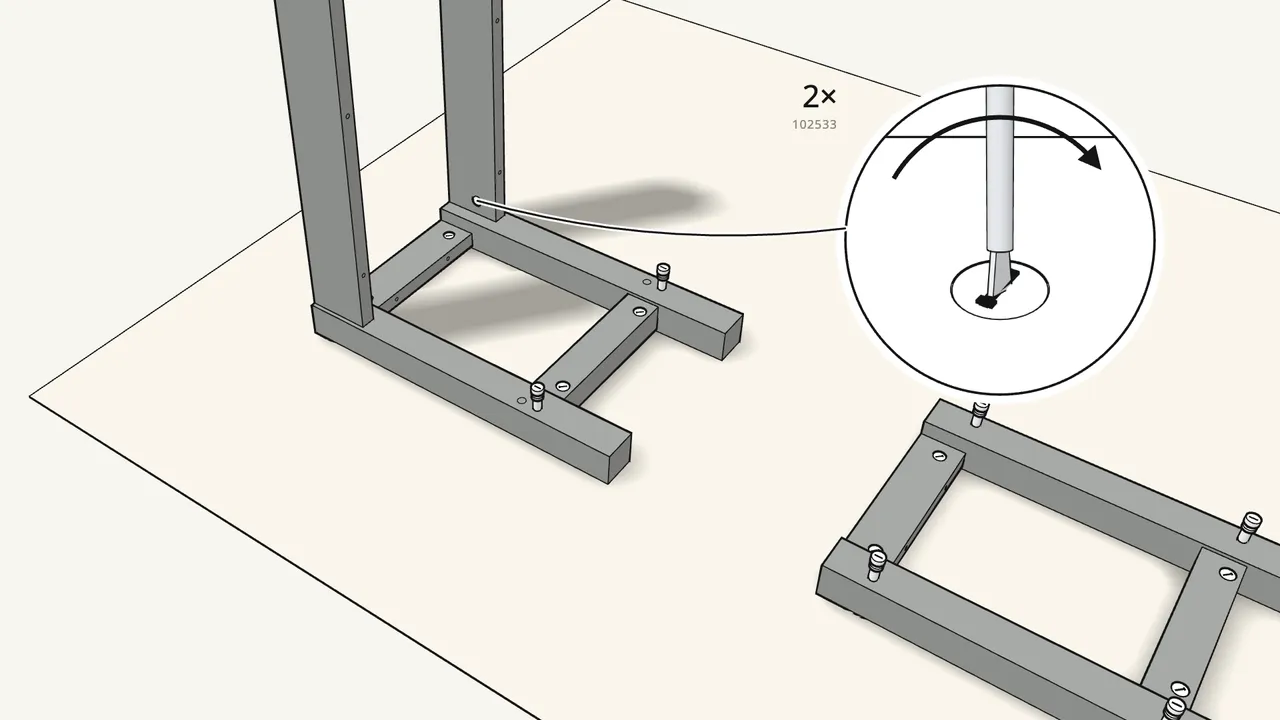
Step 6 · manual step 5
Lock the rails with 2 cam locks (102533).
Turn them clockwise with the flat screwdriver.
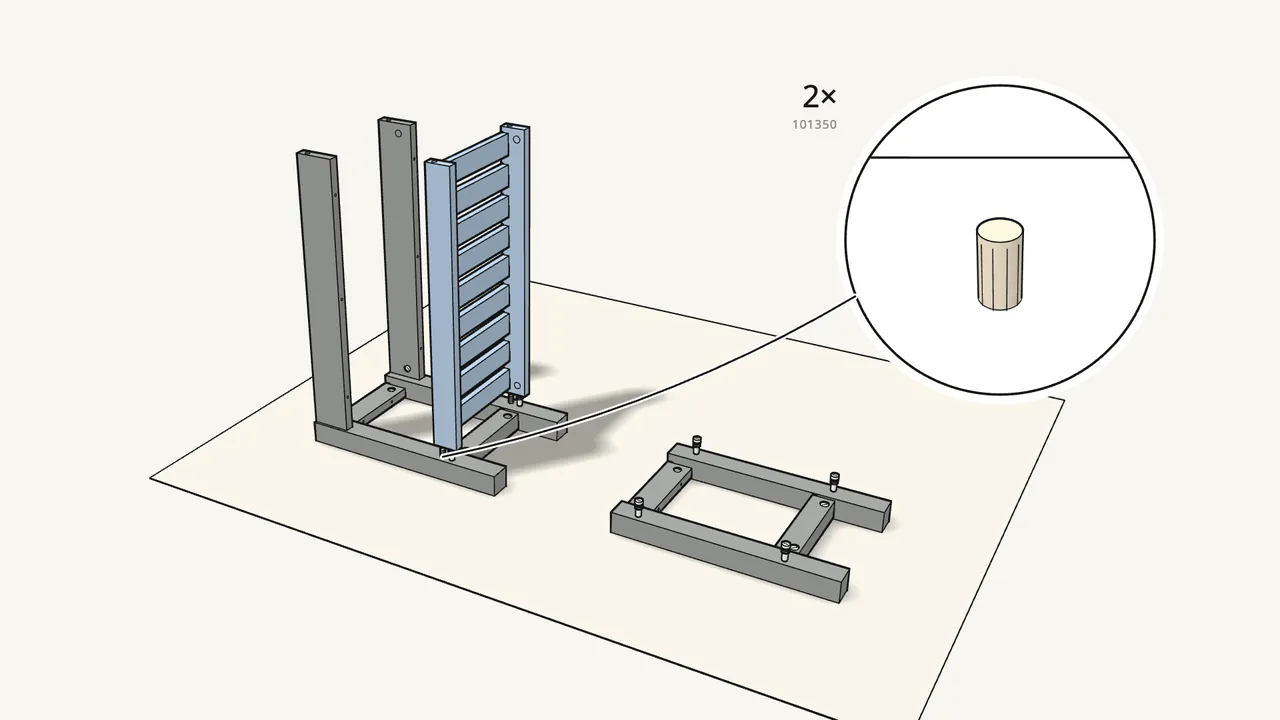
Step 7 · manual step 6
Push in 2 dowels and stand the slatted shelf on the frame.
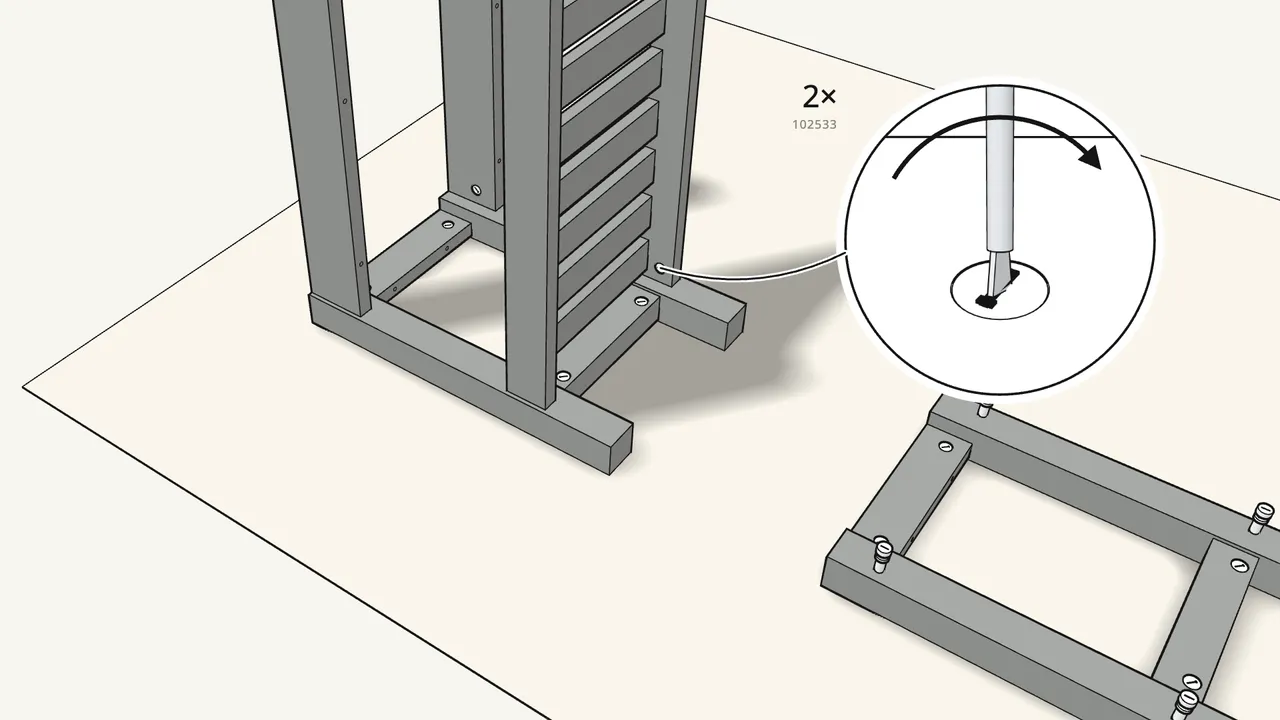
Step 8 · manual step 7
Lock the shelf with 2 cam locks (102533).
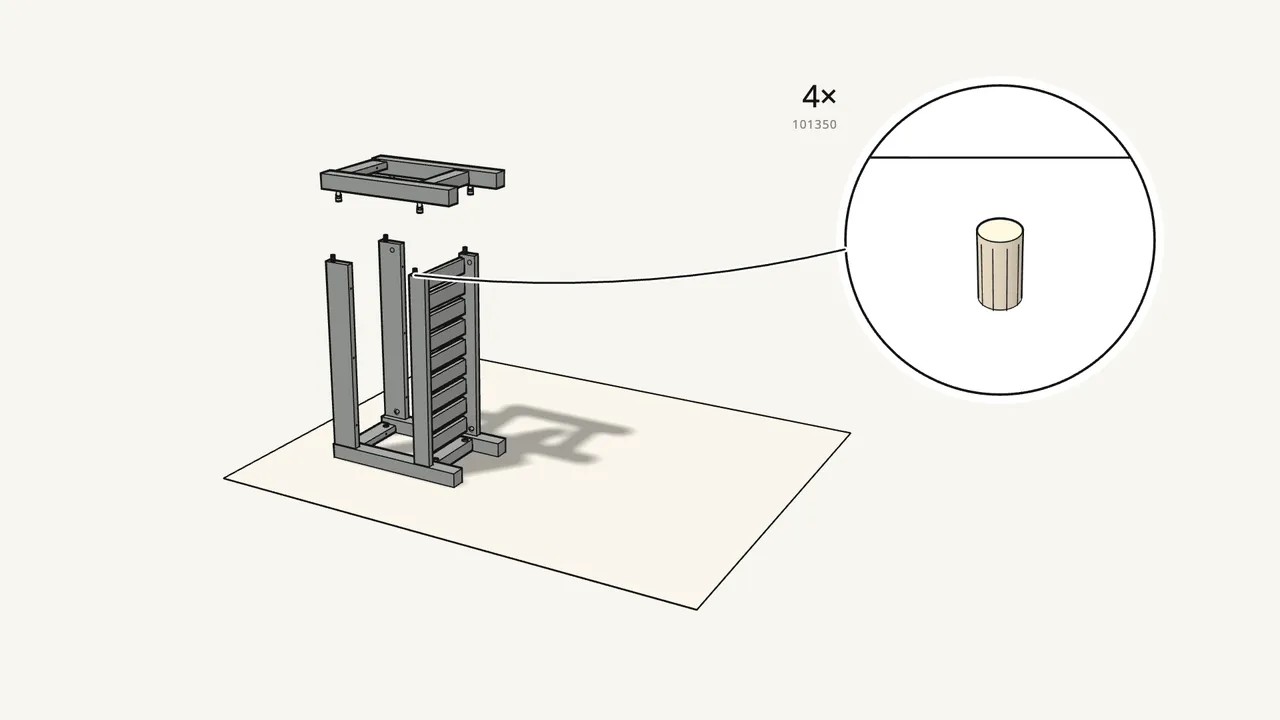
Step 9 · manual step 8
Push 4 dowels into the top ends, then fit the second frame.
Turn the frame over so its cam bolts point down.
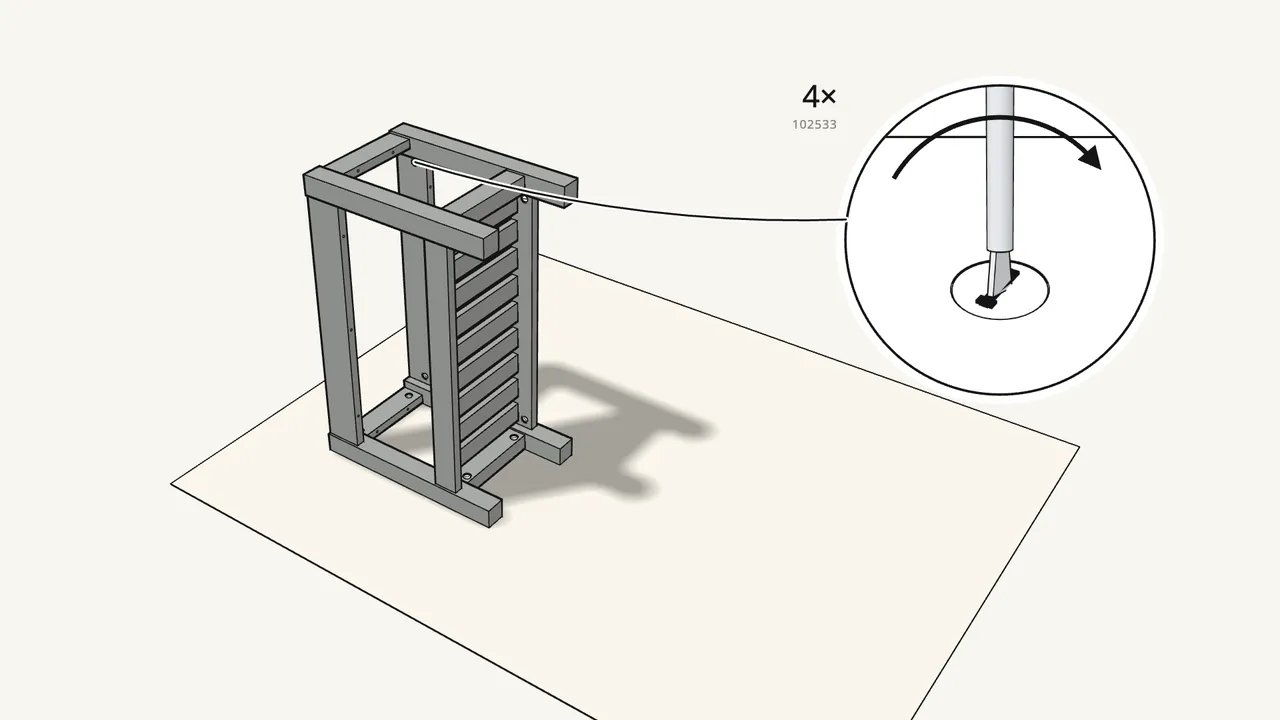
Step 10 · manual step 9
Insert 4 cam locks (102533) and turn them clockwise.
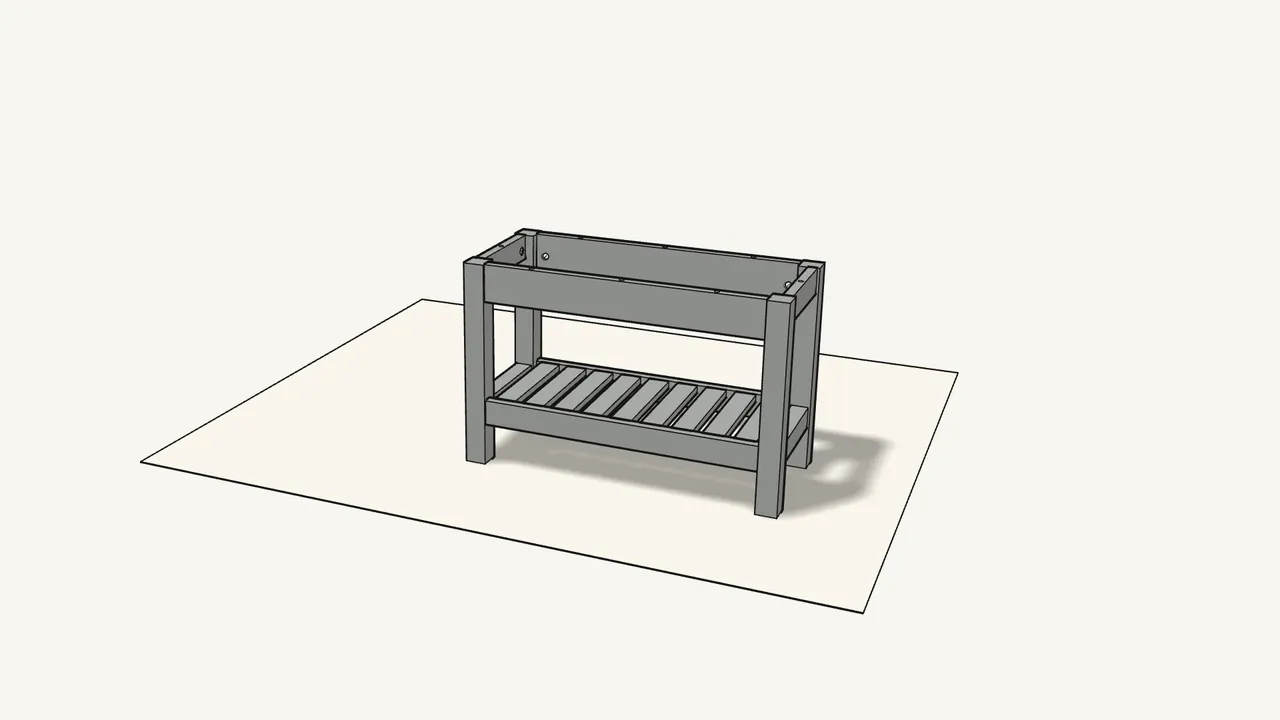
Step 11 · manual step 10
Tip the bench over onto its legs.
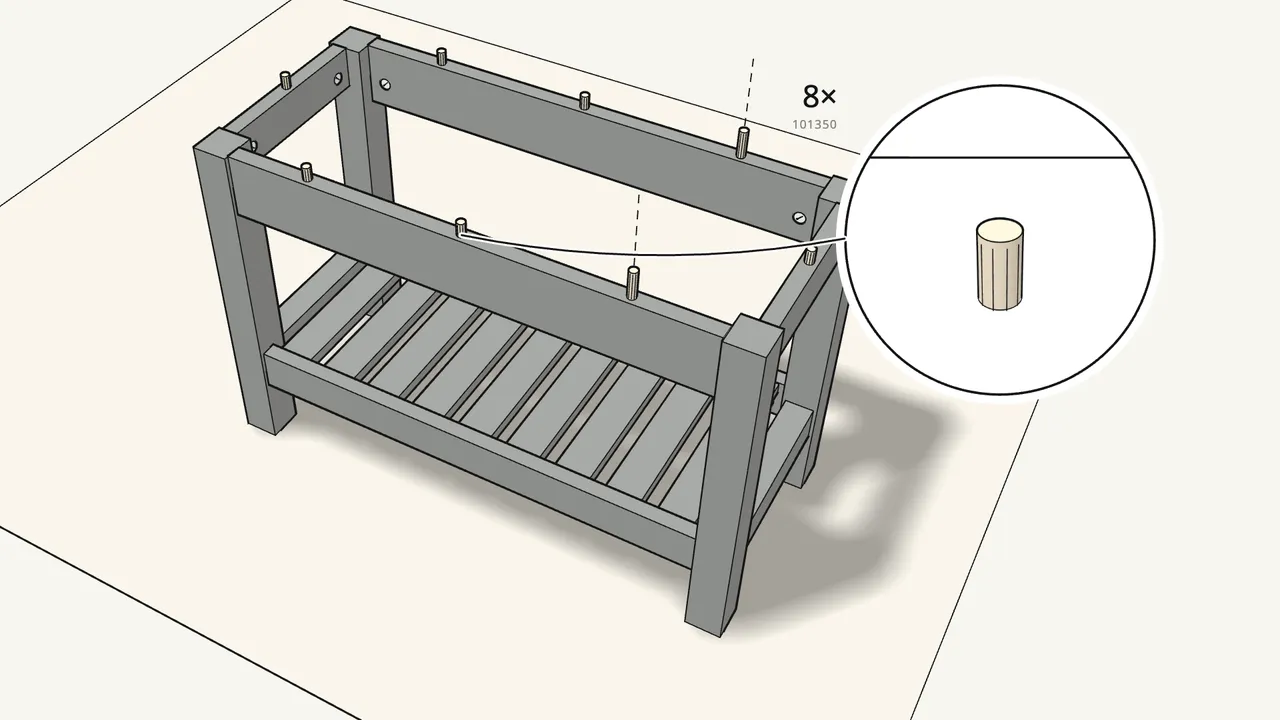
Step 12 · manual step 10
Push 8 dowels (101350) into the top edges of the rails.
3 in each long rail, 1 in each end.
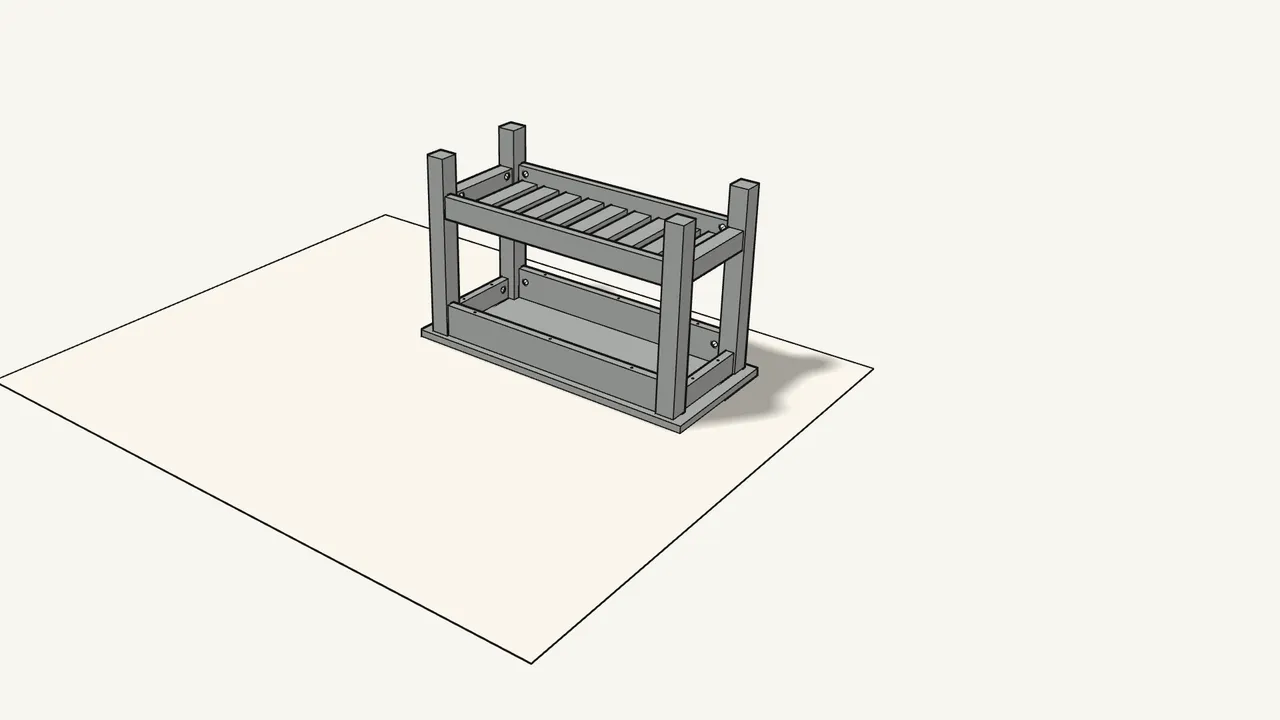
Step 13 · manual step 11
Lay the top face-down and turn the bench over onto it.
The dowels go into the holes in the top.
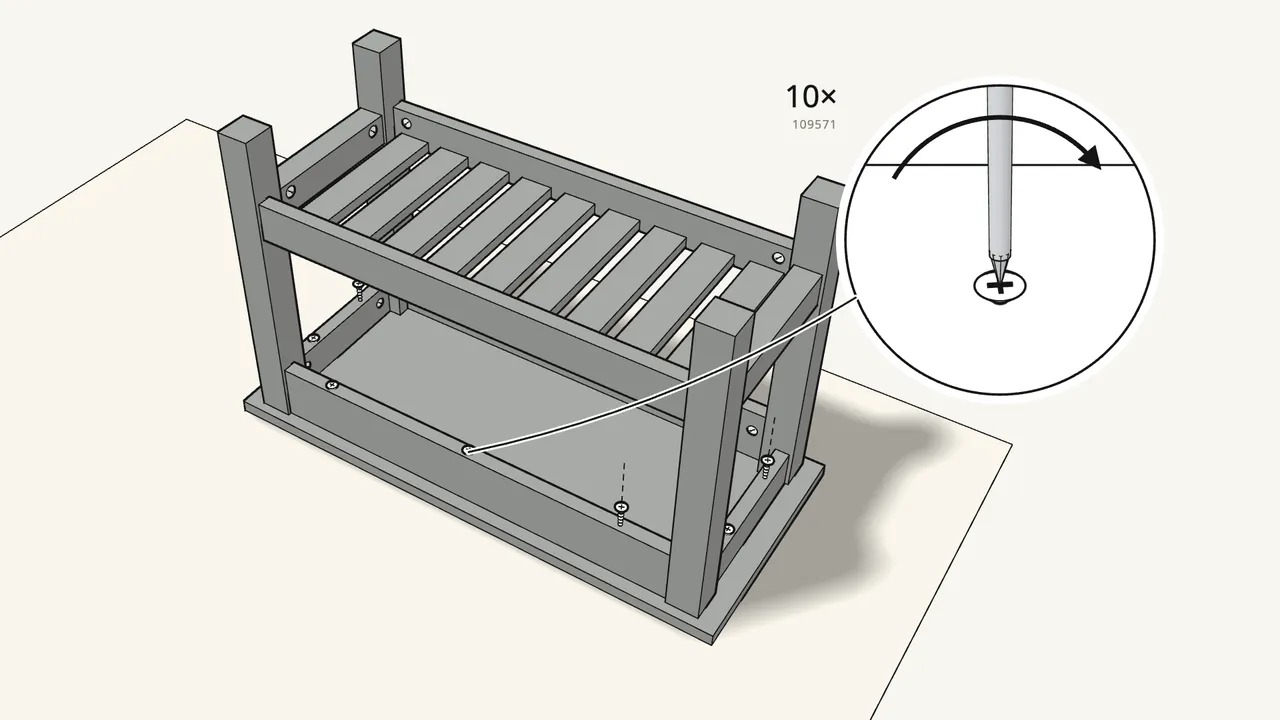
Step 14 · manual step 11
Fix the top with 10 screws (109571).
Through the rails into the top, with the Phillips screwdriver.
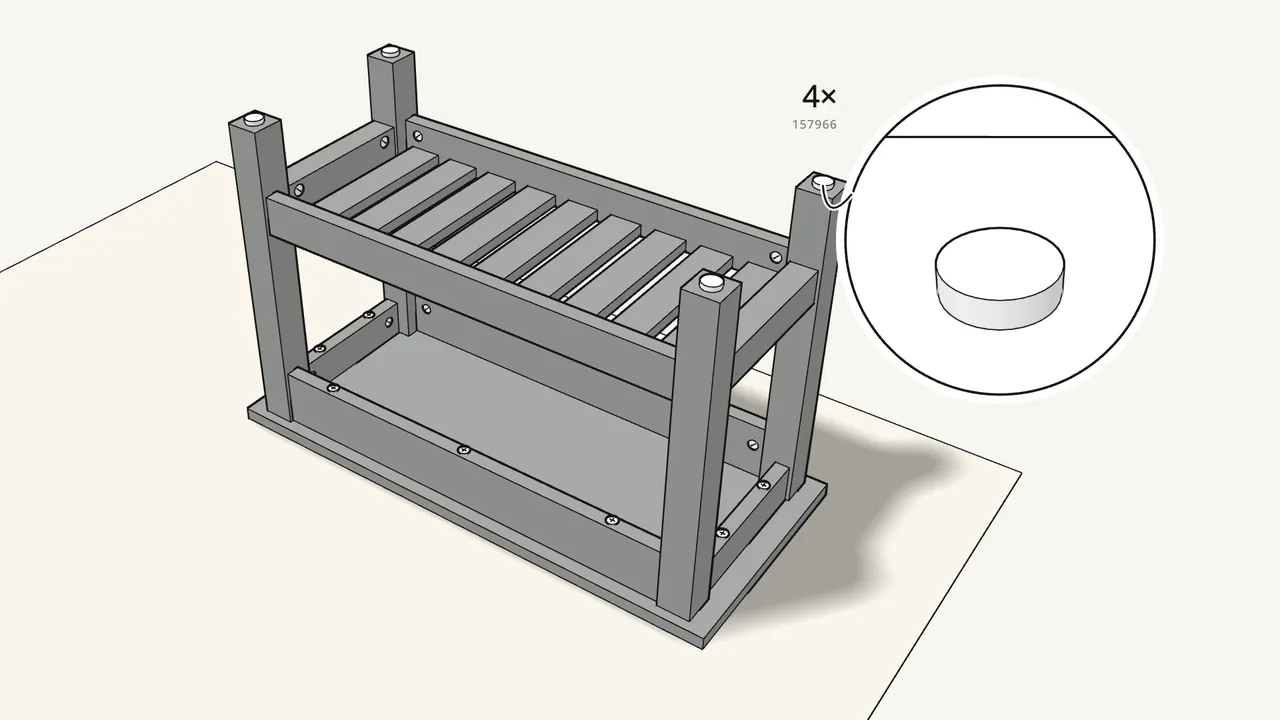
Step 15 · manual step 12
Screw the 4 adjustable feet (157966) into the legs.
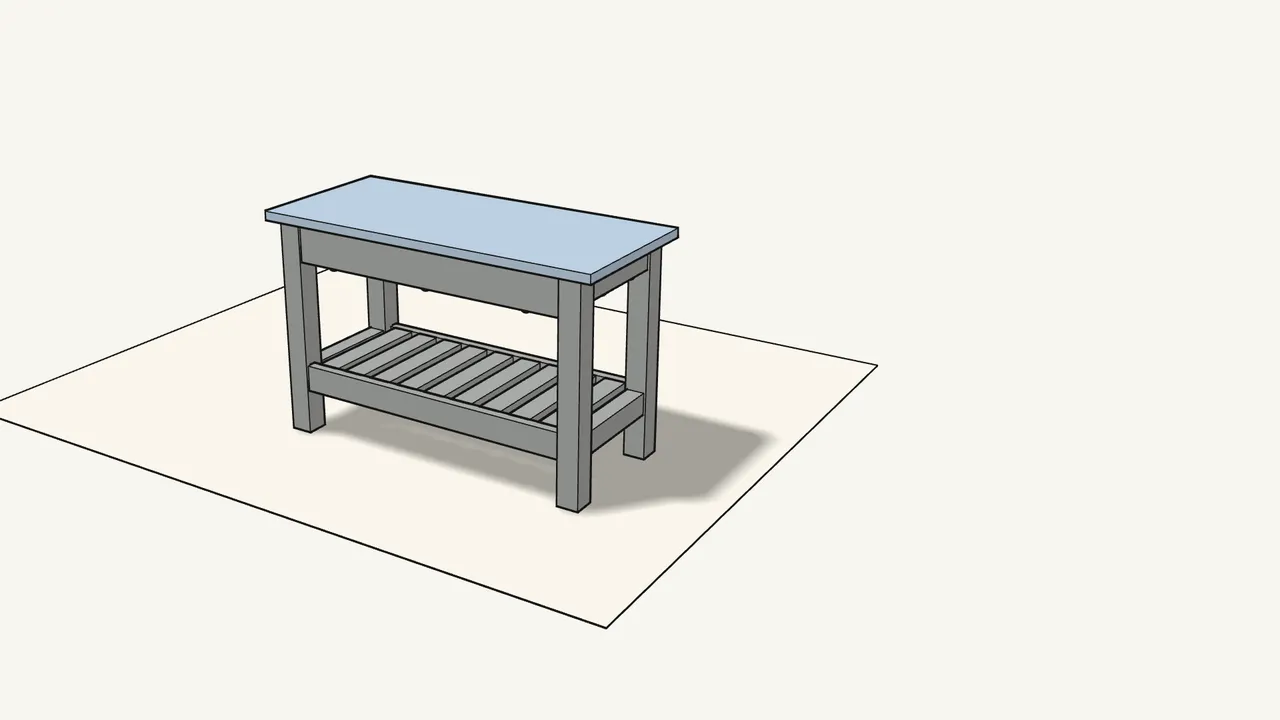
Step 16
Turn the bench upright.
Level it by turning the adjustable feet — see the info box on the last page.
Tips & safety
- Level the bench with its adjustable feet. Put a spirit level on the top and turn the 4 feet until it stands steady.
- Assemble on a soft surface. The manual shows a rug — and says to contact IKEA if you are unsure or miss a part.
Official instructions
This guide follows IKEA’s official assembly instructions (AA-568479-2). Keep the printed manual to hand — if anything differs, the manual is right.