IKEA · Carts & Clothes Racks
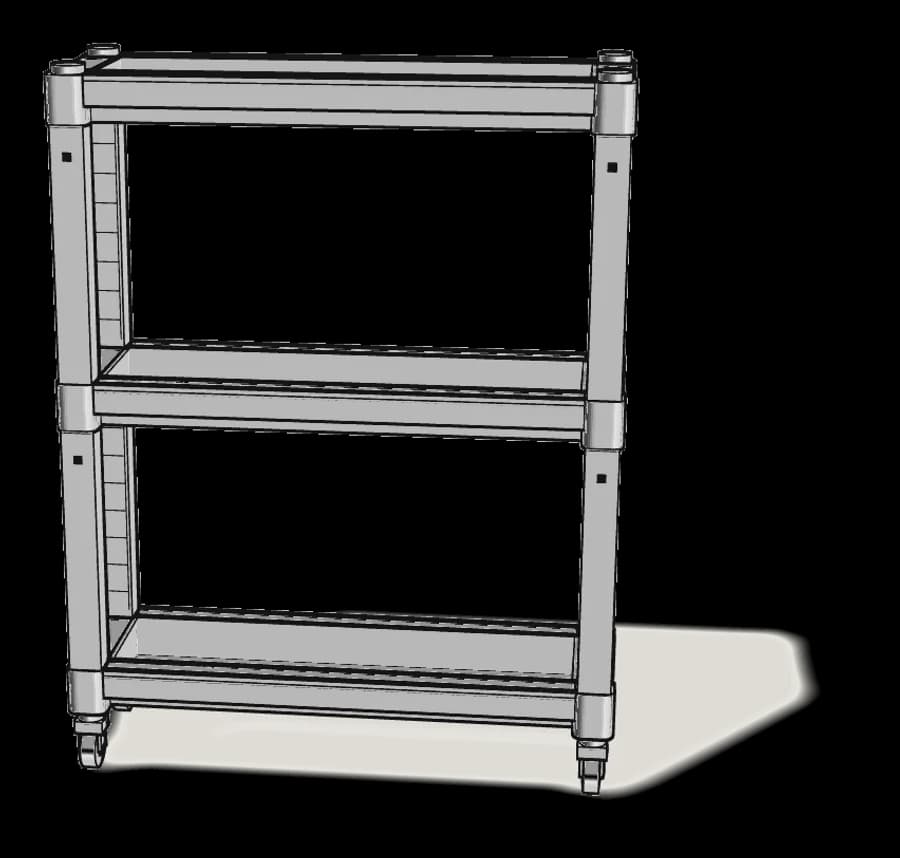
How to Assemble IKEA VESKEN Cart
Step-by-step IKEA VESKEN cart assembly: 8 illustrated steps, an animated video, the hardware list and the tools you need — following the official instructions (AA-2203938-2).
- 8 illustrated steps
- 7 steps in the manual
- 1:14 video
- 54×18×71 cm
What you need
Tools
No tools needed.
Hardware in the box
| Part no. (as printed in the manual) | Qty |
|---|---|
| — | 4× |
Step-by-step assembly
Step 1
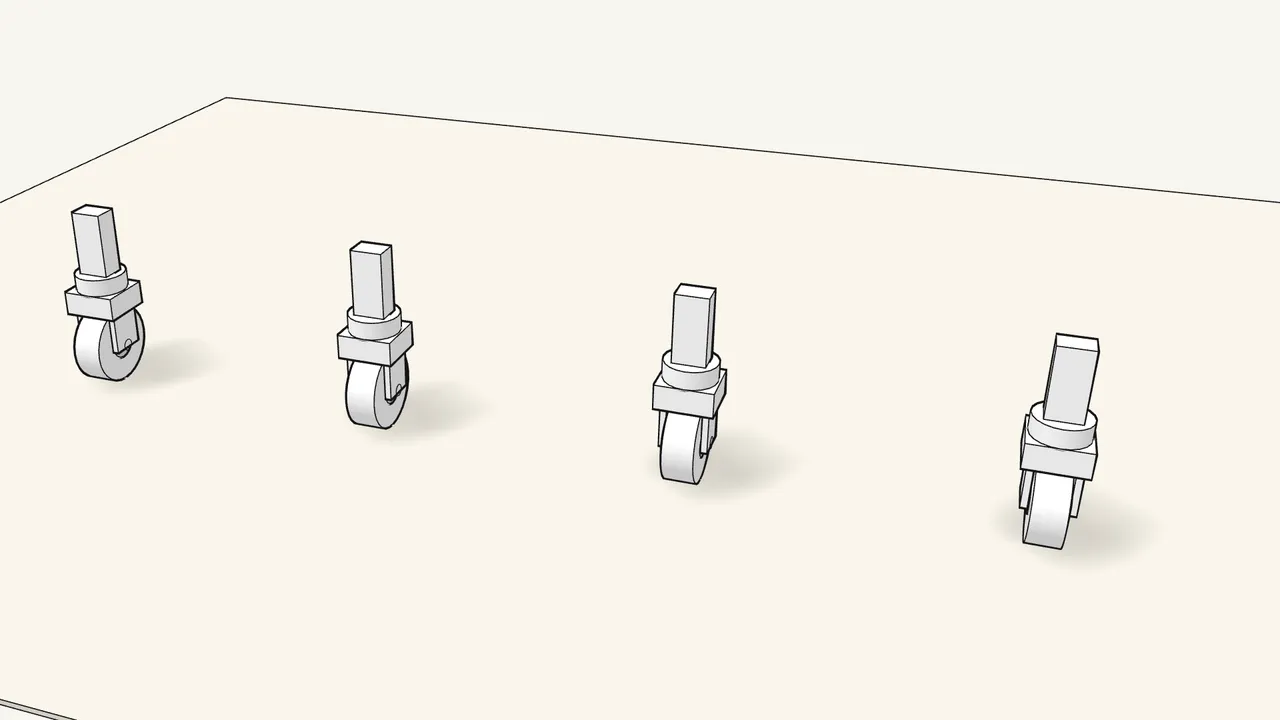
Press each castor holder down onto its wheel.
Push until it clicks. Make all 4 castors.
Step 2
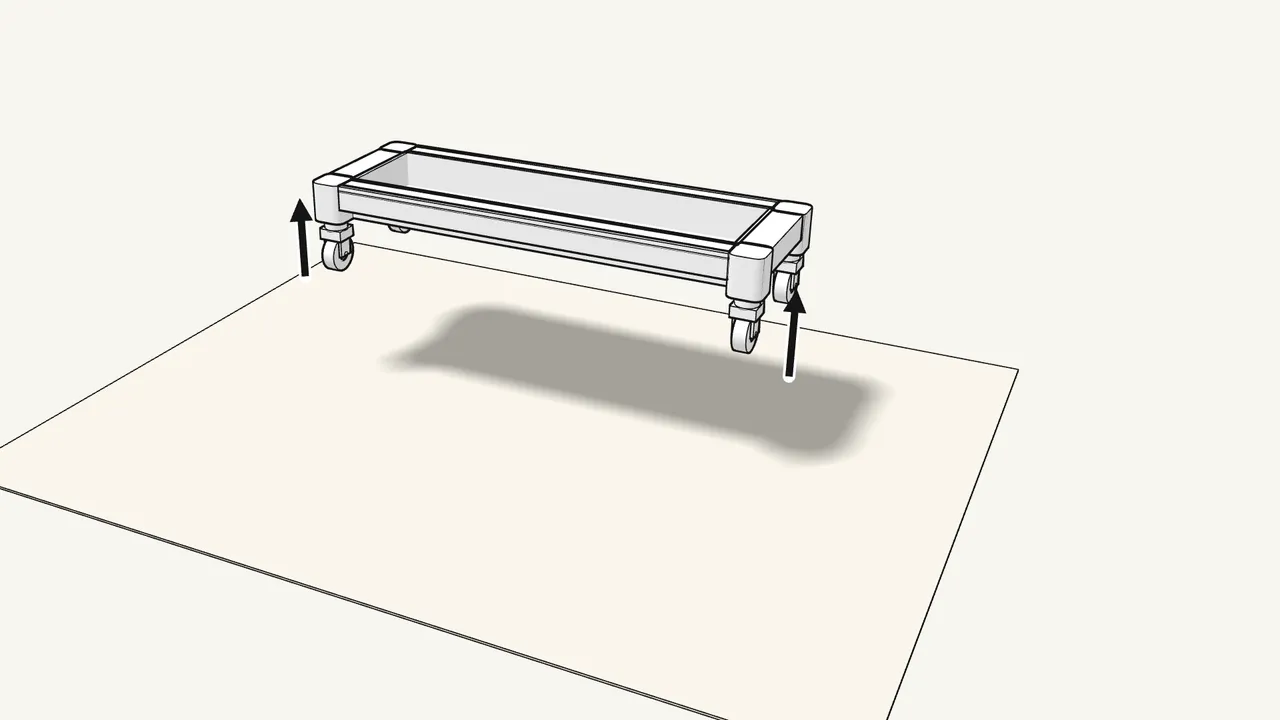
Push the 4 castors up into the corners of the bottom tray.
Note the L and R markings at the corners, as shown in the manual.
Step 3 · manual step 2
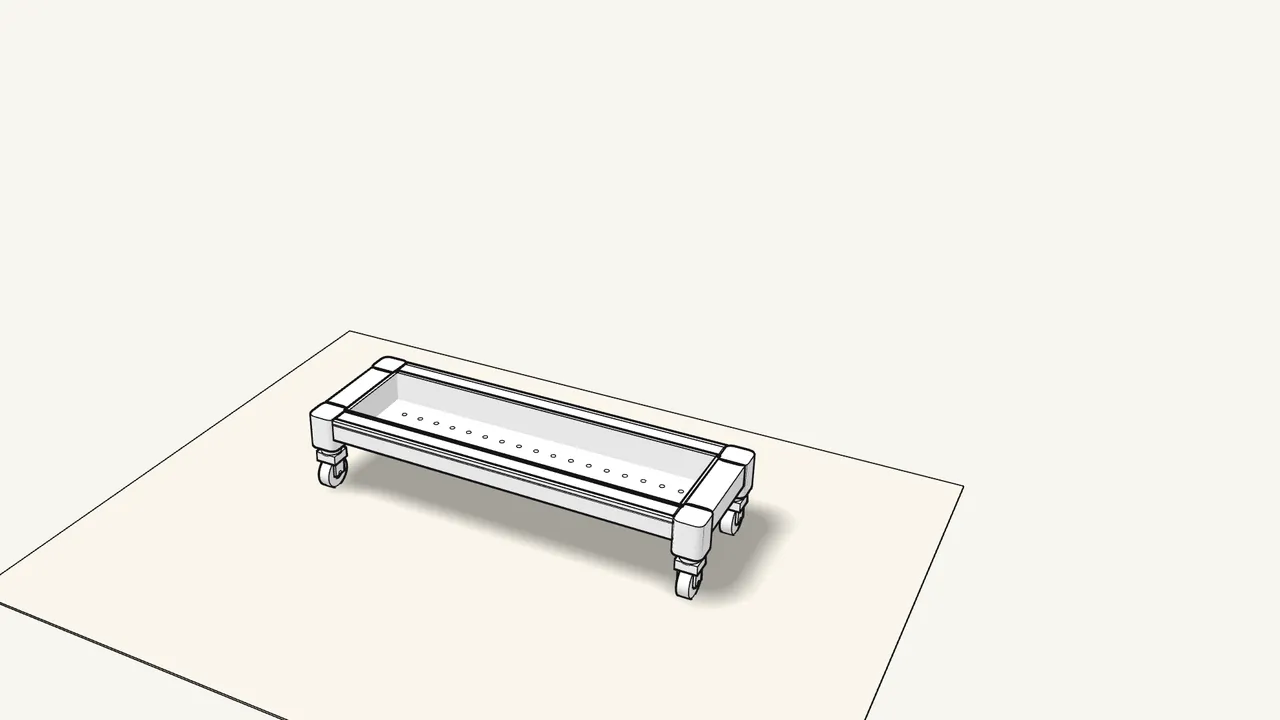
Set the base down on its wheels.
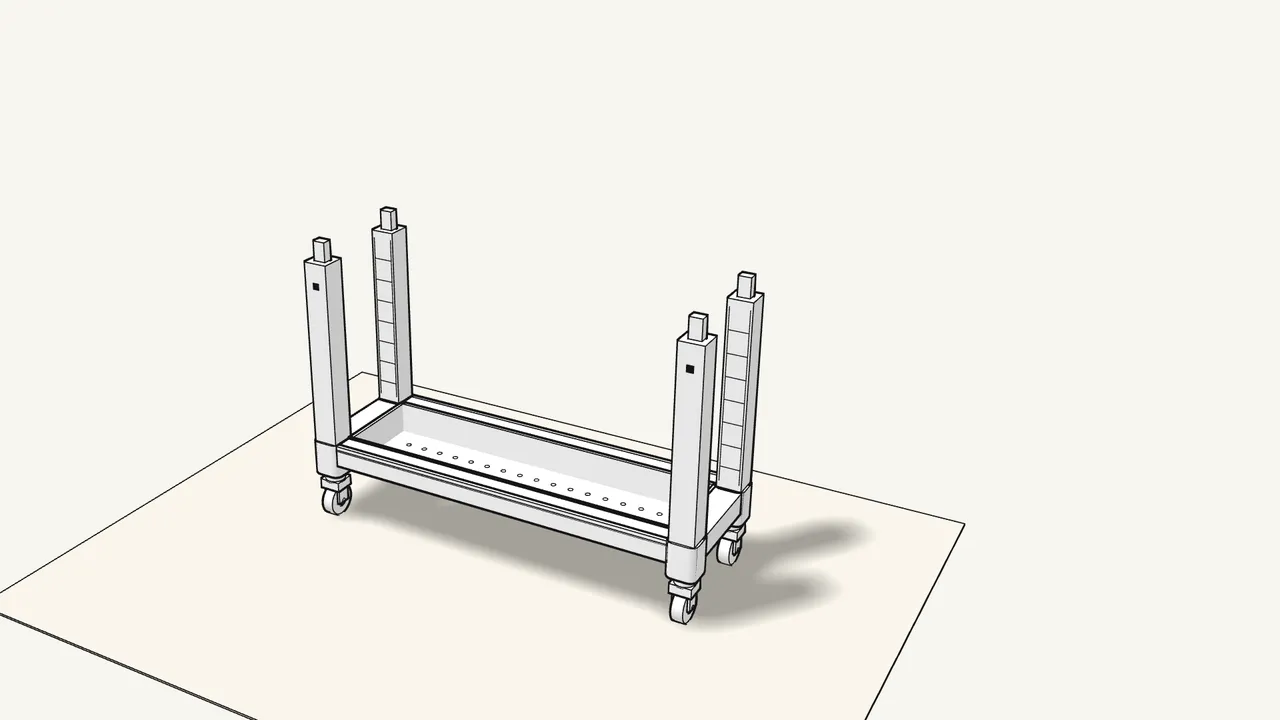
Step 4 · manual step 3
Push 4 posts down into the corners of the bottom tray.
Press until each one clicks into place.
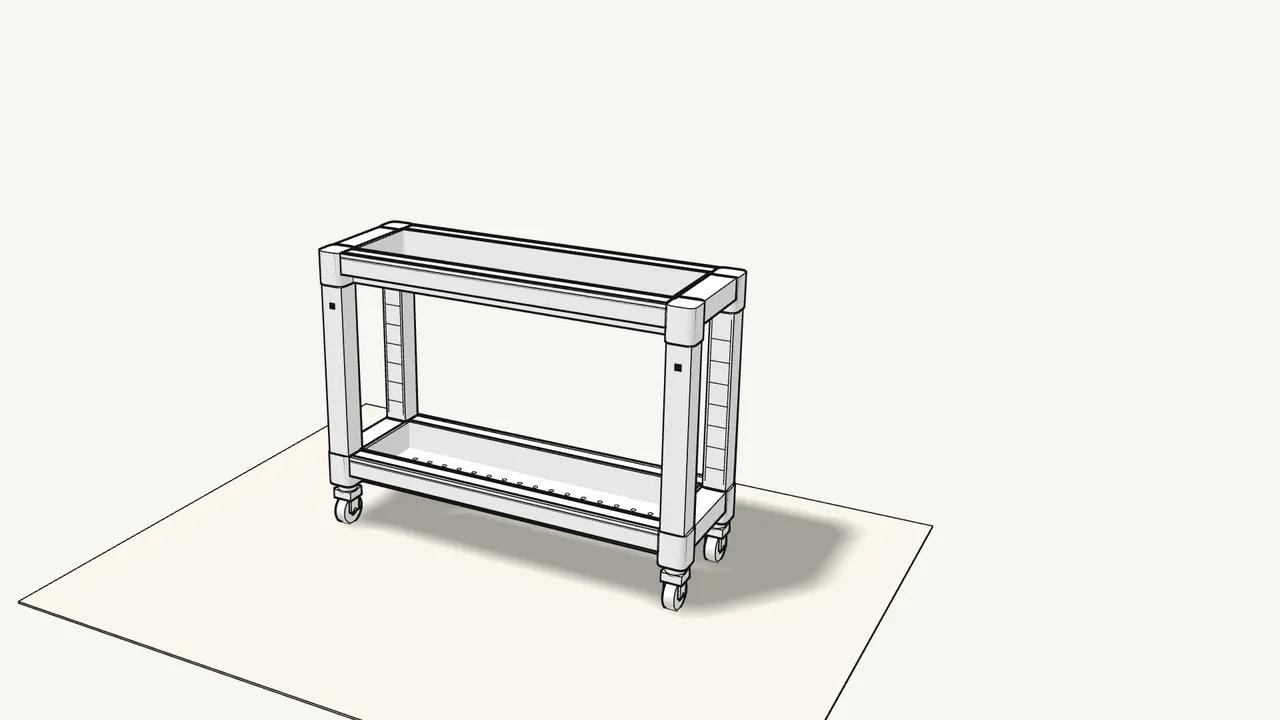
Step 5 · manual step 4
Press the middle tray down onto the 4 posts.
The posts go into the corner sockets under the tray.
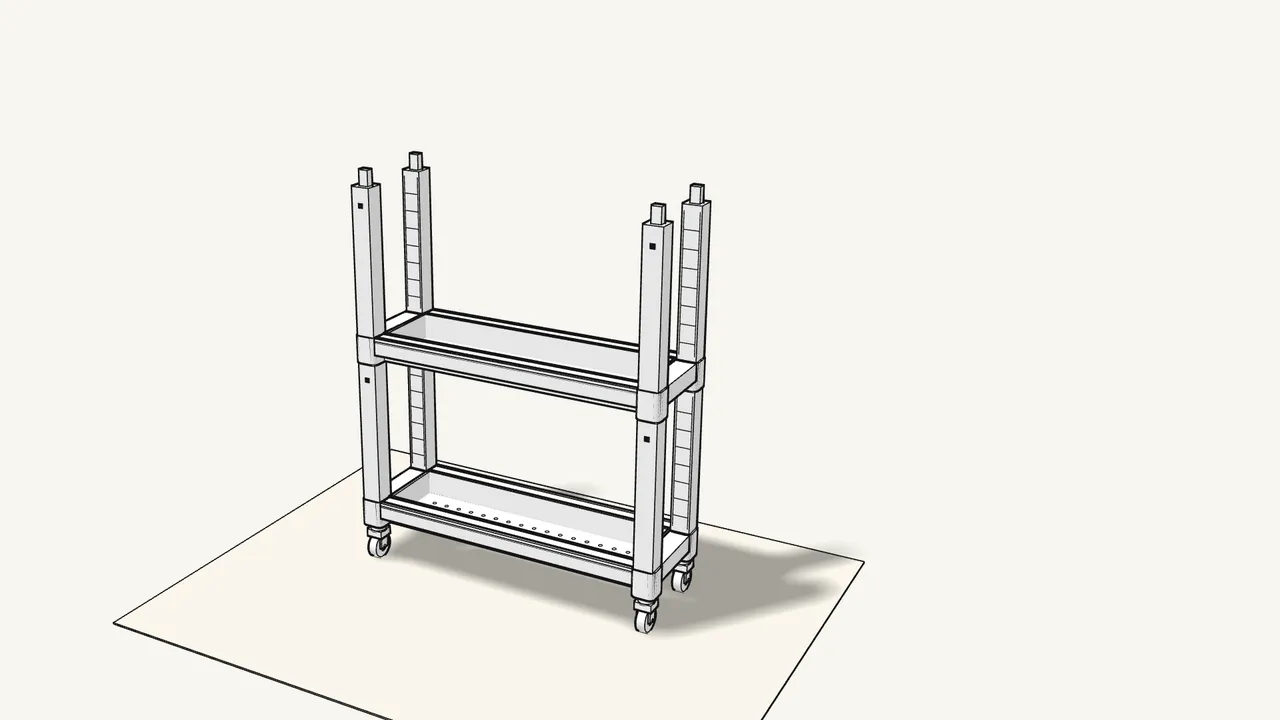
Step 6 · manual step 5
Click 4 more posts into the corners of the middle tray.
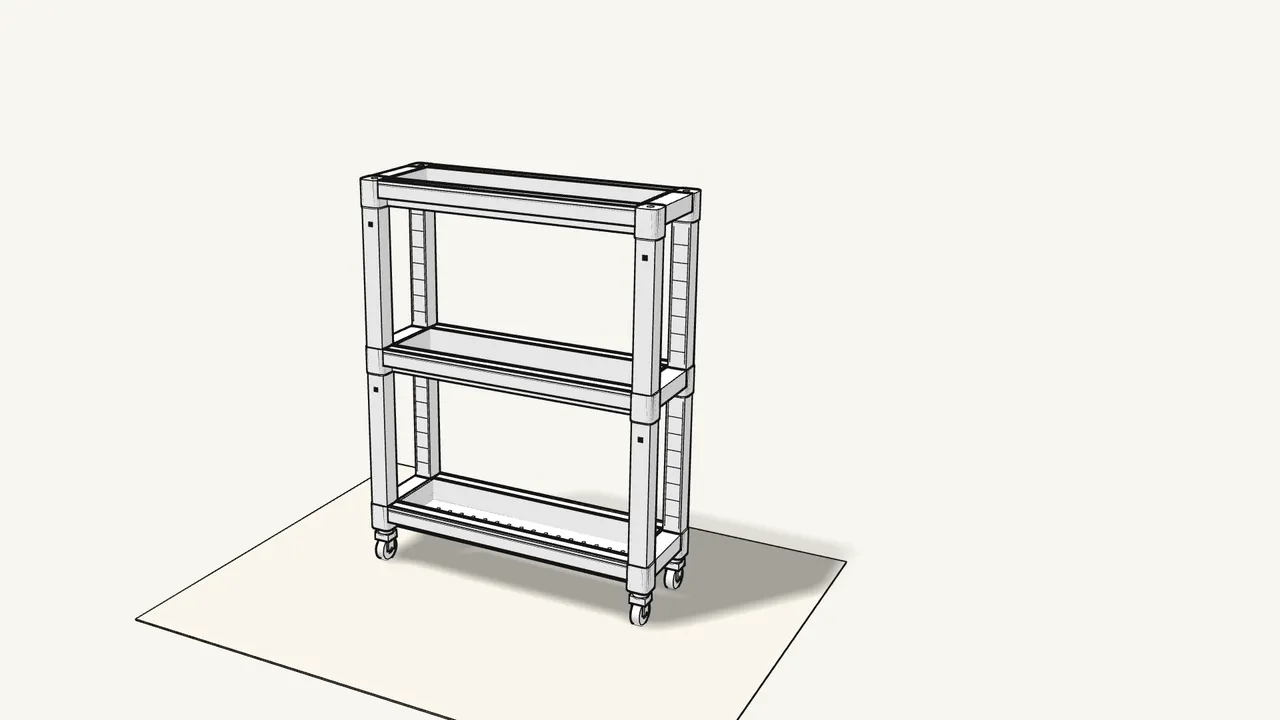
Step 7 · manual step 6
Press the top tray down onto the posts.
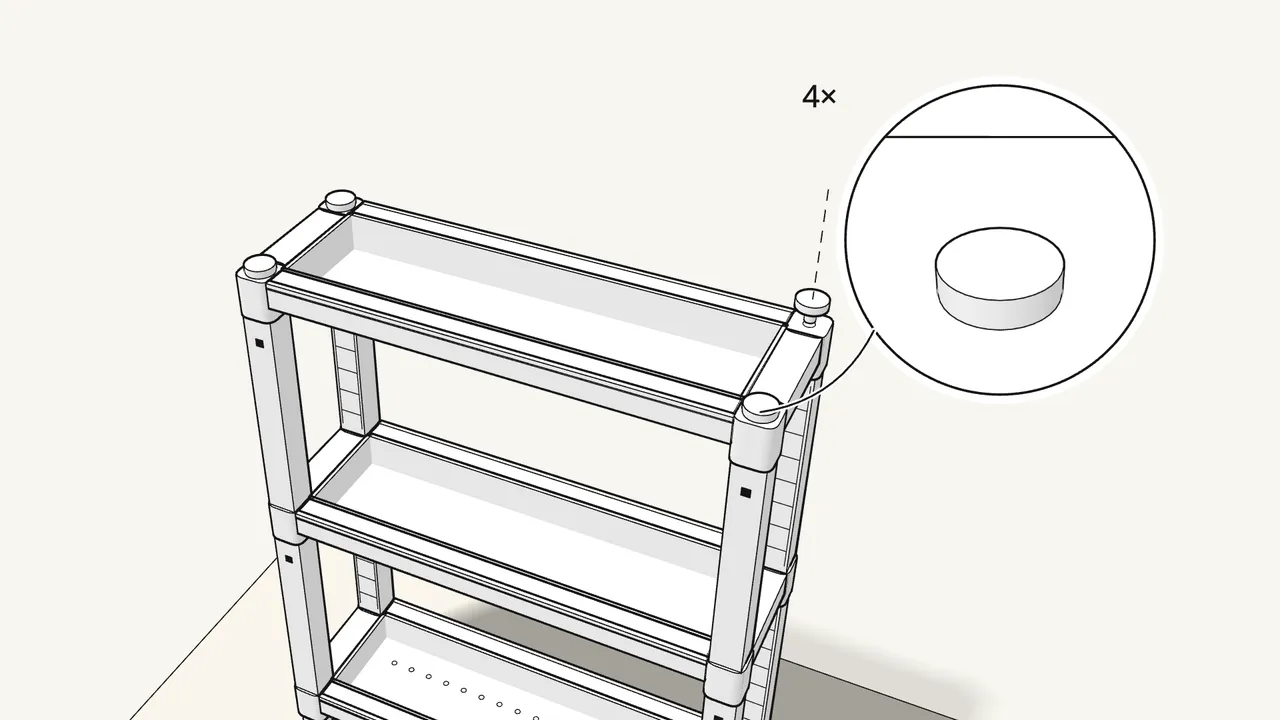
Step 8 · manual step 7
Push the 4 end caps into the tops of the posts.
Tips & safety
- Missing a part or unsure about a step? The manual asks you to contact your IKEA store for help.
Official instructions
This guide follows IKEA's official assembly instructions (AA-2203938-2). Keep the printed manual to hand — if anything differs, the manual is right.