IKEA · Carts & Clothes Racks
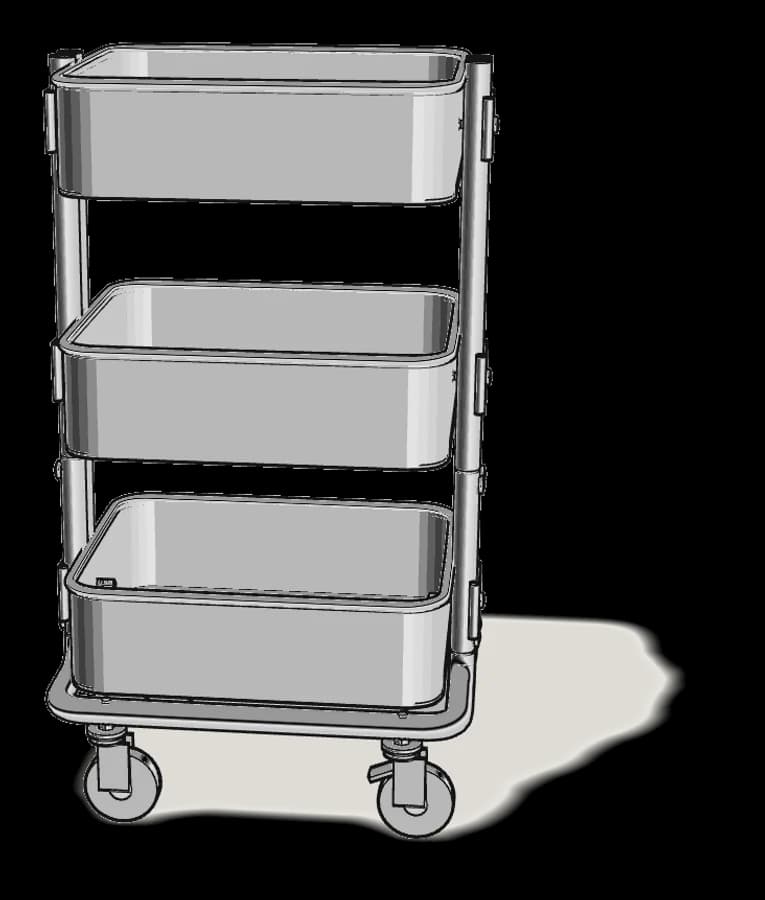
How to Assemble IKEA RÅSKOG Utility Cart
Step-by-step IKEA RÅSKOG utility cart assembly: 11 illustrated steps, an animated video, the hardware list and the tools you need — following the official instructions (AA-2475409-4).
- 11 illustrated steps
- 7 steps in the manual
- 1:41 video
- 35×45×77 cm
What you need
Tools
- Phillips screwdriver
- Spanner (included)
You’ll need: a Phillips screwdriver and the spanner (included).
Hardware in the box
| Part no. (as printed in the manual) | Qty |
|---|---|
| 124154 | 6× |
| 10119612 | 6× |
| 121194 | 8× |
| 10121215 | 2× |
| 10121224 | 2× |
Step-by-step assembly
Step 1
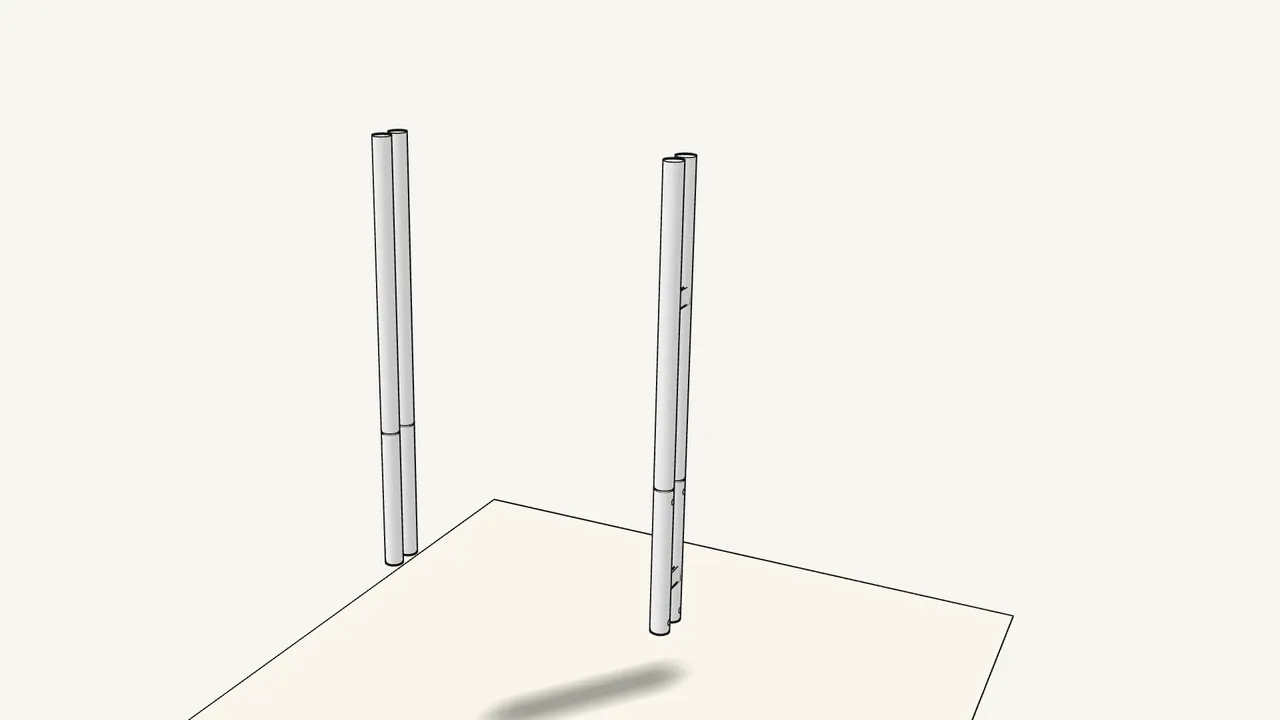
Push the upper tubes into the lower tubes.
The narrow ends go down. Do this for both uprights.
Step 2 · manual step 1
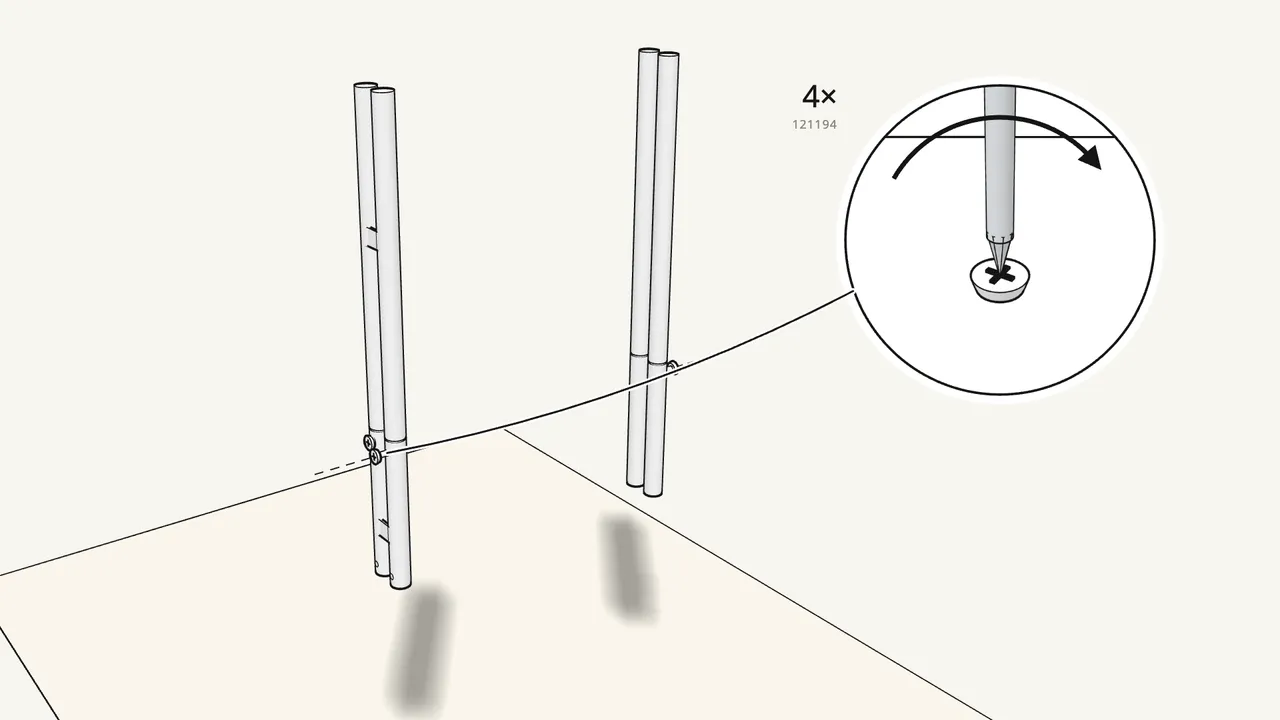
Fix each joint with 2 screws (121194).
Use the Phillips screwdriver — 4 screws in total.
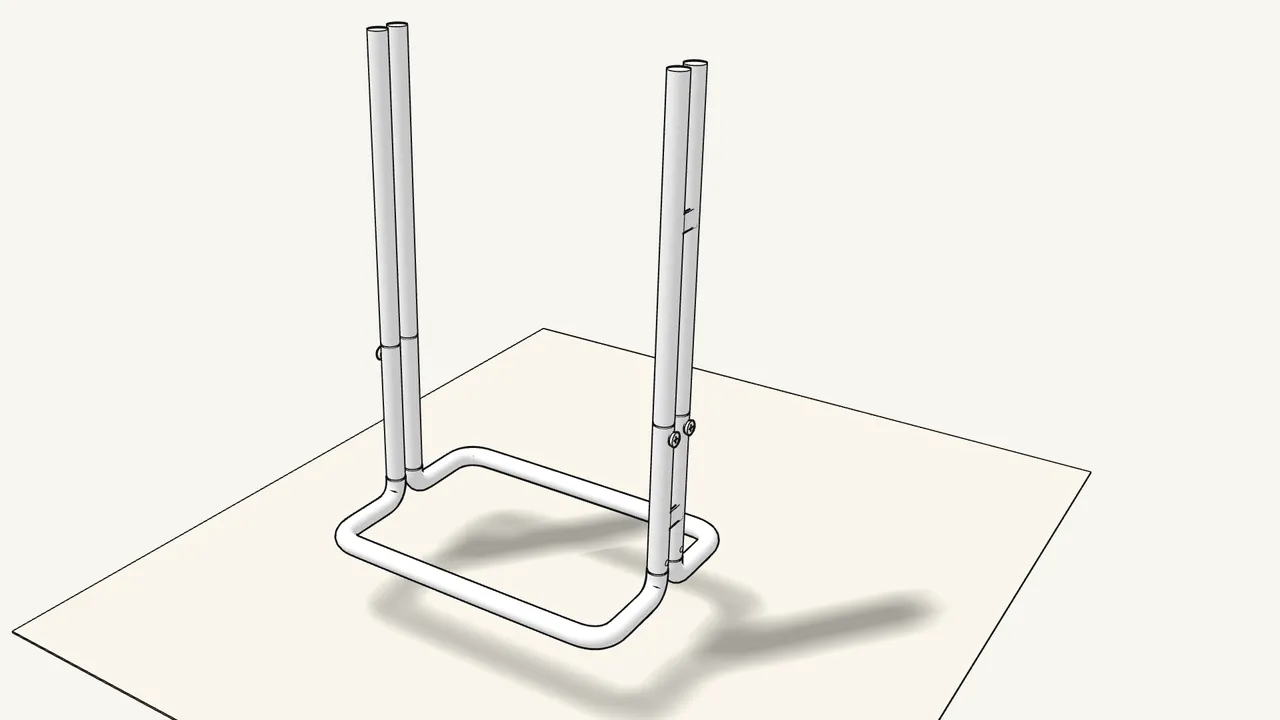
Step 3 · manual step 2
Place both uprights onto the base frame.
The lower tubes slide over the stubs of the base.
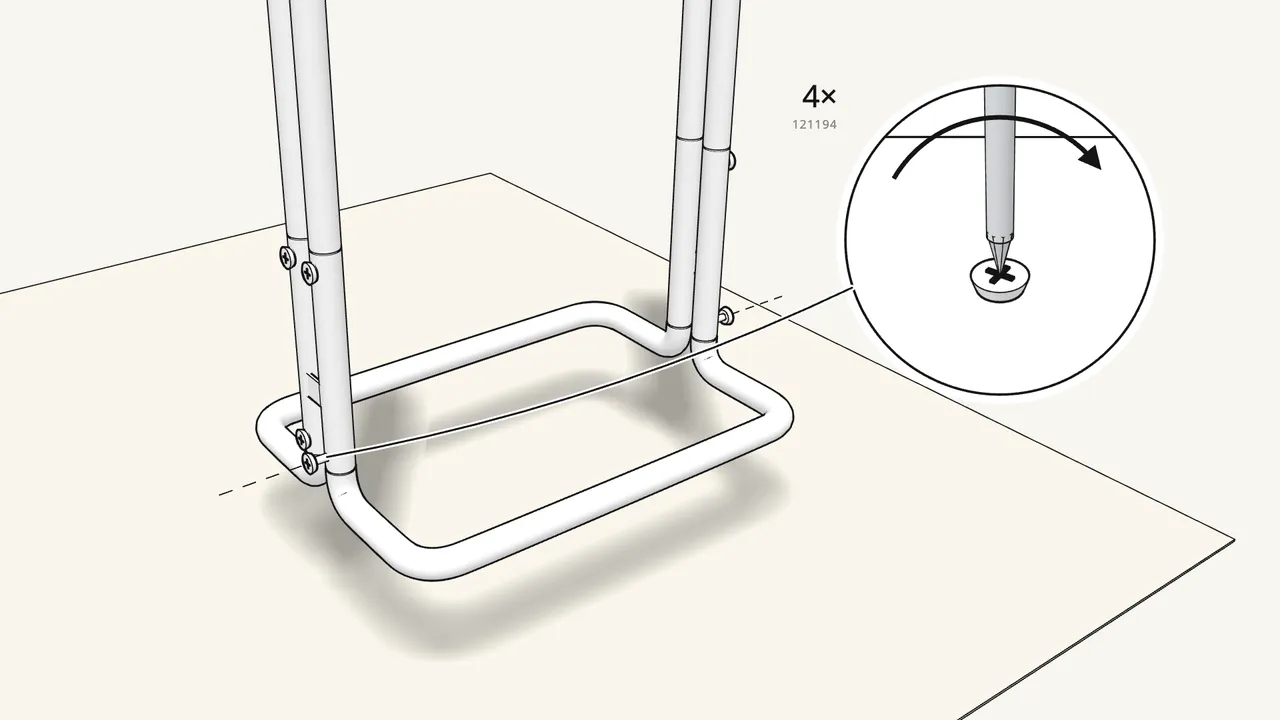
Step 4 · manual step 2
Fix them with 2 screws each (121194).
4 screws in total.
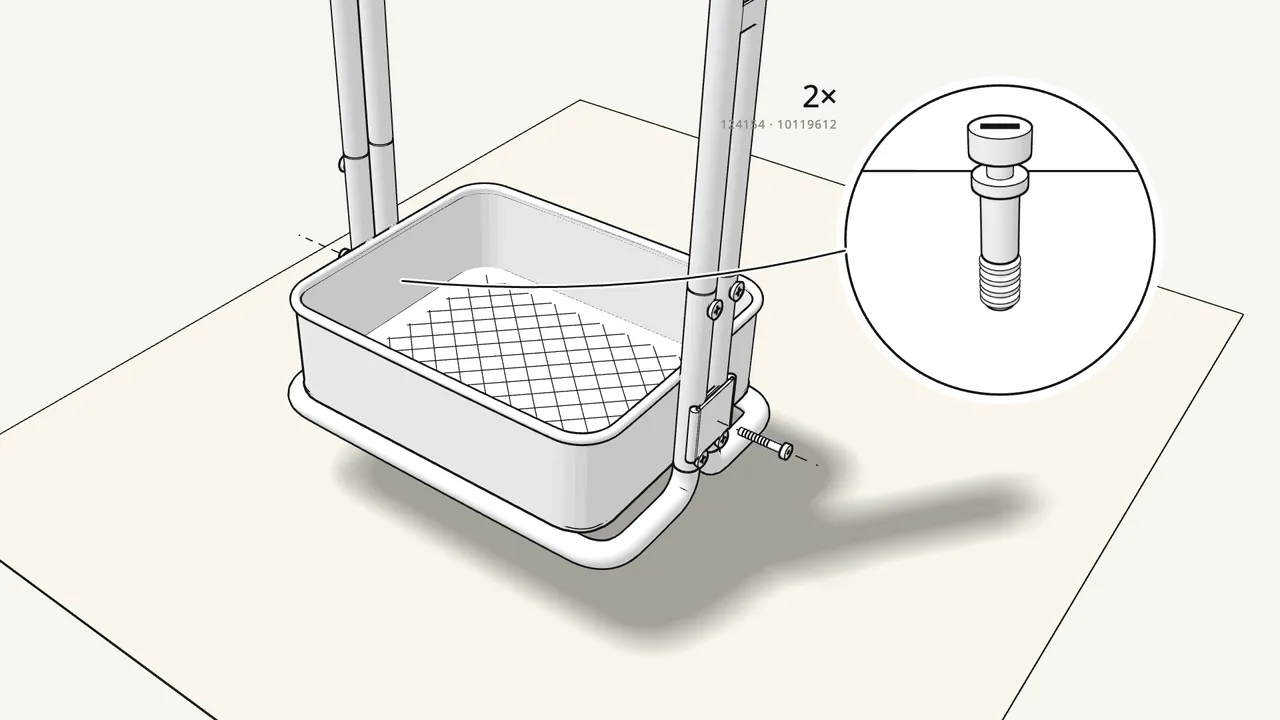
Step 5 · manual step 3
Fit the bottom tray at mark 1 on the tubes.
Clamp on the outside: bolt 124154 through, cap nut 10119612 inside. Tighten with the spanner.
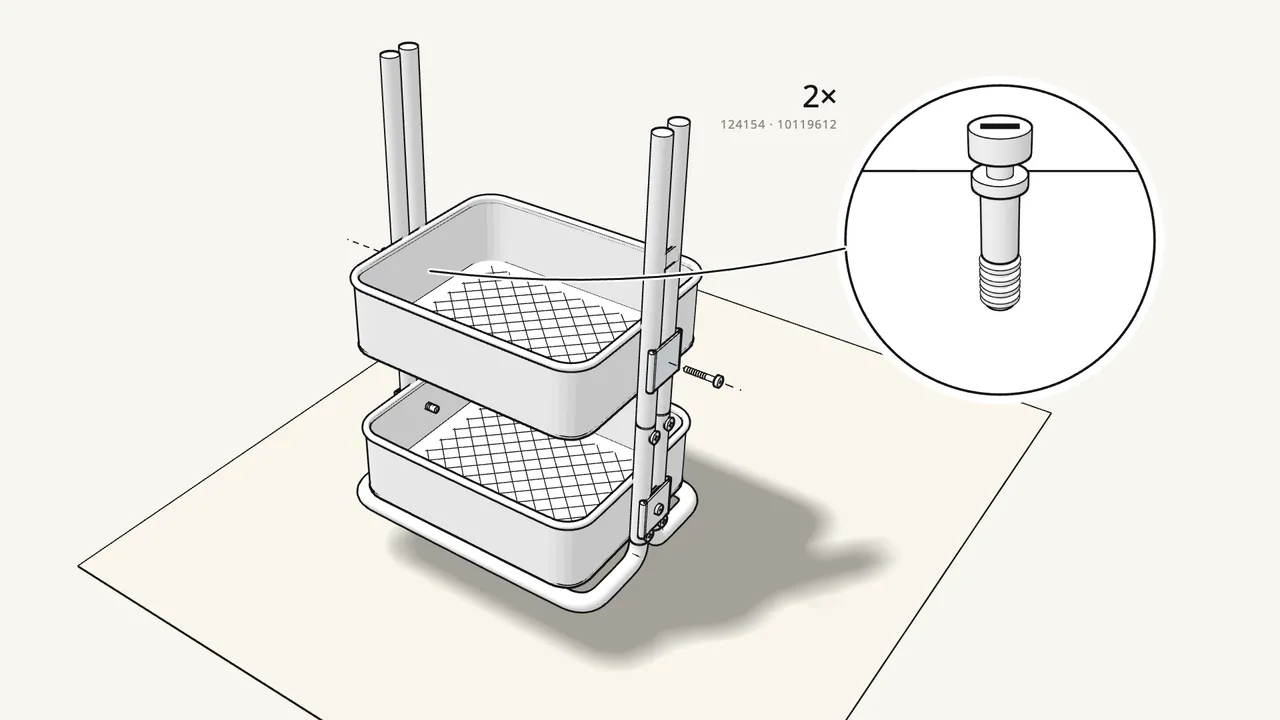
Step 6 · manual step 4
Fit the middle tray at mark 2 the same way.
1 bolt, 1 cap nut and 1 clamp at each end.
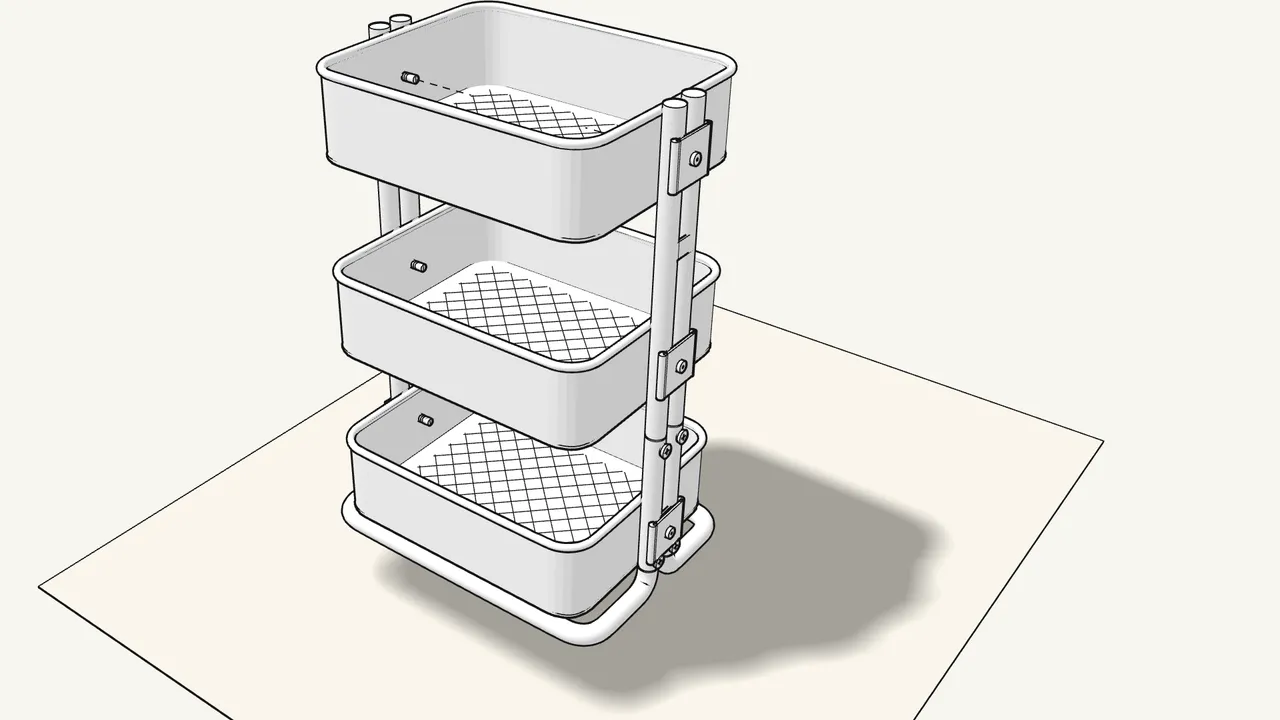
Step 7 · manual step 5
Fit the top tray at mark 3.
Tighten the cap nuts with the spanner.
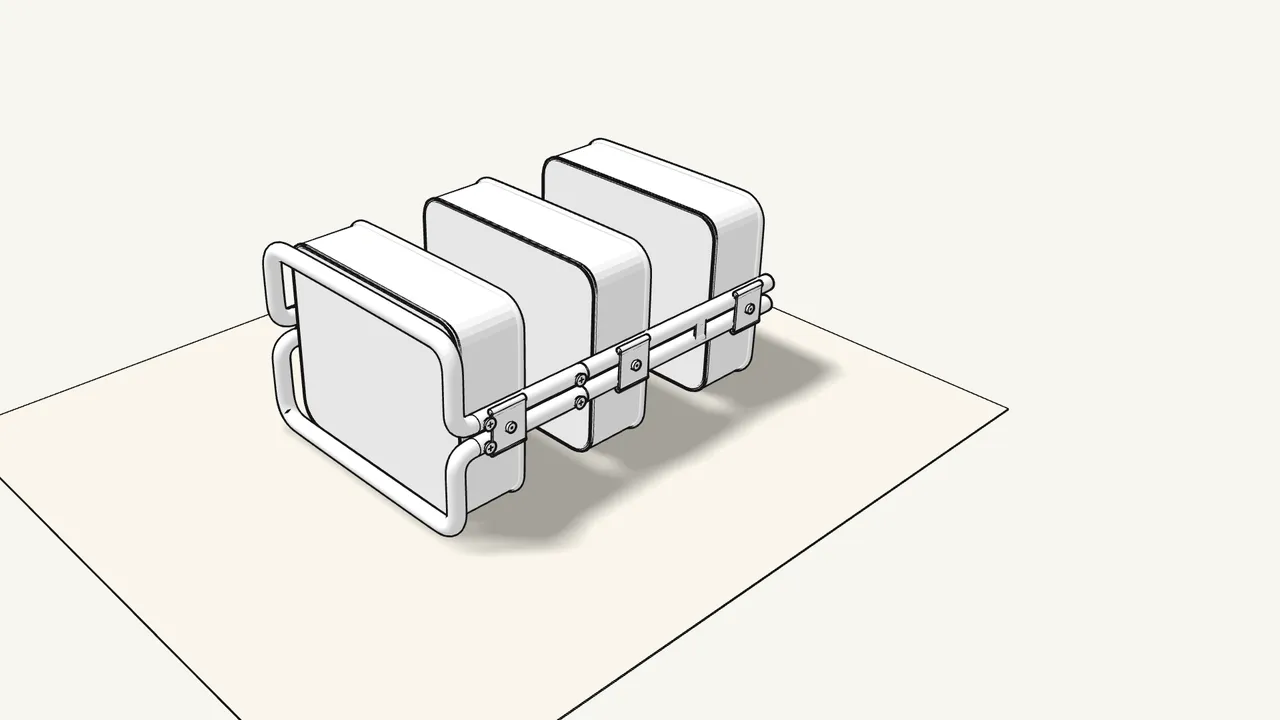
Step 8 · manual step 6
Lay the cart down on a rug.
Base facing you, ready for the castors.
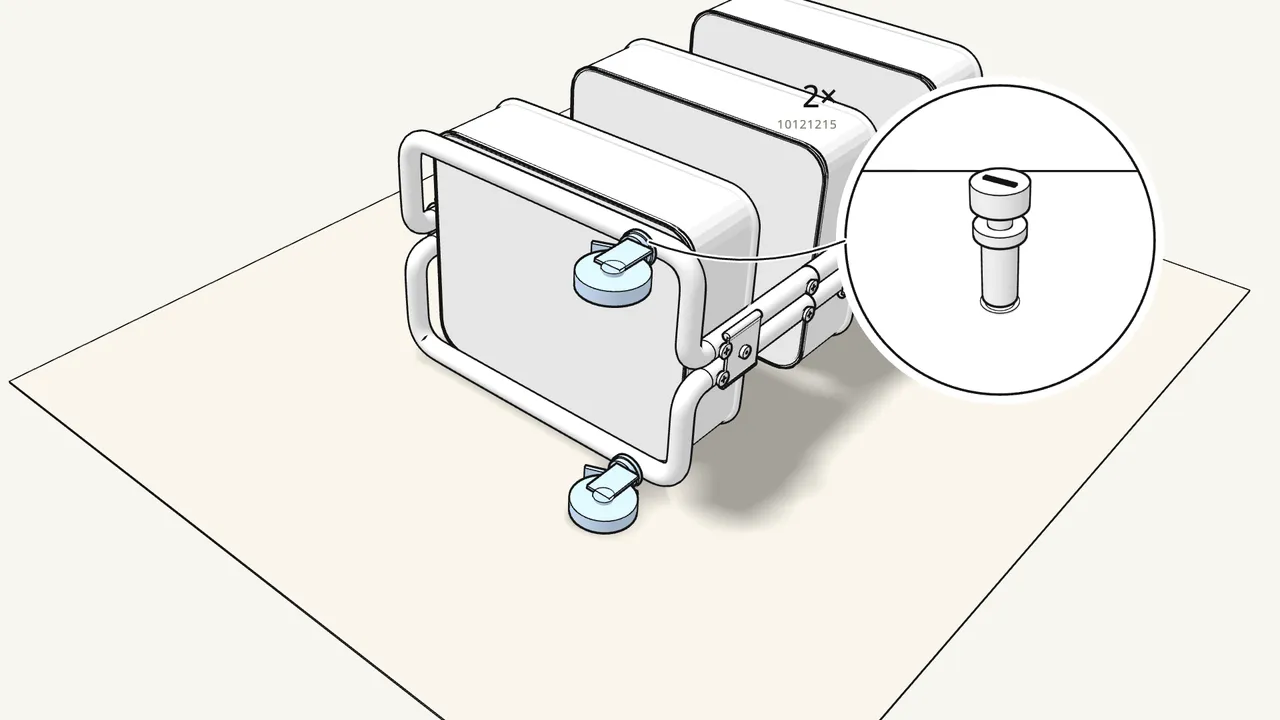
Step 9 · manual step 6
Screw in the 2 castors with brakes.
Tighten them with the spanner.
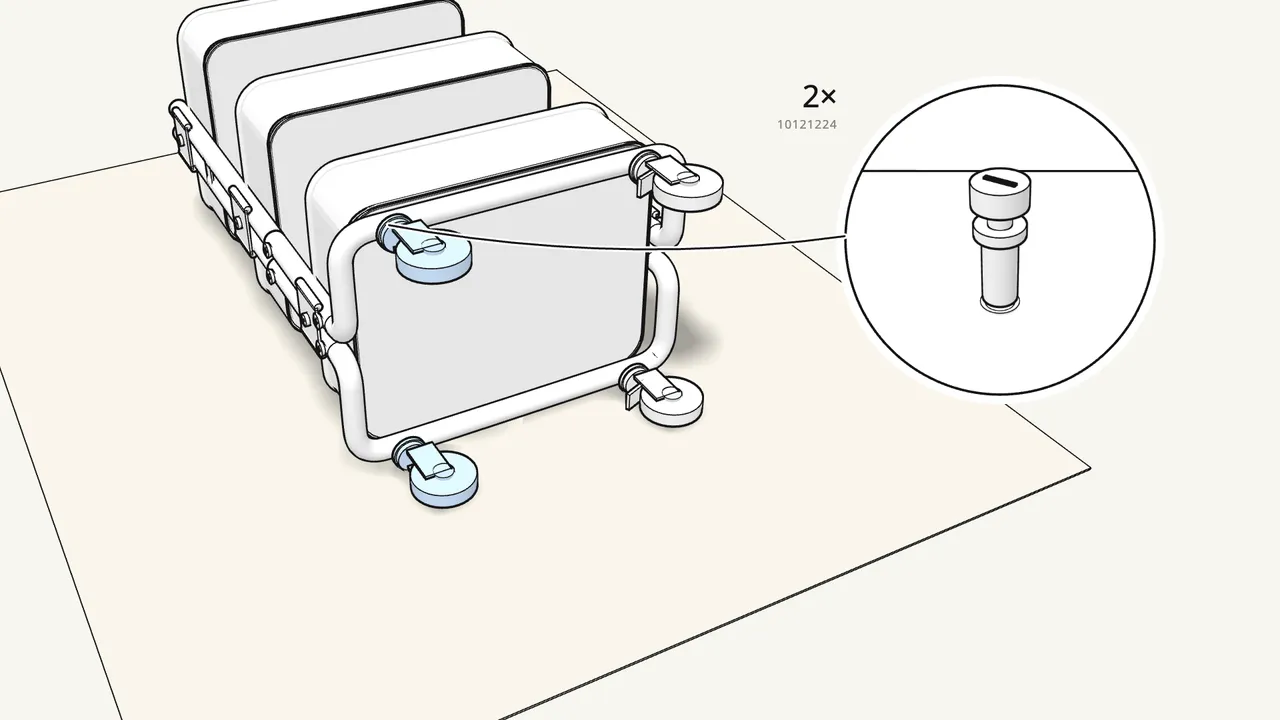
Step 10 · manual step 7
Screw in the 2 castors without brakes by hand.
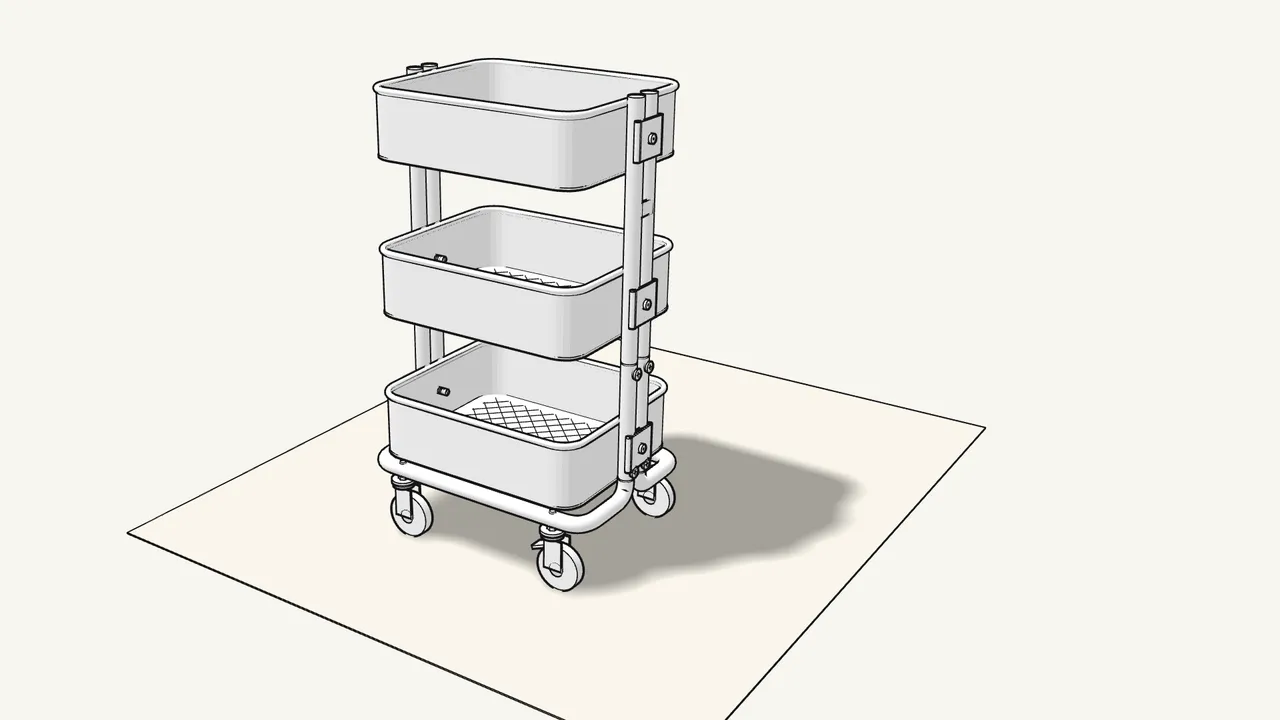
Step 11 · manual step 7
Stand the cart upright.
Tips & safety
- Castor brakes Press the lever down to lock the wheel; lift it to release (manual p. 8).
Official instructions
This guide follows IKEA's official assembly instructions (AA-2475409-4). Keep the printed manual to hand — if anything differs, the manual is right.