IKEA · Carts & Clothes Racks
How to assemble IKEA BEKVÄM Kitchen Cart
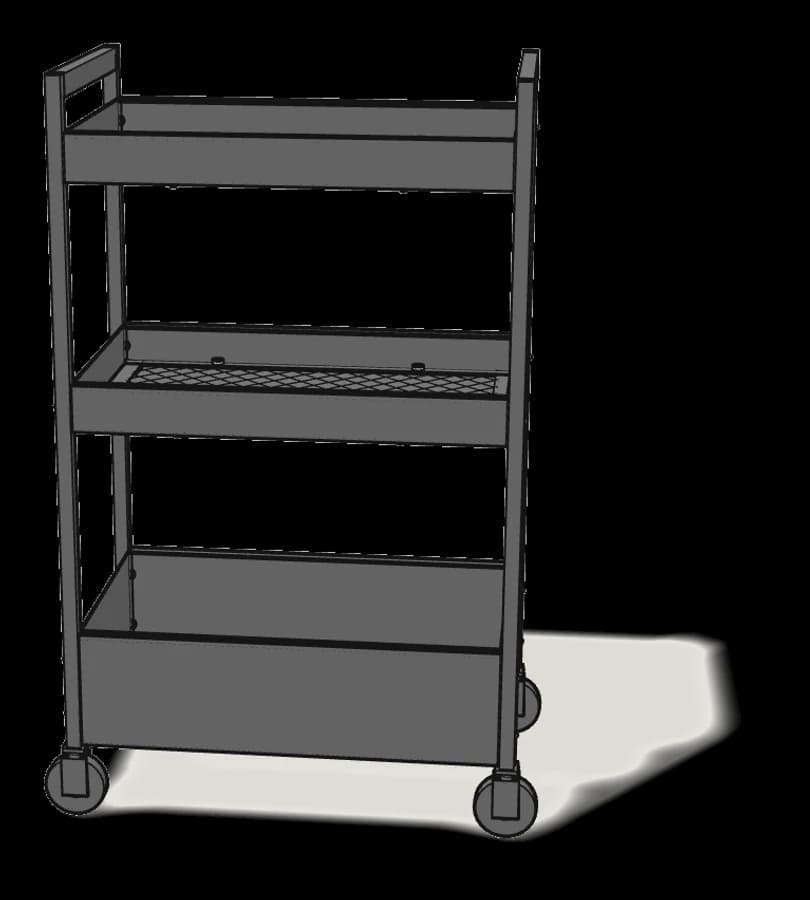
Step-by-step IKEA BEKVÄM Kitchen Cart assembly: 14 illustrated steps, an animated video, the hardware list and the tools you need — following the official instructions (AA-30370-10).
- 14 illustrated steps
- 12 steps in the manual
- 2:30 video
- 58×50×85 cm
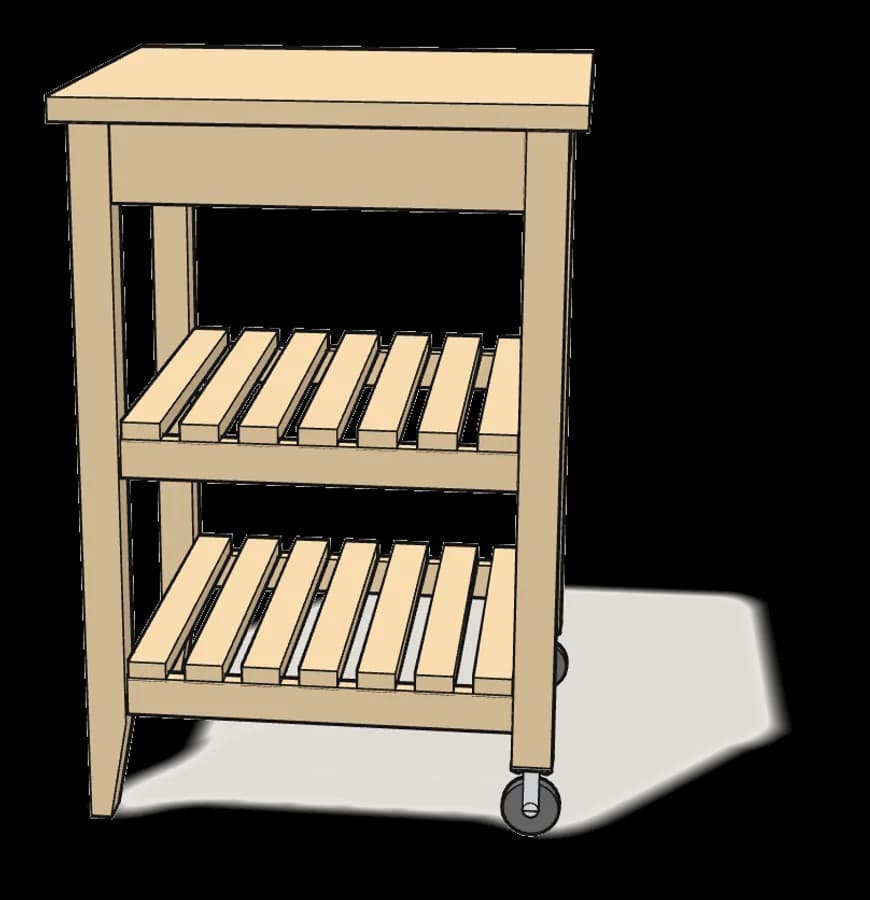
What you need
Tools
- Flat-head screwdriver
- Phillips screwdriver
- Spanner (included)
You’ll need: a flat-head and a Phillips screwdriver, an awl and an adjustable spanner.
Hardware in the box
| Part no. (as printed in the manual) | Qty |
|---|---|
| 118331 | 4× |
| 113434 | 4× |
| 108530 | 8× |
| 109041 | 24× |
| 101351 | 4× |
| 102720 | 4× |
| 100033 | 4× |
| 100535 | 4× |
| 100712 | 4× |
| 100833 | 4× |
| 102652 | 4× |
Step-by-step assembly
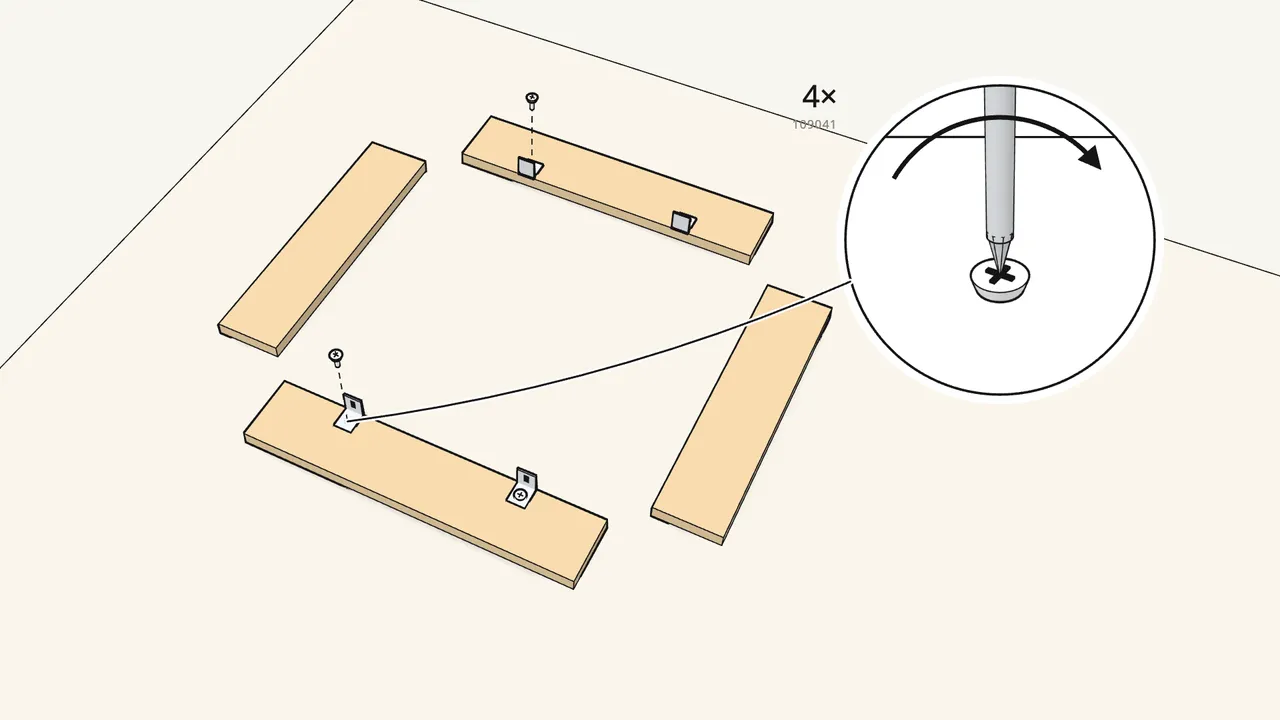
Step 1
Screw the 4 angle brackets (102720) onto 2 of the rails.
2 brackets per rail, one screw 109041 each — not the longer 108530.
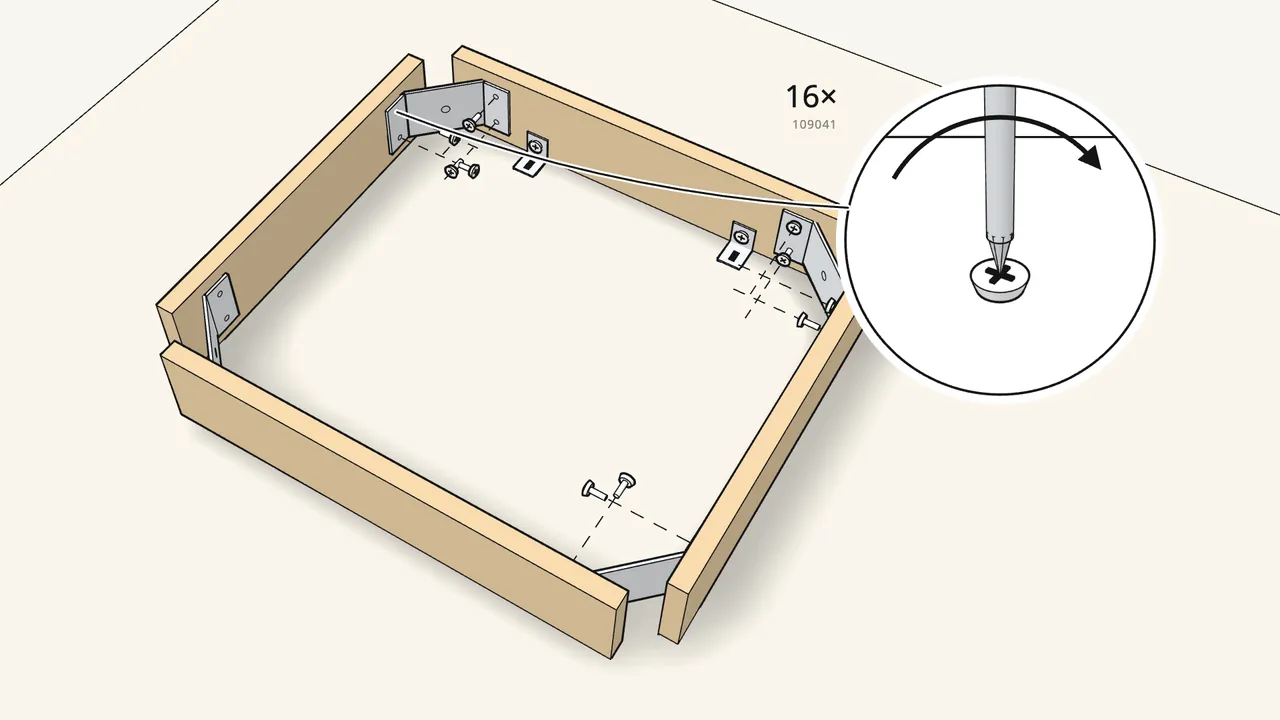
Step 2
Join the 4 rails into a frame with the corner brackets (102652).
4 screws (109041) in each bracket — 16 in all.
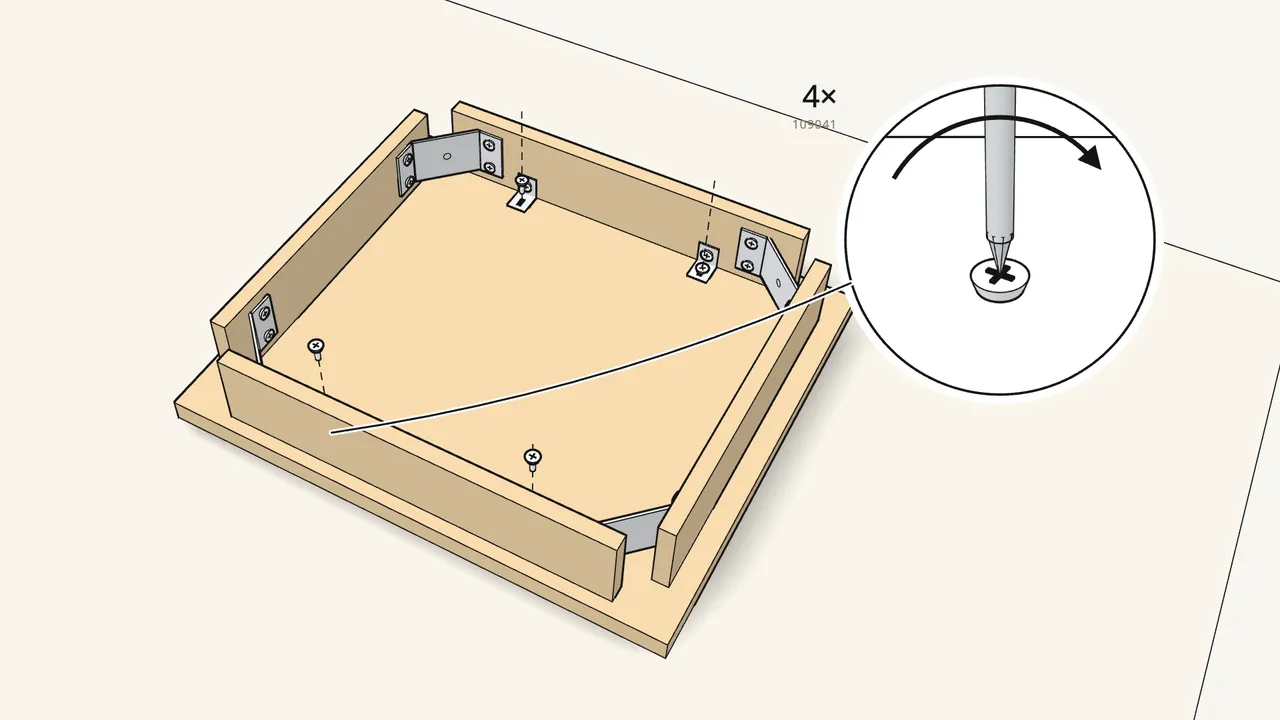
Step 3
Lay the top face-down and set the frame on it.
Fix the angle brackets to the top with 4 screws (109041).
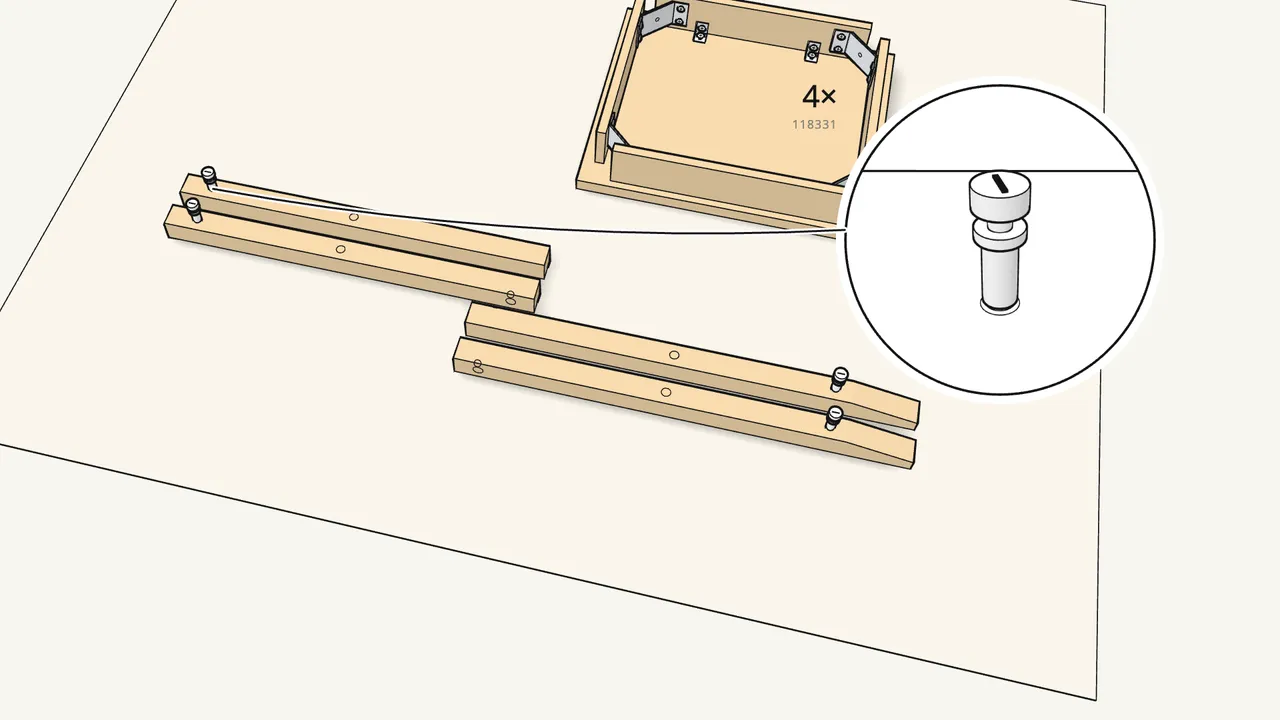
Step 4
Screw a cam bolt (118331) into each of the 4 legs.
By hand, all the way in. 2 legs have straight ends, 2 are tapered.
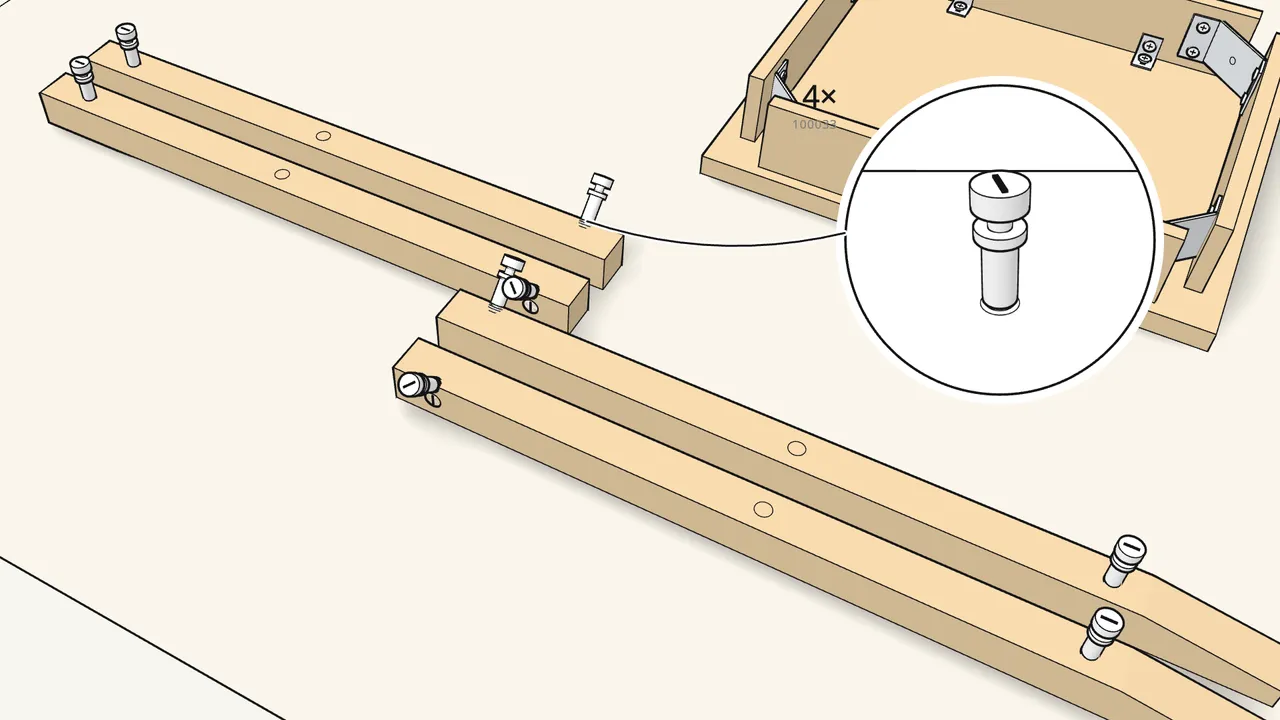
Step 5
Push a barrel nut (100535) into each leg, then screw in a threaded rod (100033).
Turn the barrel nut with the flat screwdriver so the rod can thread into it.
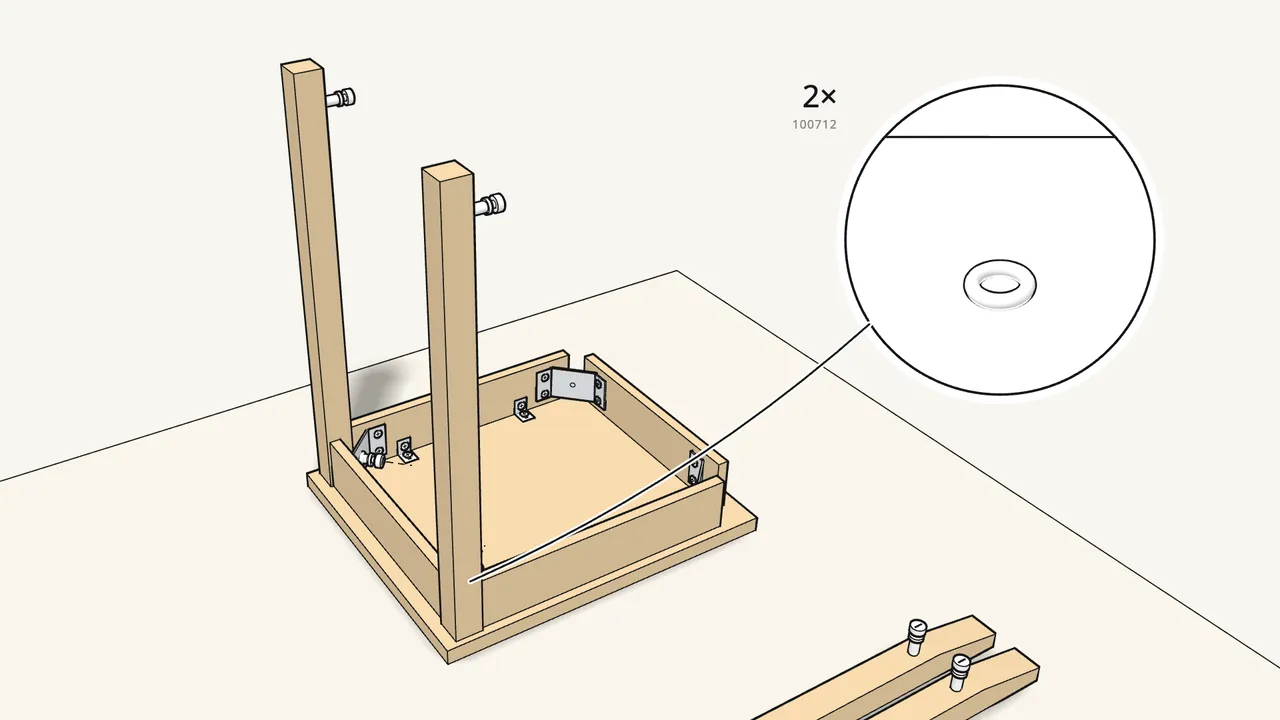
Step 6
Fit the 2 straight-ended legs into one end of the frame.
Rod through the bracket, then washer (100833) and nut (100712) — tighten with the spanner.
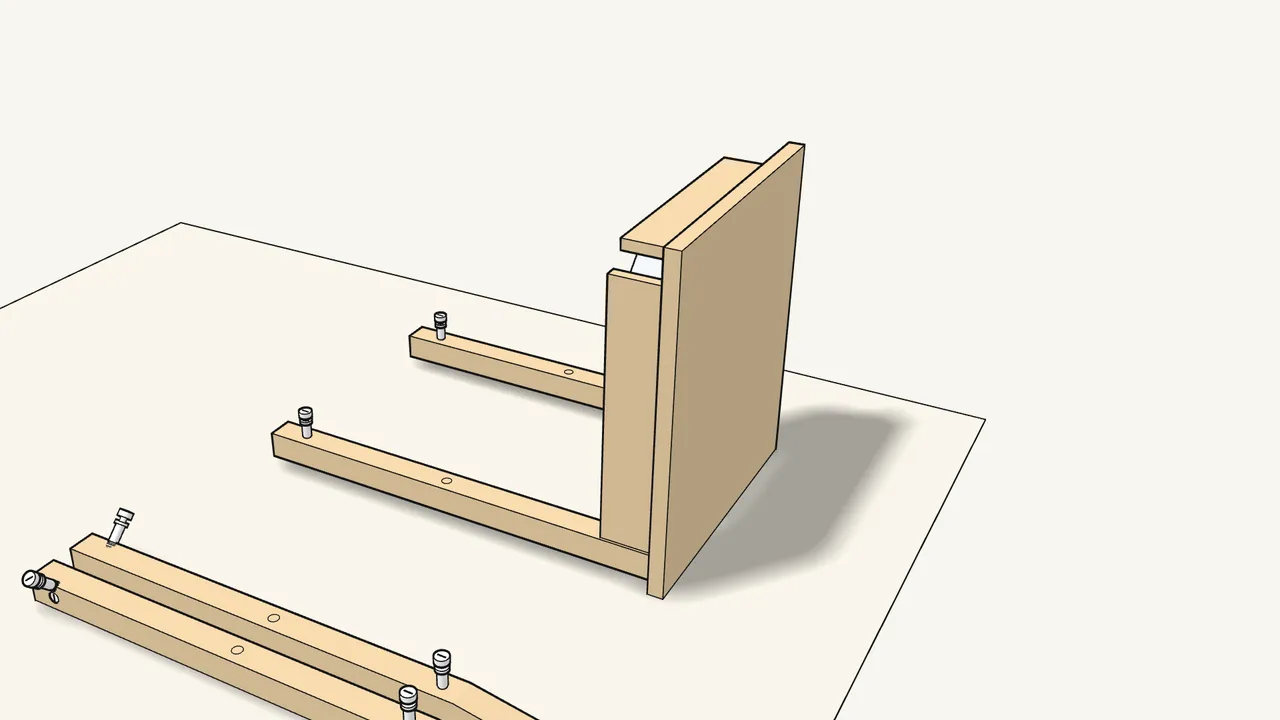
Step 7
Turn it over onto the side with the 2 legs.
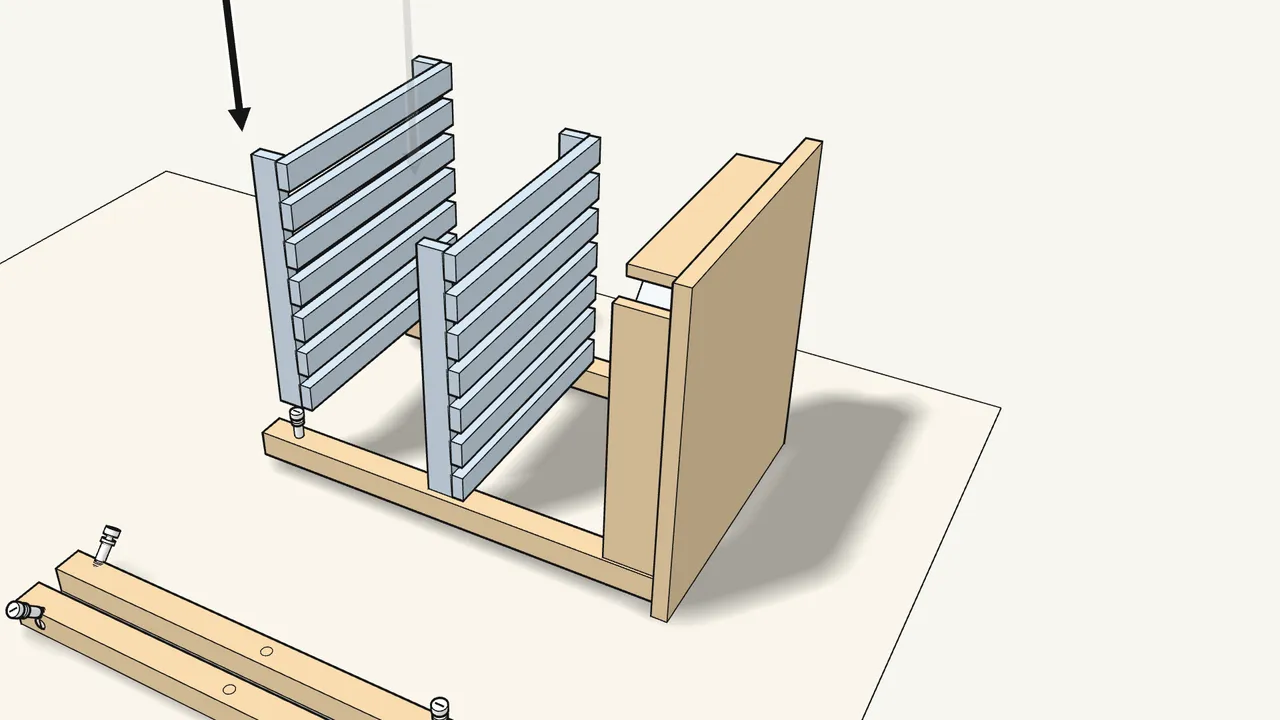
Step 8 · manual step 7
Push 2 dowels (101351) into the legs and lay both shelves on.
The upper shelf sits on the dowels, the lower one on the cam bolts.
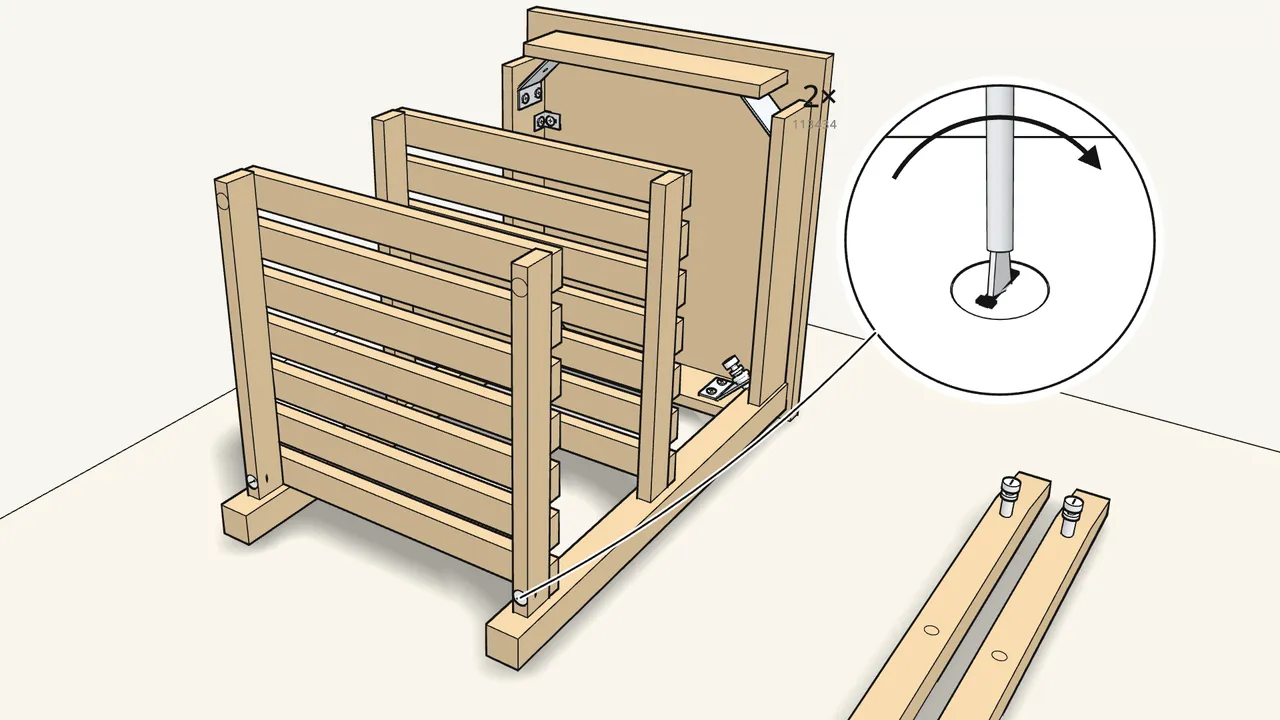
Step 9 · manual step 8
Lock the lower shelf to the legs with 2 cam locks (113434).
Push them in, then turn clockwise with the flat screwdriver.
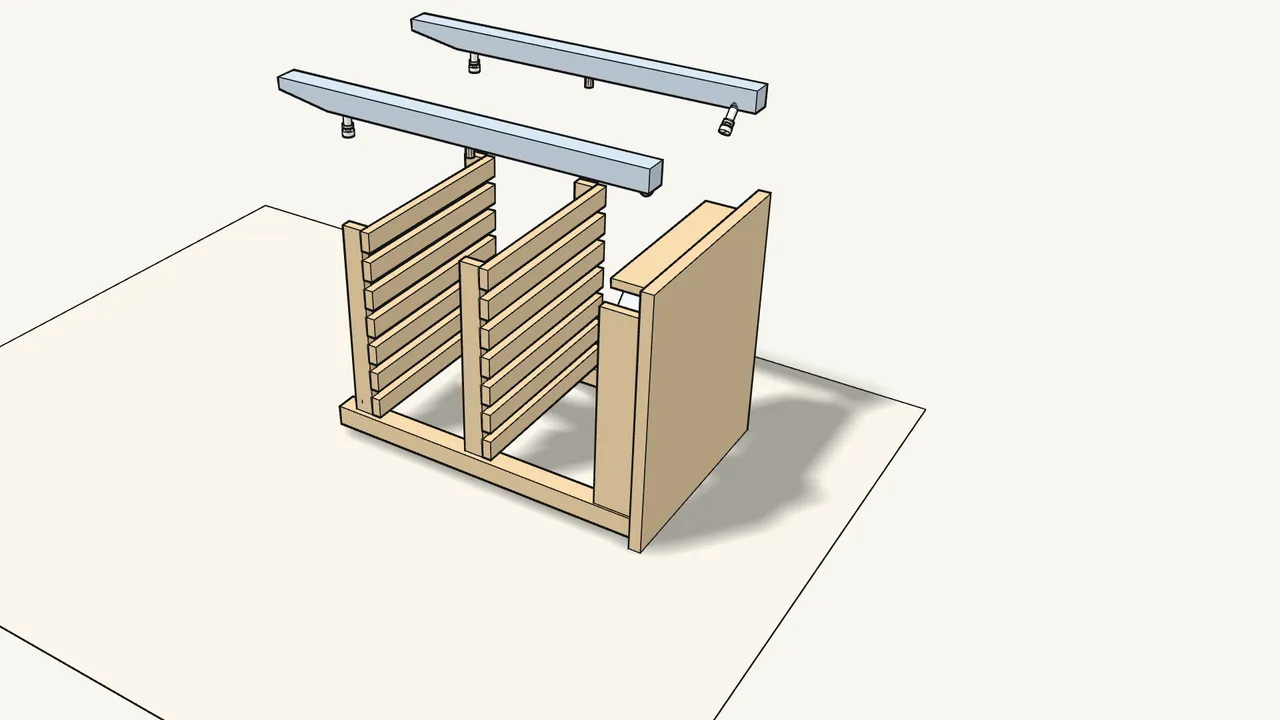
Step 10 · manual step 9
Push 2 dowels into the tapered legs and lay them on top.
Rods into the brackets, dowels and cam bolts into the shelves.
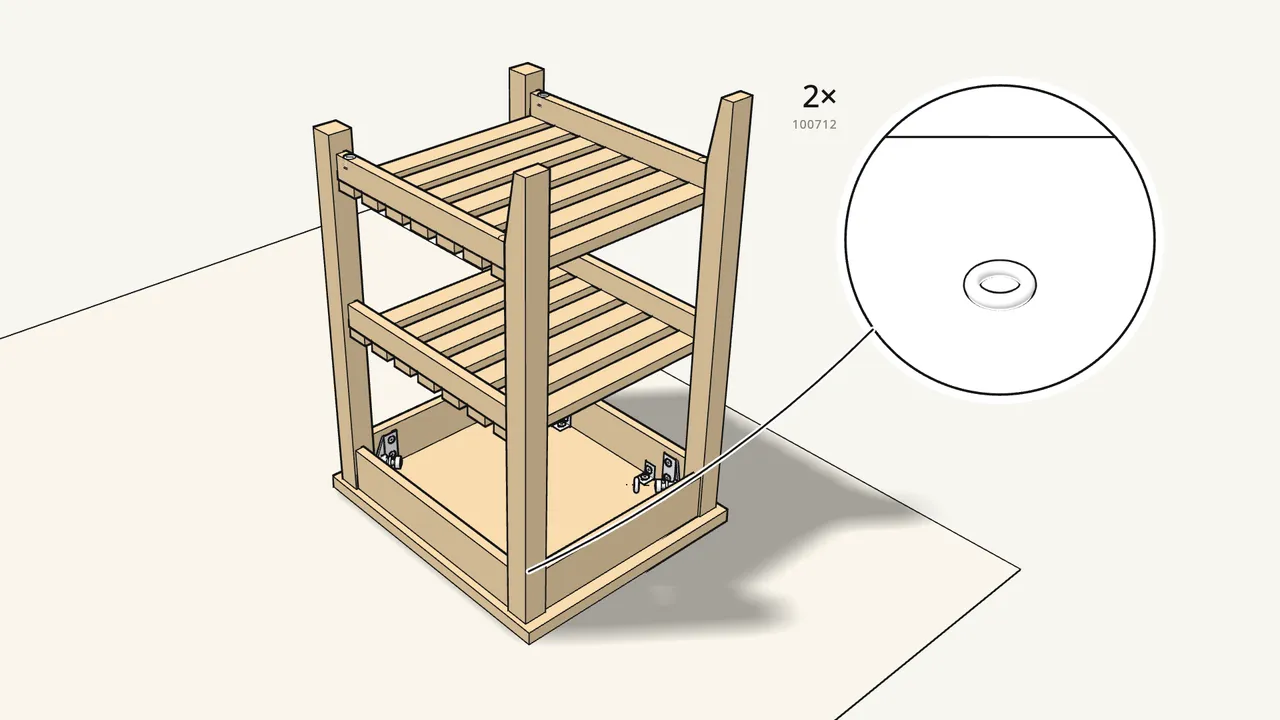
Step 11 · manual step 10
Turn the cart upside down and bolt the tapered legs.
Washer (100833) and nut (100712) on each rod — tighten with the spanner.
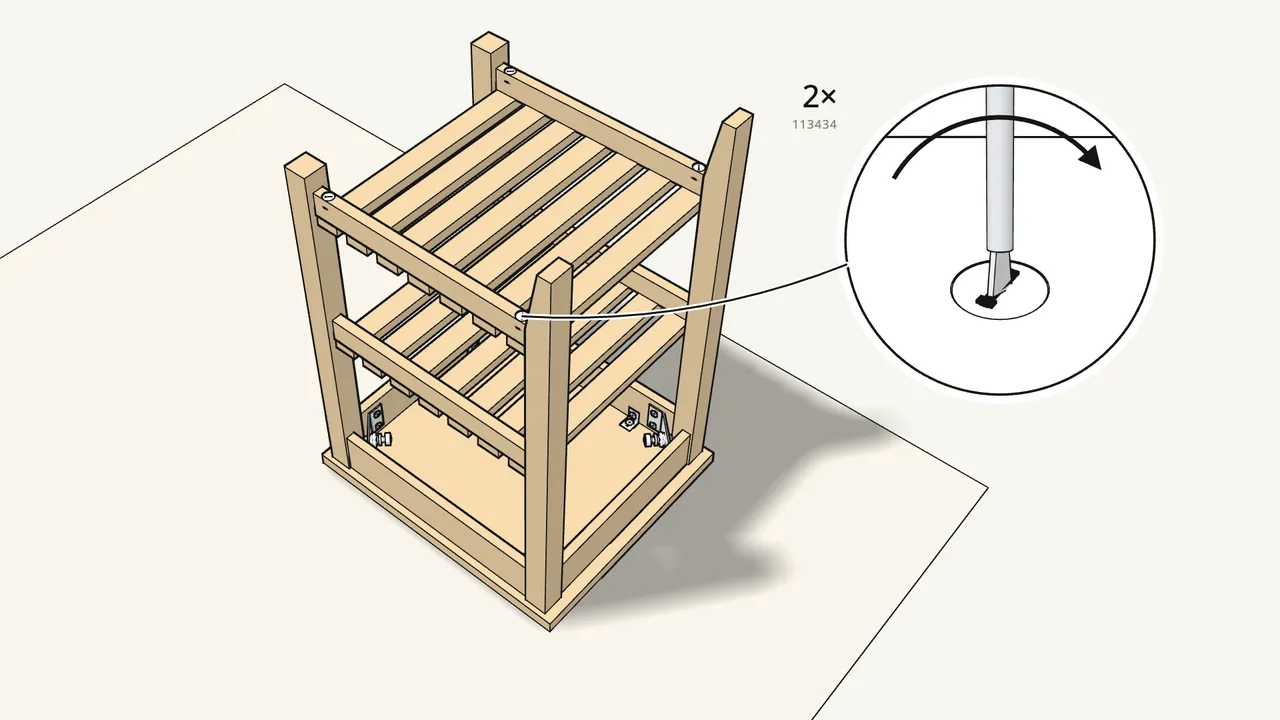
Step 12 · manual step 11
Lock the other end of the lower shelf with 2 cam locks.
Cam locks 113434 — turn them clockwise.
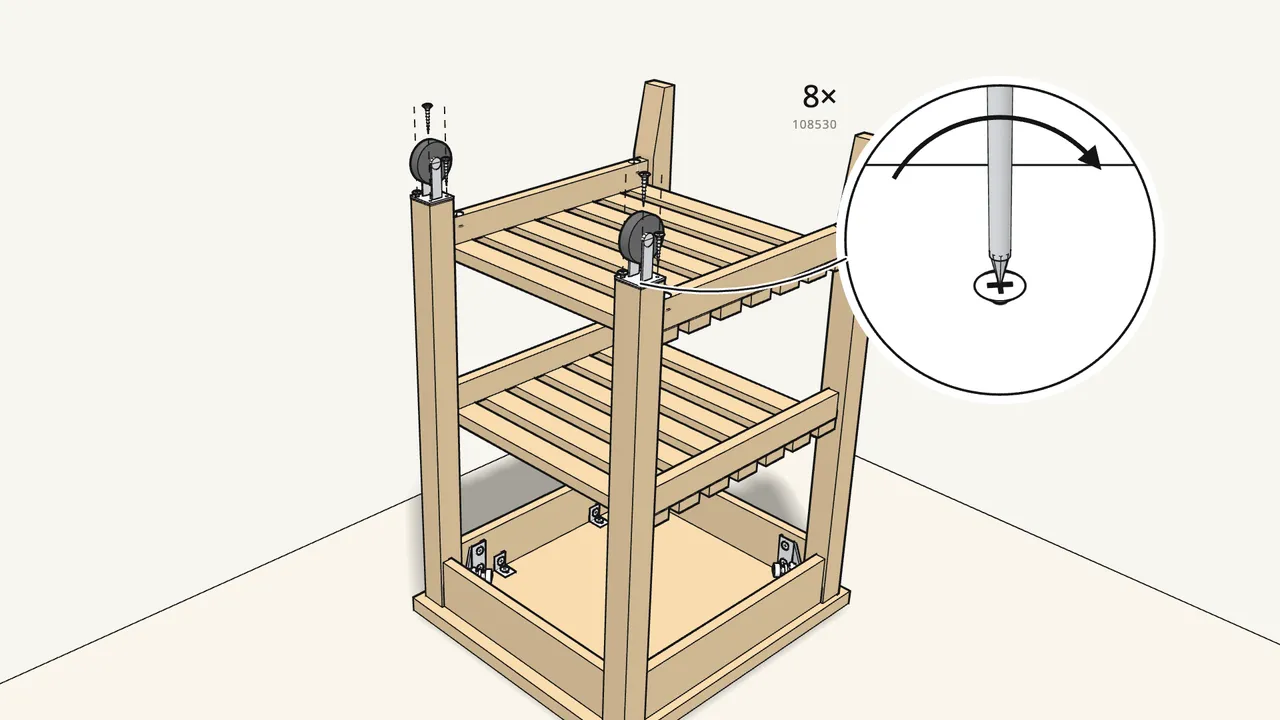
Step 13 · manual step 12
Screw the 2 castors onto the straight legs.
4 screws (108530) each — wheels in line with the leg sides, not diagonal.
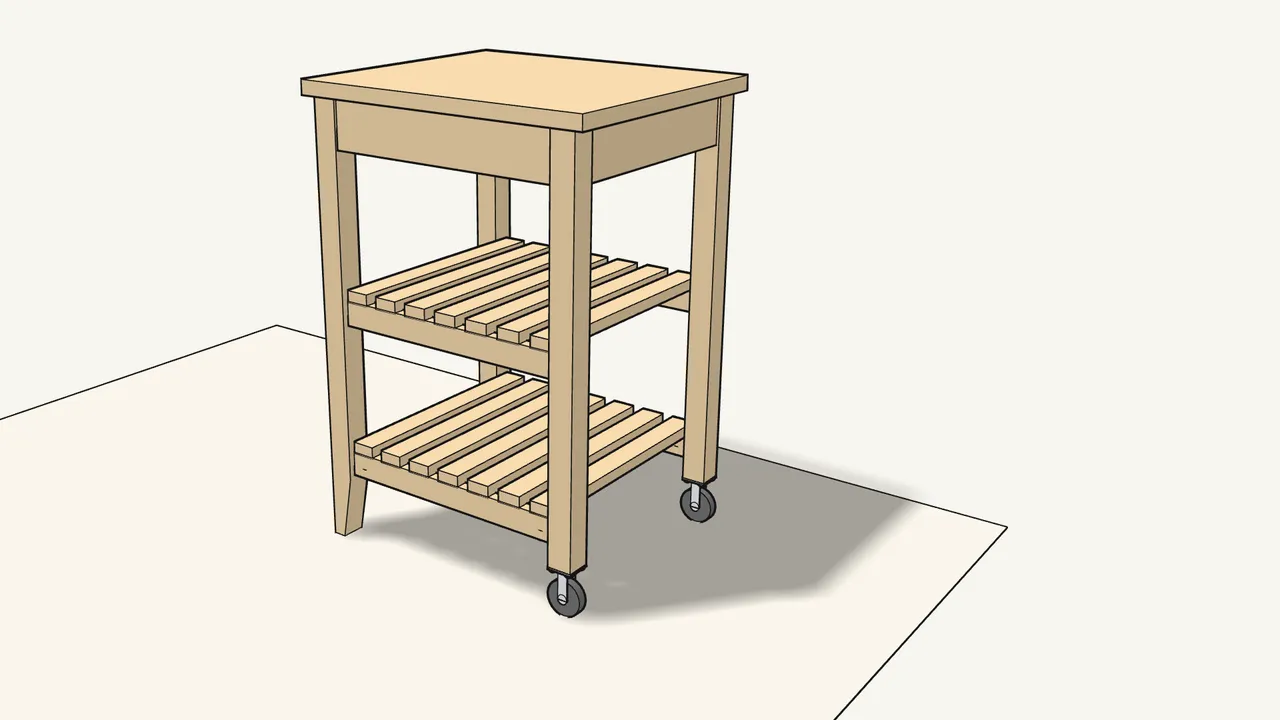
Step 14 · manual step 12
Turn the cart over onto its castors and feet.
Tips & safety
- Use the right screws. The short screws (109041) are for the brackets; the long ones (108530) only for the castors — manual steps 1–3 and 12.
- Castors square to the legs. The wheels must line up with the sides of the legs, not sit diagonally — manual step 12.
Official instructions
This guide follows IKEA’s official assembly instructions (AA-30370-10). Keep the printed manual to hand — if anything differs, the manual is right.