IKEA · Cabinets & Wardrobes
How to Assemble IKEA TORNVIKEN Kitchen Island
Step-by-step IKEA TORNVIKEN kitchen island assembly: 30 illustrated steps, an animated video, the hardware list and the tools you need — following the official instructions (AA-2100799-5).
- 30 illustrated steps
- 32 steps in the manual
- 3:44 video
- 126×77×90 cm
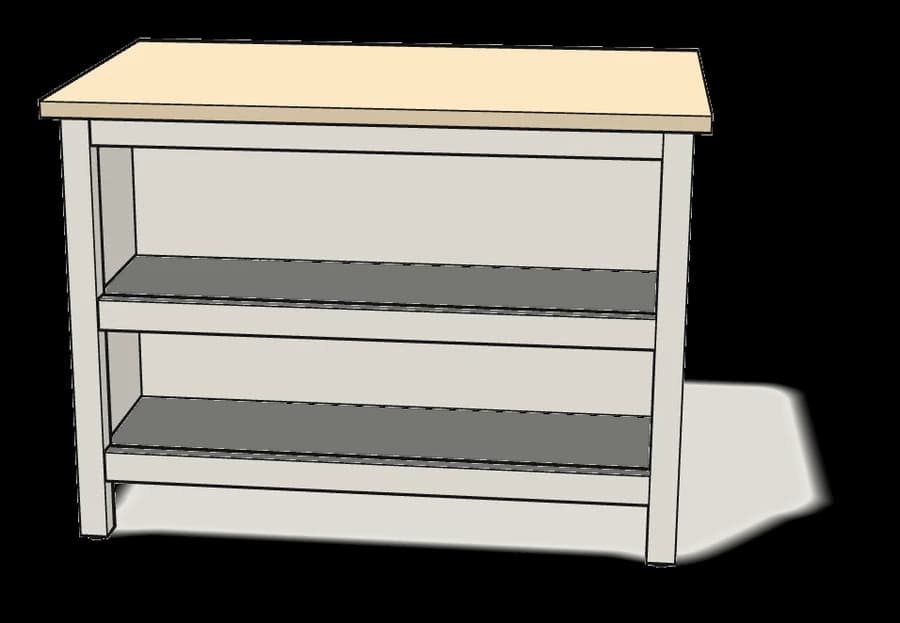
What you need
Tools
- Phillips screwdriver
- Flat-head screwdriver
Hardware in the box
| Part no. (as printed in the manual) | Qty |
|---|---|
| 118331 | 29× |
| 101345 | 38× |
| 100364 | 5× |
| 101348 | 2× |
| 103430 | 29× |
| 102720 | 4× |
| 107271 | 4× |
| 113928 | 8× |
Step-by-step assembly
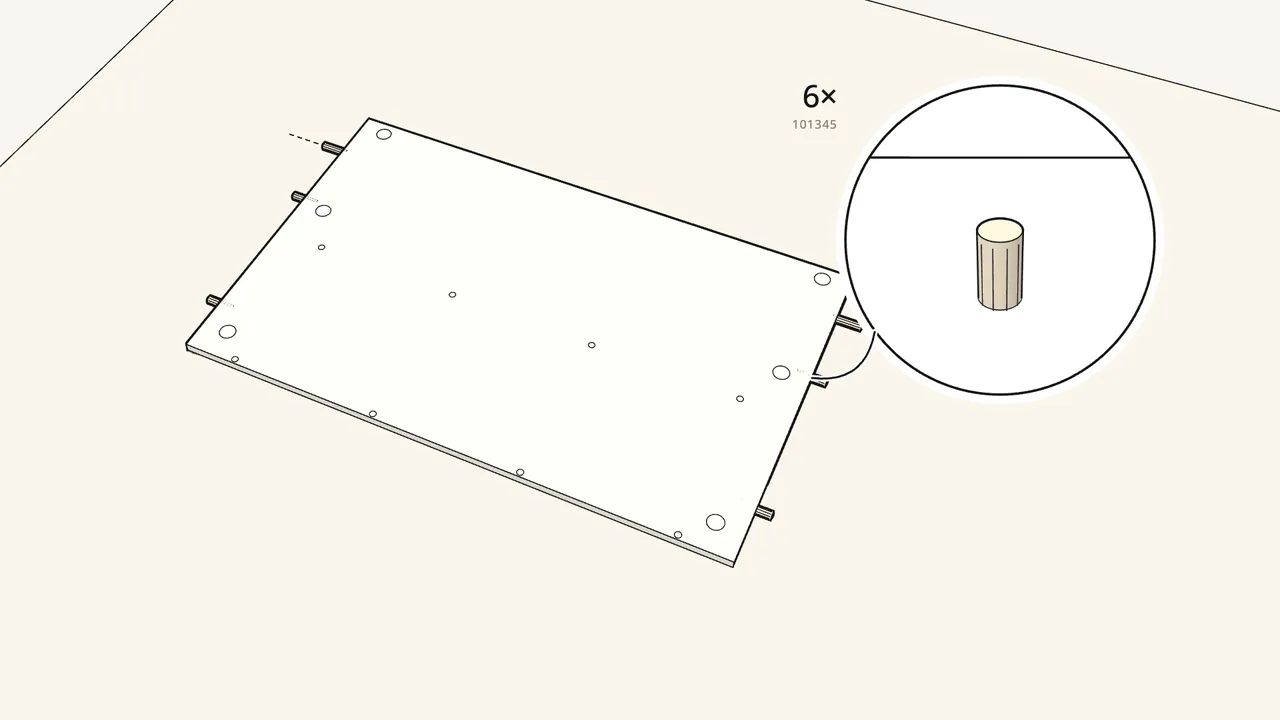
Step 1
Push 6 dowels into the ends of the large panel.
3 in each short edge.
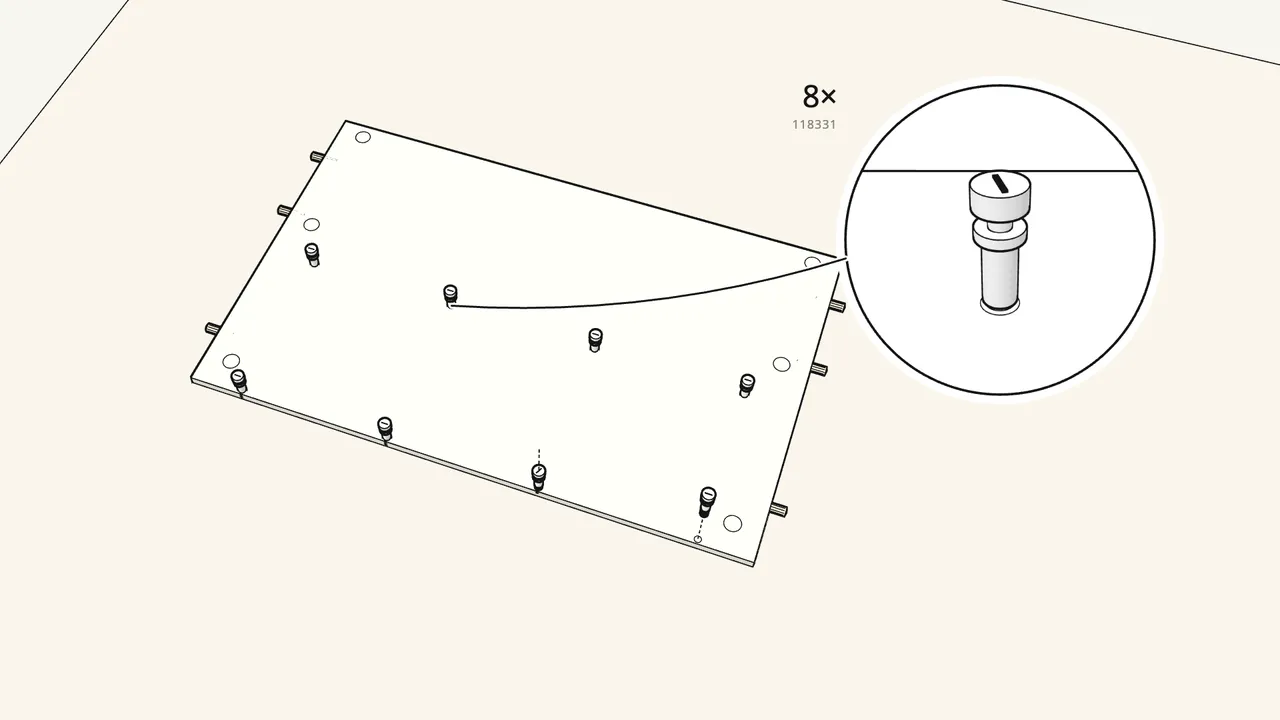
Step 2
Screw 8 cam bolts into the face of the large panel.
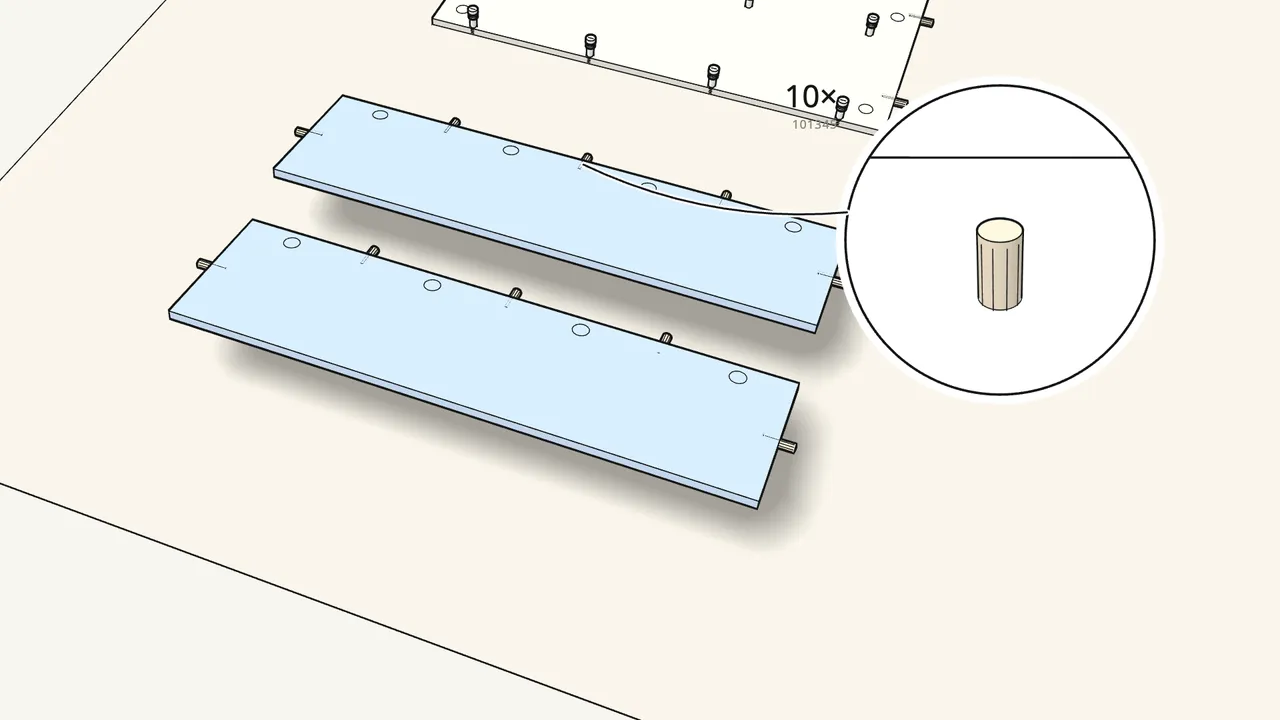
Step 3
Push 10 dowels into the two shelves, then turn them over.
5 per shelf.
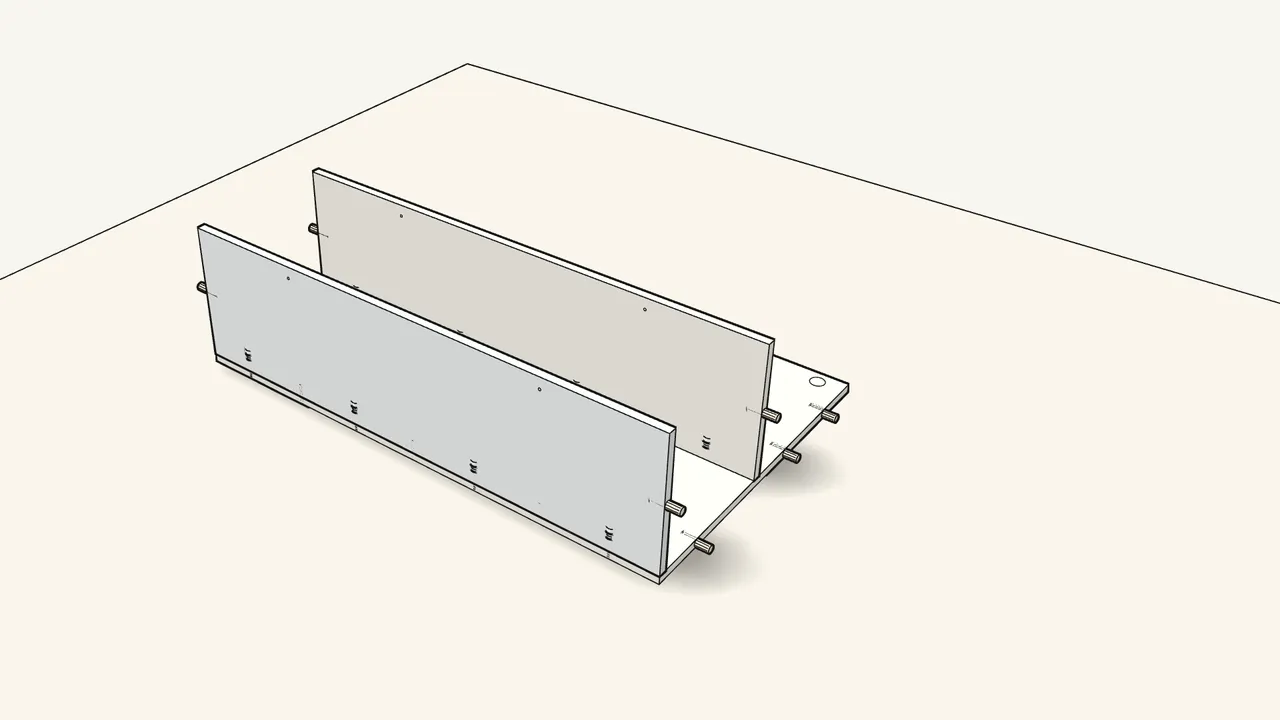
Step 4
Fit both shelves onto the large panel.
The cam bolts go into the holes in the shelf edges.
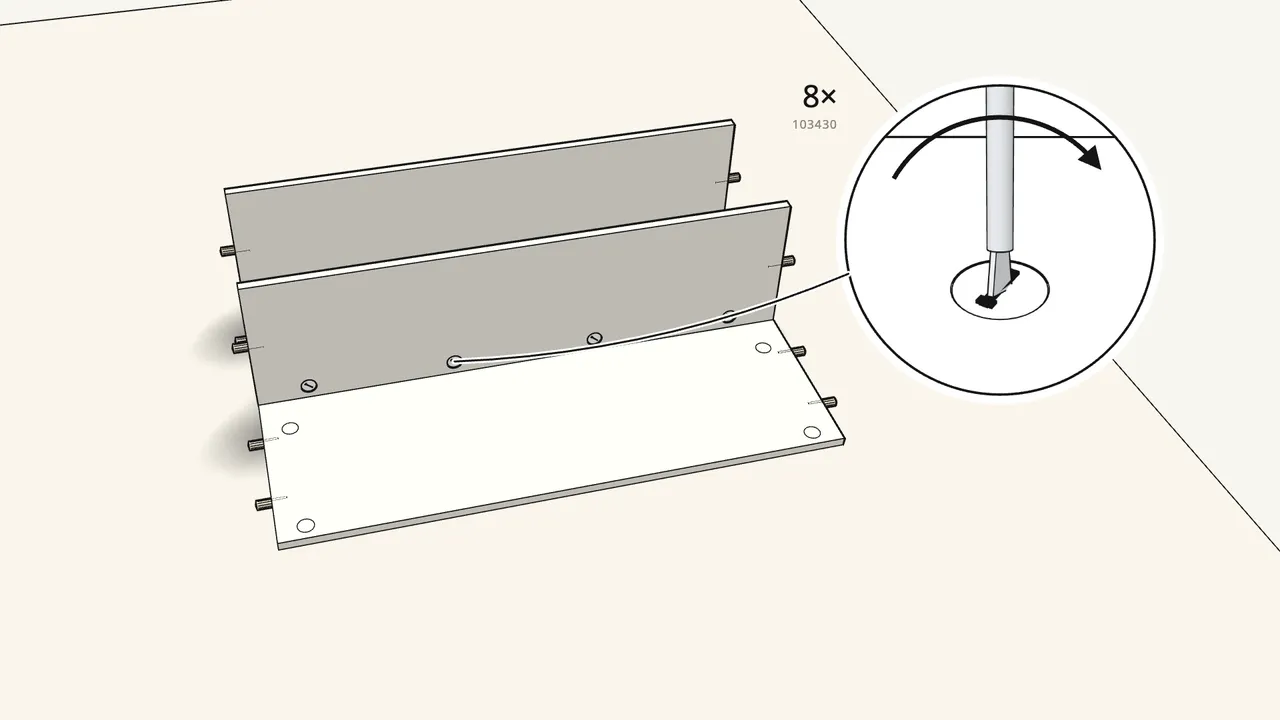
Step 5
Insert 8 cam locks and turn them clockwise.
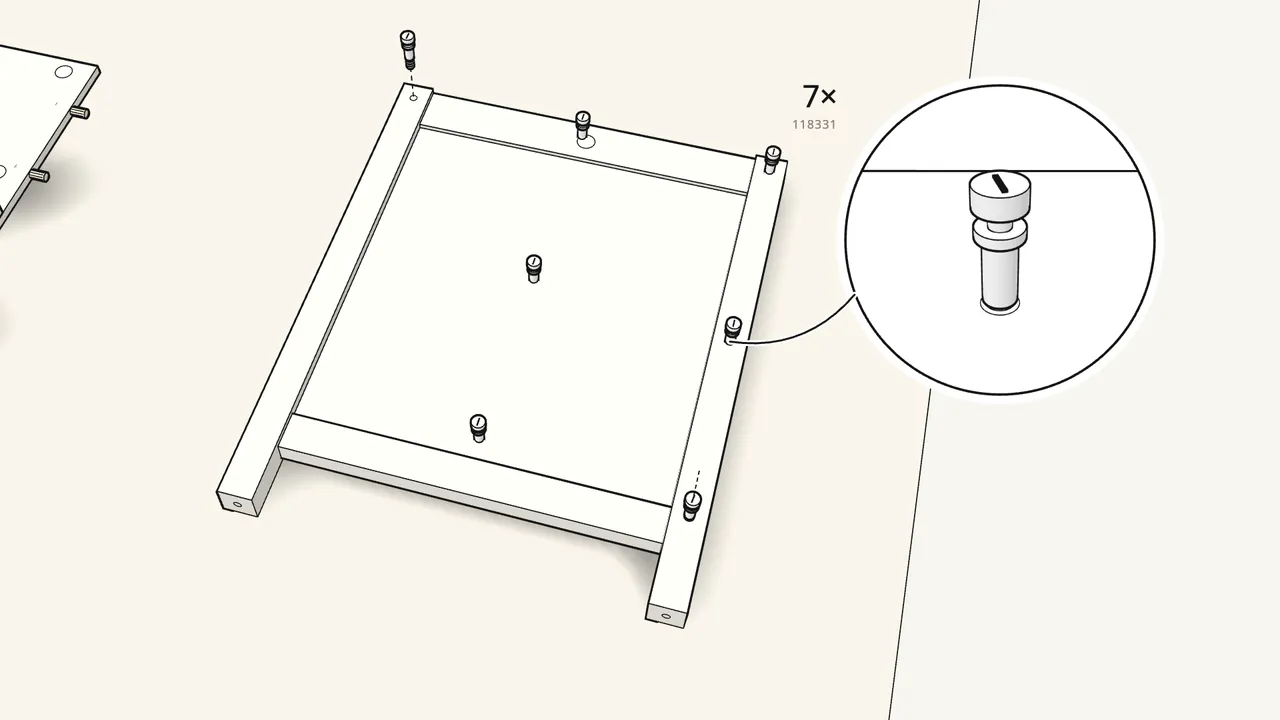
Step 6
Screw 7 cam bolts into the first end frame.
Into the inner side, where the holes are.
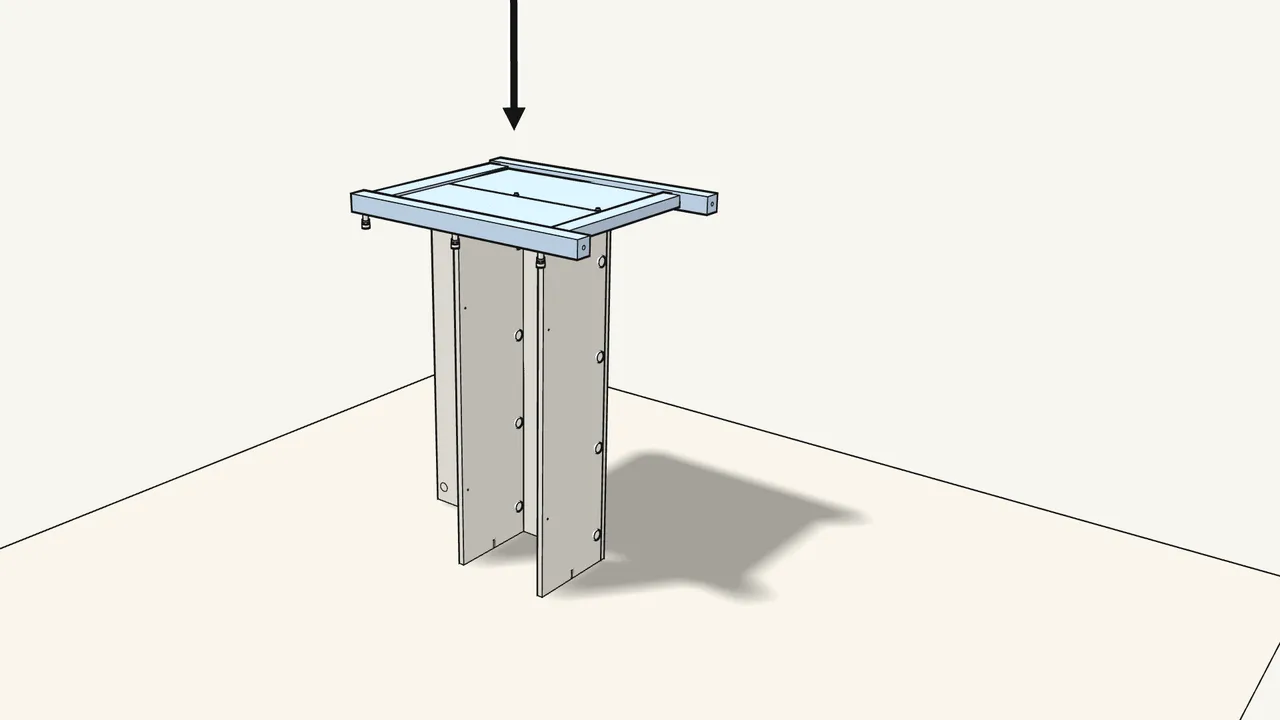
Step 7
Stand the unit on its end and lower the end frame on top.
Two people.
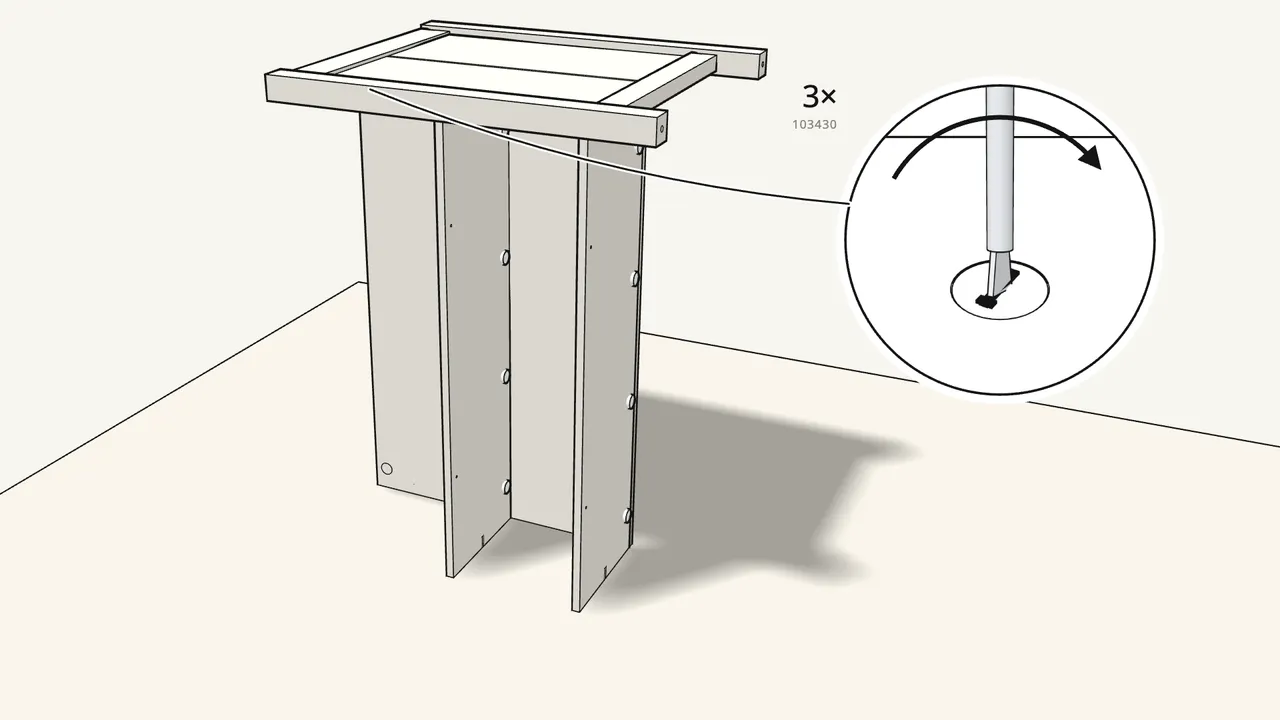
Step 8
Lock the end frame with 3 cam locks.
Turn clockwise.
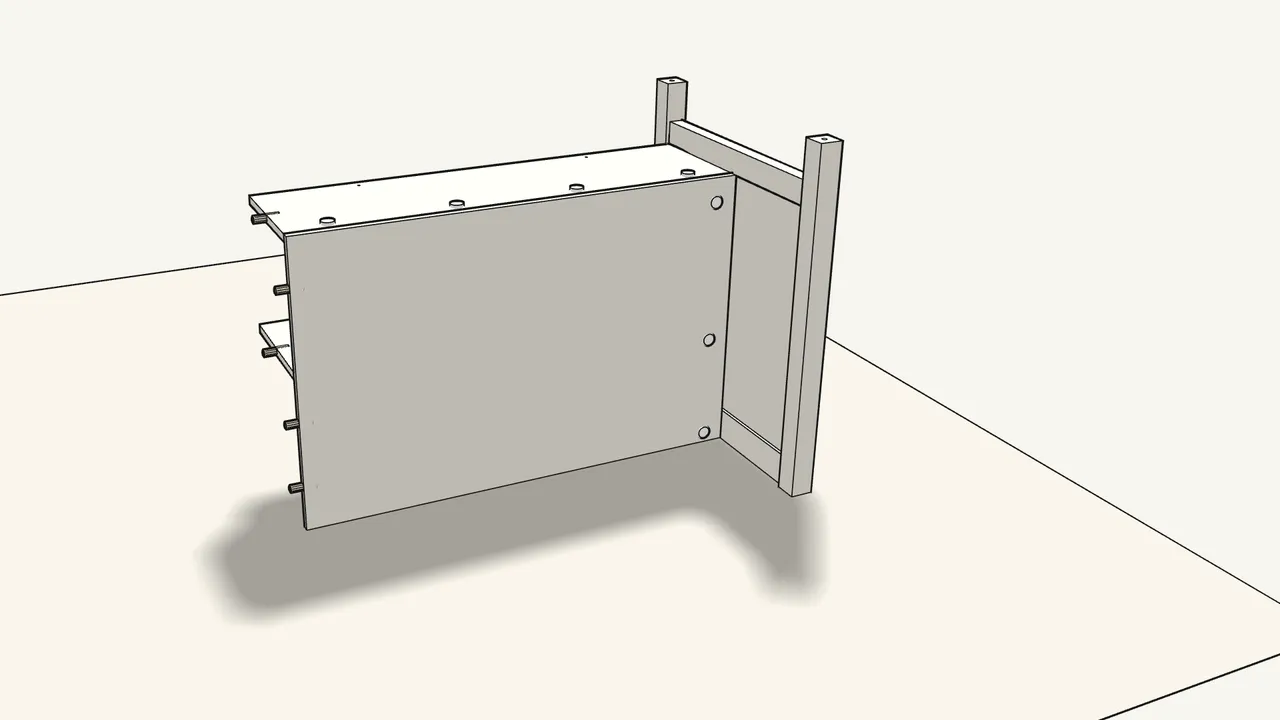
Step 9 · manual step 8
With two people, lay the unit down with the legs pointing up.
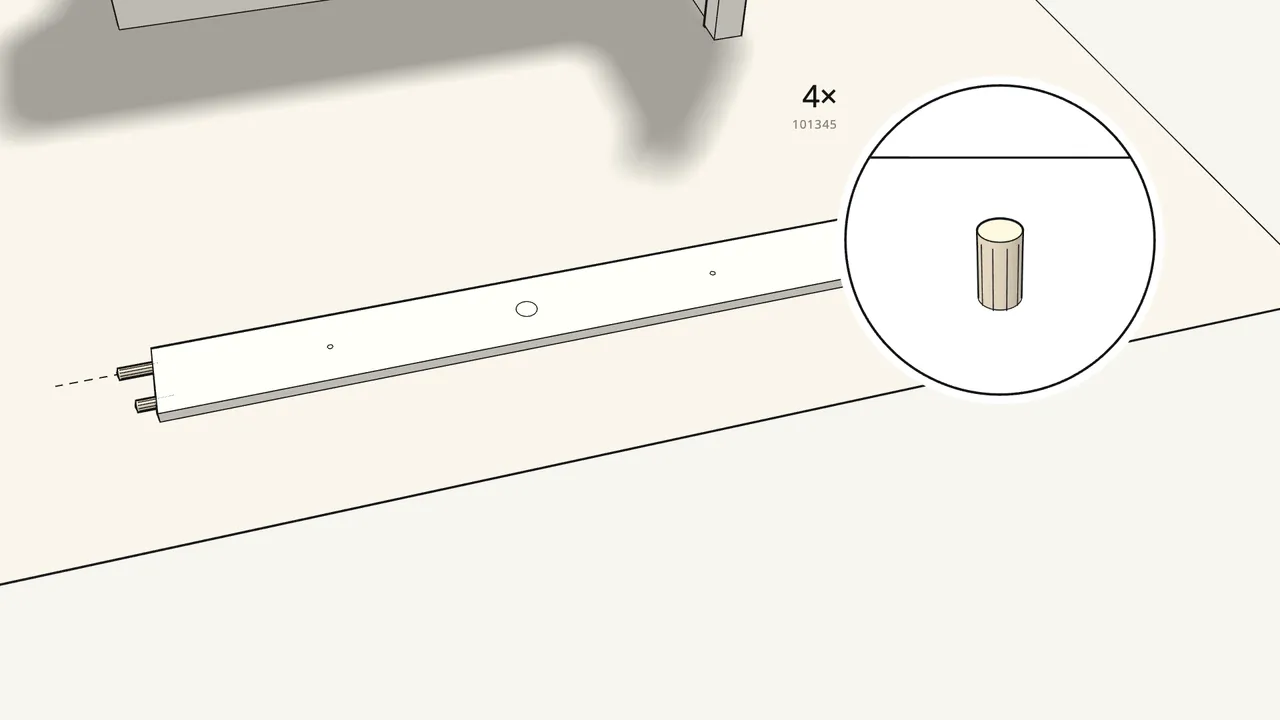
Step 10 · manual step 9
Push 4 dowels into the ends of the narrow board.
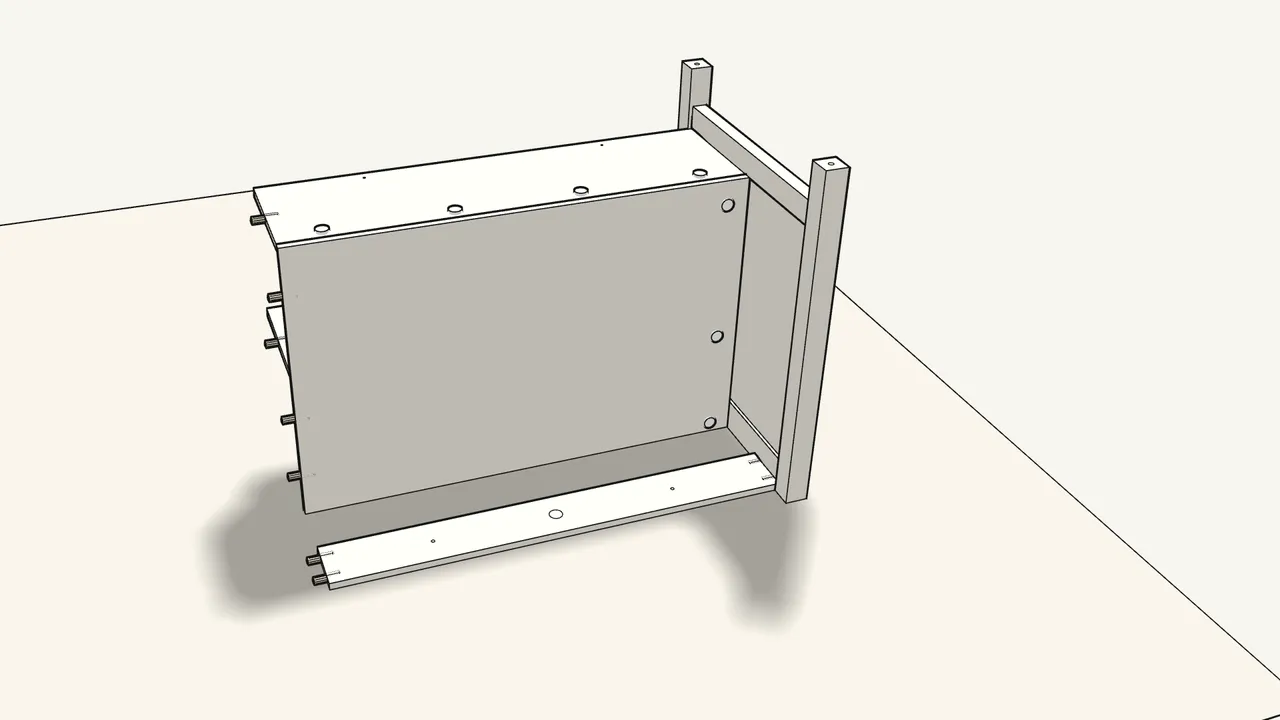
Step 11 · manual step 10
Slide the board in between the back panel and the legs.
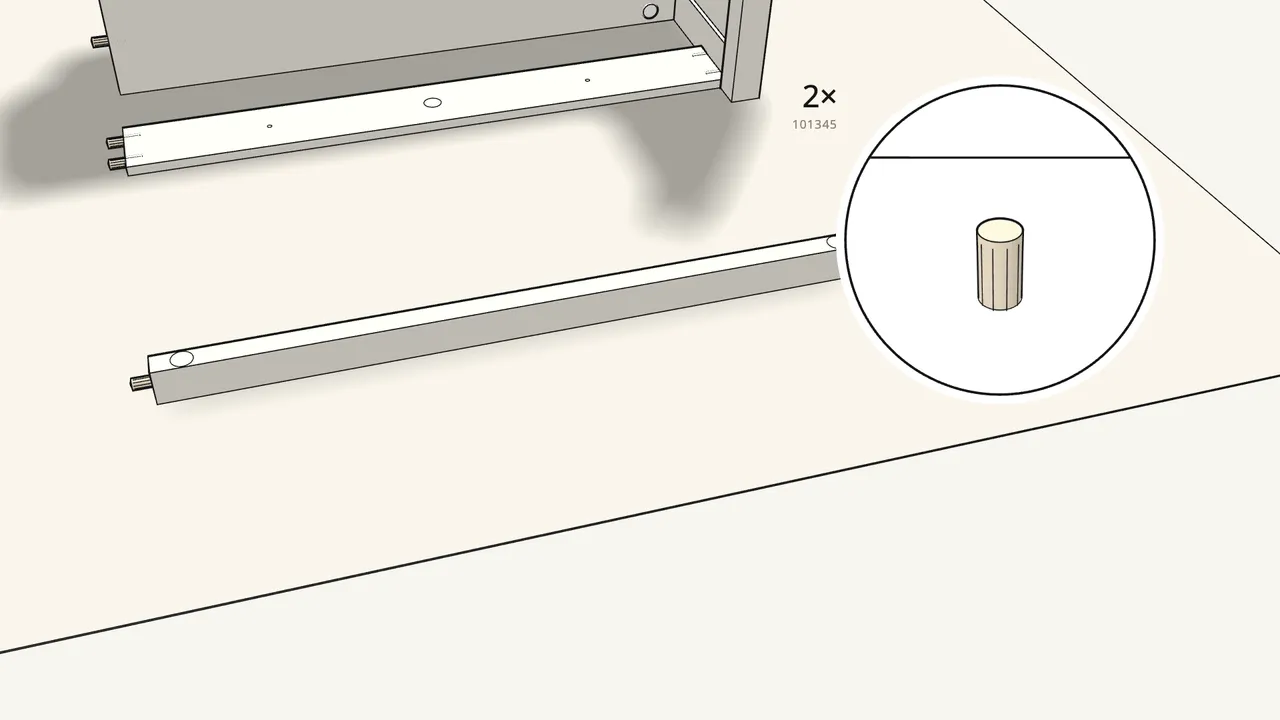
Step 12 · manual step 11
Push 2 dowels into the ends of the rail.
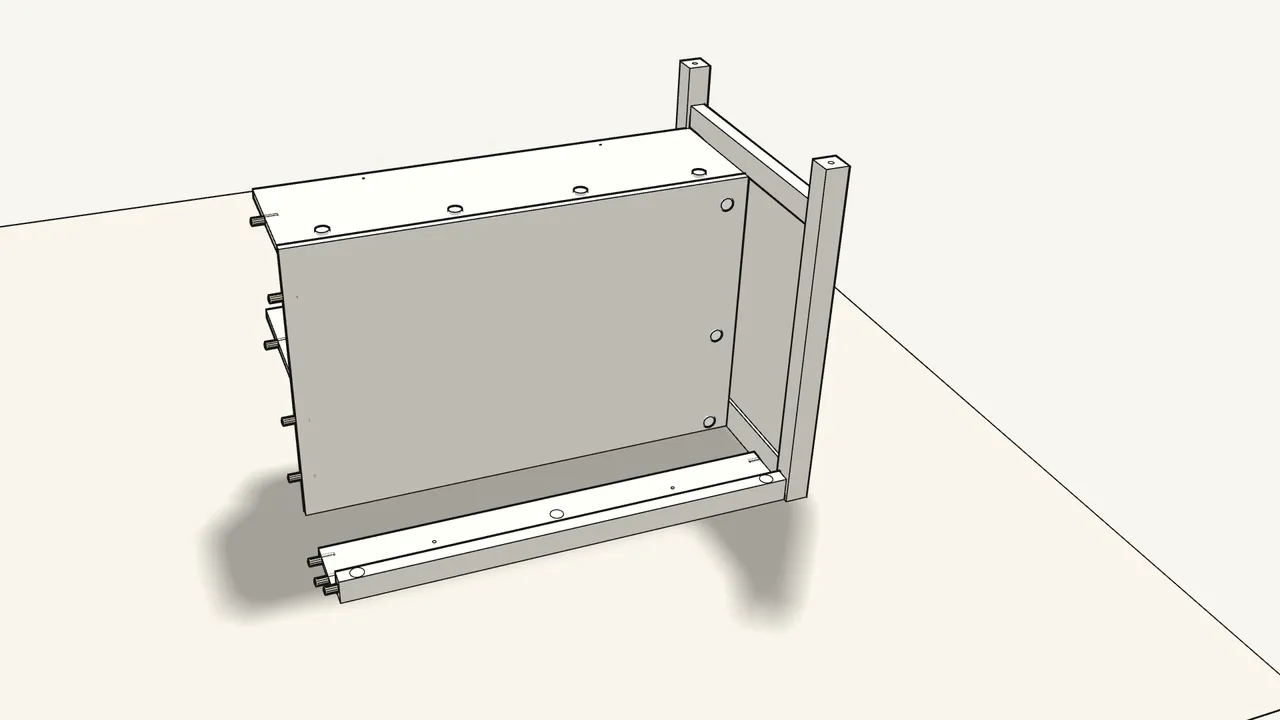
Step 13 · manual step 12
Fit the rail next to the board.
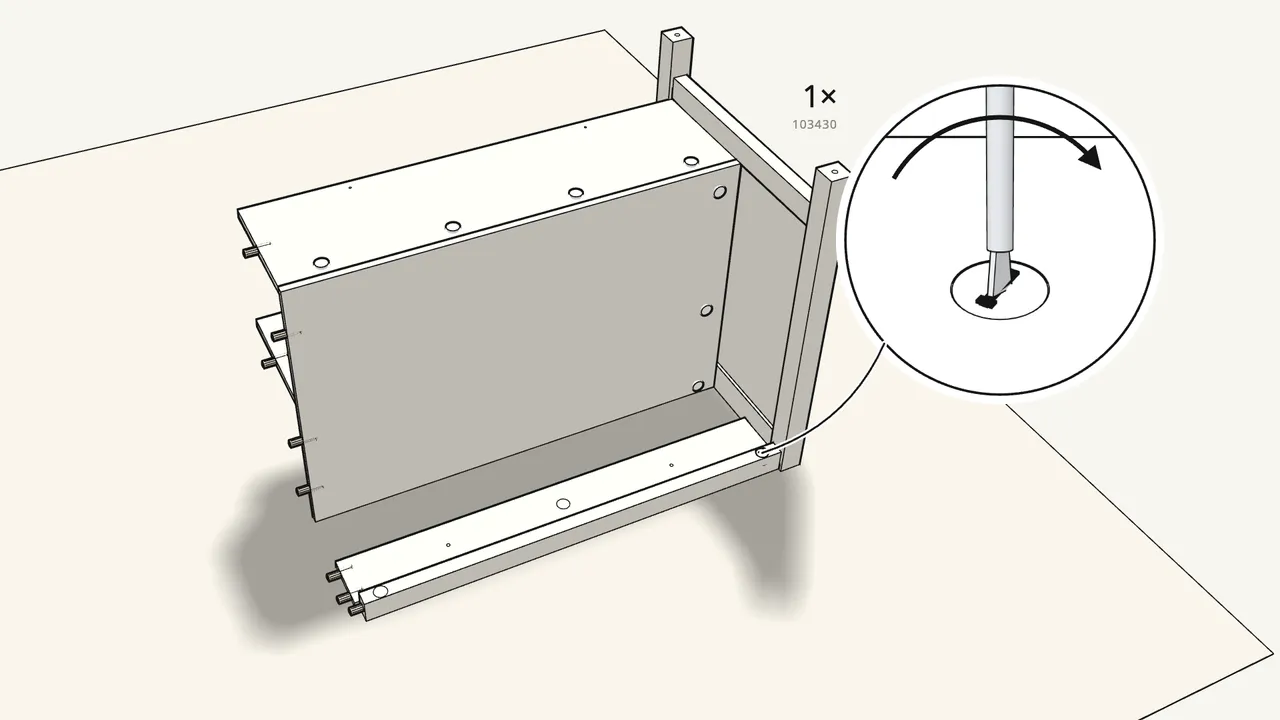
Step 14 · manual step 13
Insert 1 cam lock in the rail and turn it clockwise.
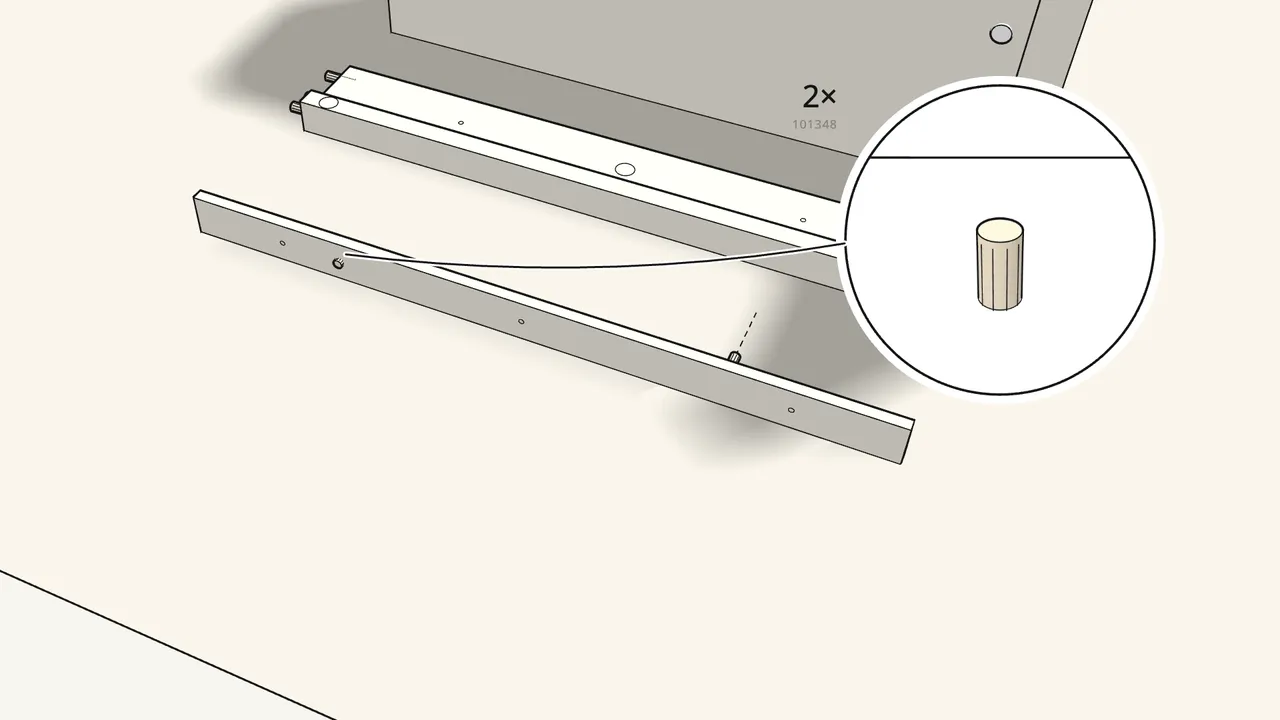
Step 15 · manual step 14
Push 2 short dowels (101348) into the strip.
Not the long 101345 dowels.
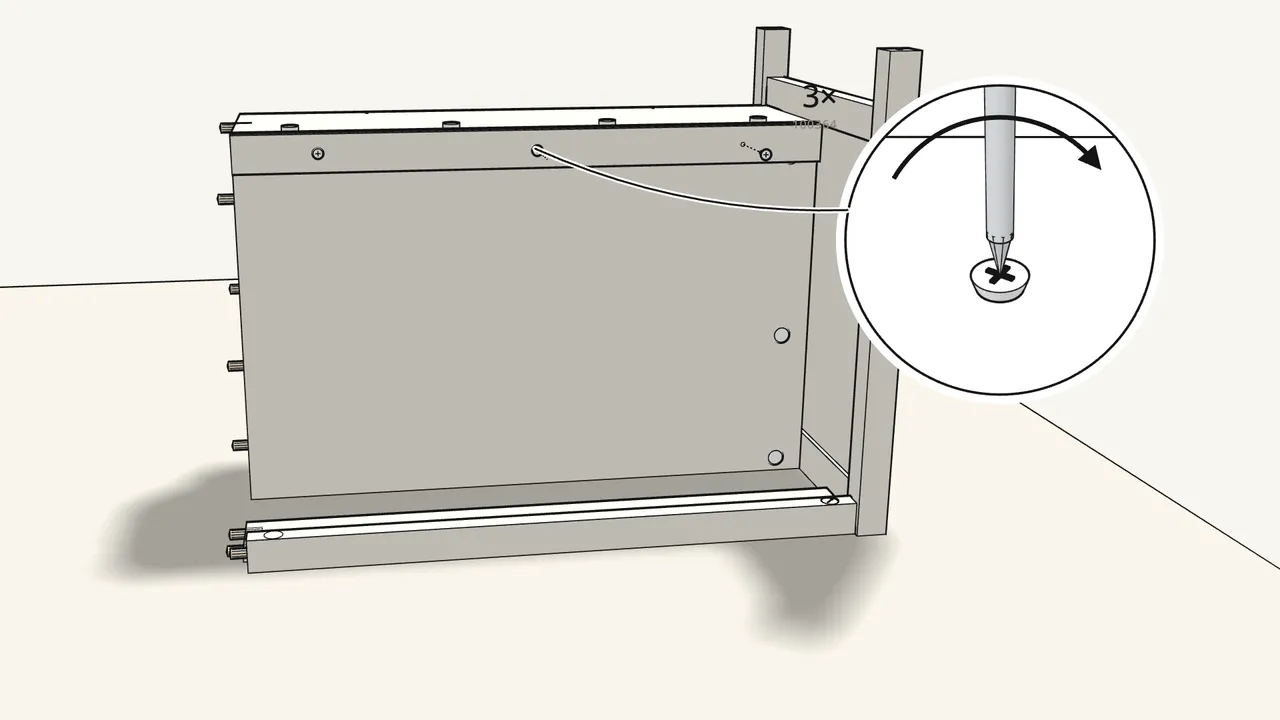
Step 16 · manual step 15
Fit the strip to the back panel with 3 screws (100364).
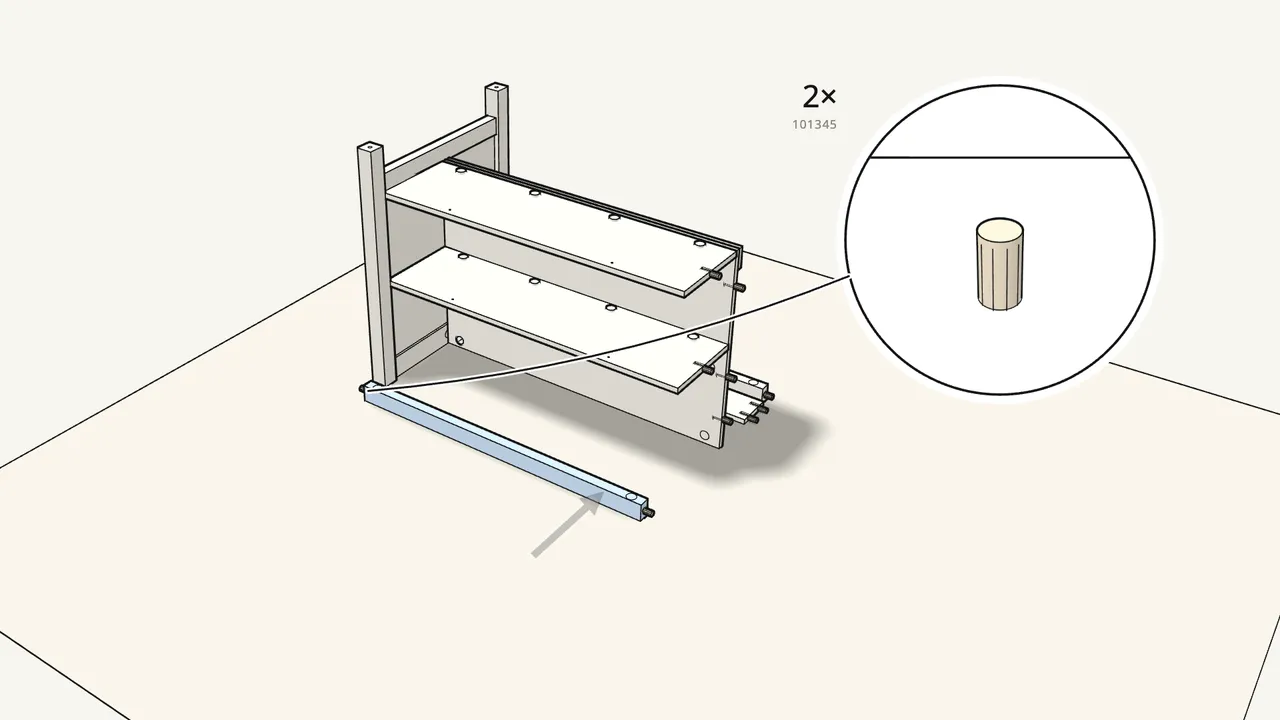
Step 17 · manual step 16–17
Push 2 dowels into the top front rail and fit it.
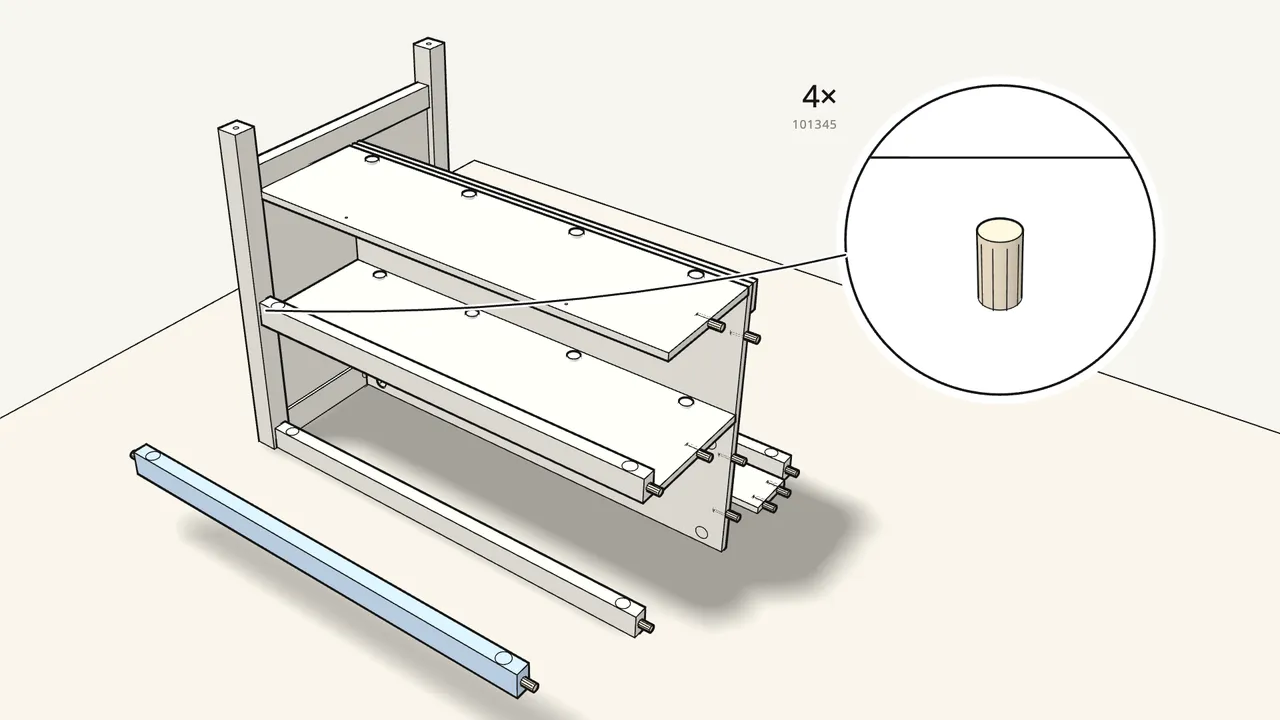
Step 18 · manual step 18–21
Do the same with the two shelf rails.
2 dowels each. Check the hole positions (manual steps 18 and 20).
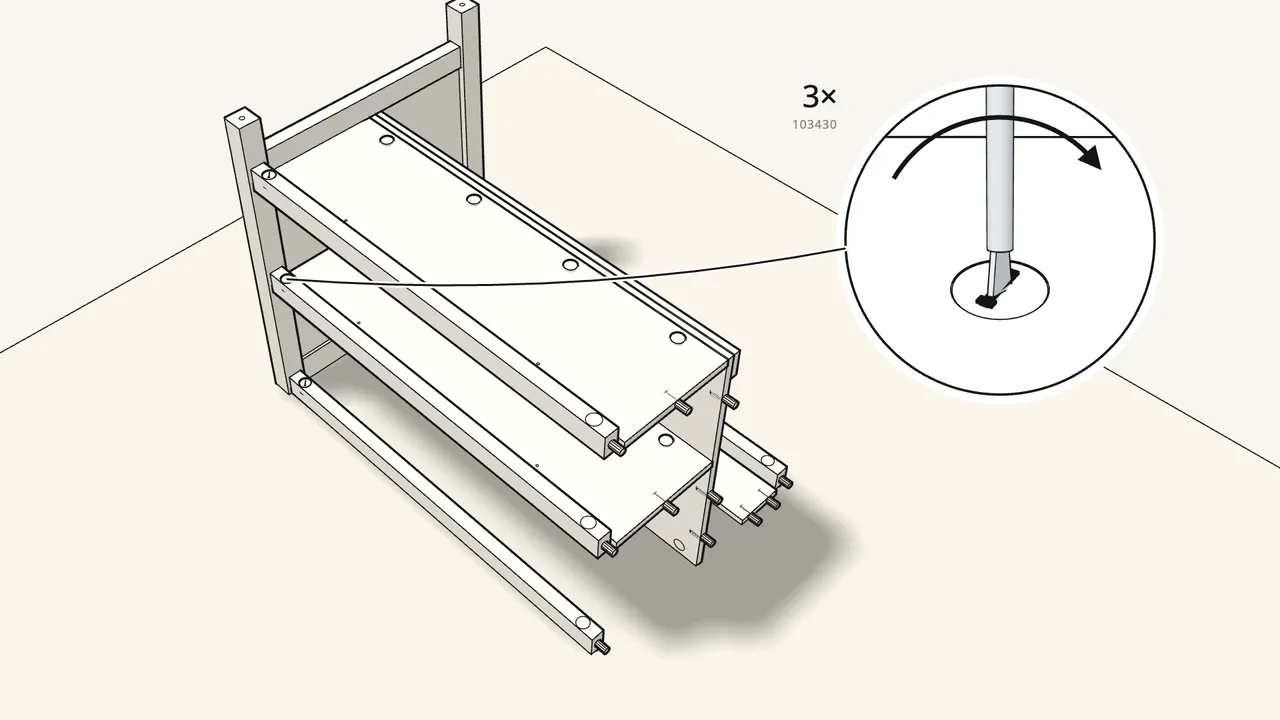
Step 19 · manual step 22
Insert 3 cam locks in the front rails and turn them clockwise.
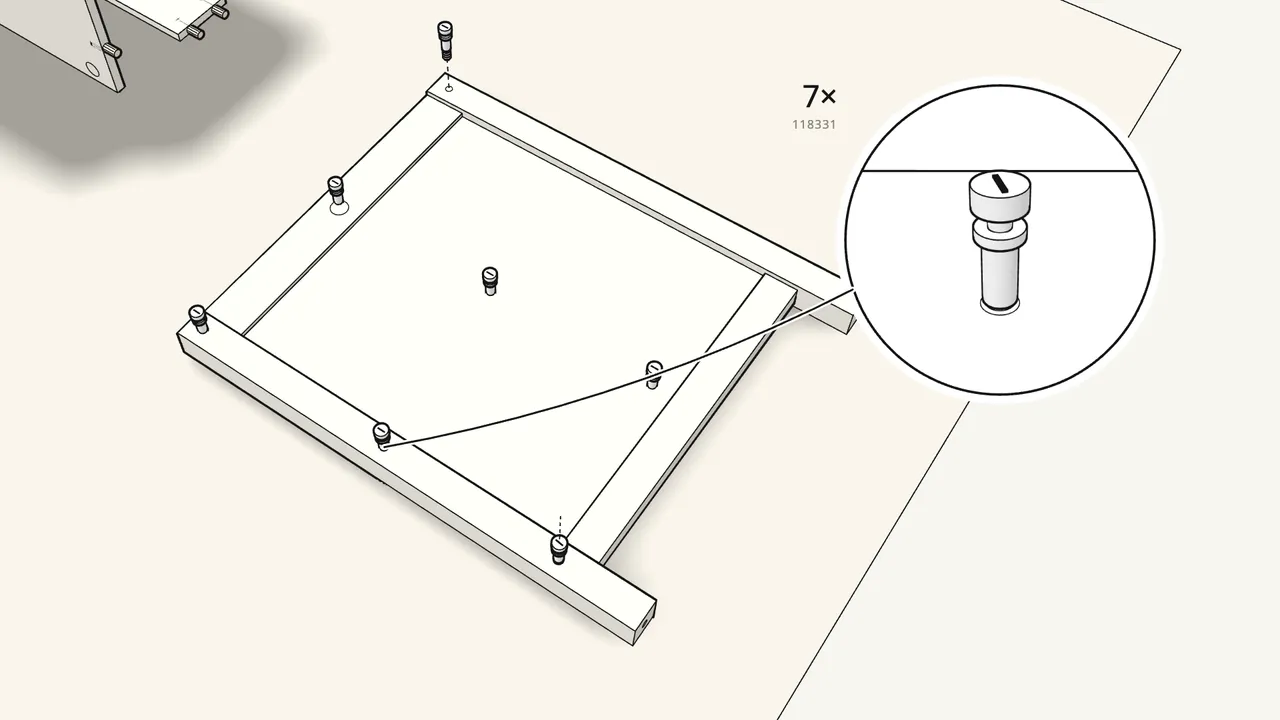
Step 20 · manual step 23
Screw 7 cam bolts into the second end frame.
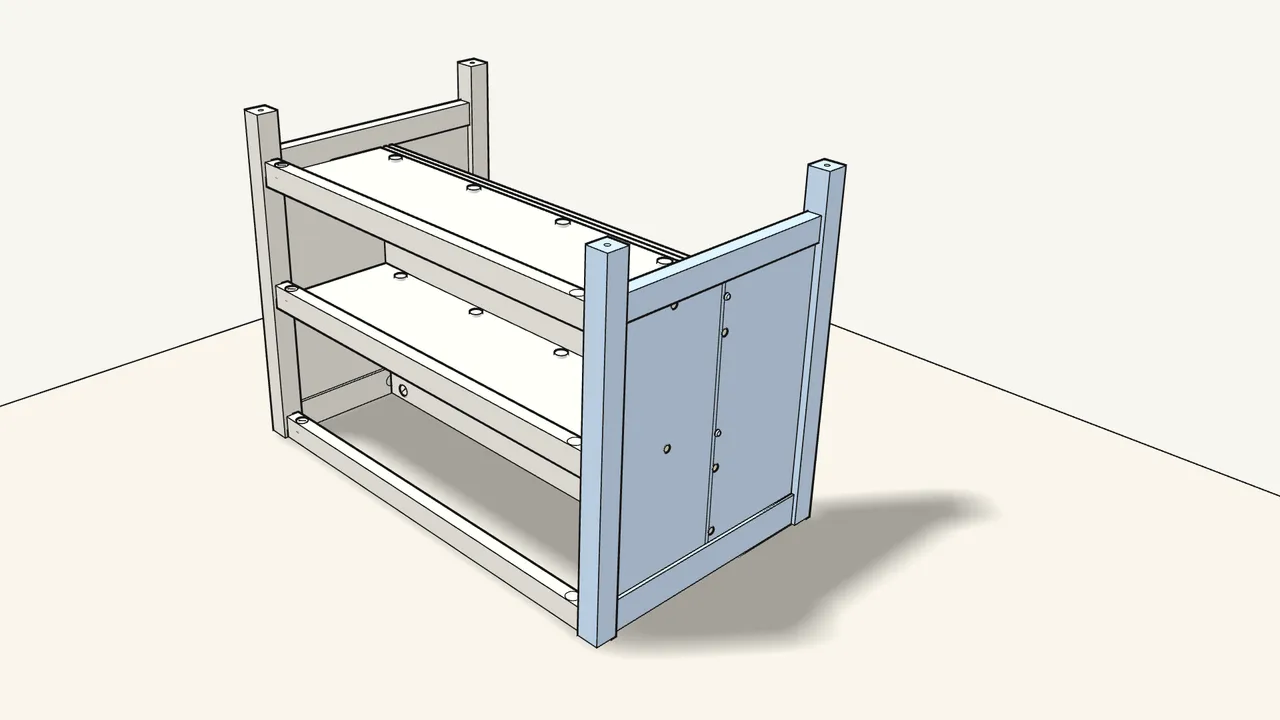
Step 21 · manual step 24
Fit the second end frame.
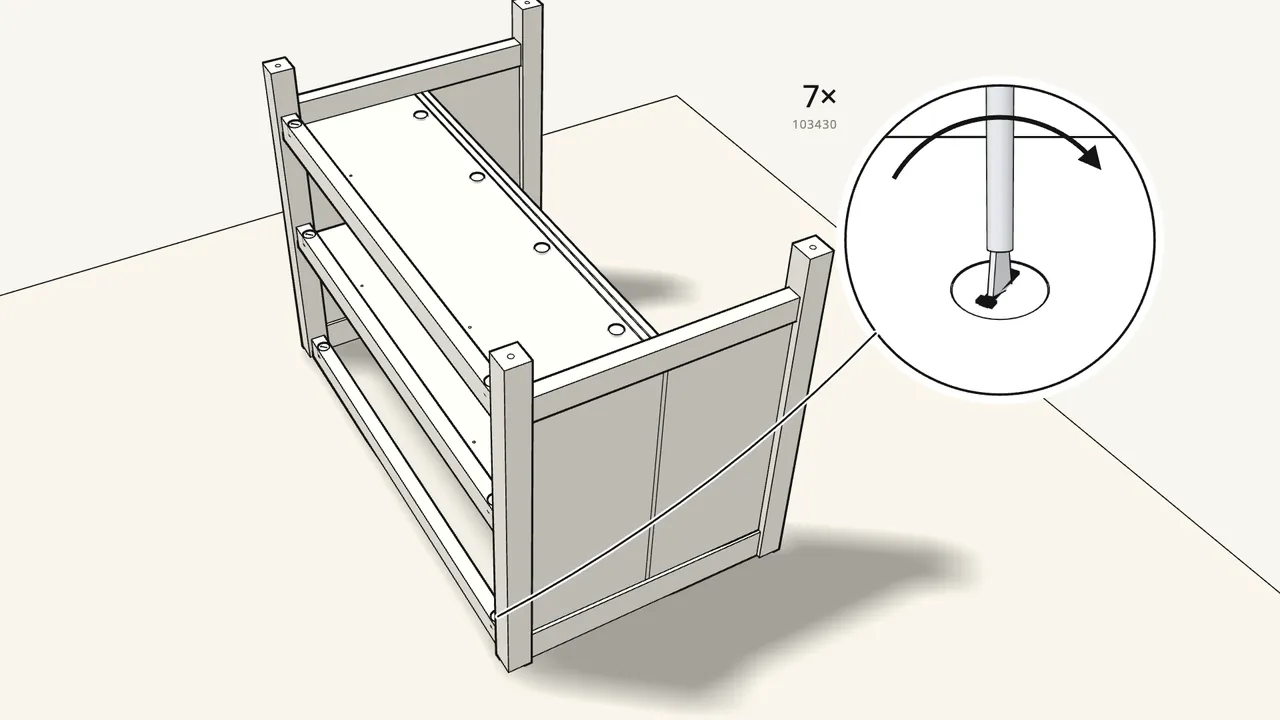
Step 22 · manual step 25
Insert 7 cam locks and turn them clockwise.
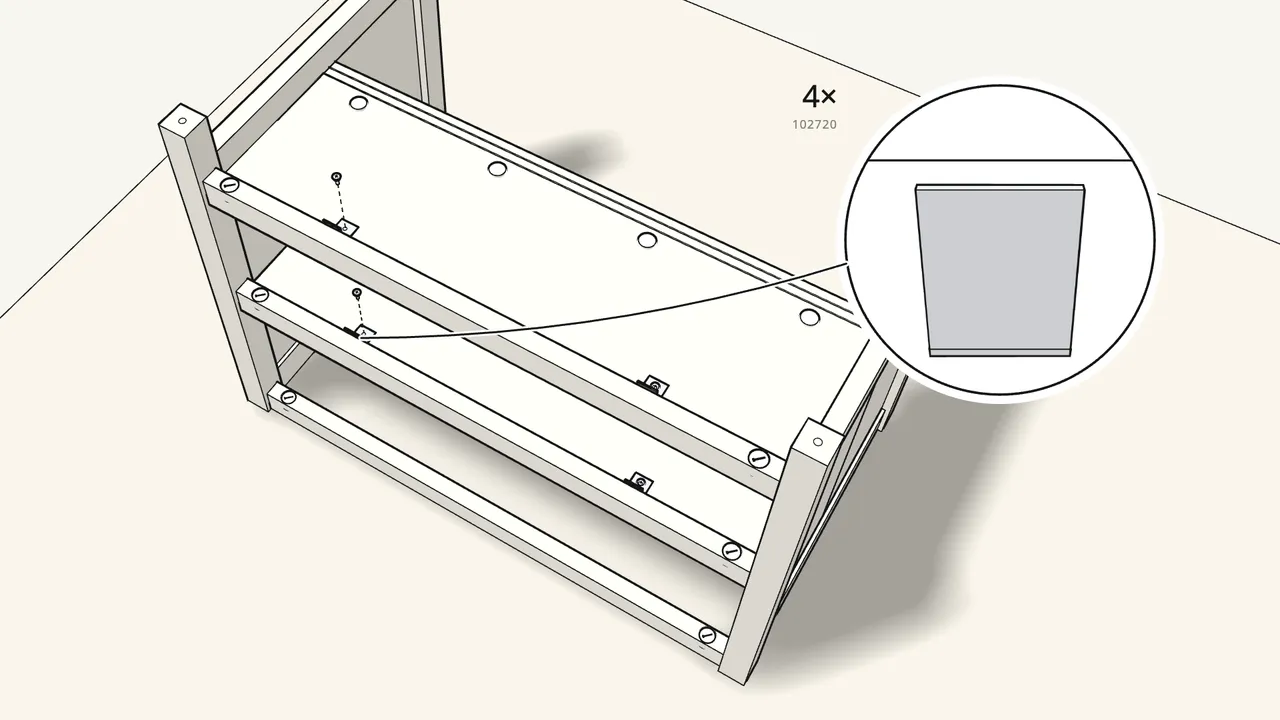
Step 23 · manual step 26
Fix 4 brackets (102720) with 8 screws (113928).
They join the shelves to the front rails. Check which way the brackets face.
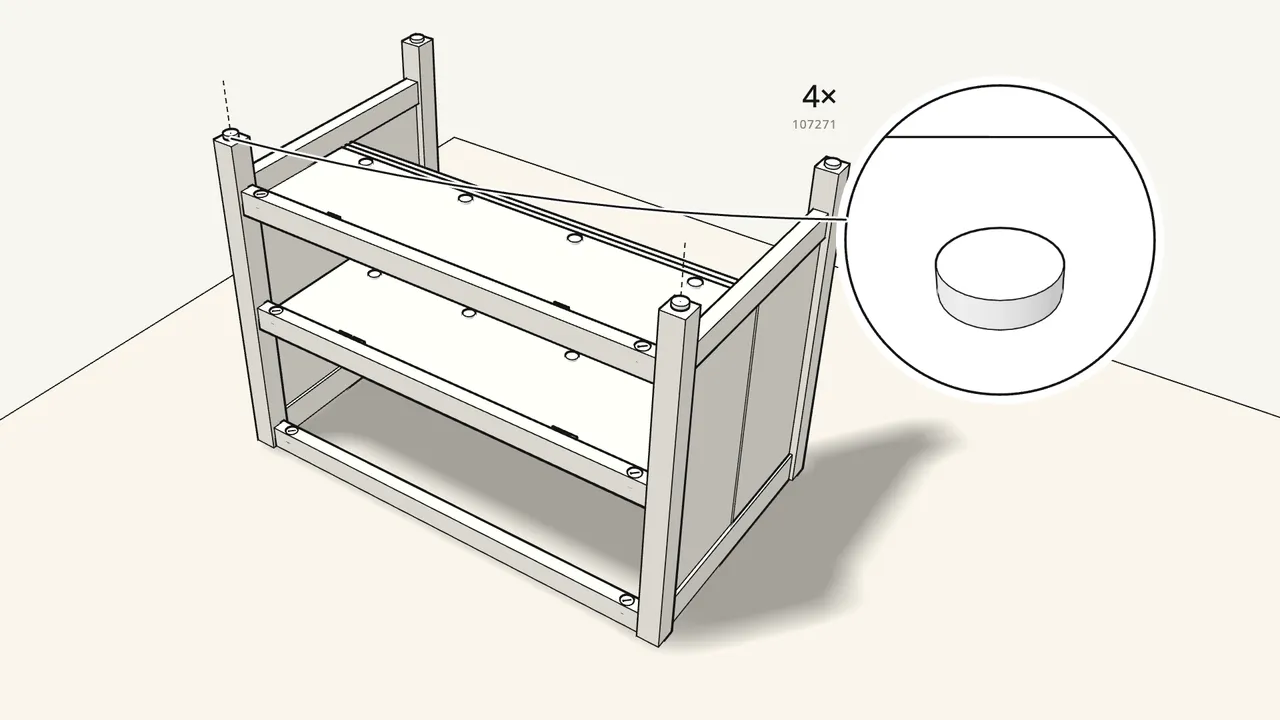
Step 24 · manual step 27
Press the 4 glides into the ends of the legs.
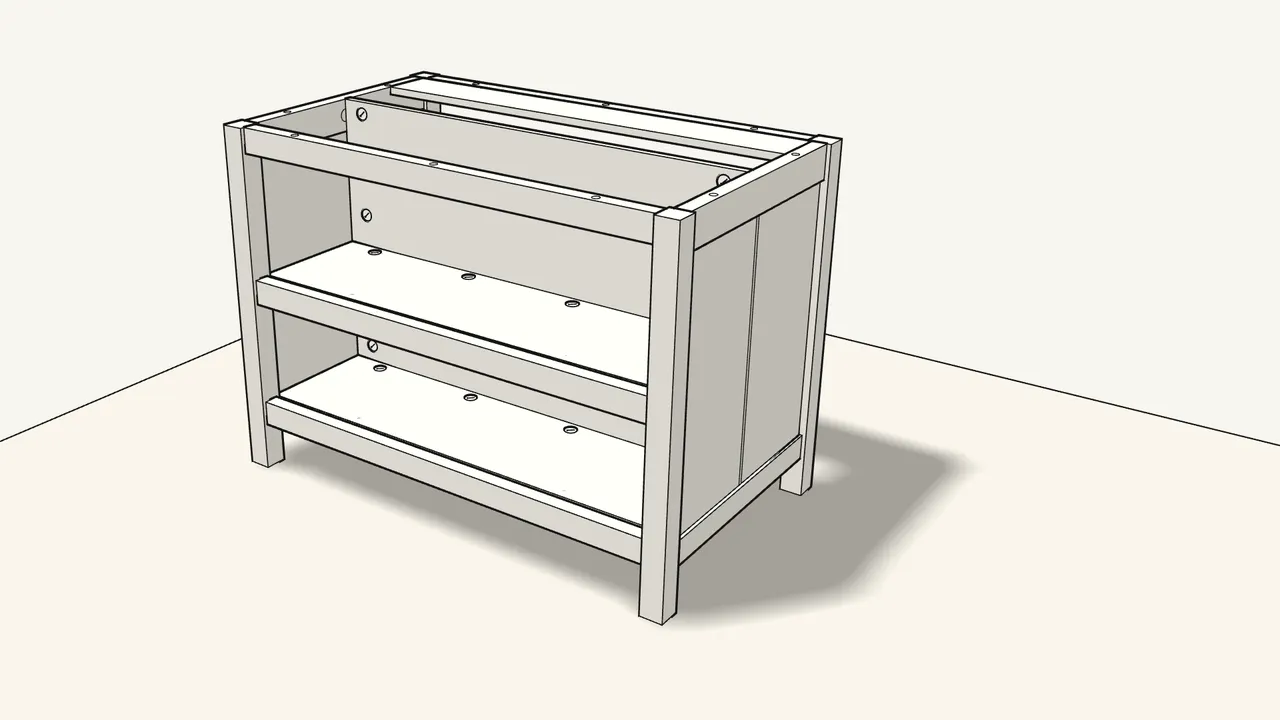
Step 25
With two people, turn the unit upright.
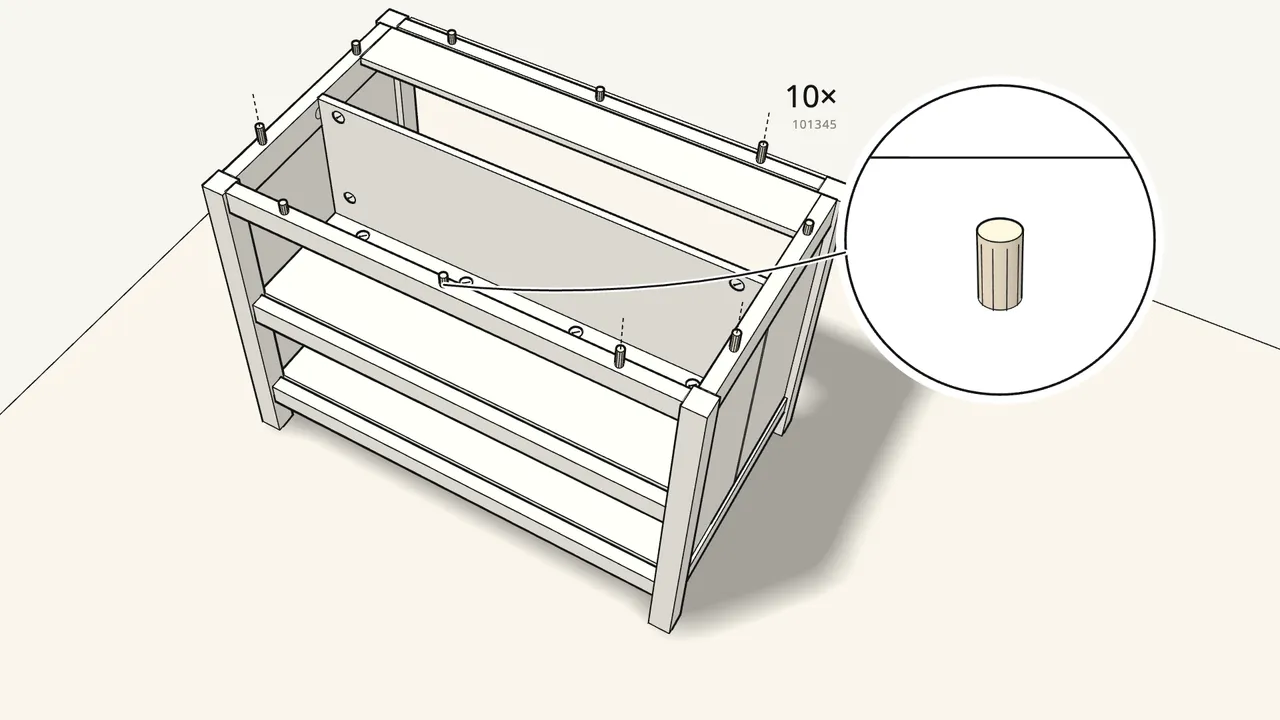
Step 26 · manual step 28
Push 10 dowels into the top edges of the frame.
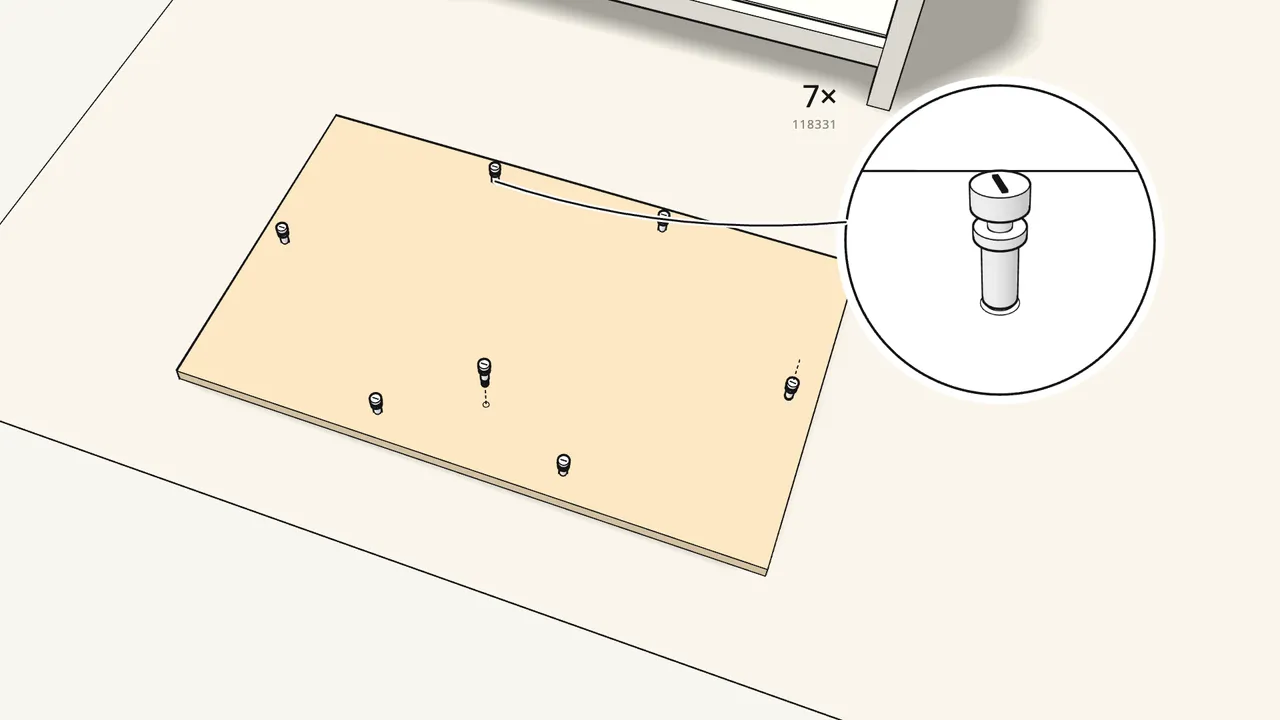
Step 27 · manual step 29
Screw 7 cam bolts into the underside of the top.
Lay the top face-down on a soft surface.
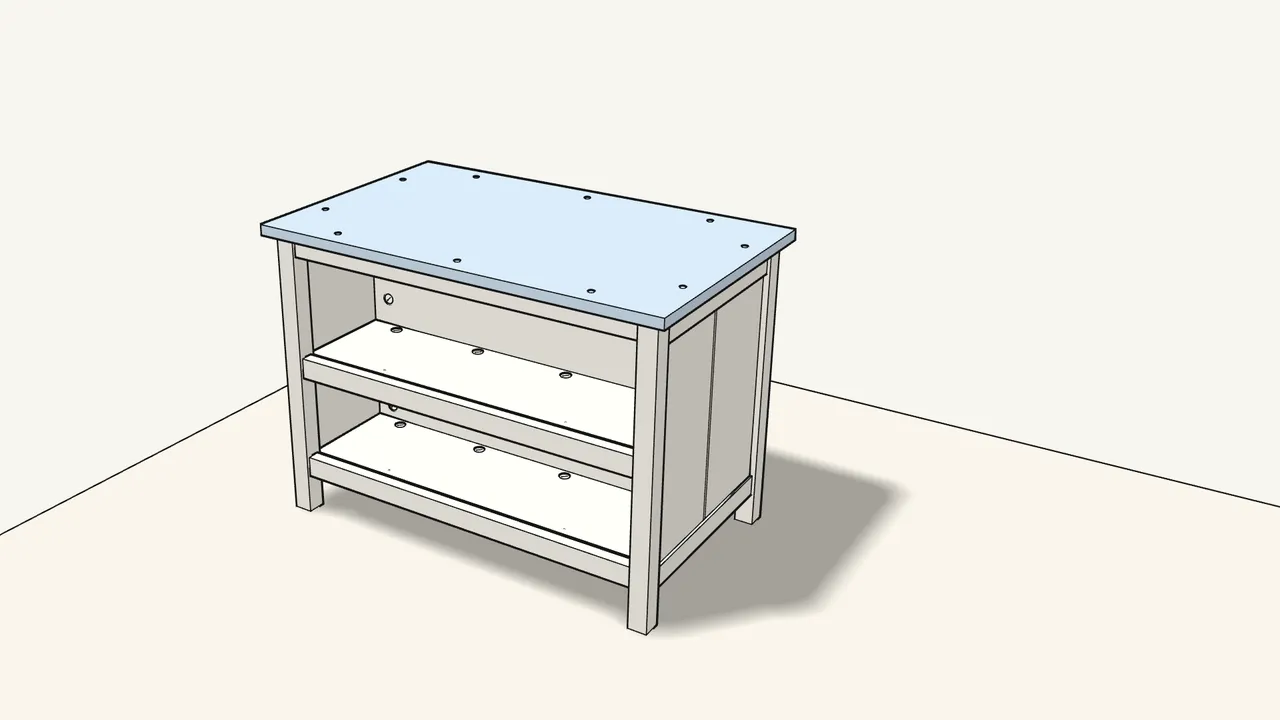
Step 28 · manual step 30
Turn the top over and lower it onto the frame.
Two people.
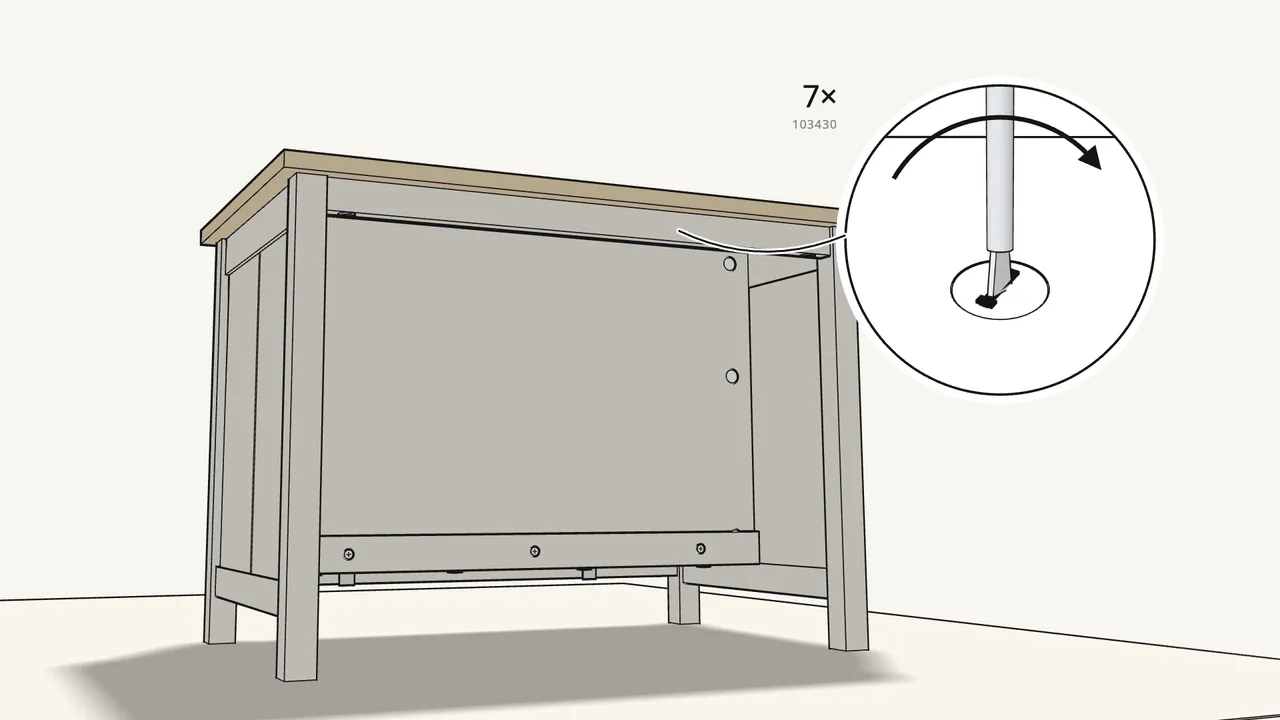
Step 29 · manual step 31
Lock the top with 7 cam locks, turned clockwise.
They sit in the rails under the top.
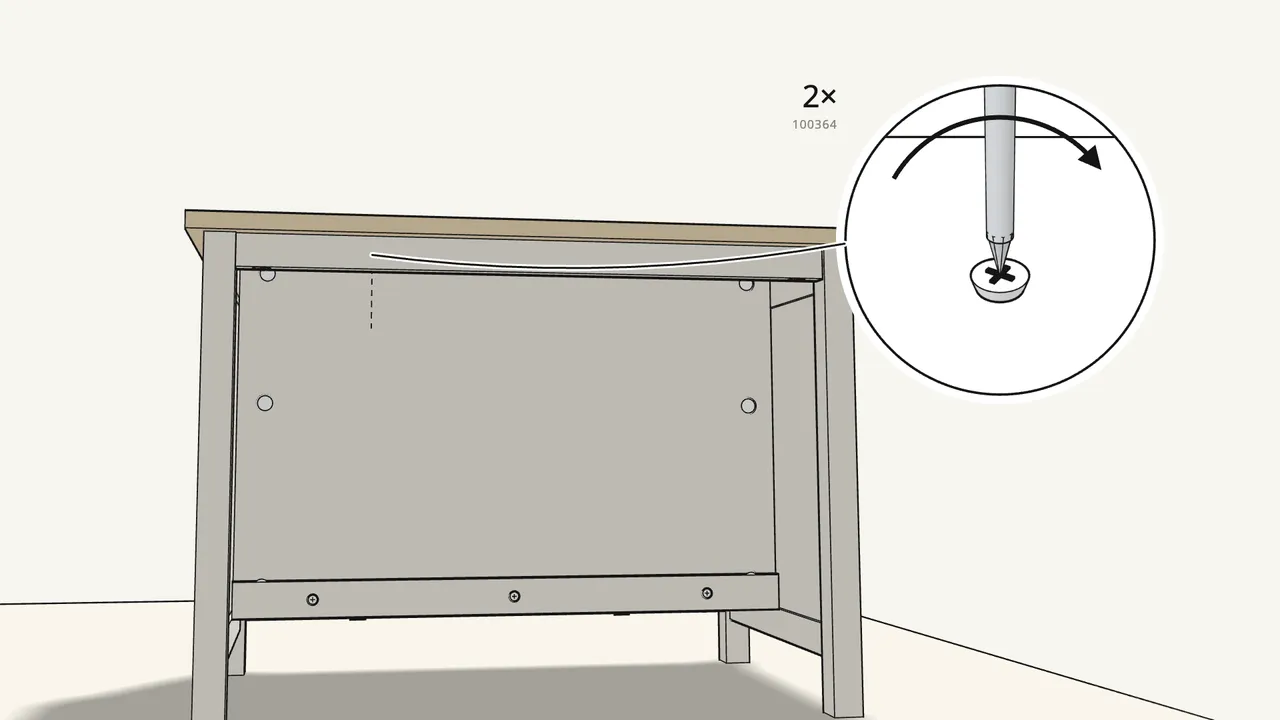
Step 30 · manual step 32
Turn the island around and fix 2 screws (100364) up into the top.
Through the board under the top.
Tips & safety
- Two people are needed. For turning the unit over and lifting the top into place (manual pages 8, 9, 21, 22).
Official instructions
This guide follows IKEA's official assembly instructions (AA-2100799-5). Keep the printed manual to hand — if anything differs, the manual is right.