IKEA · Cabinets & Wardrobes
How to assemble IKEA NORDKISA Open Wardrobe with Sliding Door
Step-by-step IKEA NORDKISA Open Wardrobe with Sliding Door assembly: 22 illustrated steps, an animated video, the hardware list and the tools you need — following the official instructions (AA-2162593-6).
- 22 illustrated steps
- 33 steps in the manual
- 3:15 video
- 120×47×186 cm cm
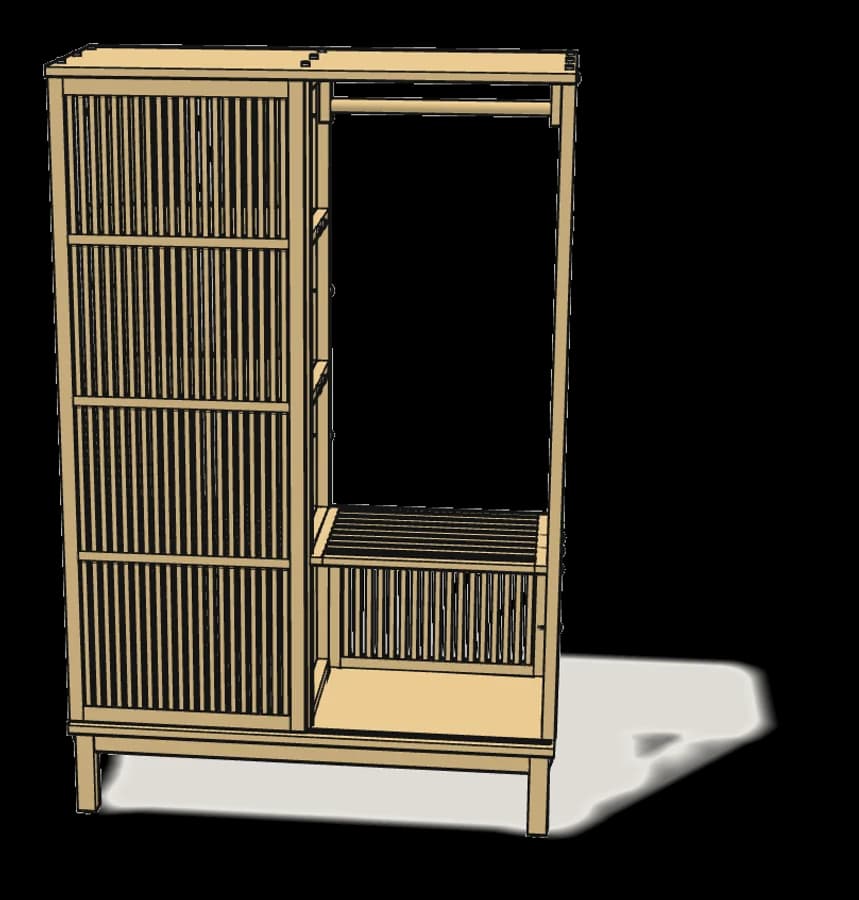
What you need
Tools
- Phillips screwdriver
- Flat-head screwdriver
- Hammer
- Spirit level
- Drill (for wall fixing)
- Allen key (included)
You’ll need: the Allen key (100006, in the box), Phillips and flat-head screwdrivers, a pencil, a hammer, a spirit level and a drill.
Hardware in the box
| Part no. (as printed in the manual) | Qty |
|---|---|
| 10040625 | 61× |
| 101345 | 46× |
| 157732 | 4× |
| 107967 | 1× |
| 109048 | 1× |
| 121714 | 1× |
| 109049 | 1× |
| 100823 | 2× |
Step-by-step assembly
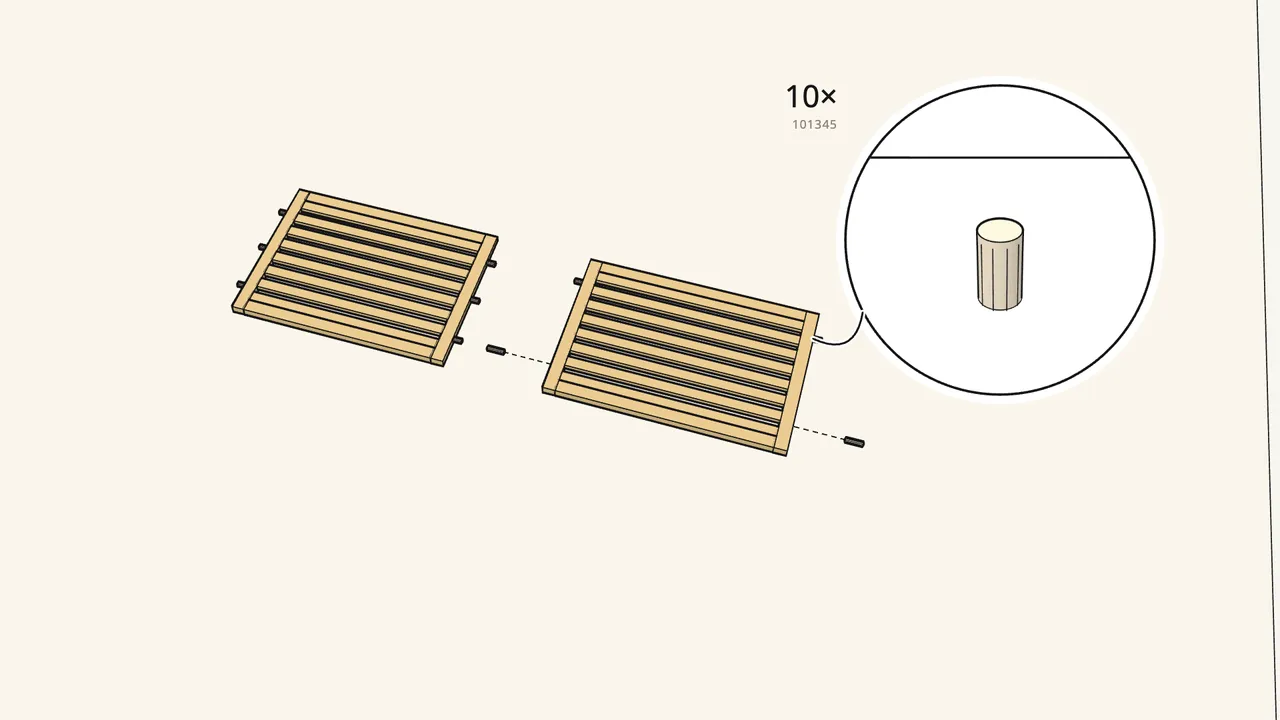
Step 1 · manual step 1–2
Push 10 dowels (101345) into the two slatted shelves.
6 in the first shelf, 4 in the second. Check the hole pattern in the manual.
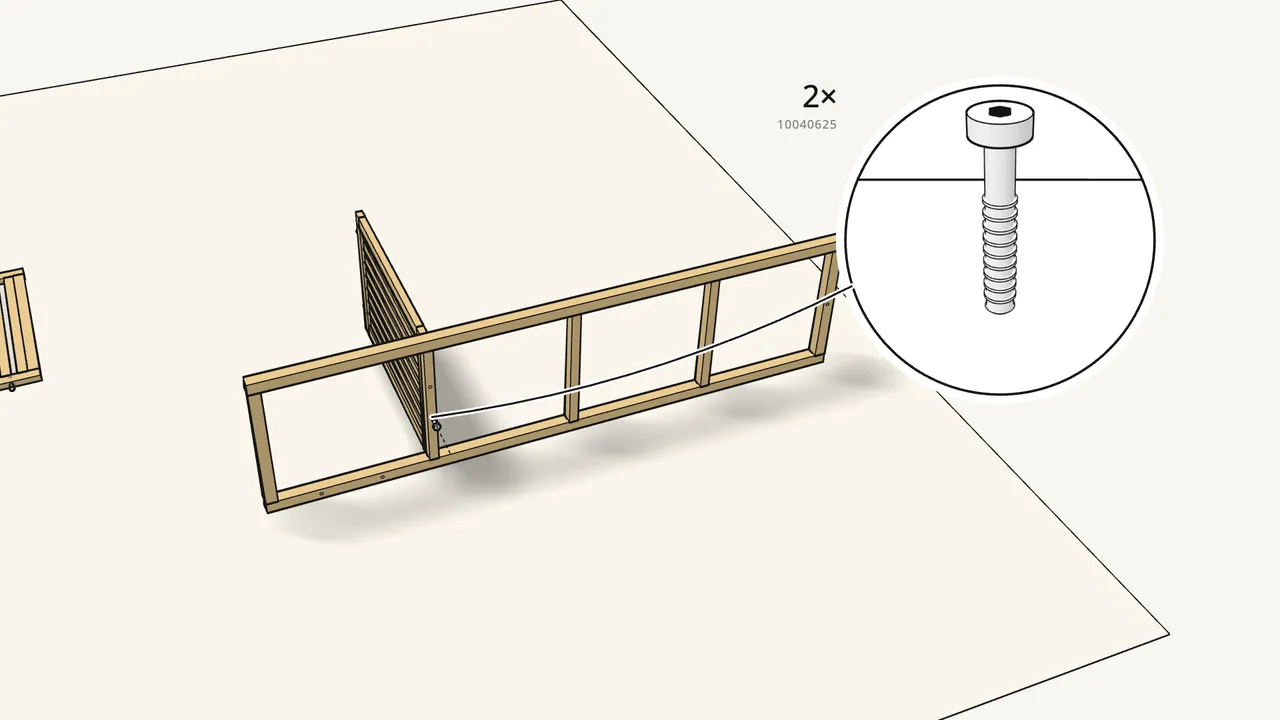
Step 2 · manual step 3
Fix the 4-dowel shelf to a side frame with 2 bolts (10040625).
This frame becomes the right side. Tighten with the Allen key.
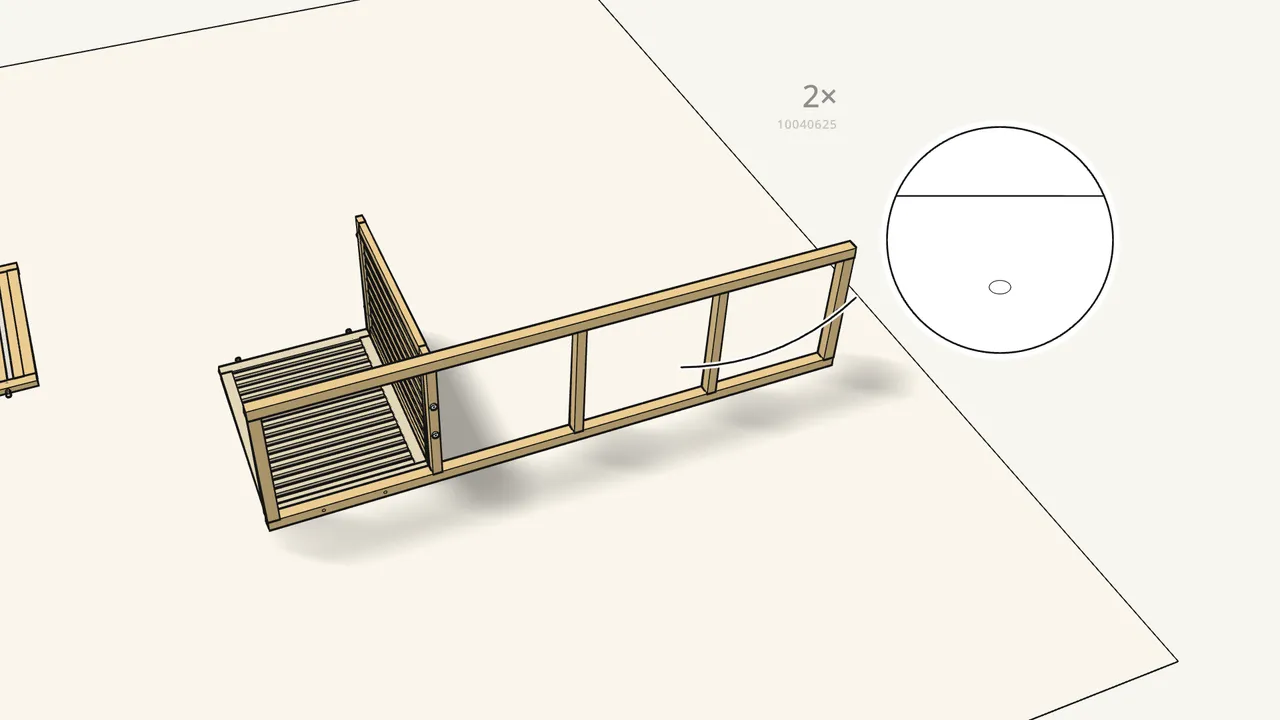
Step 3 · manual step 4–5
Push 4 dowels into the lower back panel. Fix it with 2 bolts.
It lies flat, under the slatted shelf.
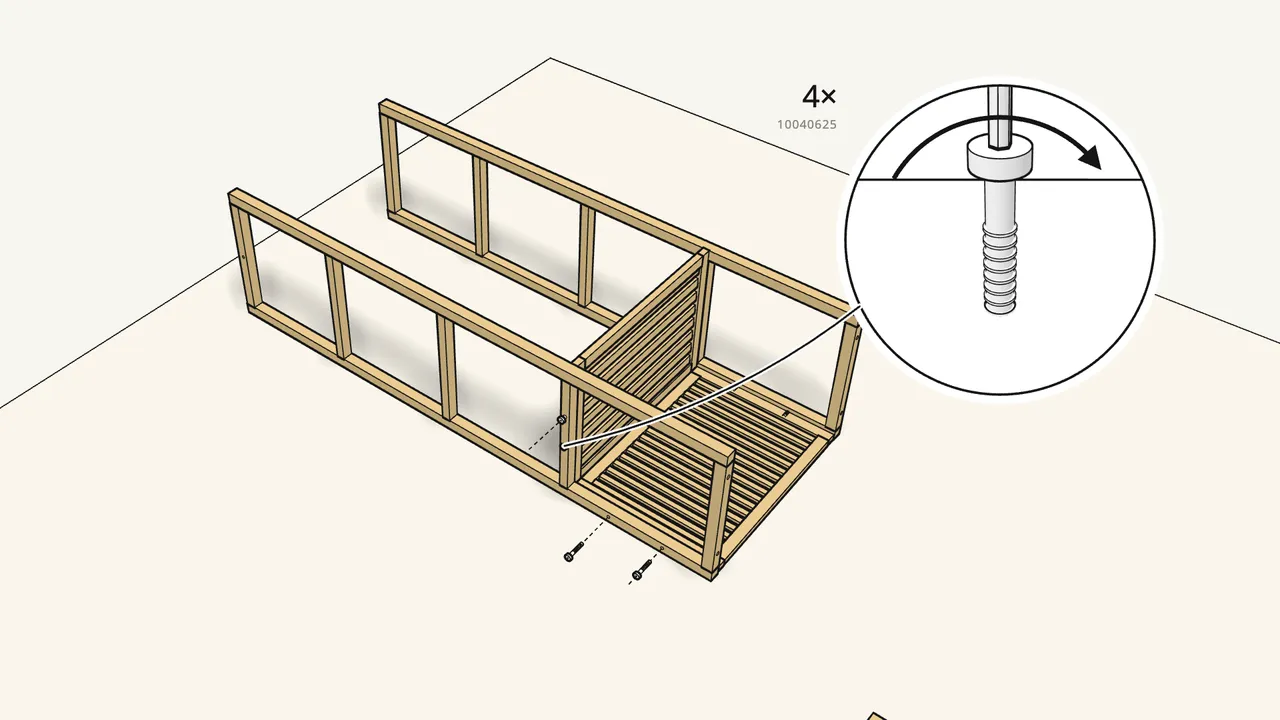
Step 4 · manual step 6
Fit the middle frame. Fix it with 4 bolts.
2 into the slatted shelf, 2 into the back panel.
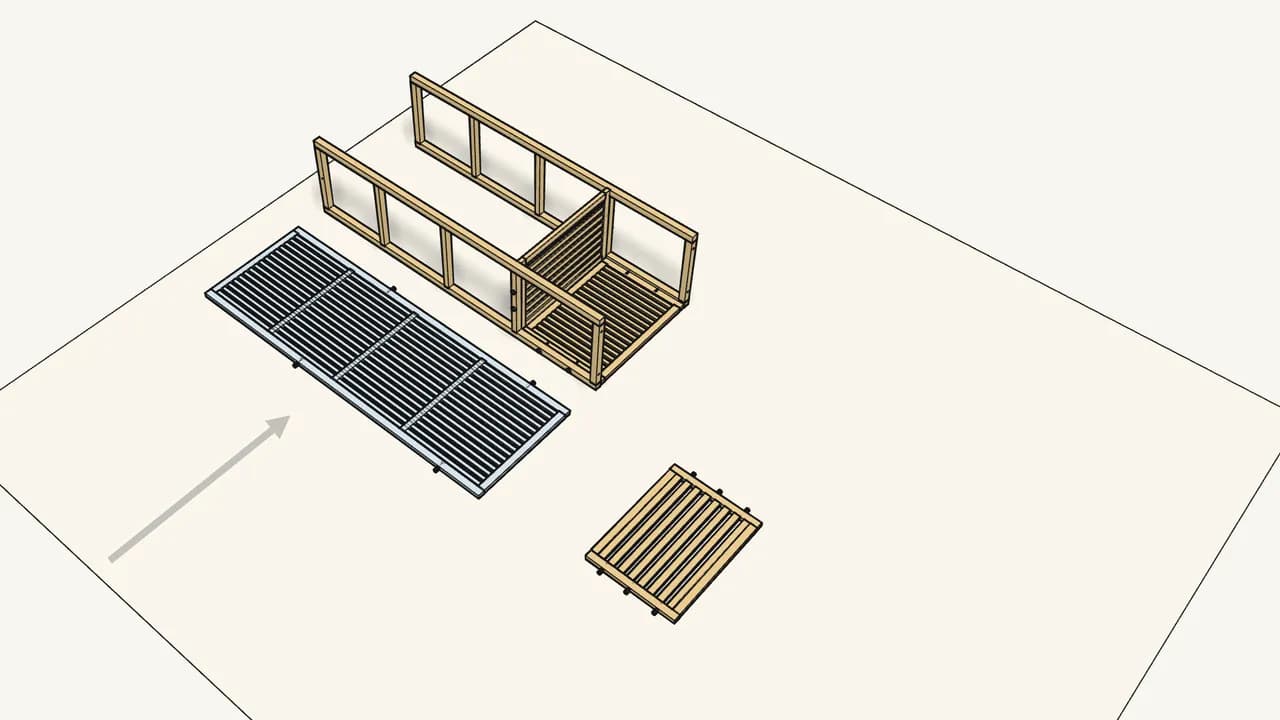
Step 5 · manual step 7–8
Push 4 dowels into the long back panel. Slide it in.
It lies flat beside the middle frame.
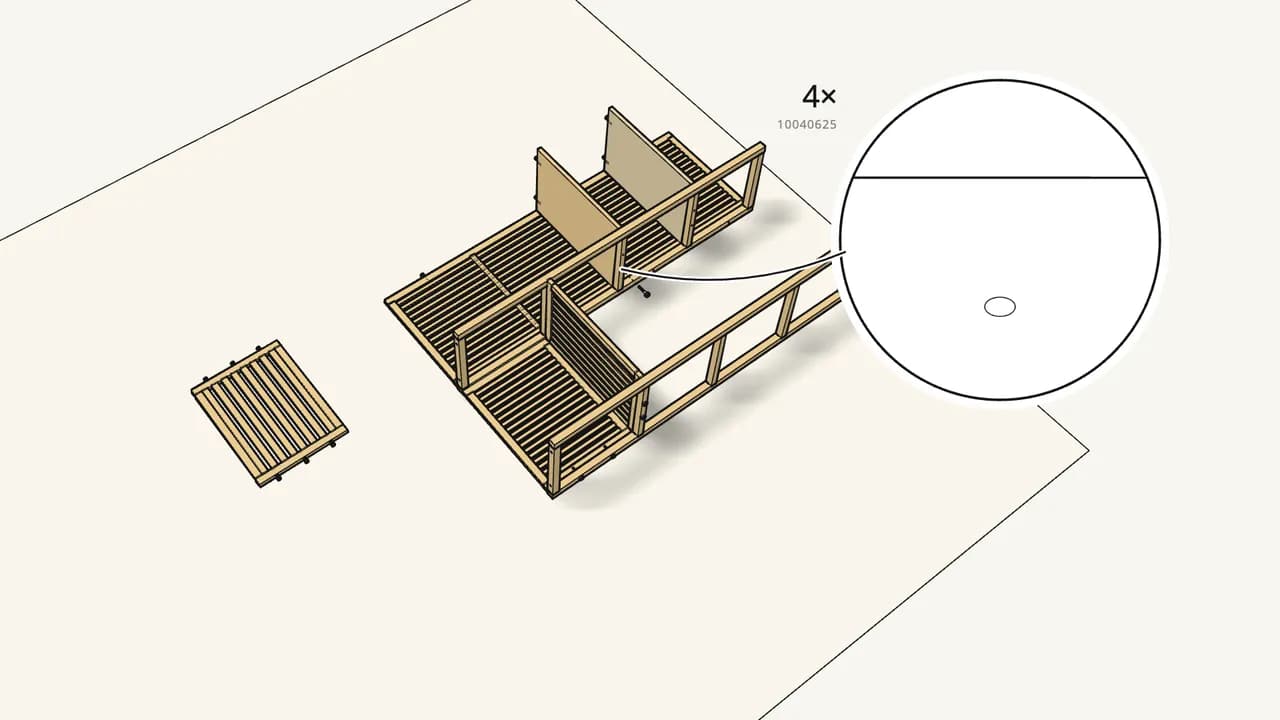
Step 6 · manual step 9–10
Push 8 dowels into the 2 solid shelves. Fix them with 4 bolts.
The bolts go through the middle frame from the open side.
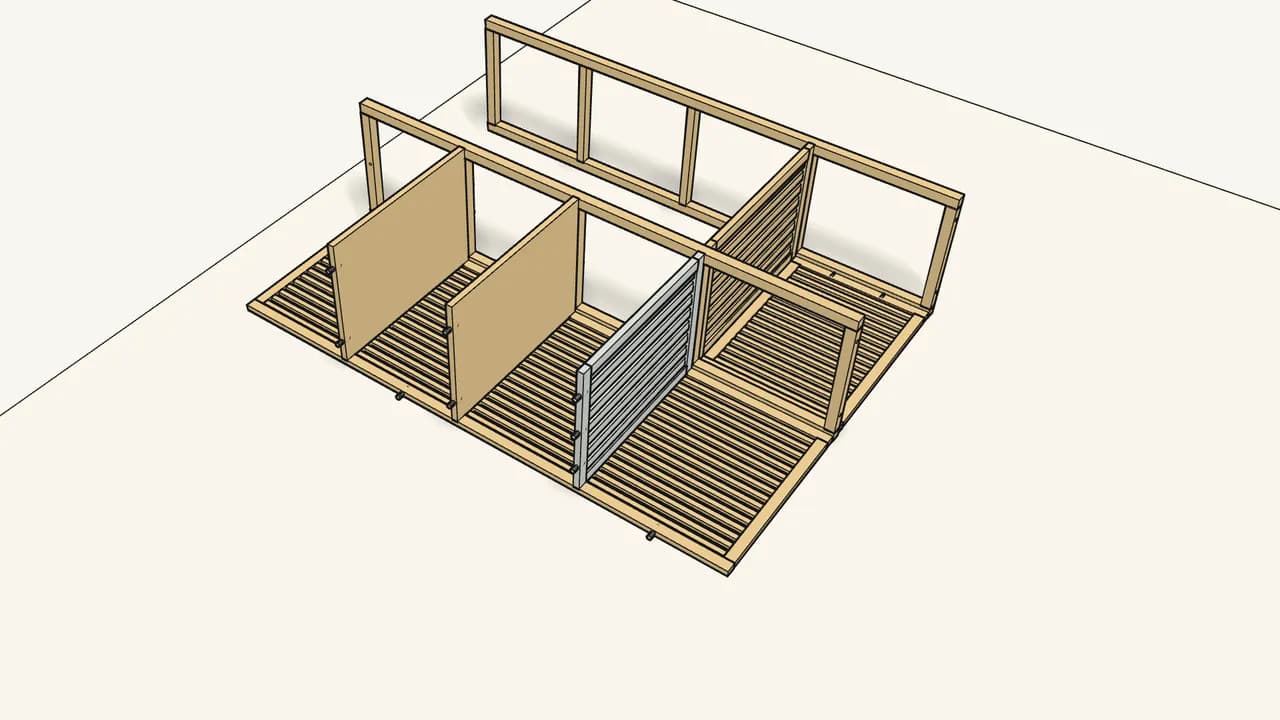
Step 7 · manual step 11
Slide in the slatted shelf with 6 dowels.
It goes at the bottom end, level with the right-hand shelf.
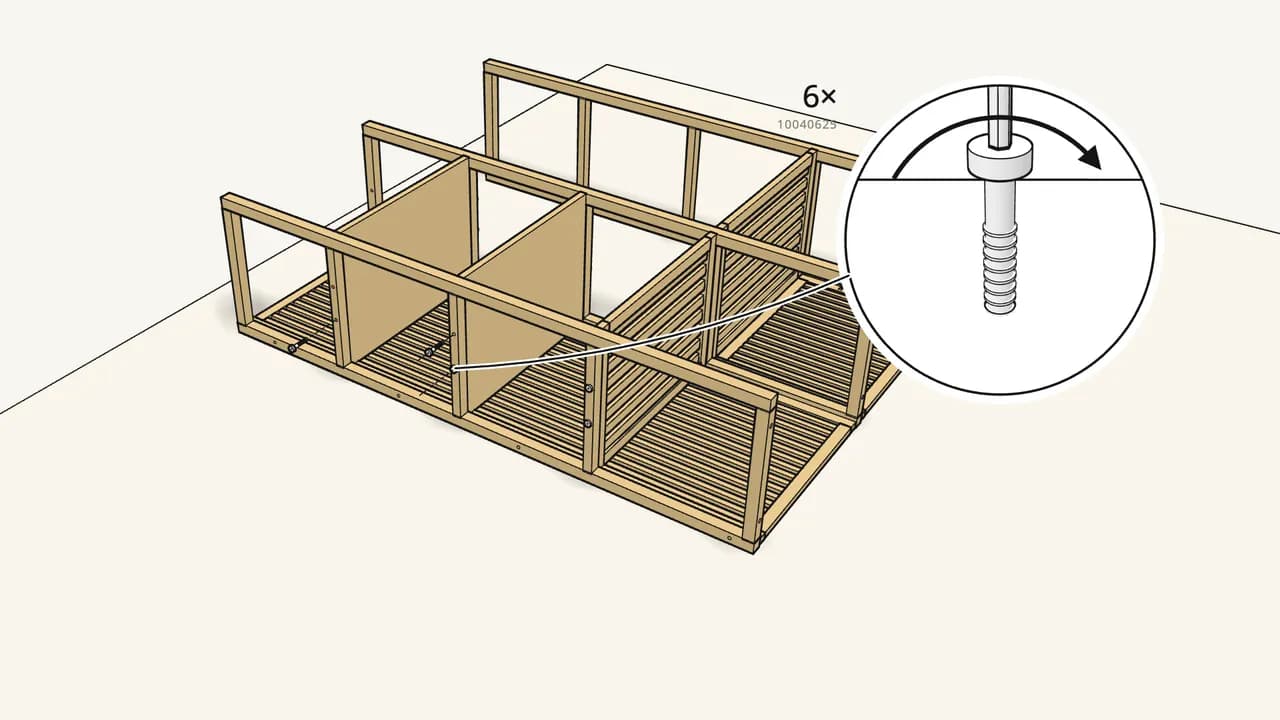
Step 8 · manual step 12
Fit the left side frame. Fix it with 6 bolts.
2 into each shelf.
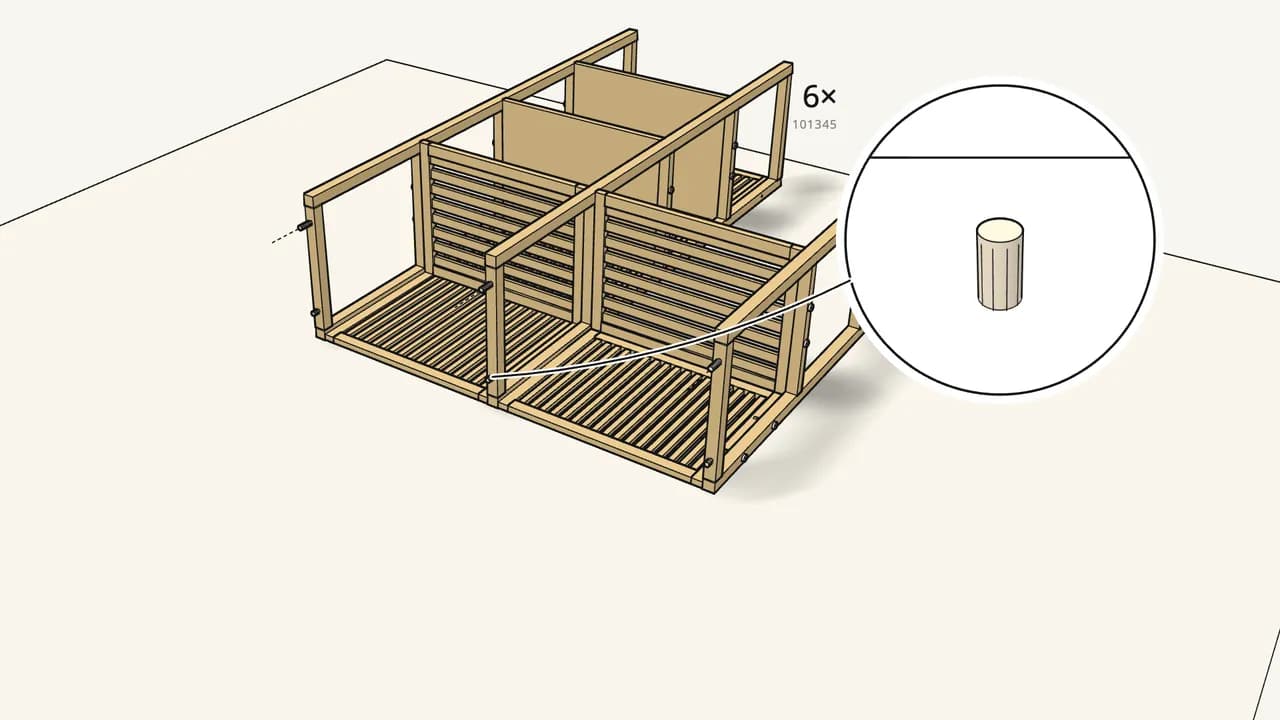
Step 9 · manual step 13
Push 6 dowels into the bottom ends of the 3 frames.
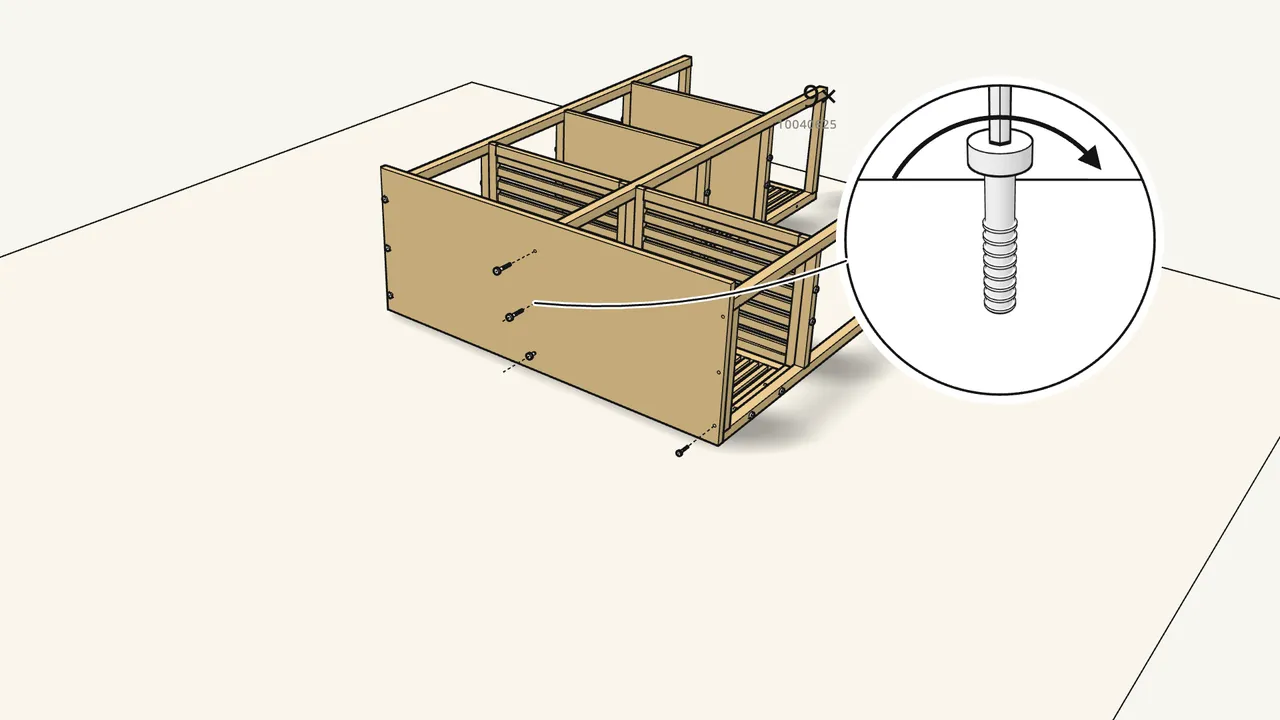
Step 10 · manual step 14–15
Swing the bottom panel up onto the frame ends. Fix it with 9 bolts.
Holes facing the frames, as shown in step 14.
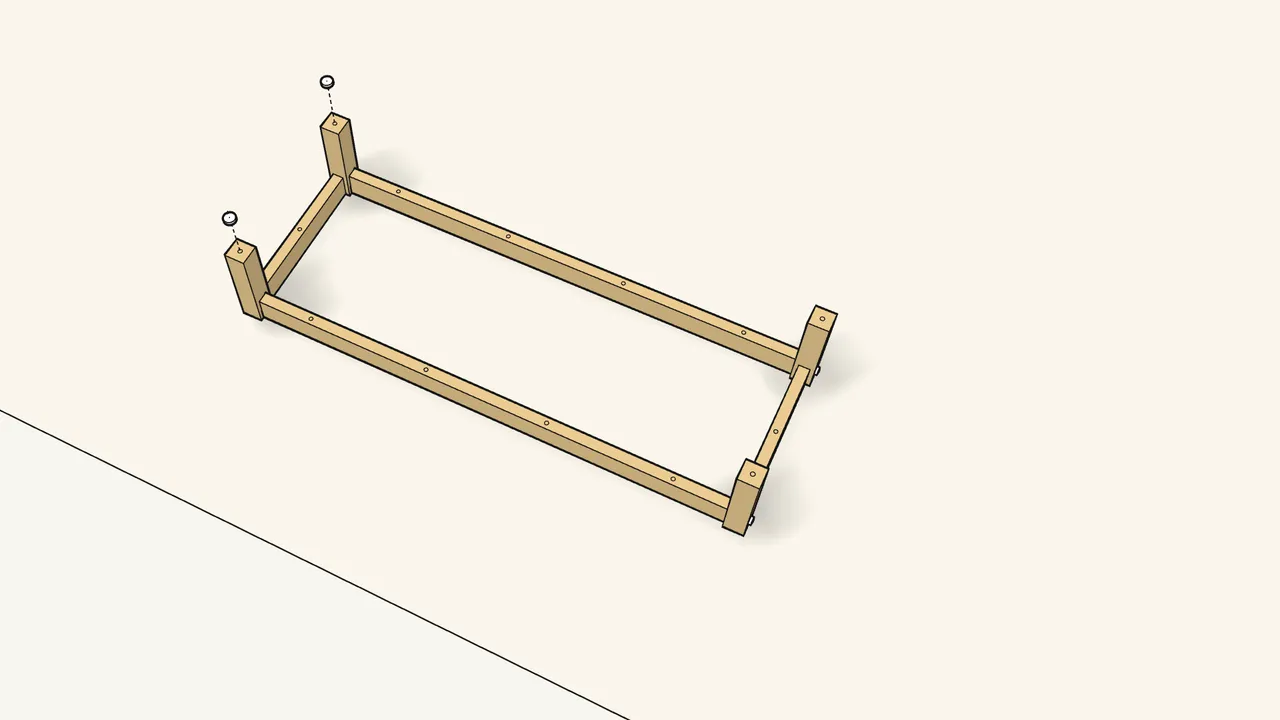
Step 11 · manual step 16–17
Join the leg frame with 4 bolts. Screw in the 4 feet (157732).
Build it upside down on the rug. Check the hole positions on the long rails.
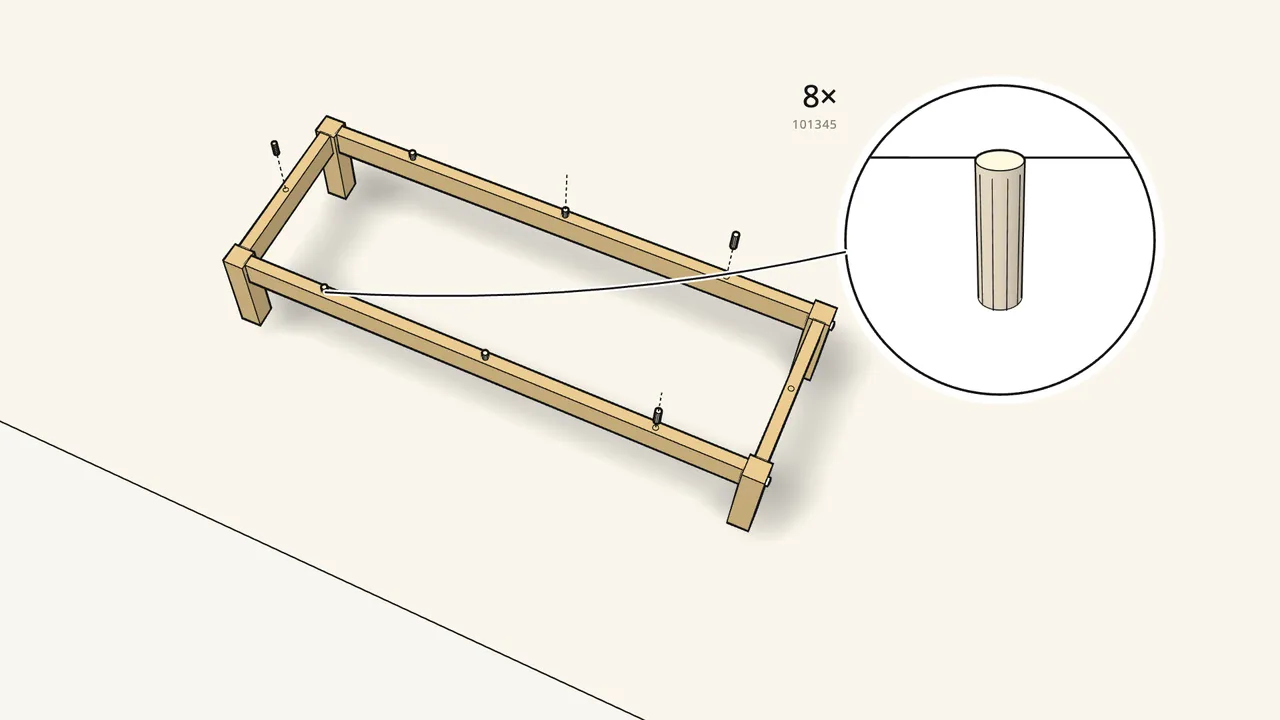
Step 12 · manual step 18
Turn the leg frame over. Push 8 dowels into the top.
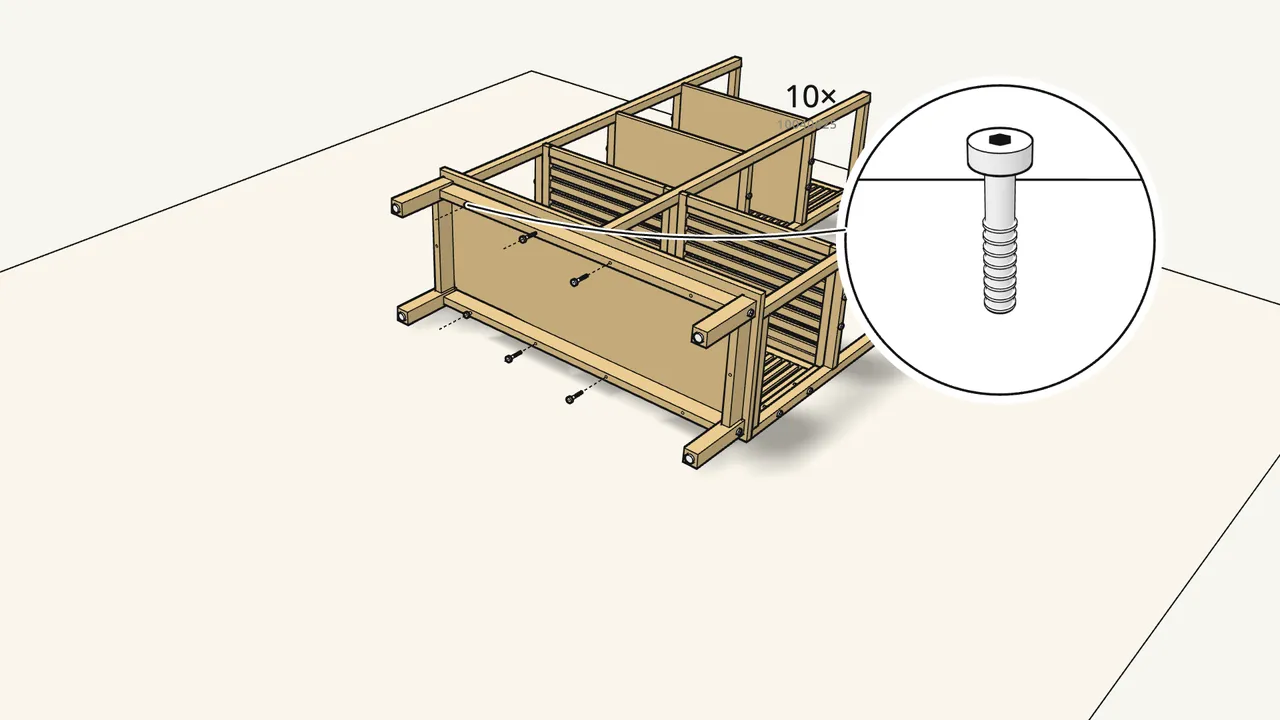
Step 13 · manual step 19–20
Fit the leg frame onto the bottom panel. Fix it with 10 bolts.
Up through the rails into the bottom panel.
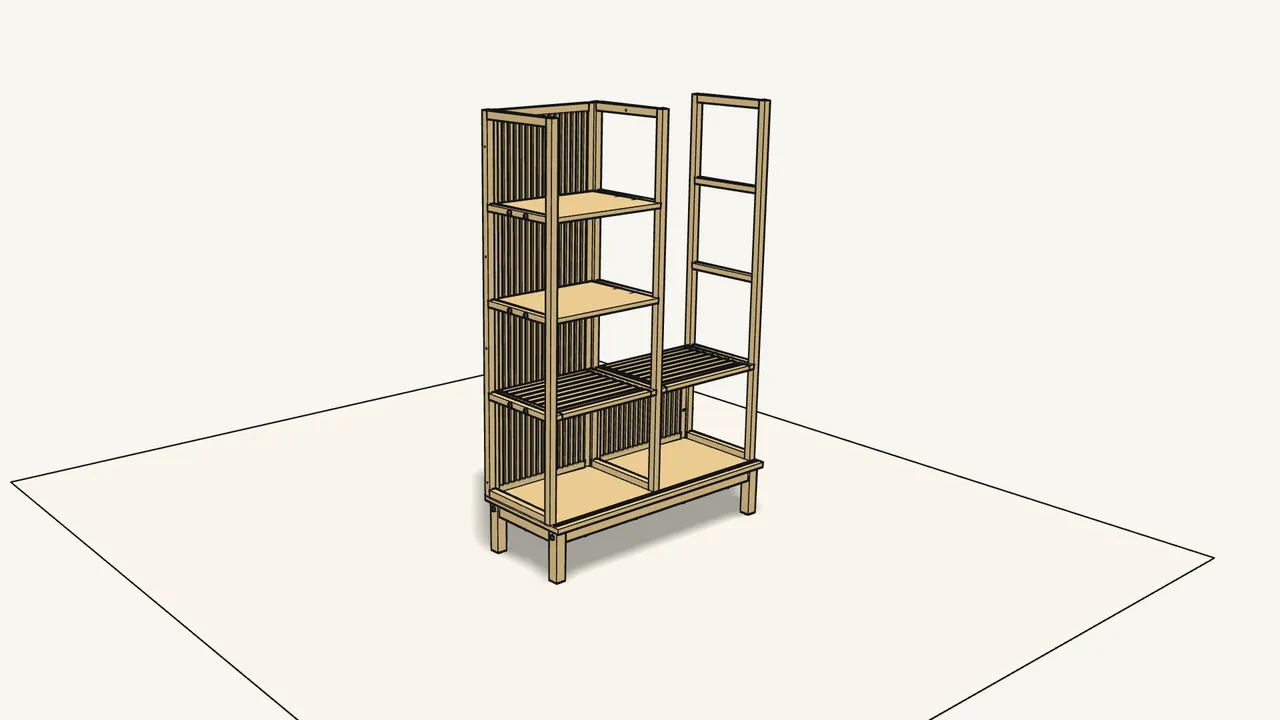
Step 14 · manual step 20
Carefully raise the wardrobe onto its legs.
Do it together — it is tall and heavy.
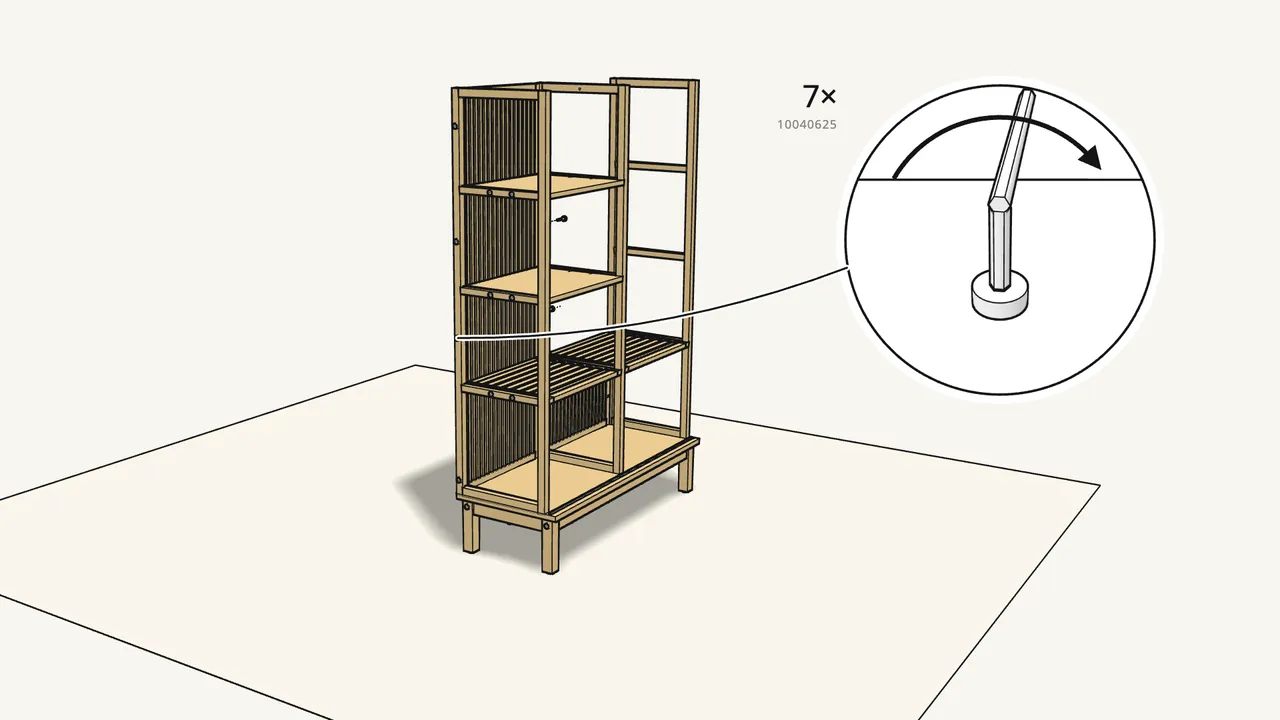
Step 15 · manual step 21
Fix the back panel with 7 more bolts.
4 through the left frame, 3 through the middle frame, into the back panel.
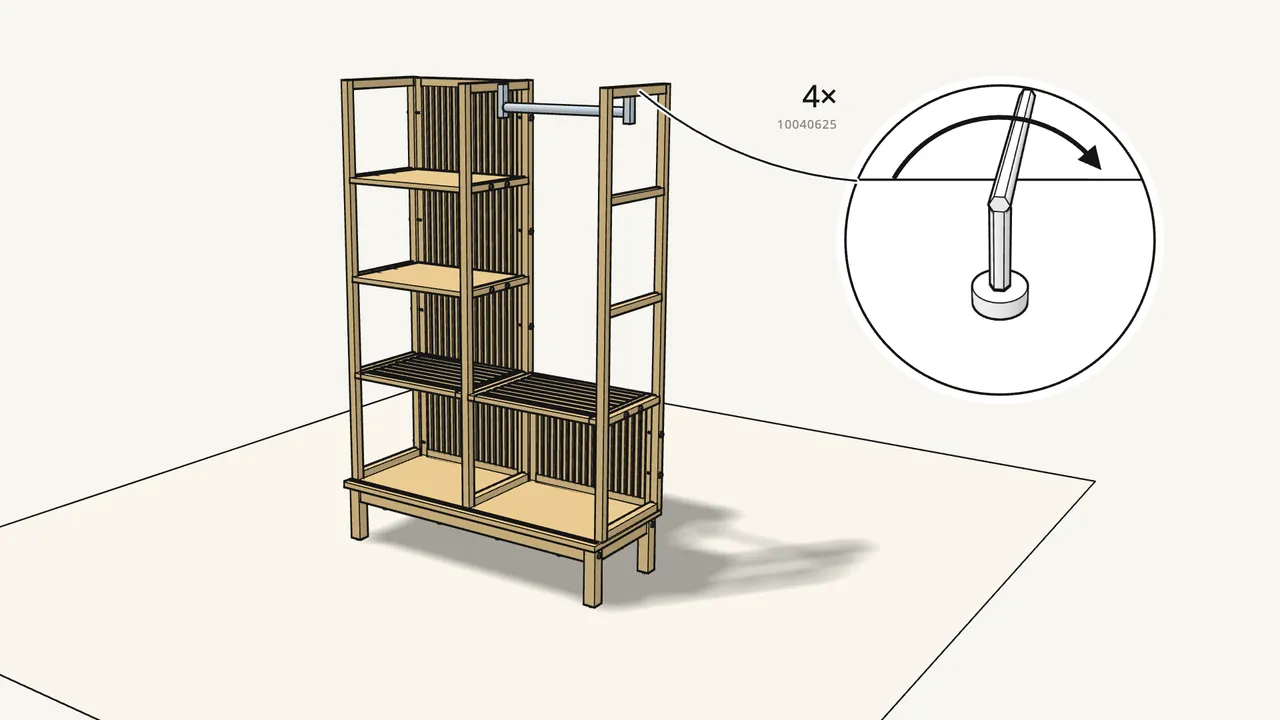
Step 16 · manual step 22–23
Bolt the clothes rail between its 2 holders. Fix it at the top.
2 bolts for the rail, 2 more through the frames into the holders.
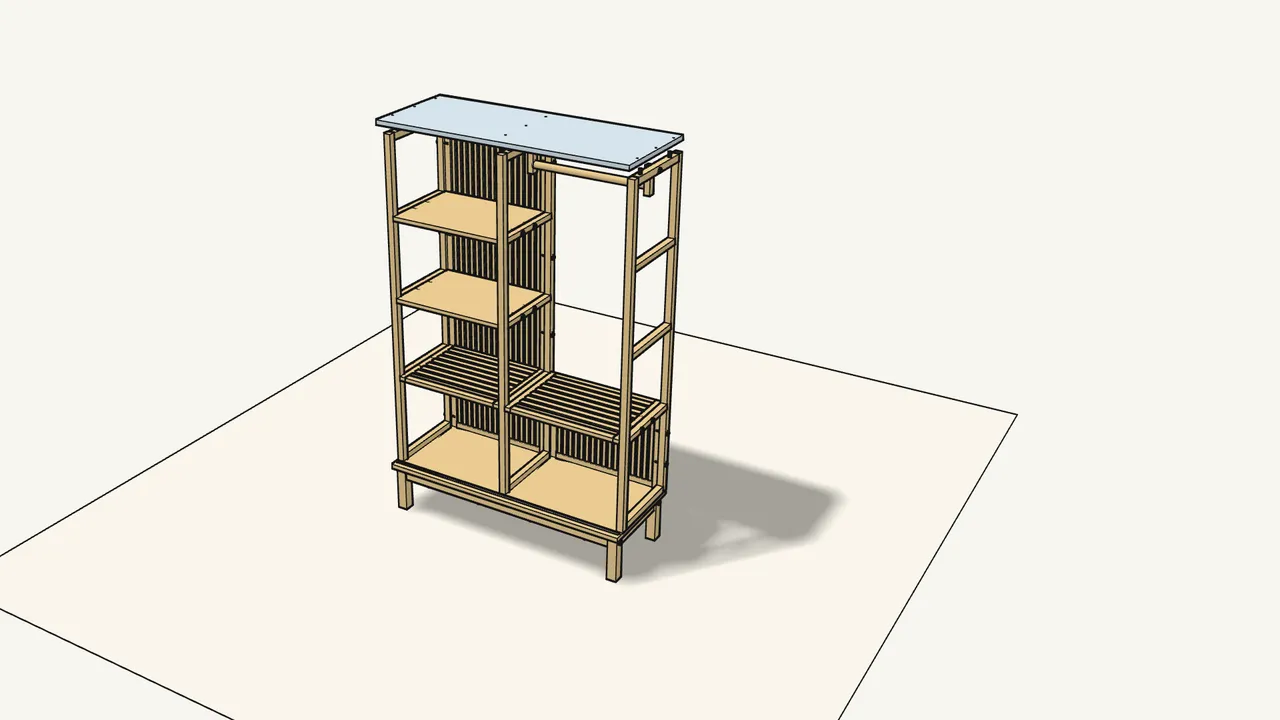
Step 17 · manual step 24–25
Push 6 dowels into the frame tops. Lay the top panel on.
Check which edge faces the front — see the manual, step 25.
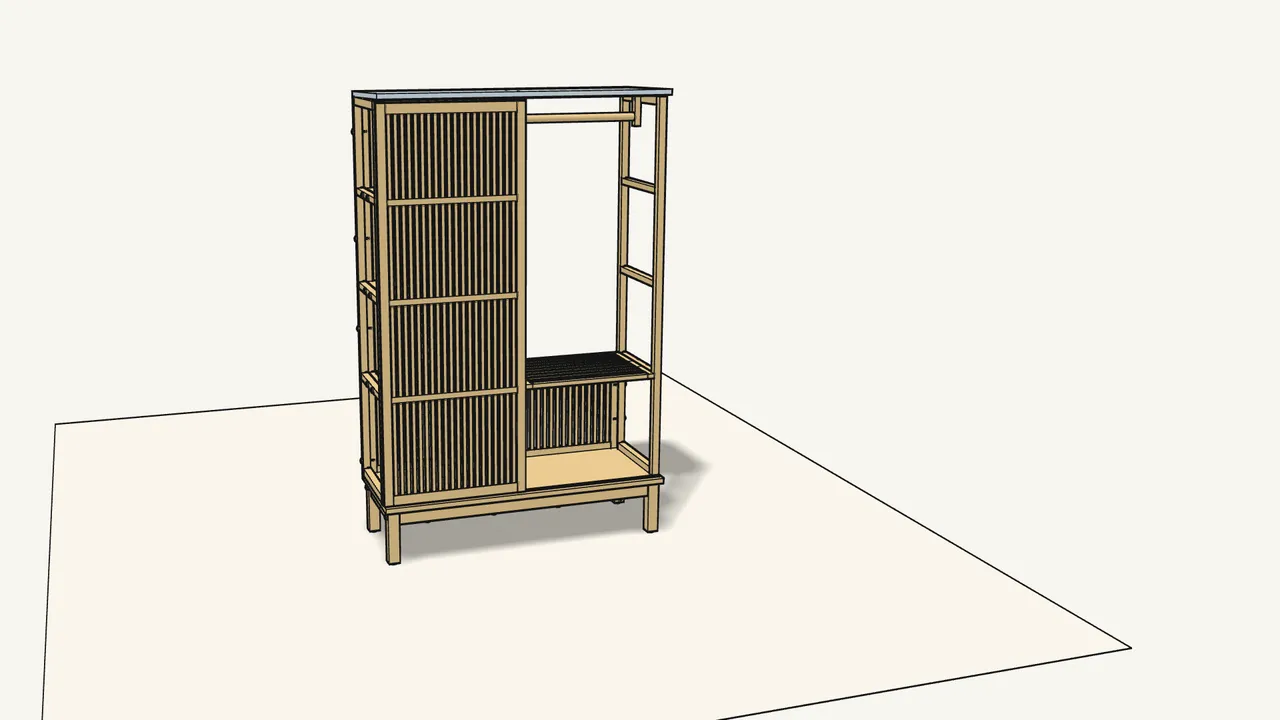
Step 18 · manual step 26–27
Hang the sliding door: bottom guides into the track first.
Lift the front of the top slightly and tilt the door in under it.
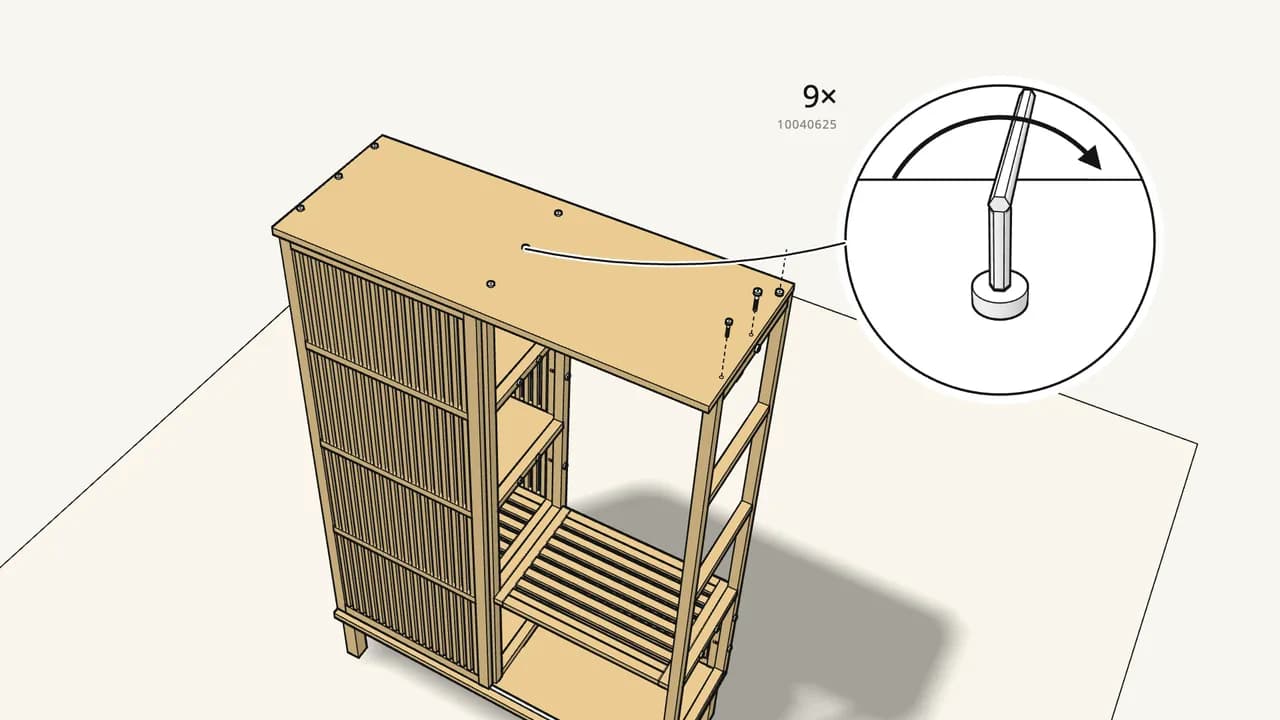
Step 19 · manual step 28
Fix the top with 9 bolts.
Use a step ladder.
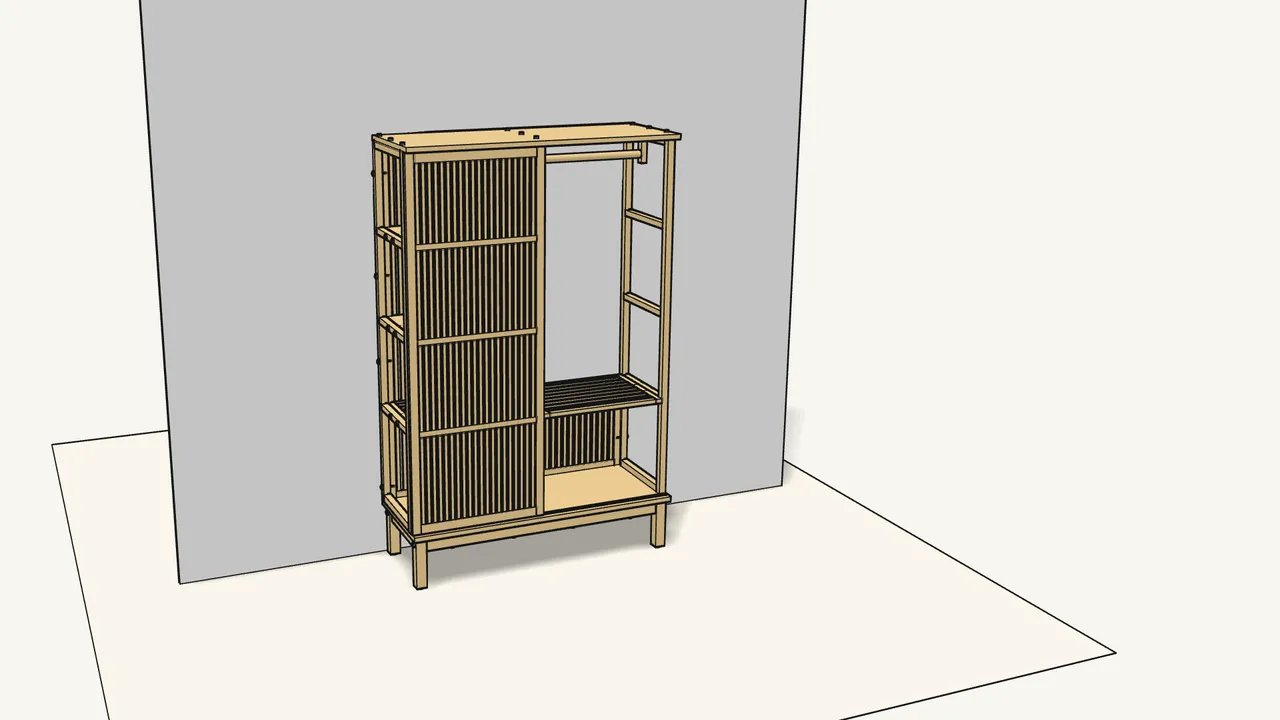
Step 20 · manual step 29–30
Stand it against the wall. Mark the top edge on the wall.
Then mark the strap position 1 cm below the line, 7 cm in (manual, step 30).
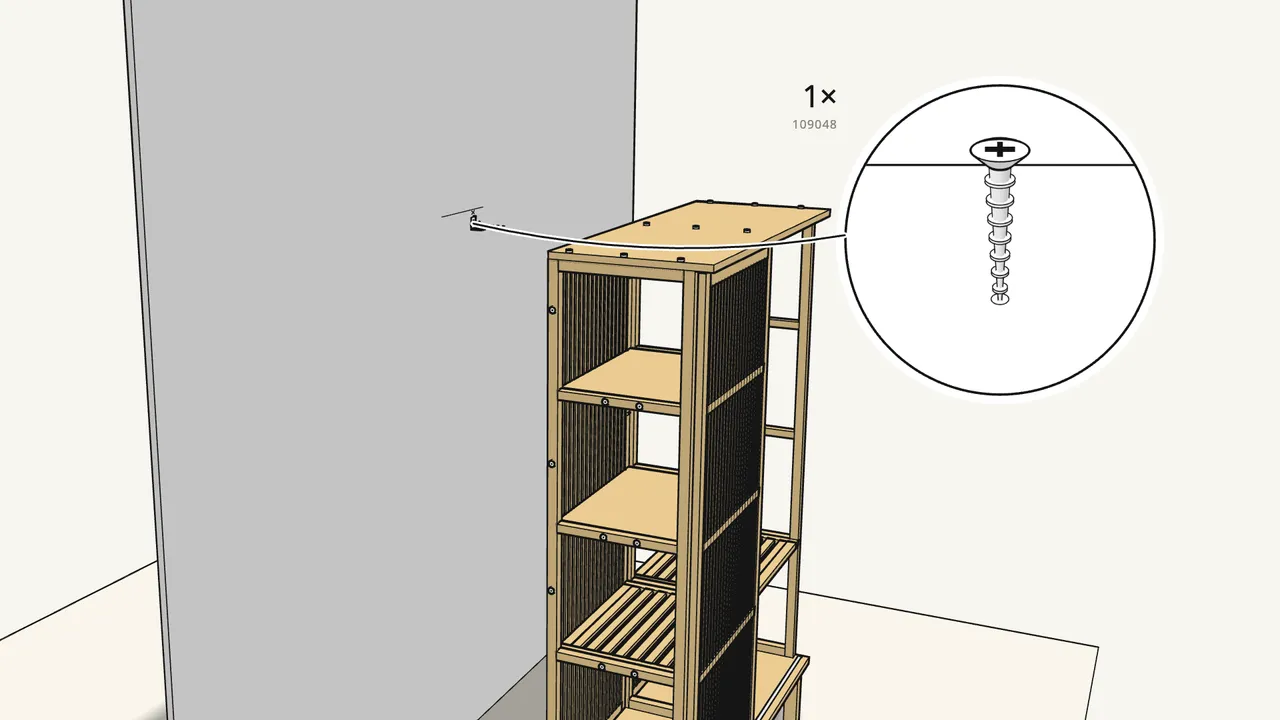
Step 21 · manual step 31–32
Pull it out. Screw the strap (107967) to the wall at the mark.
Screw 109048 + washer 100823. Plug and drill size depend on your wall — see step 31.
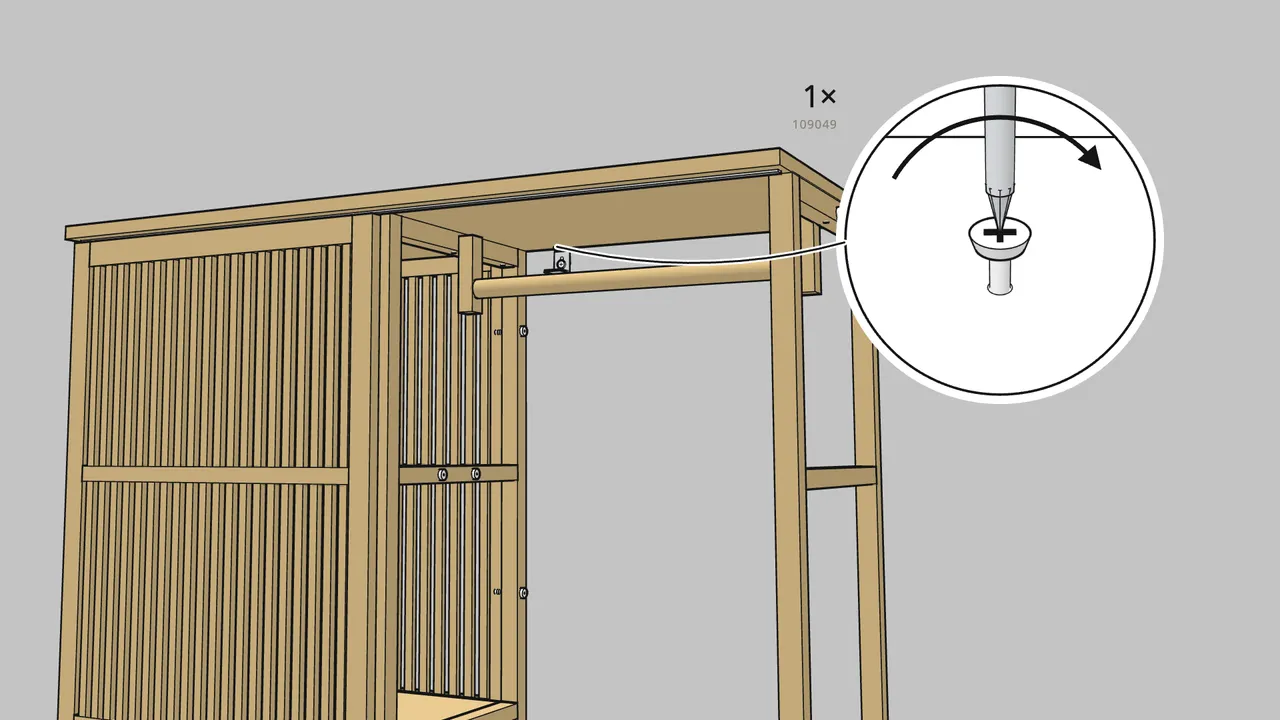
Step 22 · manual step 33
Push it back. Screw the strap under the top.
Screw 109049 with a washer (100823).
Tips & safety
- Always fix the wardrobe to the wall. Tip-over can cause serious or fatal crushing injuries. Never let children climb, sit or hang on it.
- Turn the 4 feet to level the wardrobe. Then check the door: closed, it should cover the left section evenly (info pages after step 28).
Official instructions
This guide follows IKEA’s official assembly instructions (AA-2162593-6). Keep the printed manual to hand — if anything differs, the manual is right.



