IKEA · Cabinets & Wardrobes
How to assemble IKEA IDÅSEN Cabinet with Doors and Drawers
Step-by-step IKEA IDÅSEN Cabinet with Doors and Drawers assembly: 24 illustrated steps, an animated video, the hardware list and the tools you need — following the official instructions (AA-2091158-8).
- 24 illustrated steps
- 34 steps in the manual
- 3:28 video
- 80×47×119 cm
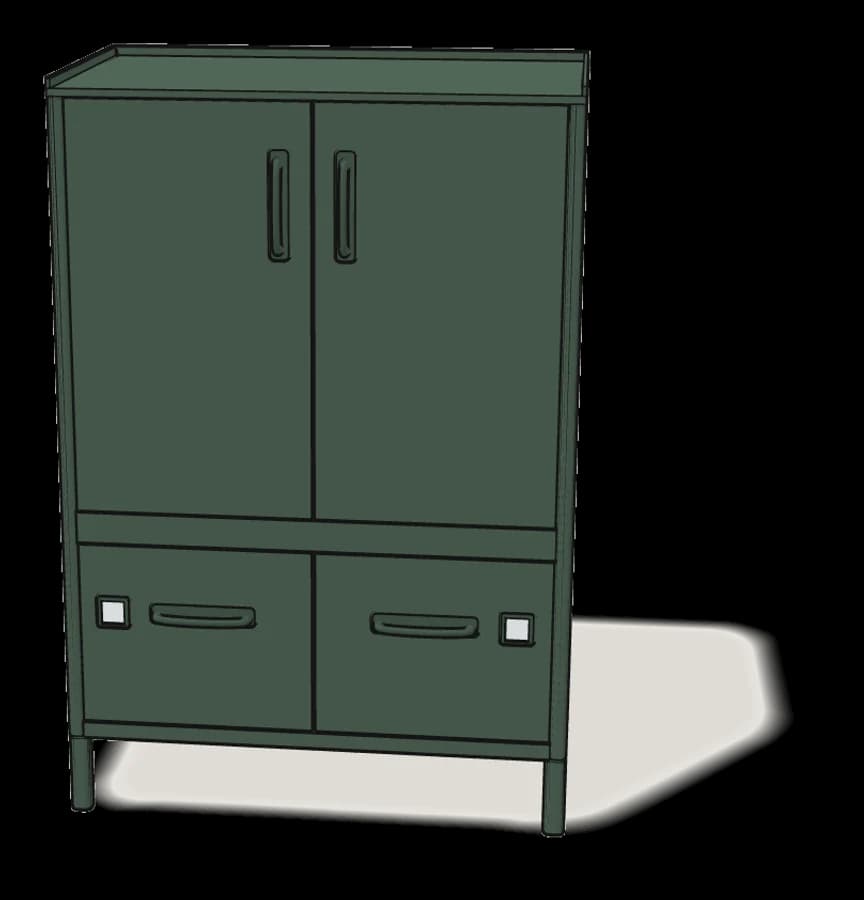
What you need
Tools
- Phillips screwdriver
- Allen key (included)
You’ll need: a cross-head screwdriver. The L-key (112830) for the hinge screws is in the box.
Hardware in the box
| Part no. (as printed in the manual) | Qty |
|---|---|
| 194732 | 20× |
| 193934 | 8× |
| 112581 | 8× |
| 193783 | 8× |
| 109535 | 8× |
| 106632 | 8× |
| 126916 | 2× |
| 133304 | 2× |
| 114594 | 8× |
Step-by-step assembly
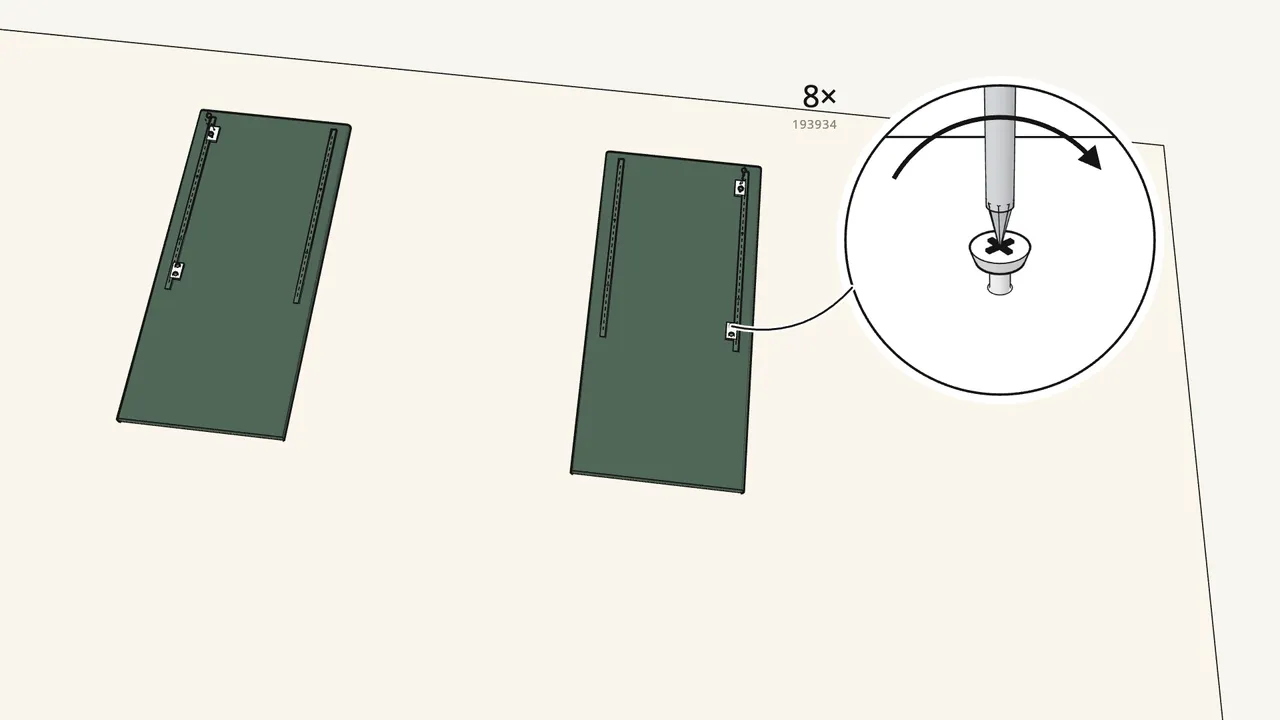
Step 1 · manual step 1–2
Screw 2 hinge plates (192555) onto each side panel.
2 screws (193934) per plate. Lay both sides flat, inside up — check the arrow on each plate.
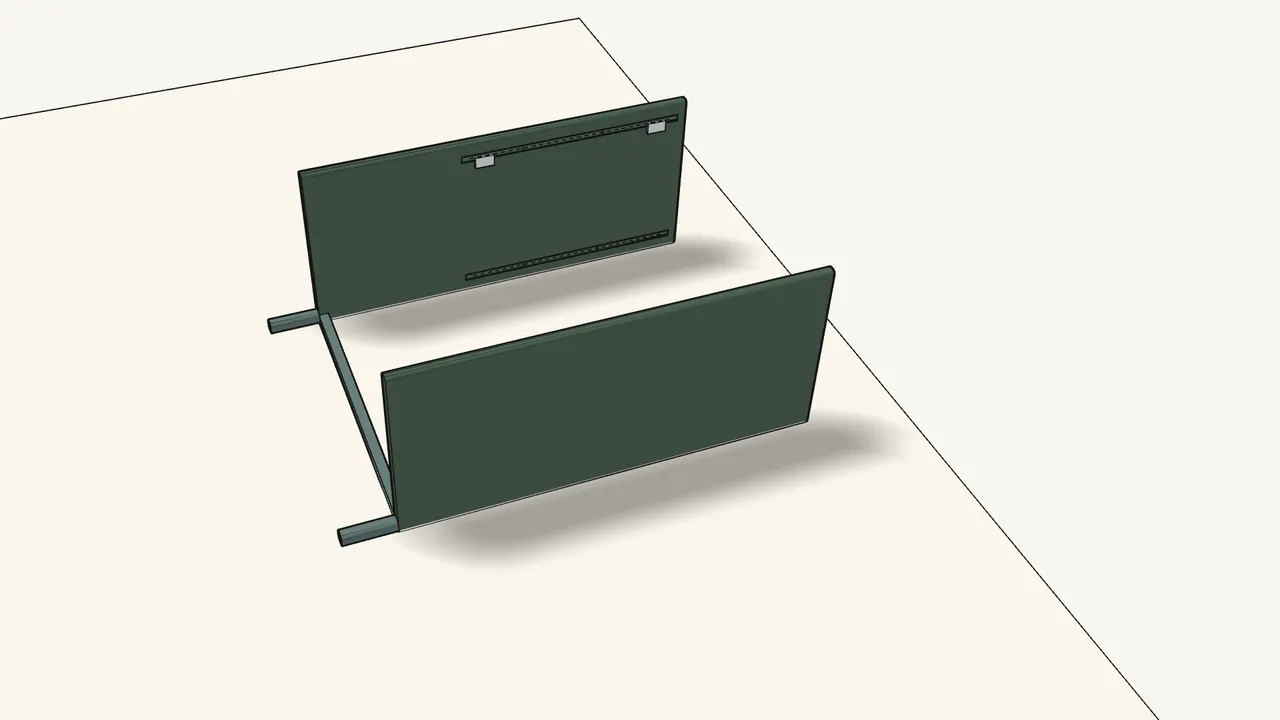
Step 2 · manual step 3
Stand the side panels on their back edges. Click in the back leg frame.
The rail with 2 legs clicks into the bottom of both sides.
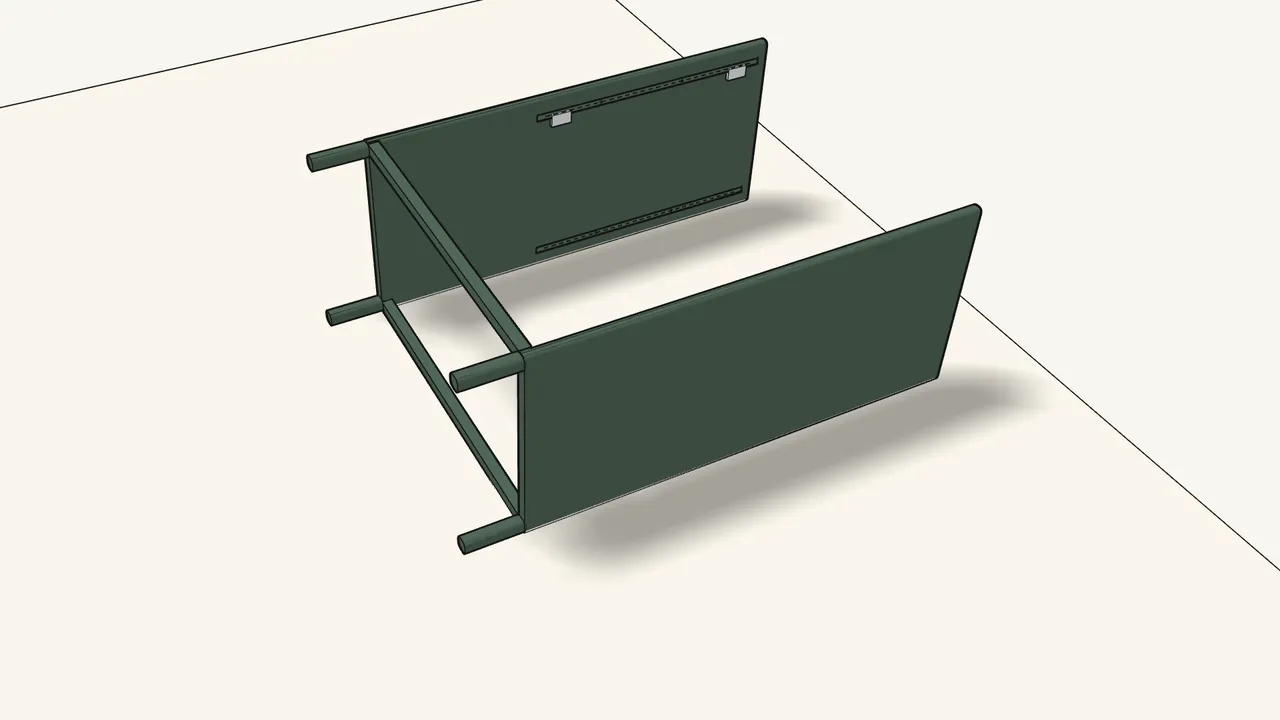
Step 3 · manual step 4
Click in the front leg frame.
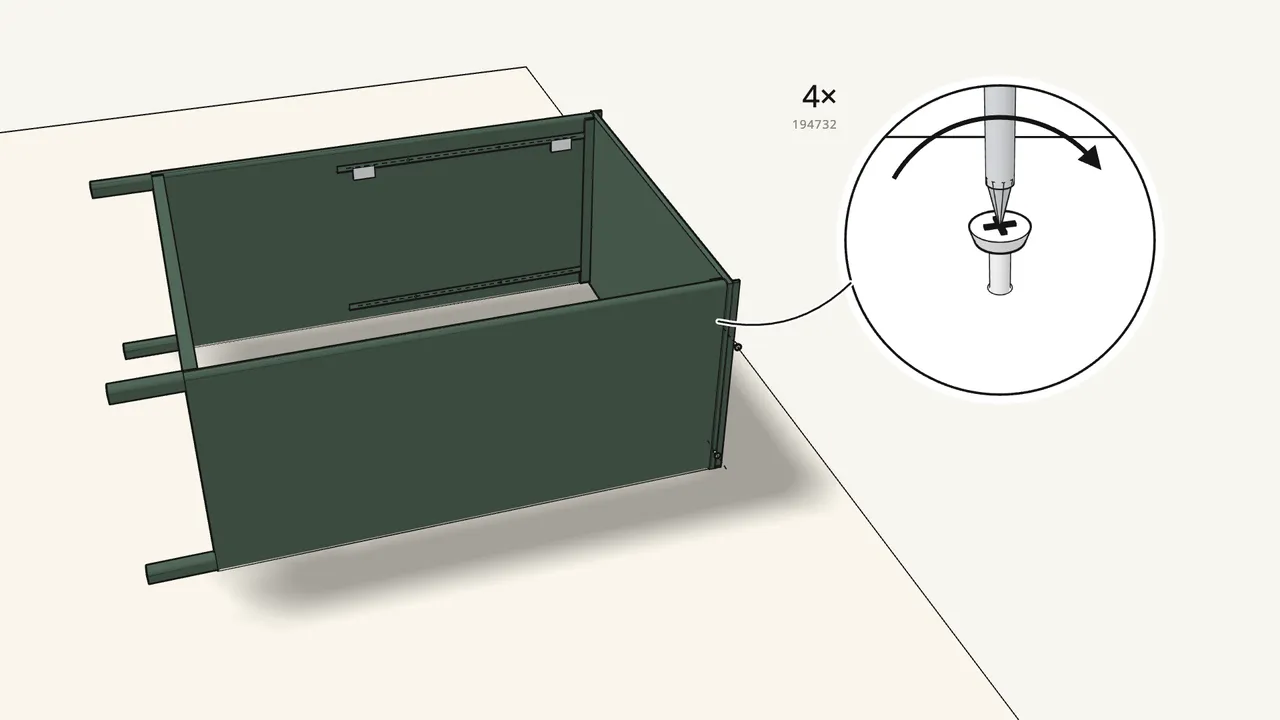
Step 4 · manual step 5–6
Slide the top onto the end. Fix it with 4 screws (194732).
2 screws through each side panel.
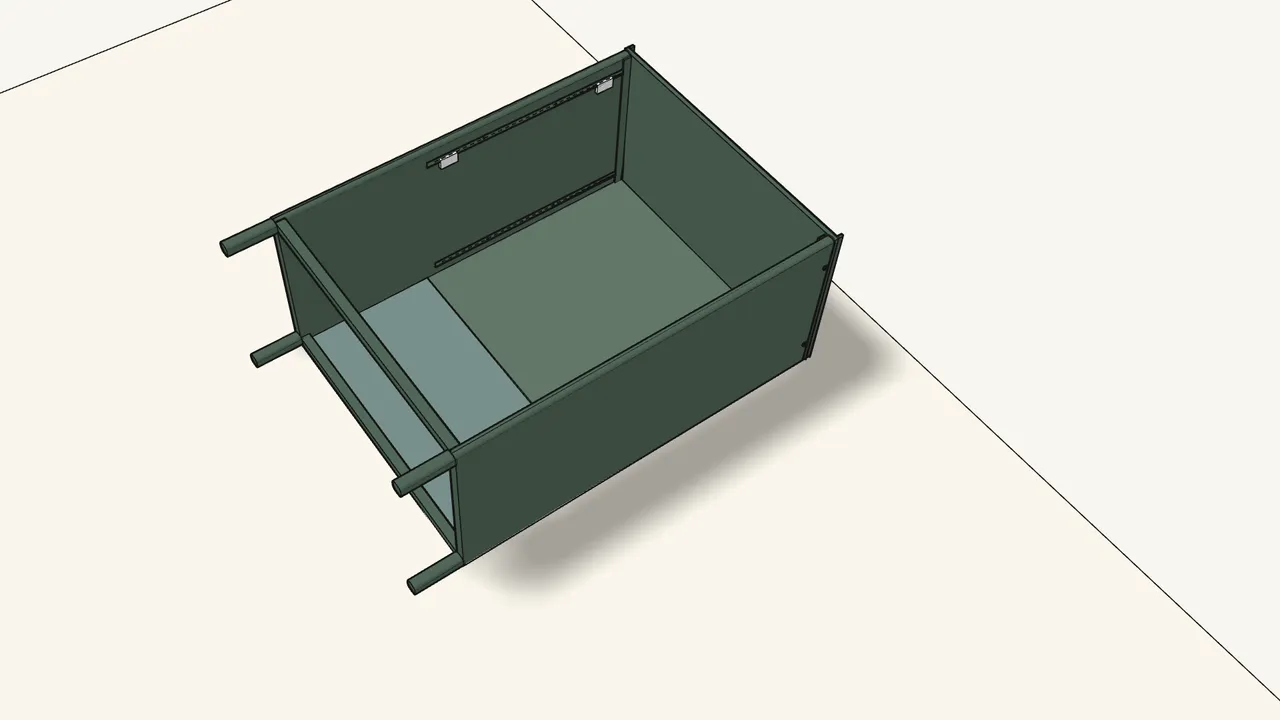
Step 5 · manual step 7–8
Lay the 2 back panels in between the sides.
The long one at the top end, the short one at the leg end.
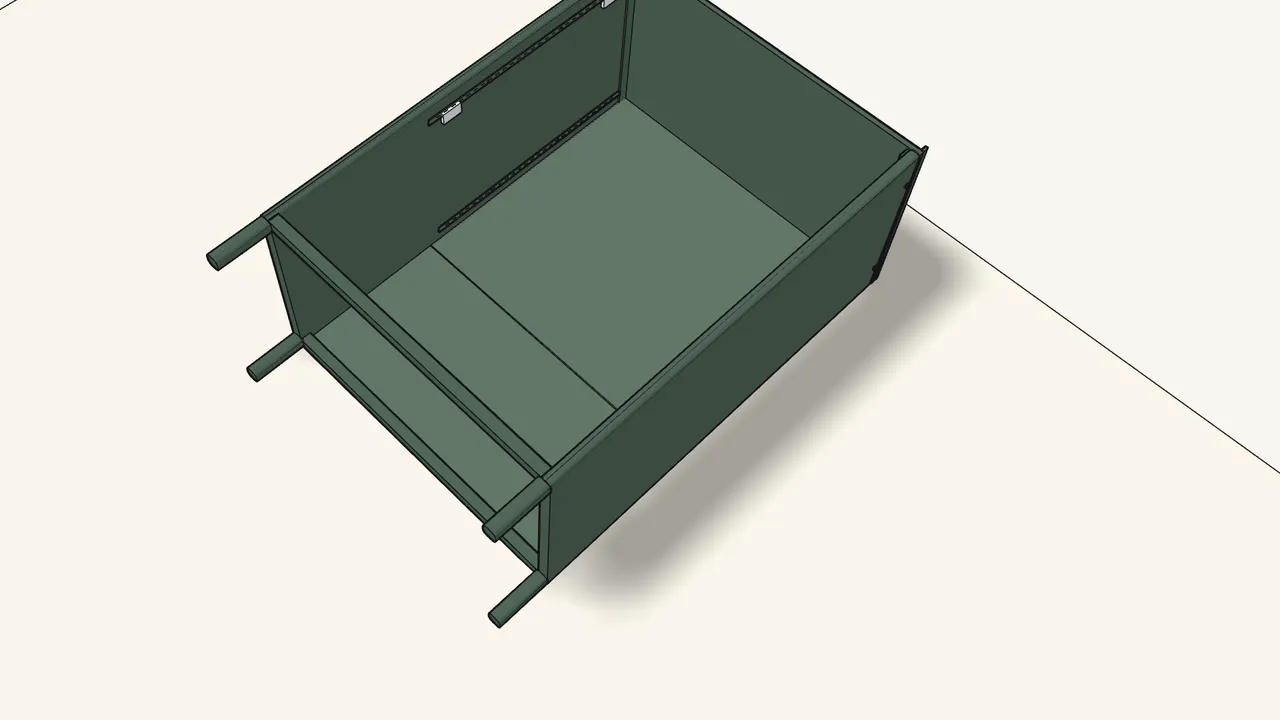
Step 6 · manual step 9
Lock the back panels: press in the 4 tabs with a screwdriver.
See the close-up in the manual, step 9.
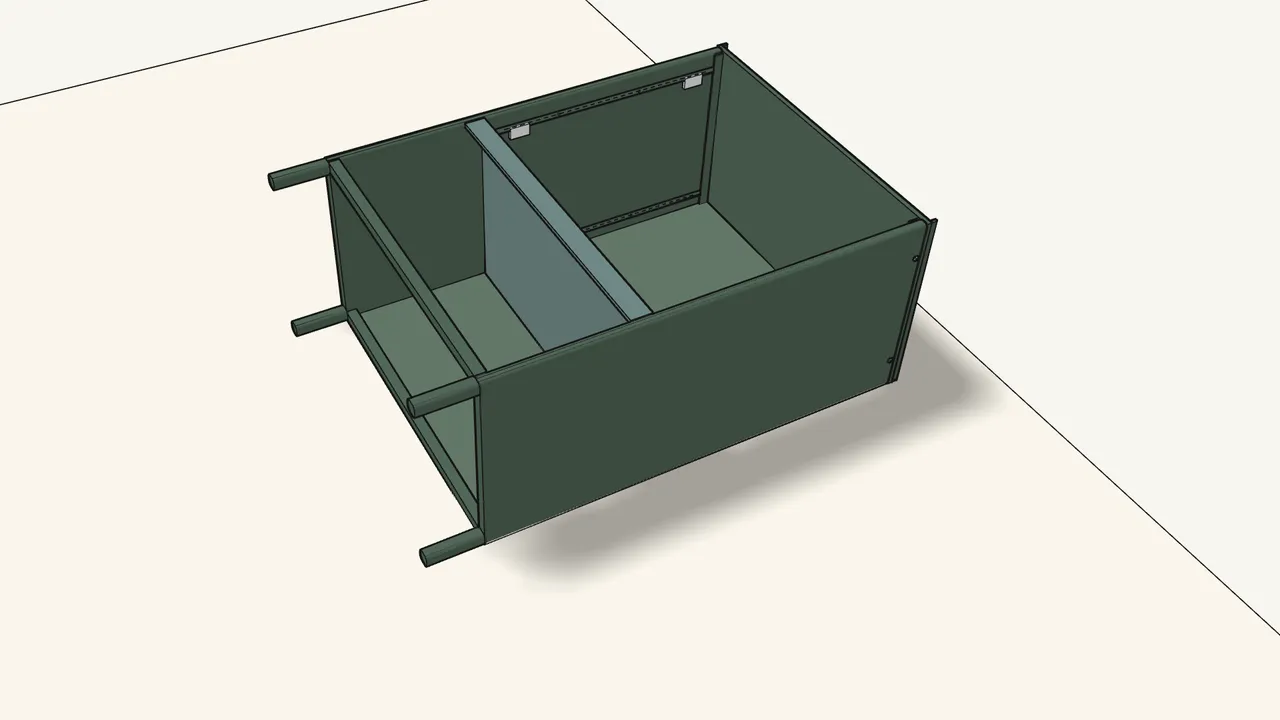
Step 7 · manual step 10
Fit the fixed shelf over the drawer section.
Hook it in at the back, then swing it up into place.
Step 8 · manual step 11–12
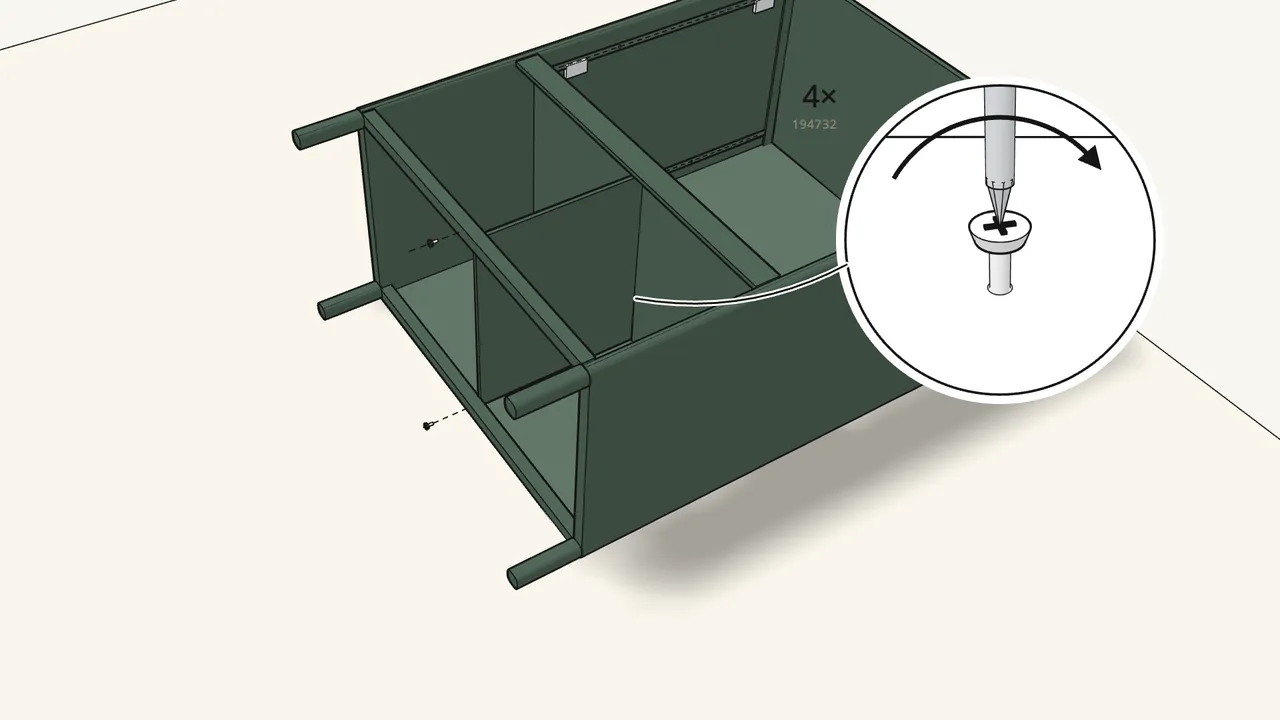
Fit the divider and fix it with 4 screws (194732).
2 through the fixed shelf, 2 through the leg frames.
Step 9 · manual step 13–14
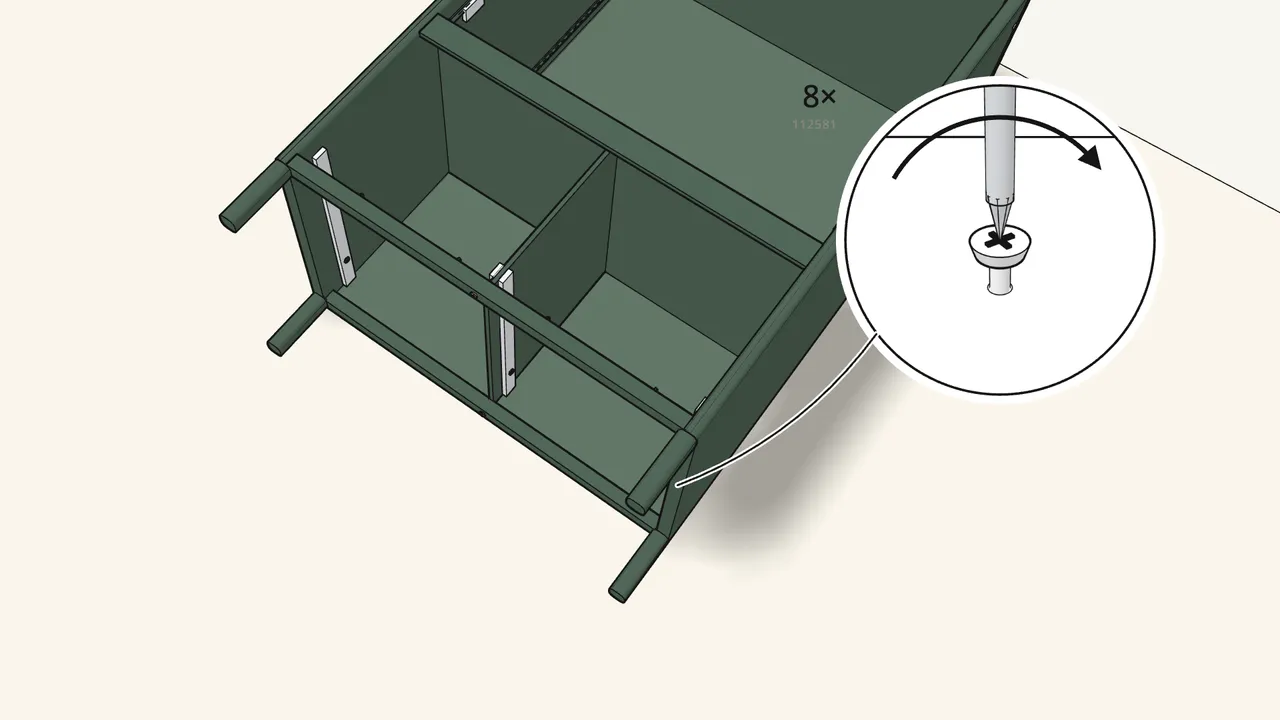
Screw in the 4 drawer runners, 2 screws (112581) each.
Runners 151127 and 151128 — the hook goes at the front.
Step 10 · manual step 14
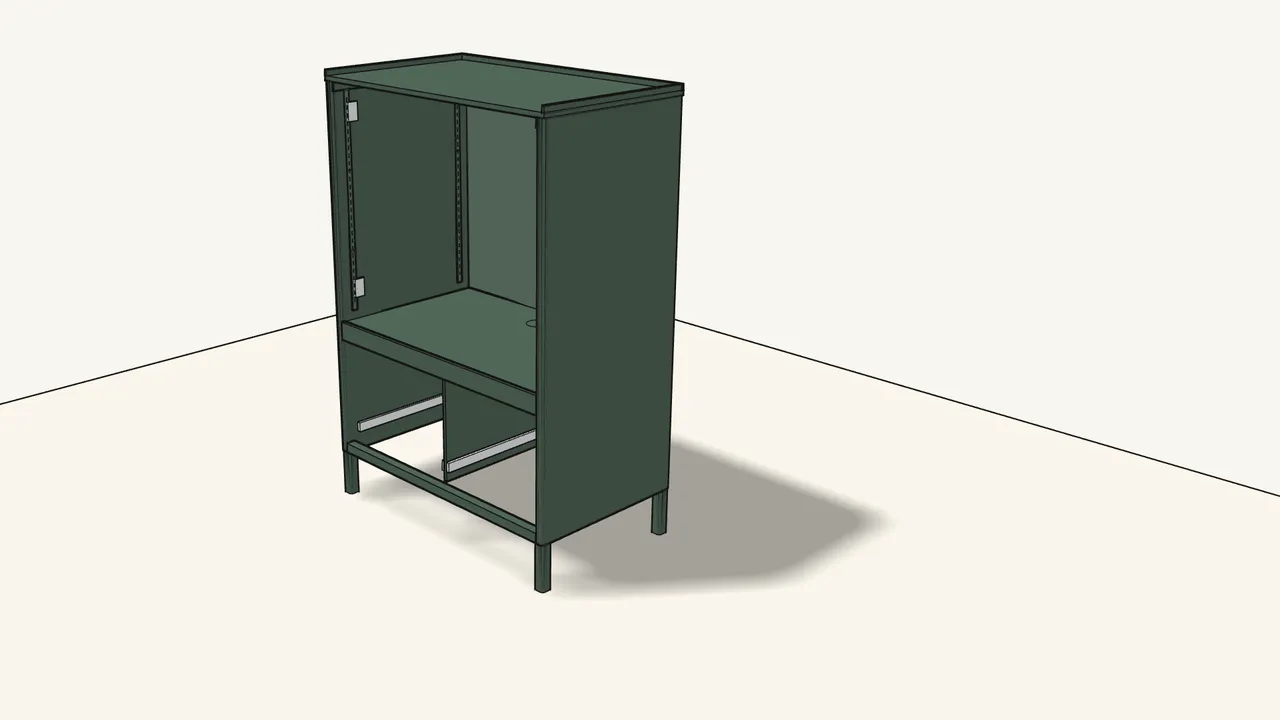
Stand the cabinet up on its legs.
Step 11 · manual step 15
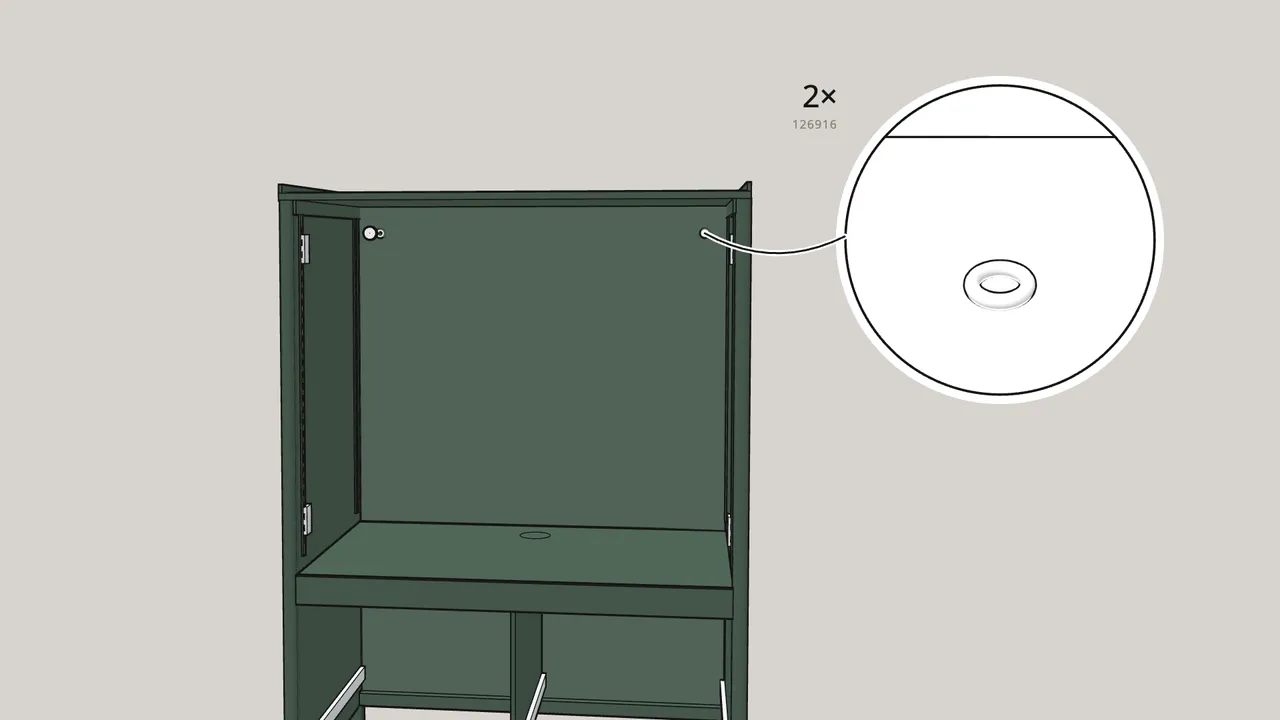
Fix the cabinet to the wall: 2 screws + washers (126916).
Wall screws are not included. Then click on the 2 covers (133304).
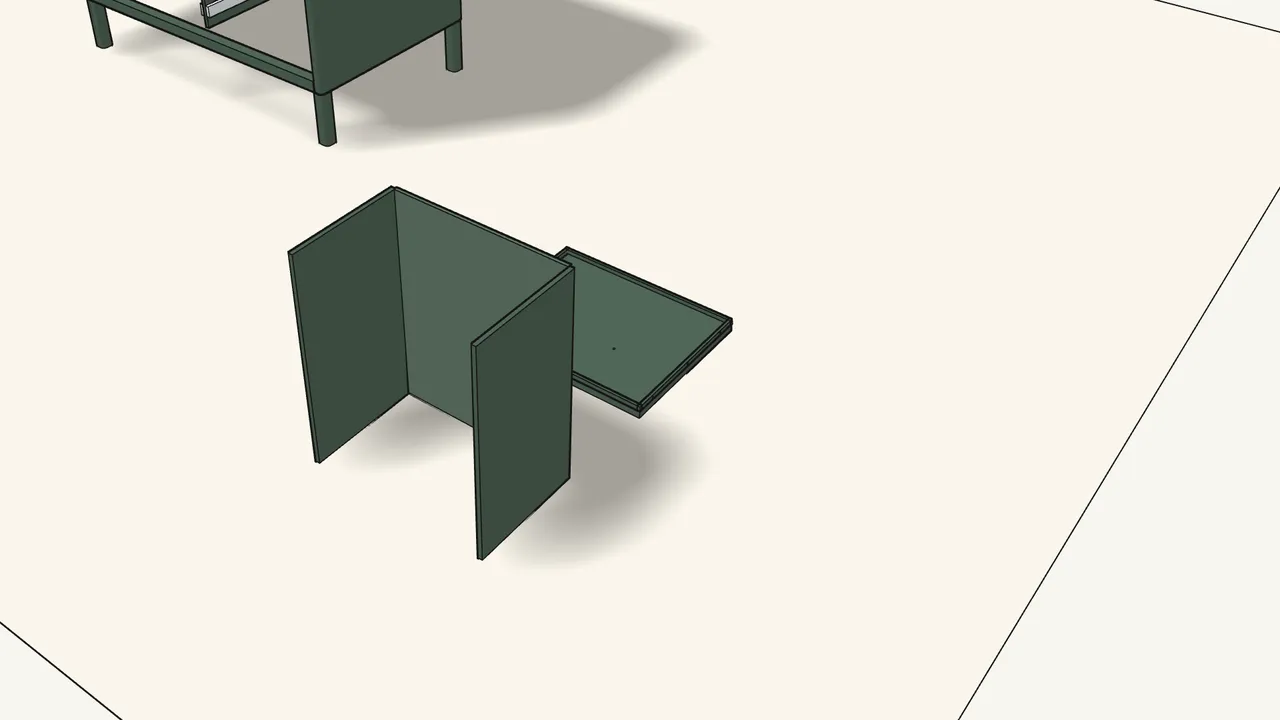
Step 12 · manual step 17–18
Drawer: hook the 2 sides onto the bottom panel.
Press down so the hooks lock. Build one drawer at a time.
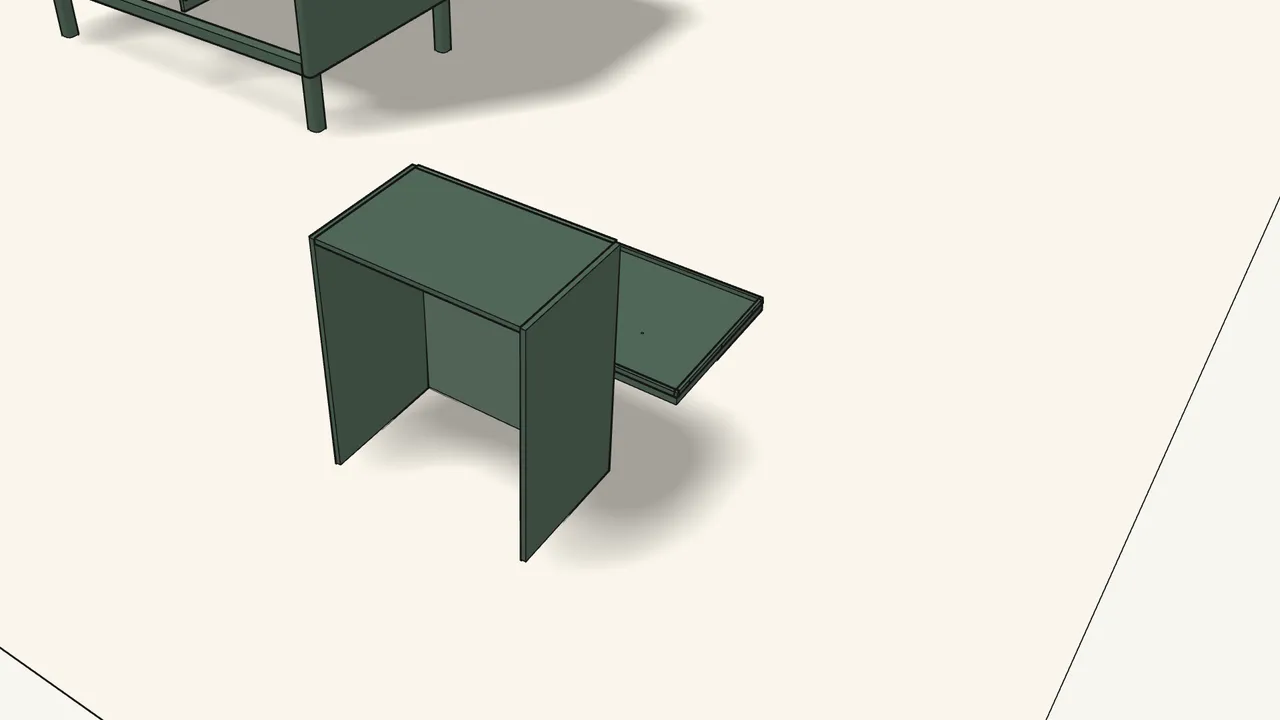
Step 13 · manual step 19–20
Press the back into the top and bend the 6 tabs.
Use the screwdriver tip on the tabs — see the manual, step 20.
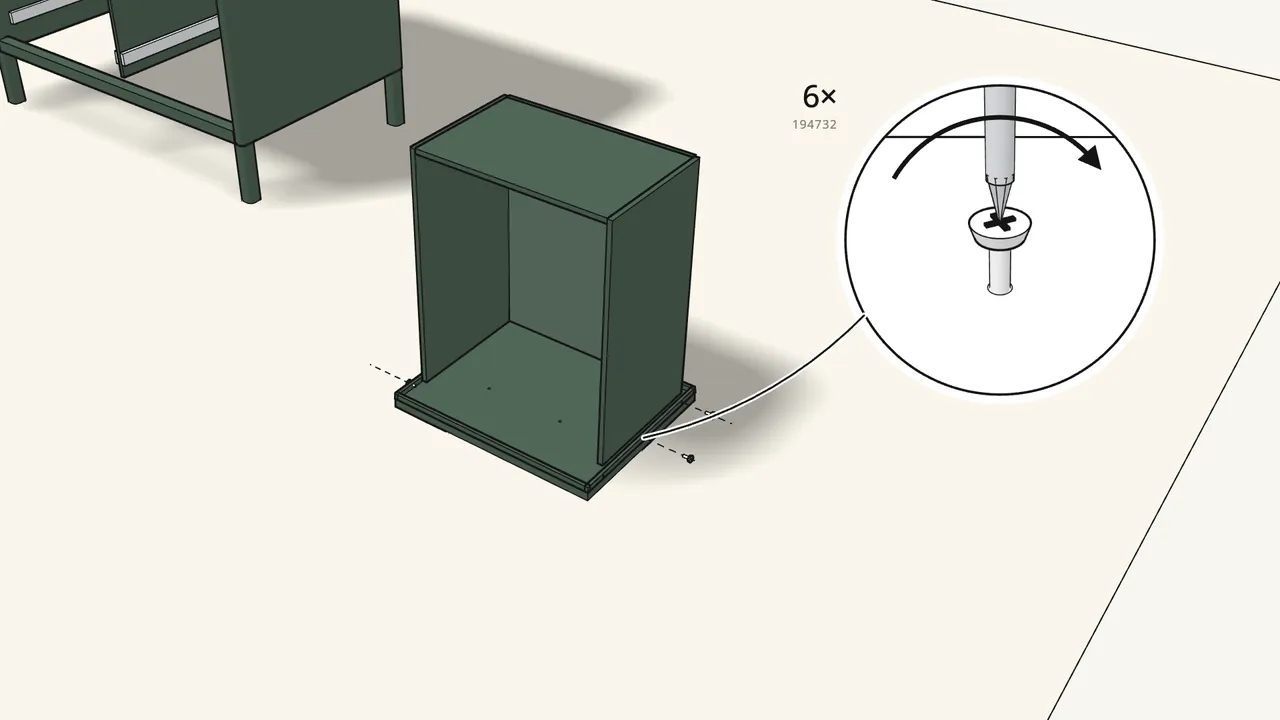
Step 14 · manual step 21–22
Set the box onto the drawer front. Fix it with 6 screws (194732).
The front lies face down on the rug.
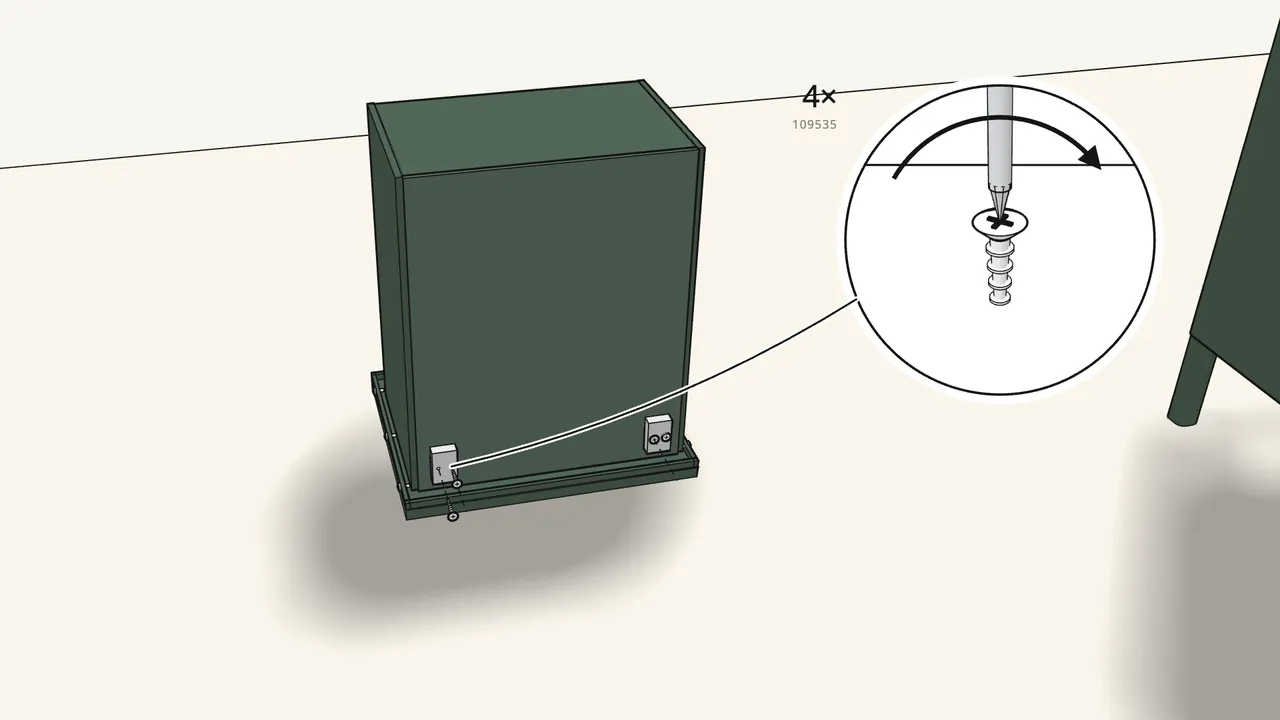
Step 15 · manual step 23
Turn it around. Screw on the drawer locks R and L.
2 screws (109535) each. 193736 (R) and 193737 (L) — check the letters.
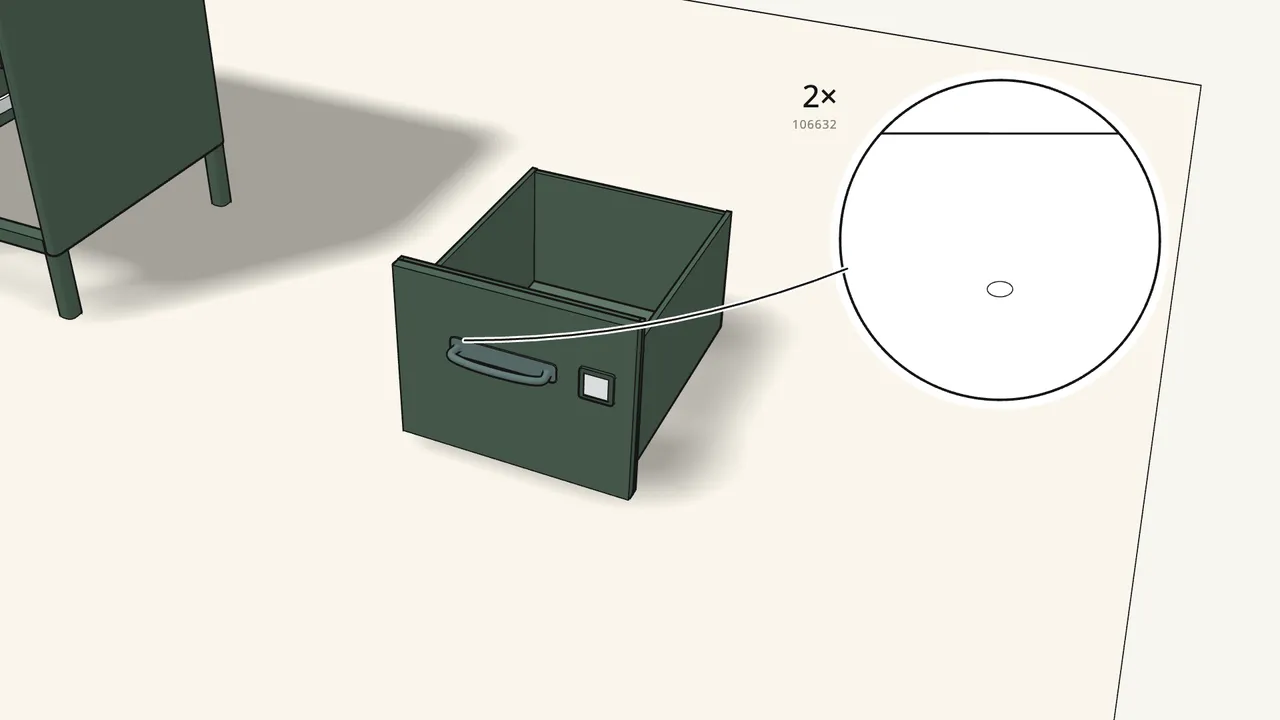
Step 16 · manual step 24–25
Turn the drawer upright. Click in the label holder, fit the handle.
Handle with 2 screws (106632) from the inside.
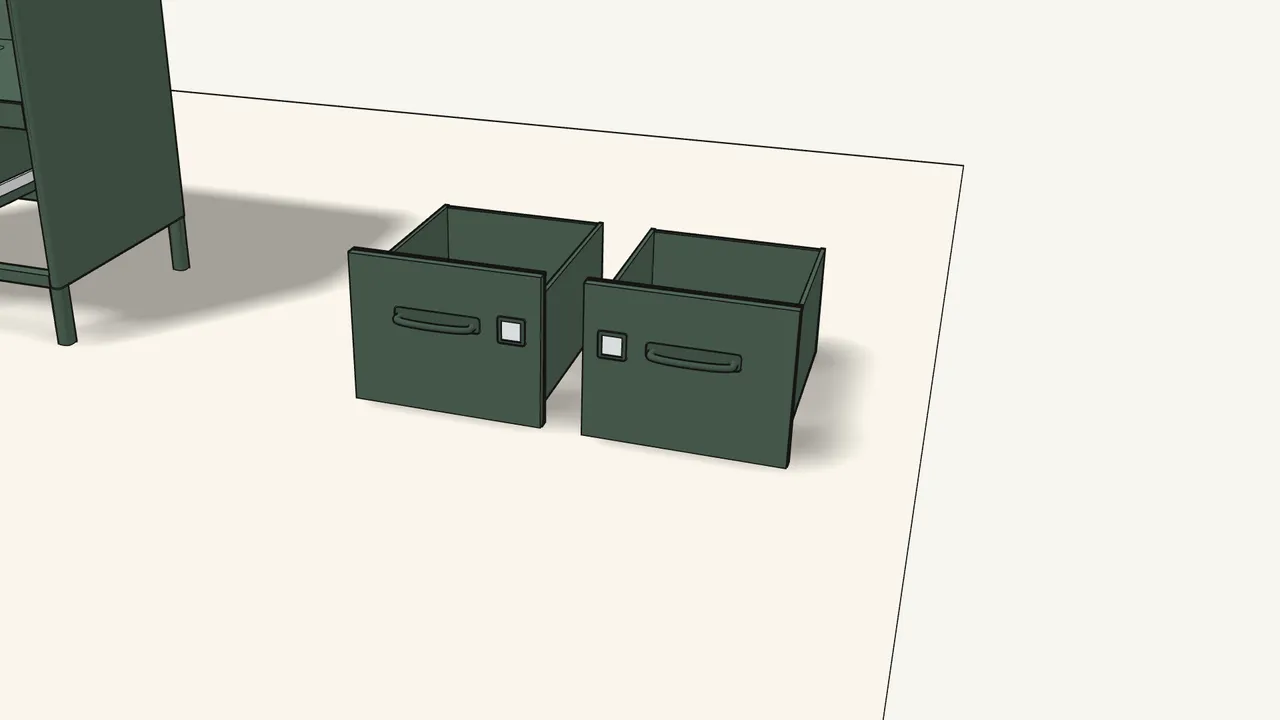
Step 17 · manual step 17–25
Build the second drawer the same way.
Its label holder and handle are mirrored — see the manual, step 24.
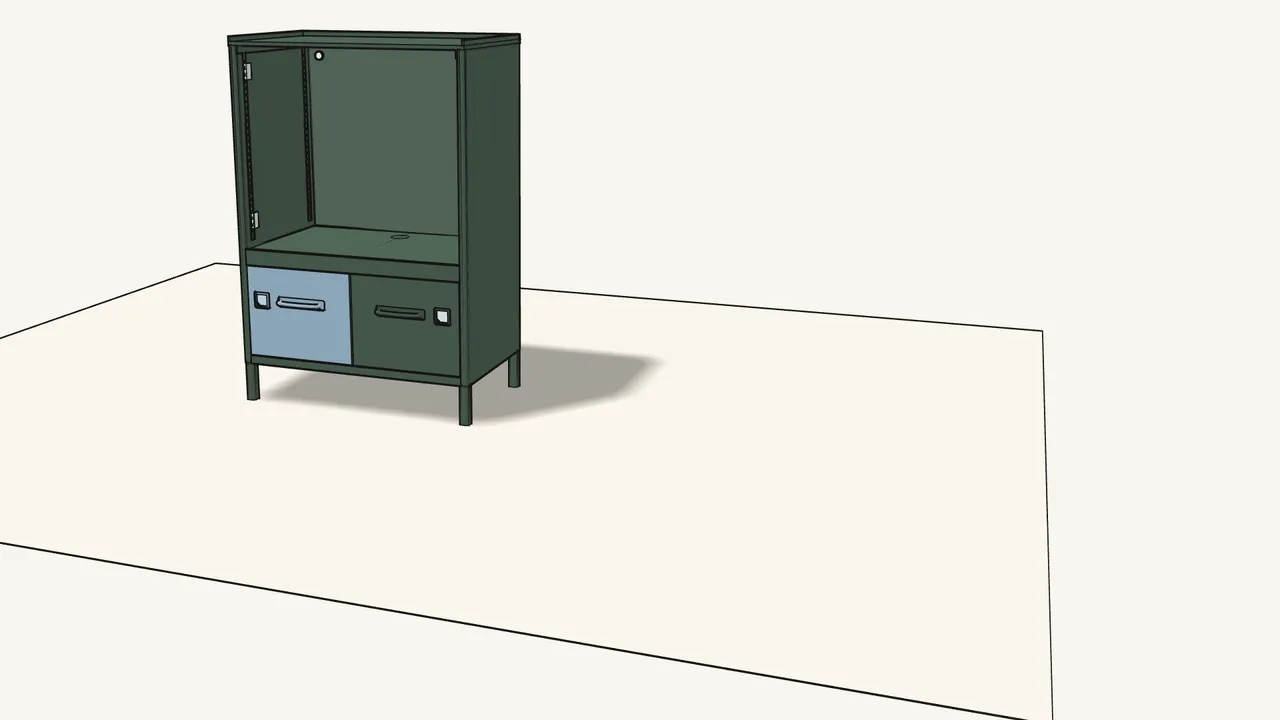
Step 18 · manual step 26
Push both drawers onto the runners until they click.
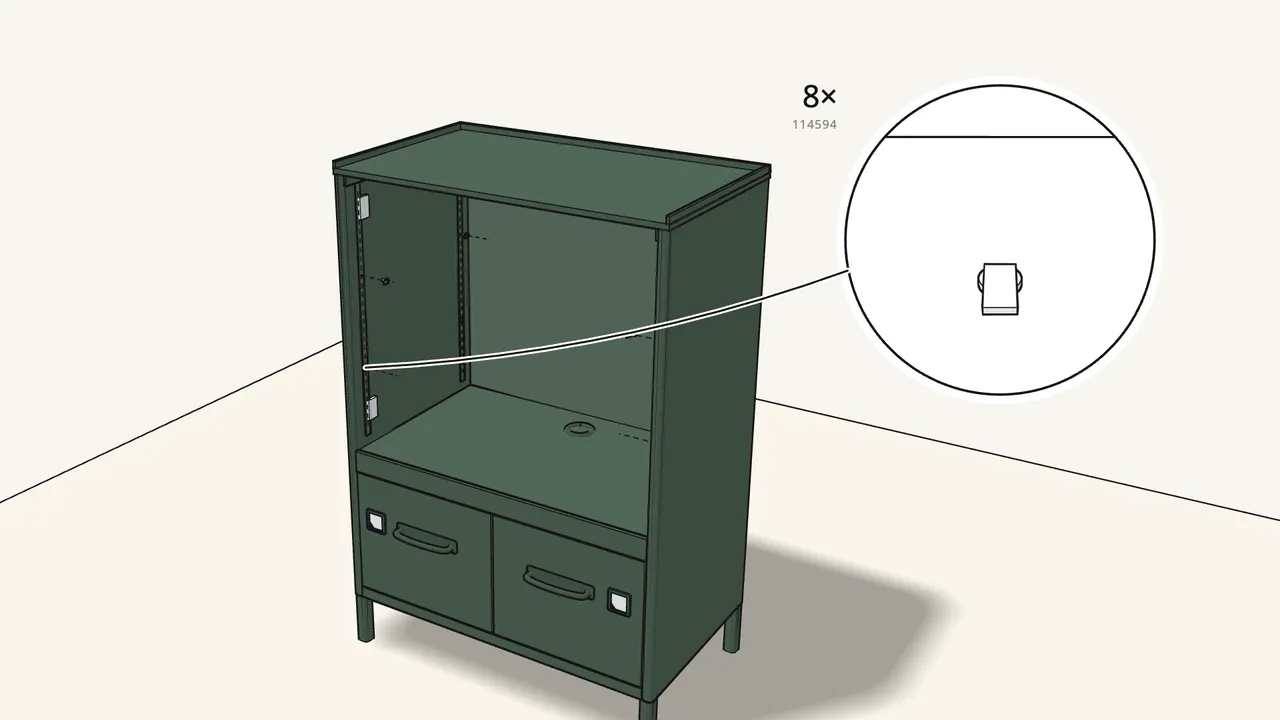
Step 19 · manual step 27–28
Press the grommet into the fixed shelf. Clip in 8 shelf supports.
Supports 114594 hook into the slotted strips — 4 per shelf.
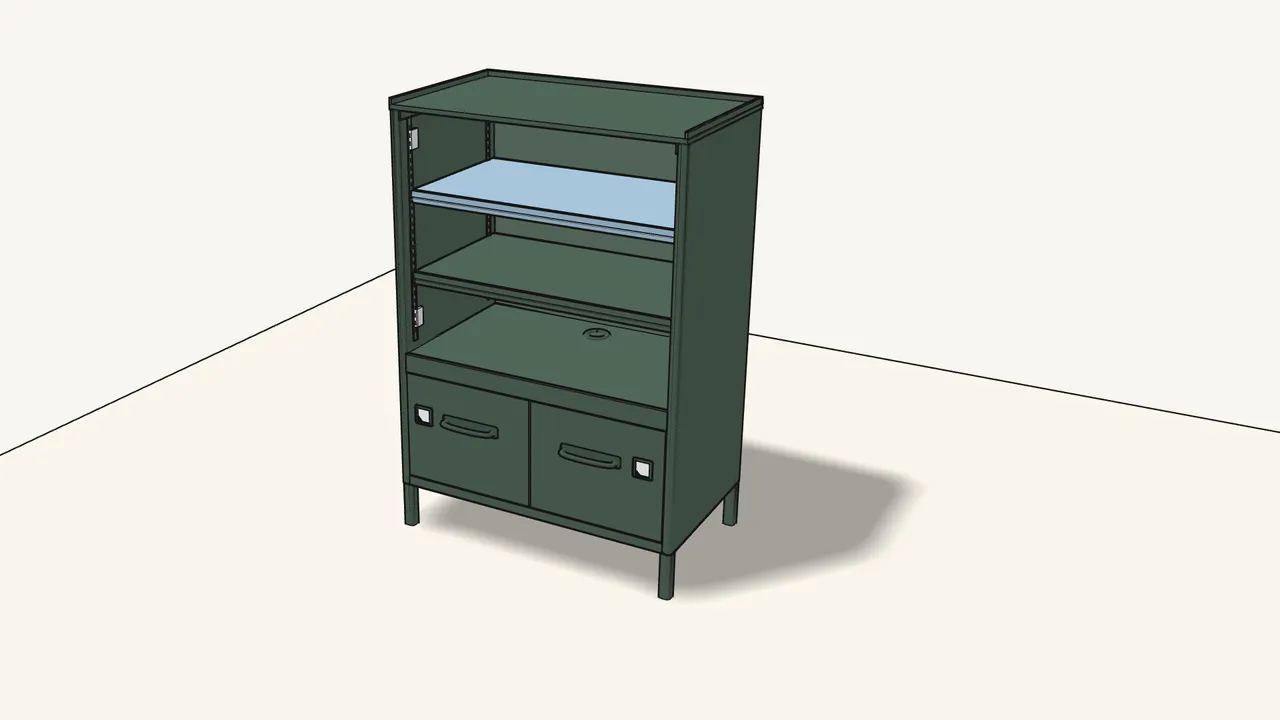
Step 20 · manual step 29–30
Put in the 2 shelves.
Tilt each one in, then lay it down on its supports.
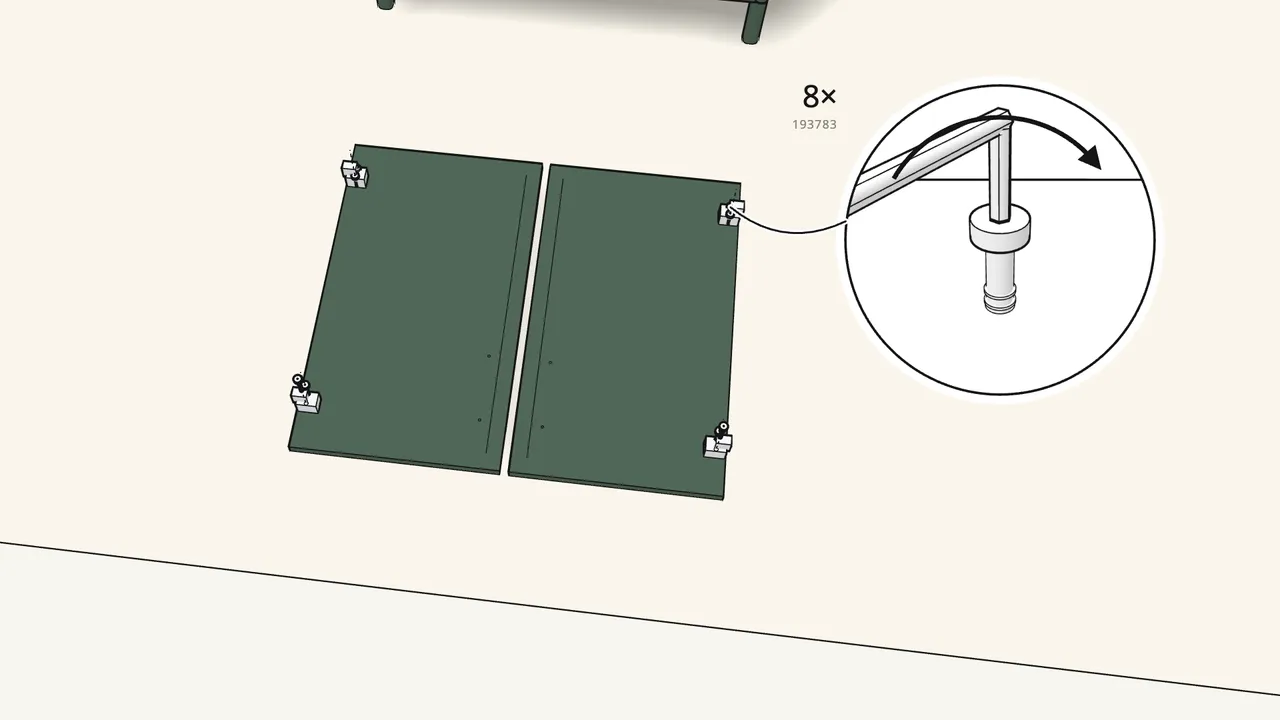
Step 21 · manual step 31–32
Doors face down: fit the hinges, 2 screws (193783) each.
Use the L-key. Hinges 191117 on one door, 192527 on the other.
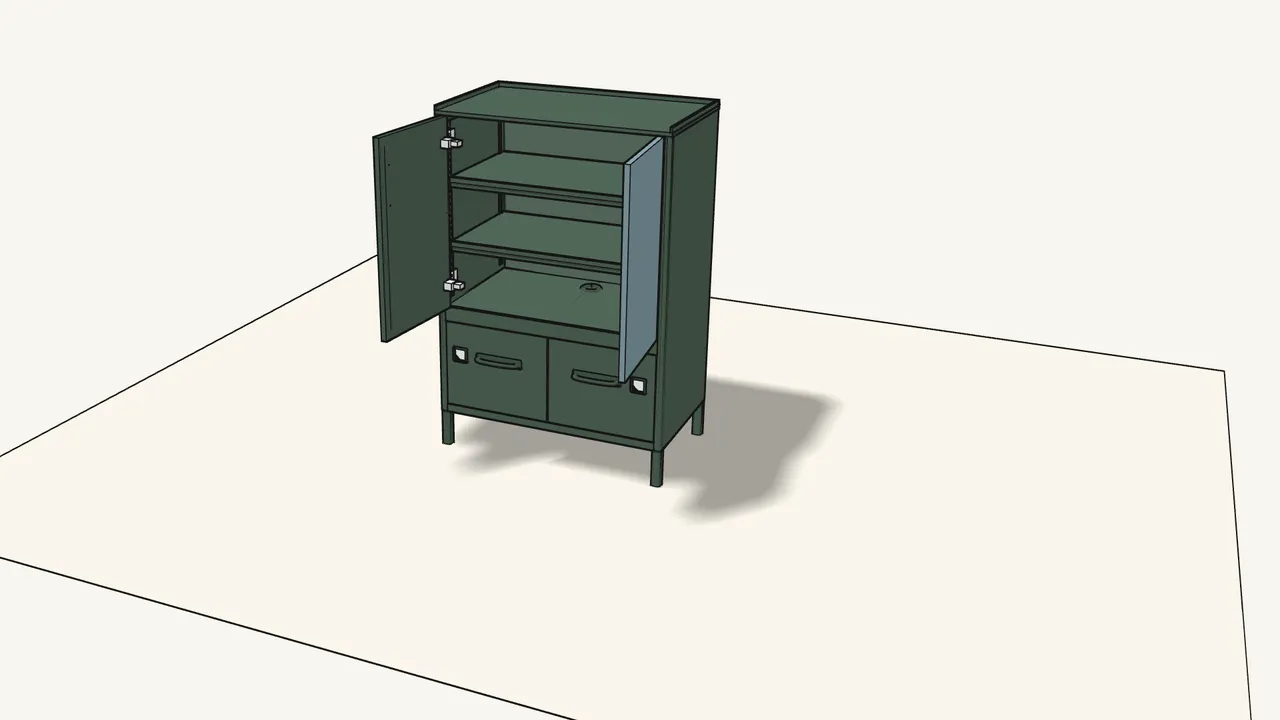
Step 22 · manual step 33
Click the doors onto the hinge plates.
Hook the hinge on at the front, then press the back until it clicks.
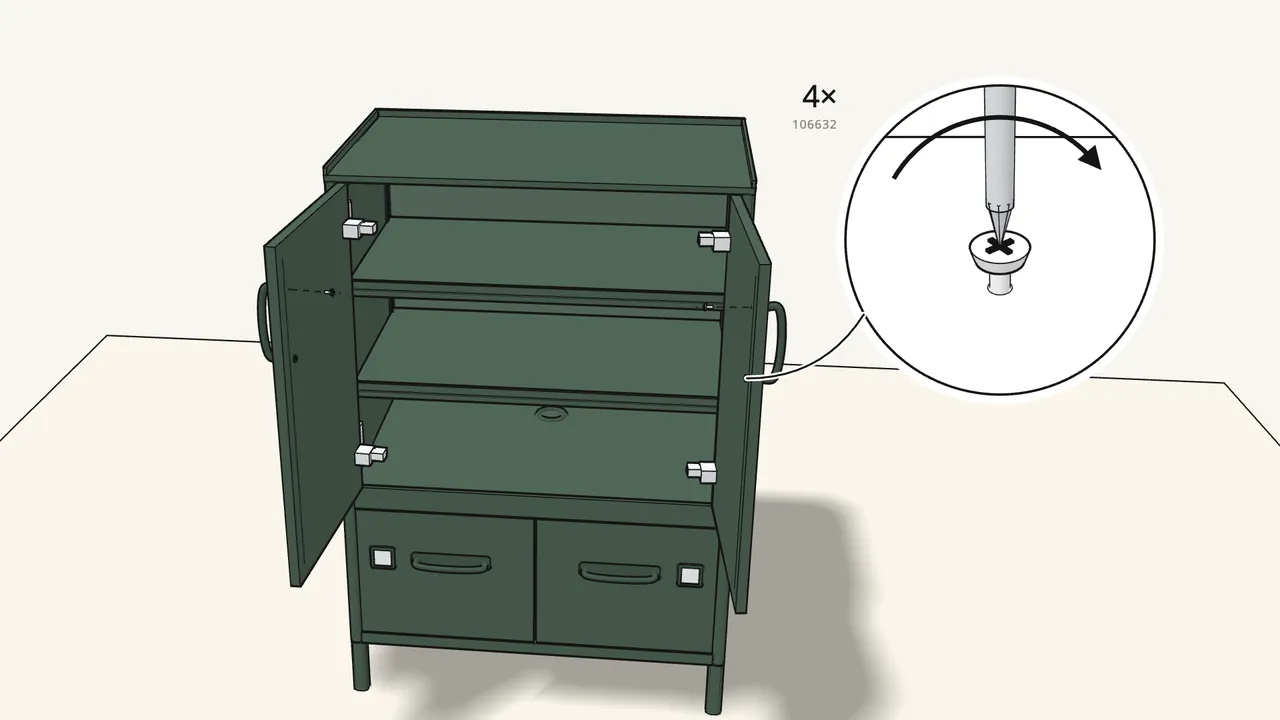
Step 23 · manual step 34
Fit the 2 door handles, 2 screws (106632) each.
The screws go in from the inside of the door.
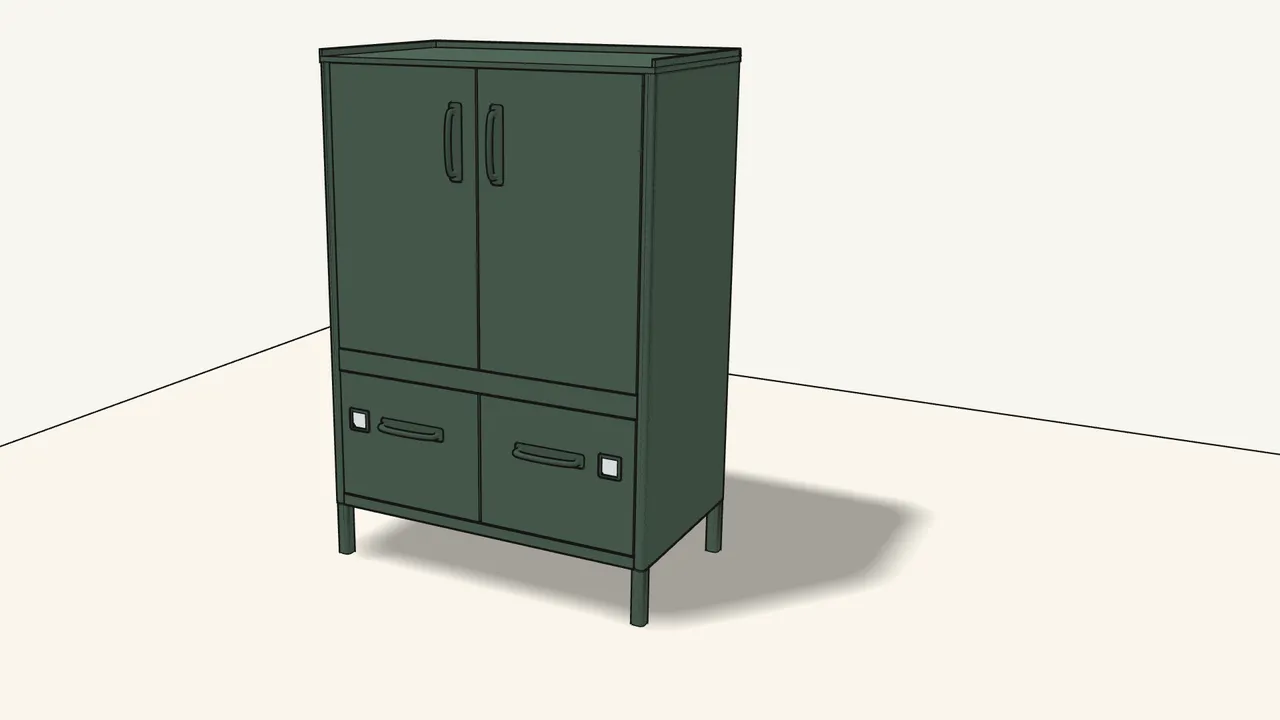
Step 24
Close the doors — done.
Tips & safety
- Always fix IDÅSEN to the wall. Furniture tip-over can cause serious or fatal crushing injuries. Wall screws and plugs are not included.
- Wall with a skirting board? Fit the 2 spacers (190233 + 190232) at the back so the cabinet stands straight — see the manual, steps 15–16.
- Doors not level? Adjust them with the screws on the hinges — see the manual, p. 35.
Official instructions
This guide follows IKEA’s official assembly instructions (AA-2091158-8). Keep the printed manual to hand — if anything differs, the manual is right.



