IKEA · Cabinets & Wardrobes
How to assemble IKEA GALANT Cabinet with Doors
Step-by-step IKEA GALANT Cabinet with Doors assembly: 23 illustrated steps, an animated video, the hardware list and the tools you need — following the official instructions (AA-2020852-3).
- 23 illustrated steps
- 26 steps in the manual
- 3:23 video
- 80×45×120 cm
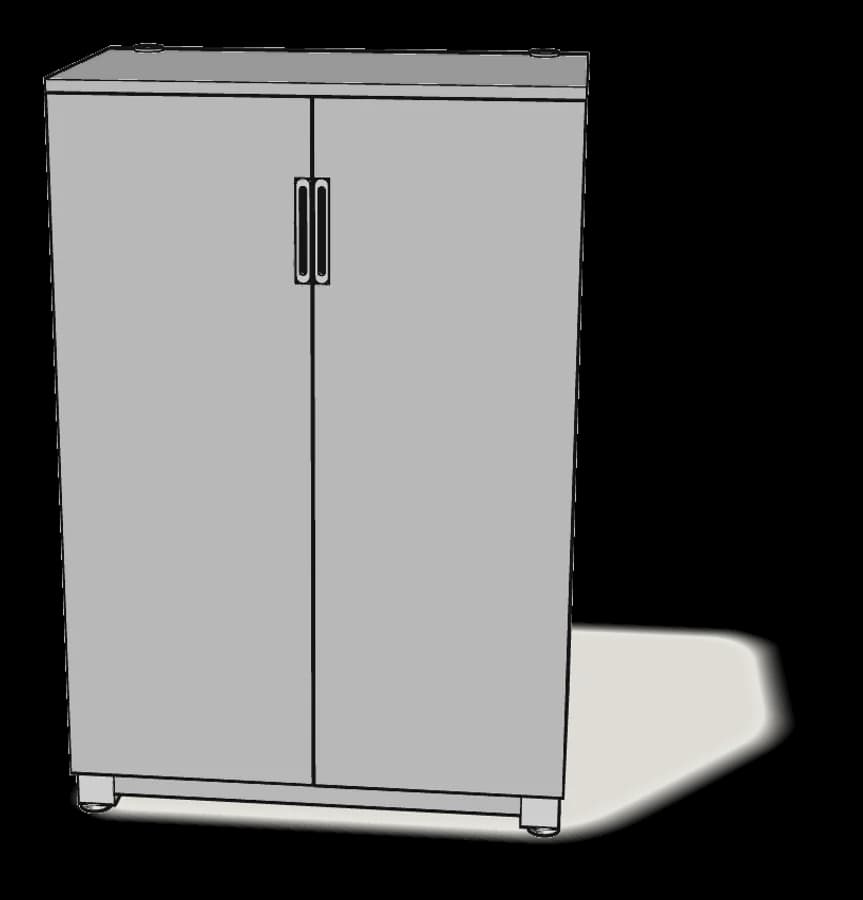
What you need
Tools
- Flat-head screwdriver
- Phillips screwdriver
You’ll need a flat-head and a Phillips screwdriver. The Allen key (100006) is in the box.
Hardware in the box
| Part no. (as printed in the manual) | Qty |
|---|---|
| 118331 | 12× |
| 101350 | 8× |
| 101345 | 2× |
| 119253 | 8× |
| 121762 | 8× |
| 109503 | 12× |
| 119030 | 4× |
| 130887 | 4× |
| 130885 | 4× |
| 146680 | 4× |
| 158452 | 2× |
| 139237 | 2× |
| 100347 | 4× |
| 122166 | 4× |
| 150578 | 2× |
| 122167 | 6× |
Step-by-step assembly
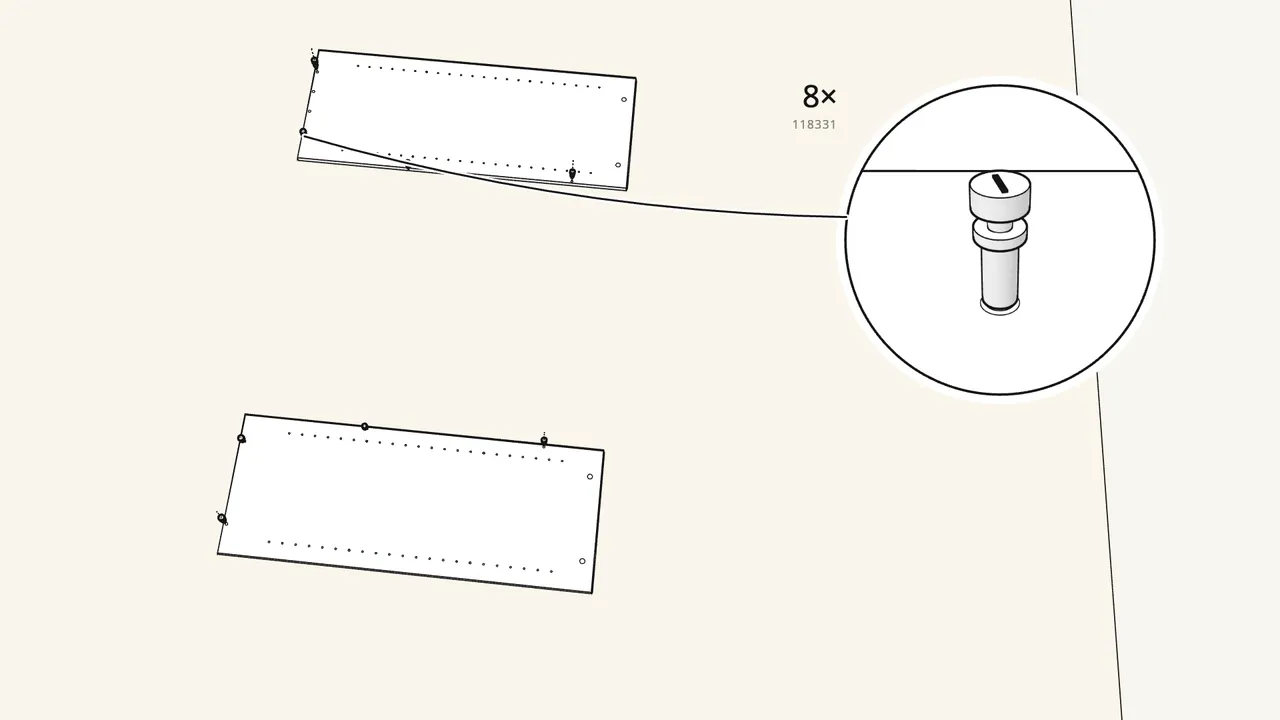
Step 1
Screw 8 cam bolts (118331) into the 2 side panels.
4 in each side, on the inner face (the one with the rows of shelf holes).
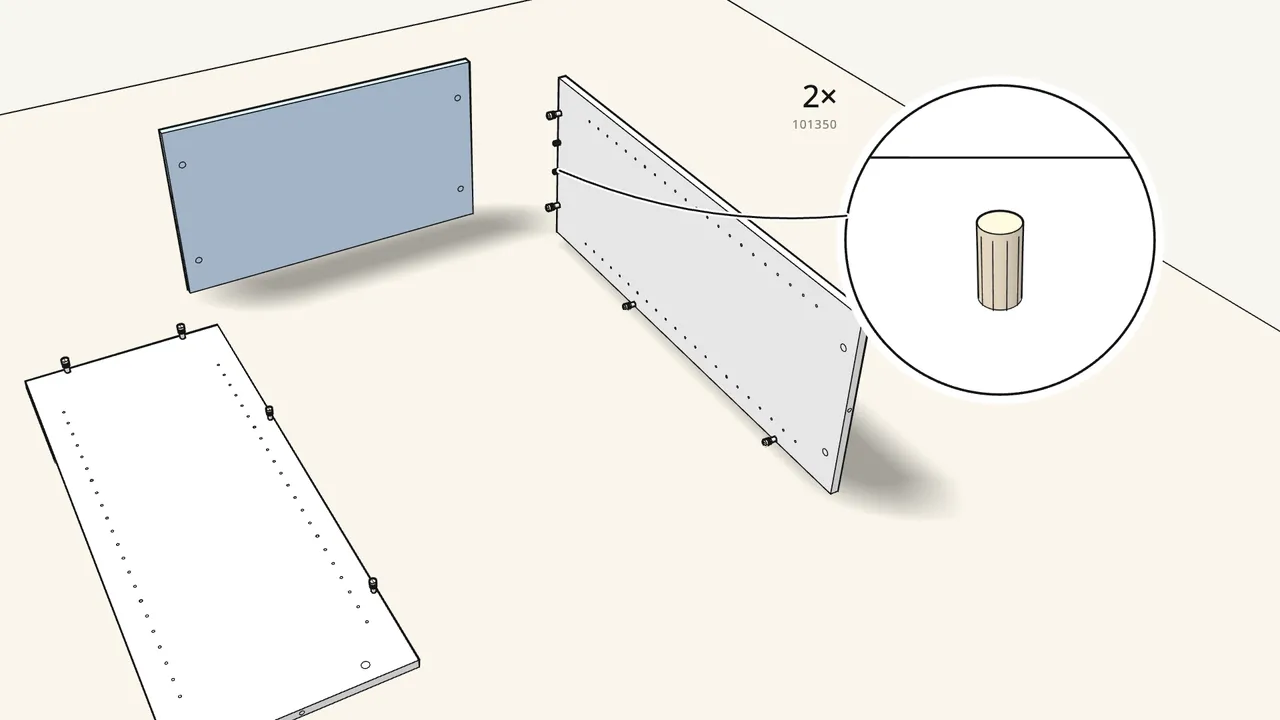
Step 2
Stand one side on its back edge, push in 2 dowels and fit the bottom.
Use the long 101350 dowels here, not the short 101345 ones.
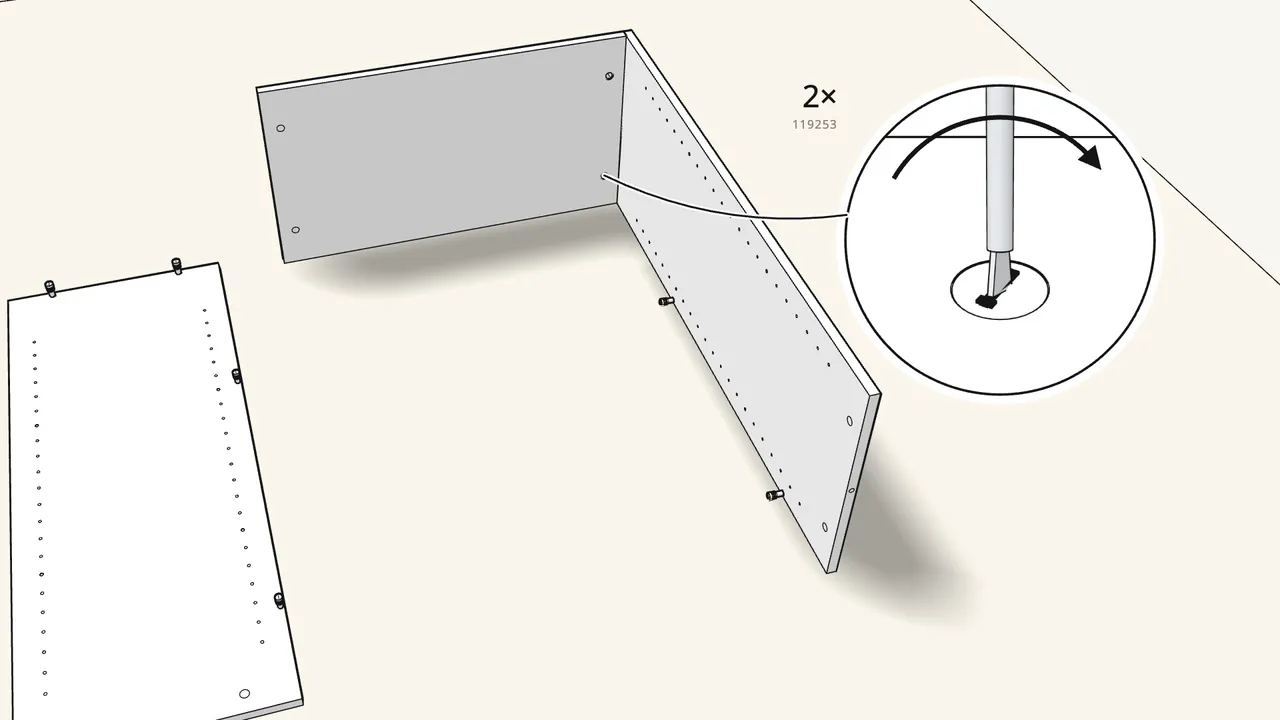
Step 3
Insert 2 cam locks (119253) in the bottom panel and turn them clockwise.
Use the 119253 locks here — the 119030 ones come later.
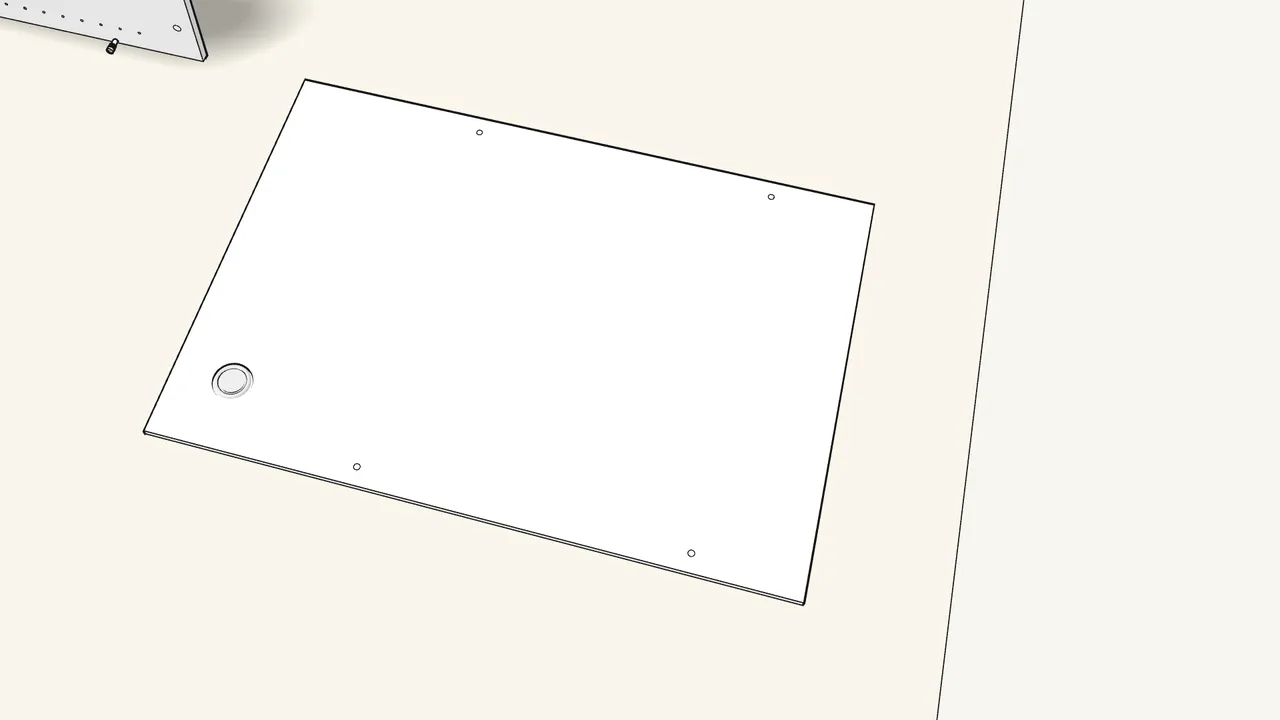
Step 4
Click the cable grommet into the hole in the back panel.
Press the two halves (158597, 158599) together from each side until they click.
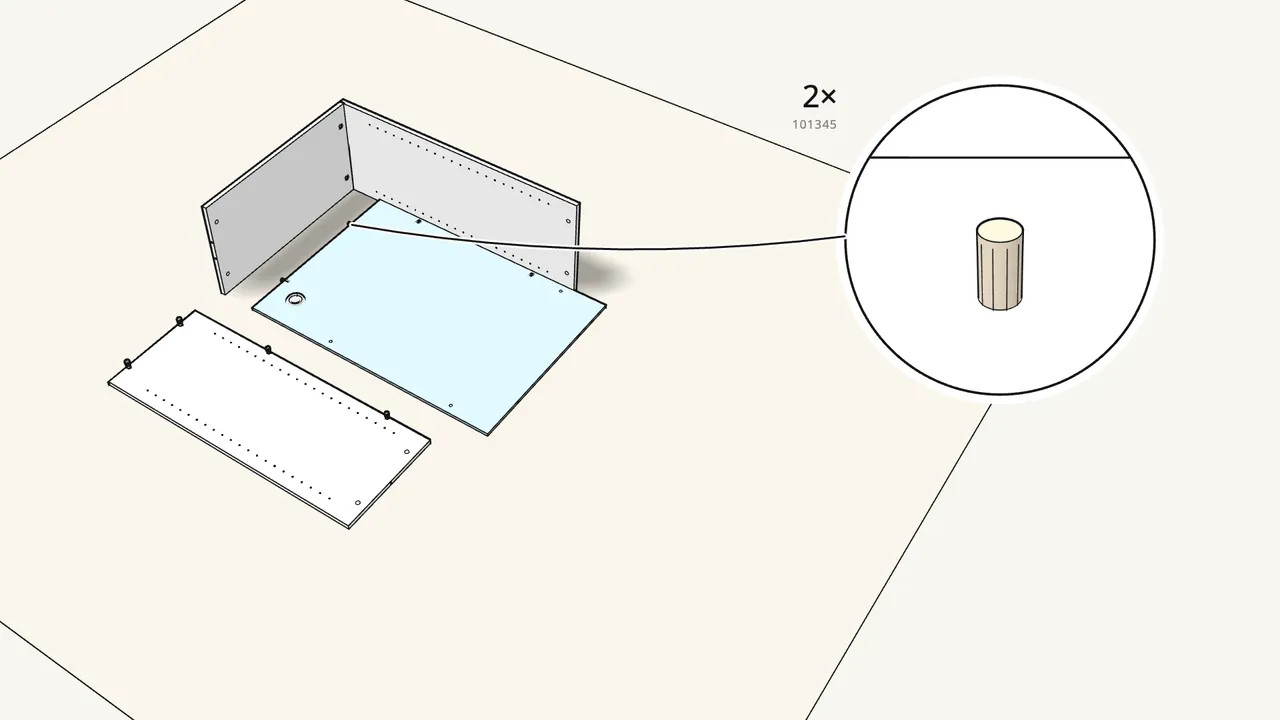
Step 5
Push 2 short dowels (101345) into the back panel and slide it in.
It slides along the floor into the grooves until the dowels reach the bottom panel.
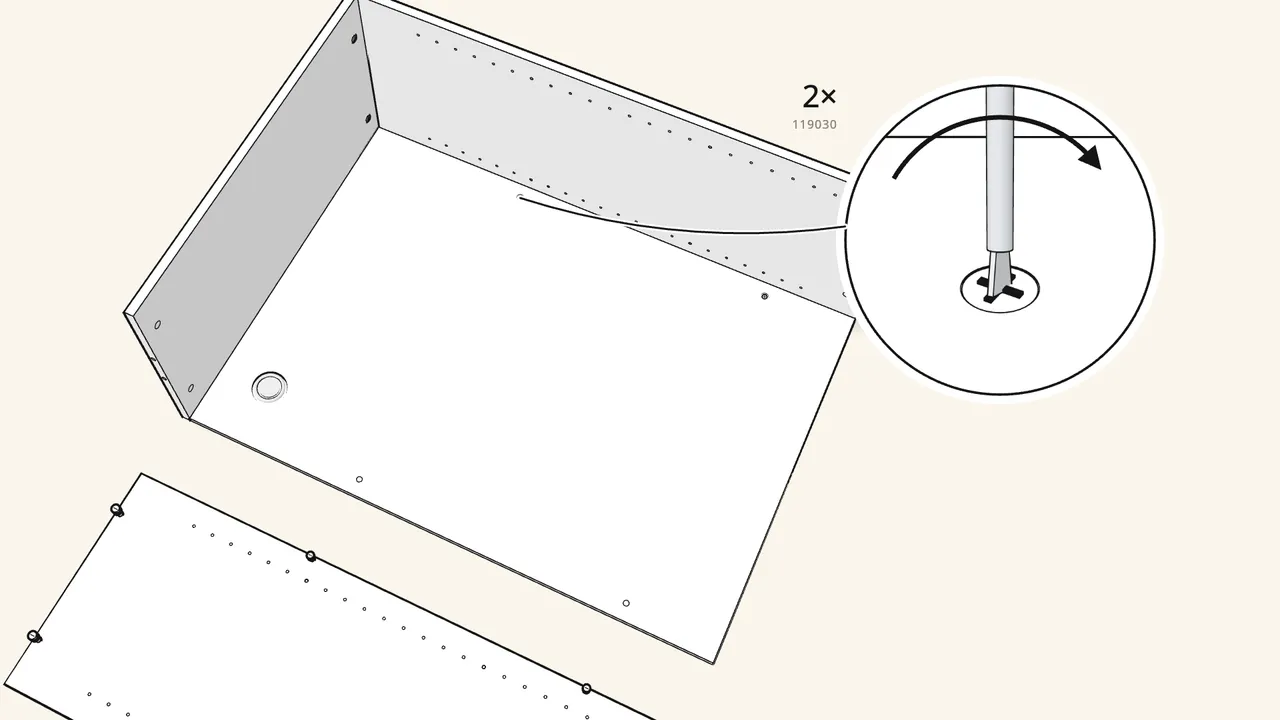
Step 6
Insert 2 cam locks (119030) in the back panel and turn them clockwise.
Use the 119030 locks from the small bag here, not 119253.
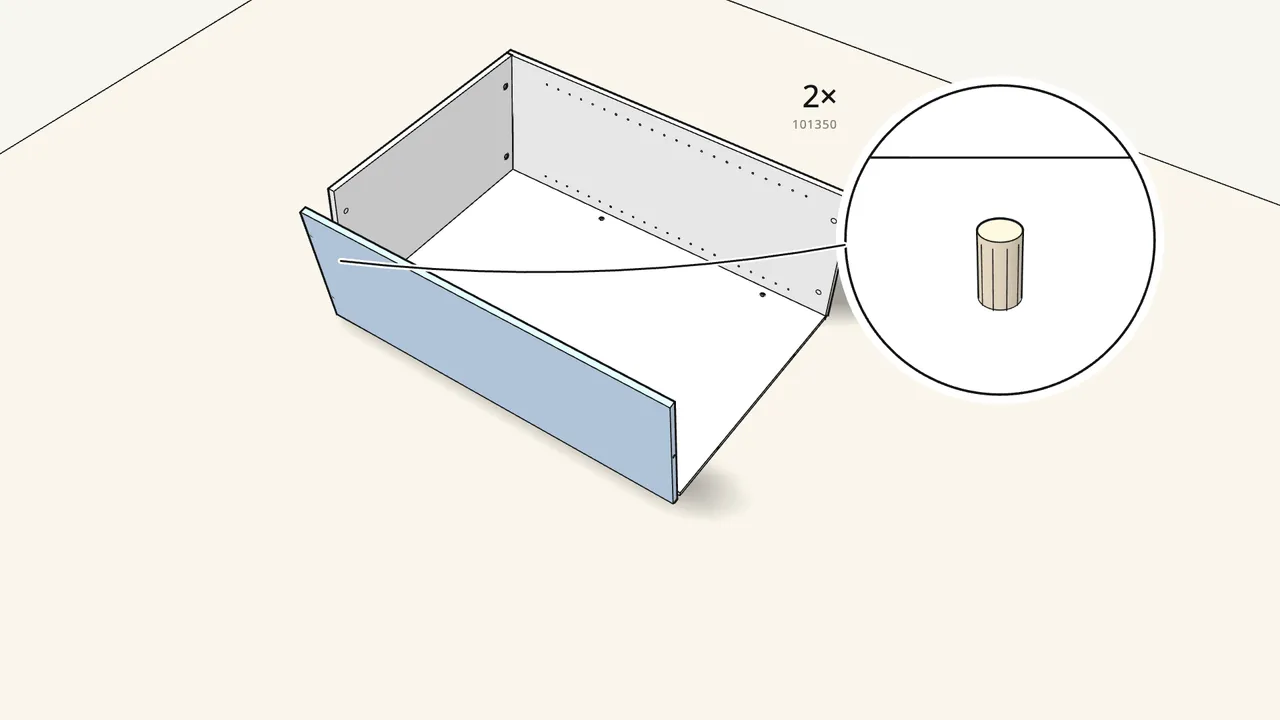
Step 7
Push 2 dowels (101350) into the bottom panel and fit the other side.
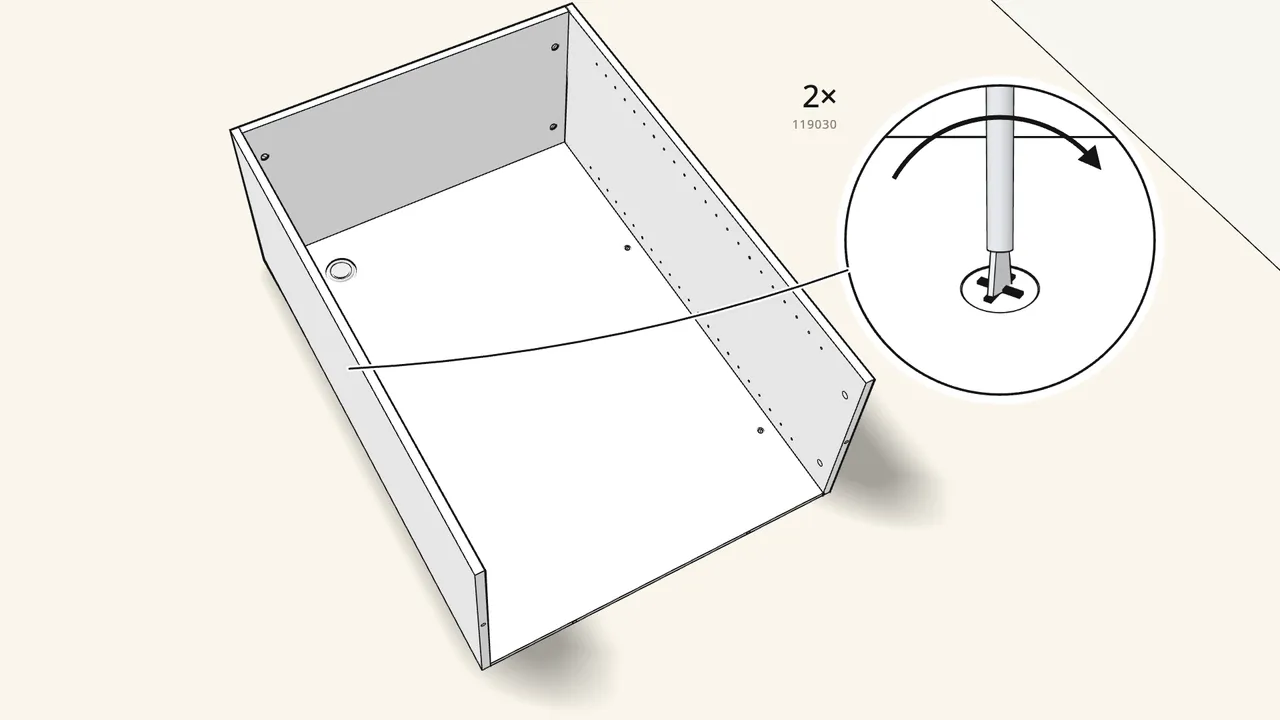
Step 8 · manual step 8–9
Lock the second side: 2 cam locks (119030) in the back, 2 (119253) in the bottom.
Turn them all clockwise with the flat-head screwdriver.
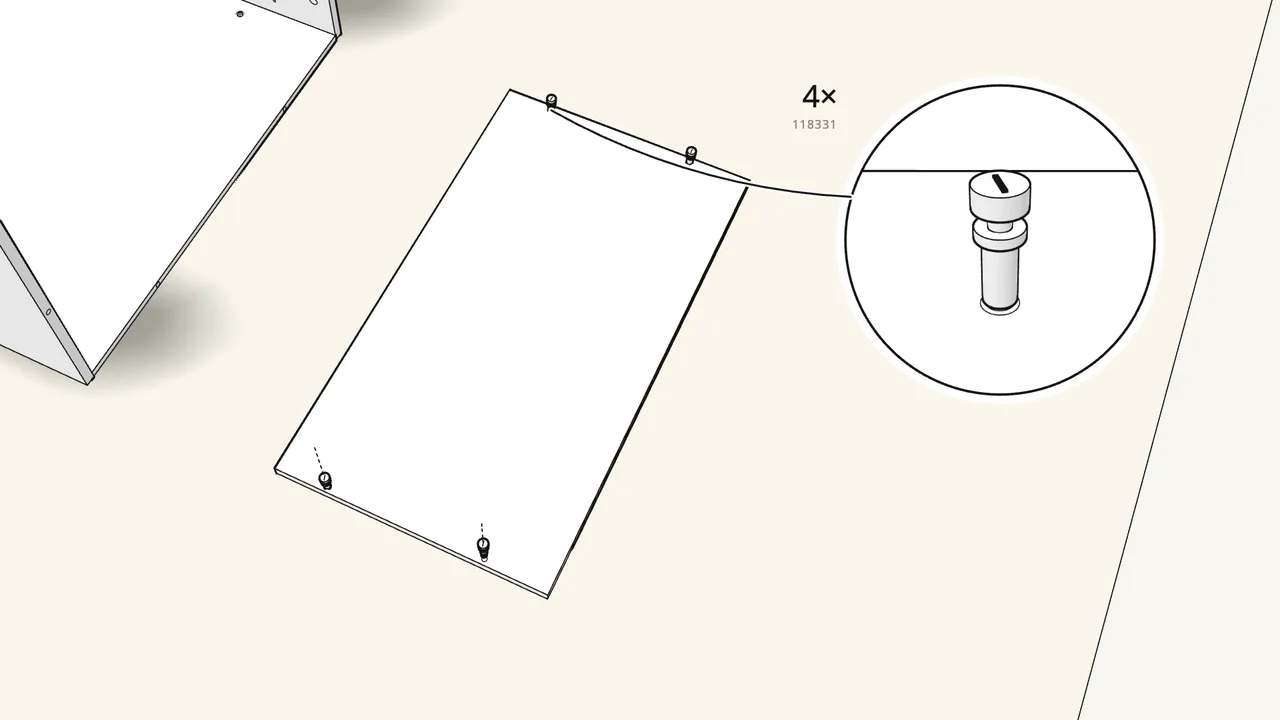
Step 9 · manual step 10
Screw 4 cam bolts (118331) into the top panel.
Lay it on the rug, inner face up.
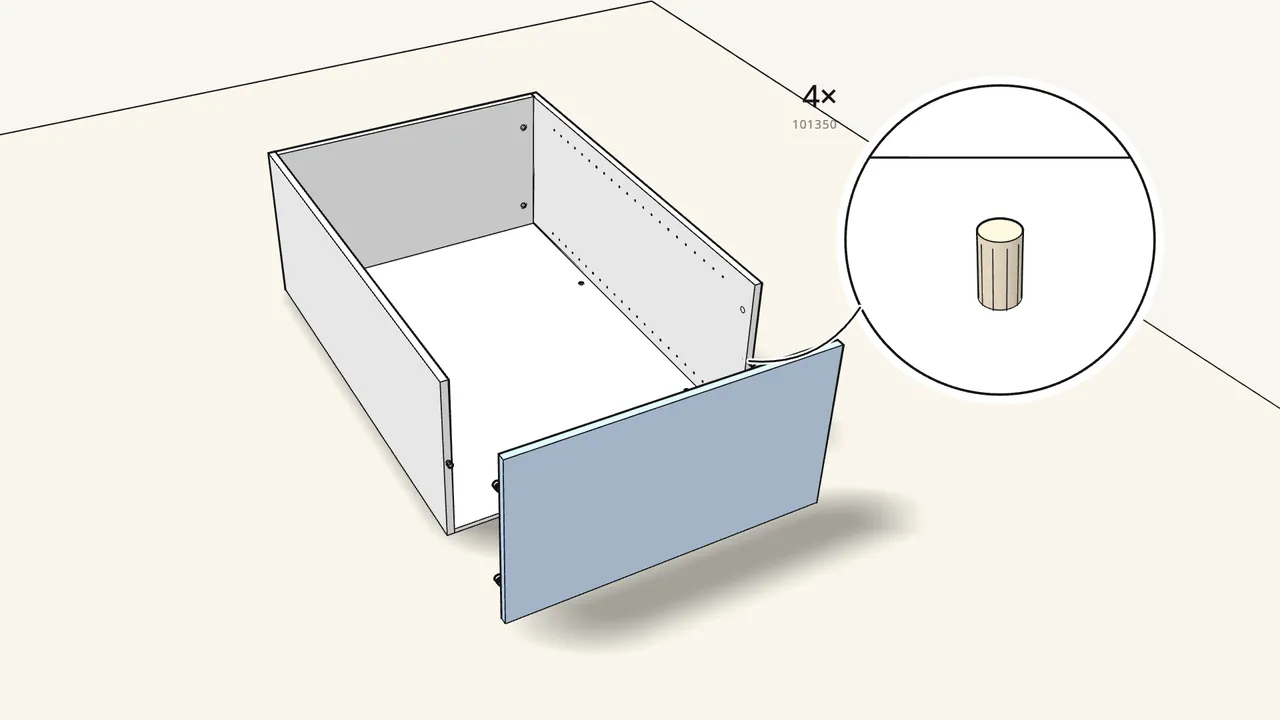
Step 10 · manual step 11–12
Push 4 dowels (101350) into the sides and the back, then fit the top.
1 in the top end of each side, 2 in the top edge of the back panel.
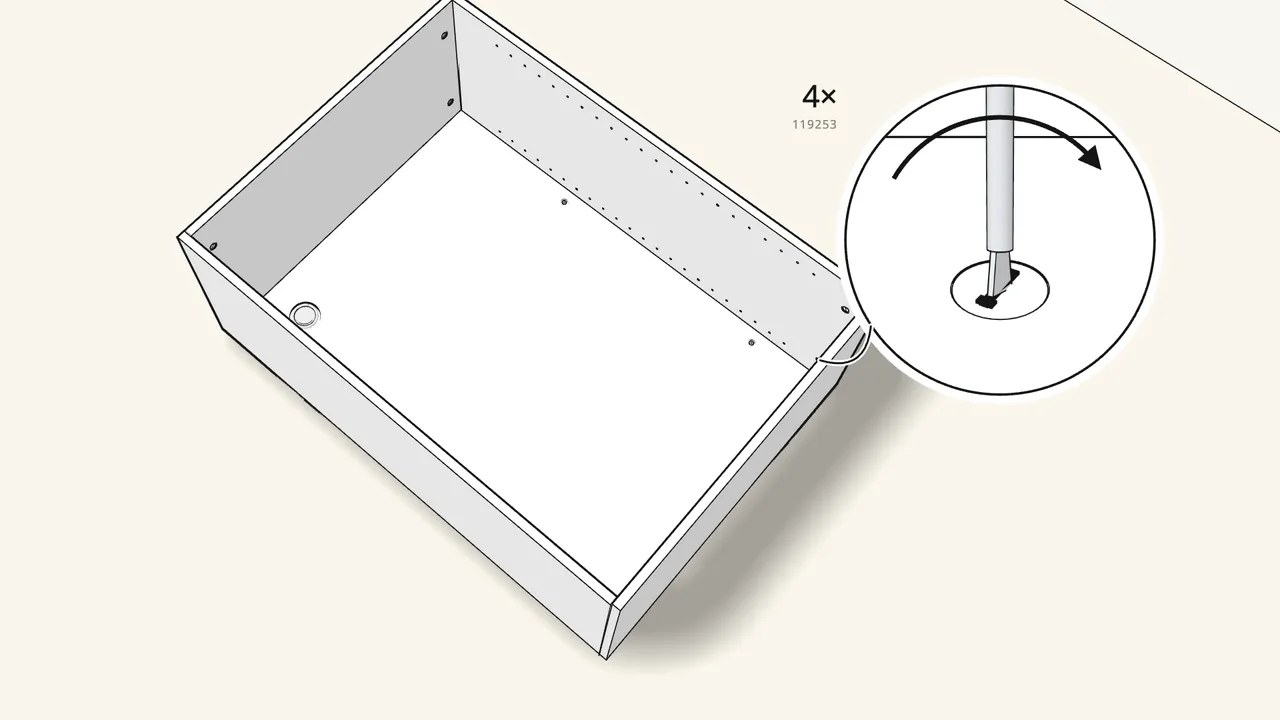
Step 11 · manual step 13
Insert 4 cam locks (119253) in the sides and turn them clockwise.
2 in each side panel, next to the top.
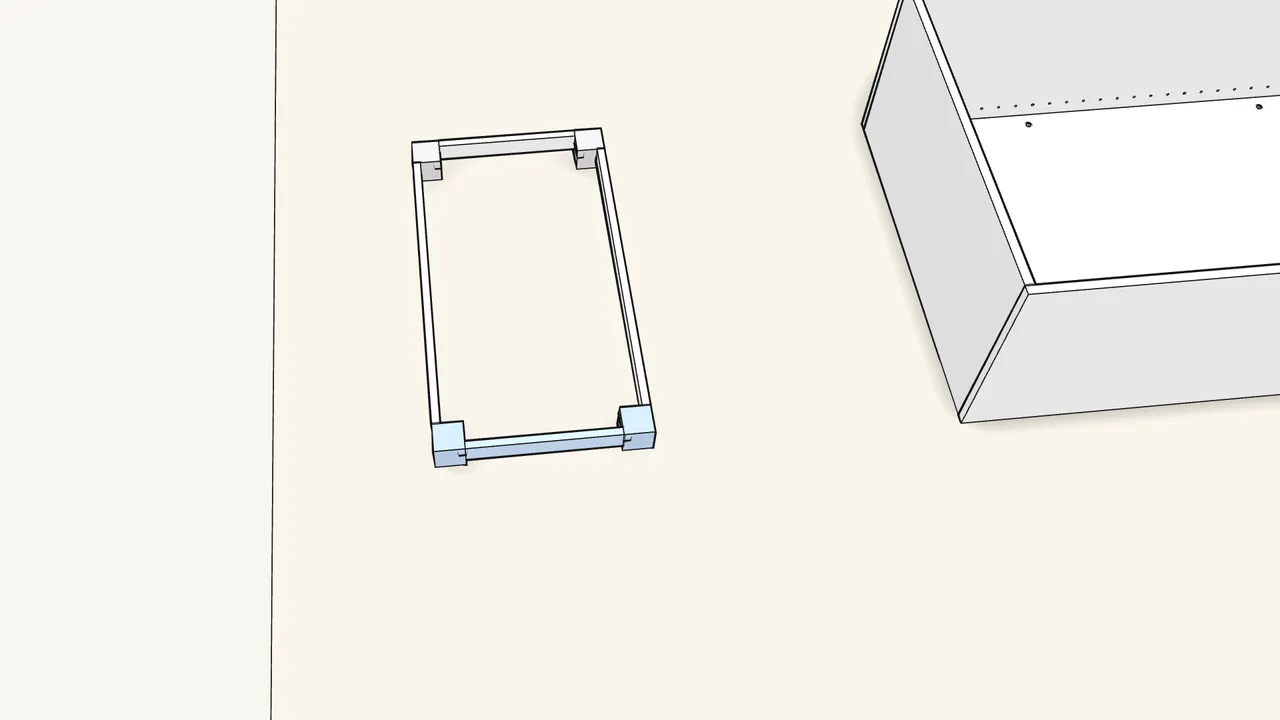
Step 12 · manual step 14–15
Build the base frame: click the 4 corner pieces (146679) onto the rails.
First onto the 2 short rails (146683), then onto the 2 long rails (146682).
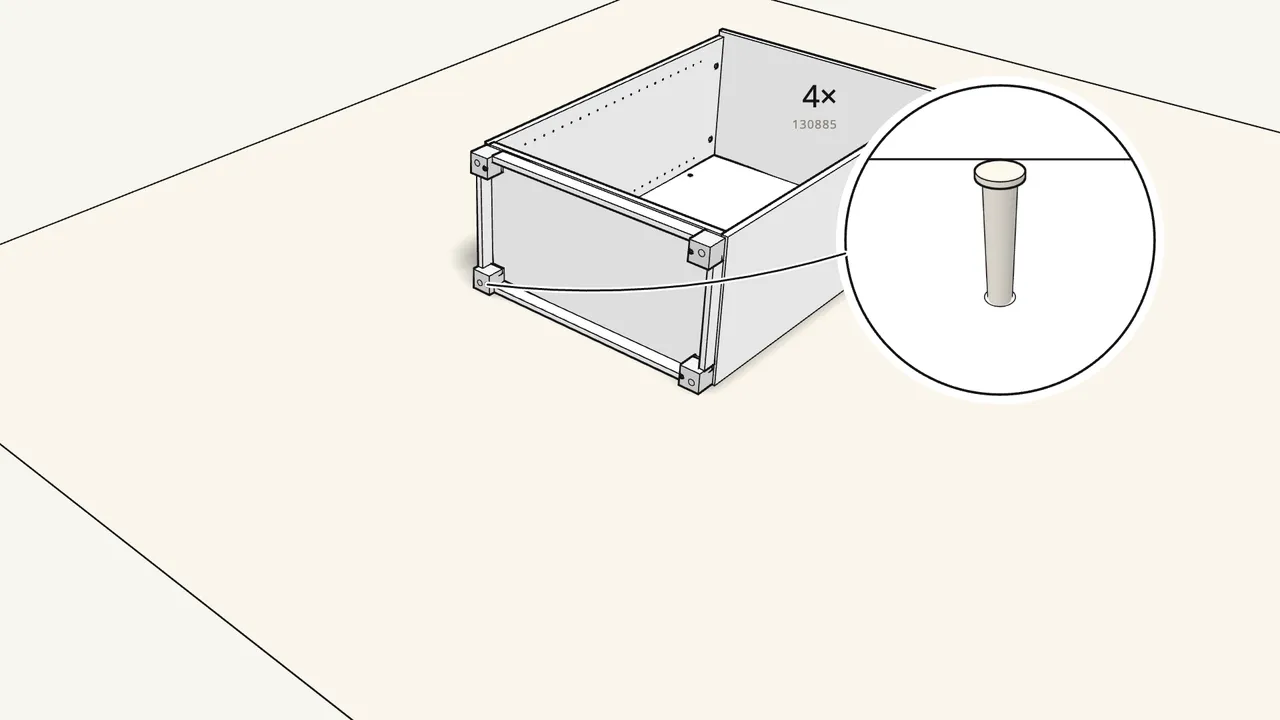
Step 13 · manual step 16
Fit the frame onto the bottom panel with 4 plugs (130885).
Push them in by hand through the corner pieces.
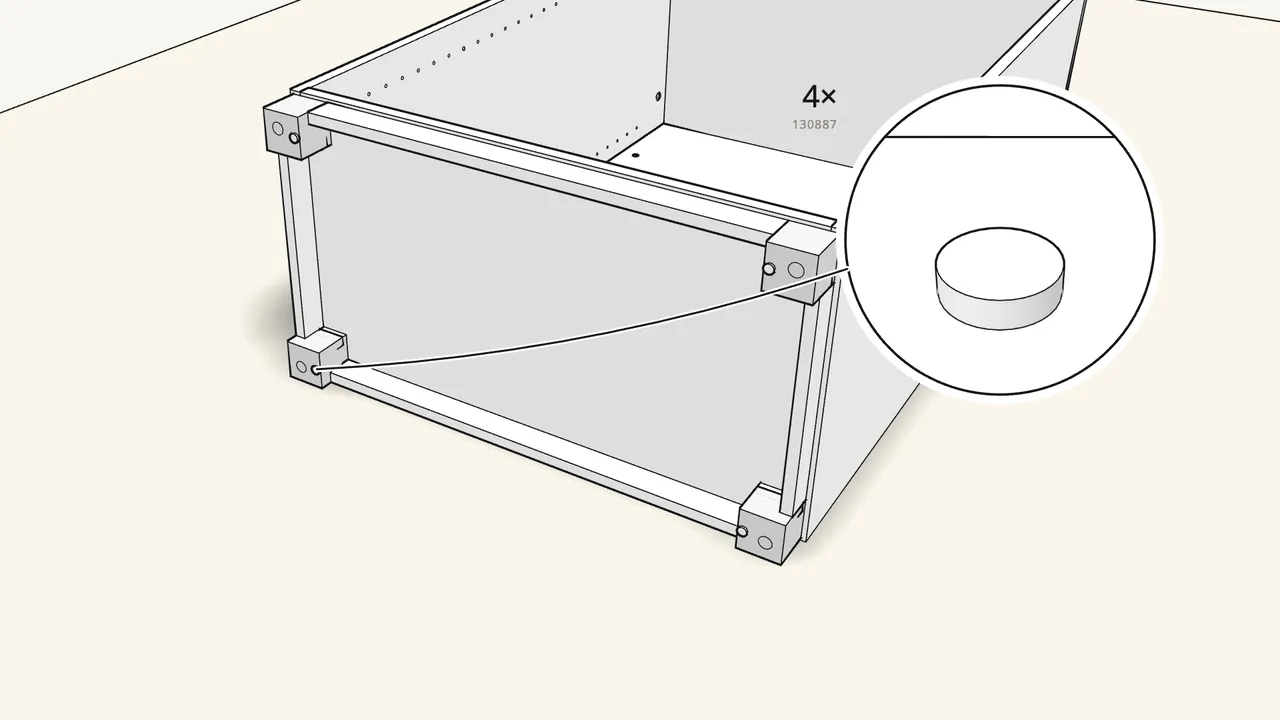
Step 14 · manual step 17
Push a pin (130887) into each plug.
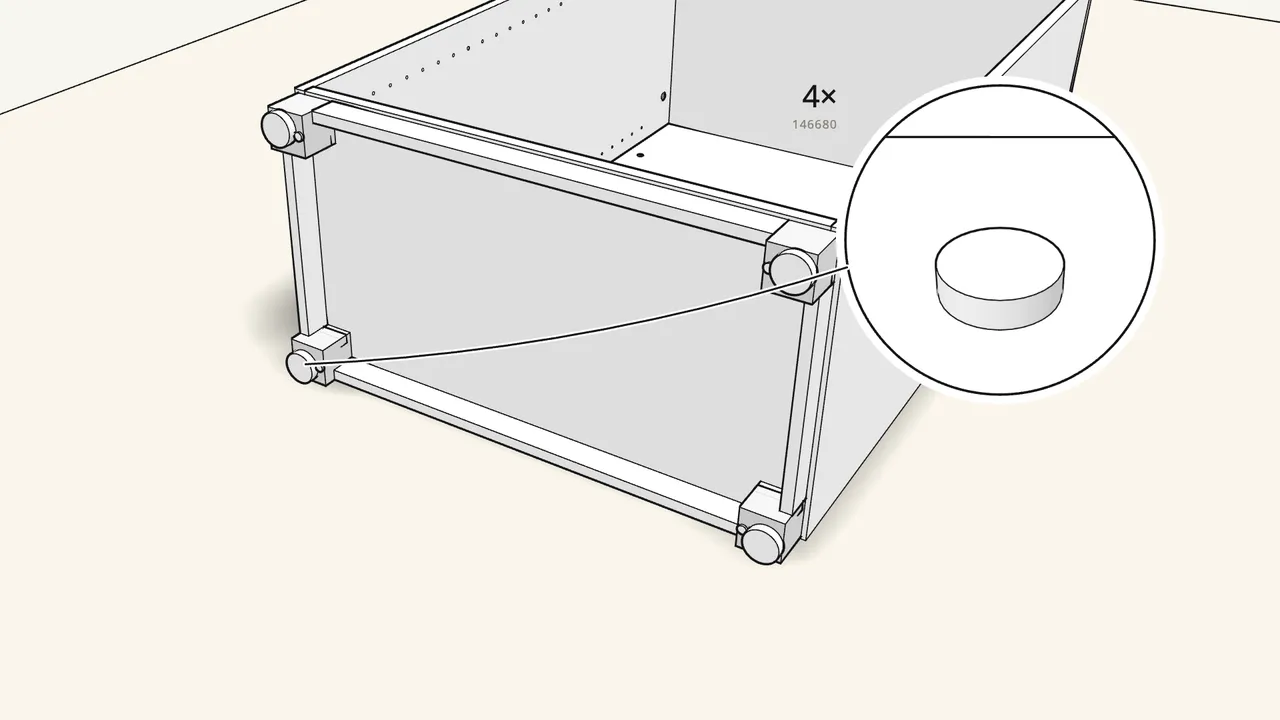
Step 15 · manual step 18
Screw the 4 feet (146680) into the corners by hand.
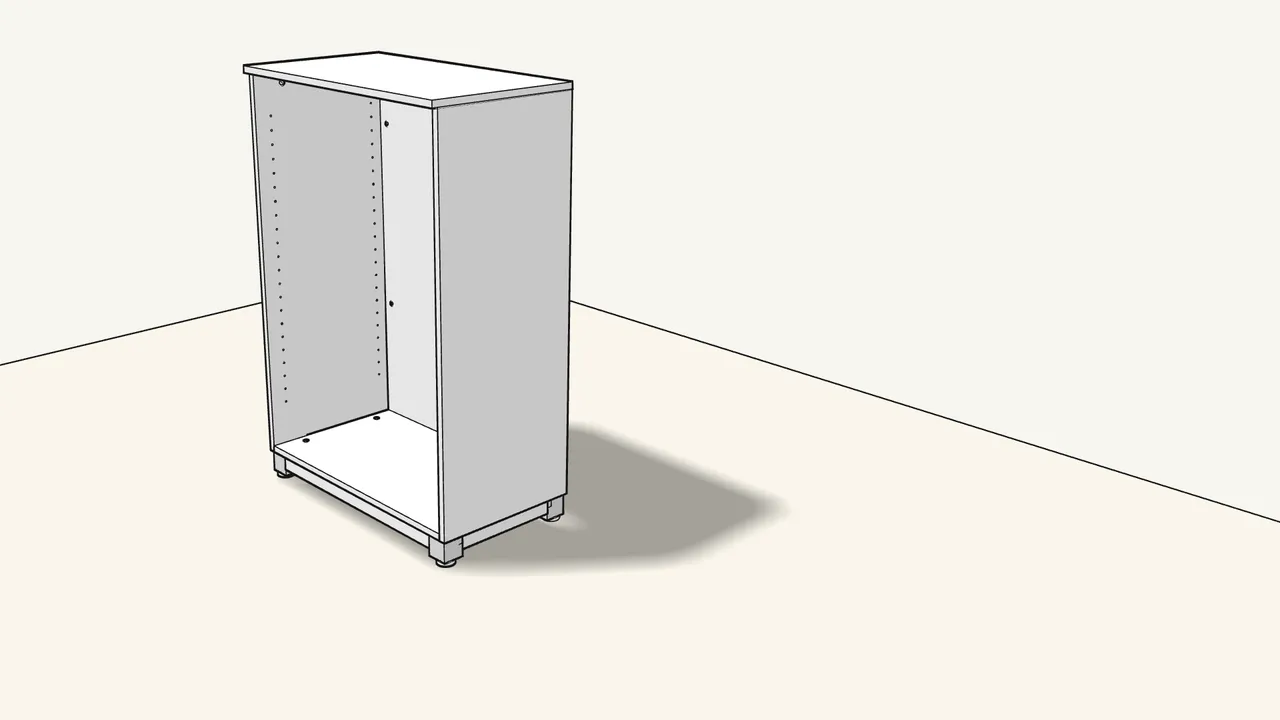
Step 16 · manual step 18
Turn the cabinet upright.
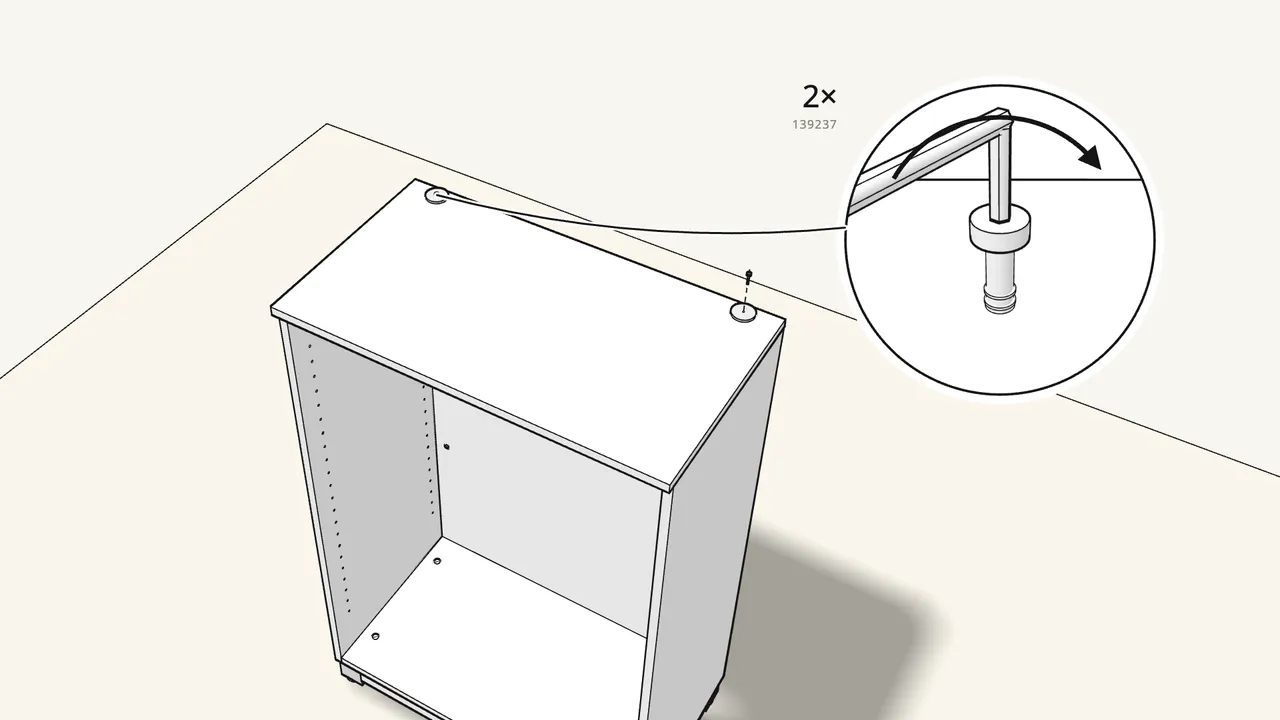
Step 17 · manual step 19
Fix the 2 discs (158452) at the back of the top with 2 screws (139237).
Use the Allen key (100006). One disc can be swapped for the hook (158450) — see the manual, page 19.
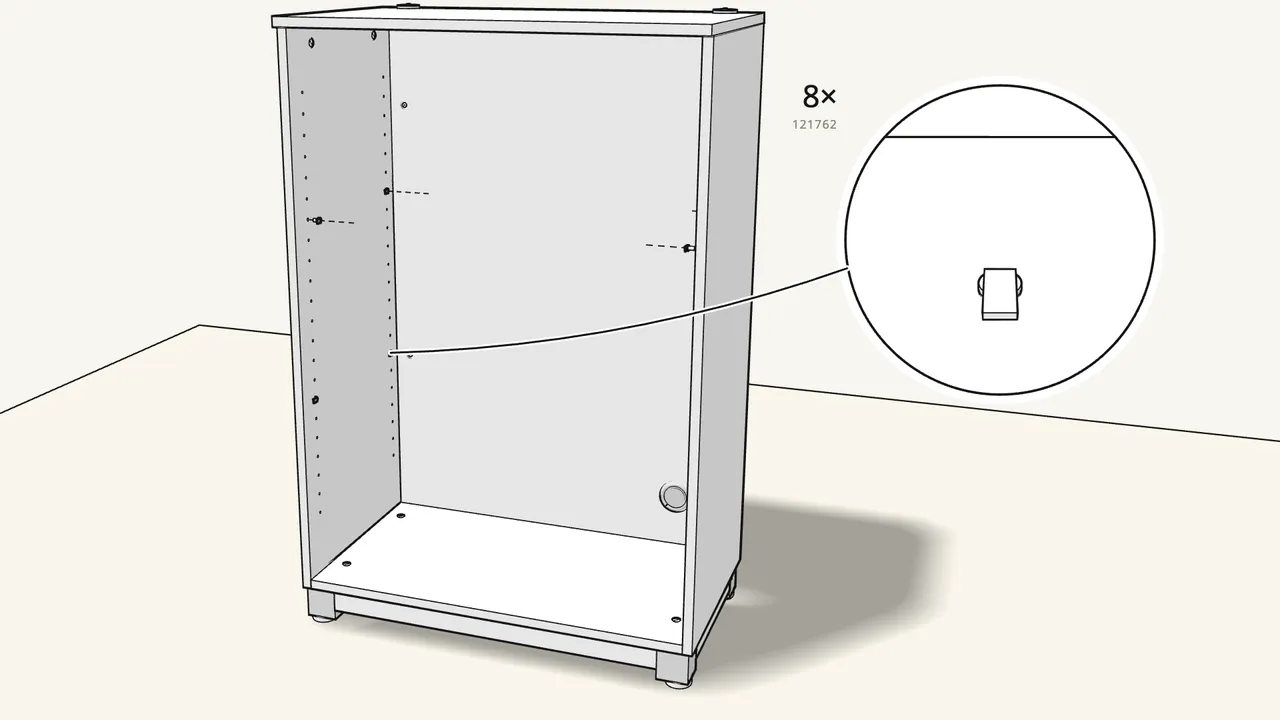
Step 18 · manual step 20
Press 8 shelf supports (121762) into the side panels.
4 per shelf, at the same height on both sides.
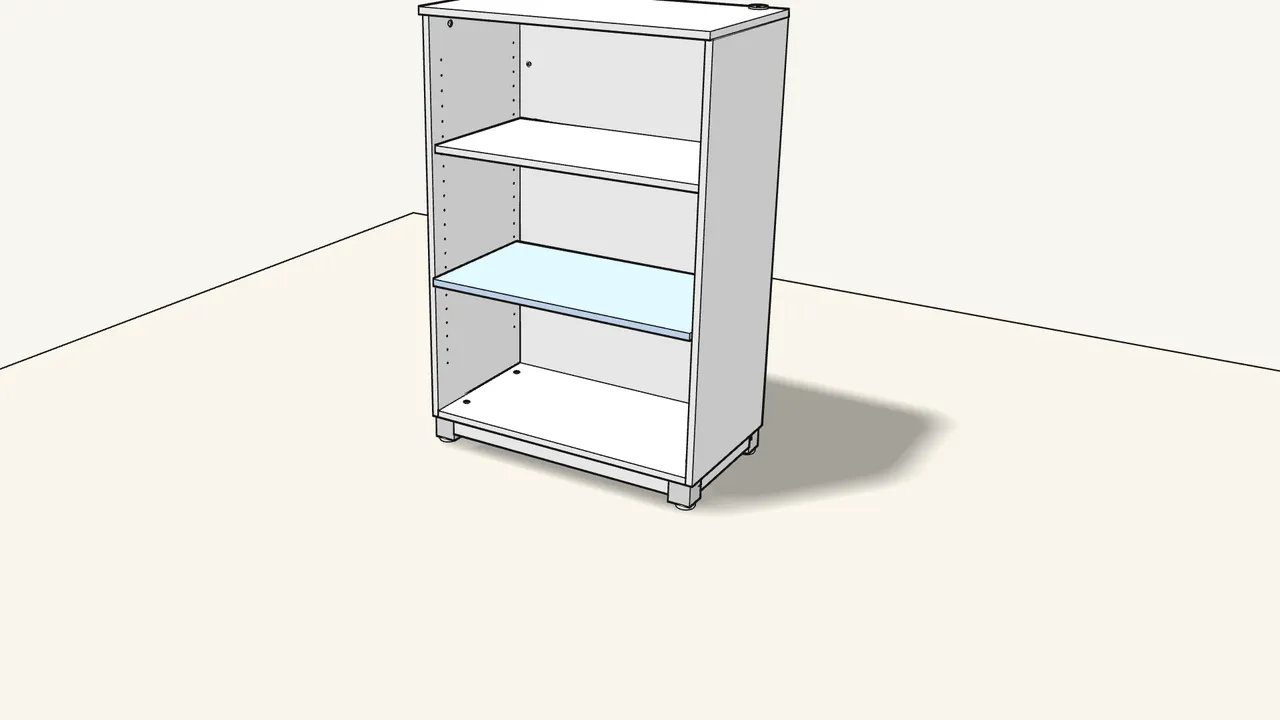
Step 19 · manual step 21
Lay the 2 shelves onto the supports.
Step 20 · manual step 22–23
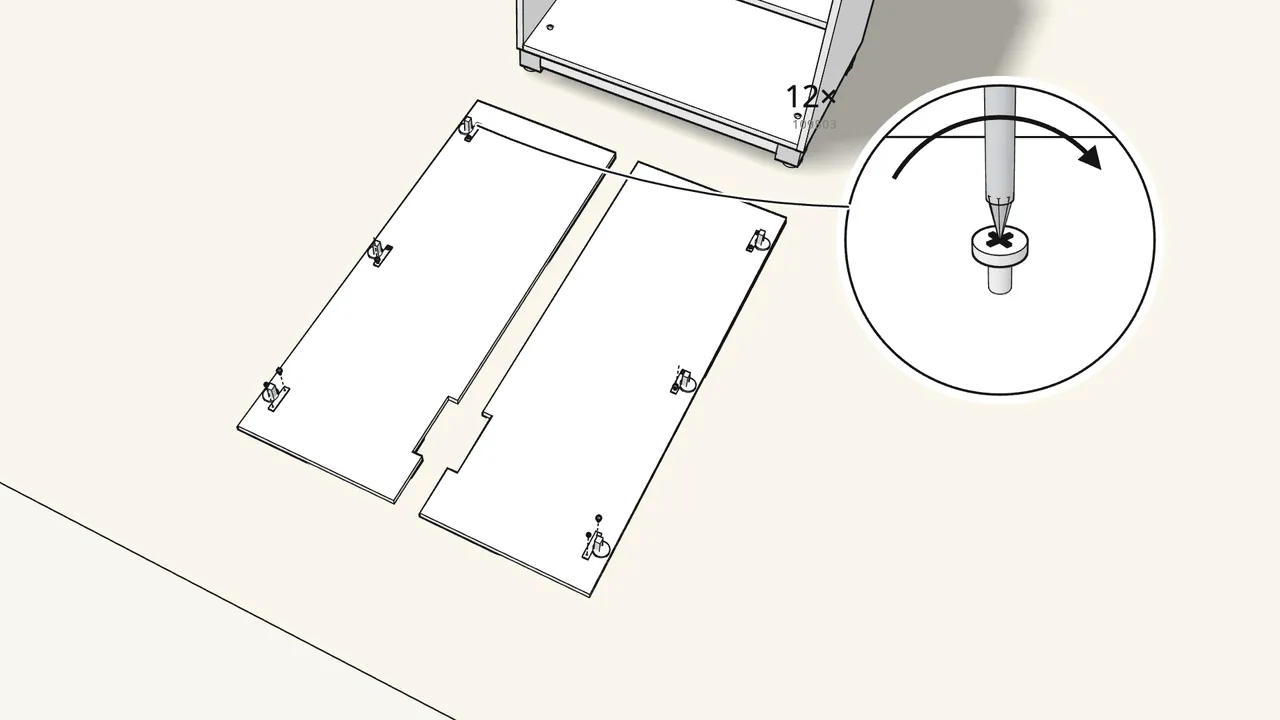
Screw 6 hinges onto the doors with 12 screws (109503).
4 hinges 122166 at the top and bottom, 2 hinges 150578 in the middle. Doors face-down.
Step 21 · manual step 24
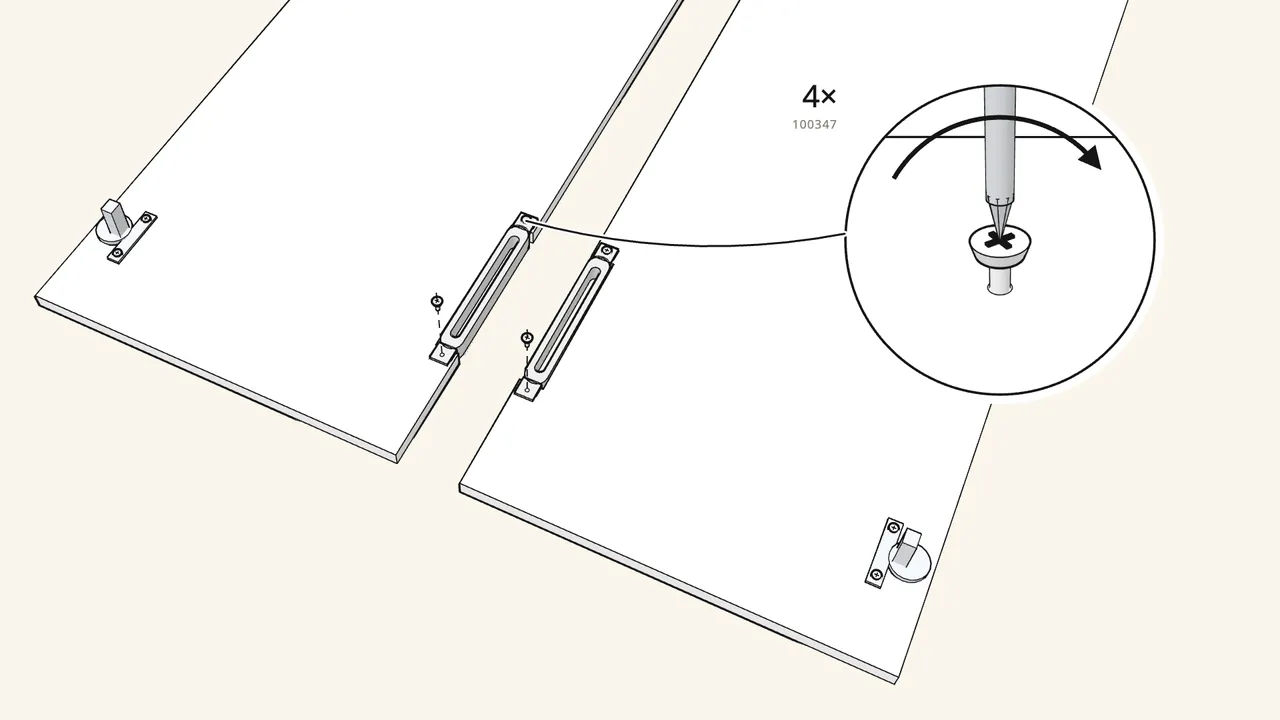
Fit a handle (158448) into each door with 2 screws (100347).
The handle sits in the notch in the door edge. Phillips screwdriver.
Step 22 · manual step 25
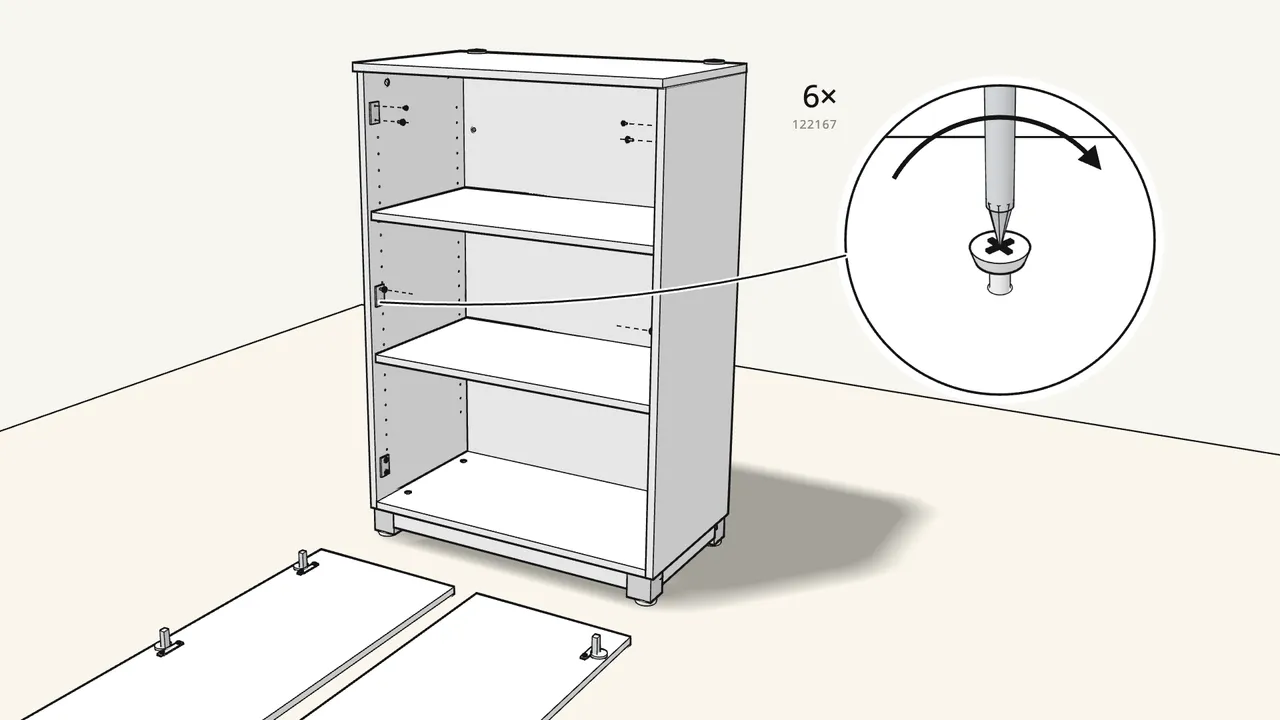
Screw the 6 mounting plates (122167) onto the inside of the sides.
3 on each side, at the front edge. Phillips screwdriver.
Step 23 · manual step 26
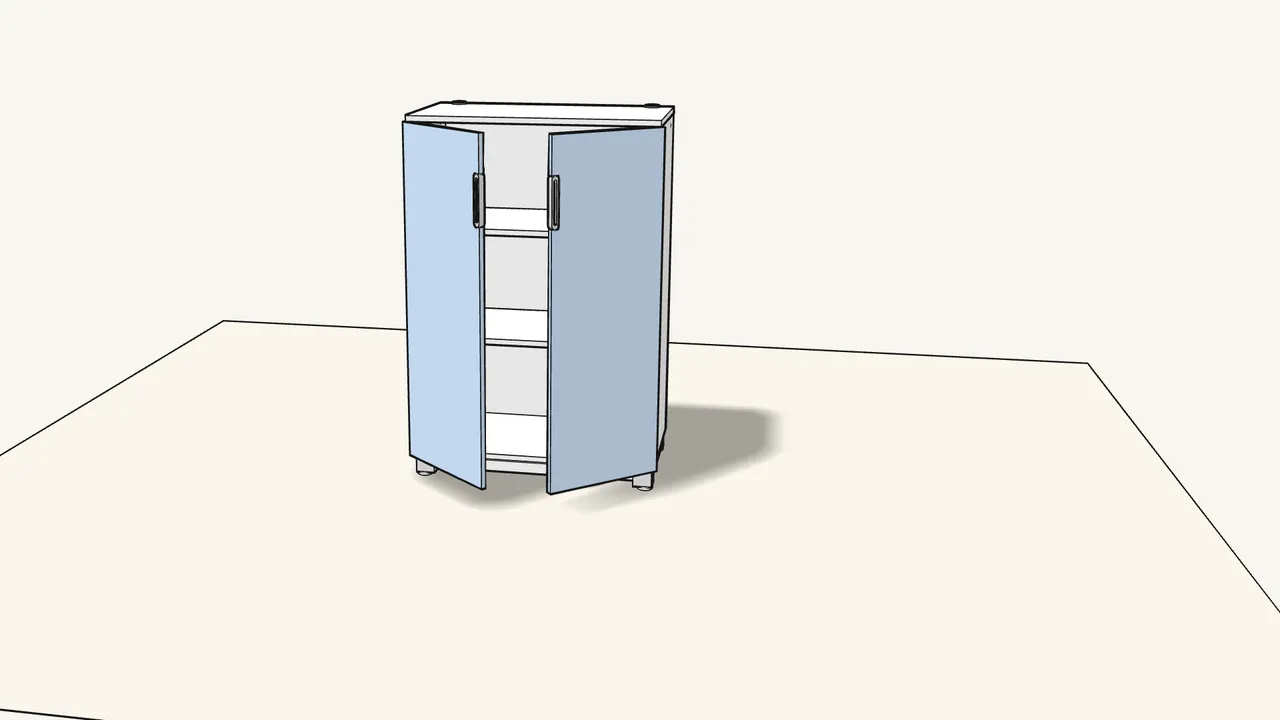
Click the hinges onto the mounting plates, then close the doors.
Push each hinge onto its plate until it clicks.
Tips & safety
- Doors not lined up? Turn the screws on the hinges to move a door up/down, sideways or in/out — see the last page of the manual.
- Build it on a soft surface. A rug or the flattened box keeps the panels from getting scratched. If something is unclear, contact IKEA.
Official instructions
This guide follows IKEA’s official assembly instructions (AA-2020852-3). Keep the printed manual to hand — if anything differs, the manual is right.



