IKEA · Cabinets & Wardrobes
How to assemble IKEA EKET Connection Hardware
Step-by-step IKEA EKET Connection Hardware assembly: 9 illustrated steps, an animated video, the hardware list and the tools you need — following the official instructions (AA-1909220-1).
- 9 illustrated steps
- 5 steps in the manual
- 1:44 video
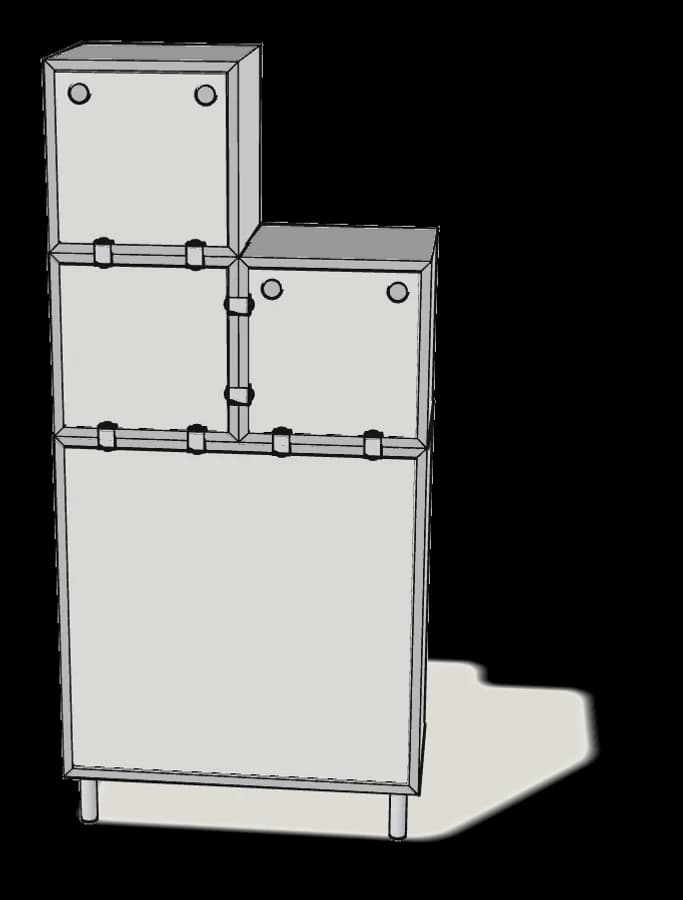
- 105×35×151 cm (shown EKET combination; kit joins cabinets) cm
What you need
Tools
- Drill (for wall fixing)
Hardware in the box
| Part no. (as printed in the manual) | Qty |
|---|---|
| 152481 | 12× |
| 144574 | 24× |
| 144575 | 24× |
Step-by-step assembly
Step 1
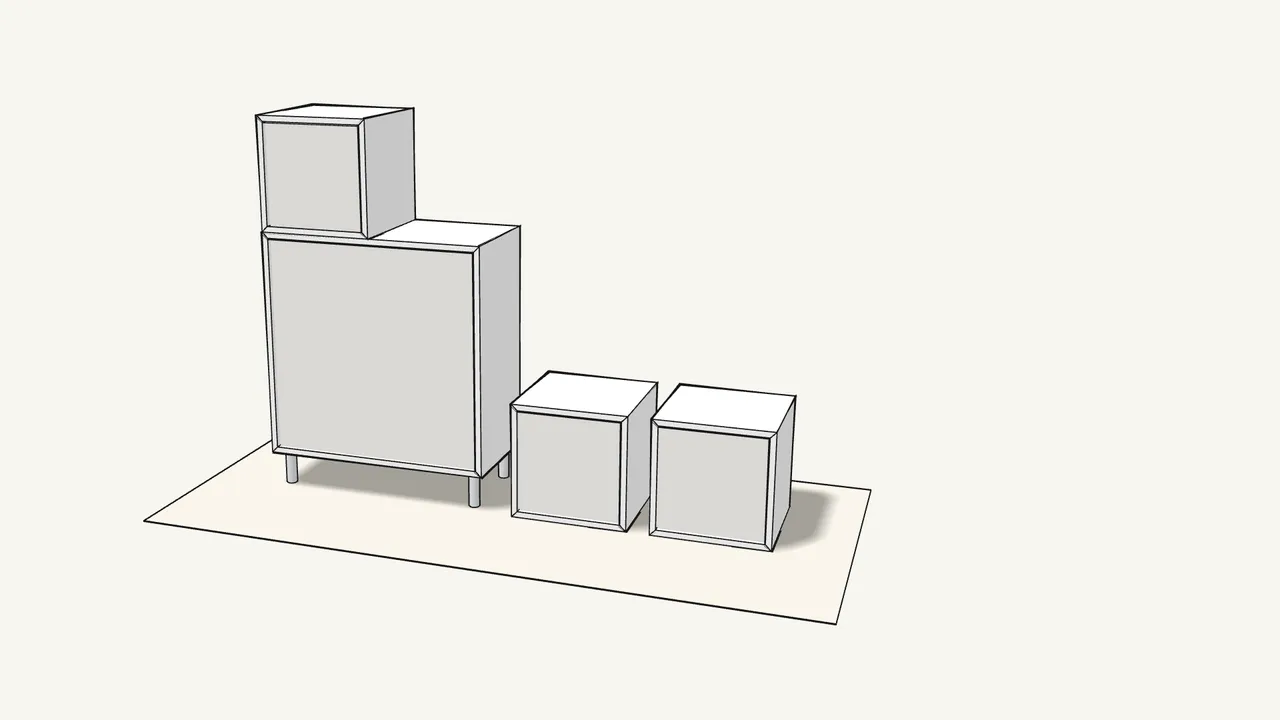
Start with your assembled EKET cabinets.
Sold separately. Shown as in the manual, seen from the back: a 70×35×70 cm cabinet on legs and three 35 cm cubes.
Step 2 · manual step 1
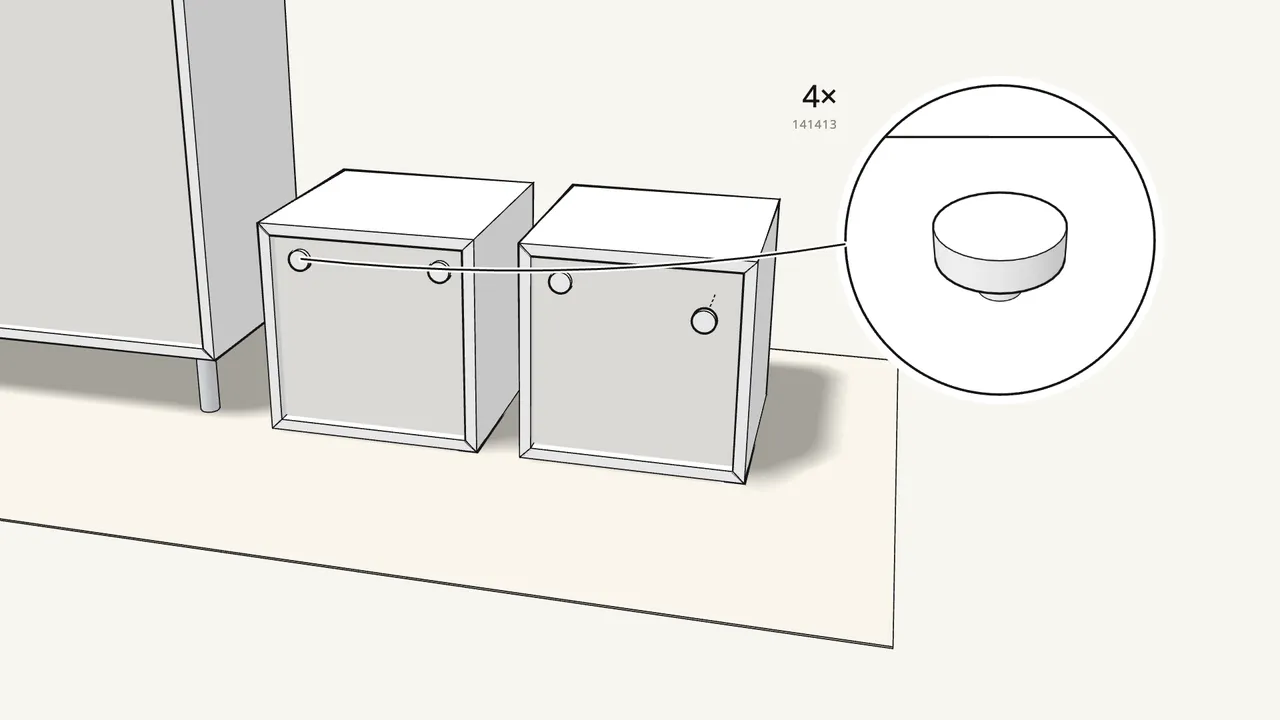
Press 2 wall connectors (141413) into each top cabinet.
At the top corners of the back — on both cabinets that go on top.
Step 3 · manual step 2
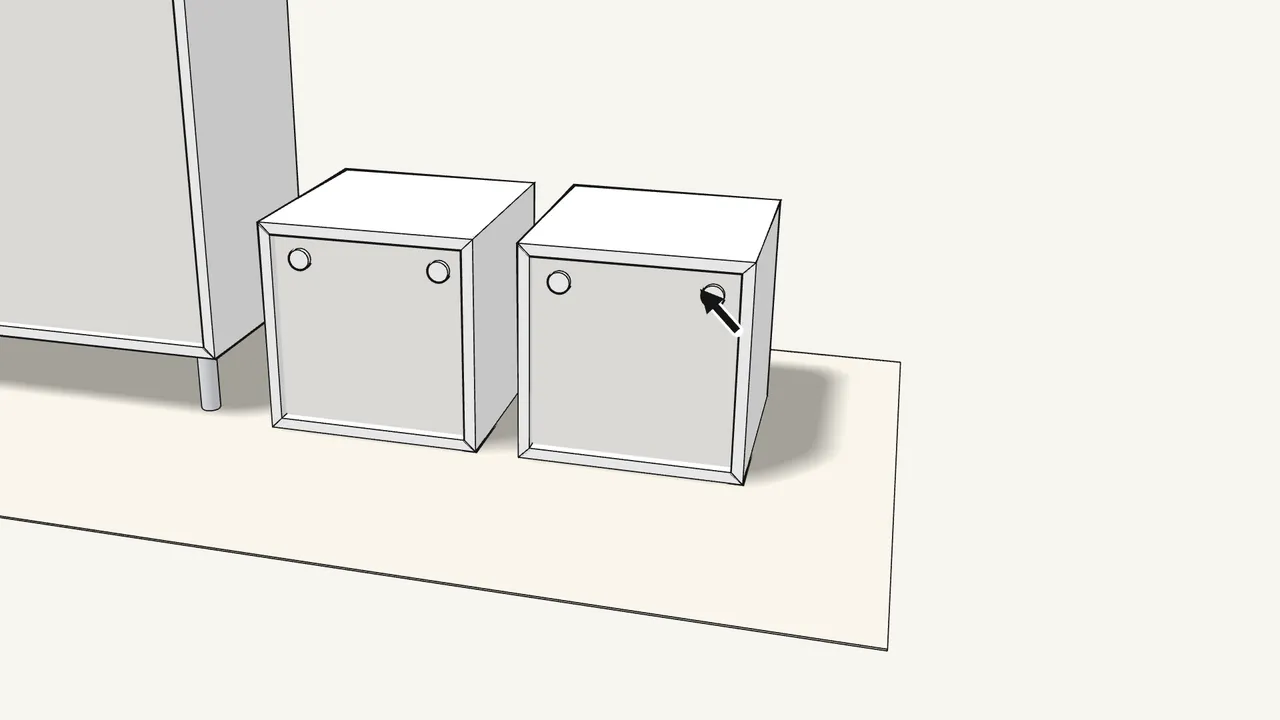
Drill at each connector with an Ø 8 mm (5/16") bit.
2 holes in each of the two top cabinets — see the manual, step 2.
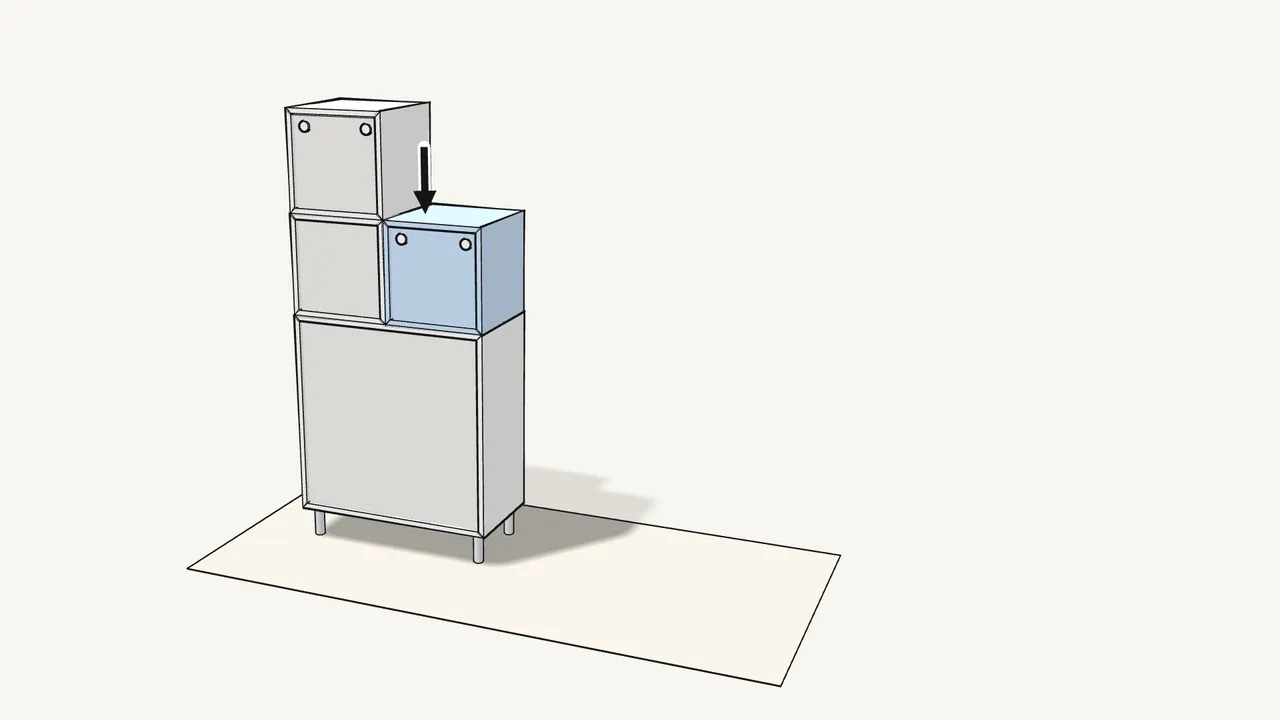
Step 4 · manual step 2
Place the two cabinets on top.
One on the left cube, one on the right half of the lower cabinet.
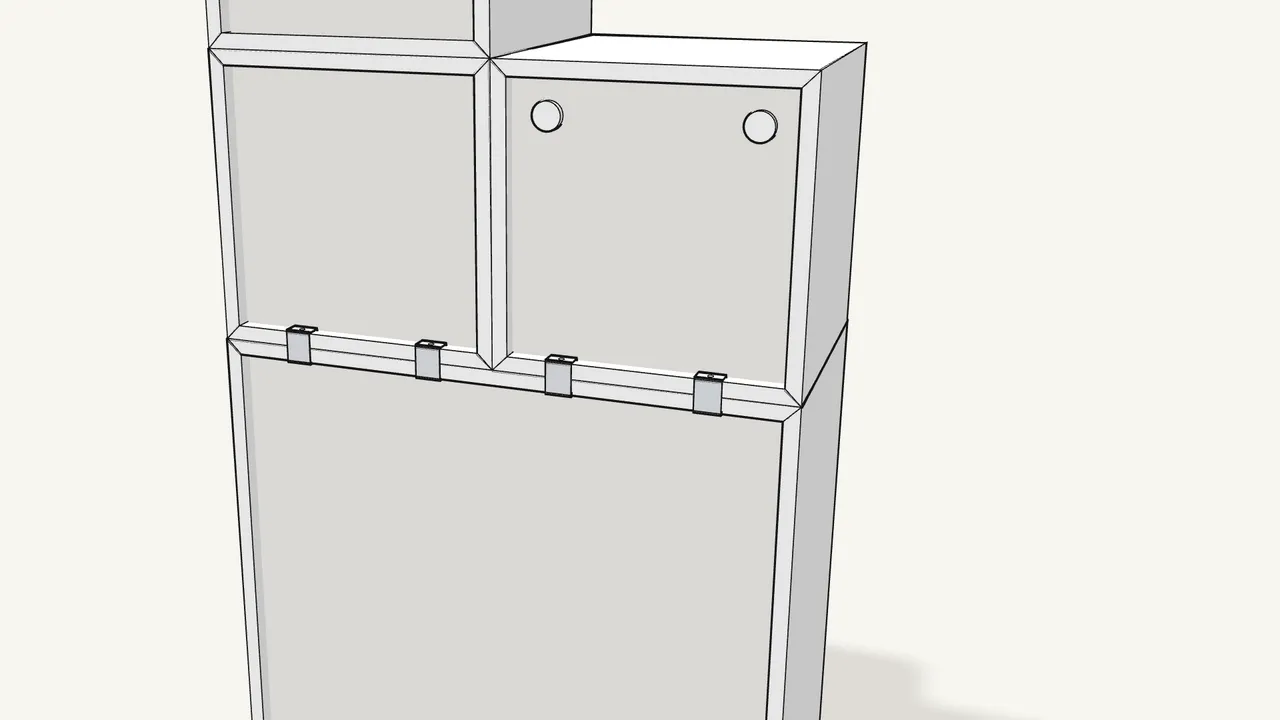
Step 5 · manual step 3
Slide 4 clips (152481) over the joint above the lower cabinet.
From the back, over the rear edges of both cabinets.
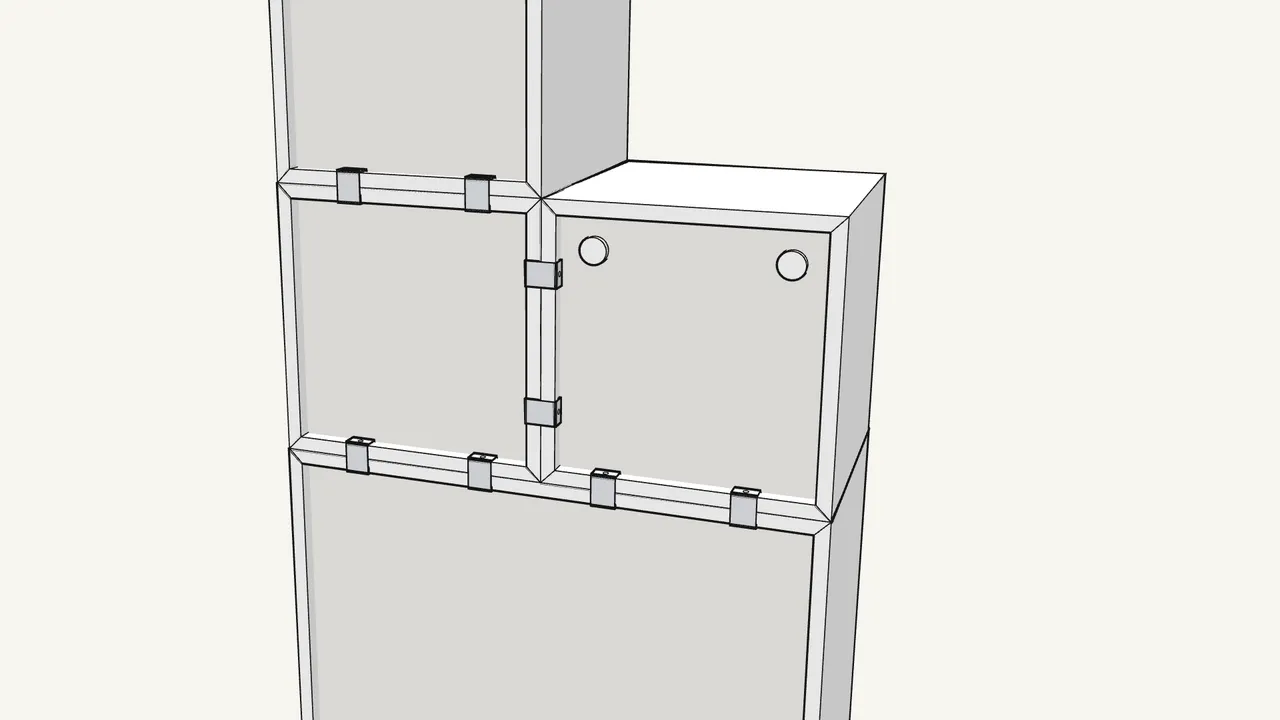
Step 6 · manual step 3
Slide on the other 4 clips: 2 between the cubes, 2 under the top cube.
8 clips in total for this combination.
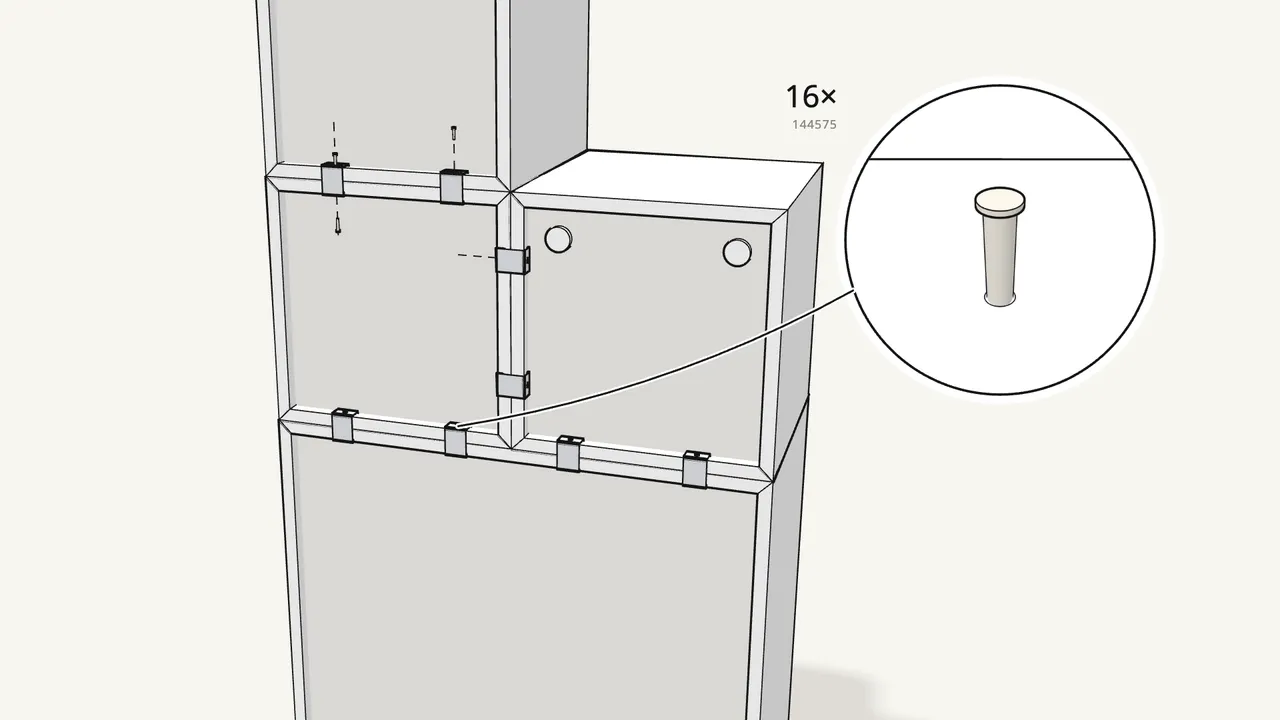
Step 7 · manual step 4
Push a sleeve (144575) into each clip hole.
One from above and one from below, through each clip — 16 sleeves.
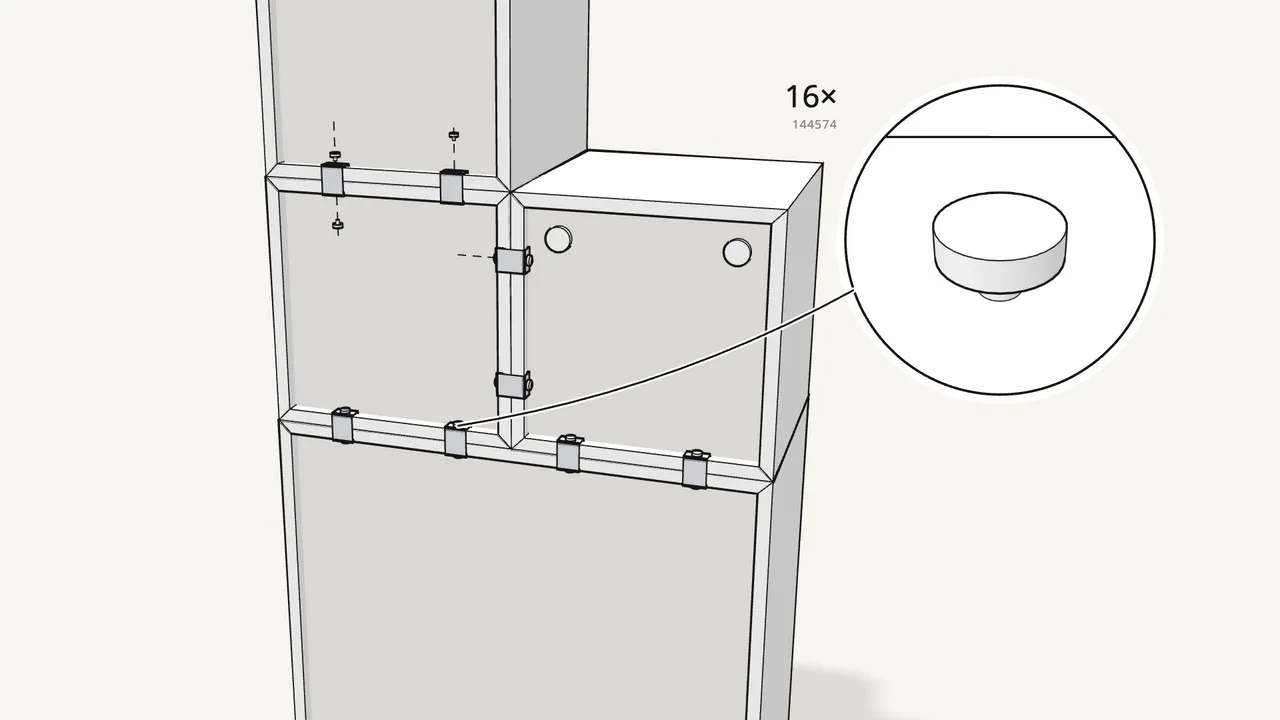
Step 8 · manual step 5
Push a pin (144574) into each sleeve.
Top and bottom of every clip — 16 pins.
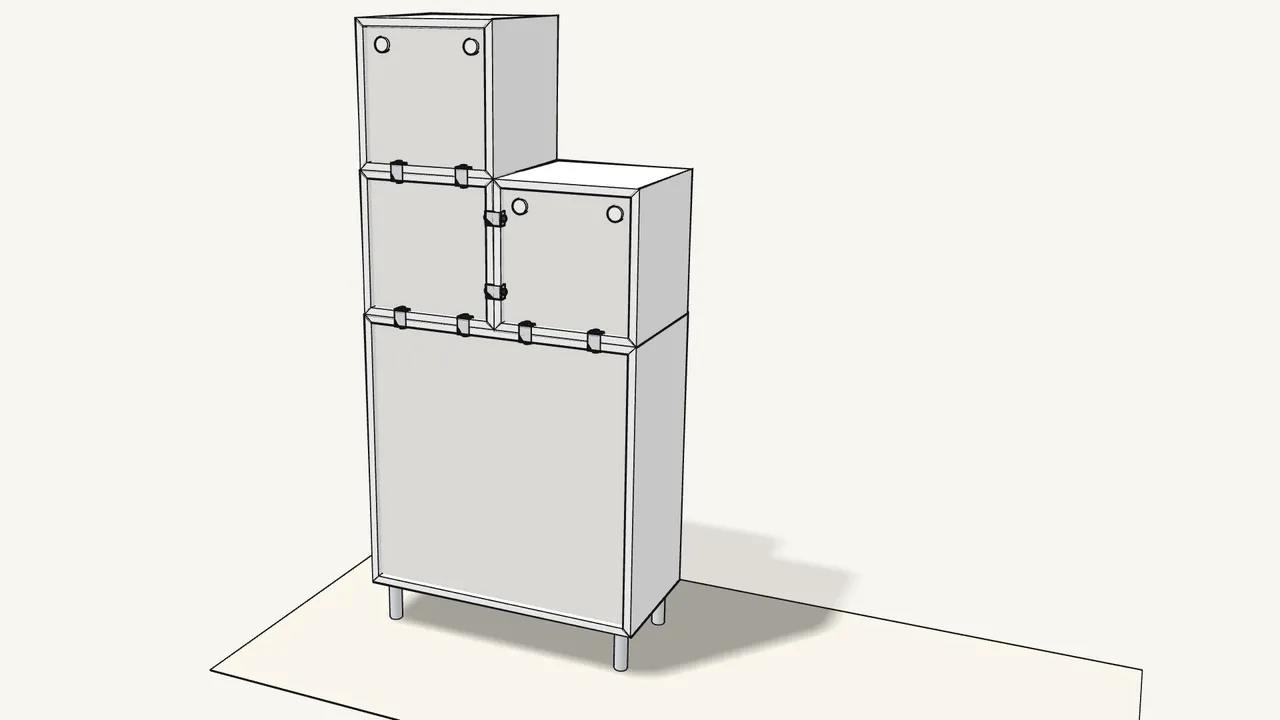
Step 9 · manual step 5
The cabinets are now joined at the back.
Tips & safety
- Max 220 cm (7' 3") high. See the manual, pages 4–5, for how cabinets may be stacked and combined.
- Fix the cabinets to the wall. Follow the wall-fixing steps in your EKET cabinet manuals.
Official instructions
This guide follows IKEA’s official assembly instructions (AA-1909220-1). Keep the printed manual to hand — if anything differs, the manual is right.



