IKEA · Cabinets & Wardrobes
How to assemble IKEA BYÅS TV Unit
Step-by-step IKEA BYÅS TV Unit assembly: 23 illustrated steps, an animated video, the hardware list and the tools you need — following the official instructions (AA-575586-10).
- 23 illustrated steps
- 30 steps in the manual
- 3:28 video
- 160×42×45 cm cm
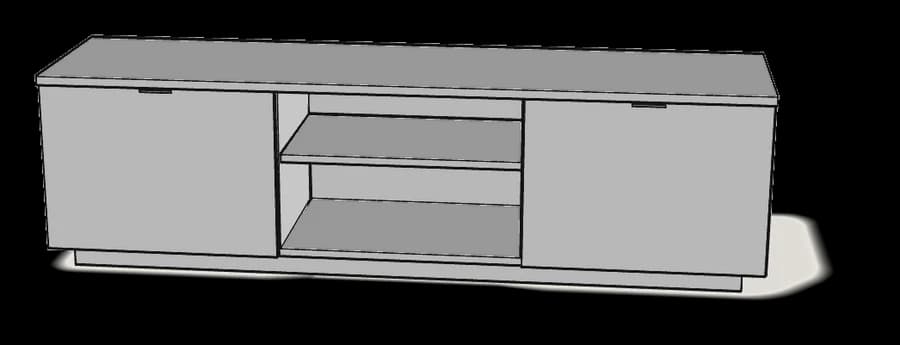
What you need
Tools
- Flat-head screwdriver
- Phillips screwdriver
- Hammer
Hardware in the box
| Part no. (as printed in the manual) | Qty |
|---|---|
| 115312 | 4× |
| 110630 | 4× |
| 110519 | 4× |
| 118331 | 26× |
| 103430 | 26× |
| 101375 | 12× |
| 100365 | 8× |
| 116637 | 12× |
| 106989 | 1× |
| 109049 | 1× |
| 100823 | 2× |
| 123442 | 2× |
| 108357 | 2× |
| 107091 | 4× |
| 113301 | 12× |
Step-by-step assembly
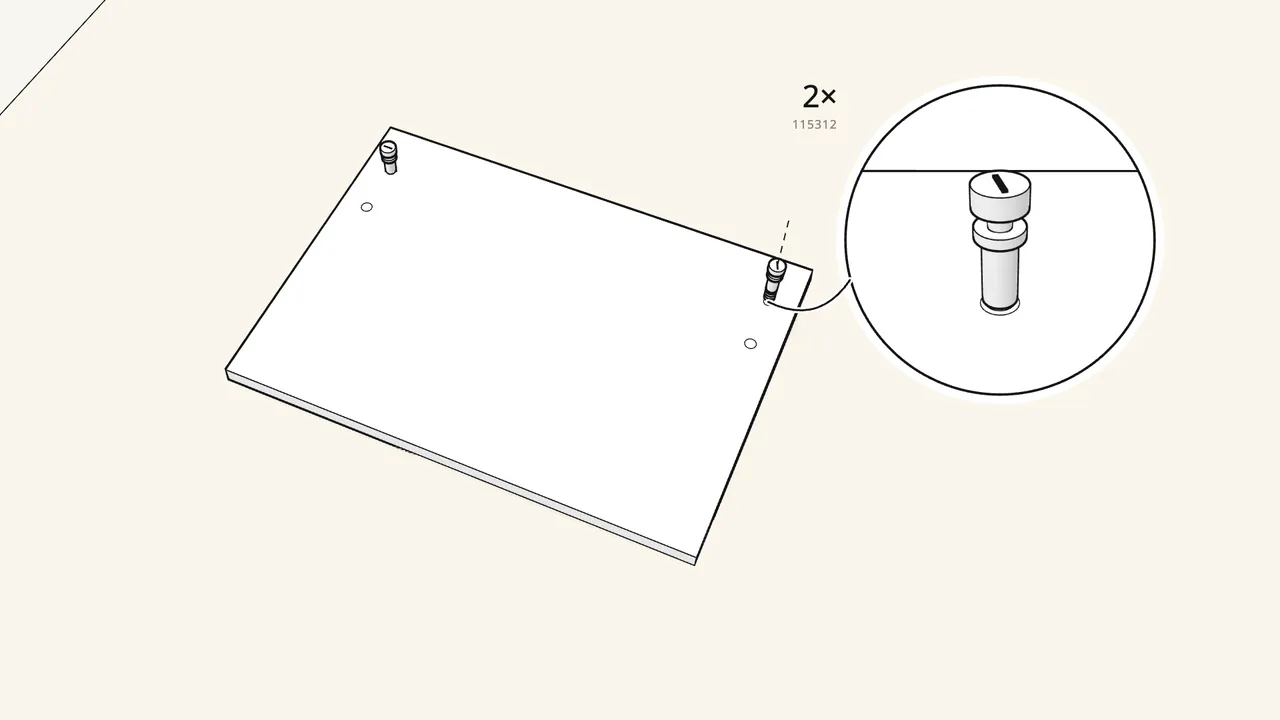
Step 1
Drawers first. Lay a drawer front face down on the rug.
Screw in 2 cam bolts (115312) by hand — not the similar 118331.
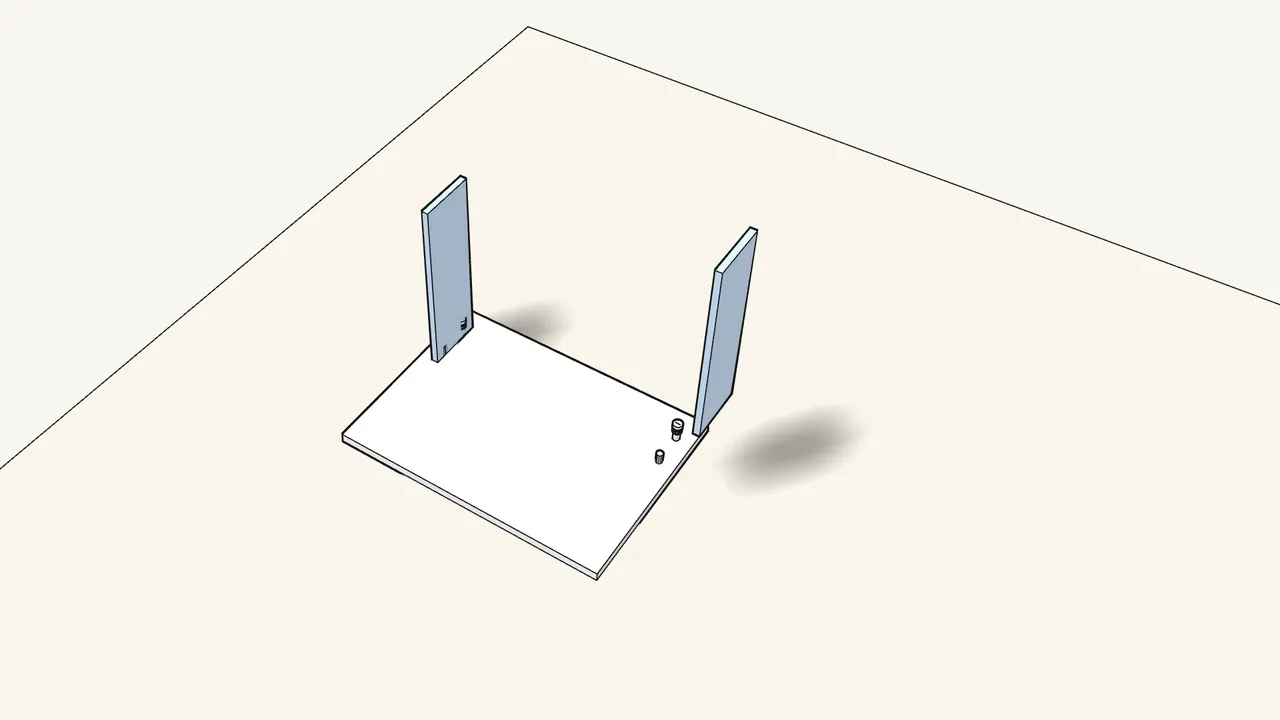
Step 2
Push in 2 dowels (101375) and fit the two drawer sides.
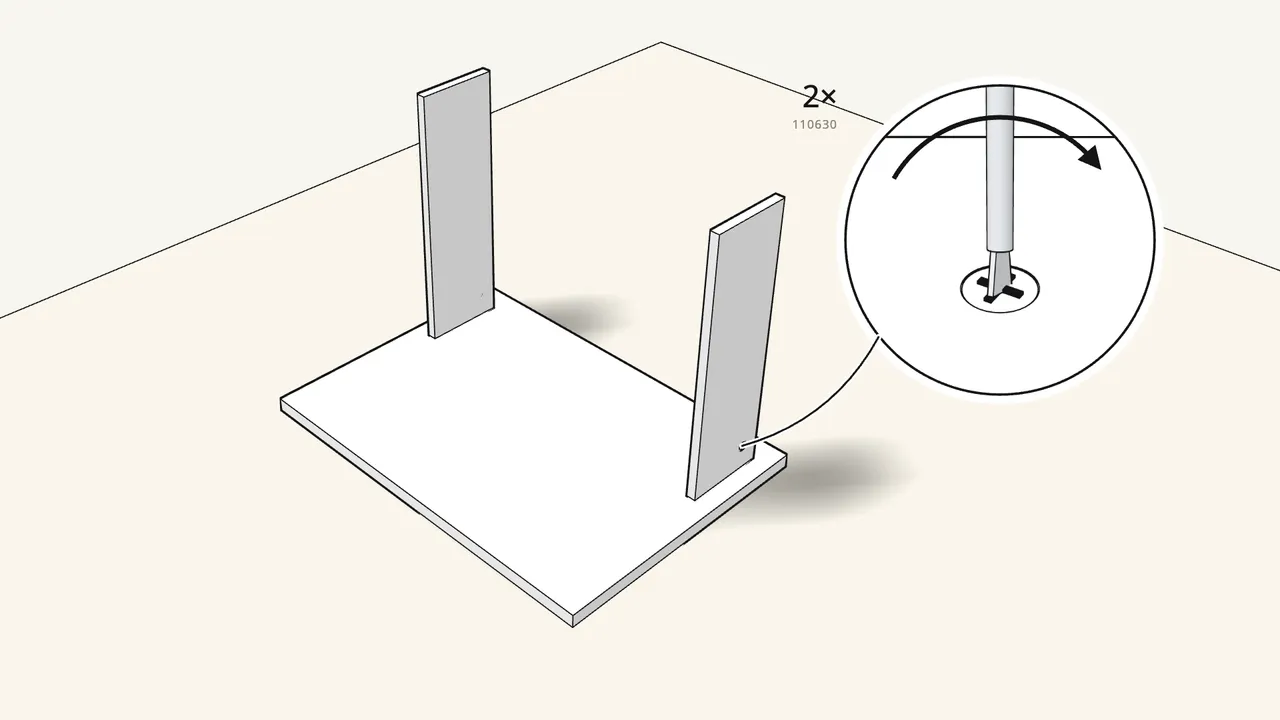
Step 3
Insert 2 cam locks (110630) and turn them to lock.
Use 110630 here — the 103430 locks are for the frame.
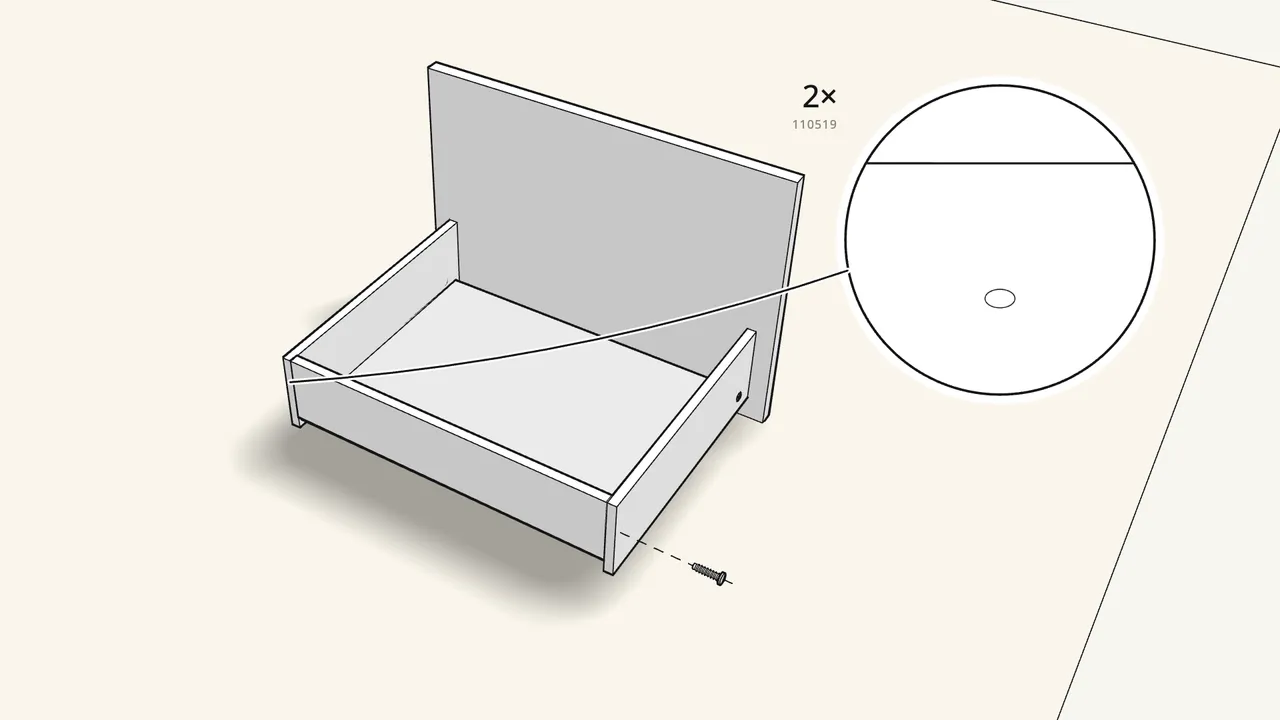
Step 4 · manual step 4–5
Stand it up. Slide the bottom in, fit the back, tap in 2 screw-dowels.
Screw-dowels 110519, with the hammer.
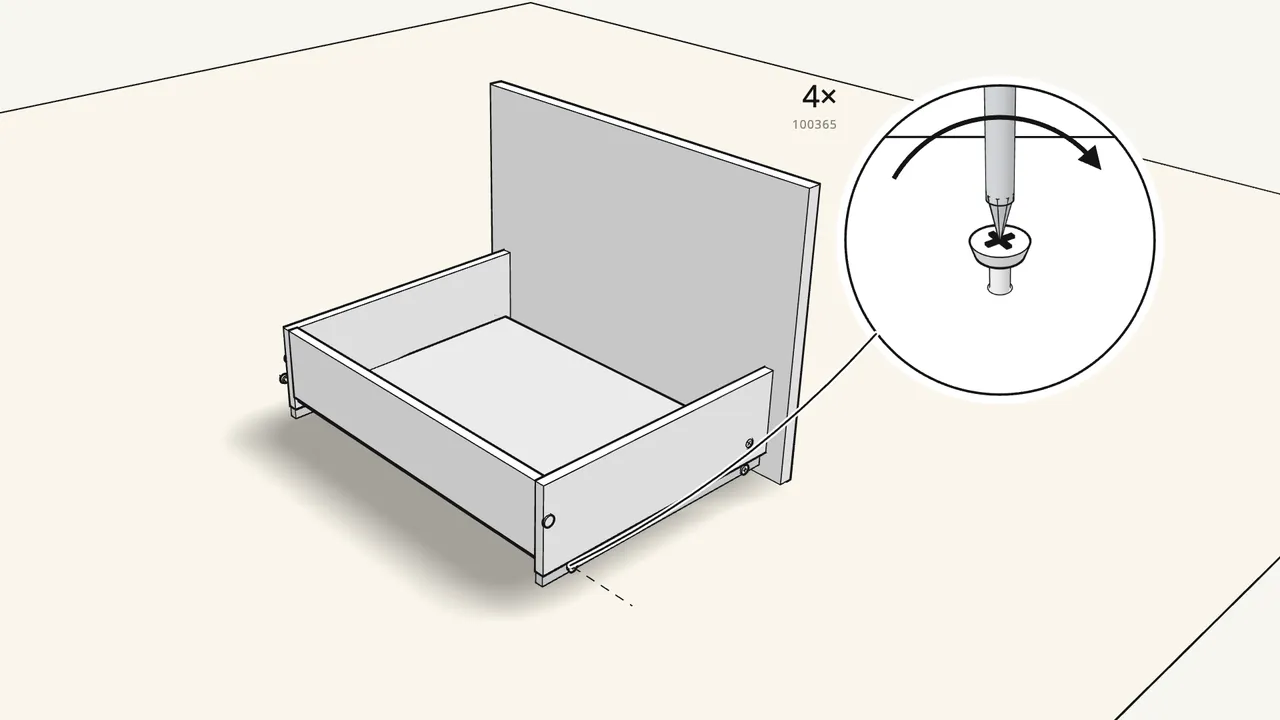
Step 5 · manual step 6
Clip the 2 runners under the sides and screw them on.
2 screws (100365) per runner — not the pointed 116637.
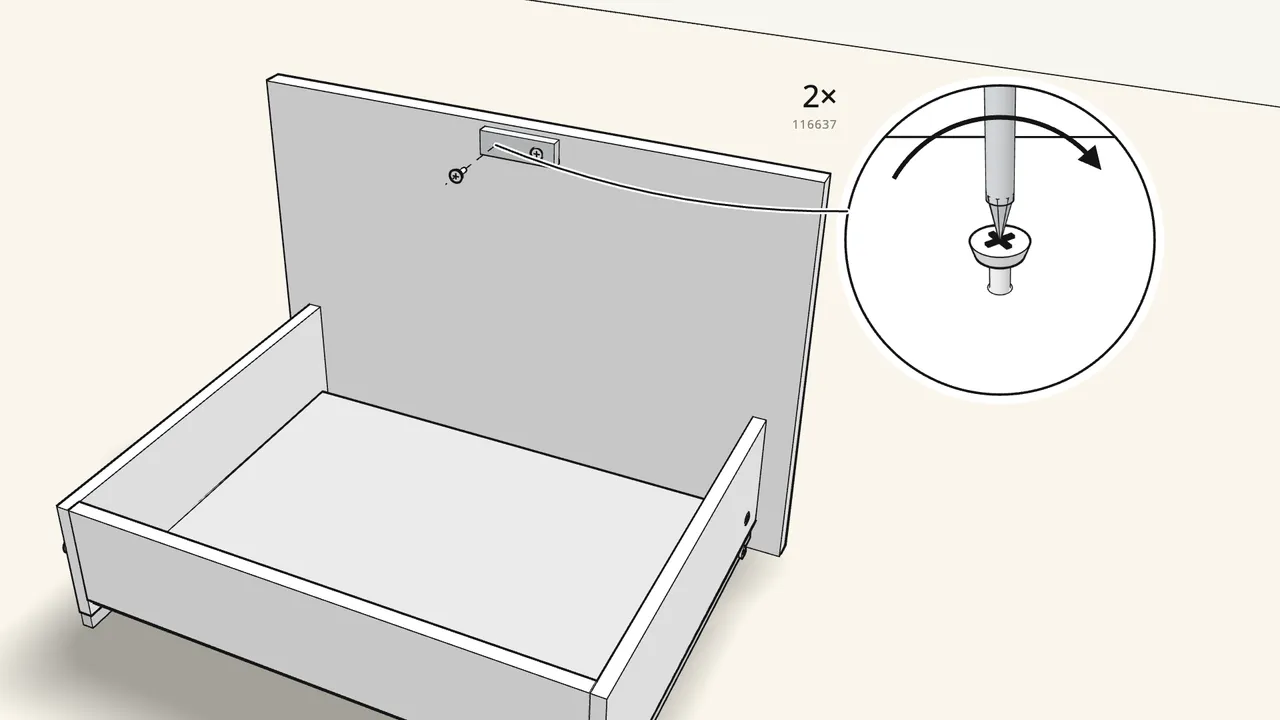
Step 6 · manual step 7
Screw the grip fitting (123442) to the top of the front.
2 screws (116637), from the inside.
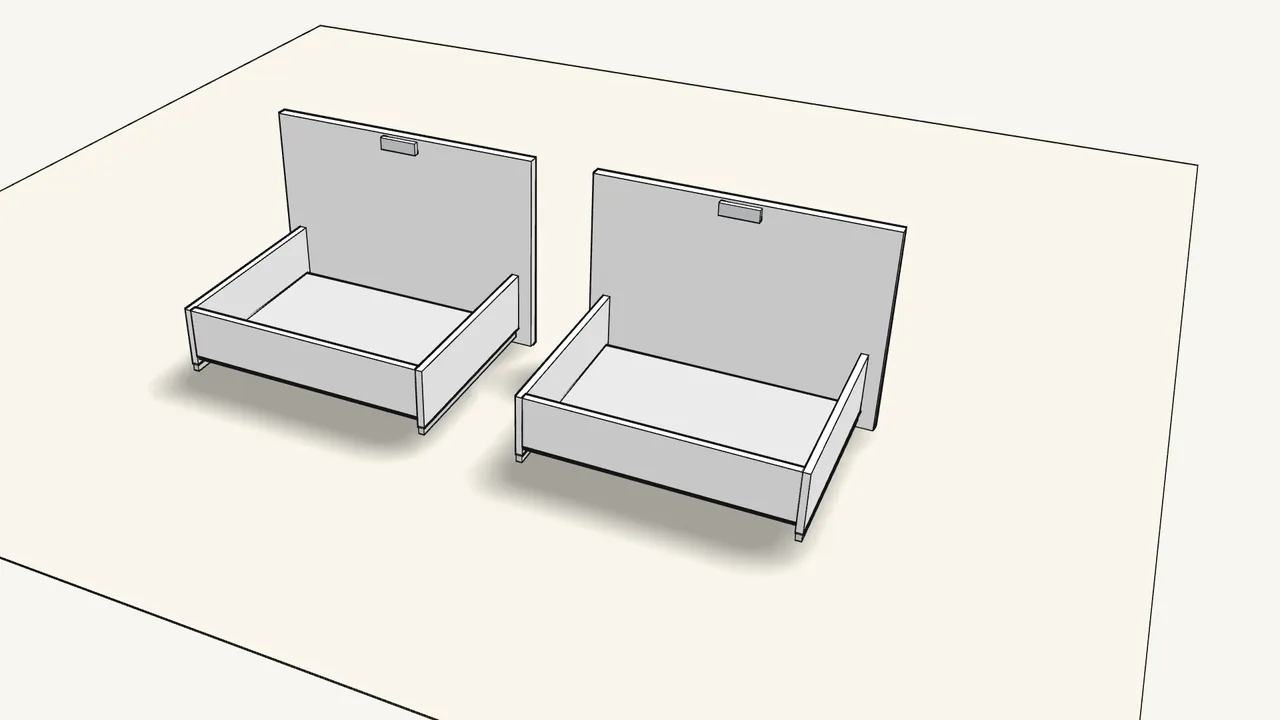
Step 7 · manual step 1–7
Build the second drawer the same way. Set both aside for now.
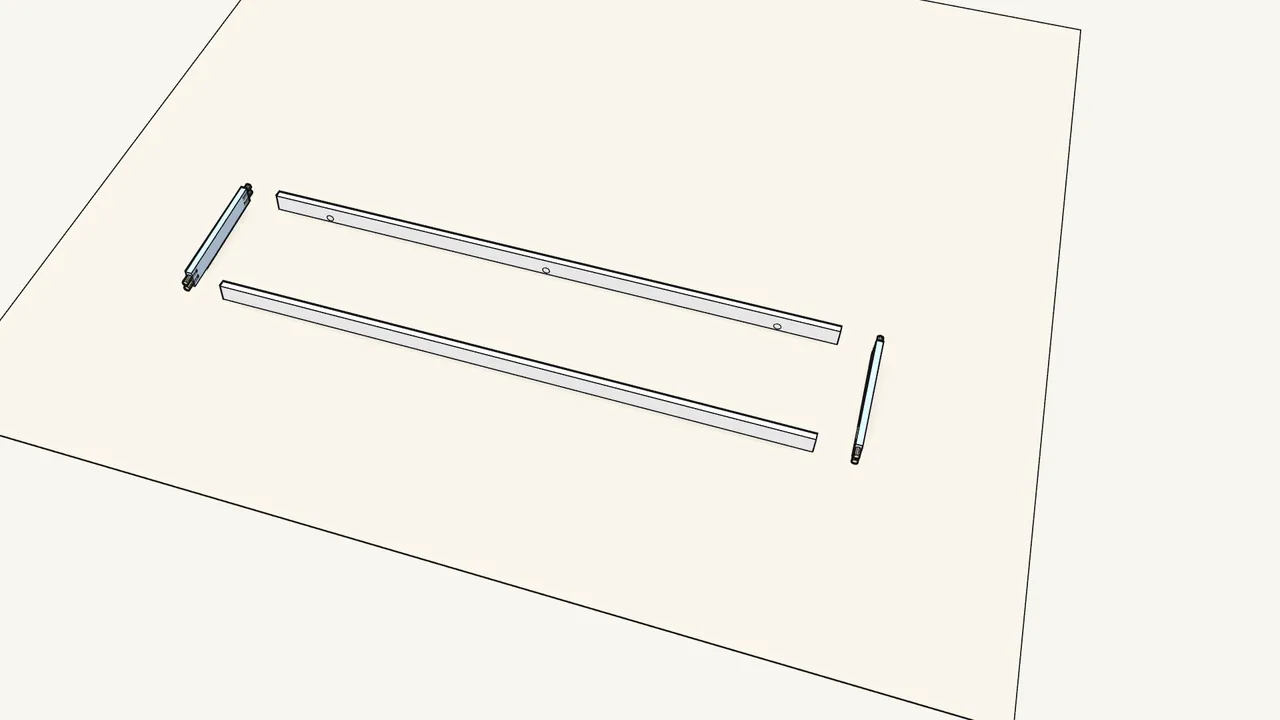
Step 8
Push 8 dowels (101375) into the short plinth rails and join the frame.
Lay the 4 plinth rails out on the rug.
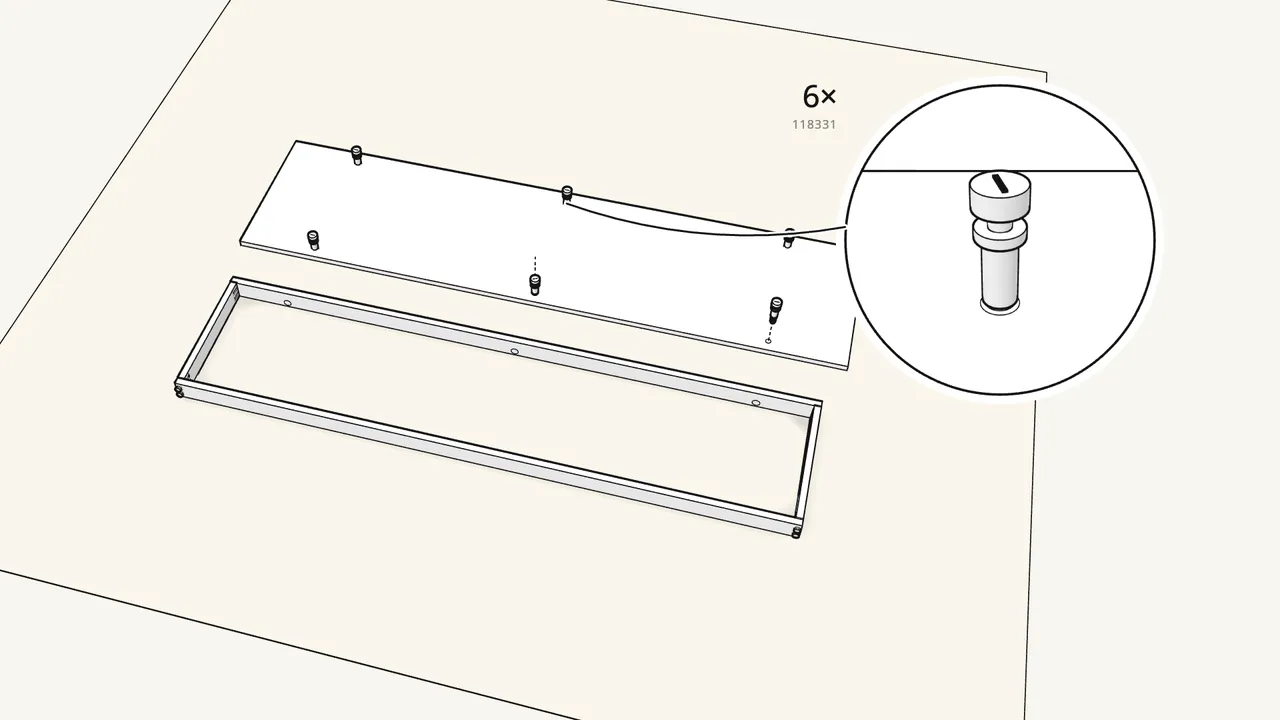
Step 9
Screw 6 cam bolts (118331) into the bottom panel.
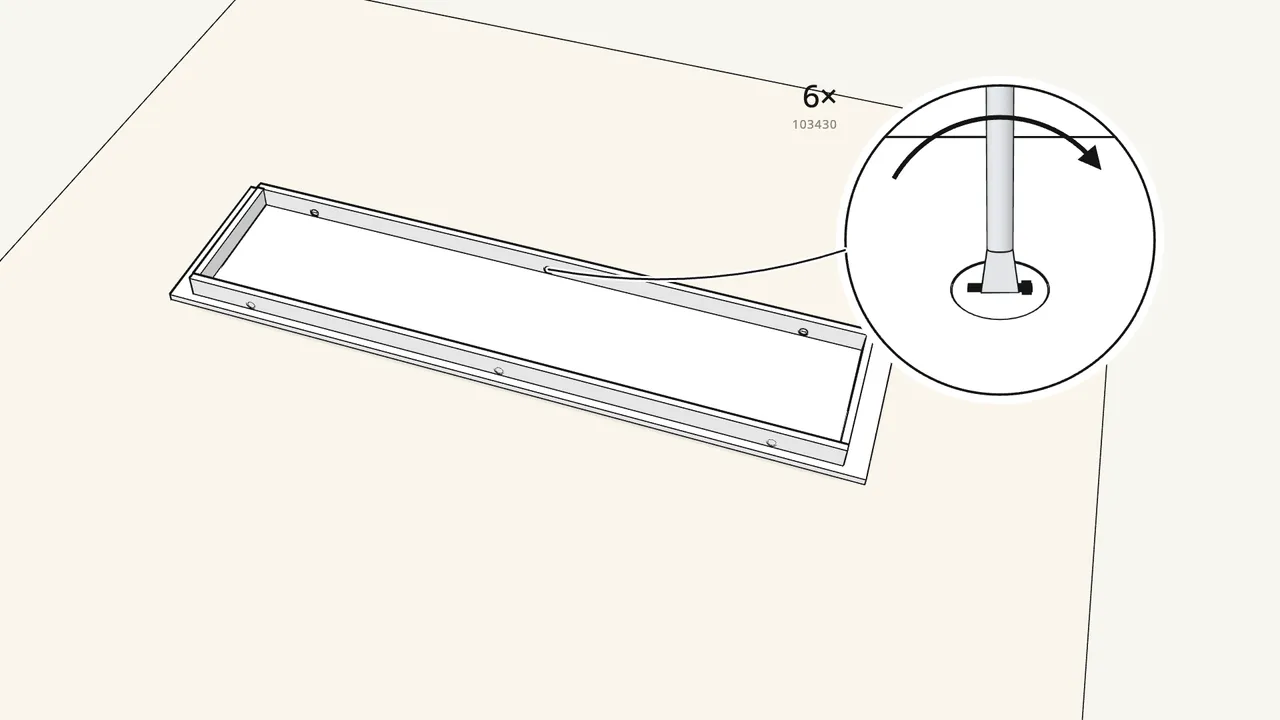
Step 10 · manual step 10–11
Lower the plinth frame onto the bolts. Lock with 6 cam locks.
Cam locks 103430, turned clockwise.
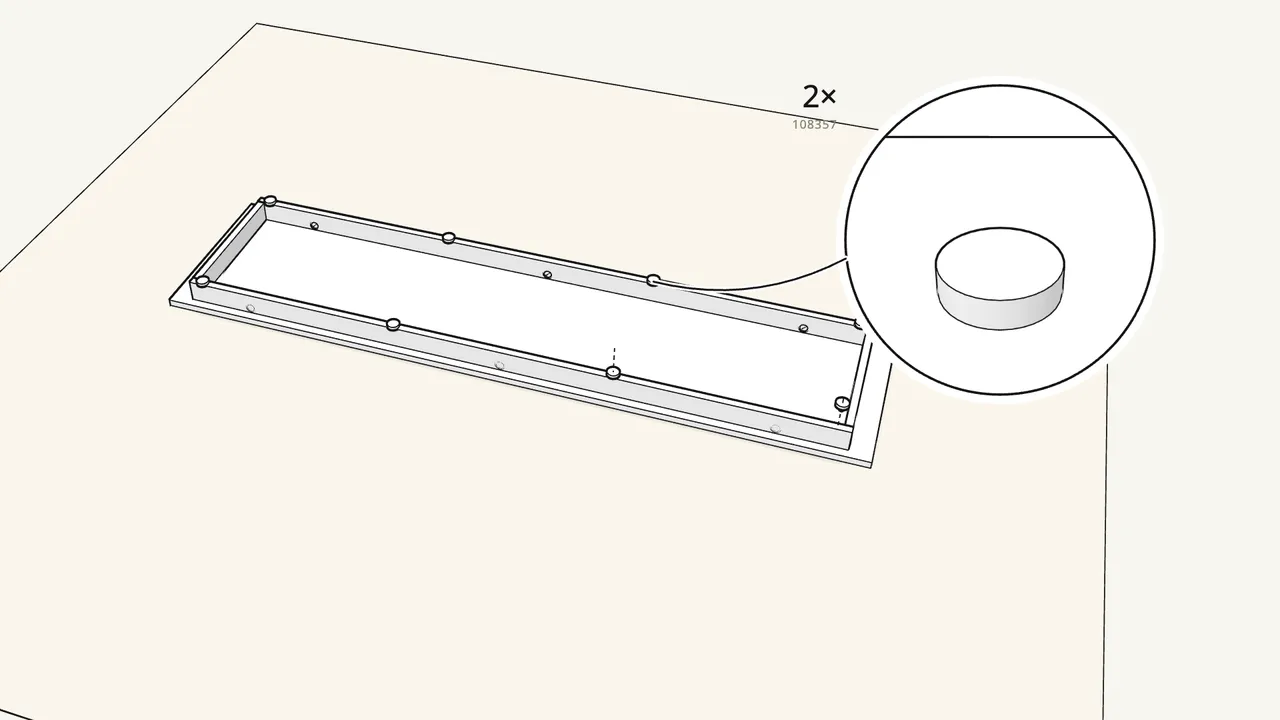
Step 11 · manual step 12
Stick the felt pads (108357) onto the plinth.
2 sheets of 4 pads. This side will stand on the floor.
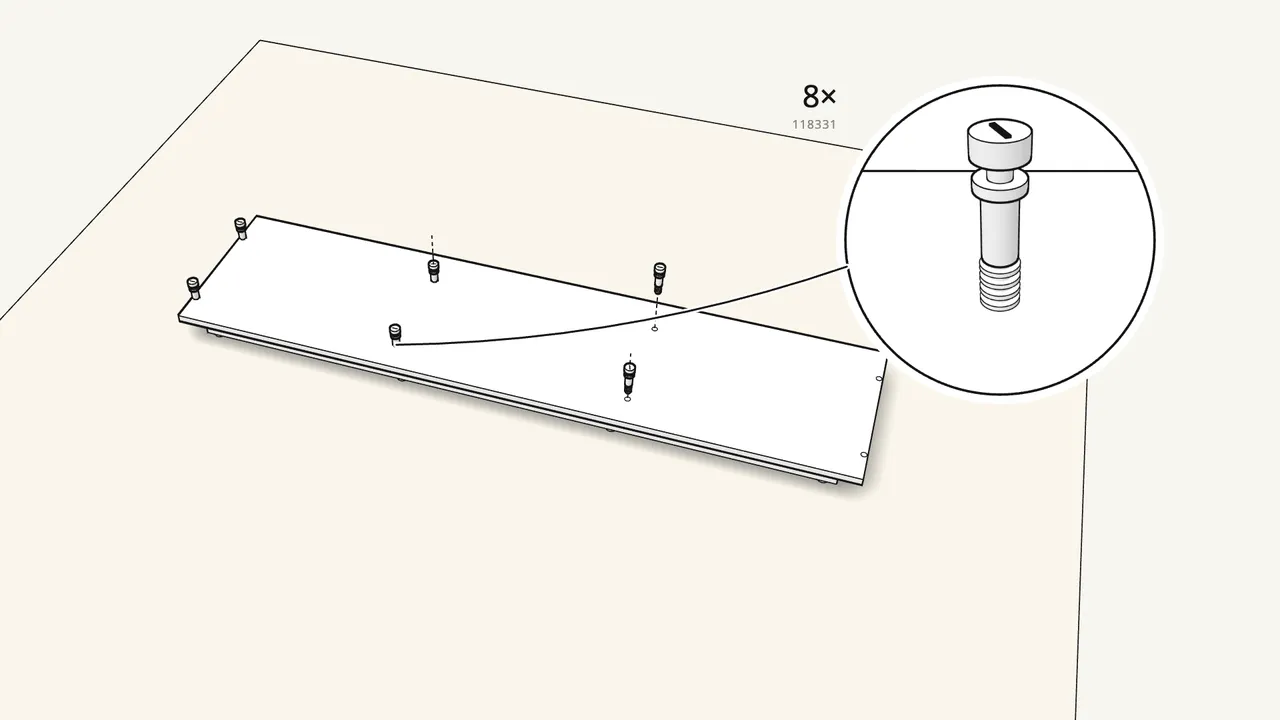
Step 12 · manual step 13
Turn it over. Screw 8 cam bolts (118331) into the bottom panel.
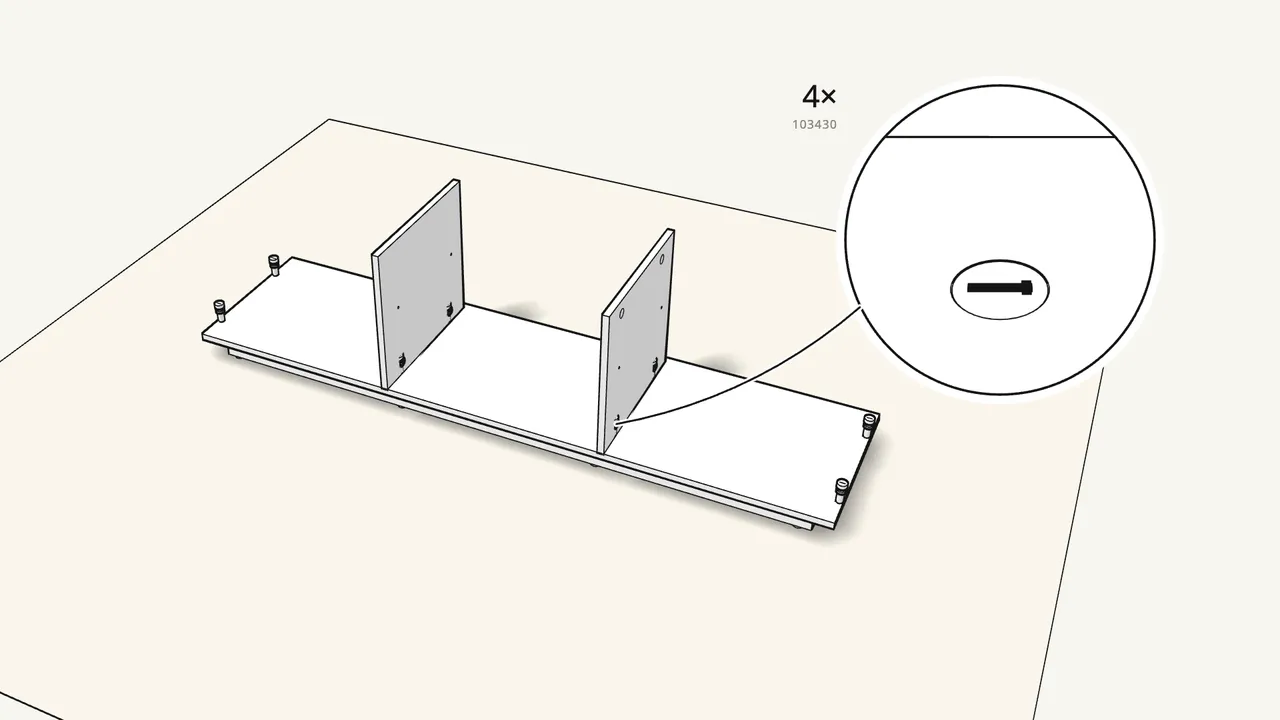
Step 13 · manual step 14–15
Fit the 2 dividers onto the bolts. Lock them with 4 cam locks.
Check which way round they go — see the hole details in the manual, step 14.
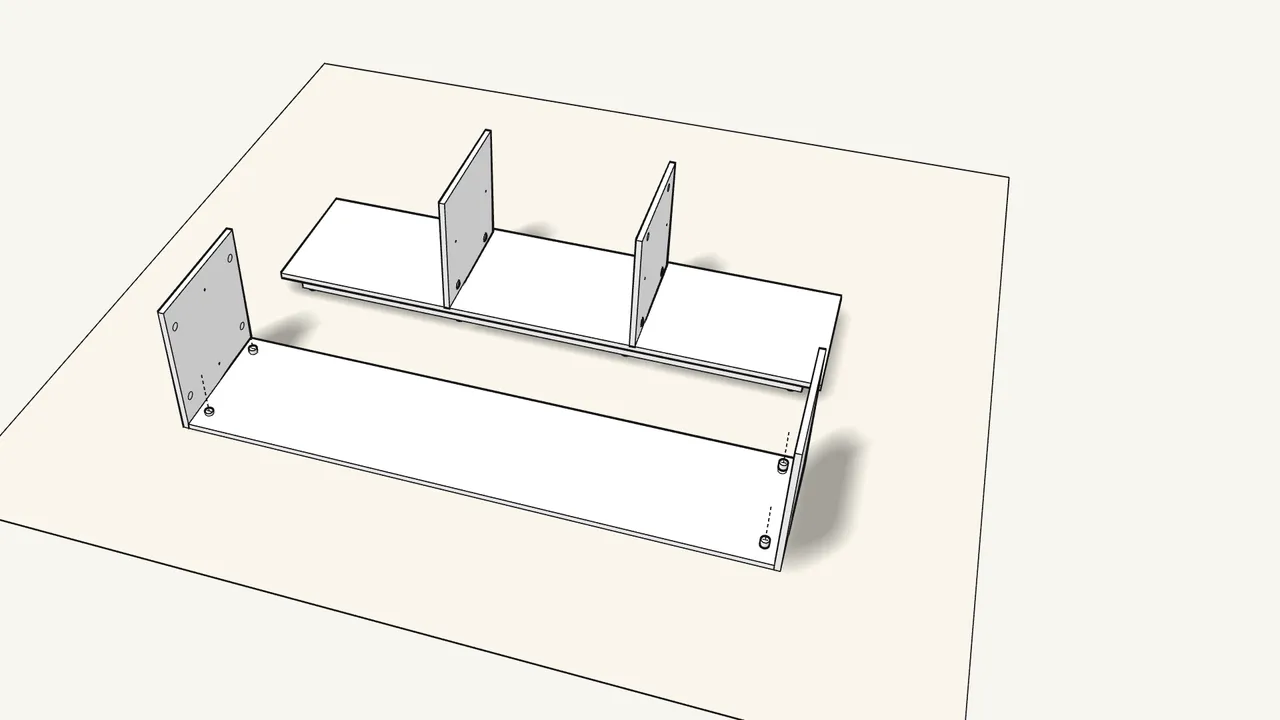
Step 14 · manual step 16–18
Fit the sides to the back panel: 4 cam bolts, 4 cam locks.
Back panel flat on the rug. Bolts 118331 in the sides, locks 103430 in the back.
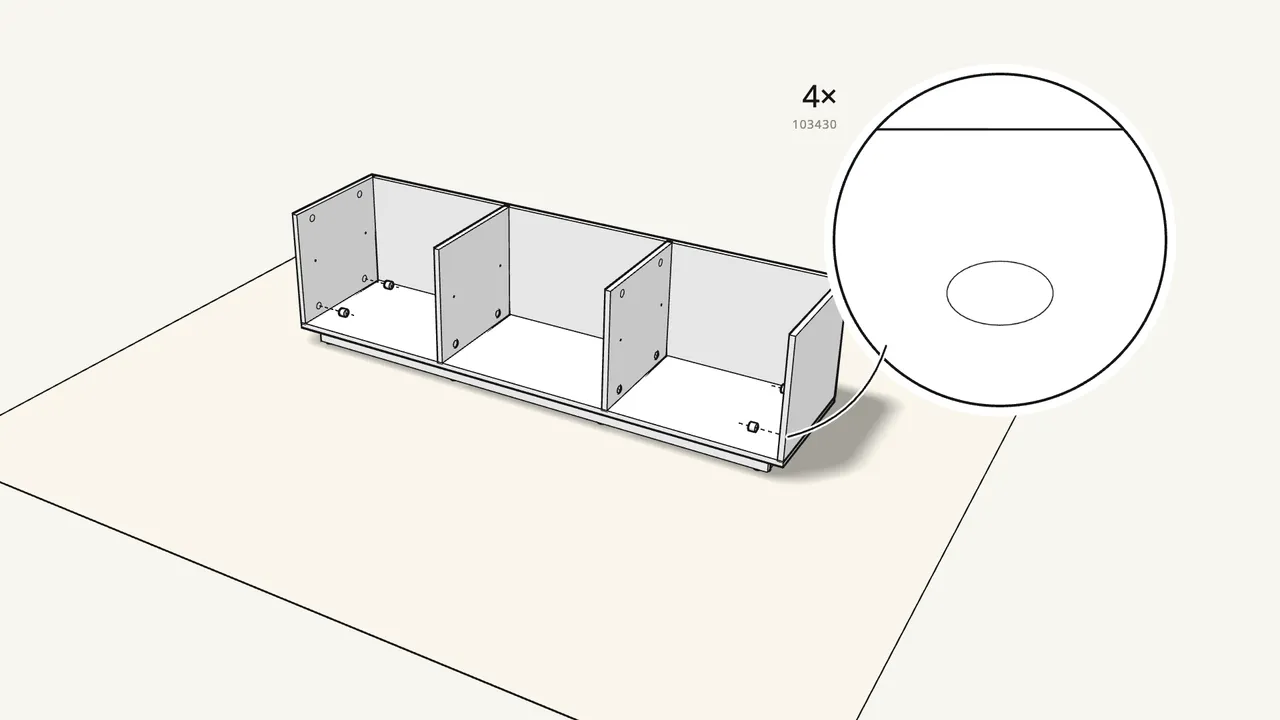
Step 15 · manual step 19–20
With a helper, stand the back up and lower it onto the bolts.
Lock the sides with 4 cam locks (103430).
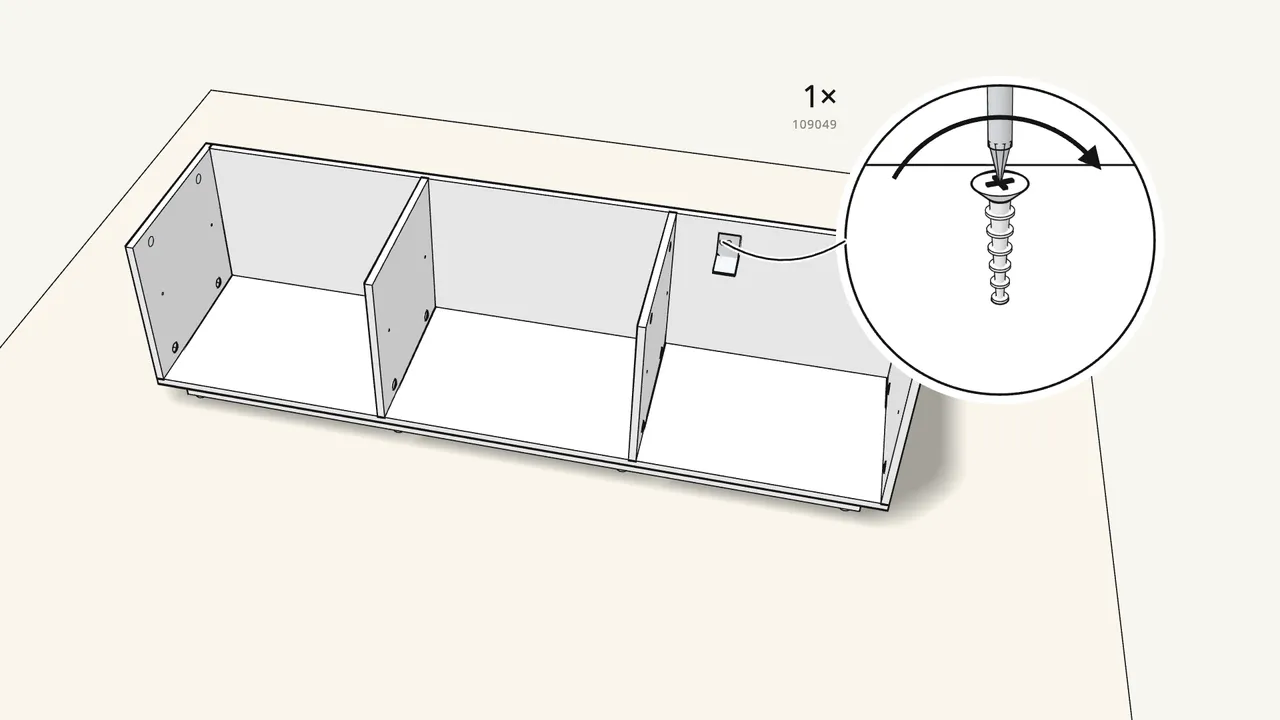
Step 16 · manual step 21
Screw the wall bracket (106989) to the inside of the back.
Screw 109049 with a washer (100823).
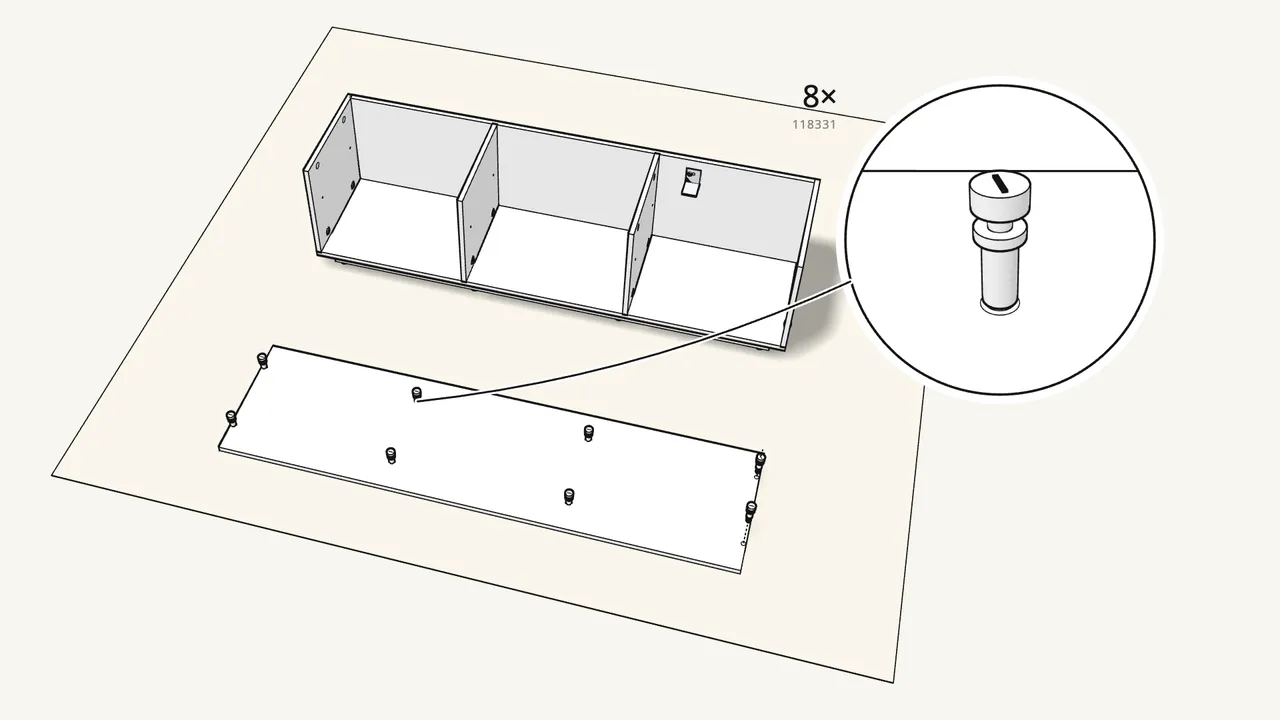
Step 17 · manual step 22
Lay the top face down. Screw in 8 cam bolts (118331).
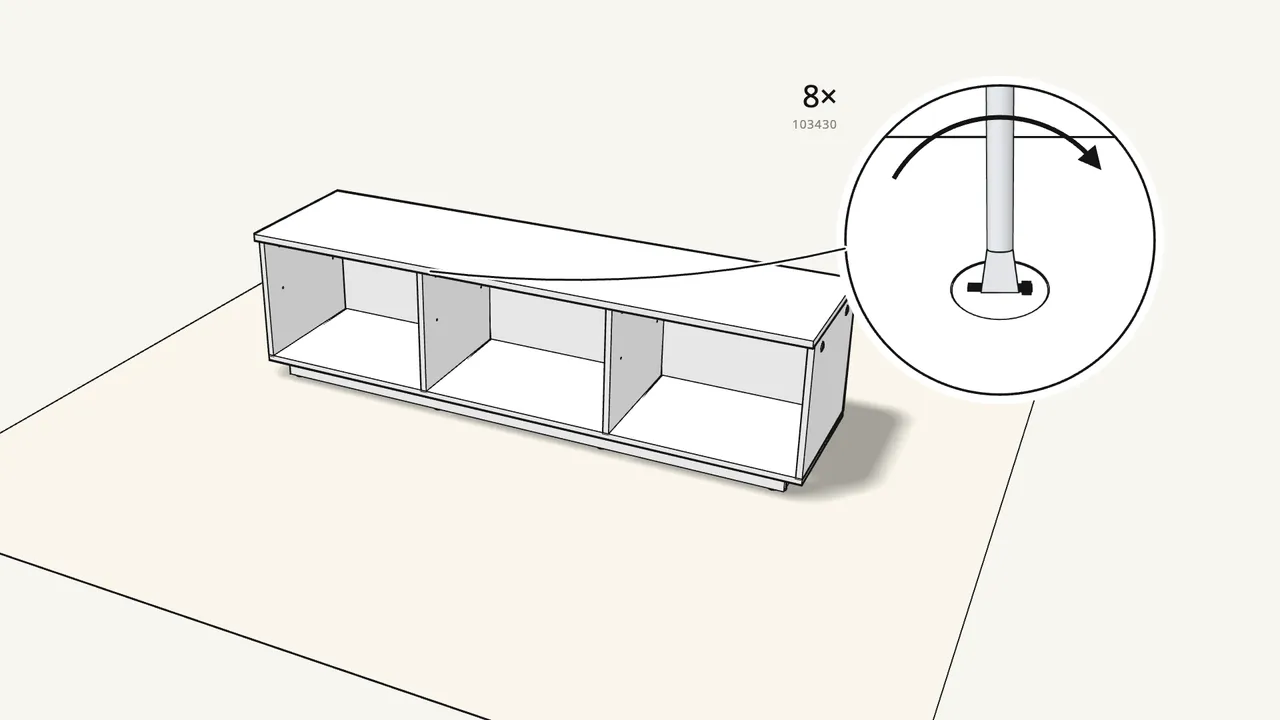
Step 18 · manual step 23–24
Lower the top on, flush at the back. Lock with 8 cam locks.
Cam locks 103430: 2 in each side, 2 in each divider.
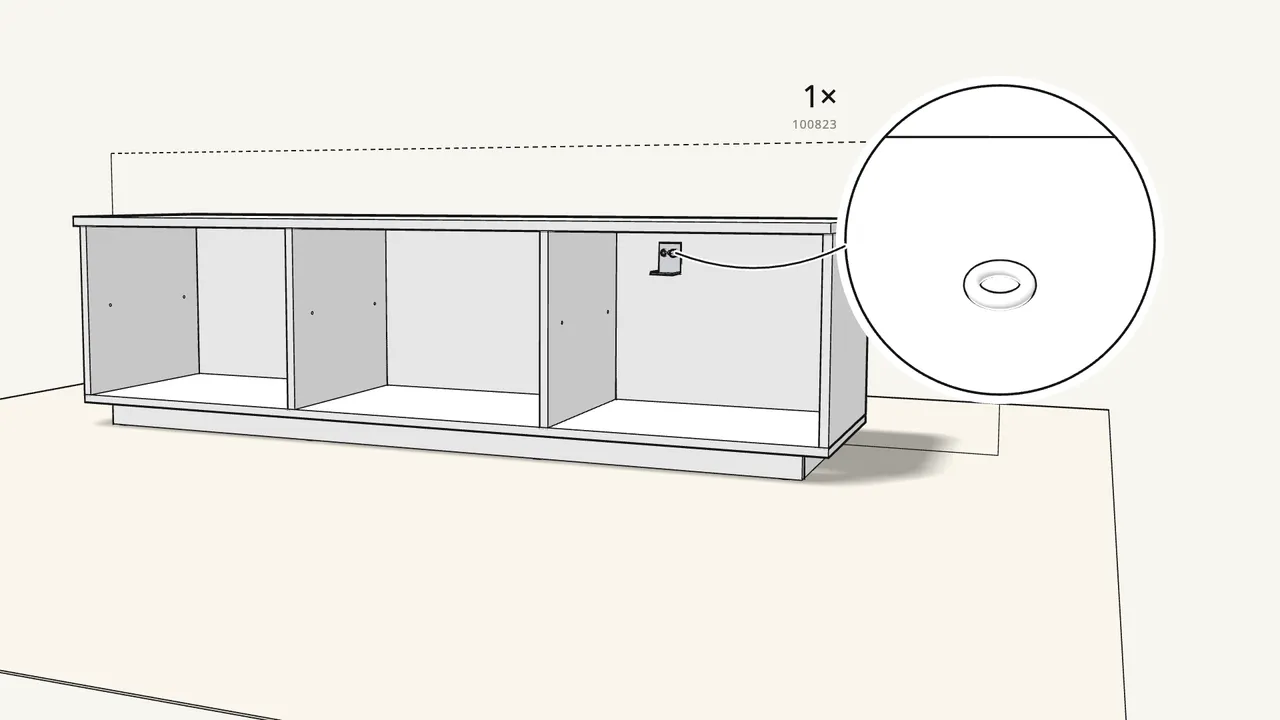
Step 19 · manual step 25
Push it to the wall. Fix the bracket with the second washer (100823).
Wall screw and plug are not included — use ones that suit your wall.
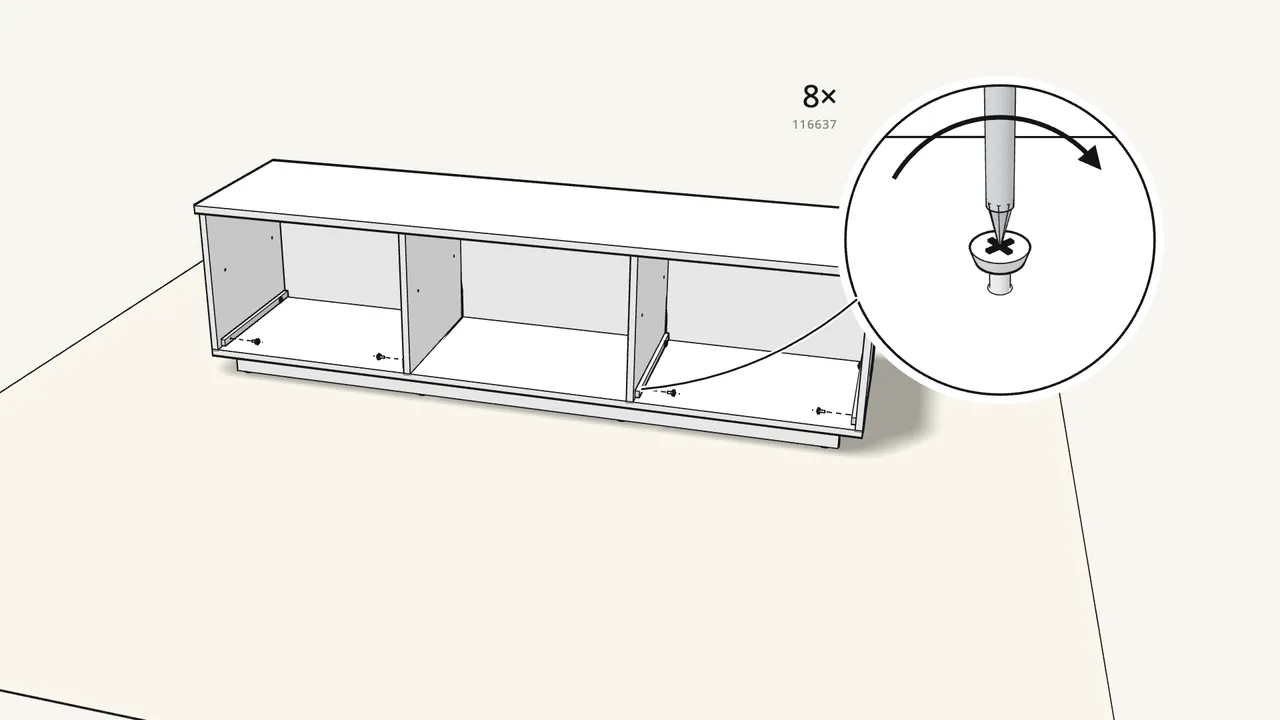
Step 20 · manual step 26
Screw the 4 cabinet runners into the drawer bays.
2 screws (116637) each. Runners are marked L and R.
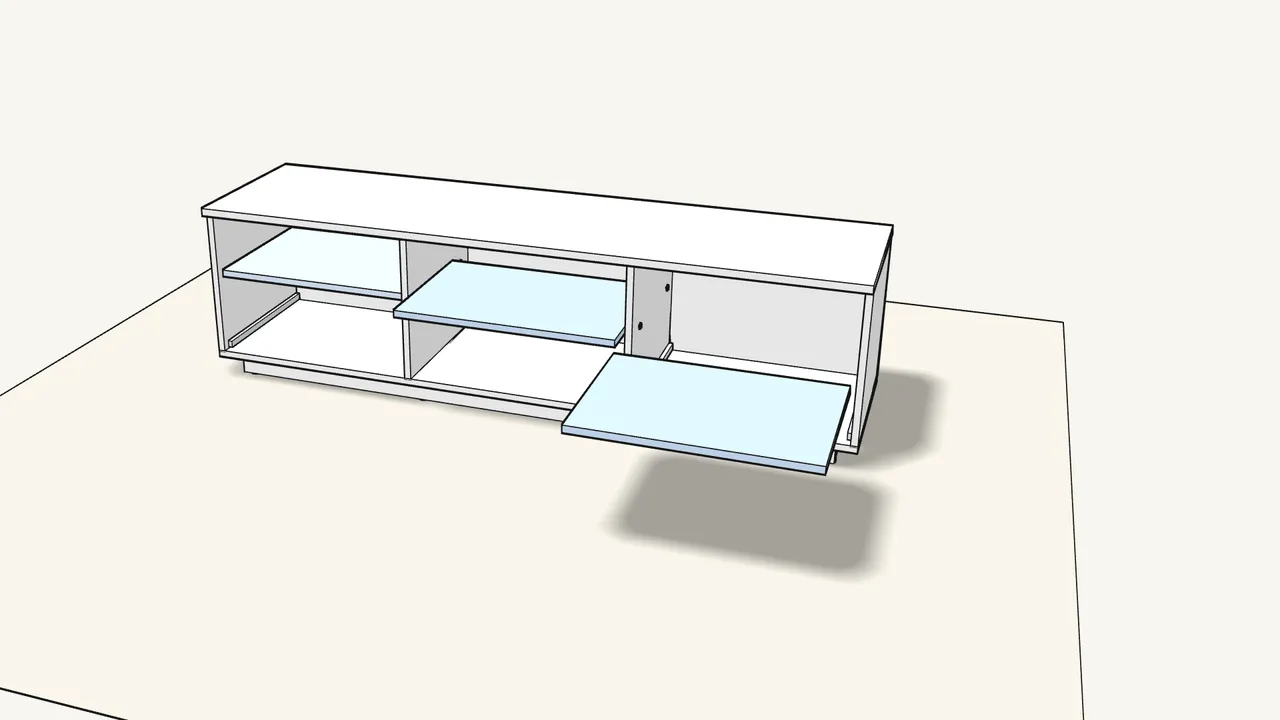
Step 21 · manual step 27–28
Push in 12 shelf pins (113301) and lay the 3 shelves on them.
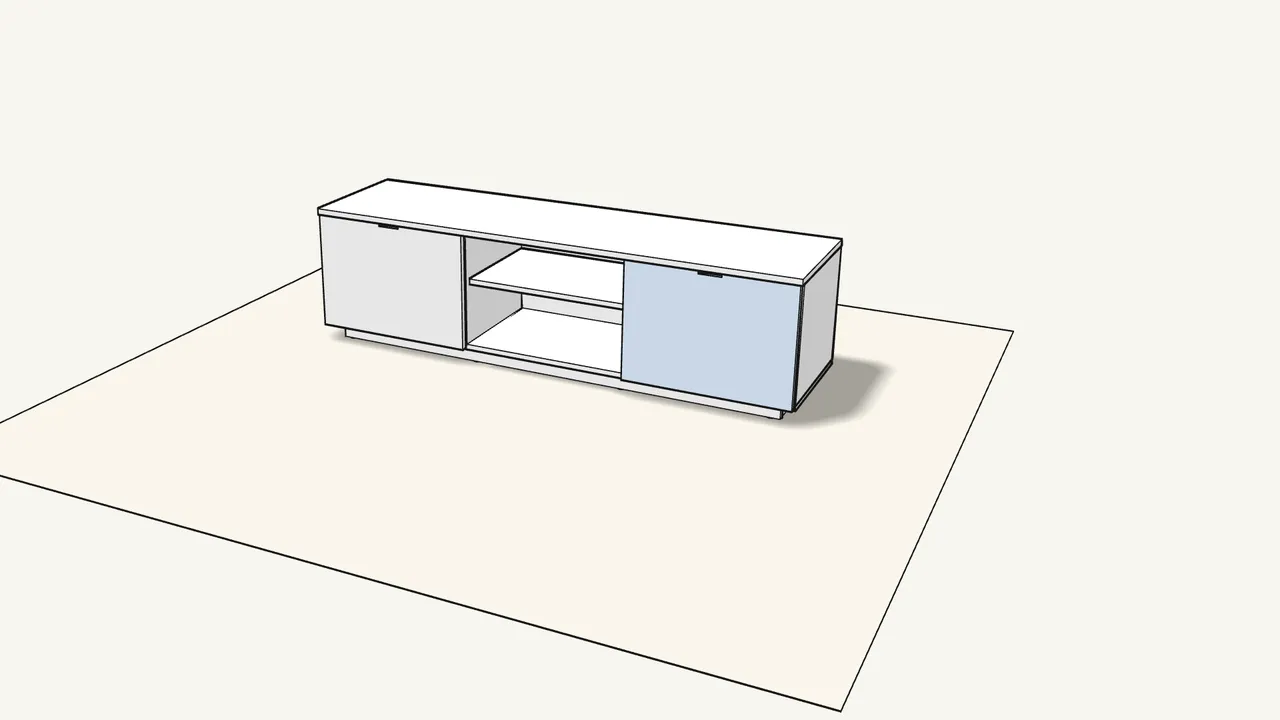
Step 22 · manual step 29
Slide both drawers in.
Set the runner wheels into the cabinet runners — see the details in the manual, step 29.
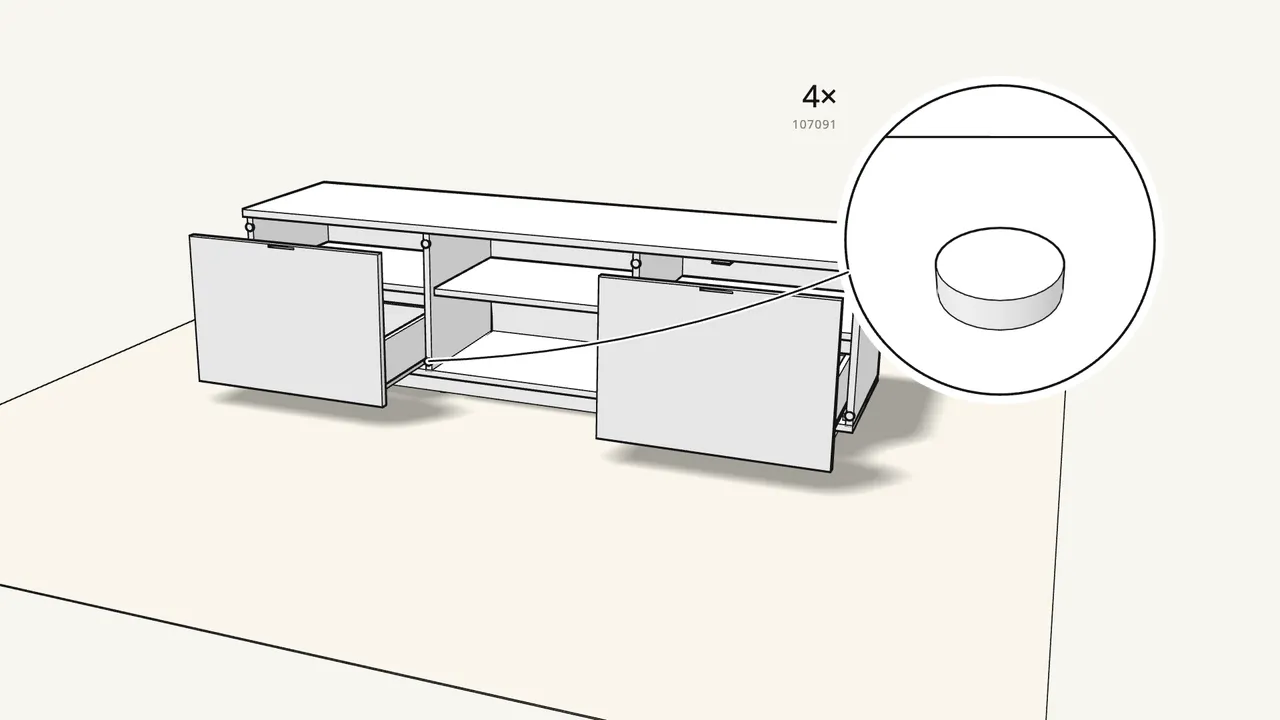
Step 23 · manual step 30
Pull the drawers out and stick on the 8 bumpers (107091).
4 sheets of 2, on the front edges around both drawer bays — see the manual, step 30.
Tips & safety
- Always fix the TV unit to the wall. Furniture tip-over can cause serious or fatal crushing injuries. Wall screw and plug are not included — ask a hardware store if unsure.
- Protect the high-gloss surfaces. Assemble on a rug or the flattened box, as the manual shows, so the glossy panels don’t get scratched.
Official instructions
This guide follows IKEA’s official assembly instructions (AA-575586-10). Keep the printed manual to hand — if anything differs, the manual is right.



