IKEA · Cabinets & Wardrobes
How to Assemble IKEA BRIMNES Nightstand
Step-by-step IKEA BRIMNES nightstand assembly: 26 illustrated steps, an animated video, the hardware list and the tools you need — following the official instructions (AA-2523142-1).
- 26 illustrated steps
- 27 steps in the manual
- 3:24 video
- 39×41×53 cm
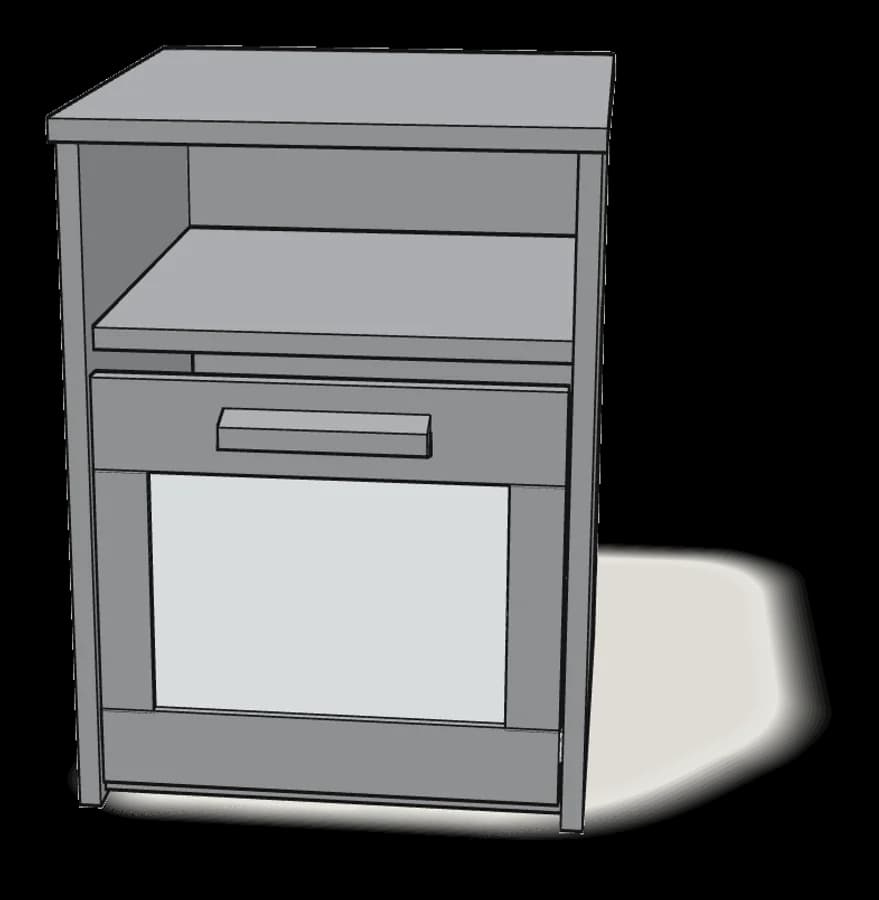
What you need
Tools
- Flat-head screwdriver
- Phillips screwdriver
- Hammer
Hardware in the box
| Part no. (as printed in the manual) | Qty |
|---|---|
| 118331 | 12× |
| 101345 | 12× |
| 117434 | 8× |
| 118224 | 4× |
| 100365 | 8× |
| 107519 | 4× |
| 153548 | 4× |
| 101221 | 17× |
| 110519 | 4× |
| 109567 | 2× |
| 107091 | 1× |
Step-by-step assembly
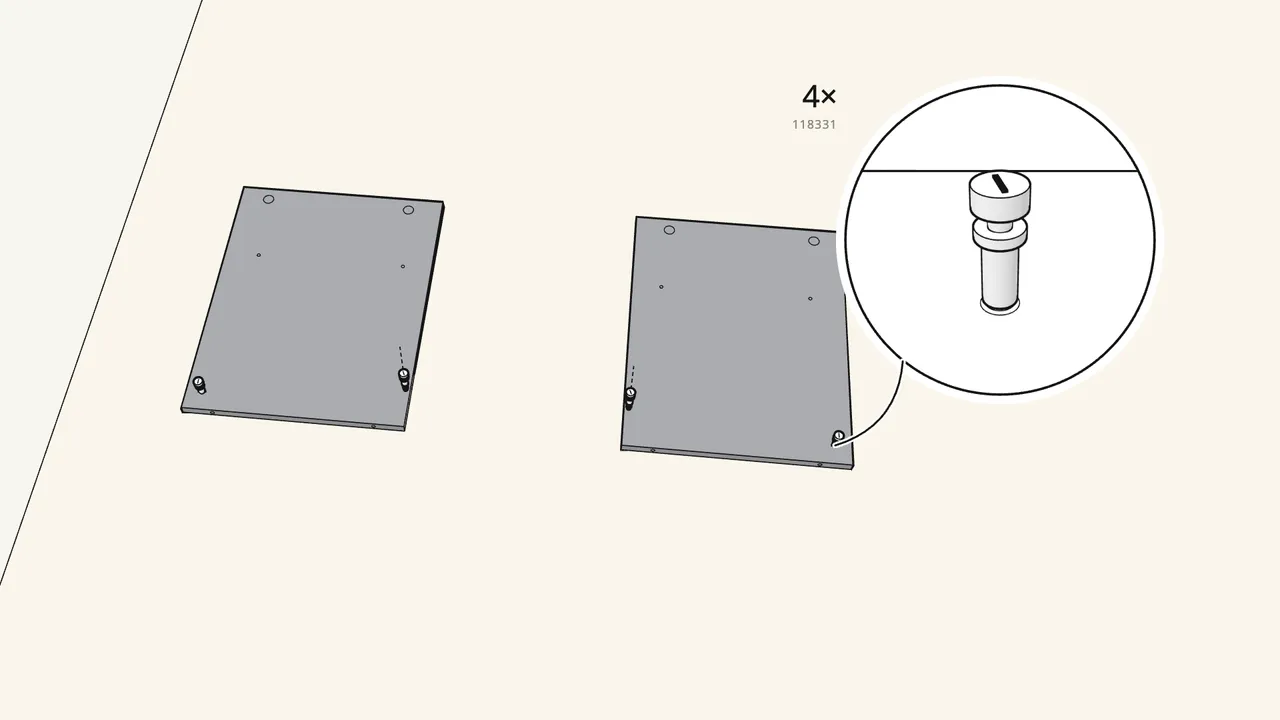
Step 1
Screw 4 cam bolts (118331) into the two side panels.
2 in each panel, by hand or with a Phillips screwdriver.
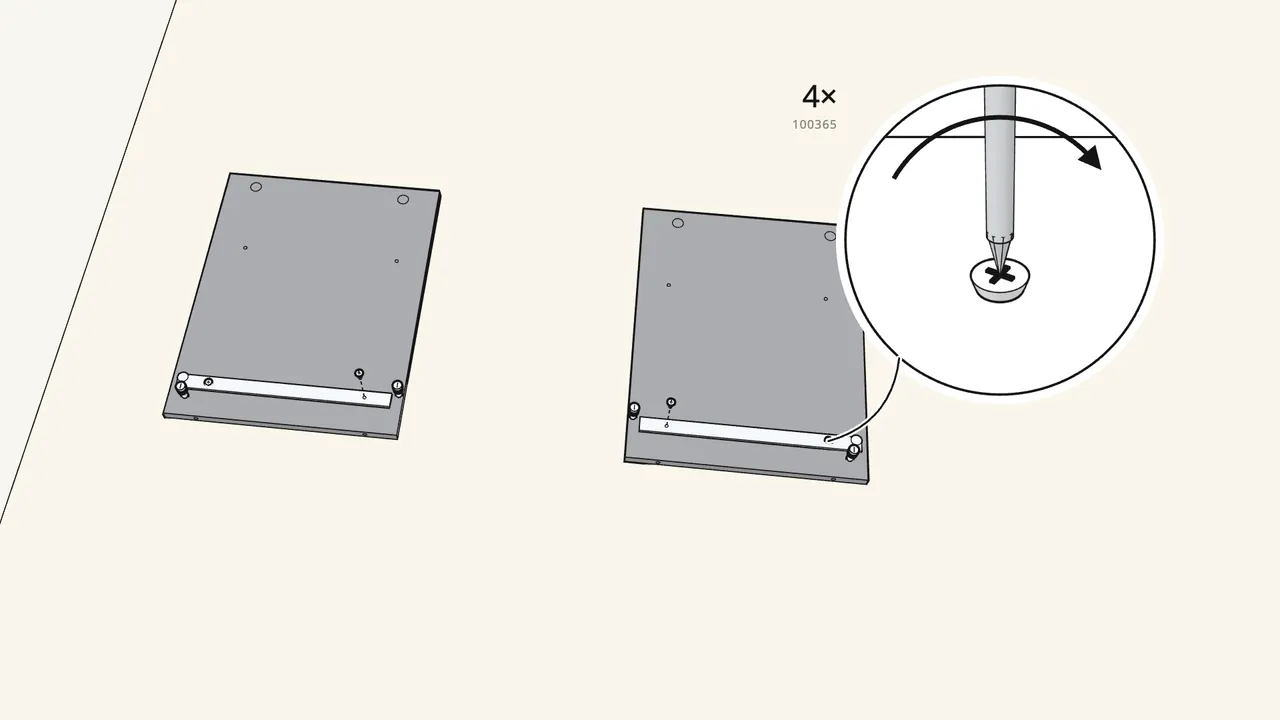
Step 2
Screw a runner onto each side panel.
2 screws (100365) per runner.
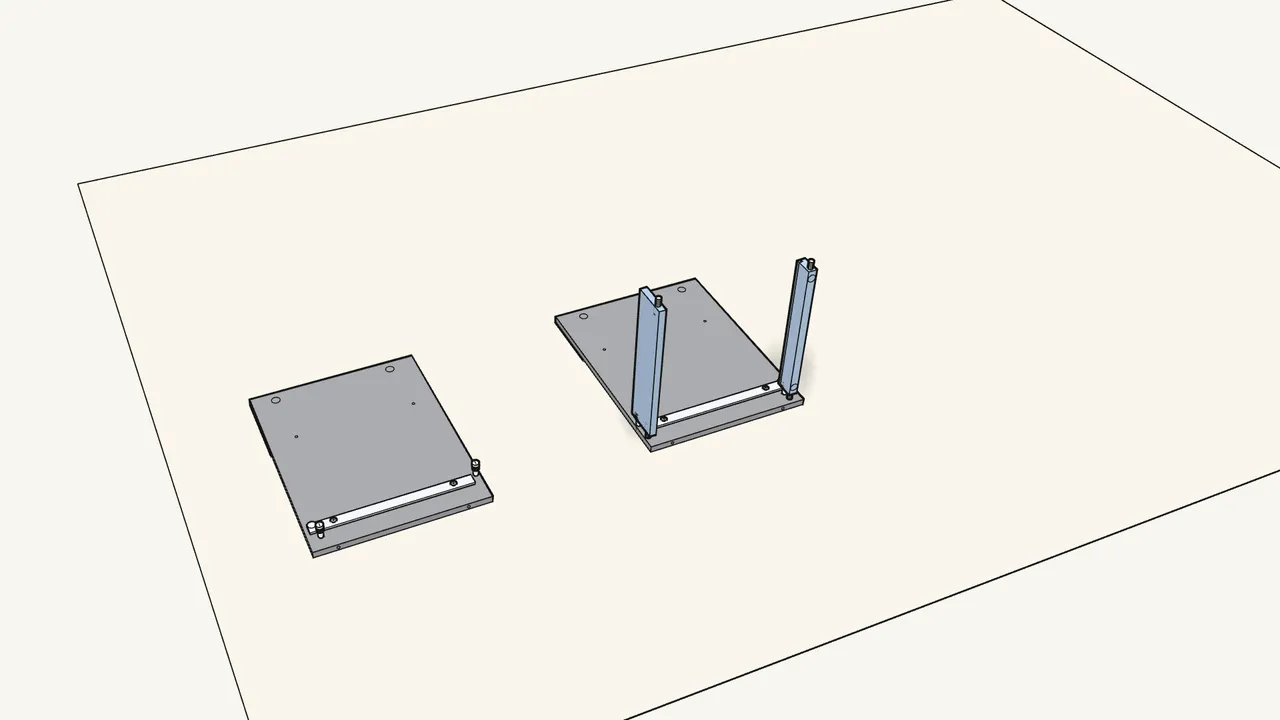
Step 3
Push 4 dowels (101345) into the rail ends and fit both rails.
Set the two rails onto one side panel.
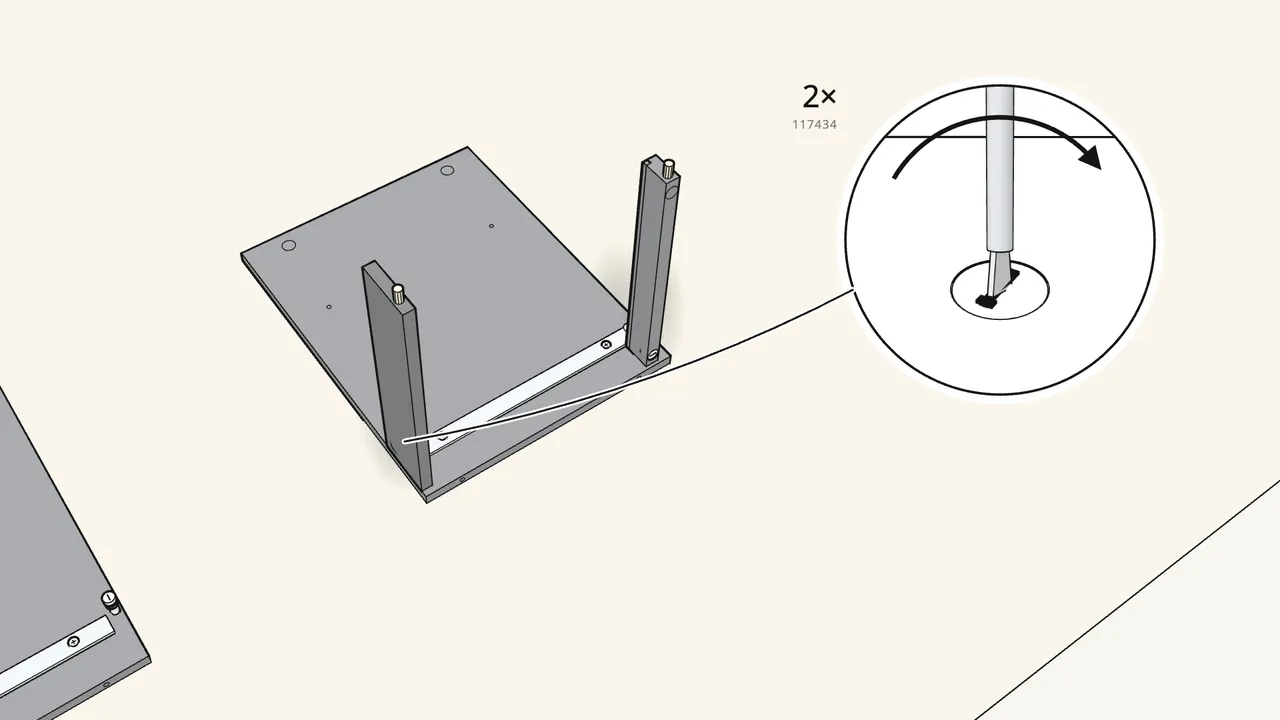
Step 4
Insert 2 cam locks (117434) and turn them clockwise.
Use a flat-head screwdriver.
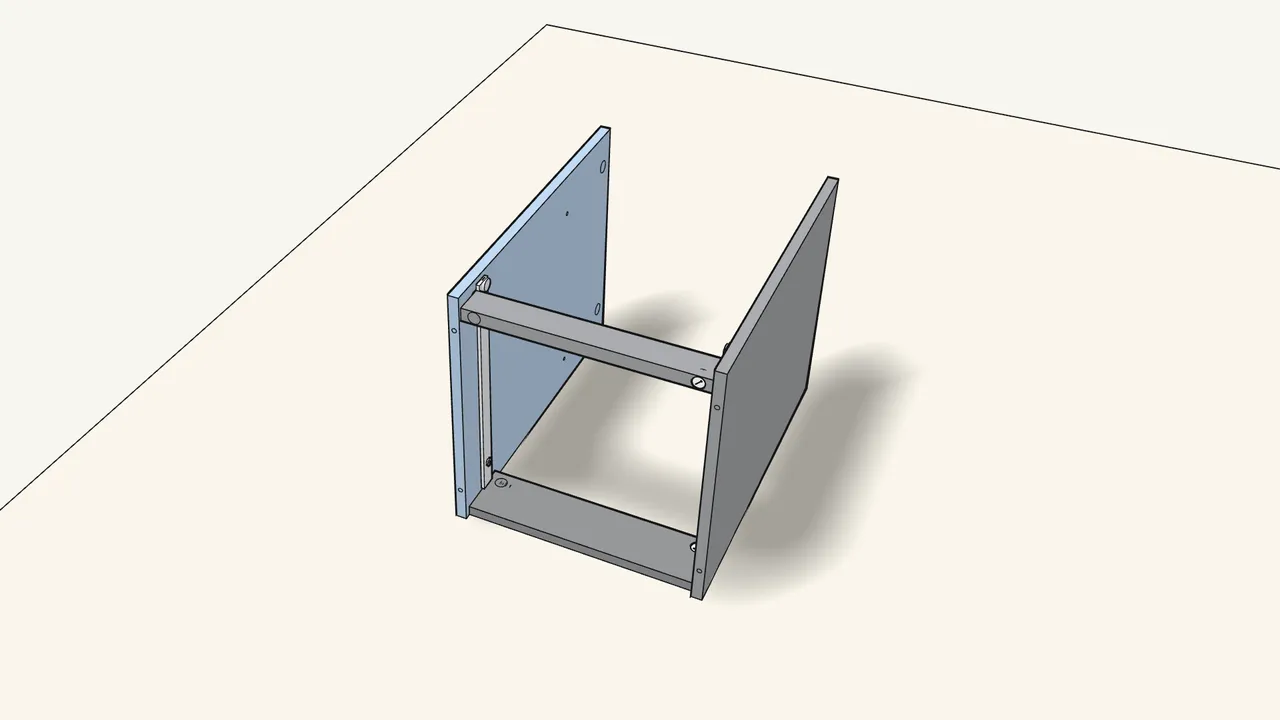
Step 5
Raise that side and fit the second side panel.
The dowels and bolts go into the other ends of the rails.
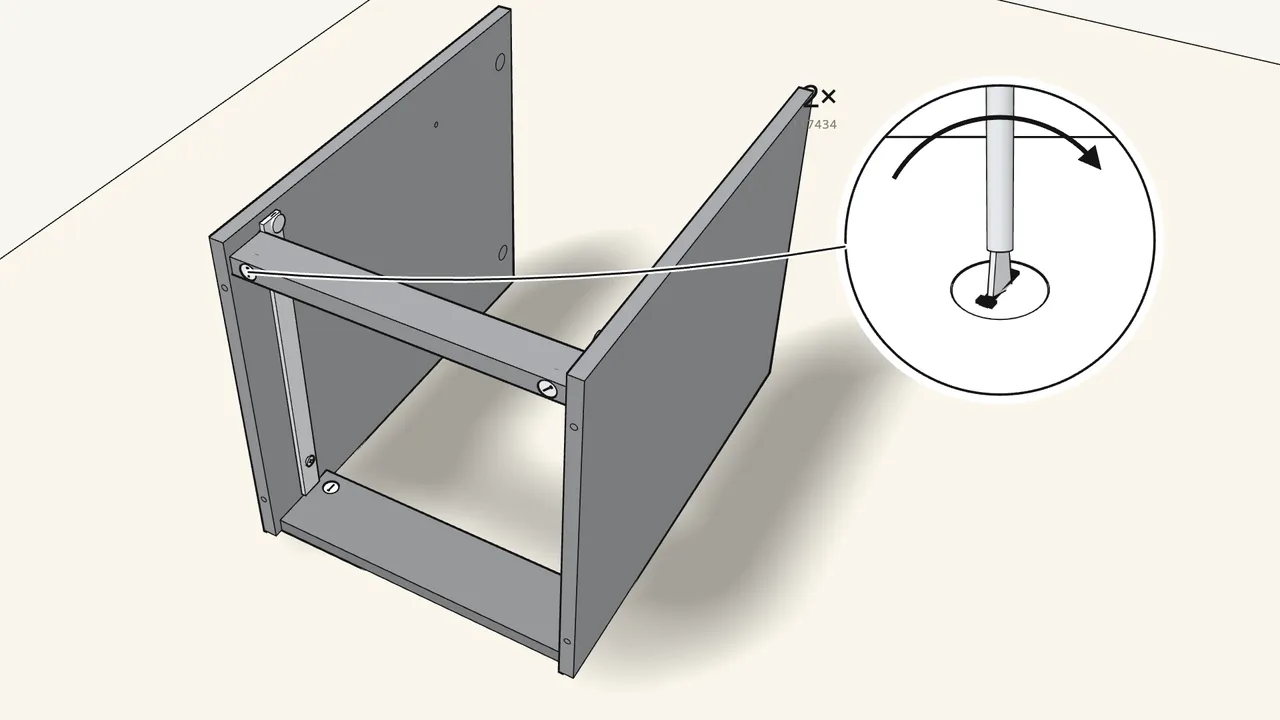
Step 6
Insert 2 more cam locks and turn them clockwise.
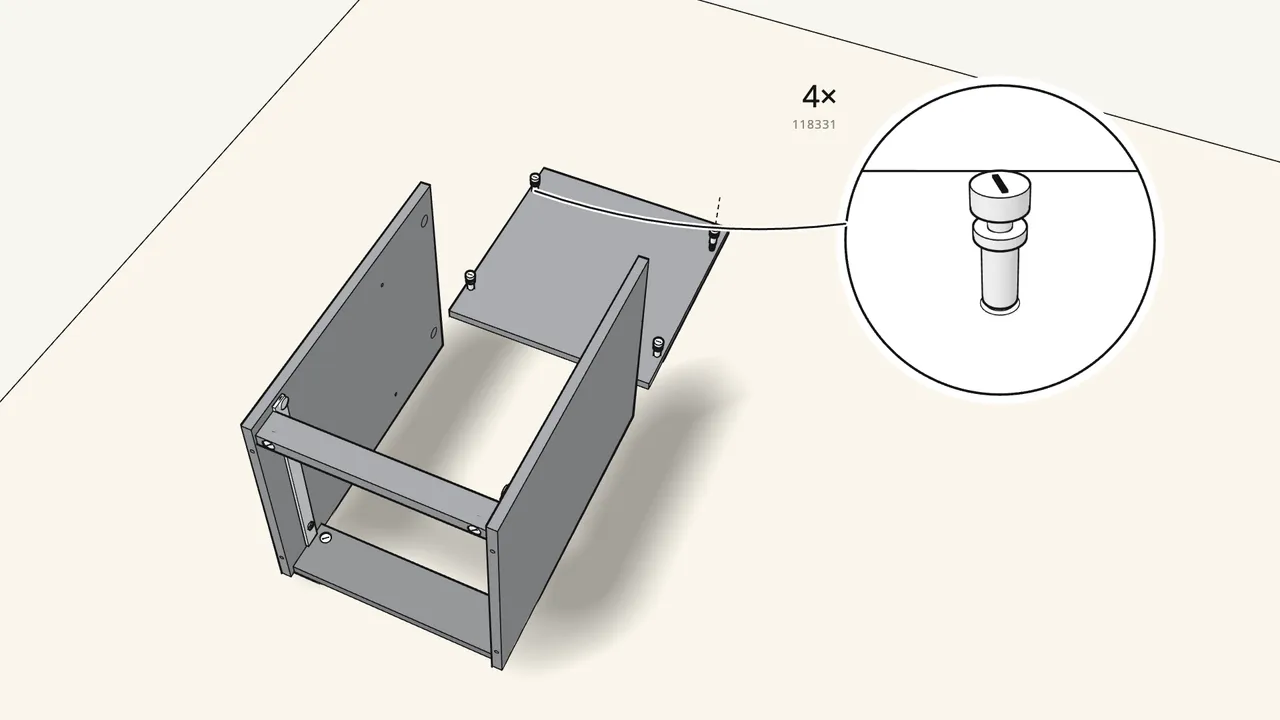
Step 7
Screw 4 cam bolts (118331) into the top panel.
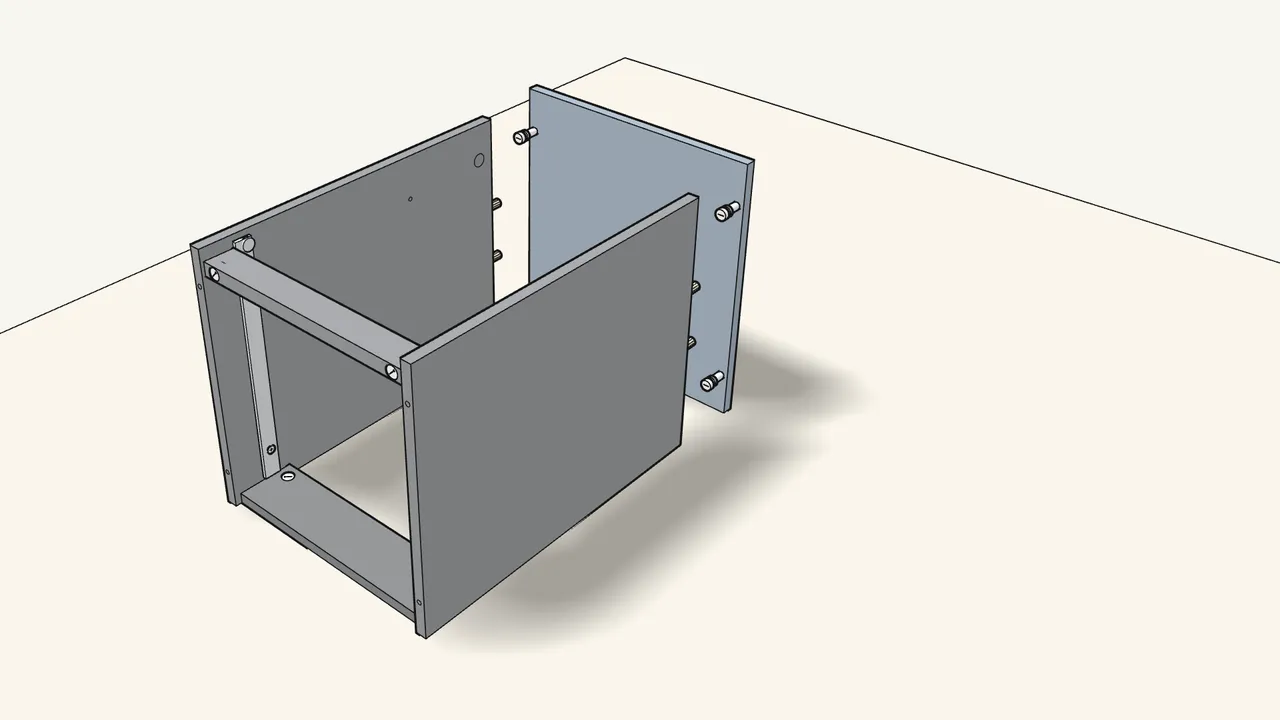
Step 8
Push 4 dowels into the sides and fit the top panel.
Check the top’s edge is the right way round (inset, manual step 8).
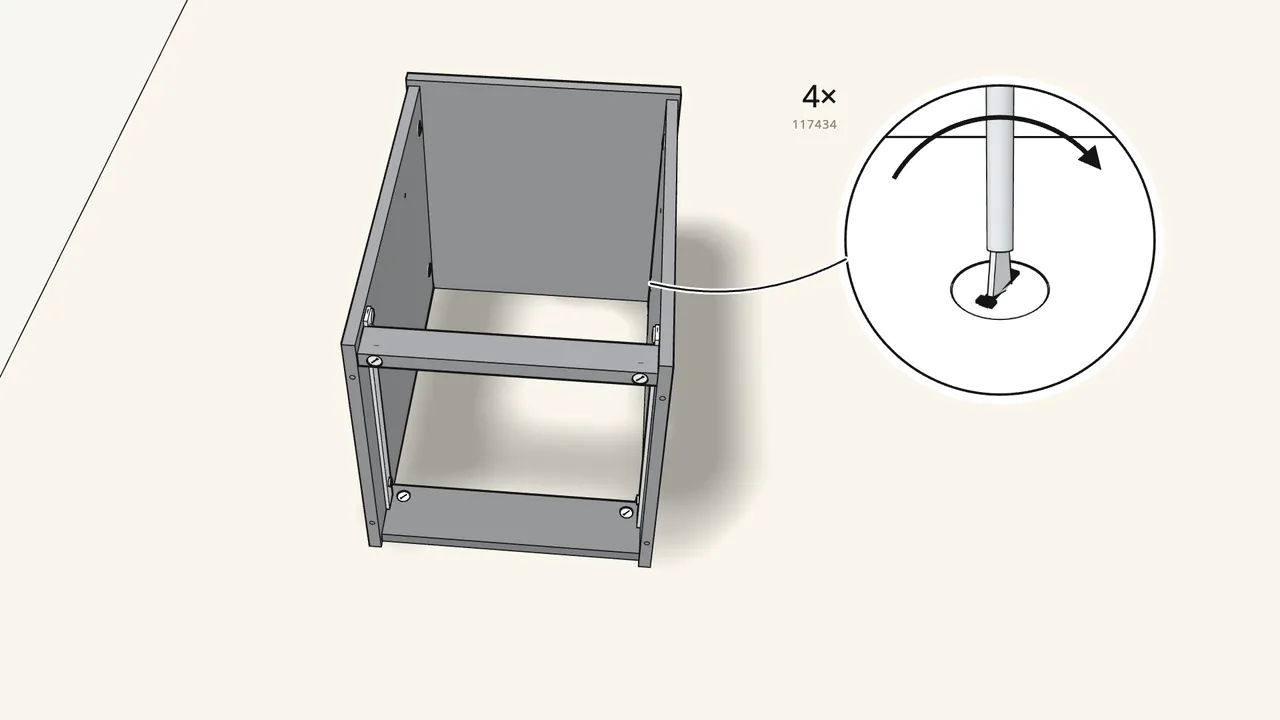
Step 9
Insert 4 cam locks (117434) and turn them clockwise.
2 in each side panel, next to the top.
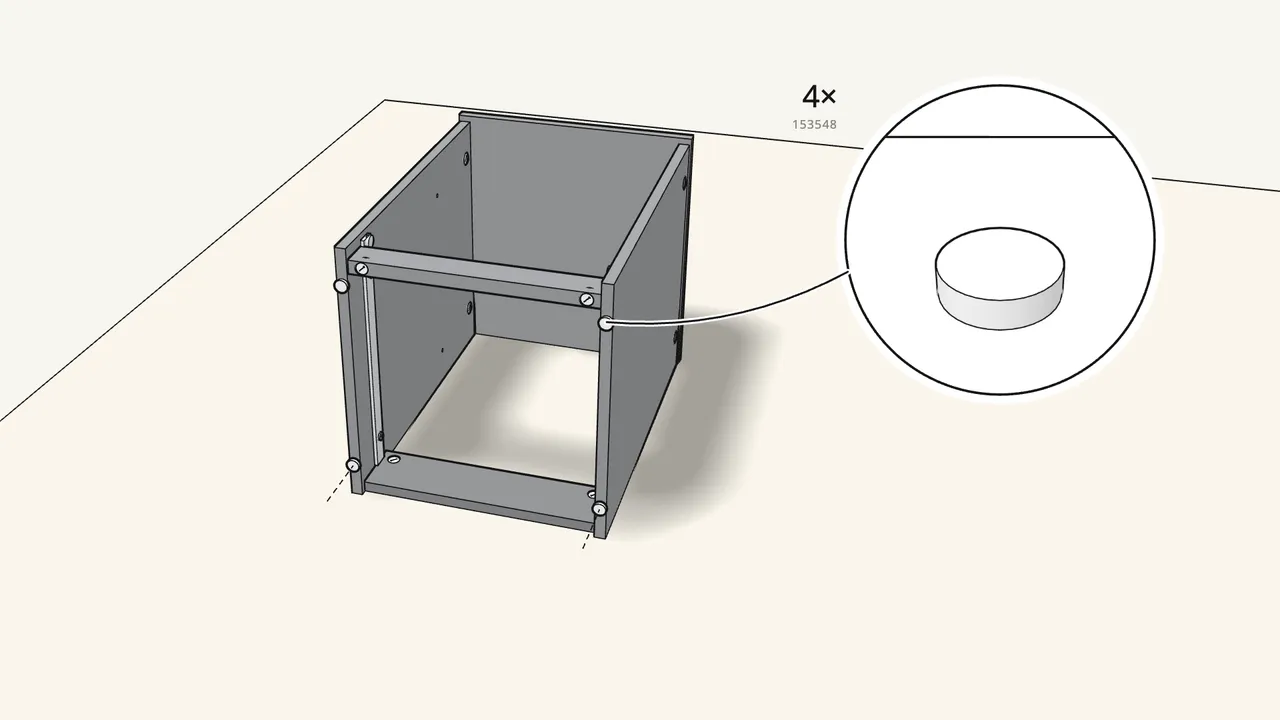
Step 10
Press 4 glides (153548) into the bottom edges of the sides.
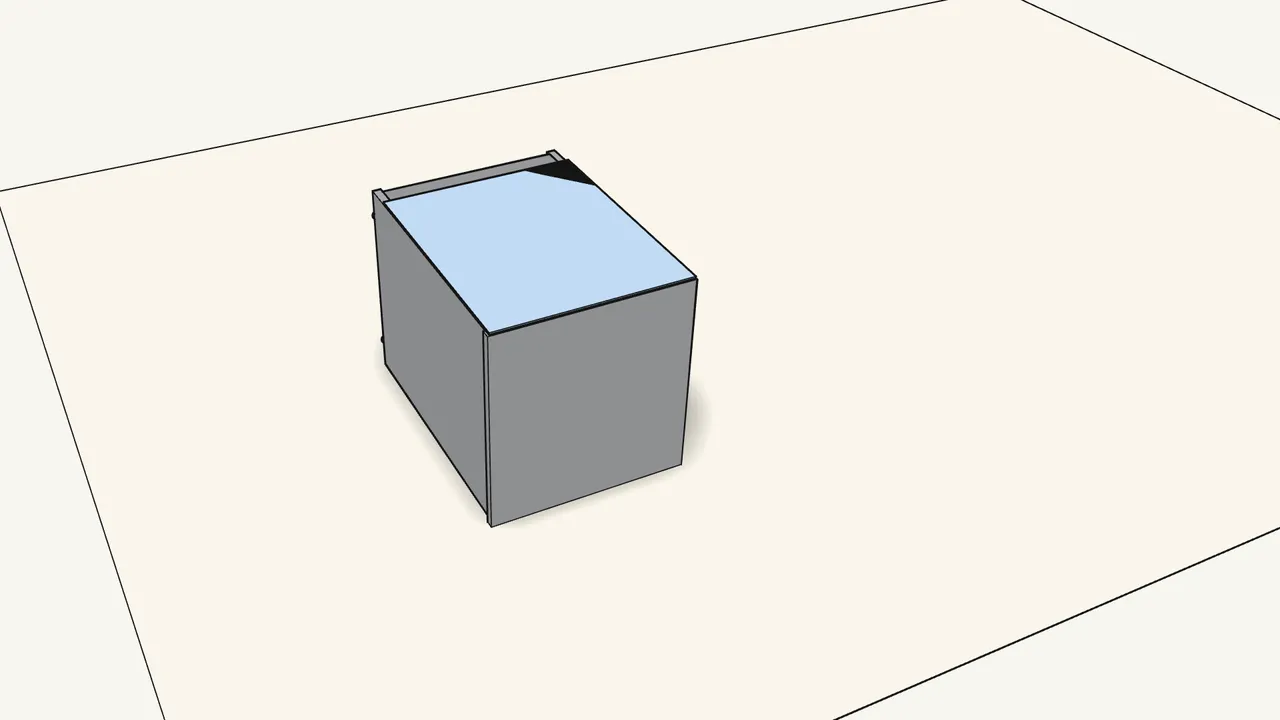
Step 11
Turn the frame over onto its front and lay the back panel on.
Check which way round the back panel goes (manual step 11).
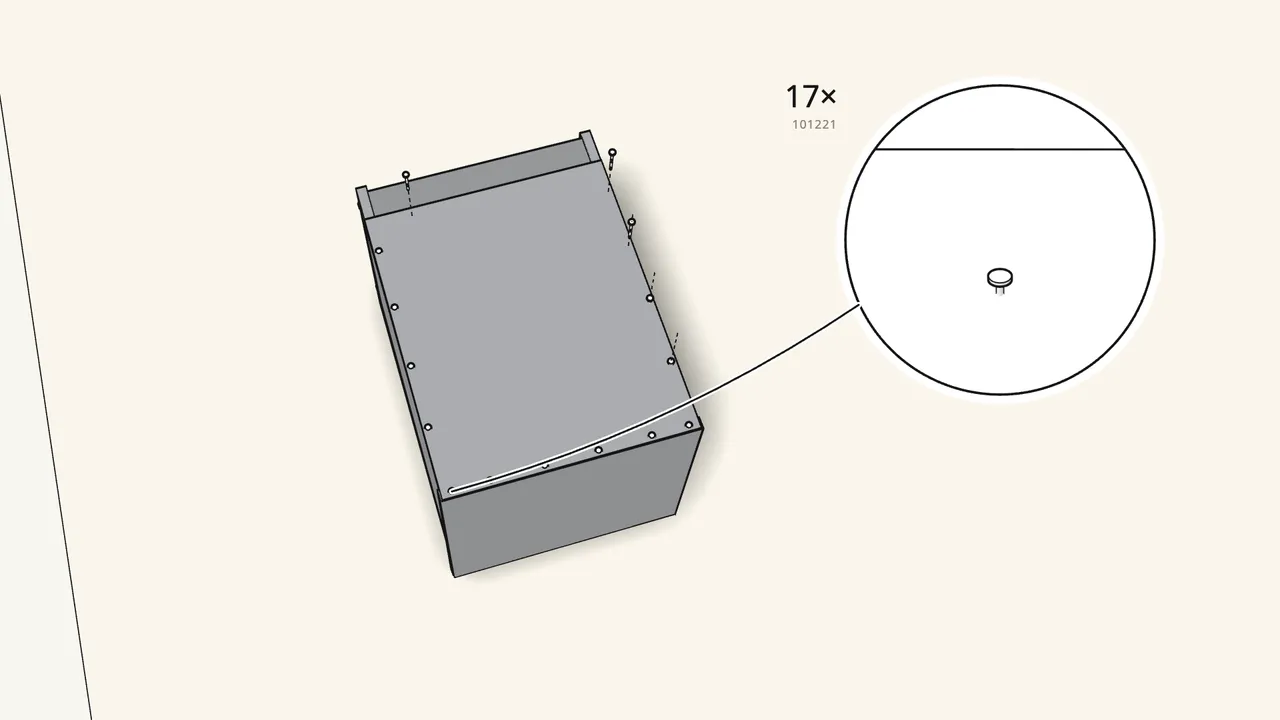
Step 12 · manual step 12–14
Line up the back panel and nail it on with 17 nails (101221).
First the 2 top corners, then the rest. Hold each nail in the nail guide (105494).
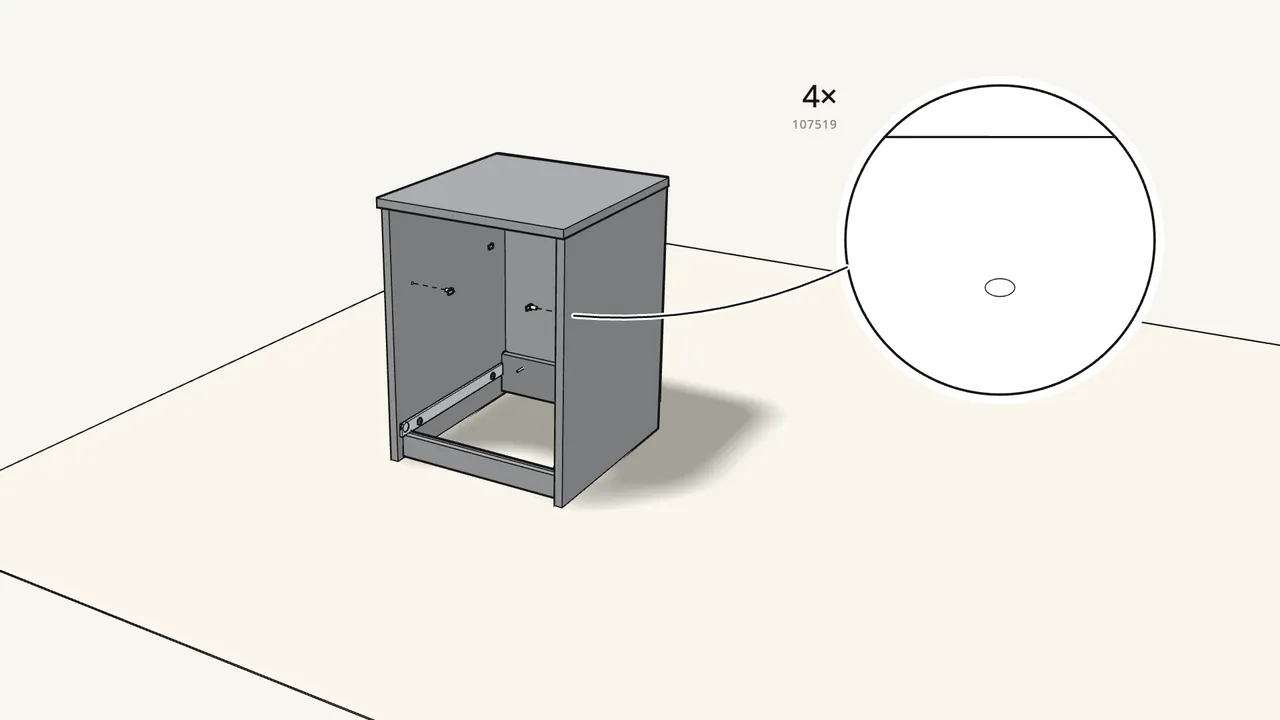
Step 13 · manual step 15
Stand the nightstand up and push in 4 shelf supports (107519).
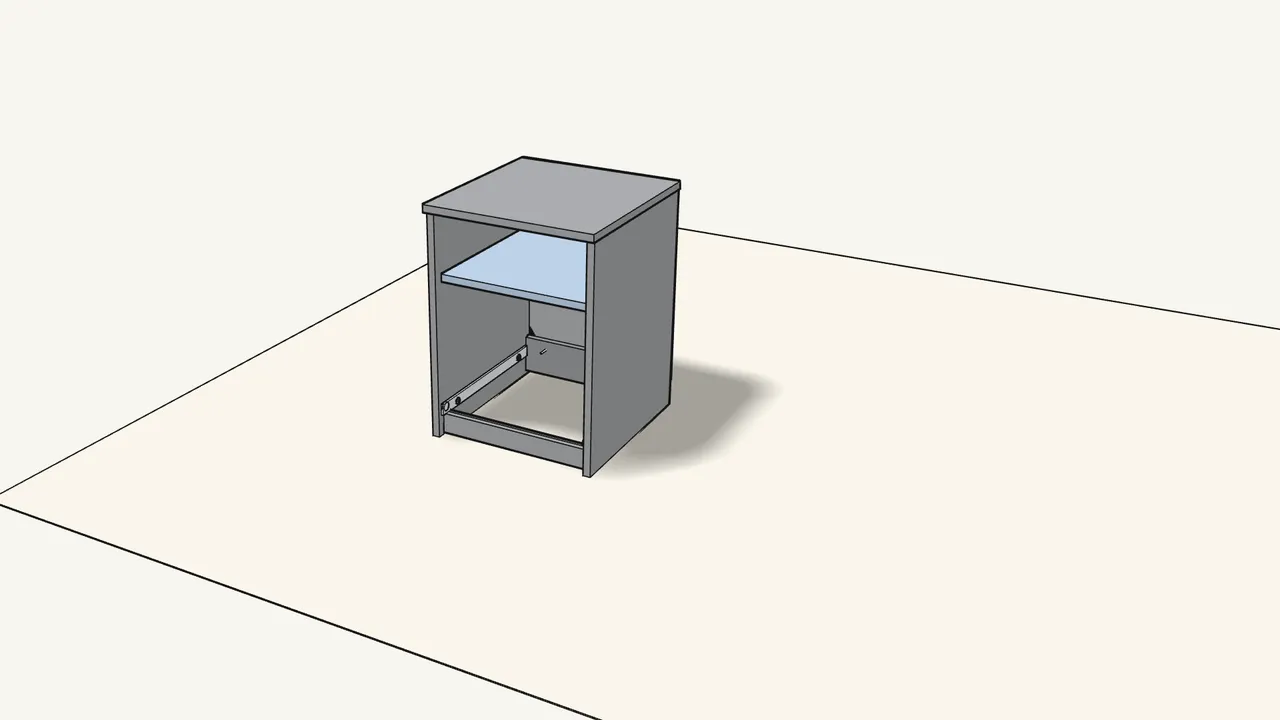
Step 14 · manual step 16
Lay the shelf on the supports.
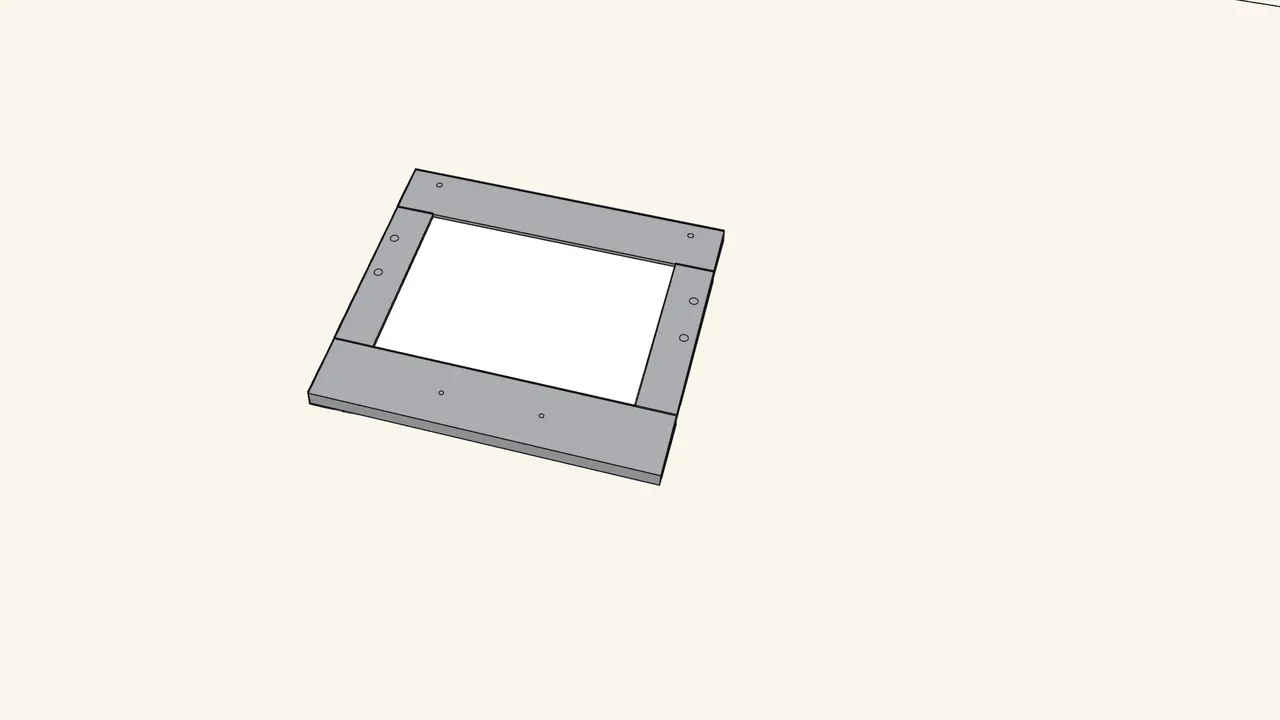
Step 15
Now the drawer.
Build it on a rug, standing on its front.
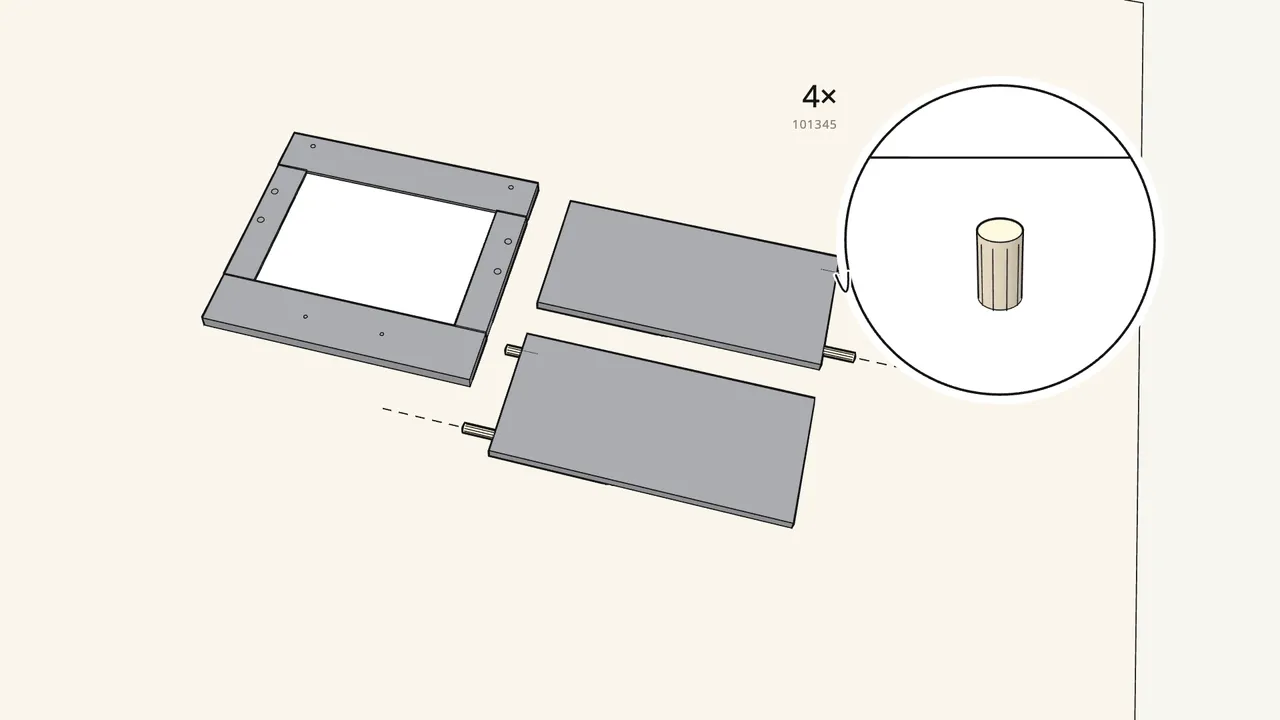
Step 16 · manual step 17
Push 4 dowels (101345) into the drawer sides.
2 in one end of each side.
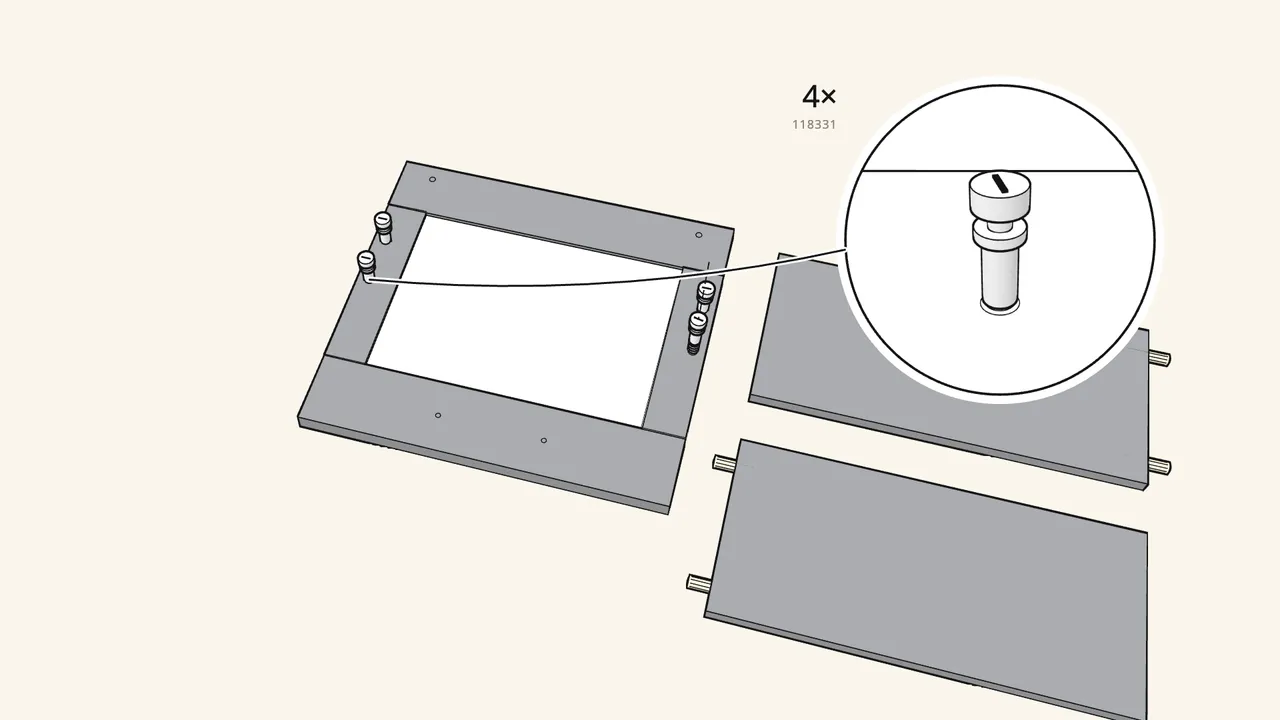
Step 17 · manual step 18
Screw 4 cam bolts (118331) into the drawer front.
The front lies face-down.
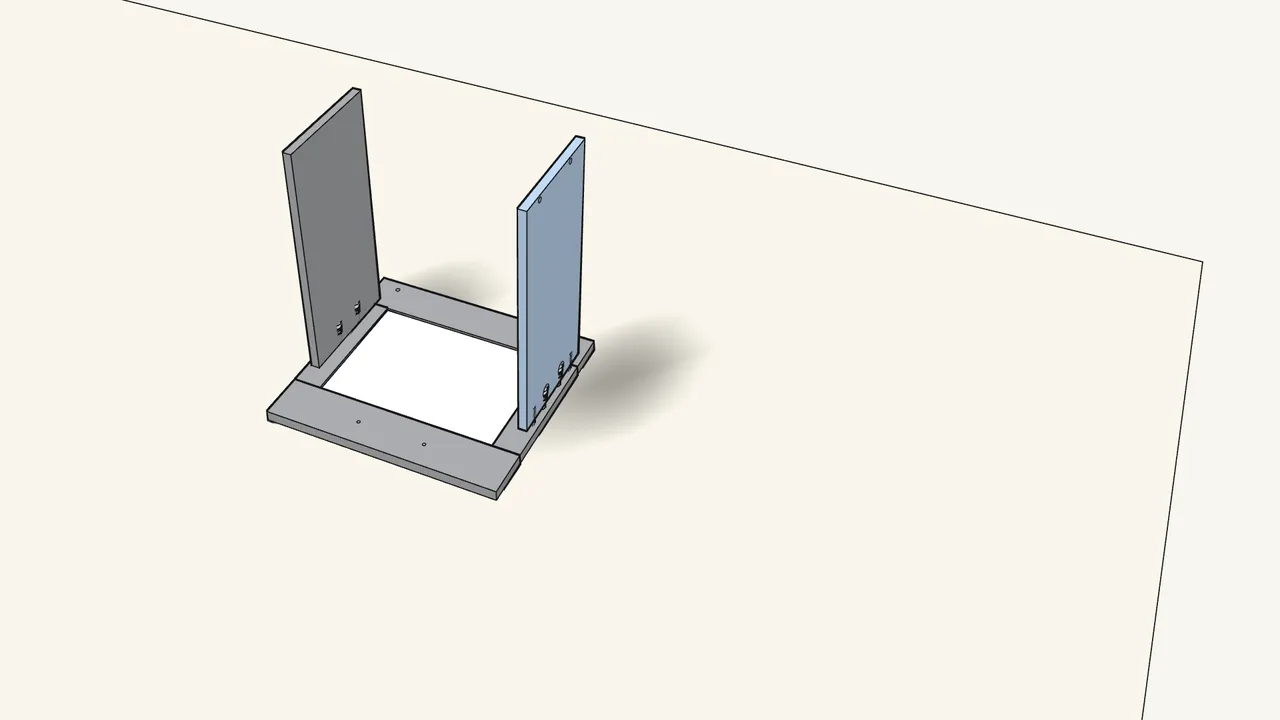
Step 18 · manual step 19
Stand both sides onto the drawer front.
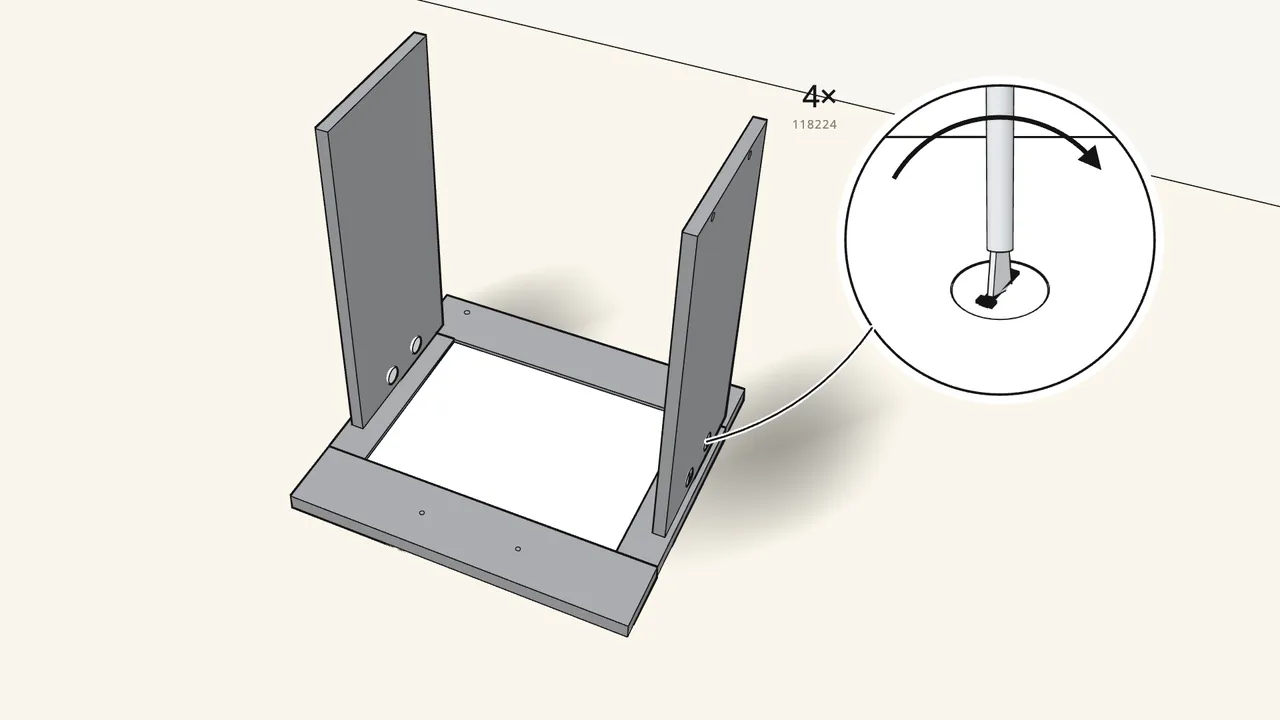
Step 19 · manual step 20
Insert 4 cam locks (118224) and turn them clockwise.
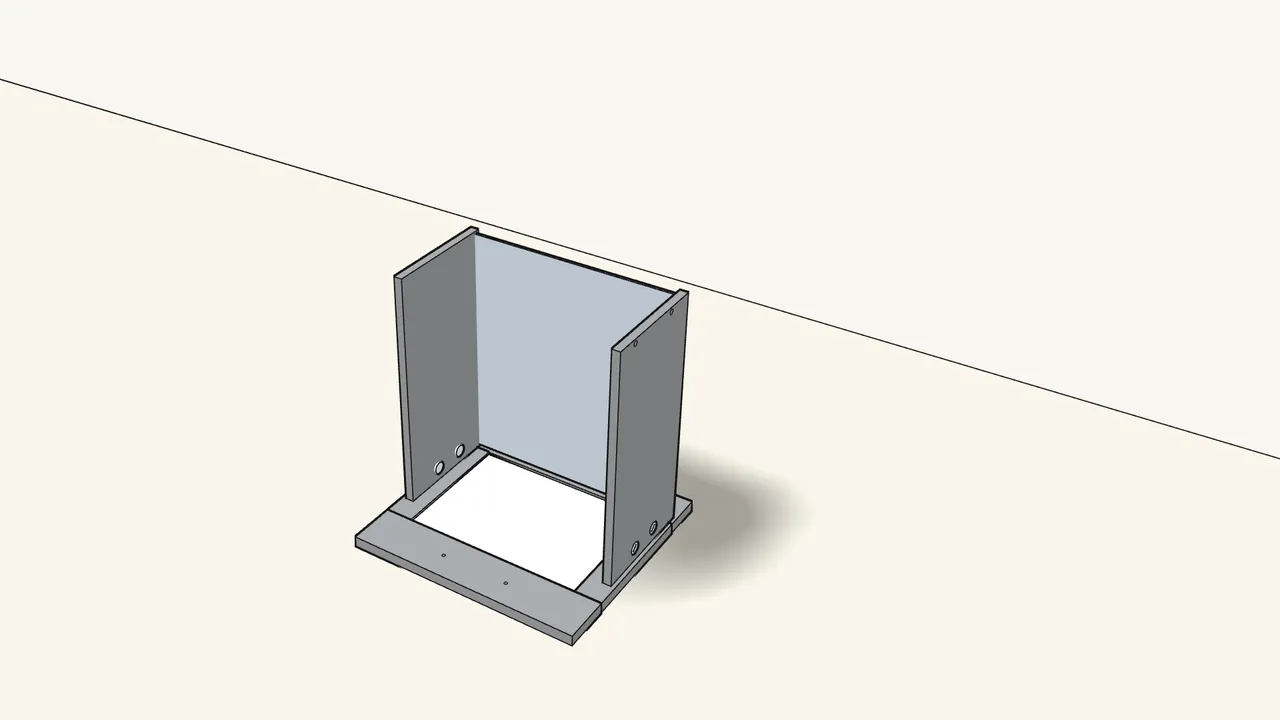
Step 20 · manual step 21
Slide the drawer bottom down into the grooves.
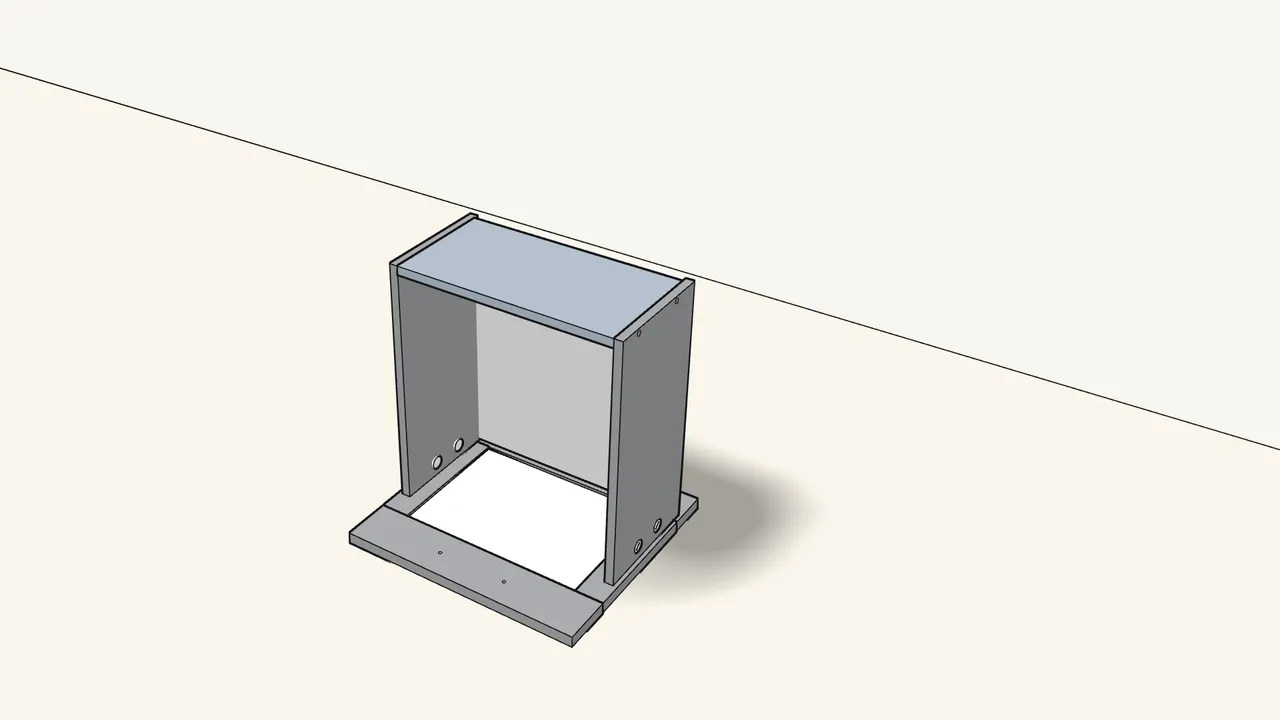
Step 21 · manual step 22
Fit the drawer back between the sides.
The notch goes over the drawer bottom (inset, manual step 22).
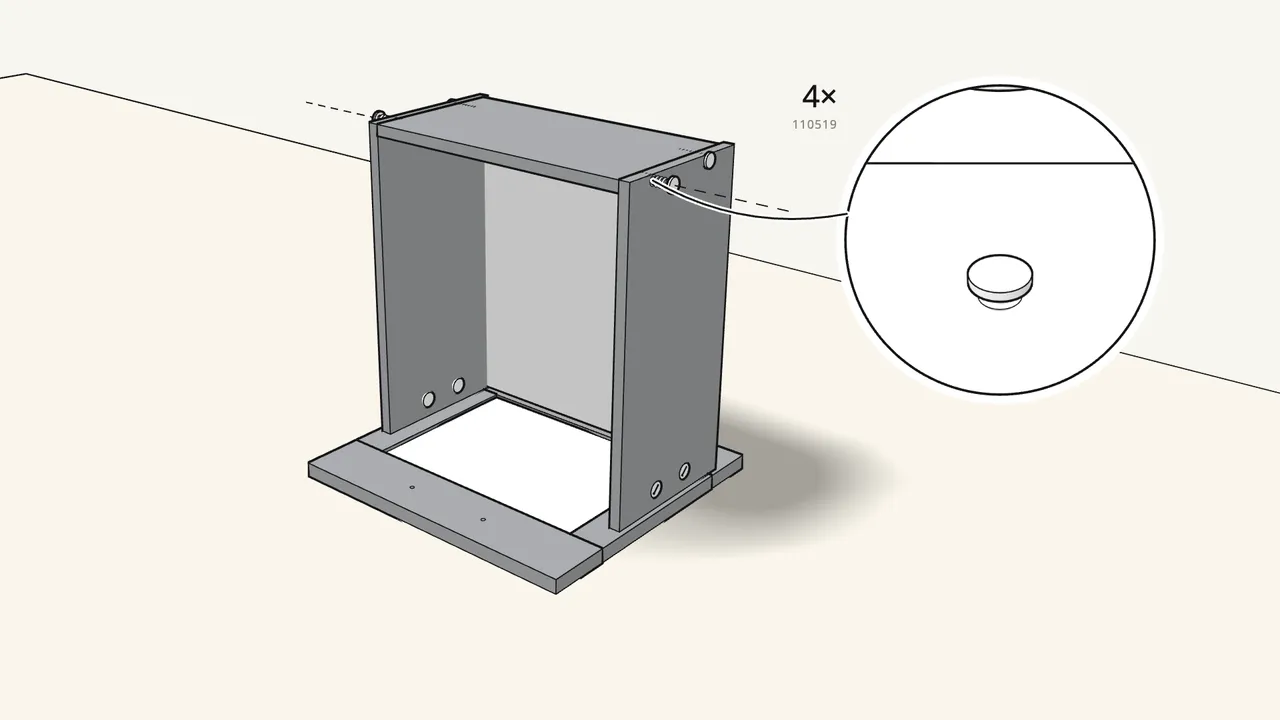
Step 22 · manual step 23
Hammer in 4 screw-dowels (110519) — 2 each side.
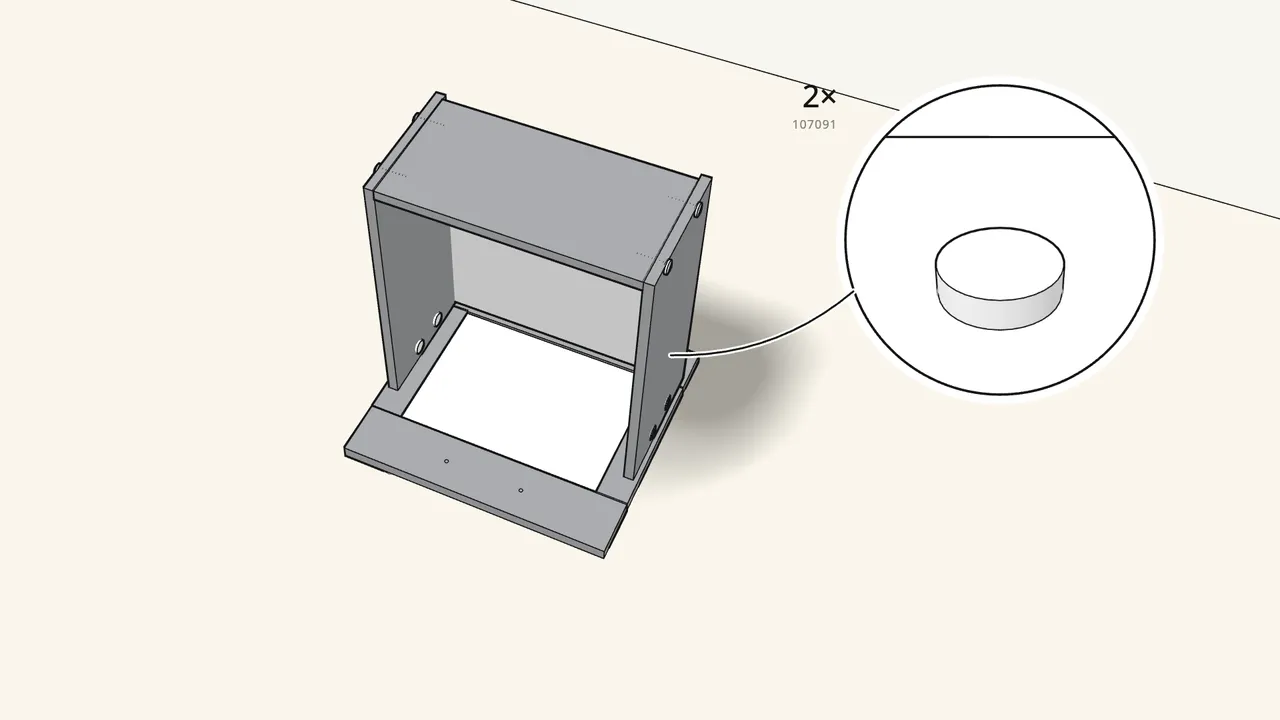
Step 23 · manual step 24
Stick the 2 bumpers (107091) onto the drawer front.
At the bottom corners, on the inside.
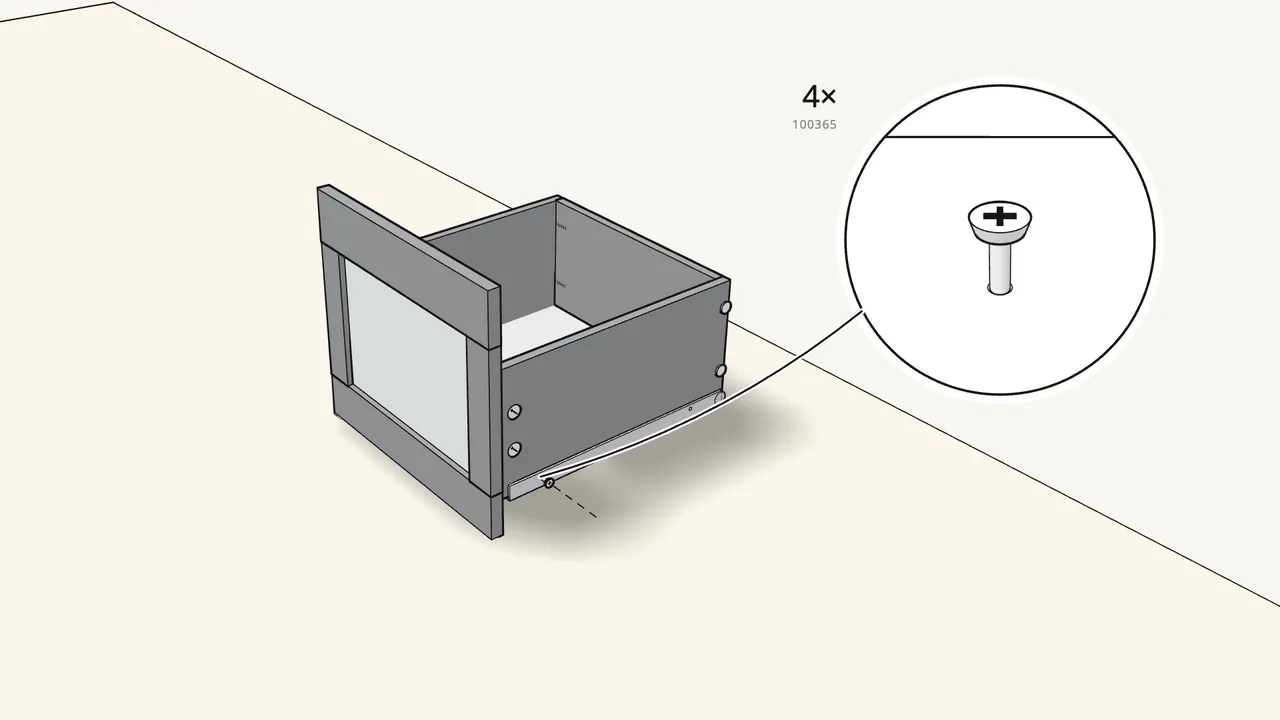
Step 24 · manual step 25
Turn the drawer upright and fit the 2 runners.
Hook them on at the front, then 2 screws (100365) each.
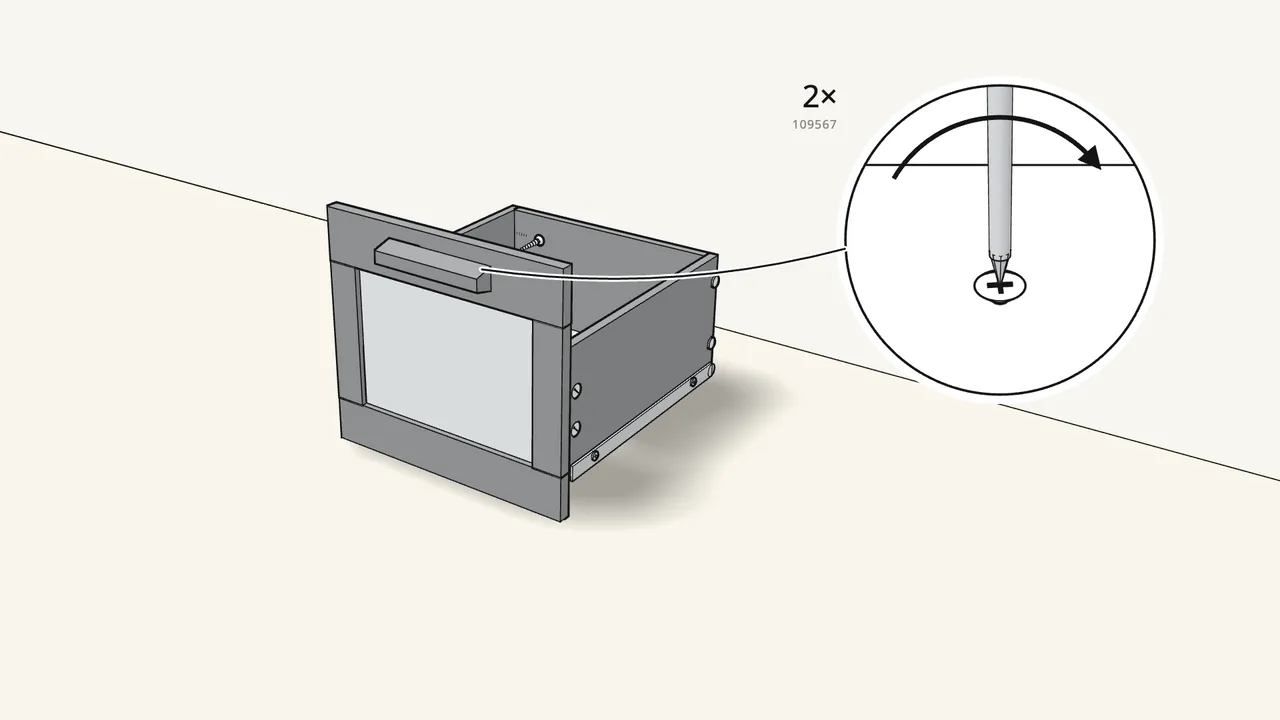
Step 25 · manual step 26
Screw the handle onto the front with 2 screws (109567).
The screws go in from the inside of the drawer.
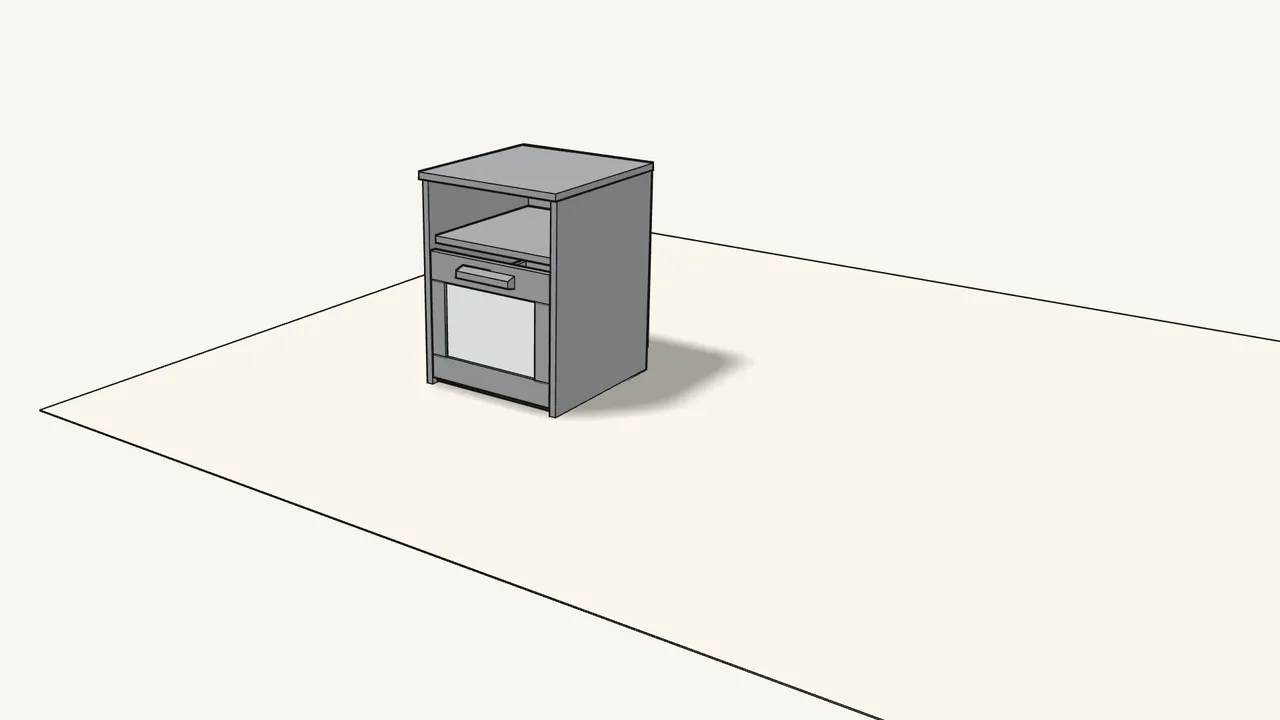
Step 26 · manual step 27
Slide the drawer into the runners.
Tilt it slightly to get the wheels in, then push it closed.
Tips & safety
- Don’t sit or stand on the nightstand. Maximum load on top is 25 kg (55 lb).
- Charging in the drawer? Page 18 of the manual shows how to run a charging cable from the drawer out through the back.
Official instructions
This guide follows IKEA's official assembly instructions (AA-2523142-1). Keep the printed manual to hand — if anything differs, the manual is right.