IKEA · Cabinets & Wardrobes
How to Assemble IKEA BESTÅ TV Unit
Step-by-step IKEA BESTÅ tv unit assembly: 21 illustrated steps, an animated video, the hardware list and the tools you need — following the official instructions (AA-1402080-13).
- 21 illustrated steps
- 19 steps in the manual
- 3:16 video
- 180×40×38 cm cm
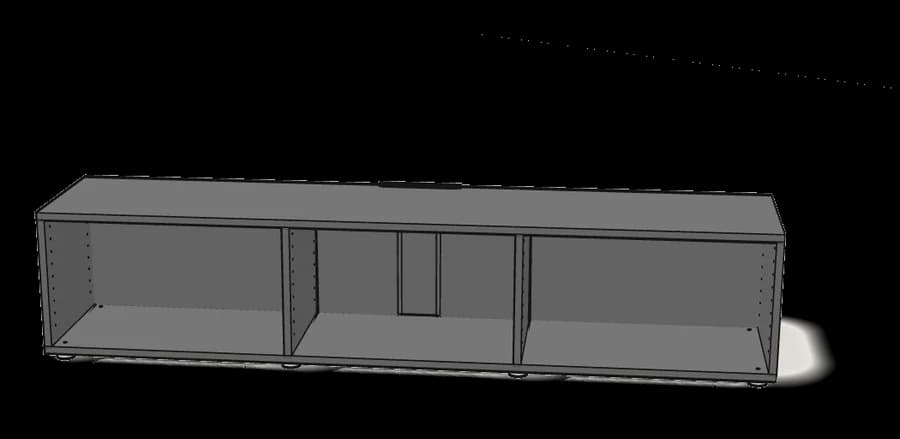
What you need
Tools
- Flat-head screwdriver
- Phillips screwdriver
- Allen key (included)
- Spirit level
Hardware in the box
| Part no. (as printed in the manual) | Qty |
|---|---|
| 130618 | 16× |
| 118137 | 8× |
| 130619 | 8× |
| 109049 | 4× |
| 113287 | 8× |
| 116637 | 12× |
| 144342 | 4× |
| 144343 | 4× |
| 103693 | 4× |
| 114947 | 8× |
| 115444 | 6× |
| 115443 | 6× |
Step-by-step assembly
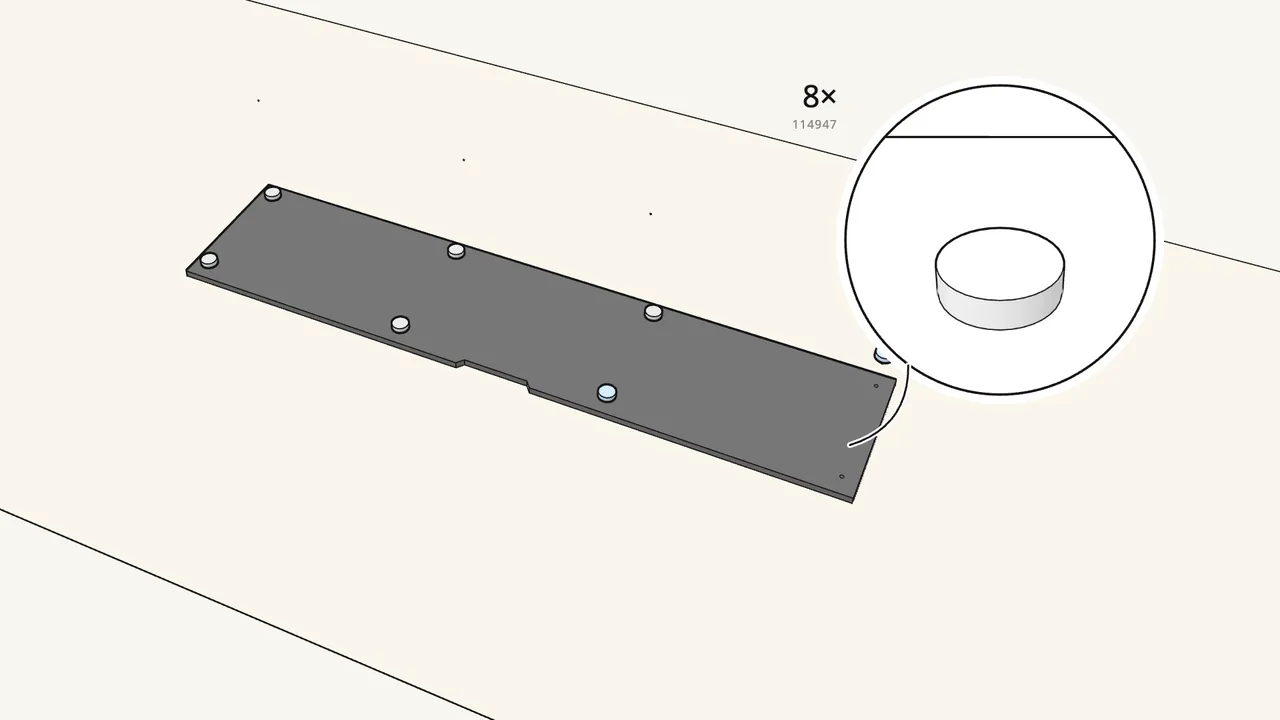
Step 1
Screw the 8 feet (114947) into the bottom panel.
Hanging it on the wall instead? Leave the feet out — see manual p. 21.
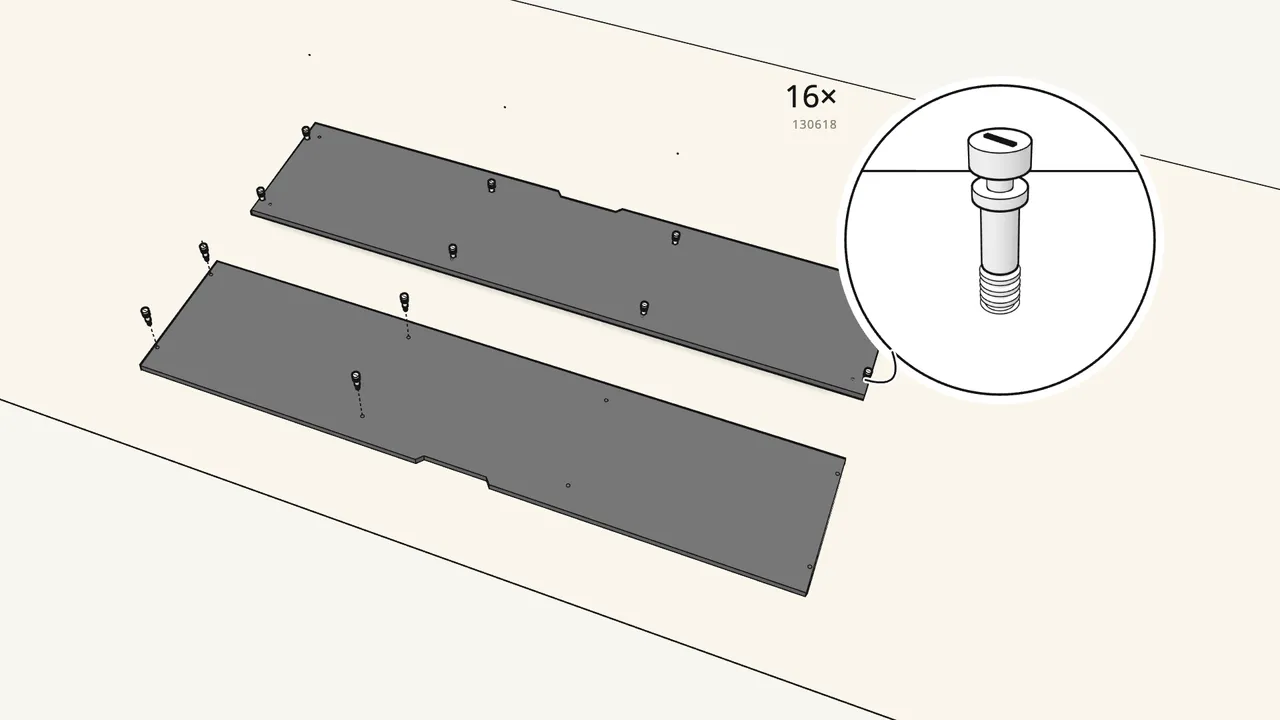
Step 2
Turn it over and screw 16 cam bolts (130618) into the long panels.
8 in the bottom panel and 8 in the top panel — screwdriver by hand.
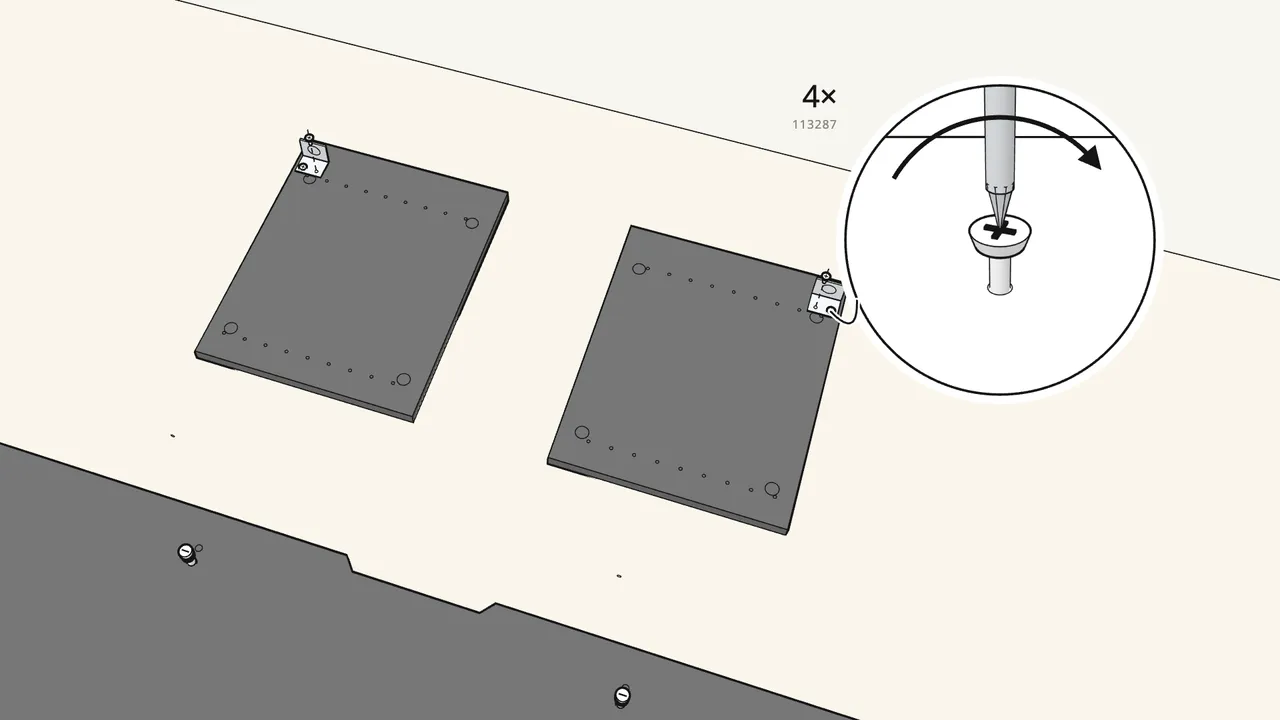
Step 3
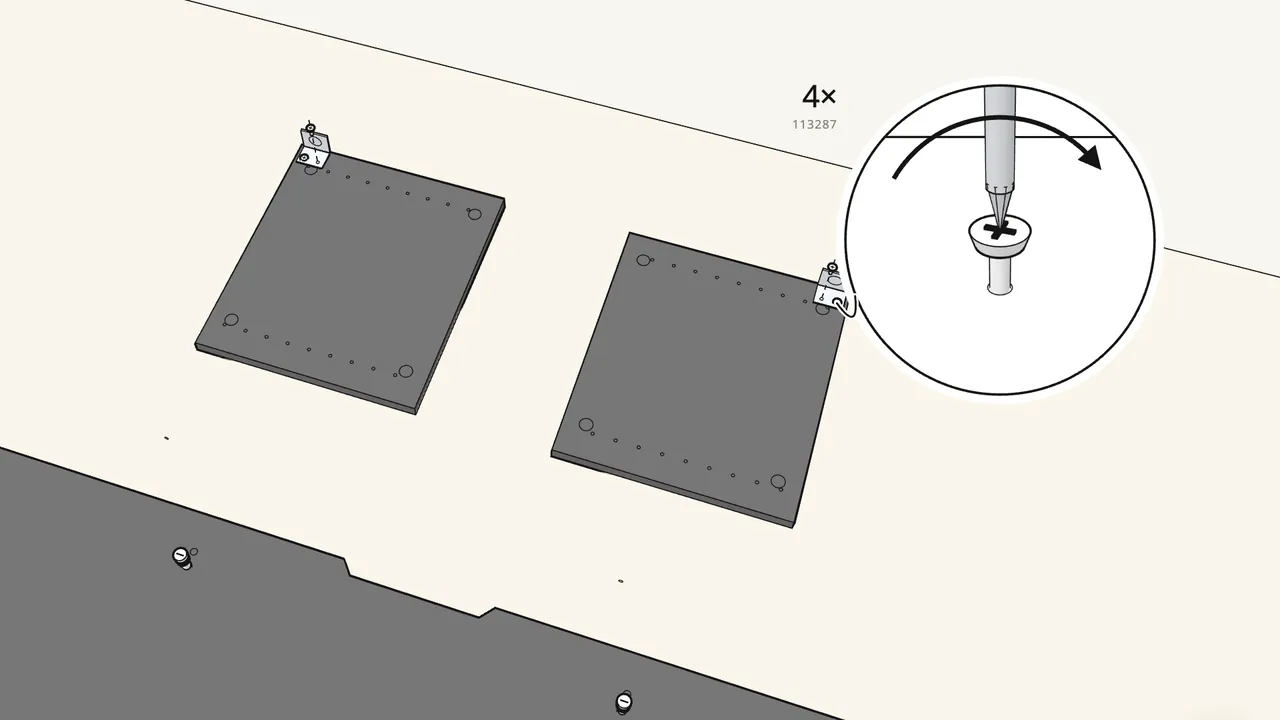
Screw a fitting (144342) onto each end panel with 2 screws (113287).
Top back corner, on the inside face.
Step 4
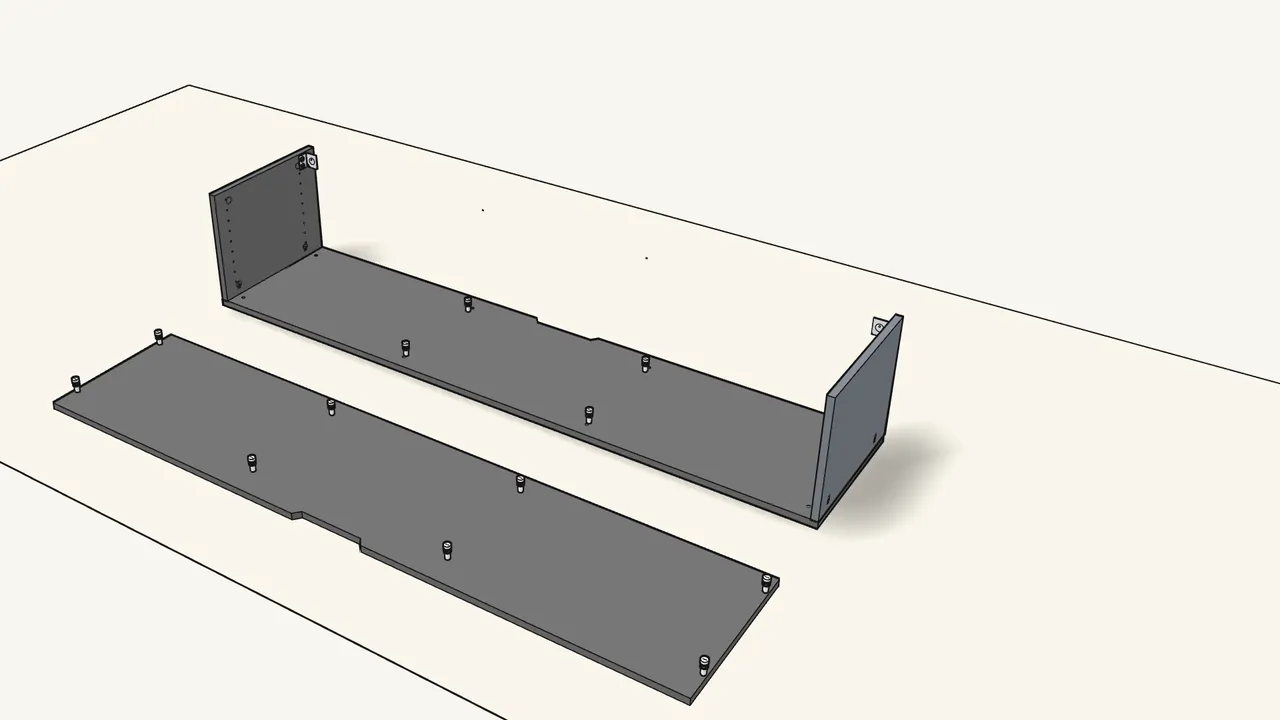
Lower the two end panels onto the bolts.
The fittings go at the back, at the top.
Step 5
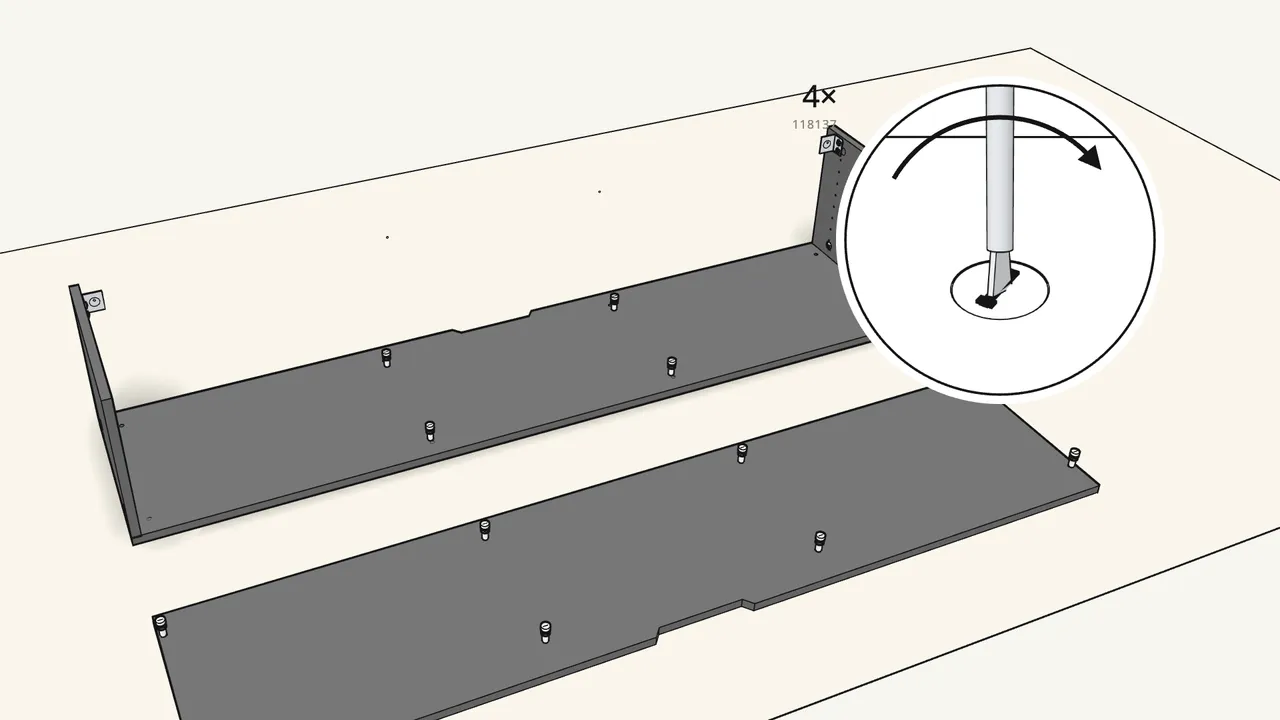
Insert 4 cam locks (118137) and turn them clockwise.
The end panels take the 118137 locks — not 130619.
Step 6
Screw a fitting (144342) onto each divider with 2 screws (113287).
Same place: top back corner.
Step 7
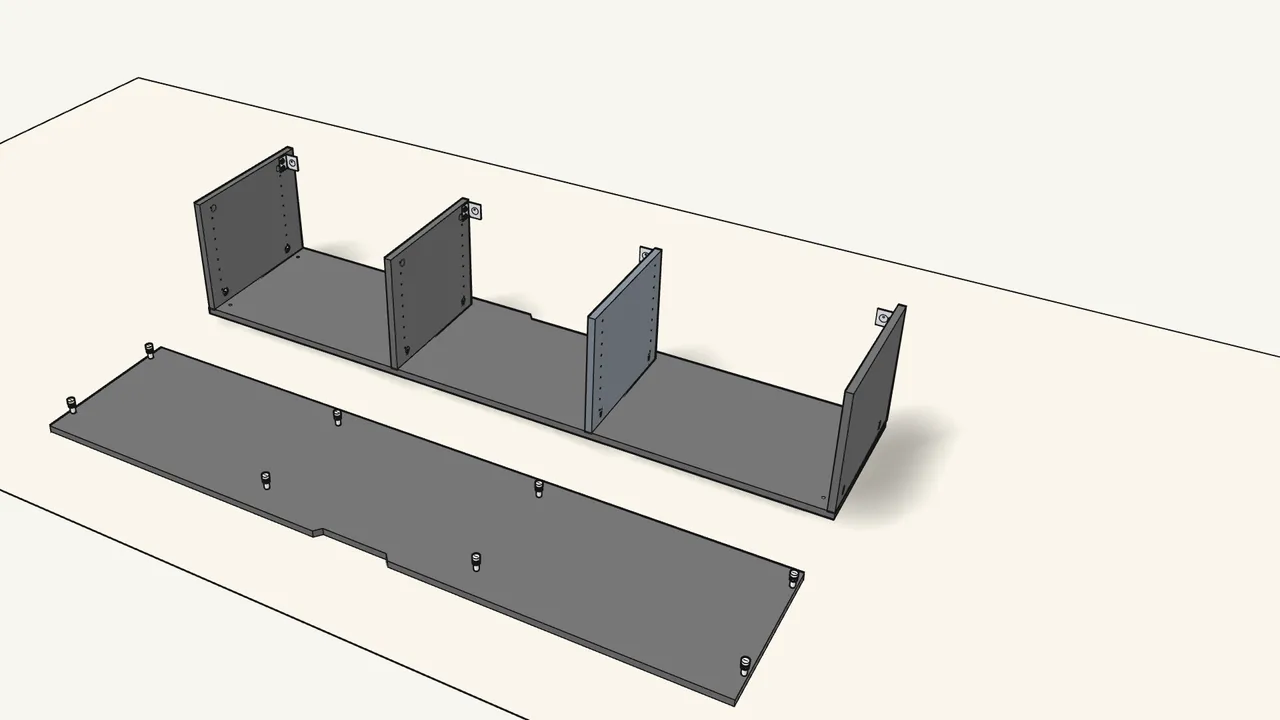
Lower the two dividers onto the bolts.
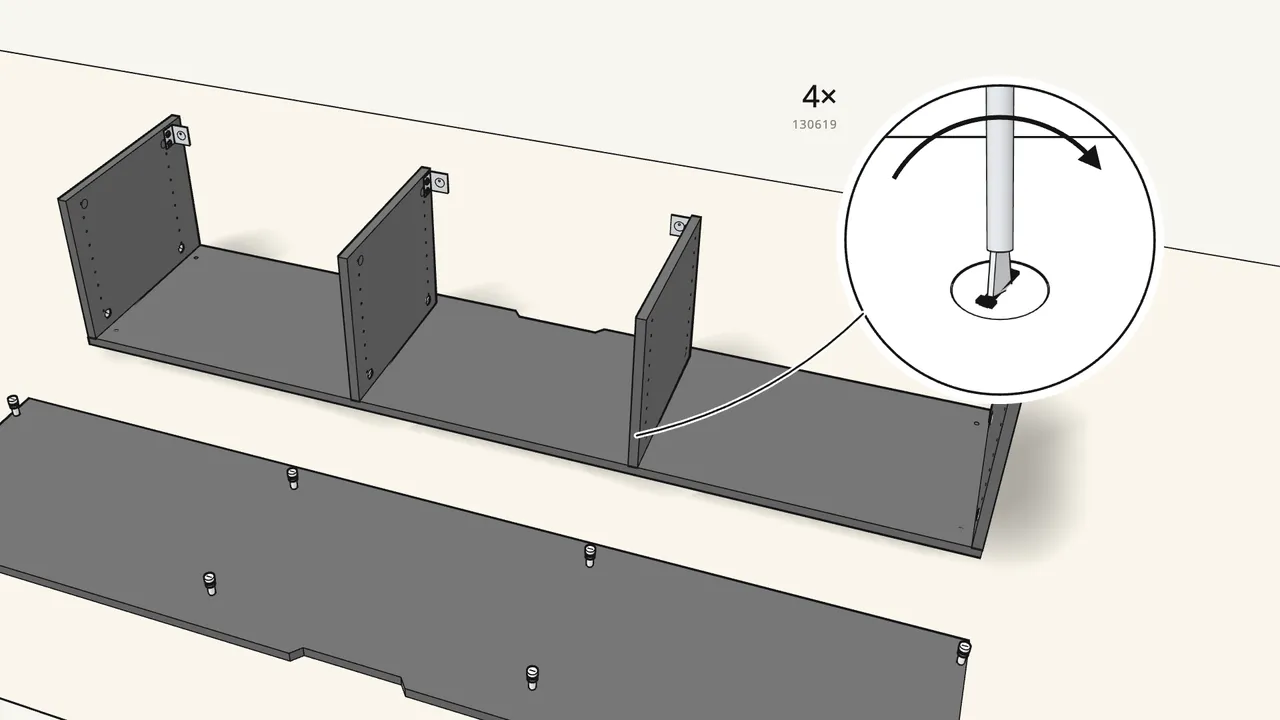
Step 8
Insert 4 cam locks (130619) in the dividers and turn them.
The dividers take the 130619 locks — not 118137.
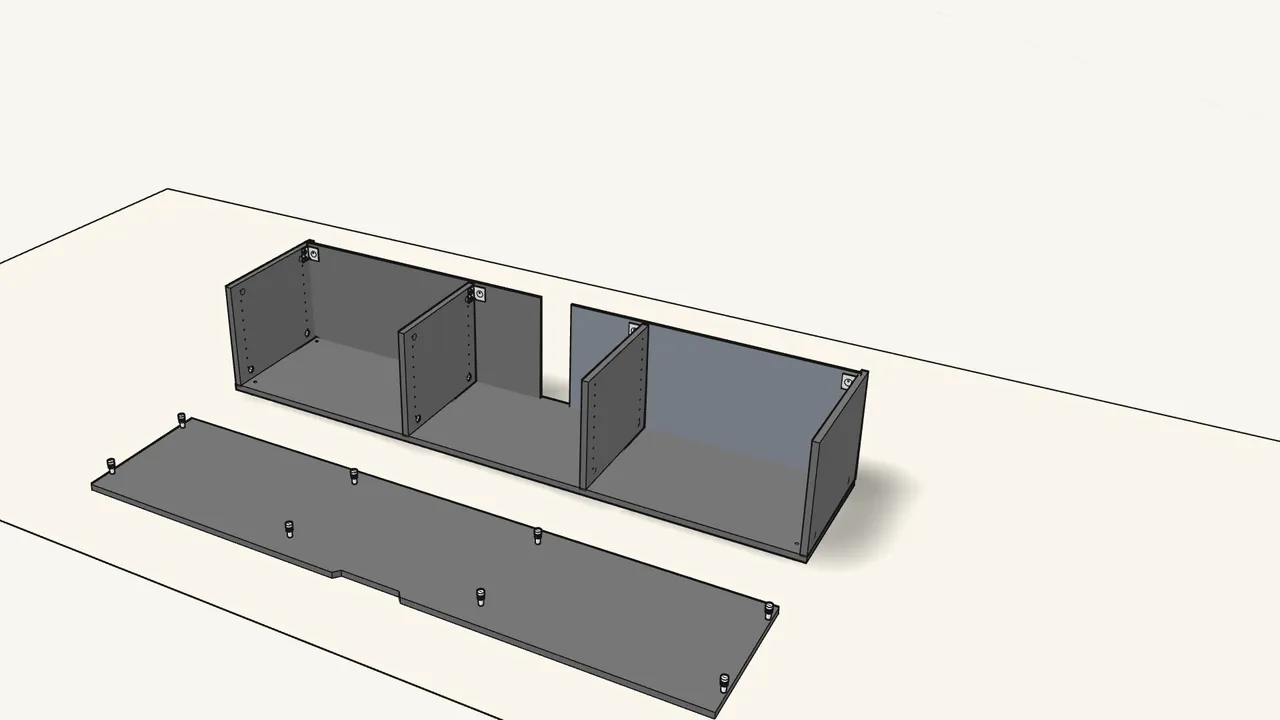
Step 9
Slide the two back panels down into the grooves.
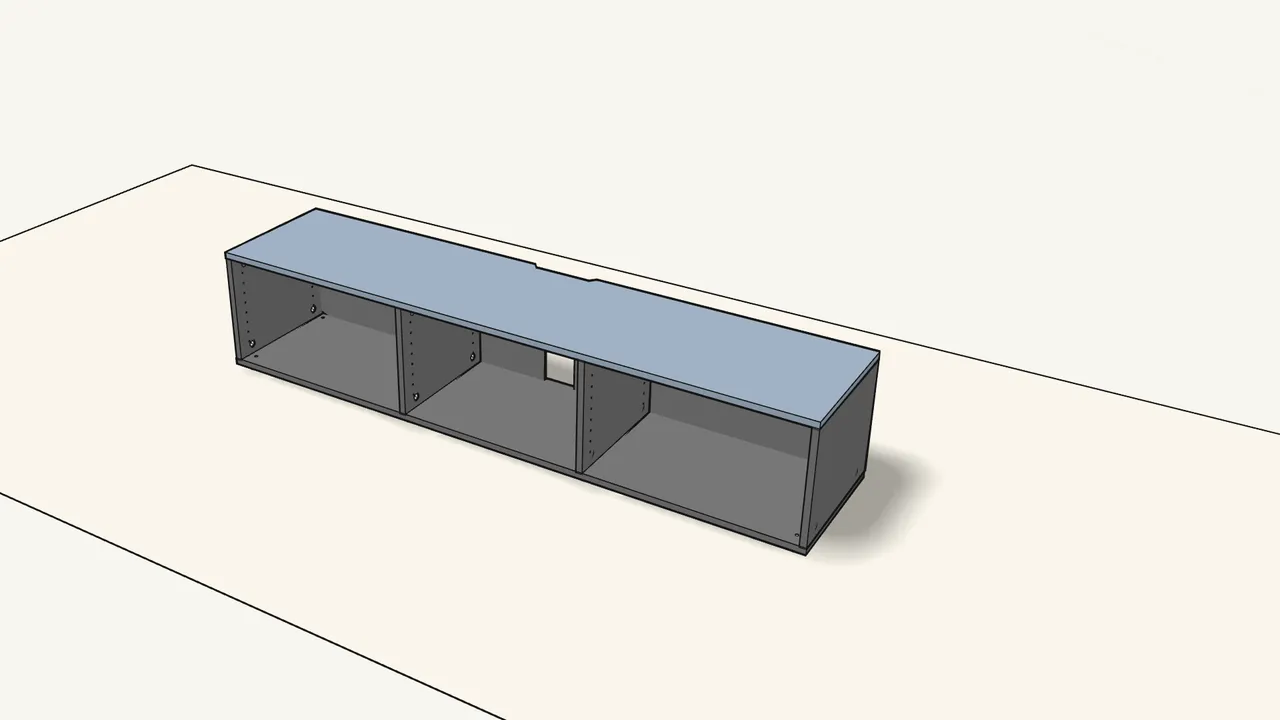
Step 10
Turn the top panel over and lower it onto the frame.
Its bolts go into the holes in the panels below.
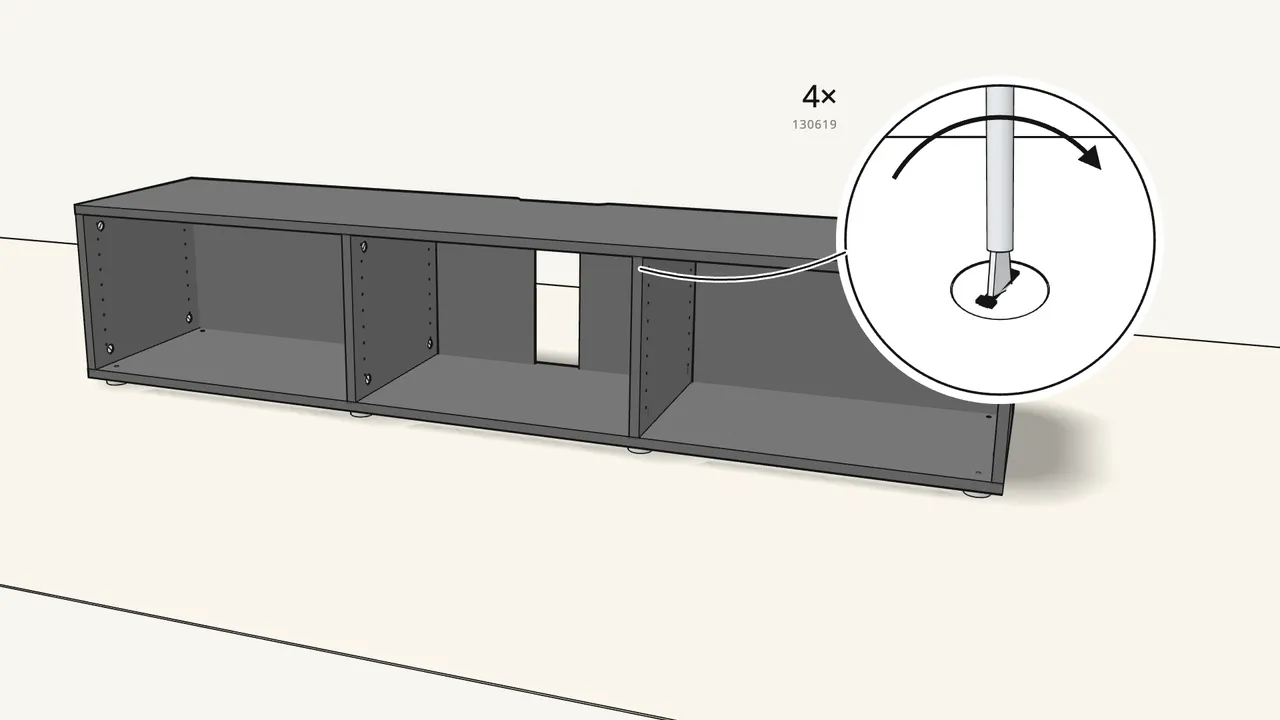
Step 11
Insert 8 more cam locks and turn them clockwise.
4 × 130619 in the dividers, 4 × 118137 in the end panels.
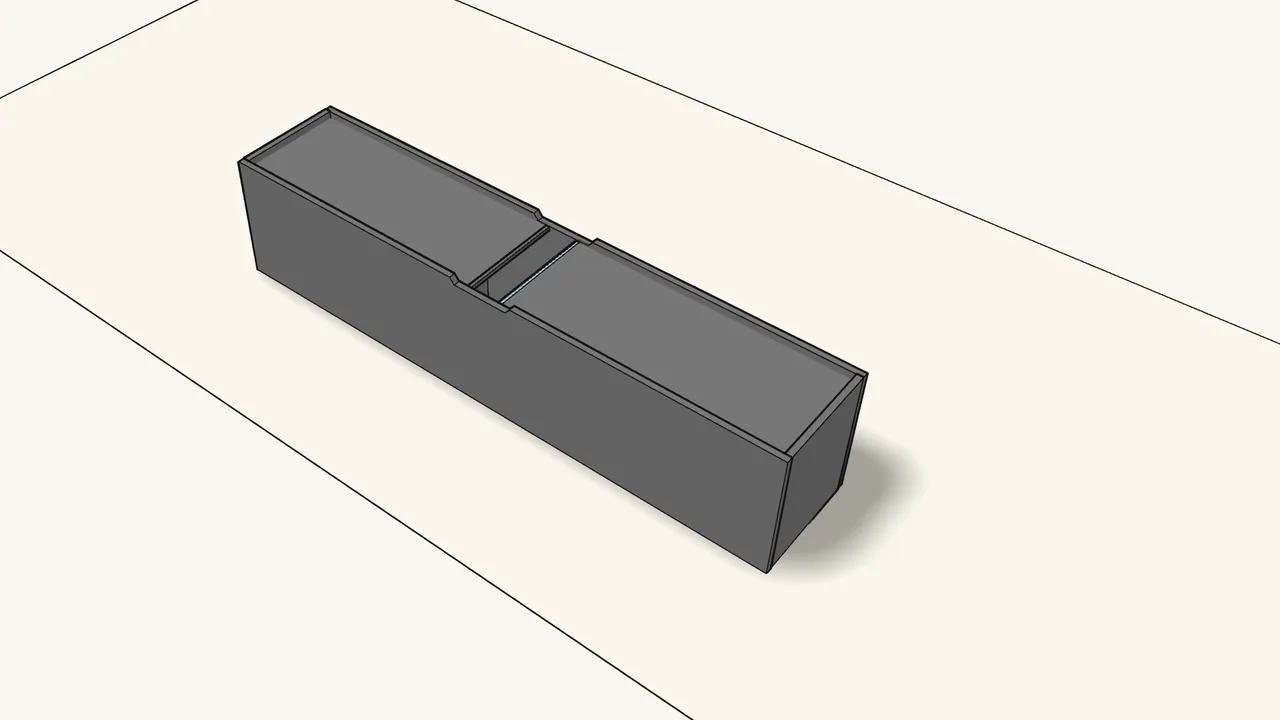
Step 12
Lay the unit on its front and slide in the 2 strips (144348).
They go onto the back-panel edges, in the middle.
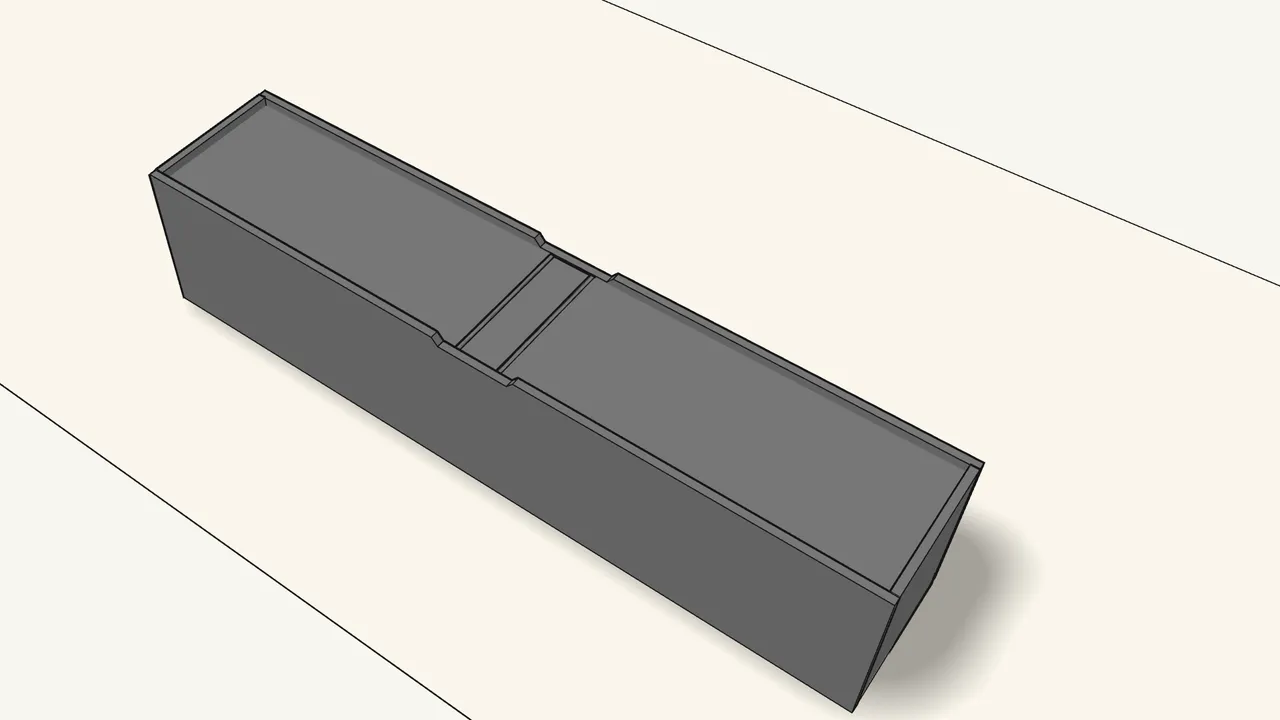
Step 13
Slide the cover panel in between the strips.
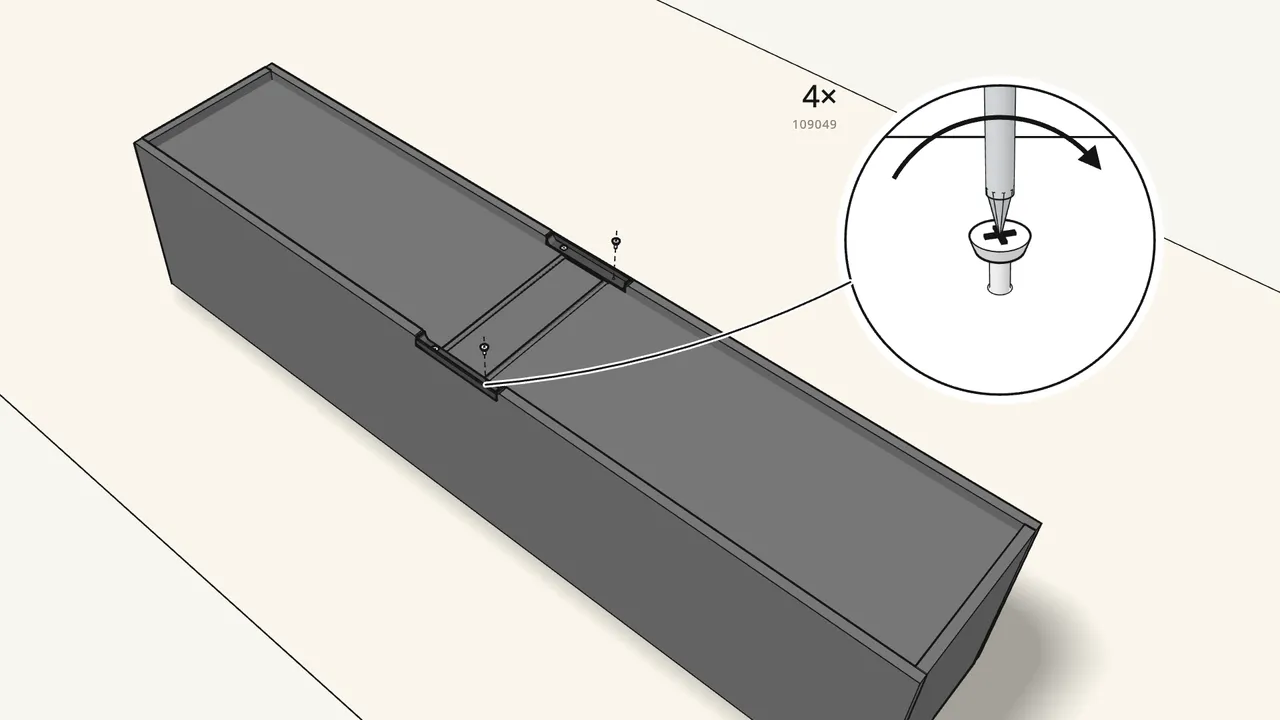
Step 14
Fit the 2 cable guides into the openings with 4 screws (109049).
133203 goes in the top panel, 144567 in the bottom panel.
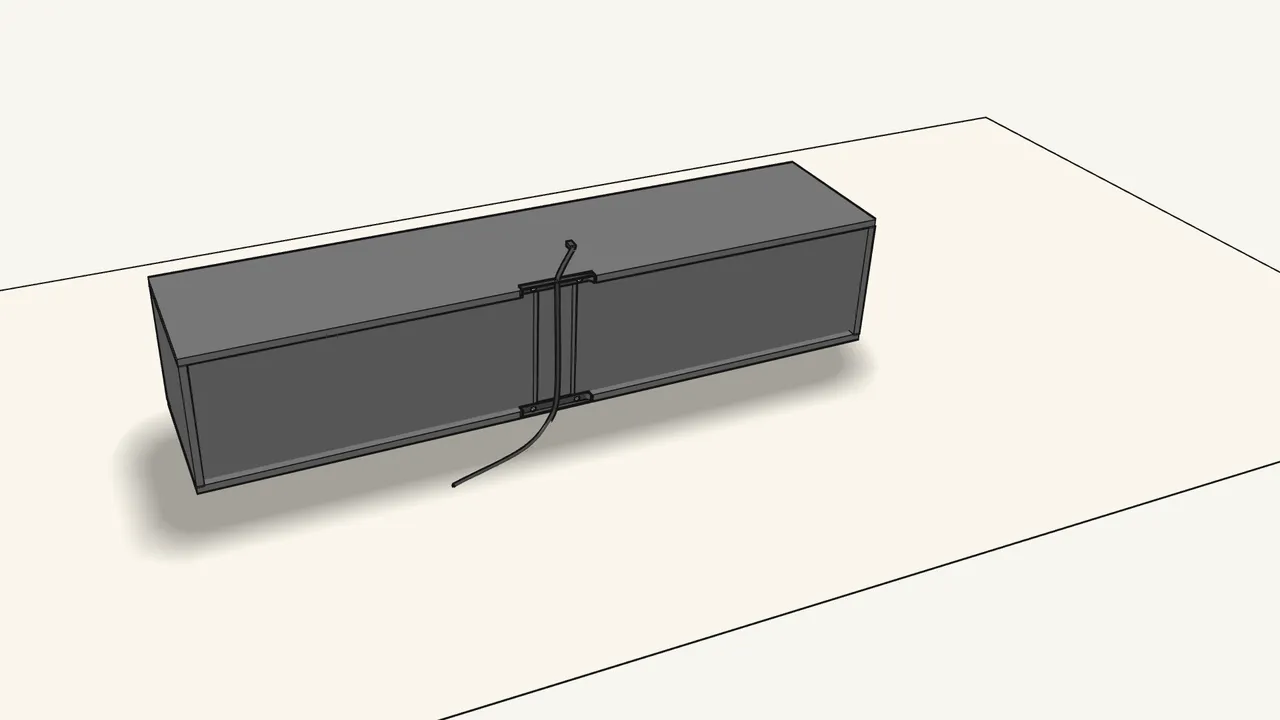
Step 15
Stand the unit up and run your cables through the openings.
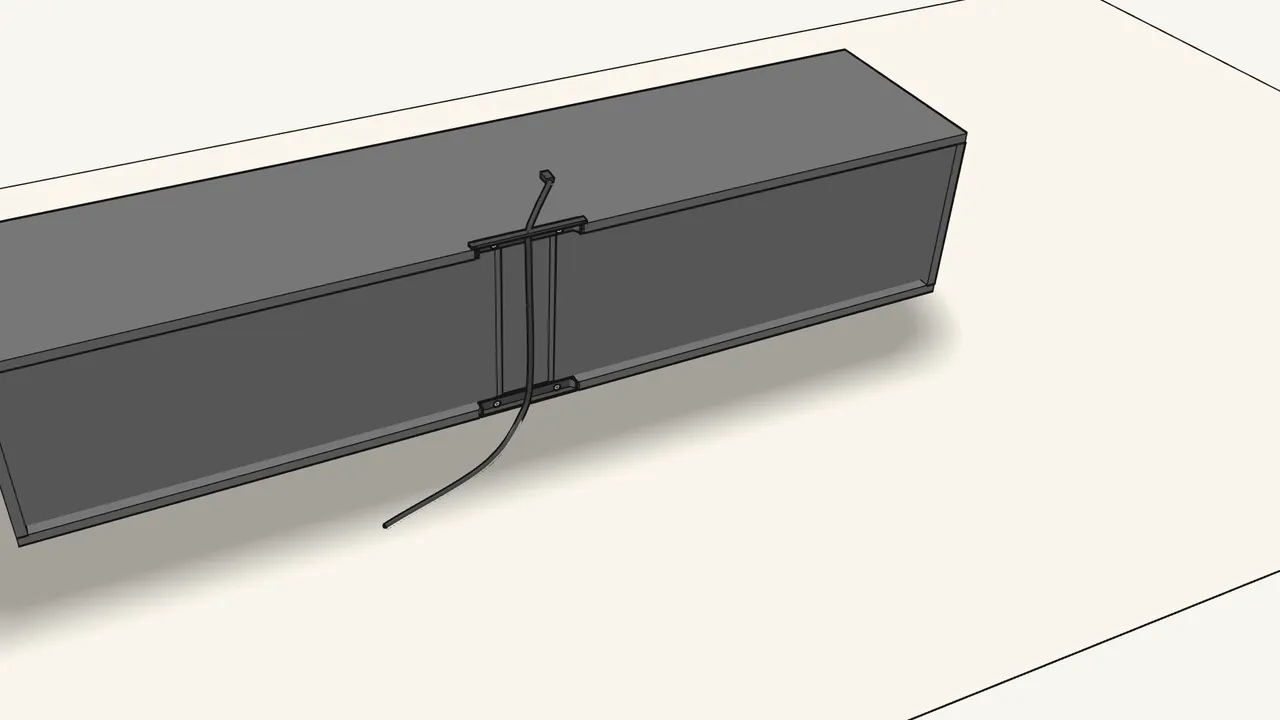
Step 16
Click the cable clip (133209) onto the top opening.
It holds the cables in place.
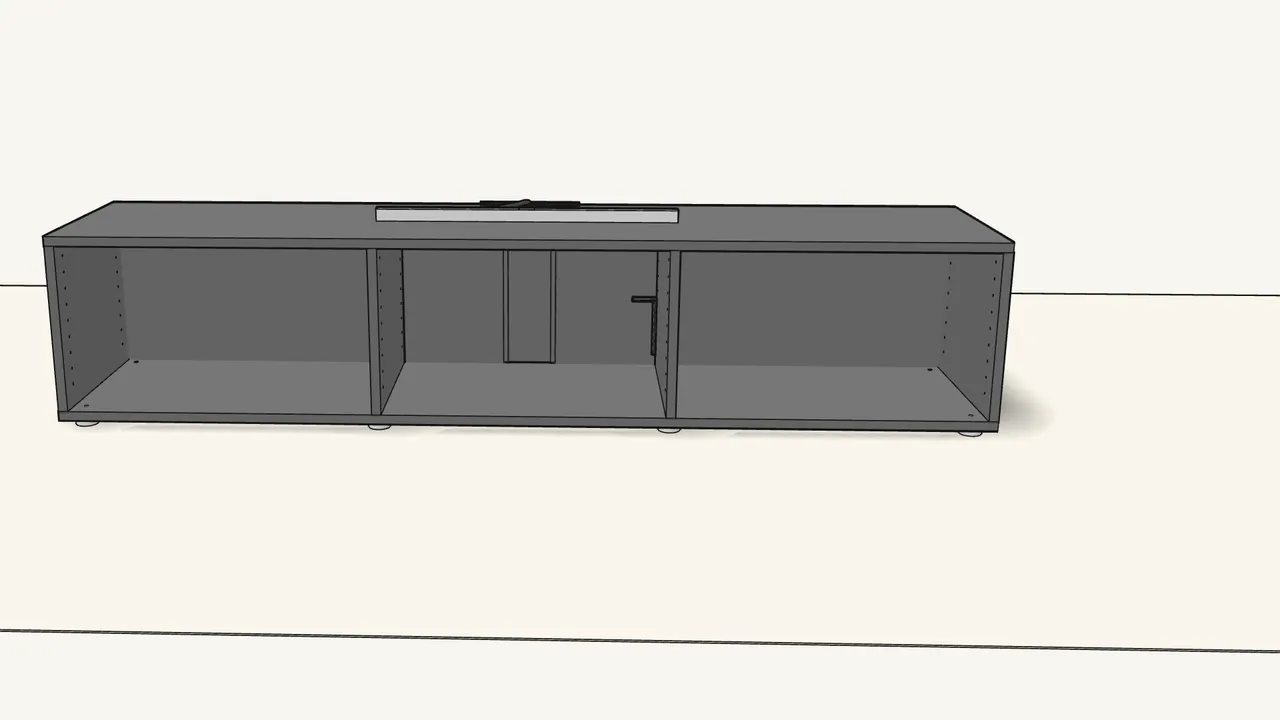
Step 17
Level the unit: adjust the 4 back feet with the Allen key (100006).
Reach them through the holes in the bottom panel.
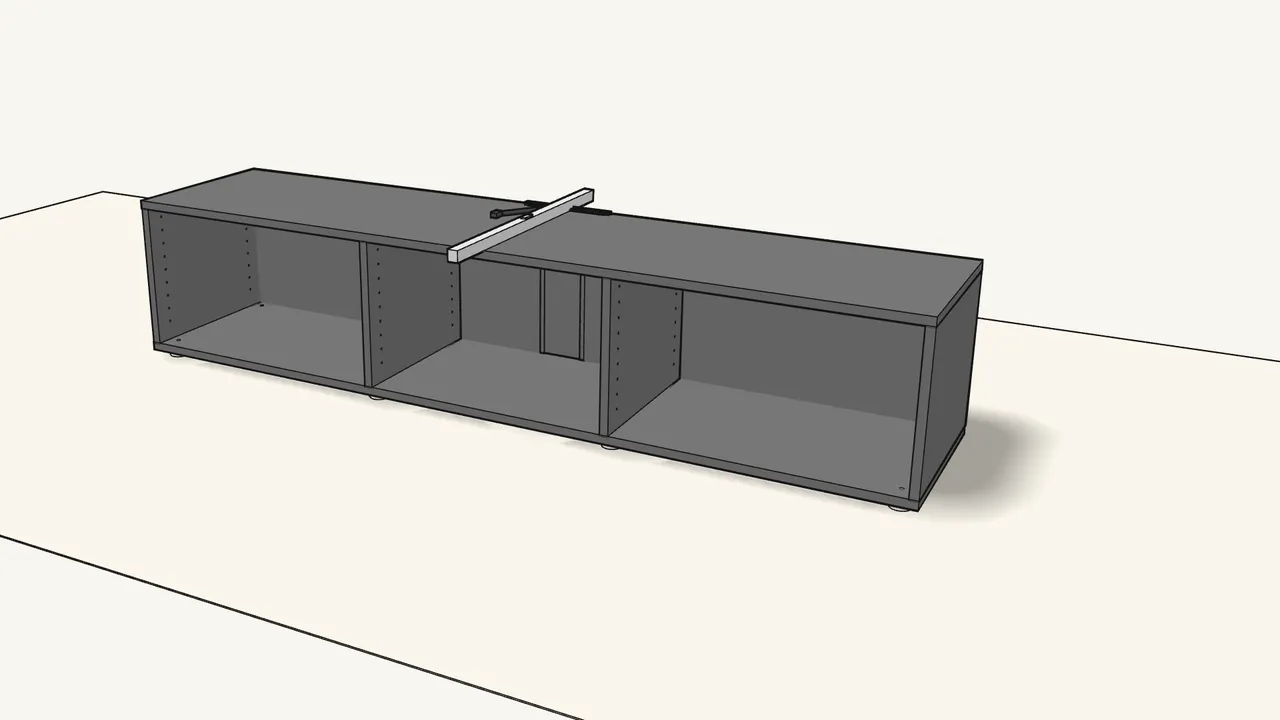
Step 18
Then turn the 4 front feet by hand until it is level.
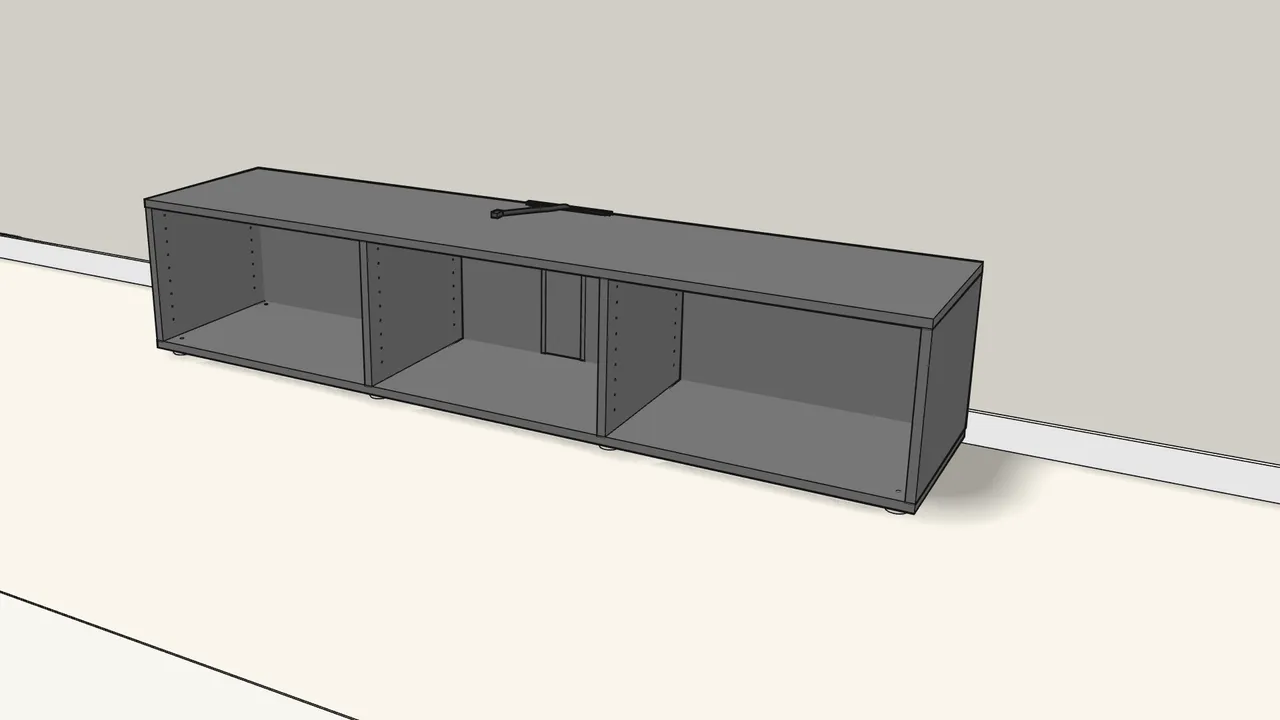
Step 19
Push the unit back against the wall.
Always fix it to the wall — see the warning in the manual.
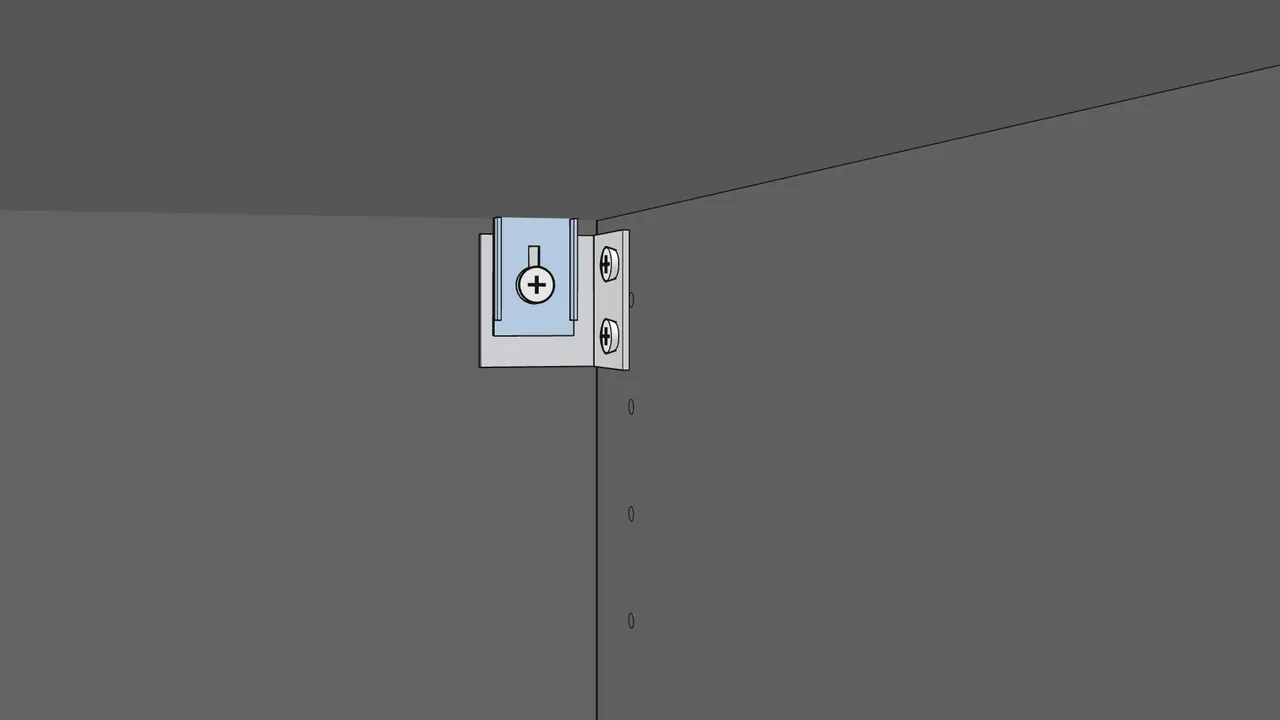
Step 20 · manual step 19
Screw into the wall through each fitting, then hook on a plate (103693).
Wall screws are not included — use ones suited to your wall.
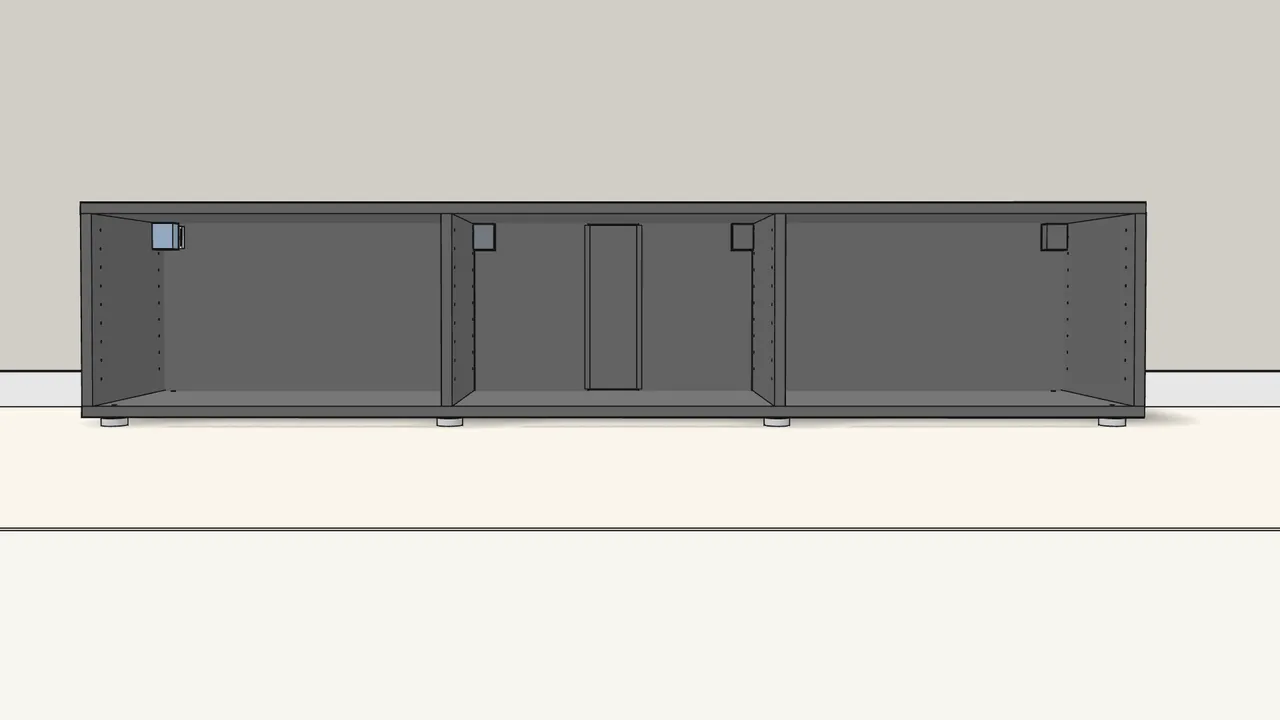
Step 21 · manual step 19
Do the same at the other 3 fittings, then click on the covers (144343).
Adjust the plates before you fit the covers.
Tips & safety
- Always fix the unit to the wall. Tip-over can cause serious or fatal crushing injuries. Screws and plugs for your wall are not included.
- Hanging it on the wall instead? No feet. 4 screws in a row, 80 mm below the top edge, 600 / 514 / 600 mm apart — see manual p. 21–22.
- Adding shelves? BESTÅ shelves are sold separately. Fit them with the shelf supports (115443, 115444) and screws (116637) — manual p. 23.
Official instructions
This guide follows IKEA's official assembly instructions (AA-1402080-13). Keep the printed manual to hand — if anything differs, the manual is right.