IKEA · Bookcases & Shelving
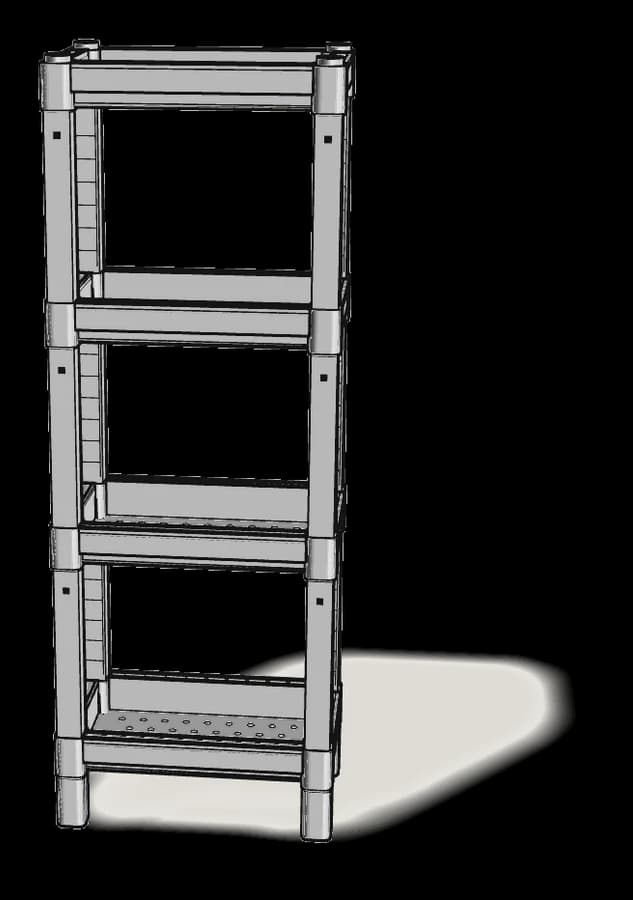
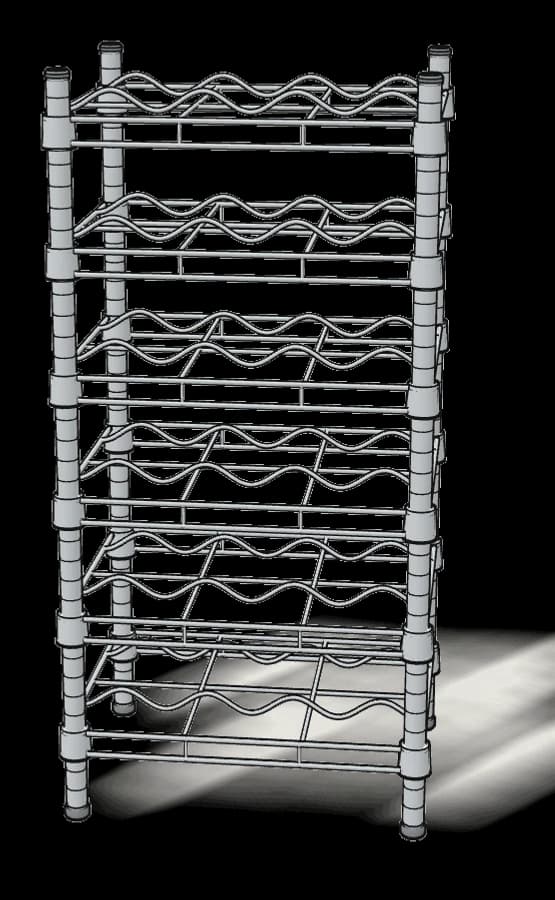
How to assemble IKEA OMAR Bottle Shelving Unit
Step-by-step IKEA OMAR Bottle Shelving Unit assembly: 15 illustrated steps, an animated video, the hardware list and the tools you need — following the official instructions (AA-108684-13).
- 15 illustrated steps
- 13 steps in the manual
- 2:12 video
- 46×36×94 cm
What you need
Tools
No tools needed.
Hardware in the box
| Part no. (as printed in the manual) | Qty |
|---|---|
| 10054272 | 2× |
| 139294 | 4× |
| 130531 | 48× |
| 139285 | 4× |
| 10054270 | 2× |
Step-by-step assembly
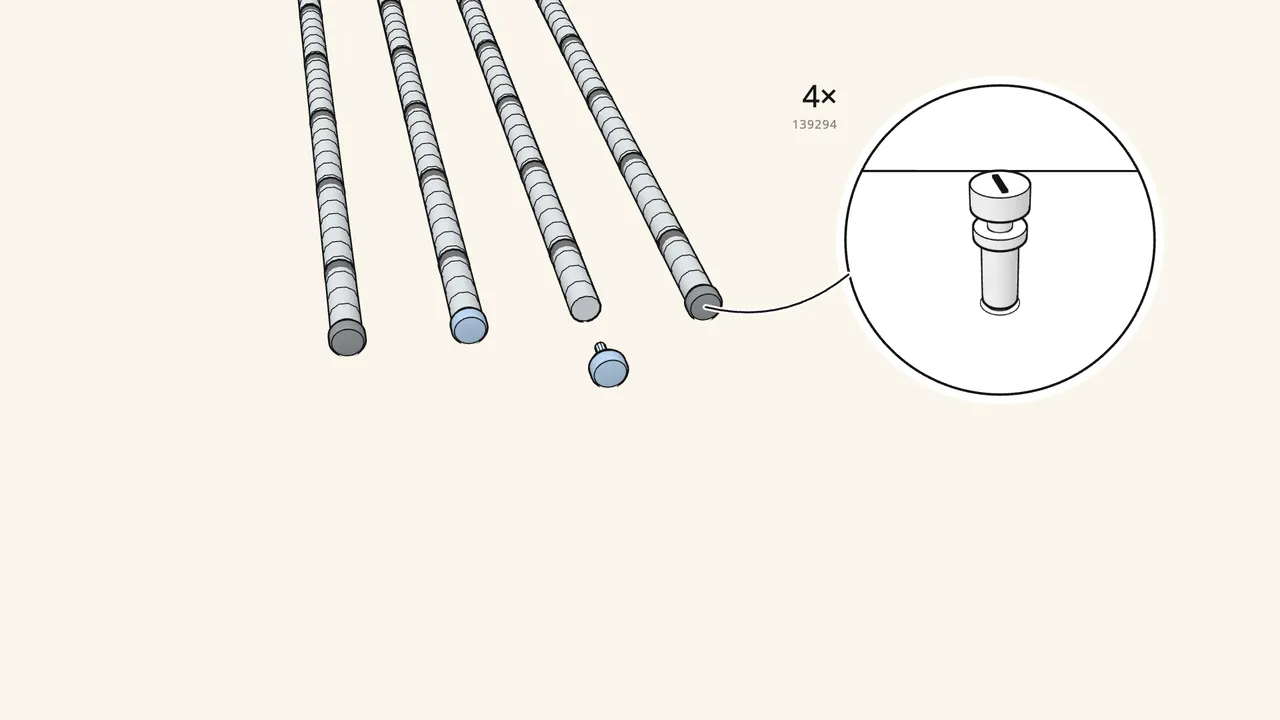
Step 1
Screw a foot (139294) into the bottom end of each post.
4 posts, 4 feet — turn them in by hand.
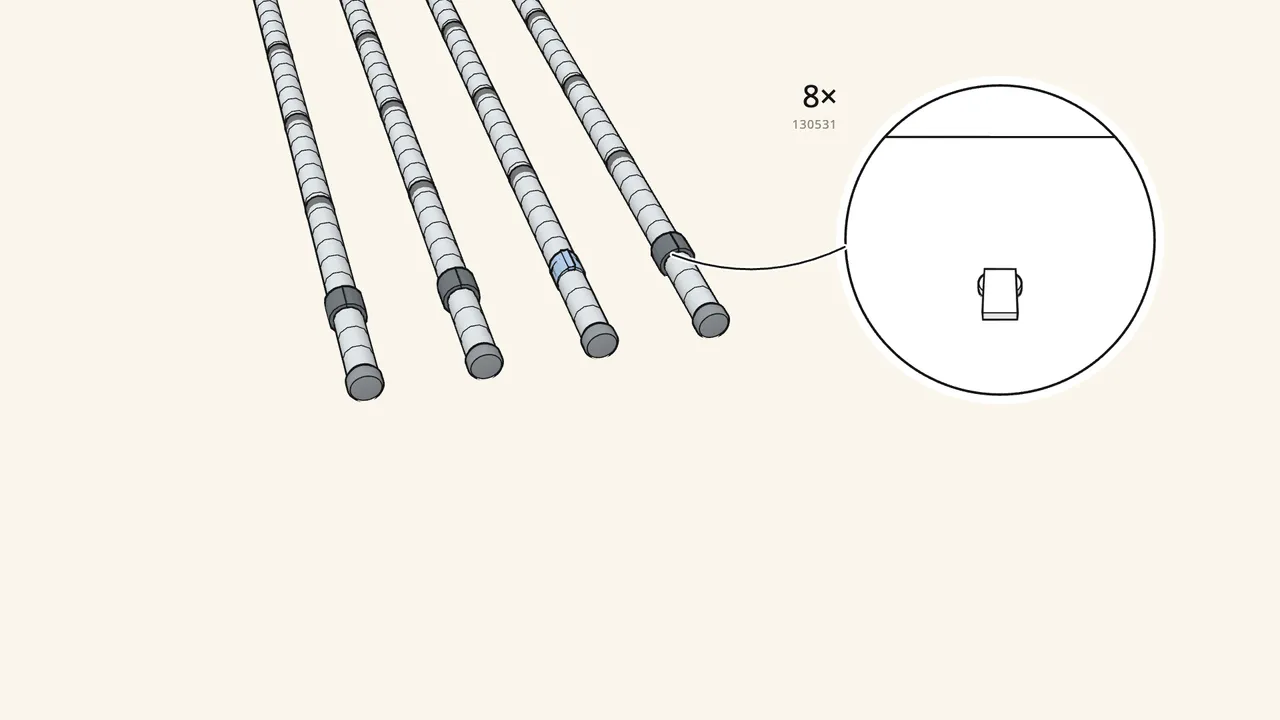
Step 2
Snap a pair of clips (130531) onto each post at the first marking.
The marking near the foot — press the two halves together round the post.
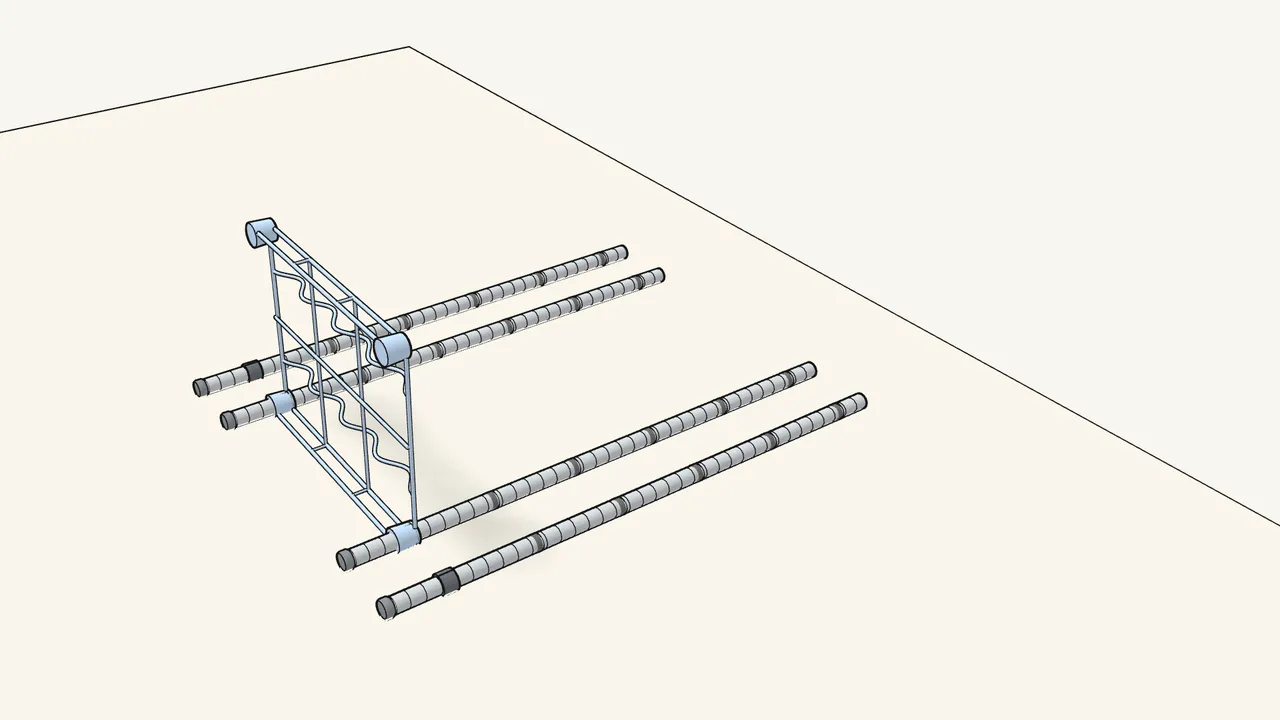
Step 3
Slide a shelf onto the 2 posts lying on the floor.
Push it down onto the clips — see the manual, step 3.
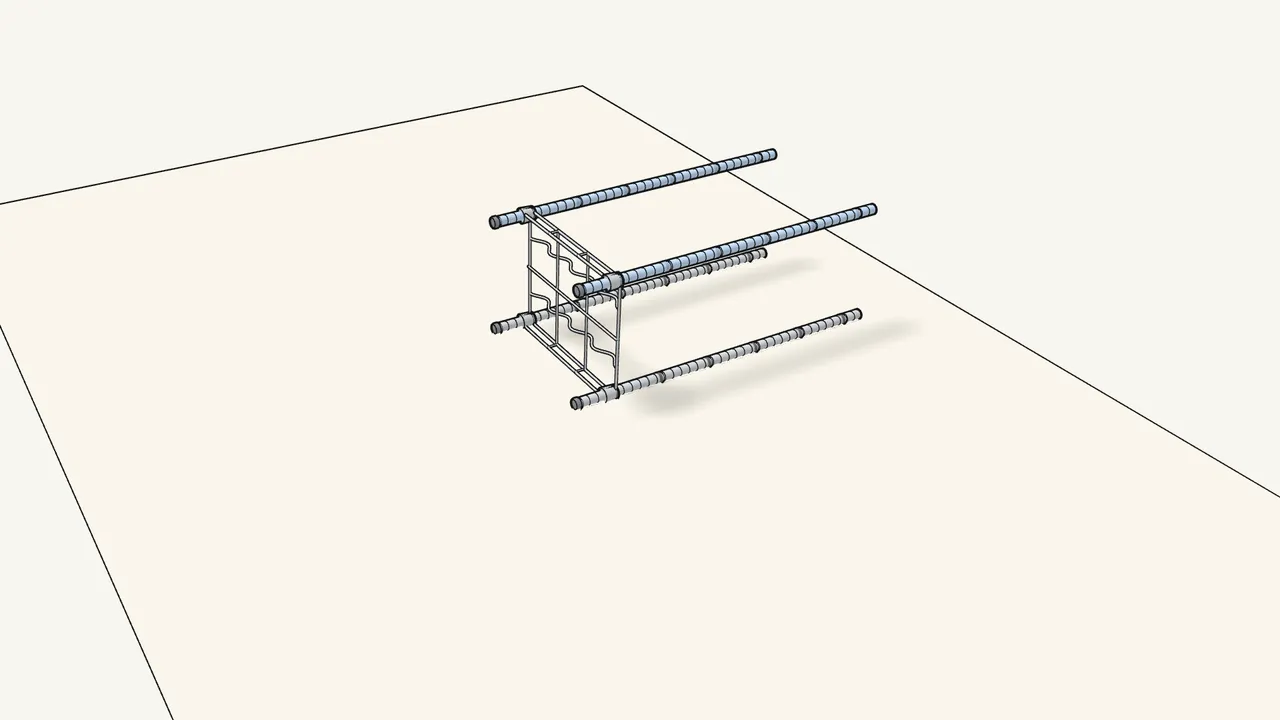
Step 4
Push the other 2 posts through the shelf corners.
Feet toward the same end as the first two.
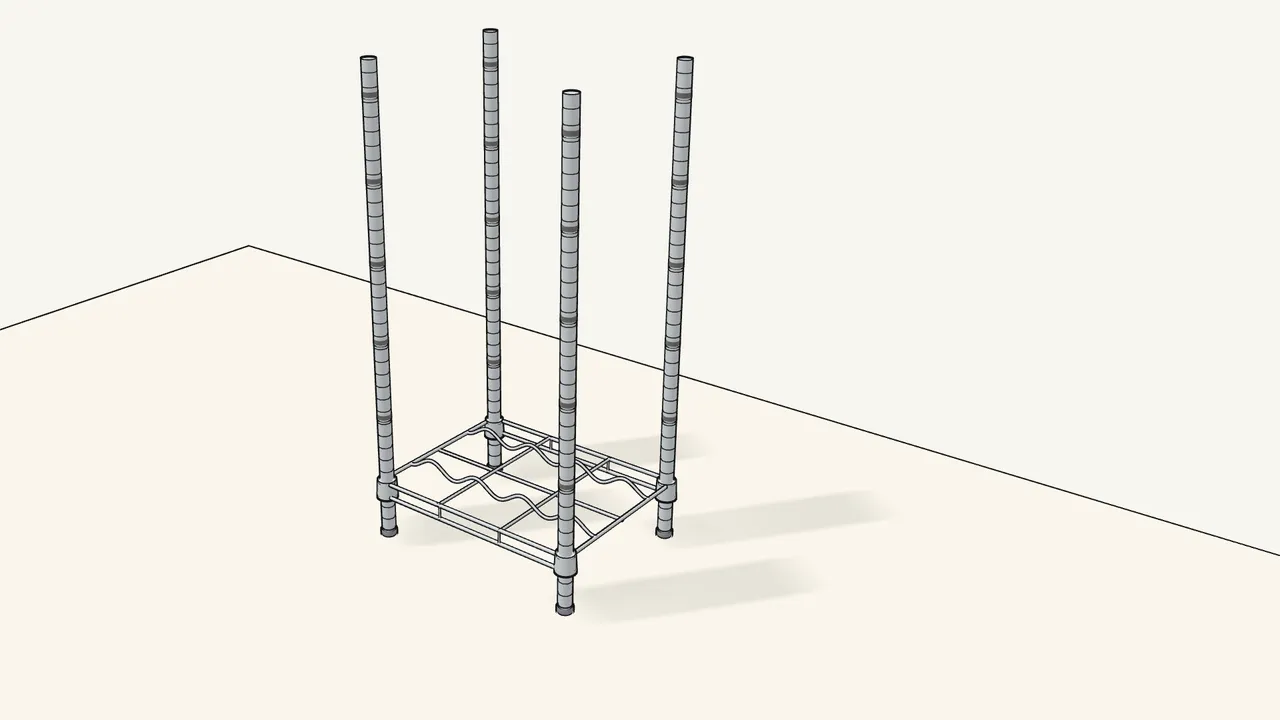
Step 5
Stand the frame upright on its feet.
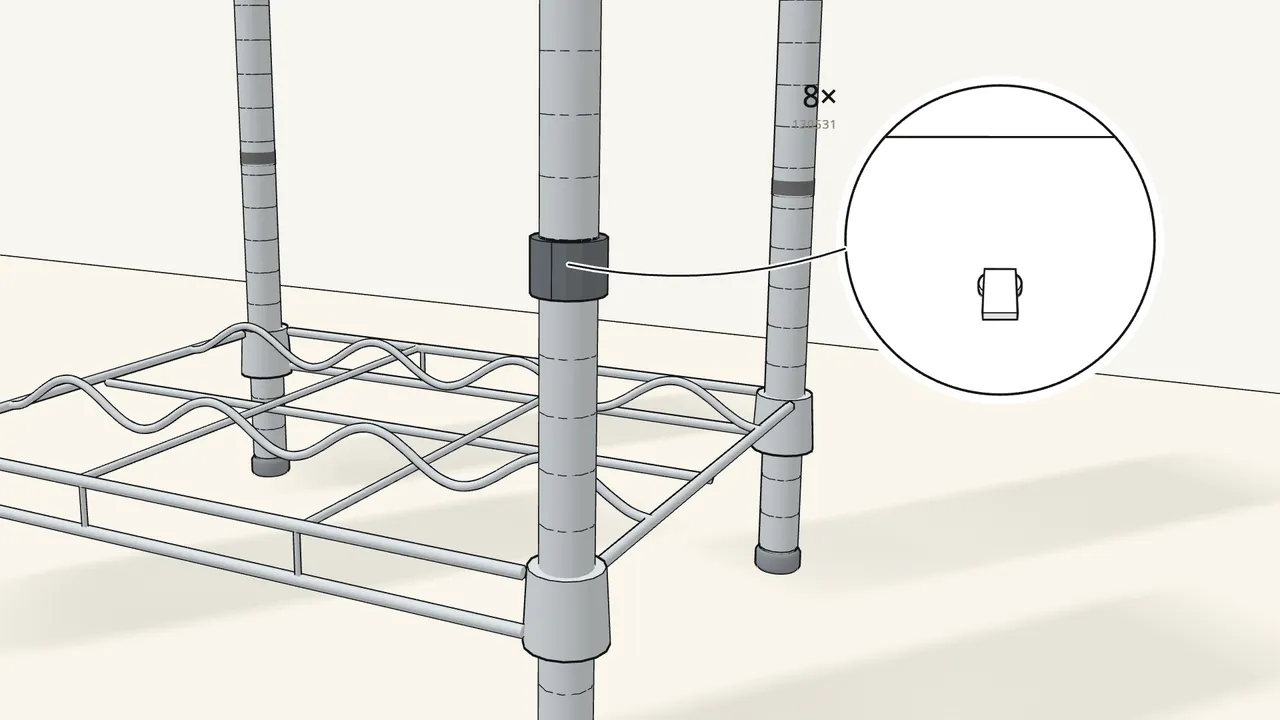
Step 6 · manual step 5
Snap a pair of clips (130531) round each post at the next marking.
Each clip fits between two grooves, not across one — see the manual, step 5.
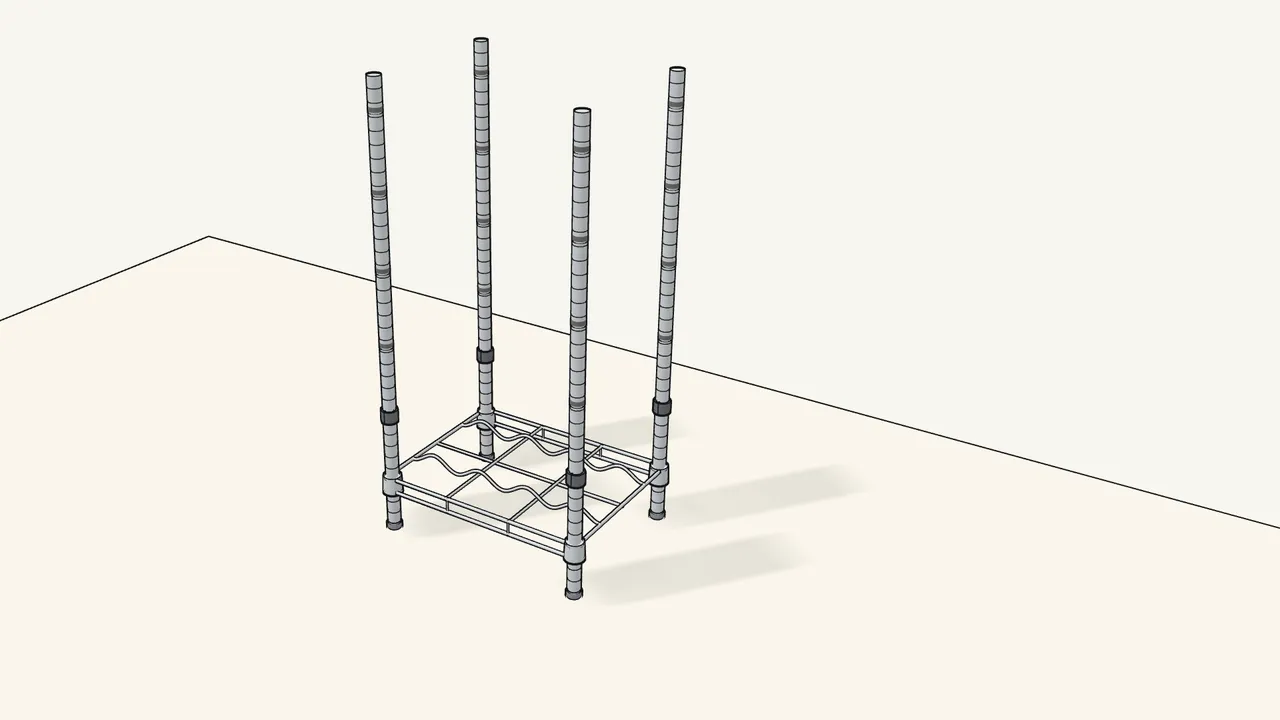
Step 7 · manual step 5
Repeat on the other 3 posts.
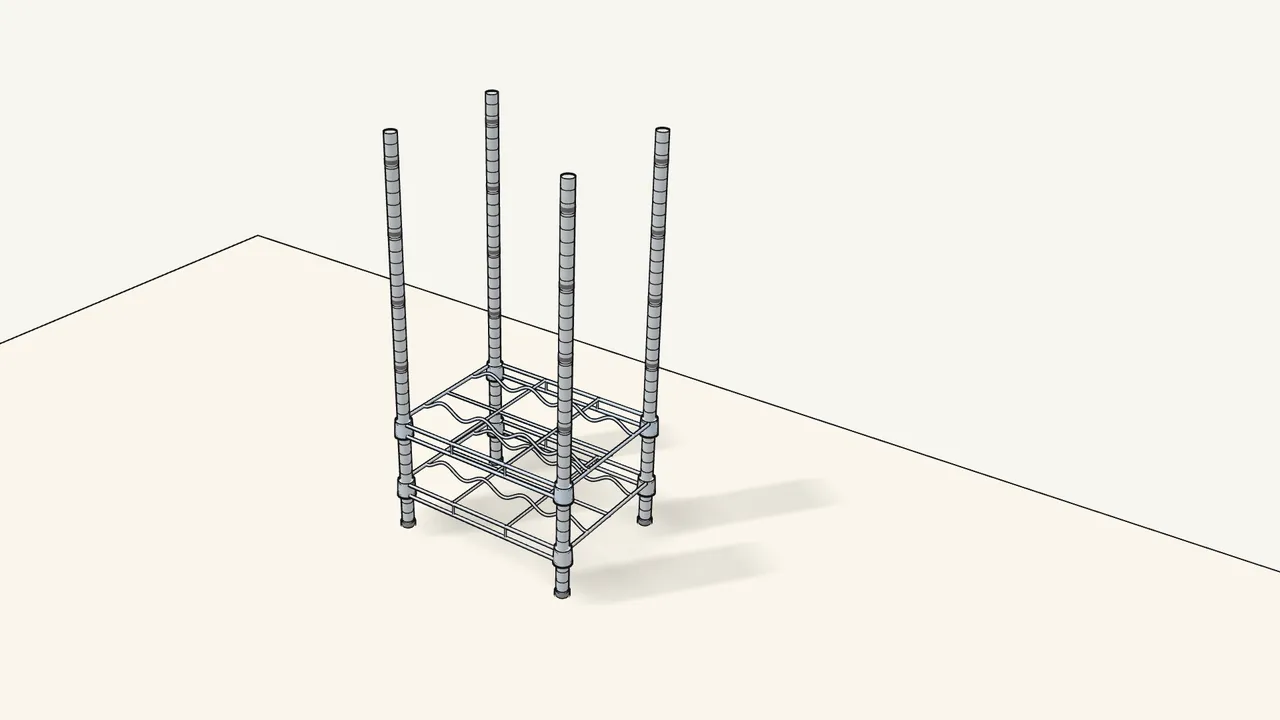
Step 8 · manual step 6
Lower the next shelf over the posts onto the clips.
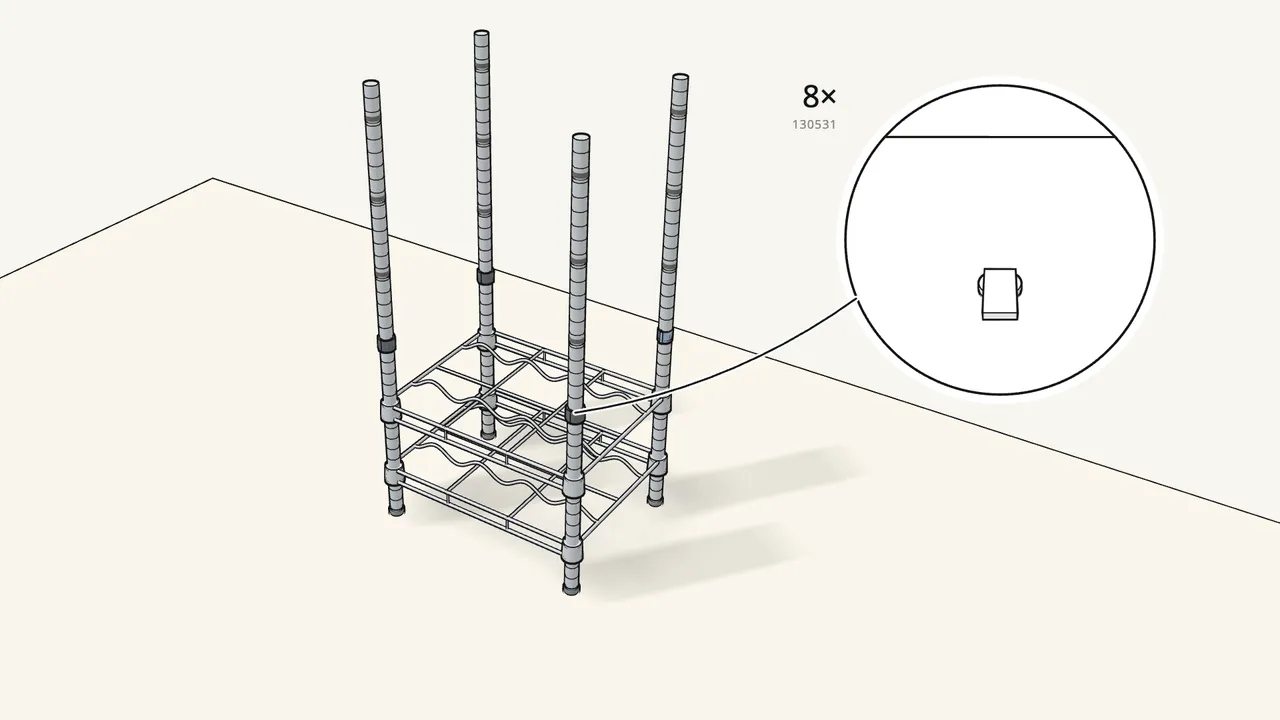
Step 9 · manual step 7
Snap 4 more pairs of clips onto the posts at the next marking.
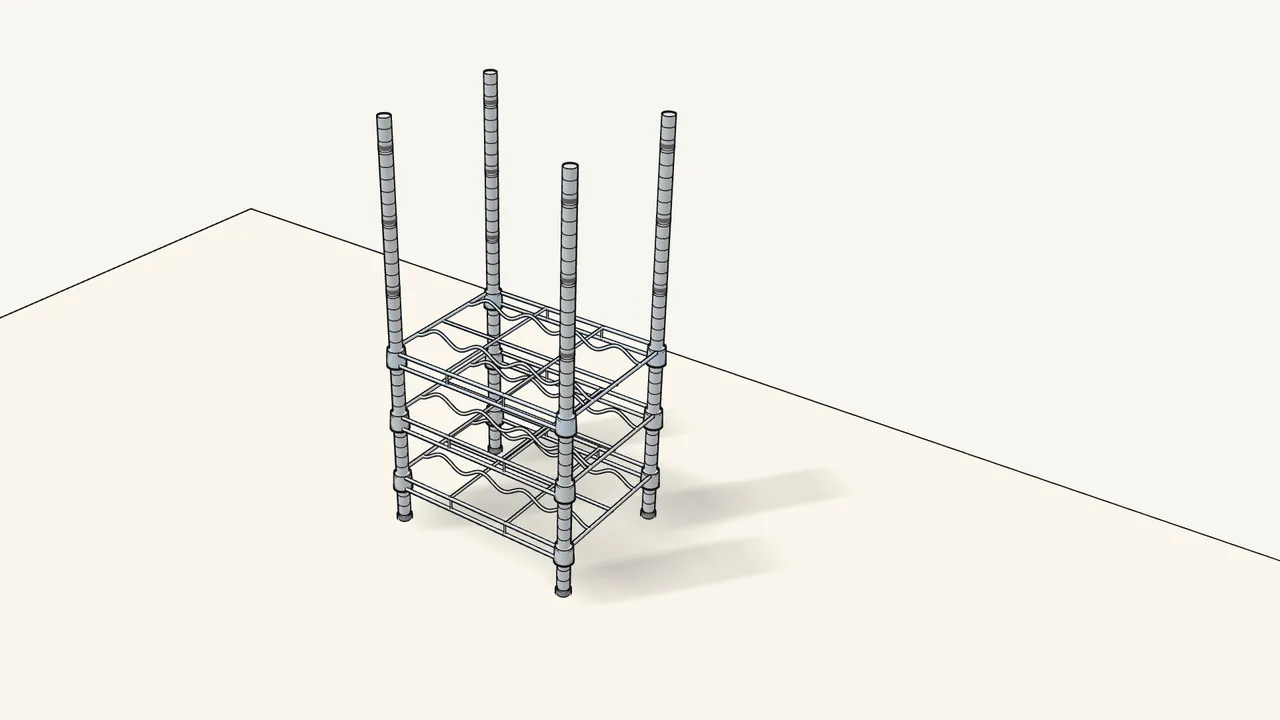
Step 10 · manual step 8
Lower the third shelf onto the clips.
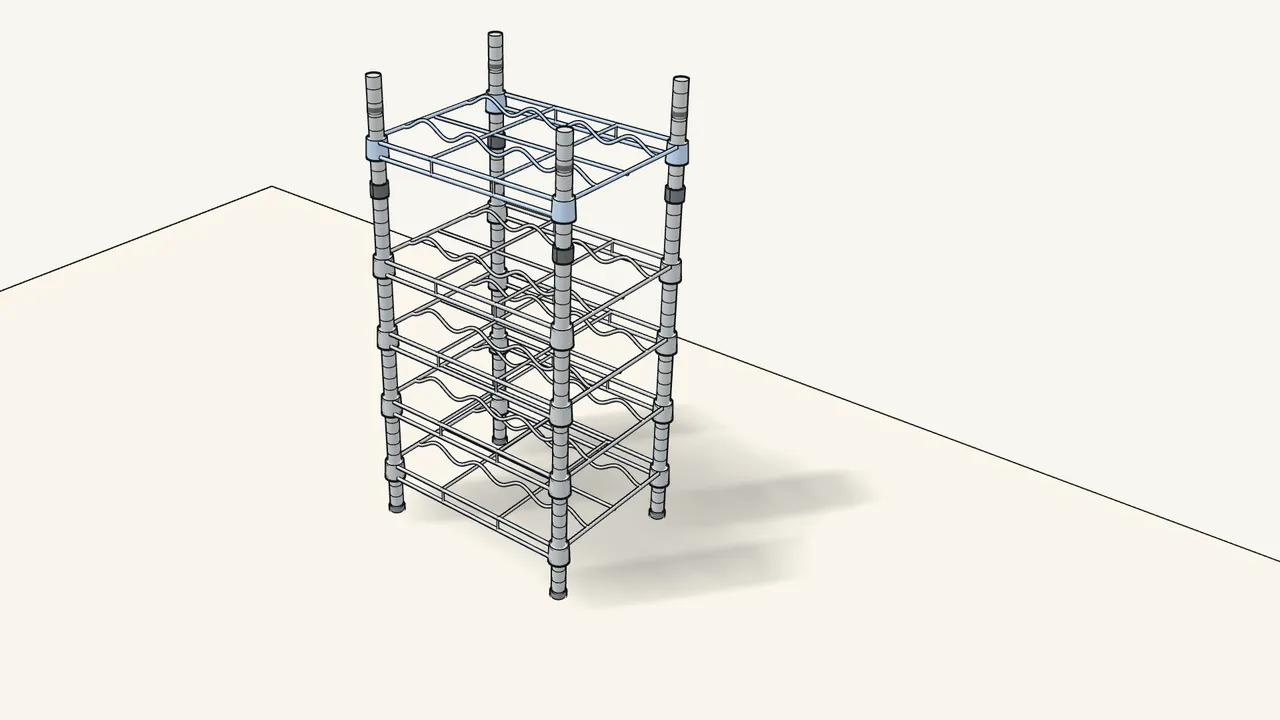
Step 11 · manual step 7–8
Repeat steps 7 and 8 for the next two shelves.
Clips first, then the shelf — one level at a time.
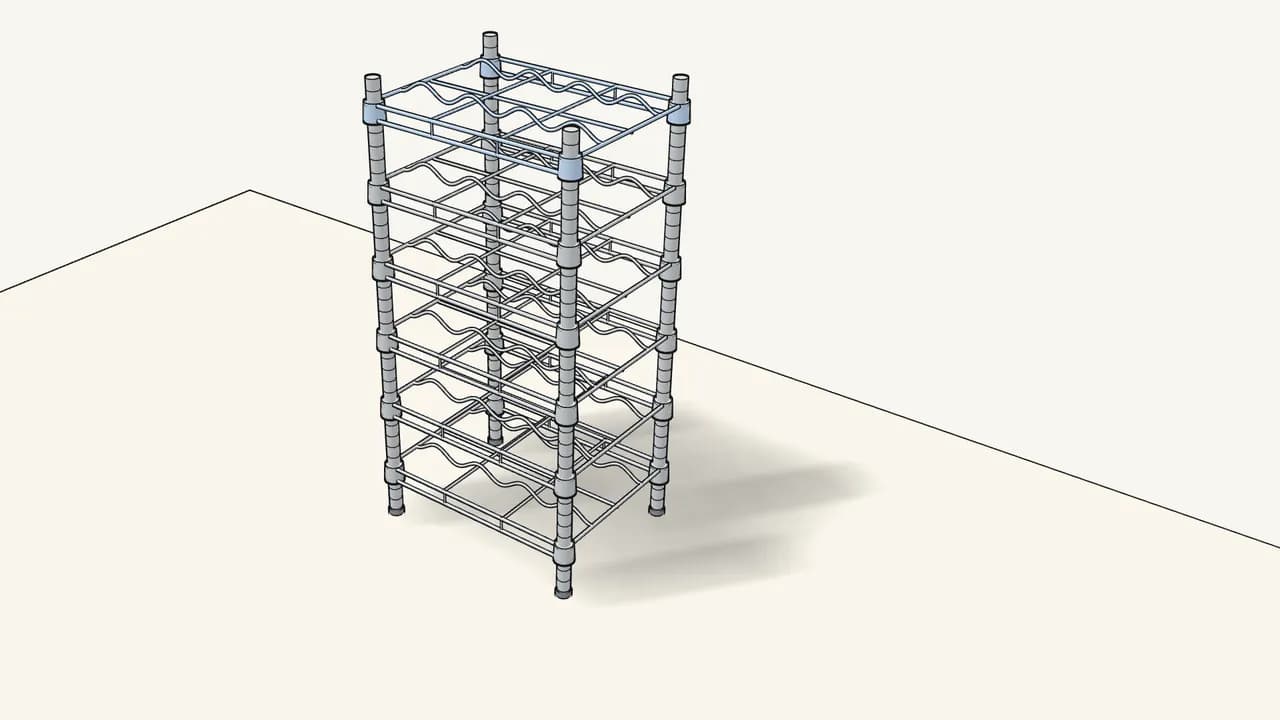
Step 12 · manual step 7–8
Clip on the last 4 pairs and lower the top shelf.
All 6 shelves are in place.
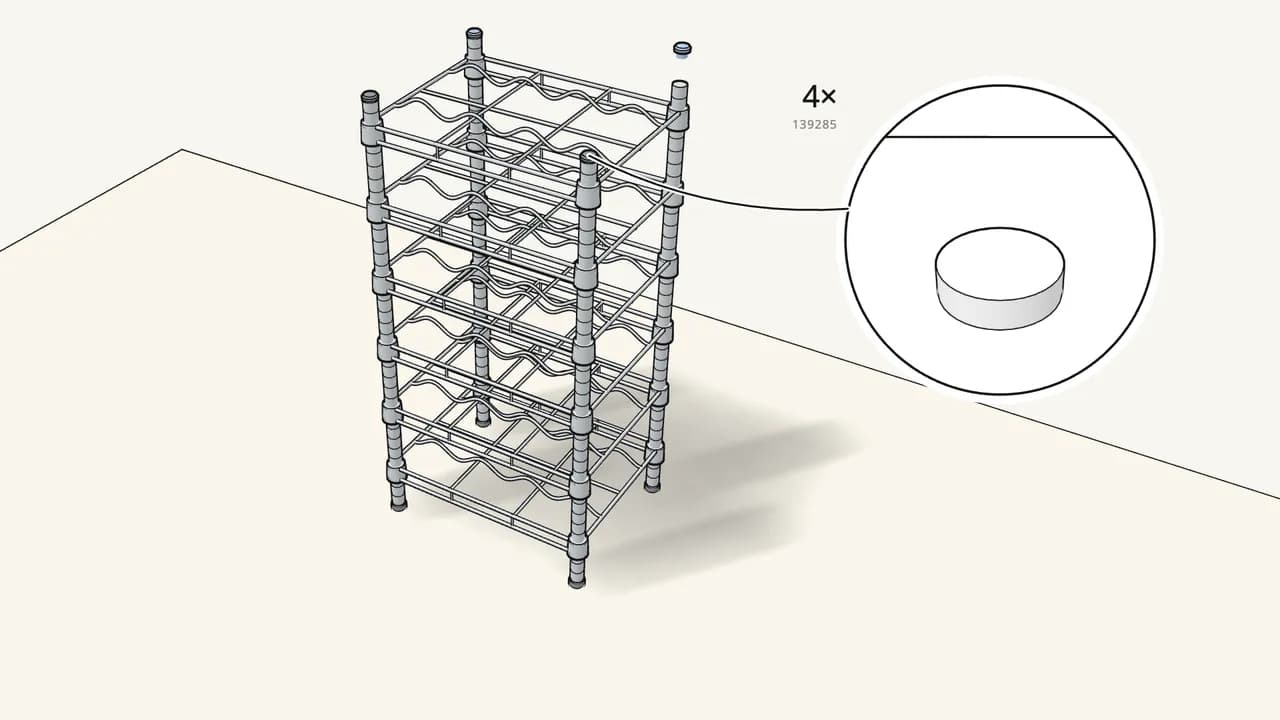
Step 13 · manual step 9
Press a cap (139285) onto the top of each post.
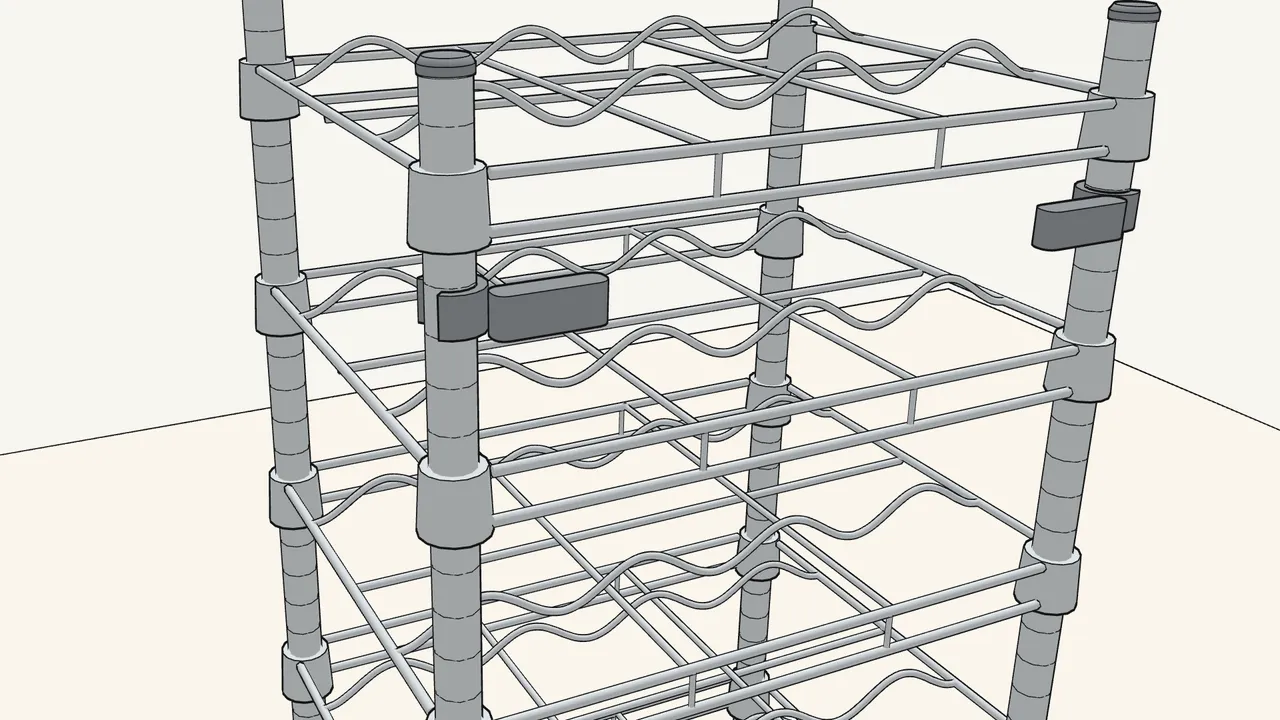
Step 14 · manual step 10
Snap a wall bracket (10054272) round each back post, under the top shelf.
Check the position in the manual, step 10.
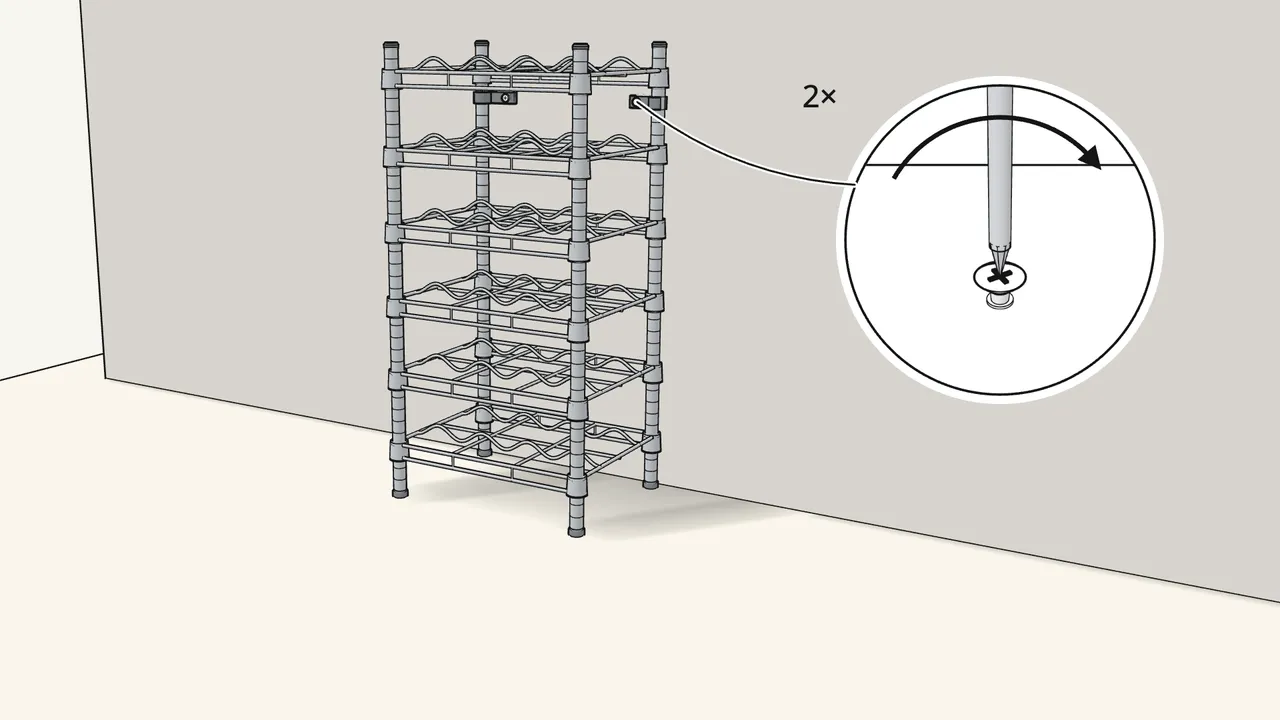
Step 15 · manual step 11–13
Push the unit against the wall and screw both brackets to it.
Wall screws and plugs are not included. Skirting board 10 or 15 mm? Fit the spacer (10054270) — steps 12–13.
Tips & safety
- Always fix OMAR to the wall. Furniture tip-over can cause serious or fatal crushing injuries. Use screws and plugs suited to your wall — ask a specialist if unsure.
- Stacking units? Two high at most. The manual shows two units stacked as OK, three as not allowed — see step 10.
Official instructions
This guide follows IKEA’s official assembly instructions (AA-108684-13). Keep the printed manual to hand — if anything differs, the manual is right.