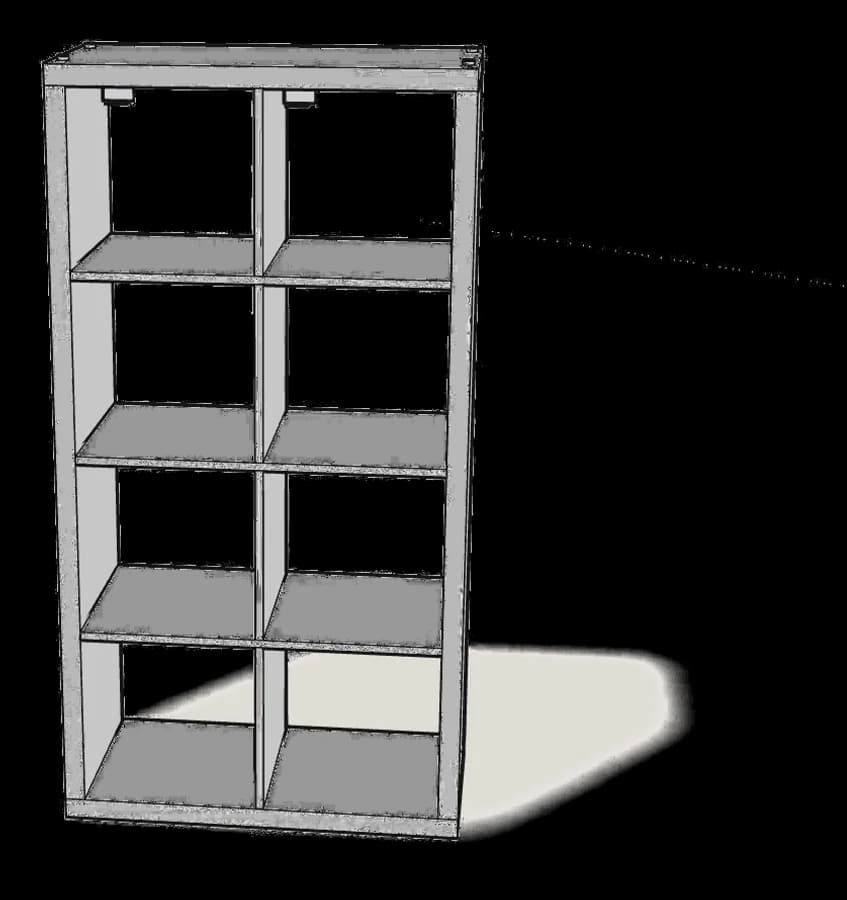
IKEA · Bookcases & Shelving
How to Assemble IKEA BILLY Bookcase
Step-by-step IKEA BILLY bookcase assembly: 17 illustrated steps, an animated video, the hardware list and the tools you need — following the official instructions (AA-2289108-3).
- 17 illustrated steps
- 12 steps in the manual
- 2:40 video
- 80×28×202 cm
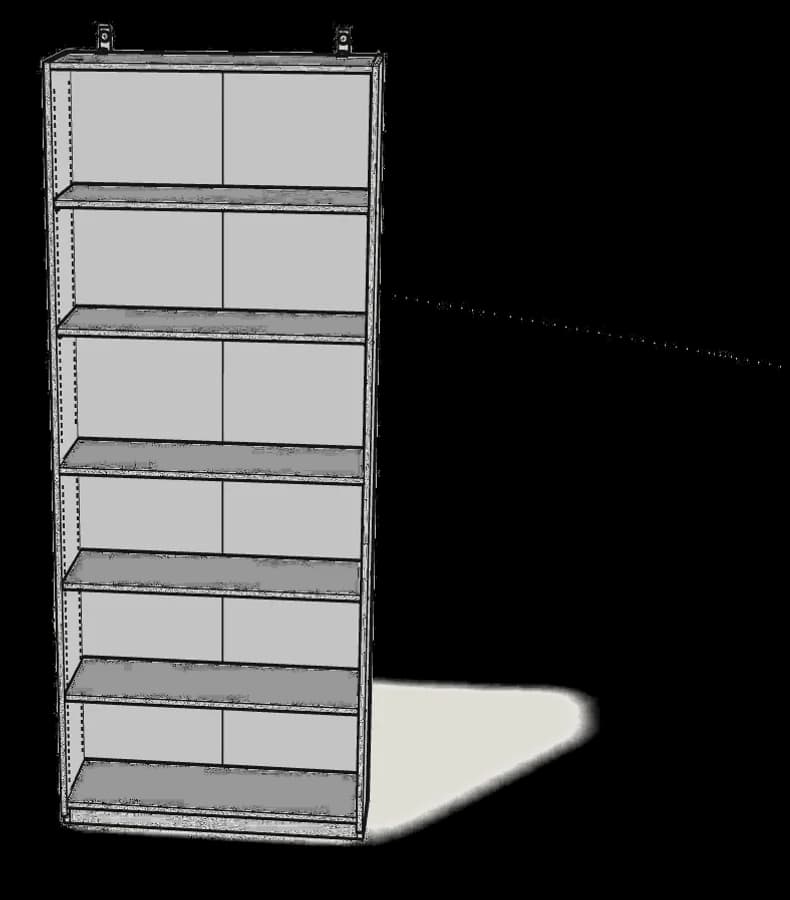
What you need
Tools
- Flat-head screwdriver
- Phillips screwdriver
- Hammer
You’ll need: flat-head and Phillips screwdrivers, a hammer, a pencil and a ruler.
Hardware in the box
| Part no. (as printed in the manual) | Qty |
|---|---|
| 118331 | 12× |
| 101351 | 16× |
| 151705 | 18× |
| 151706 | 18× |
| 119081 | 12× |
| 131372 | 16× |
| 109041 | 2× |
| 100823 | 4× |
| 106989 | 2× |
Step-by-step assembly
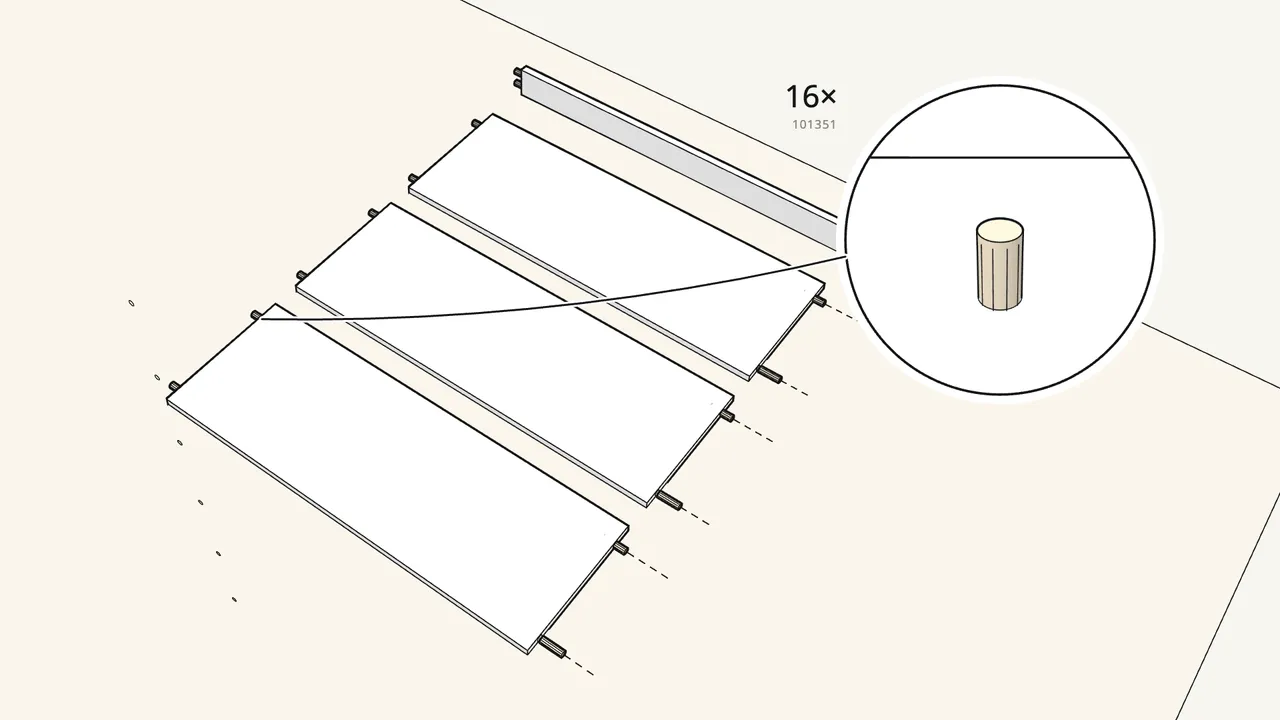
Step 1
Push 16 wooden dowels into the ends of four panels.
Top, bottom, fixed middle shelf and plinth — 2 dowels in each end.
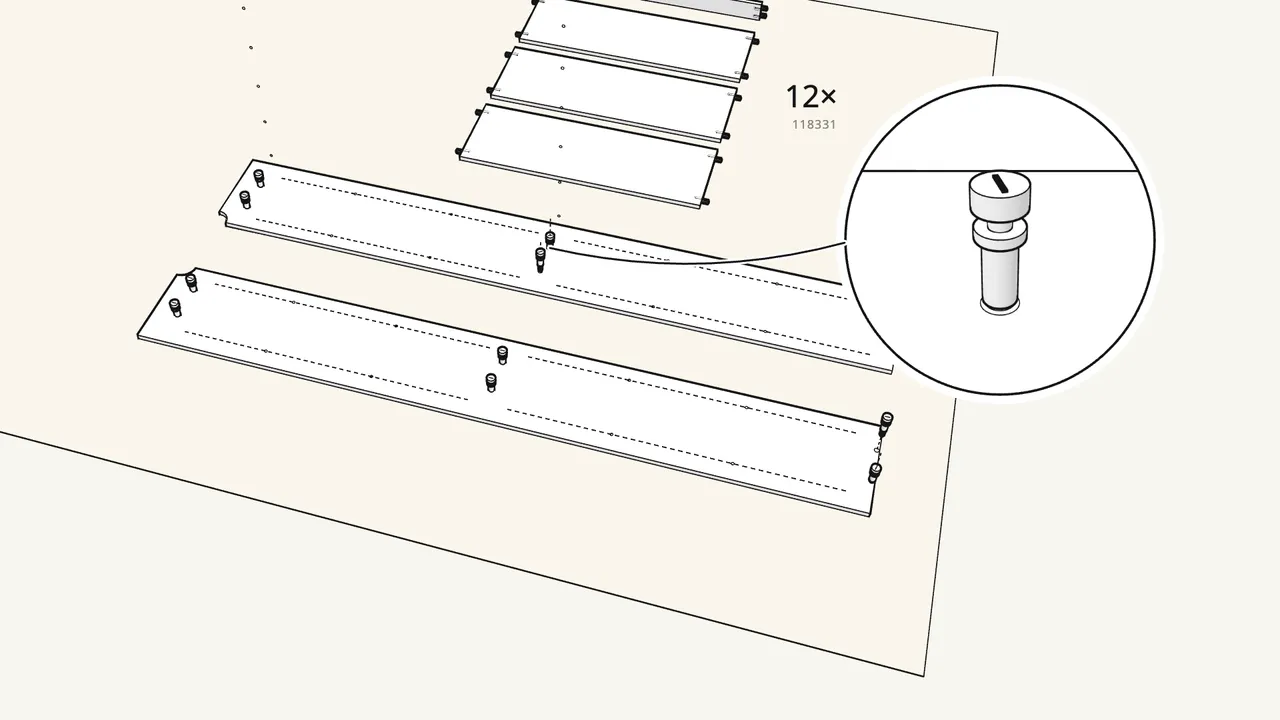
Step 2
Screw 12 cam bolts into the two side panels.
6 in each side, turned in by hand with a Phillips screwdriver.
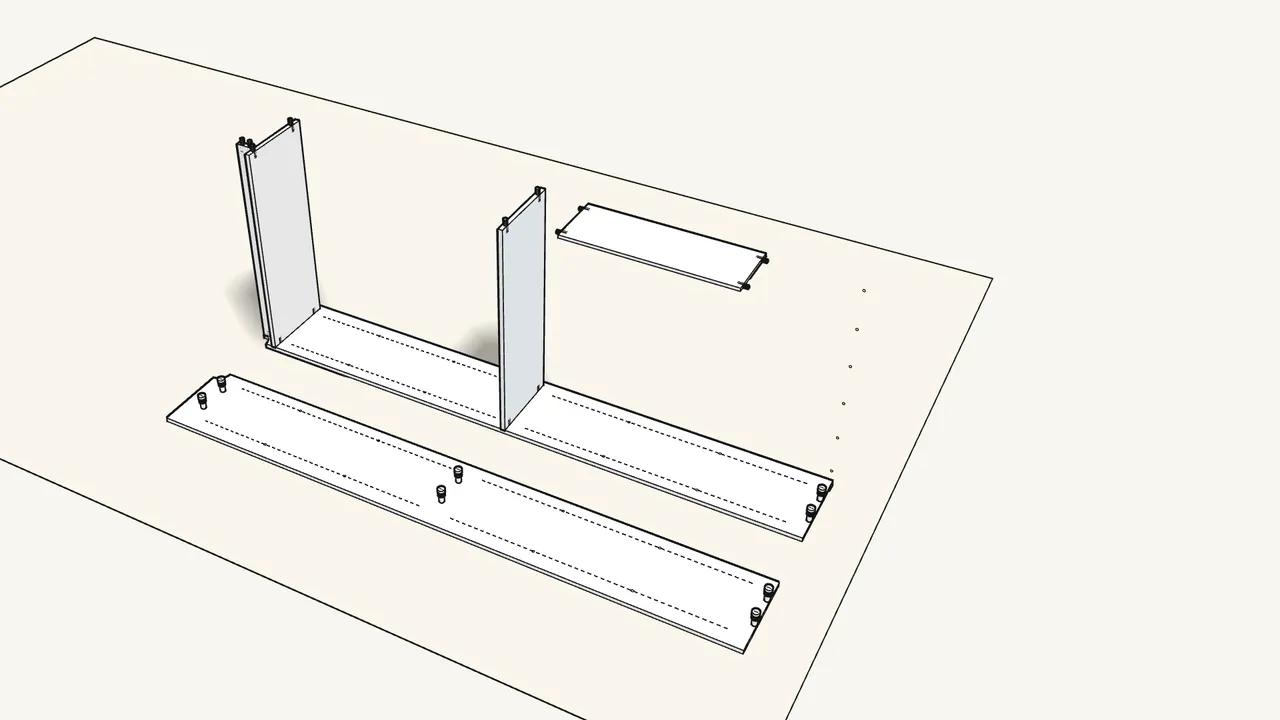
Step 3
Stand the plinth, bottom and fixed shelf on one side panel.
Dowels and bolts go into the holes. Check which way round each panel goes (manual inset).
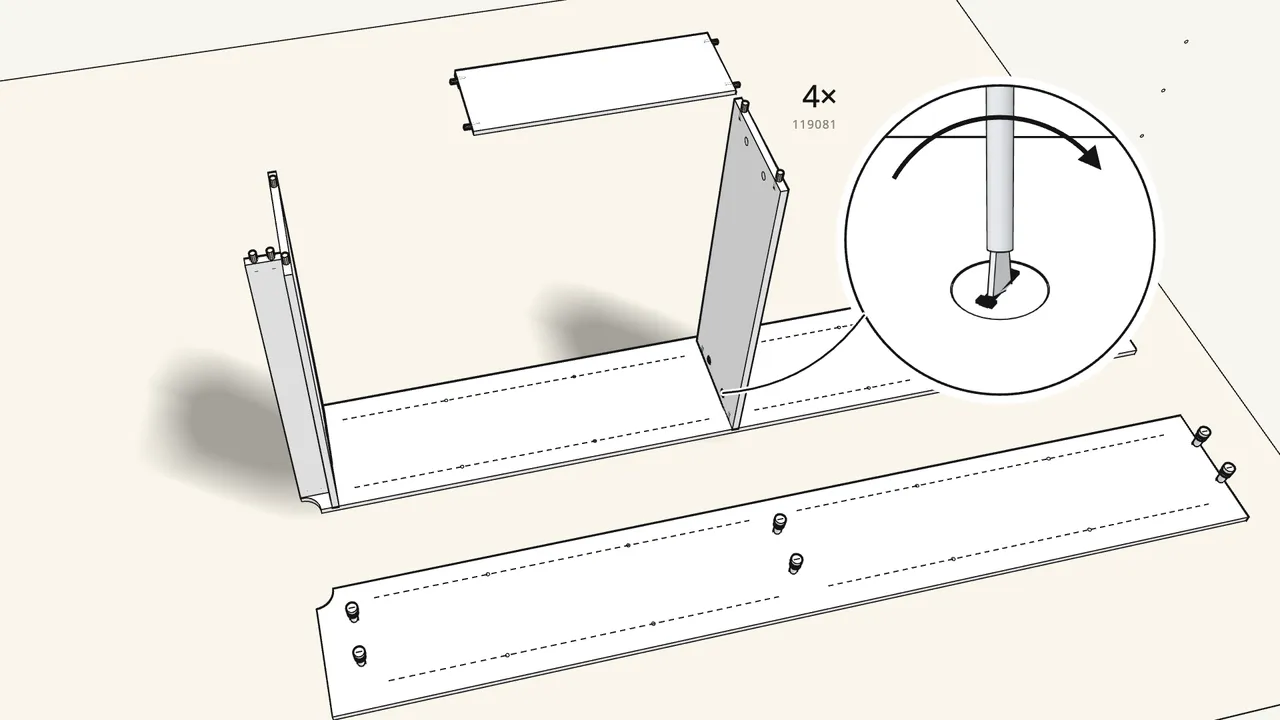
Step 4
Insert 4 cam locks (119081) and turn them clockwise.
They go in the underside of the bottom and fixed shelves, next to the side on the floor.
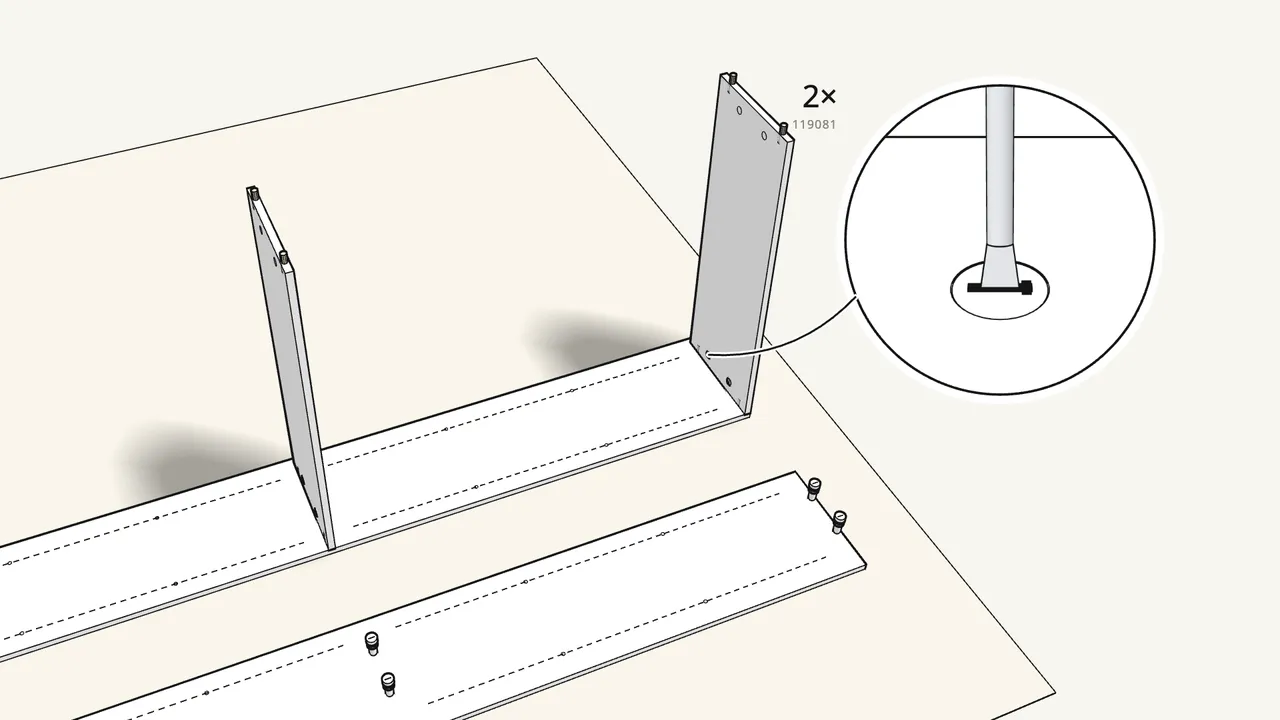
Step 5
Fit the top panel, then lock it with 2 cam locks.
Cam-lock holes face inwards, towards the fixed shelf.
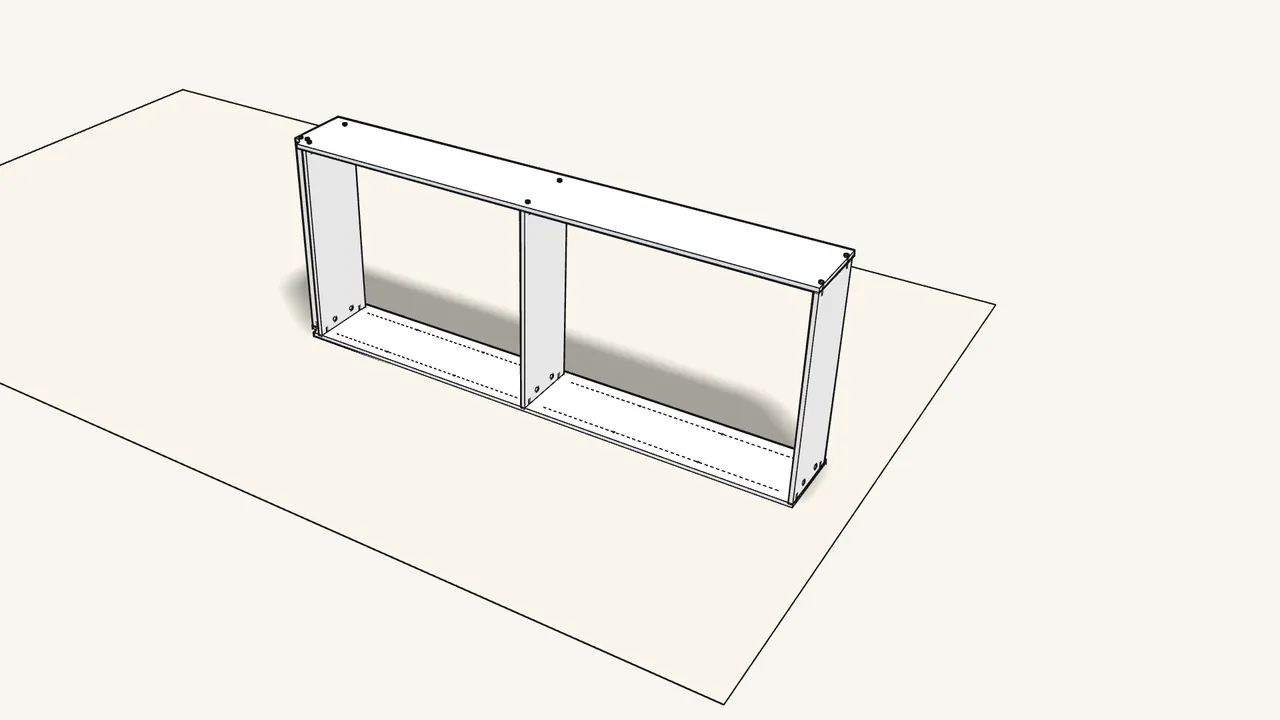
Step 6
Lay the second side panel on top.
The dowels and cam bolts line up with the holes in the panel ends.
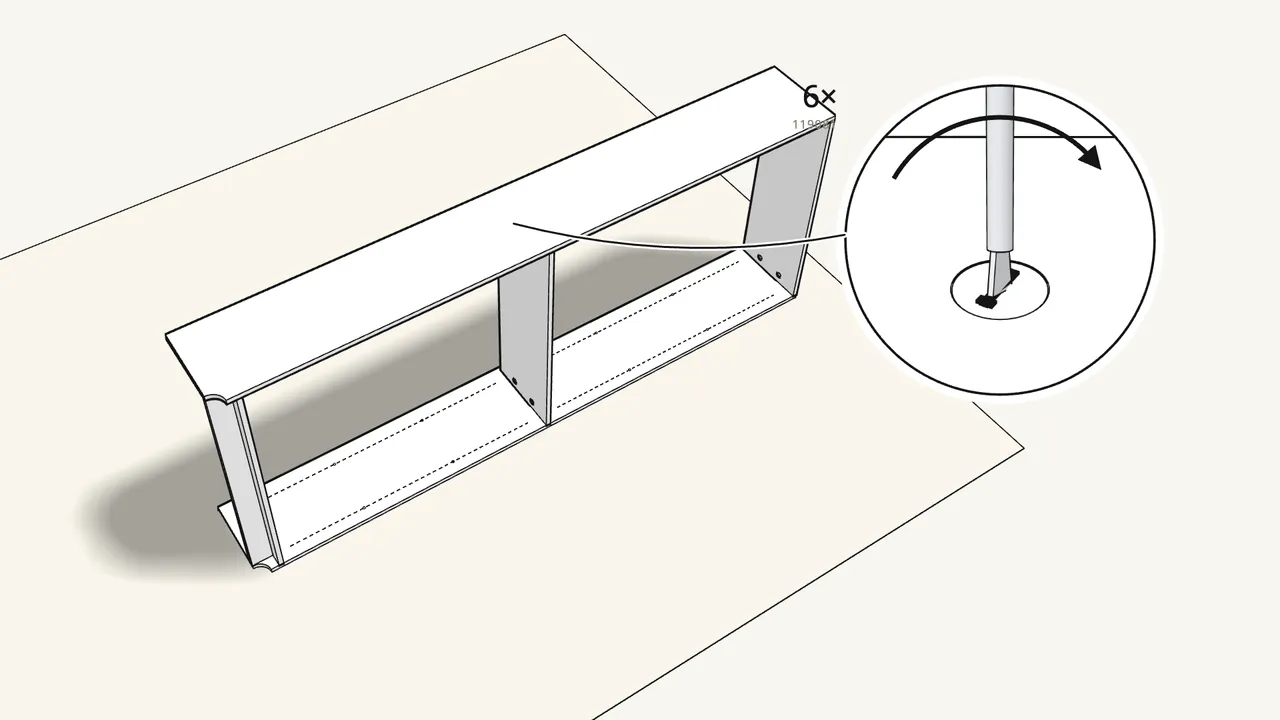
Step 7
Insert 6 cam locks (119081) and turn them clockwise.
Two in each panel, on the new side. Tighten them all.
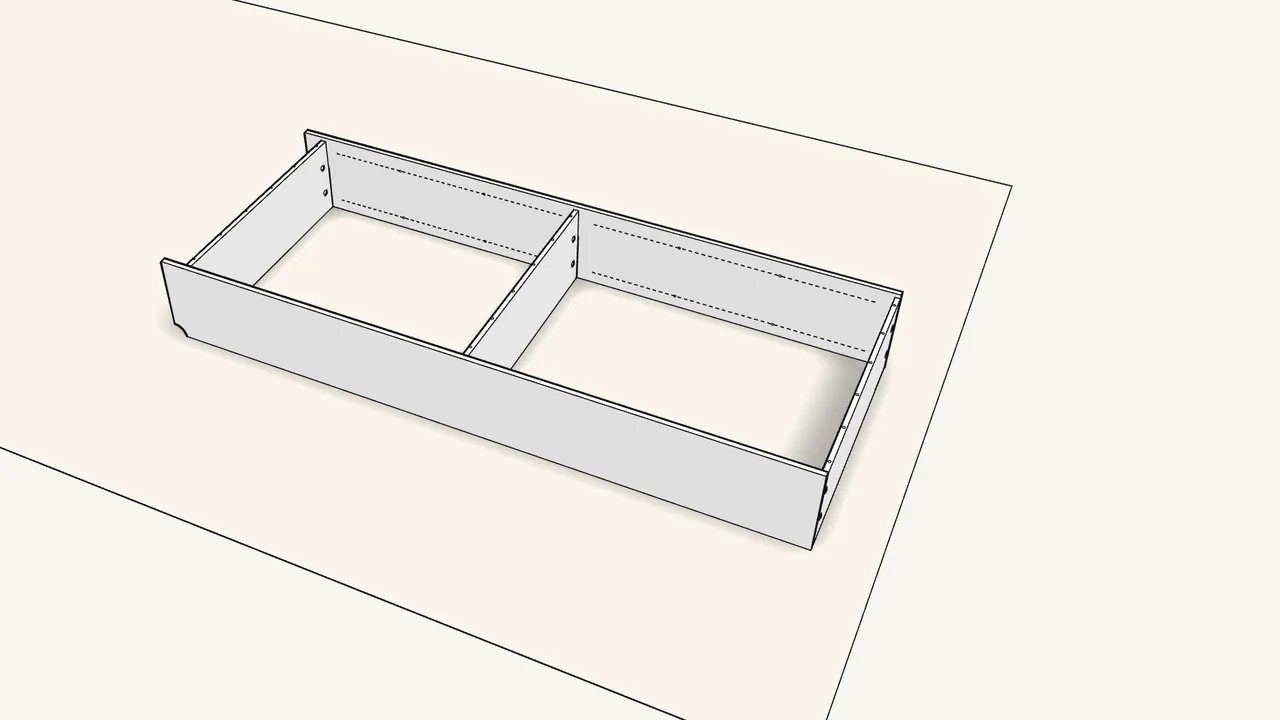
Step 8
Turn the frame onto its front.
Lay it face-down so the back edges point up.
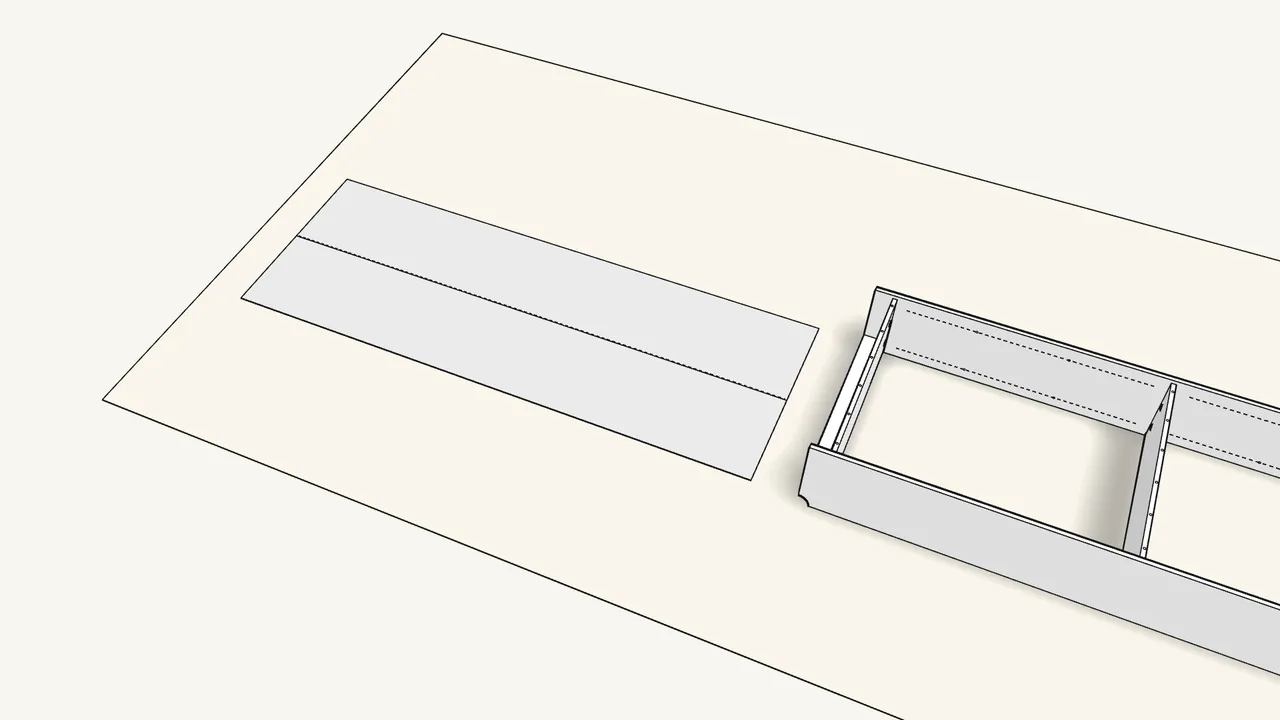
Step 9 · manual step 8
Unfold the back panel flat.
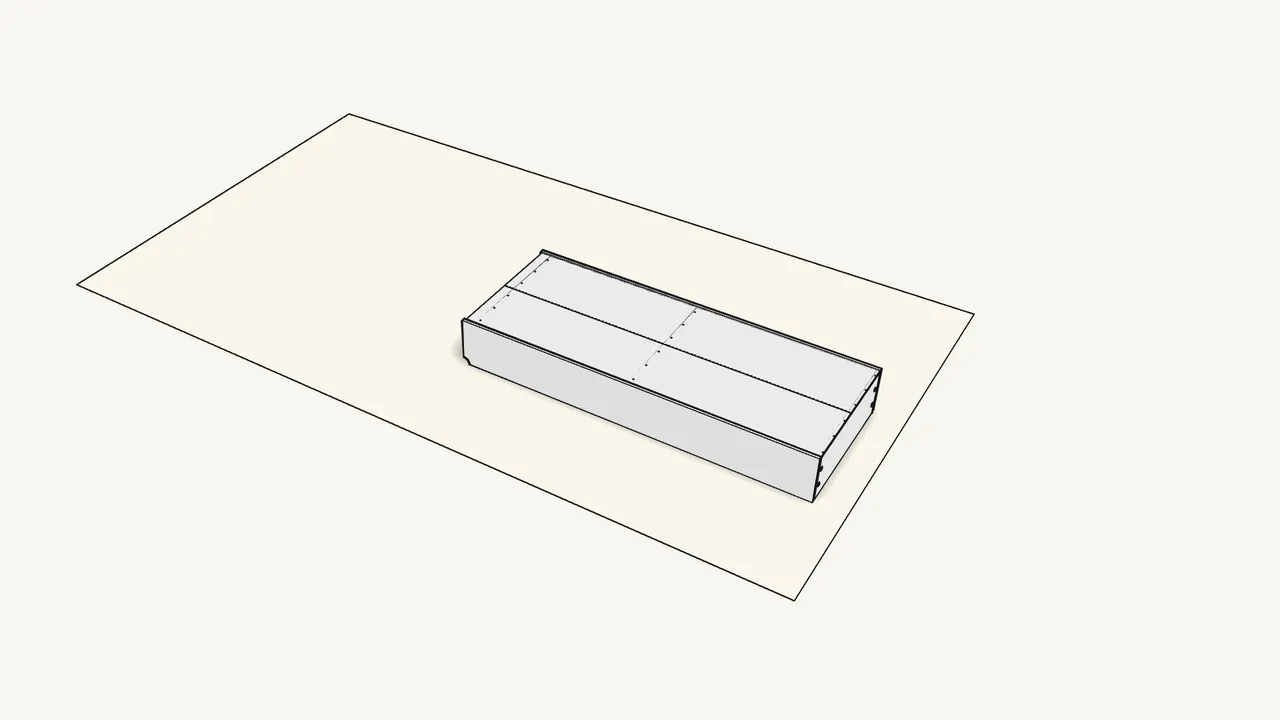
Step 10 · manual step 8
Slide the back panel into the grooves in the sides.
Push it in from the bottom end all the way to the top.
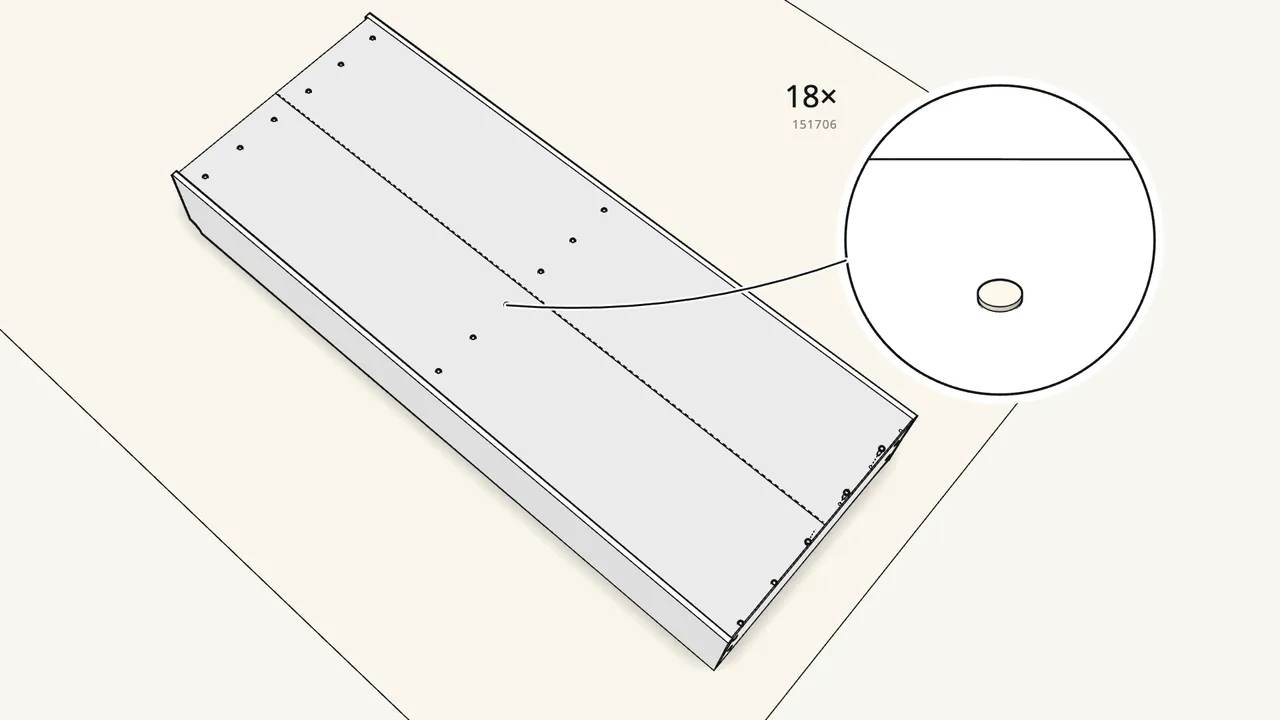
Step 11 · manual step 9
Press 18 plastic plugs (151706) through the back.
6 along the bottom, 6 at the fixed shelf and 6 at the top.
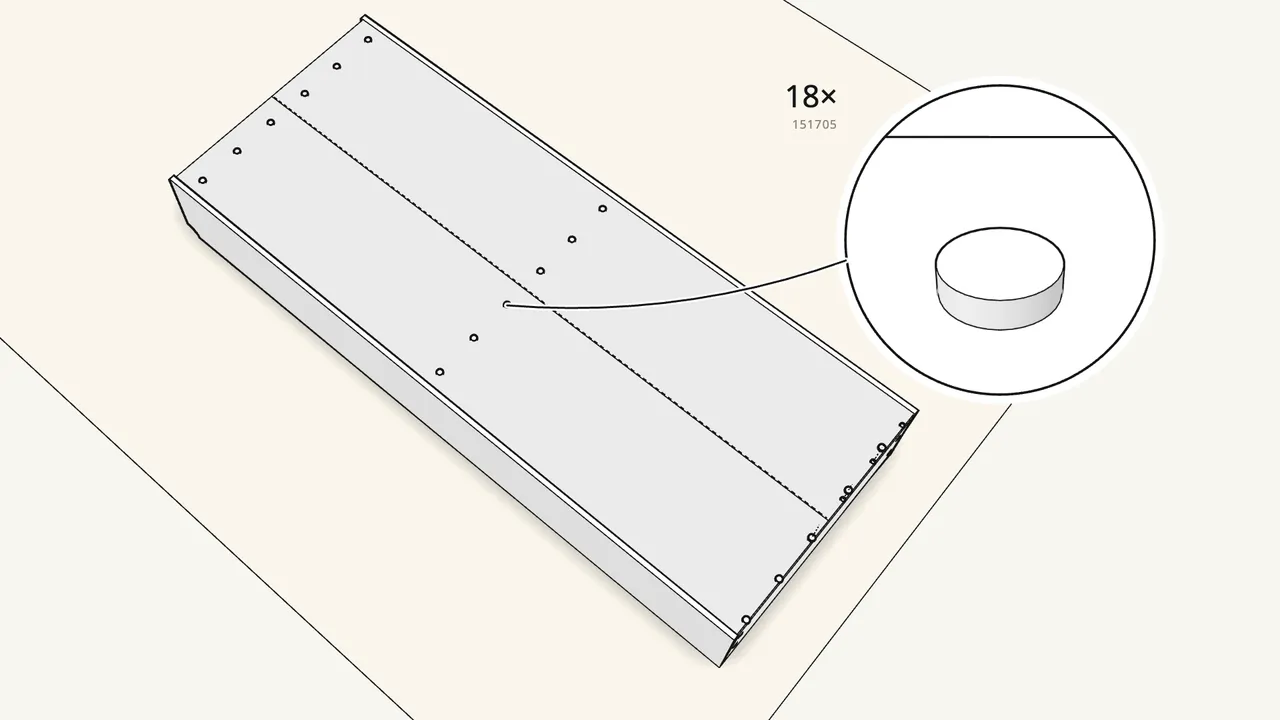
Step 12 · manual step 9
Push a pin (151705) into each plug to lock it.
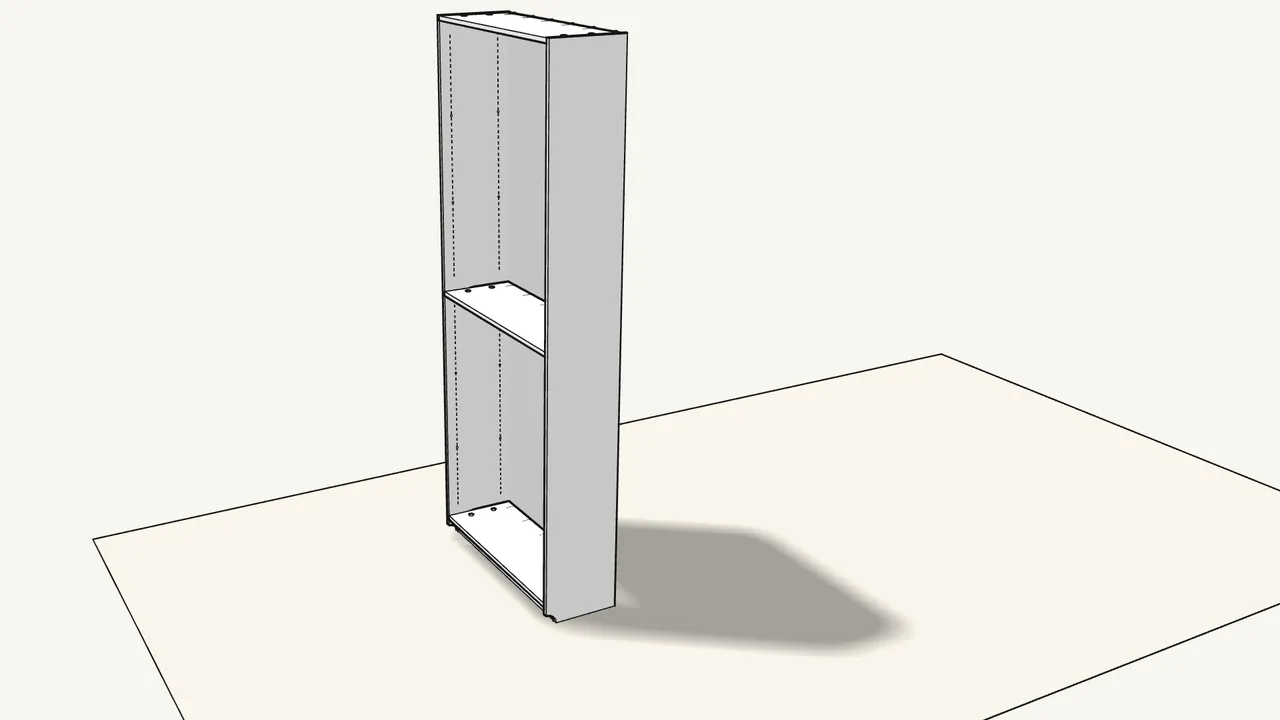
Step 13 · manual step 10
Stand the bookcase upright.
Get help — it is tall and heavy.
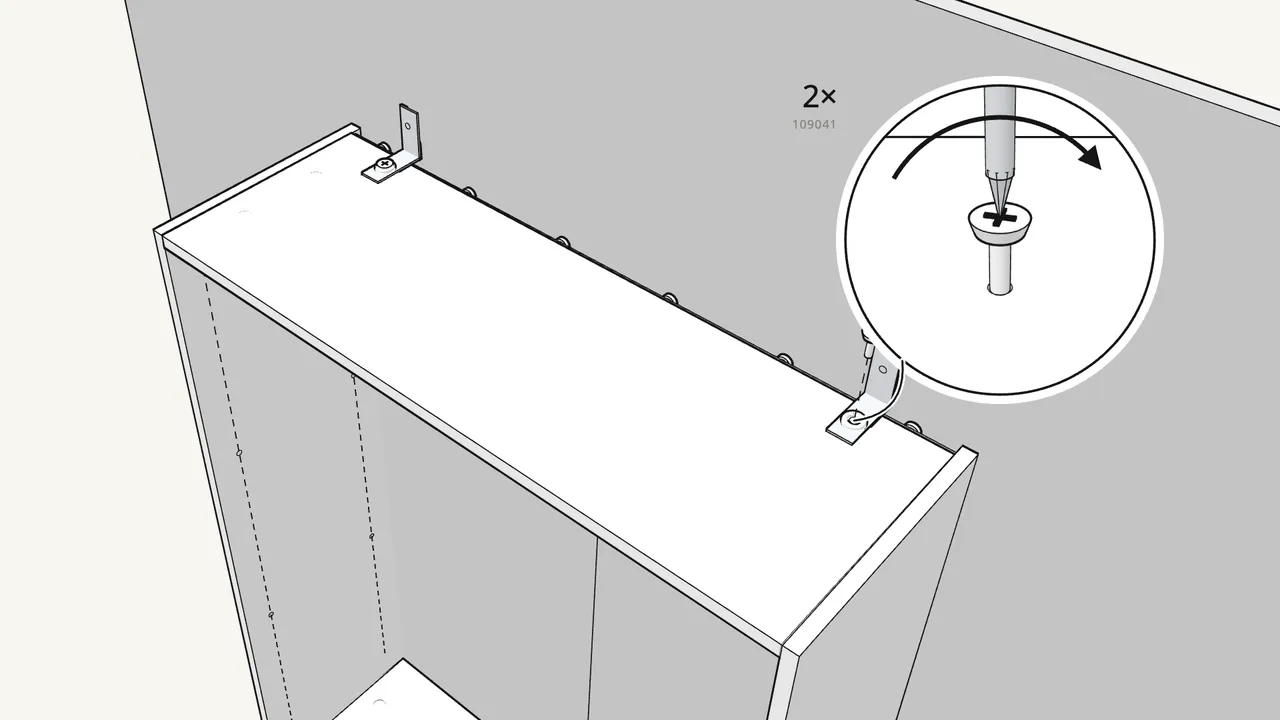
Step 14 · manual step 10
Screw 2 wall brackets (106989) to the top panel.
Each with a screw (109041) and a washer (100823), close to the wall side.
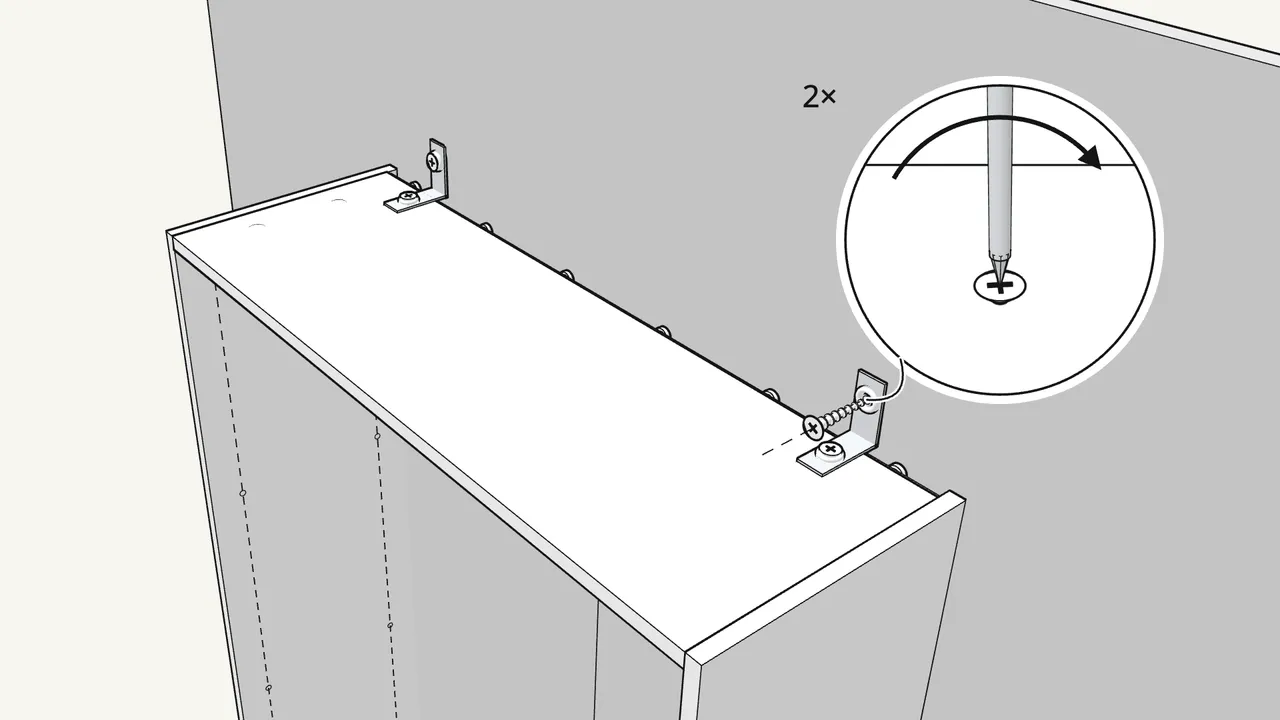
Step 15 · manual step 10
Fix the brackets to the wall.
Wall screws and plugs are not included — use ones suited to your wall (with a washer, 100823).
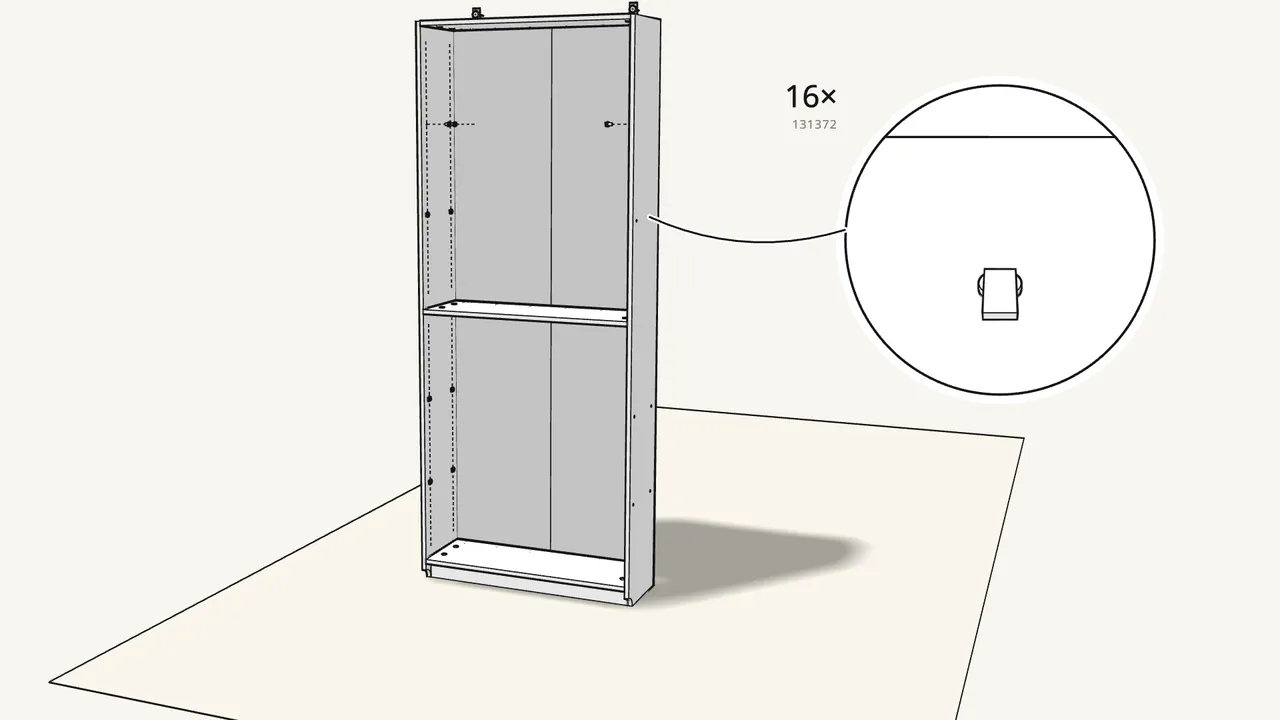
Step 16 · manual step 11
Push 16 shelf supports (131372) into the side holes.
4 per shelf, at the height you want each shelf.
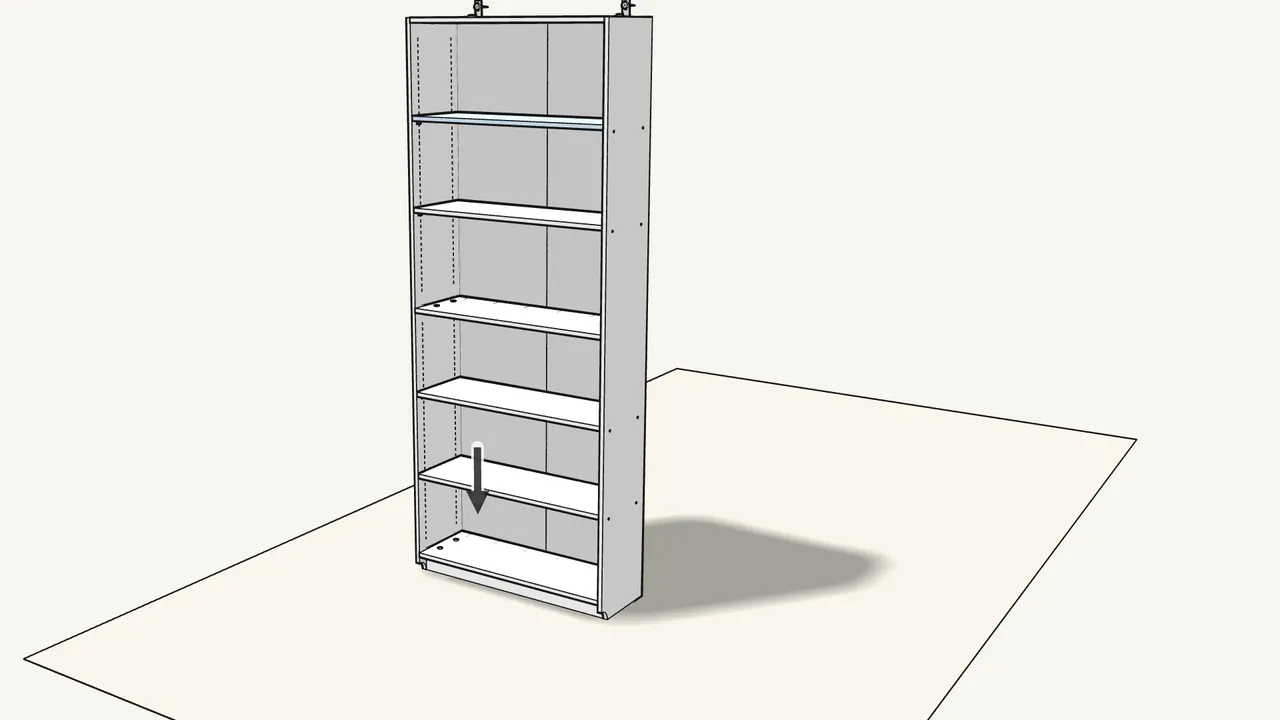
Step 17 · manual step 12
Lay the 4 shelves on the supports.
Press each shelf down so its supports click into the holes underneath.
Tips & safety
- Always fix BILLY to the wall. Furniture tip-over can cause serious or fatal crushing injuries. Use the included wall attachment.
- Wall screws and plugs are not included. Choose fittings that suit your wall material. If unsure, ask a professional.
Official instructions
This guide follows IKEA's official assembly instructions (AA-2289108-3). Keep the printed manual to hand — if anything differs, the manual is right.