IKEA · Bookcases & Shelving
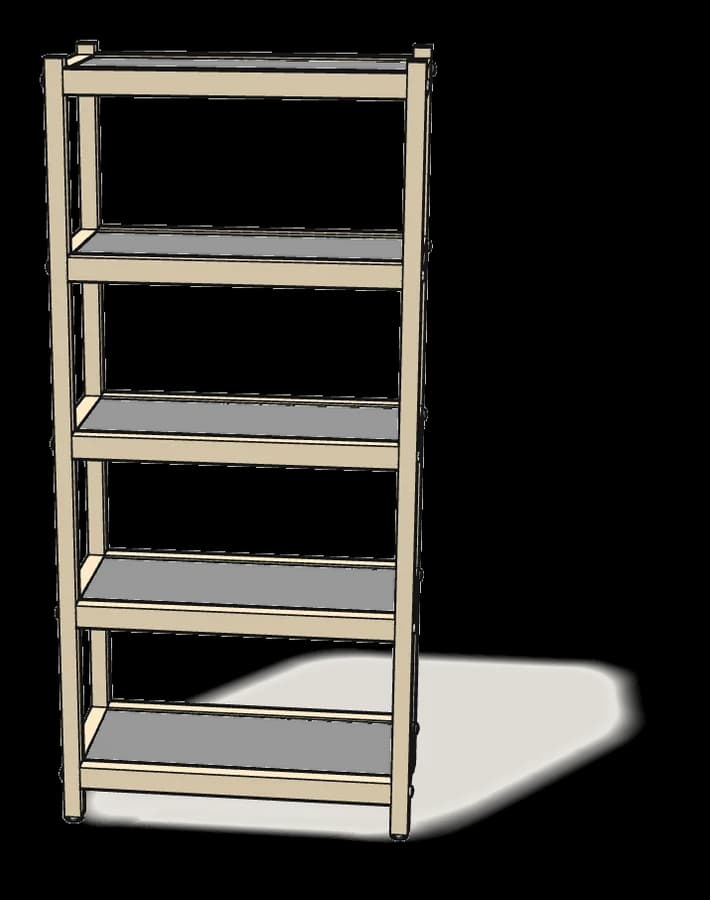
How to assemble IKEA EKENABBEN Open Shelf Unit
Step-by-step IKEA EKENABBEN Open Shelf Unit assembly: 12 illustrated steps, an animated video, the hardware list and the tools you need — following the official instructions (AA-2258706-3).
- 12 illustrated steps
- 10 steps in the manual
- 2:09 video
- 70×34×154 cm cm
What you need
Tools
- Flat-head screwdriver
- Phillips screwdriver
- Allen key (included)
- Spirit level
Hardware in the box
| Part no. (as printed in the manual) | Qty |
|---|---|
| 105107 | 20× |
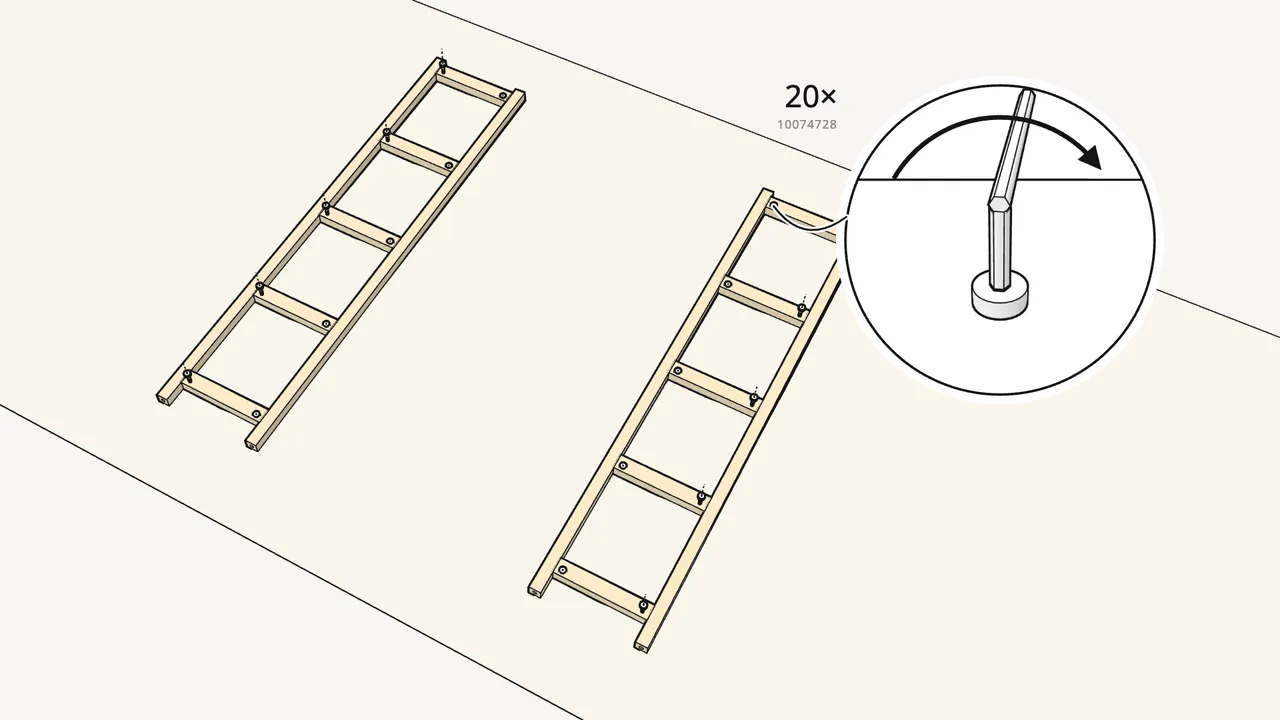
| 10074728 | 20× |
| 107862 | 4× |
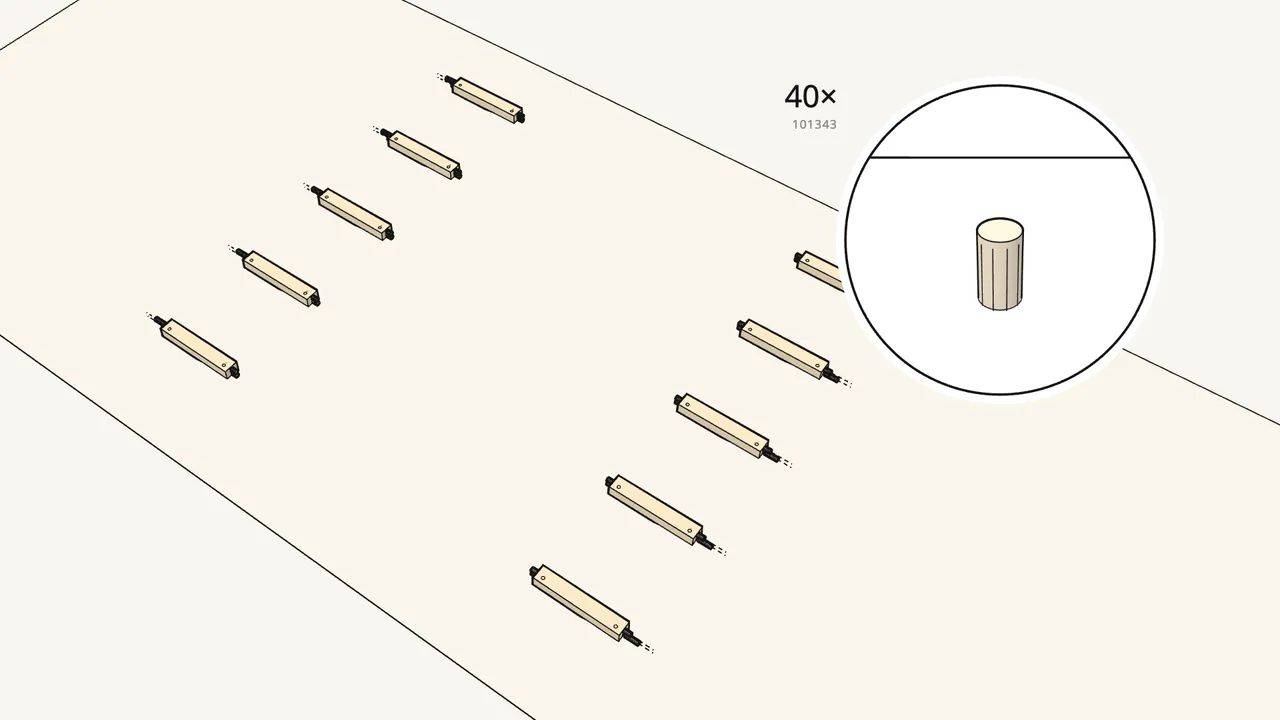
| 101343 | 40× |
| 109560 | 2× |
| 100823 | 2× |
| 100001 | 1× |
| 102720 | 2× |
Step-by-step assembly
Step 1
Push 2 dowels (101343) into each end of the 10 short rails.
40 dowels in total.
Step 2
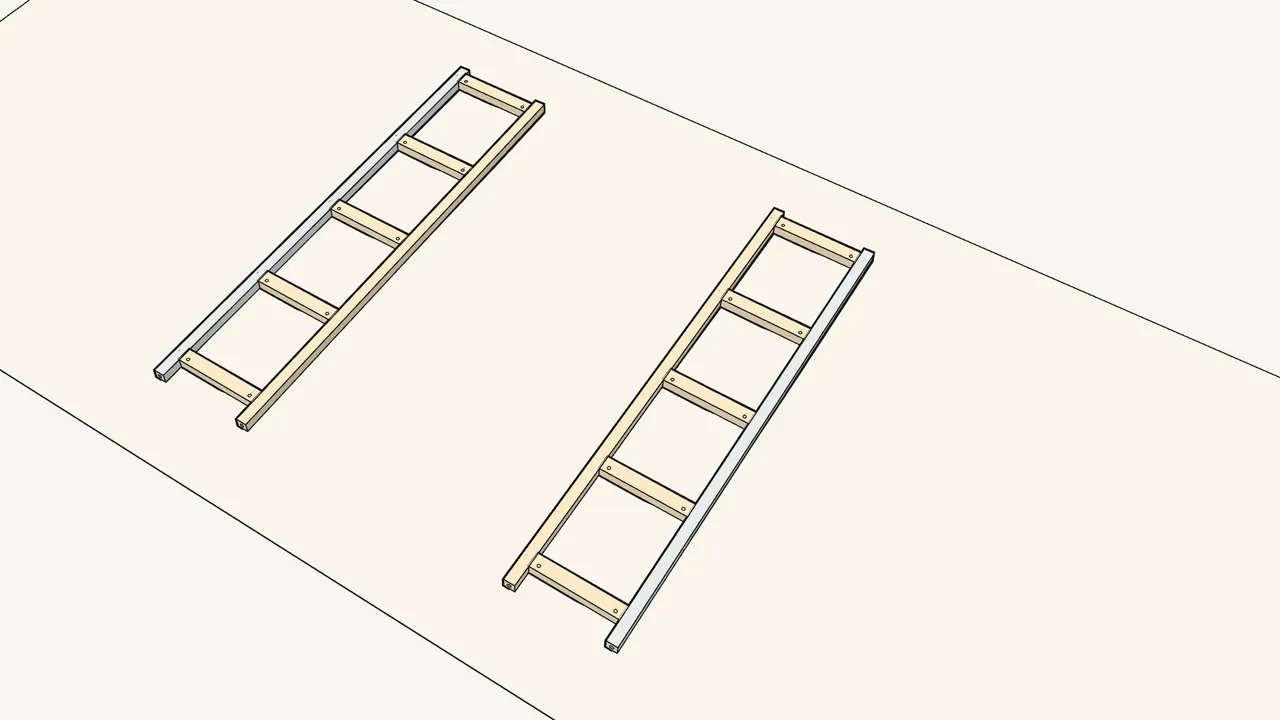
Build two side ladders: 2 posts and 5 rails each.
Push the rails onto one post, then fit the second post on the other ends.
Step 3
Fix each rail with 2 screws (10074728) and the Allen key.
20 screws in total — not the 105107 bolts, which look similar.
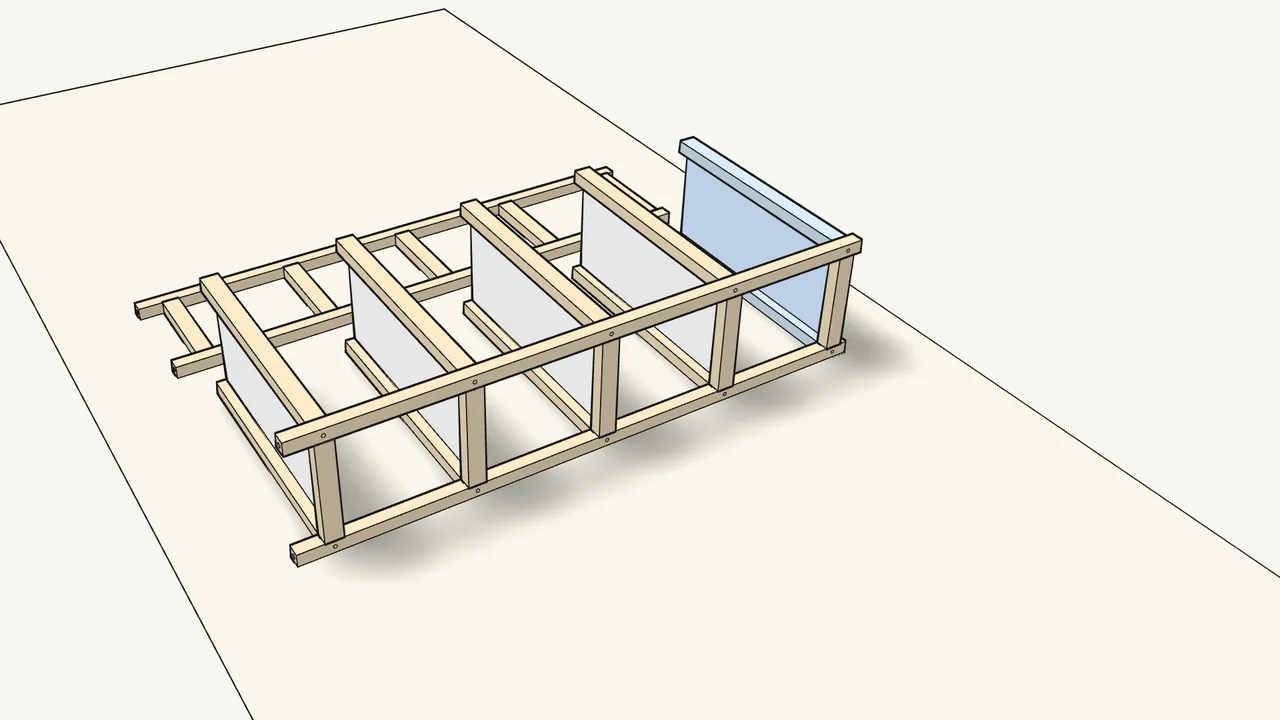
Step 4
Stand one ladder on its edge and place the 5 shelves against it.
Each shelf end slides in under a rail, up against the post.
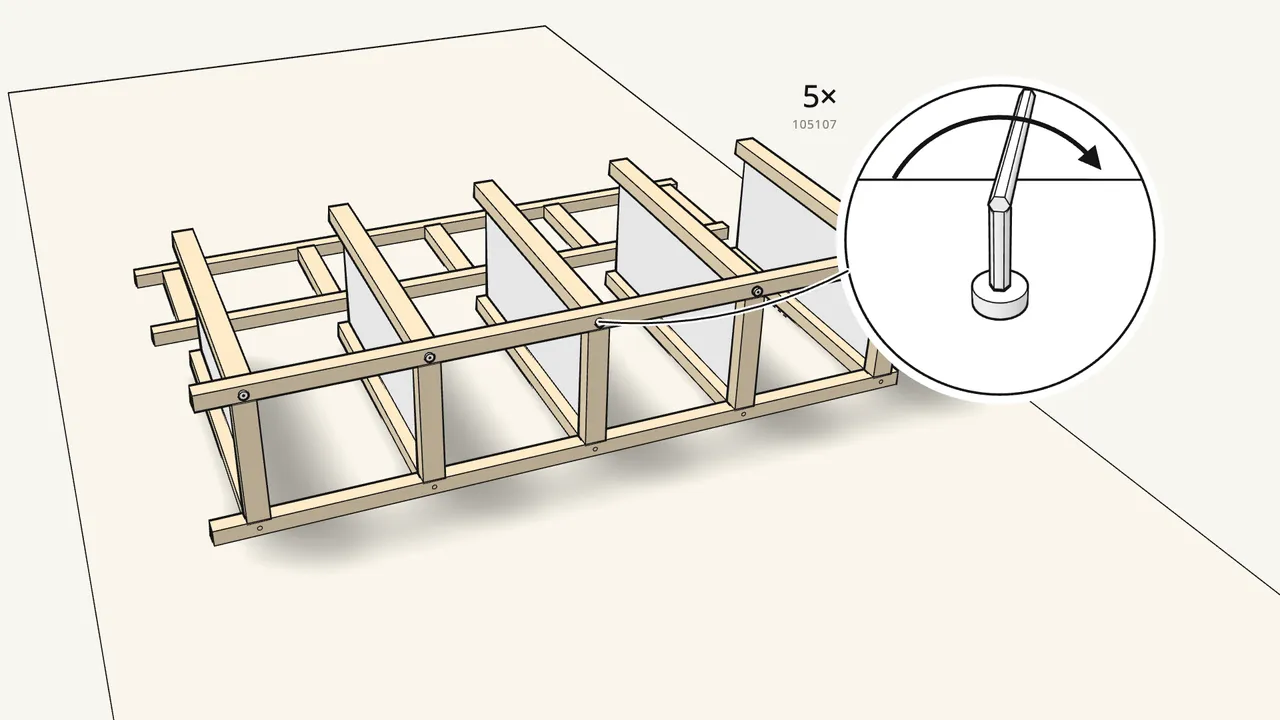
Step 5 · manual step 4
Fix the shelves with 5 bolts (105107) and the Allen key.
One bolt through the upper post into each shelf.
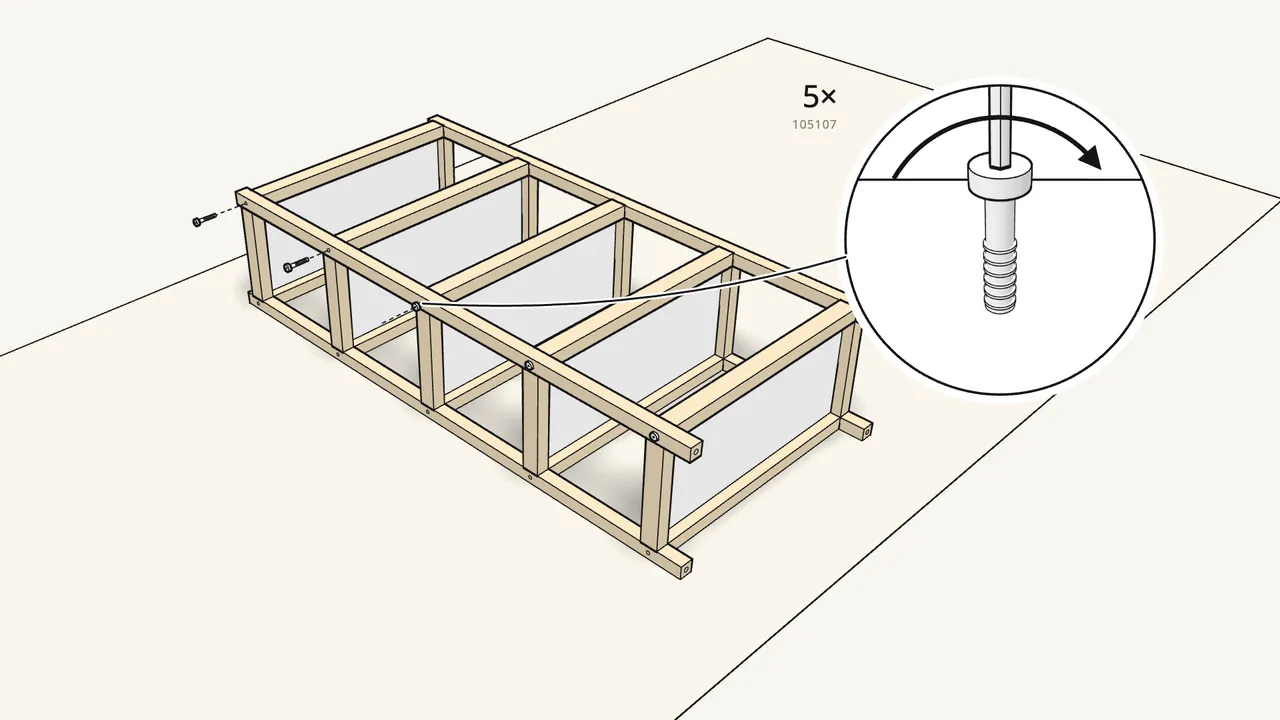
Step 6 · manual step 5
Fit the second ladder on the other ends and fix it with 5 bolts.
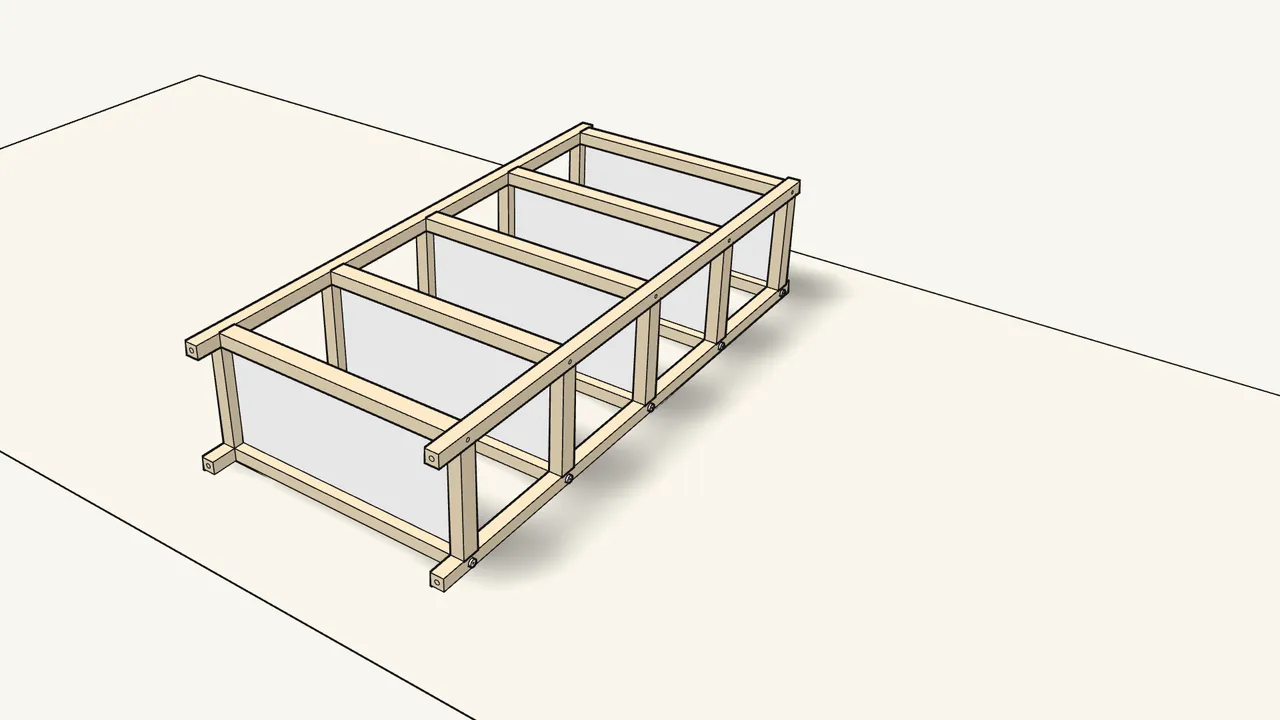
Step 7 · manual step 5
Carefully turn the unit over.
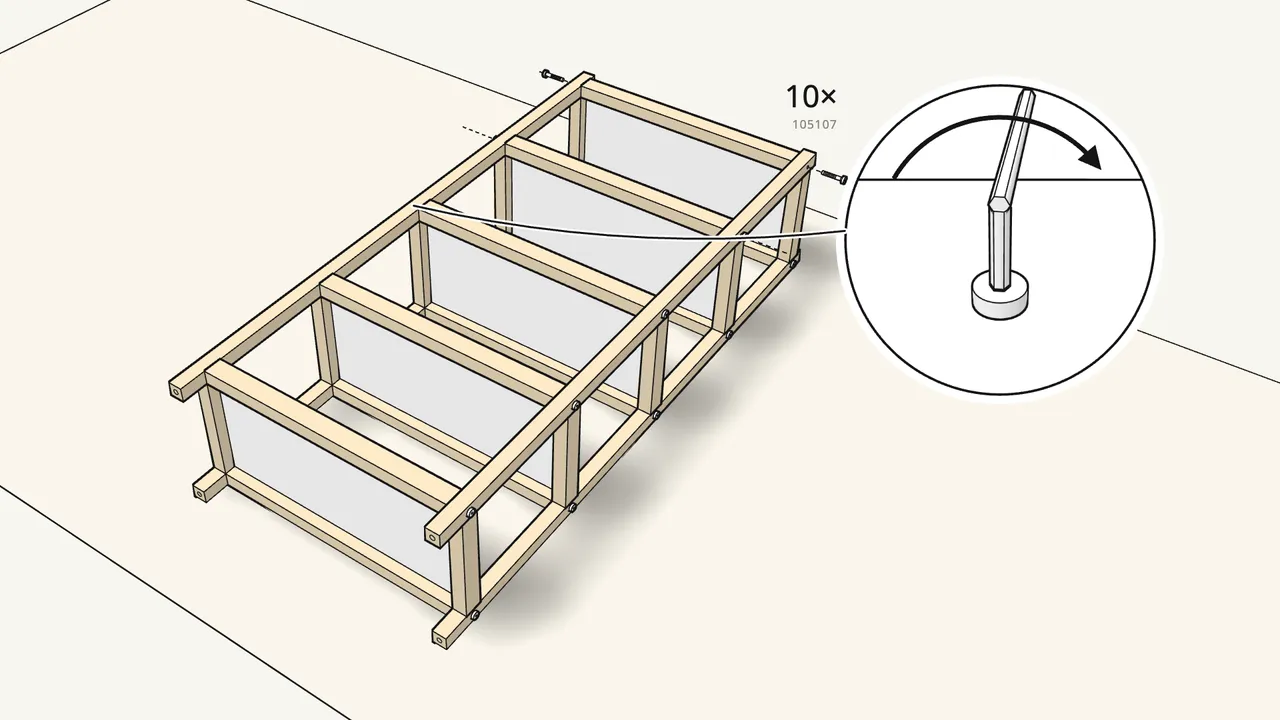
Step 8 · manual step 6
Insert 10 more bolts (105107) — 5 in each post.
Tighten them all with the Allen key.
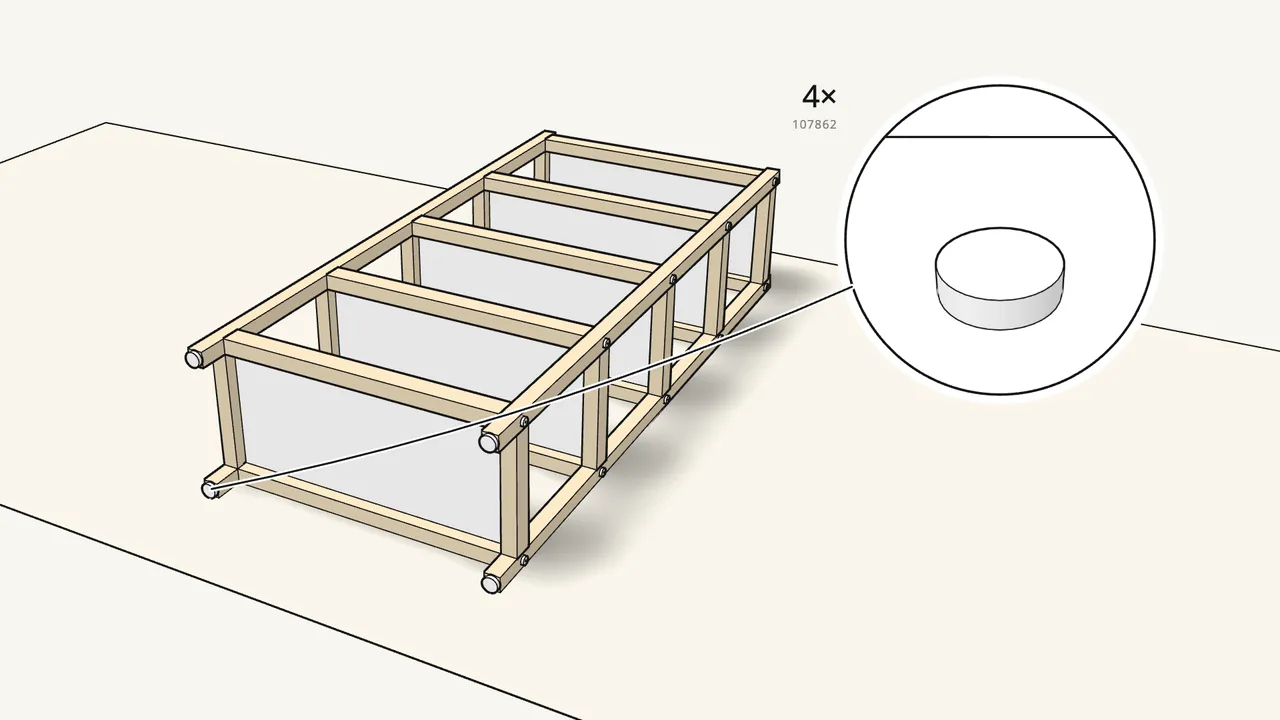
Step 9 · manual step 7
Screw the 4 adjustable feet (107862) into the ends of the posts.
Turn them in by hand.
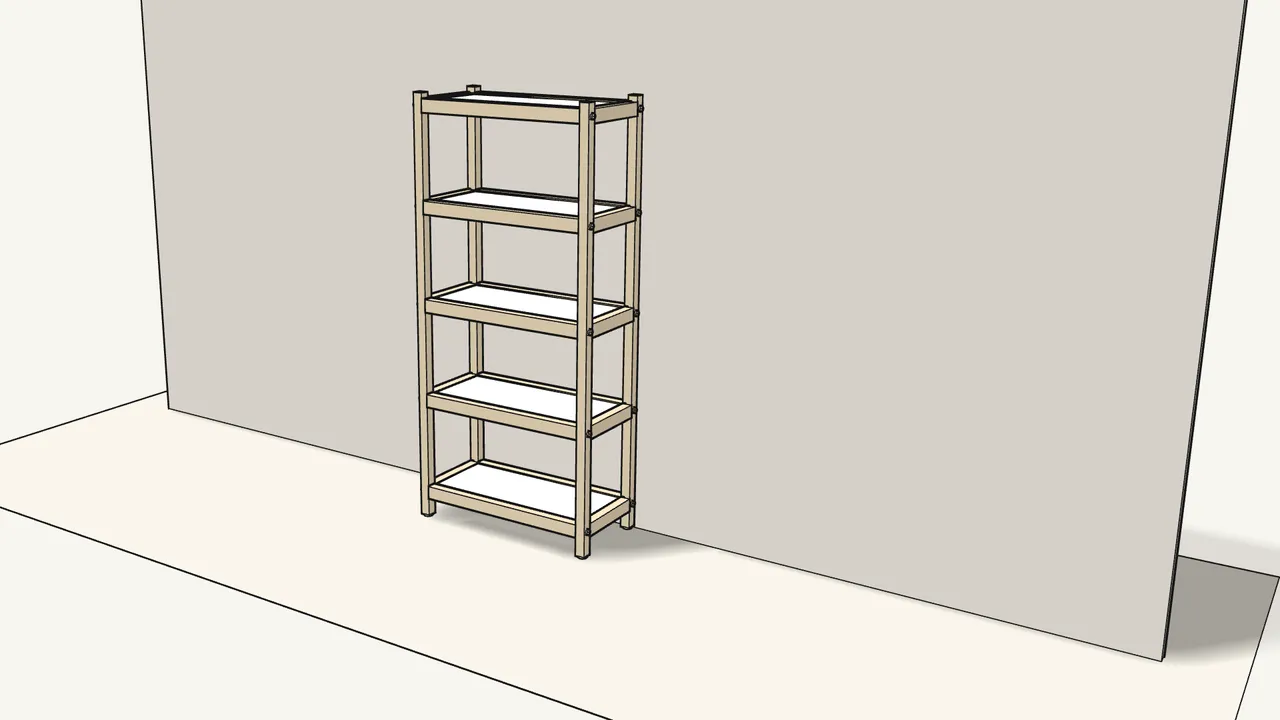
Step 10 · manual step 8
Stand the unit up and turn the feet until it stands level.
Check with a spirit level.
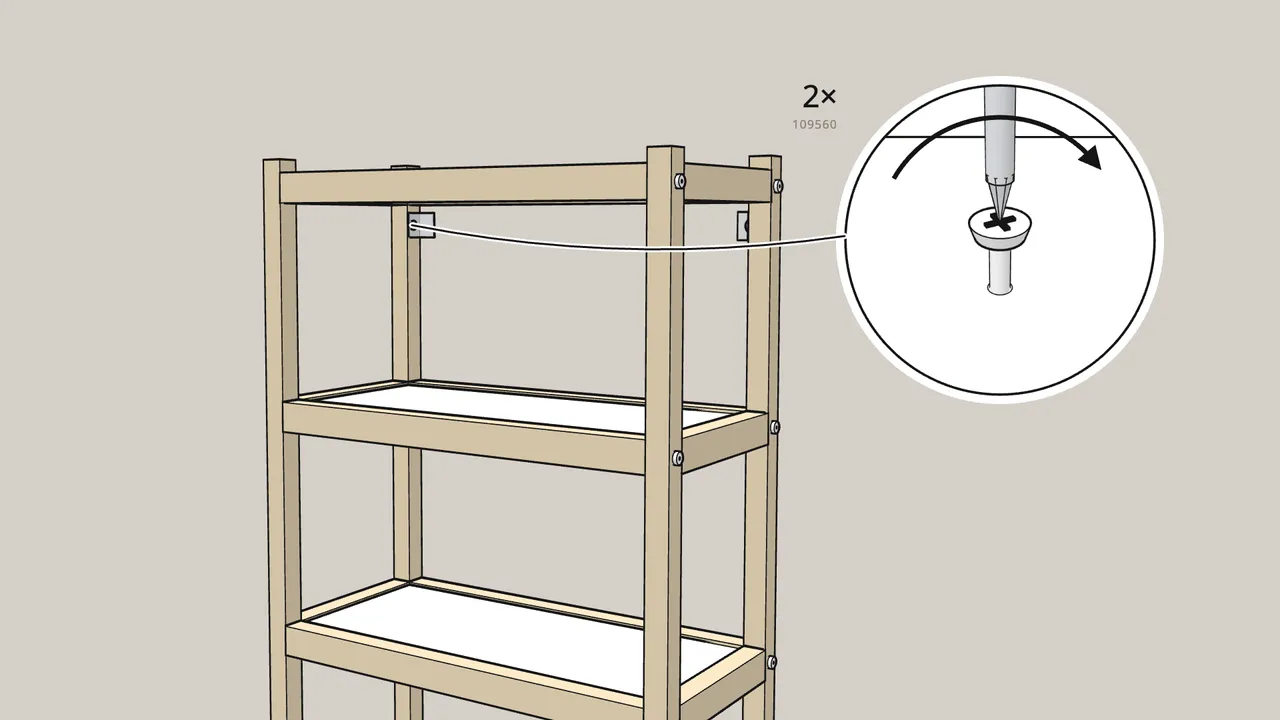
Step 11 · manual step 9
Fit a wall bracket (102720) to the top of each back post.
Push it against the wall, then screw it on with a screw (109560). Skirting board? See manual p. 15.
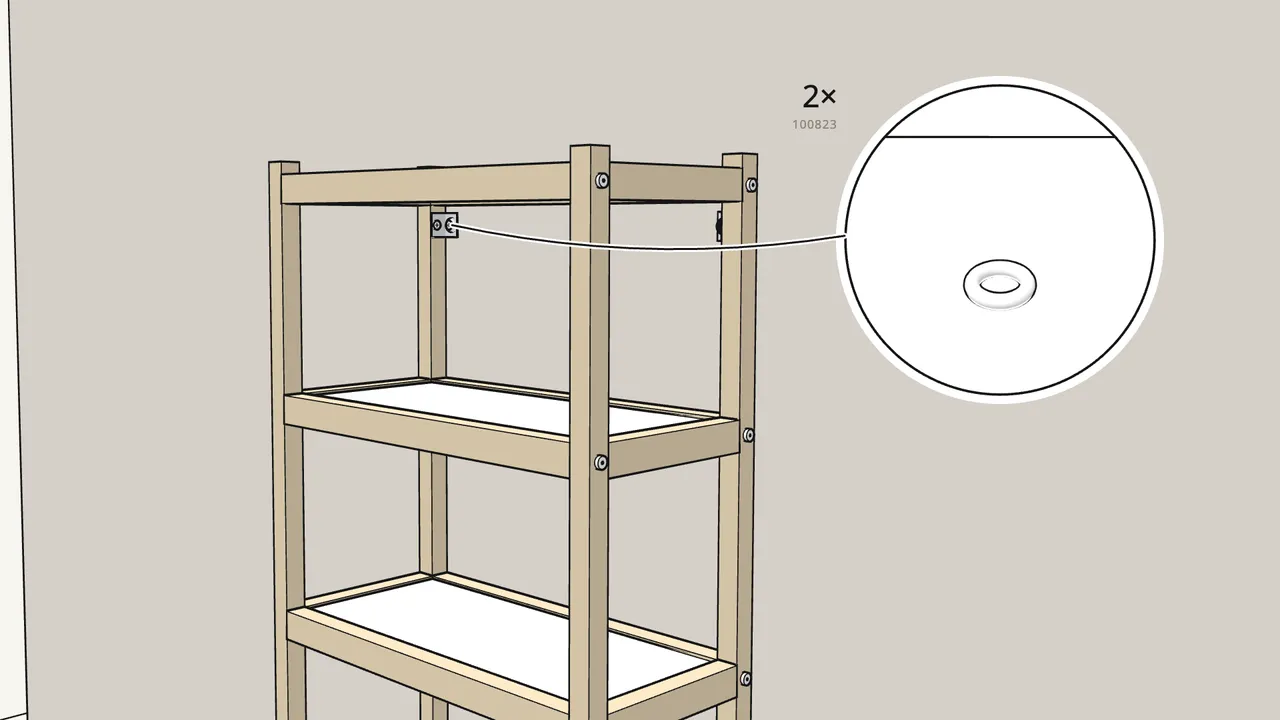
Step 12 · manual step 10
Screw the brackets to the wall with a washer (100823) each.
Wall screws and plugs are not included — use ones suited to your wall.
Tips & safety
- Always fix EKENABBEN to the wall. Tip-over can cause serious or fatal crushing injuries. Wall screws and plugs are not included — ask a specialist if unsure.
- Wobbly on an uneven floor? Turn the adjustable feet in or out until the unit stands level (manual step 8).
Official instructions
This guide follows IKEA’s official assembly instructions (AA-2258706-3). Keep the printed manual to hand — if anything differs, the manual is right.