IKEA · Bookcases & Shelving
How to Assemble IKEA BRIMNES Bookcase
Step-by-step IKEA BRIMNES bookcase assembly: 28 illustrated steps, an animated video, the hardware list and the tools you need — following the official instructions (AA-1357641-10).
- 28 illustrated steps
- 30 steps in the manual
- 3:26 video
- 60×35×190 cm
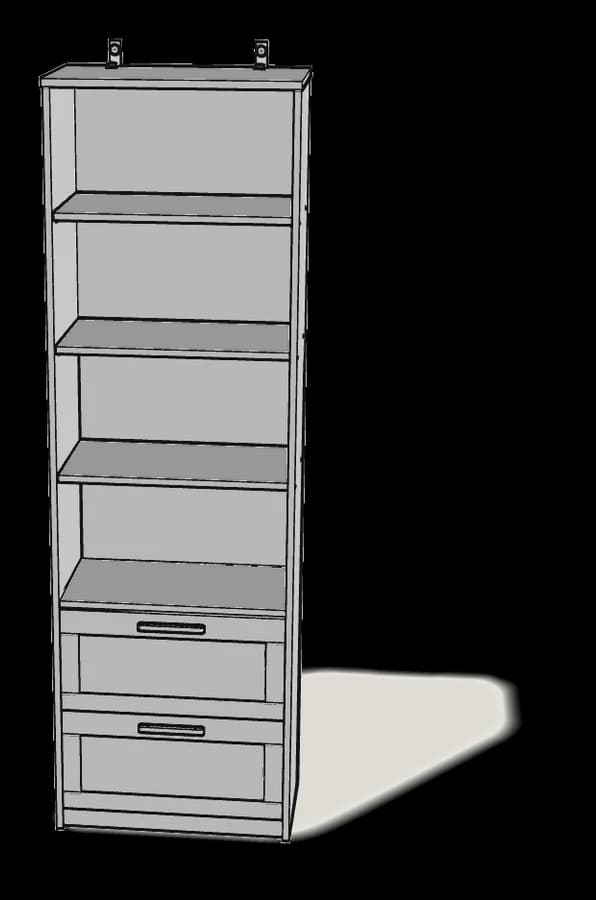
What you need
Tools
- Flat-head screwdriver
- Phillips screwdriver
- Hammer
You’ll need: flat-head and Phillips screwdrivers, a pencil and a hammer.
Hardware in the box
| Part no. (as printed in the manual) | Qty |
|---|---|
| 118331 | 16× |
| 101345 | 20× |
| 118224 | 16× |
| 100214 | 4× |
| 110519 | 8× |
| 108462 | 16× |
| 109567 | 4× |
| 153548 | 4× |
| 113301 | 12× |
| 110678 | 4× |
| 107091 | 2× |
| 106989 | 2× |
| 109503 | 2× |
| 100823 | 4× |
Step-by-step assembly
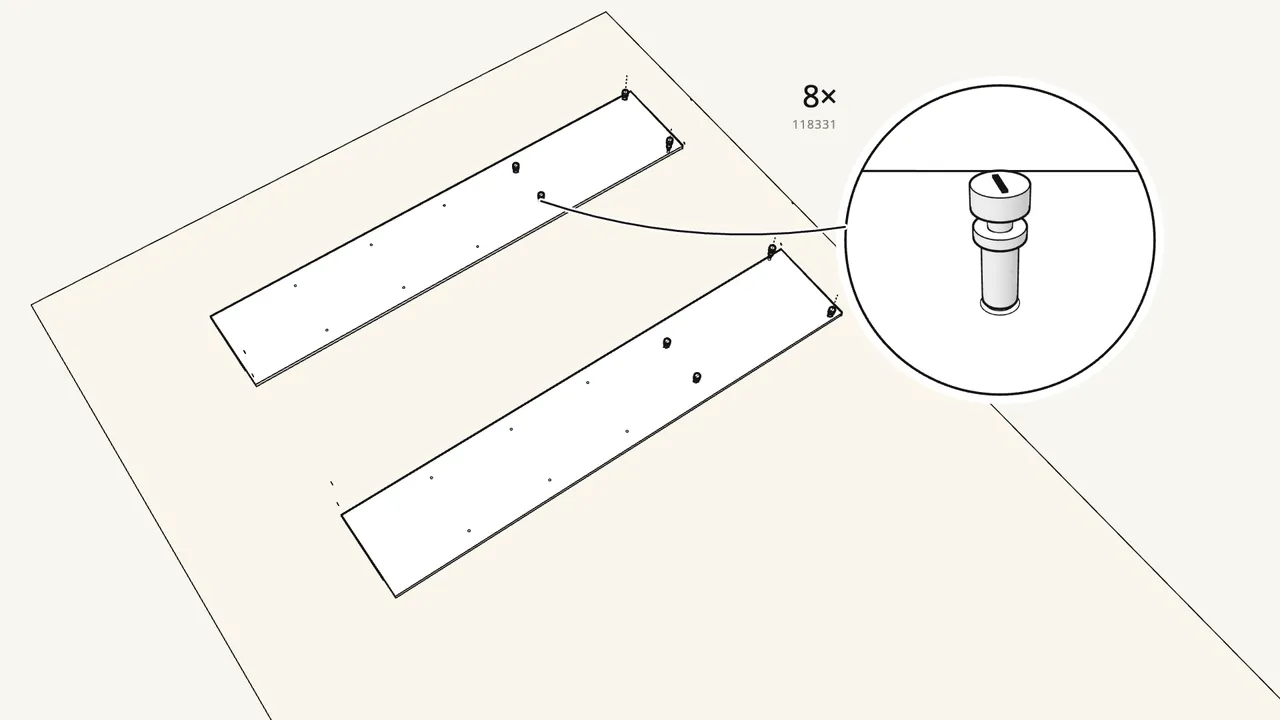
Step 1
Lay both side panels flat. Screw in 8 cam bolts (118331).
4 in each side, with a Phillips screwdriver. Check the arrows in the manual for which side is which.
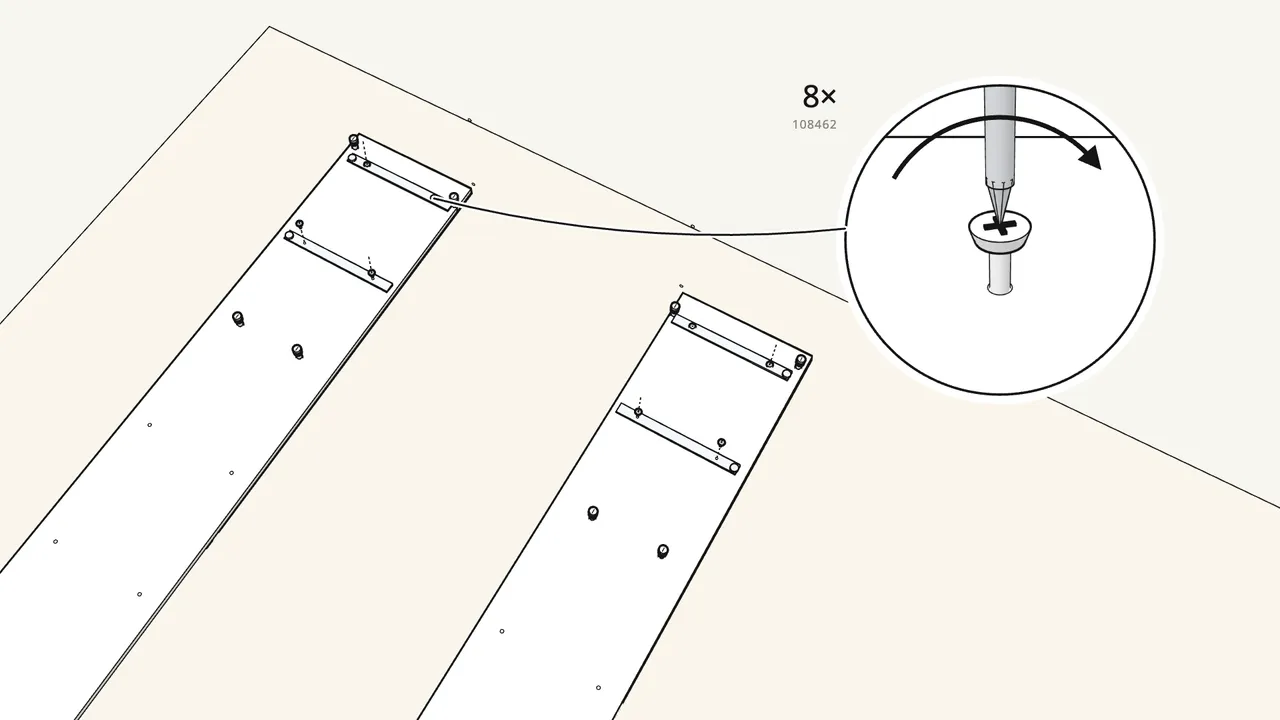
Step 2
Screw 2 runners (130501) onto each side panel.
8 screws (108462) in total — 2 per runner.
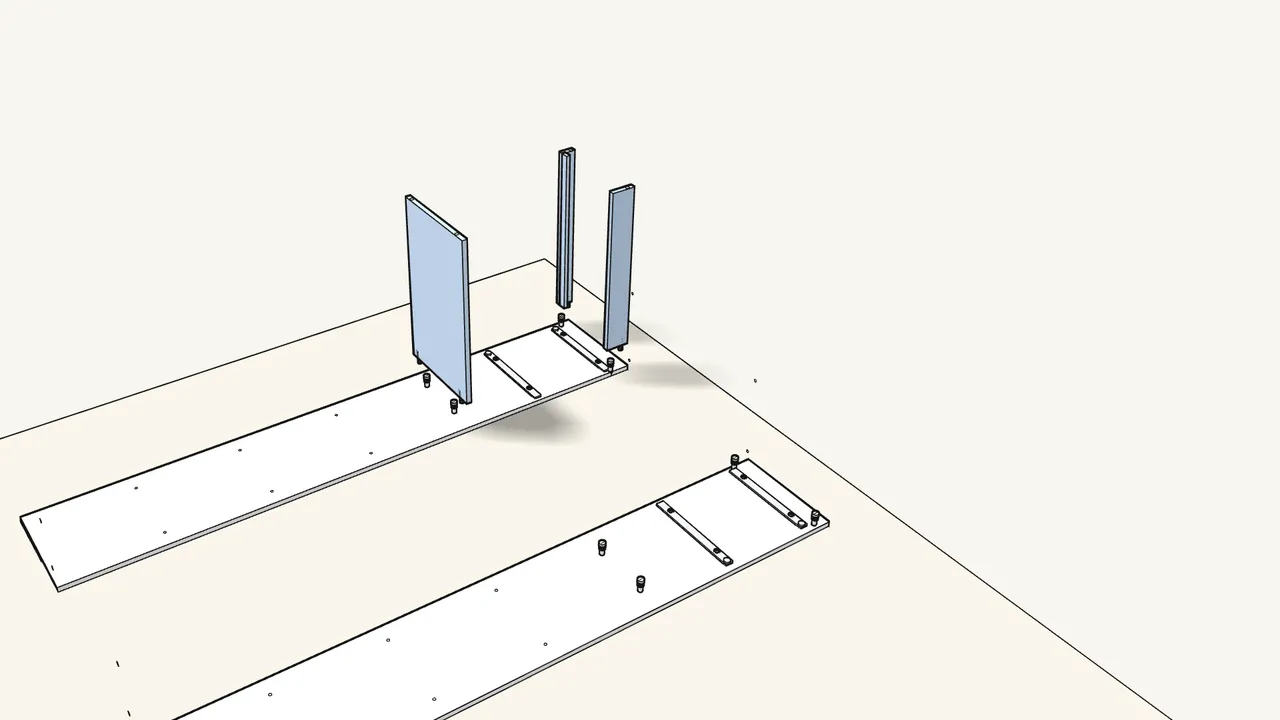
Step 3
Push 4 dowels (101345) into the fixed shelf and the 2 rails.
Stand them on the right side panel.
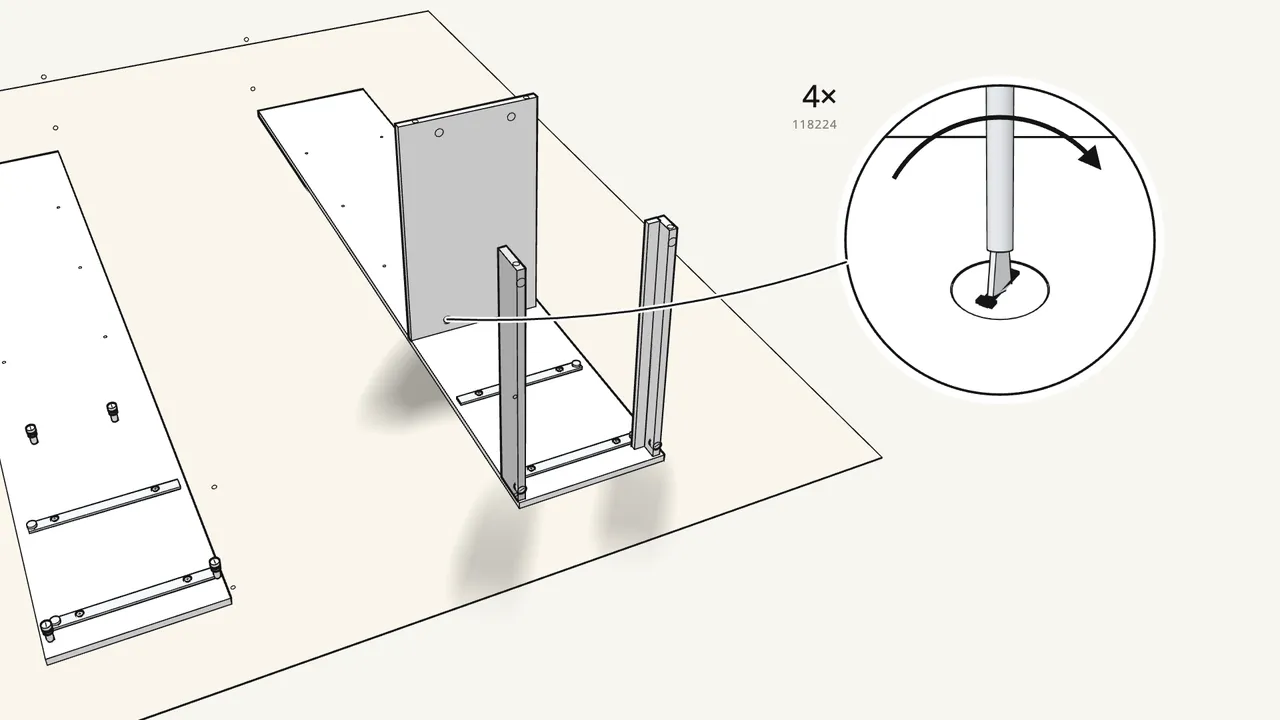
Step 4
Insert 4 cam locks (118224) and turn them clockwise.
Use the flat-head screwdriver.
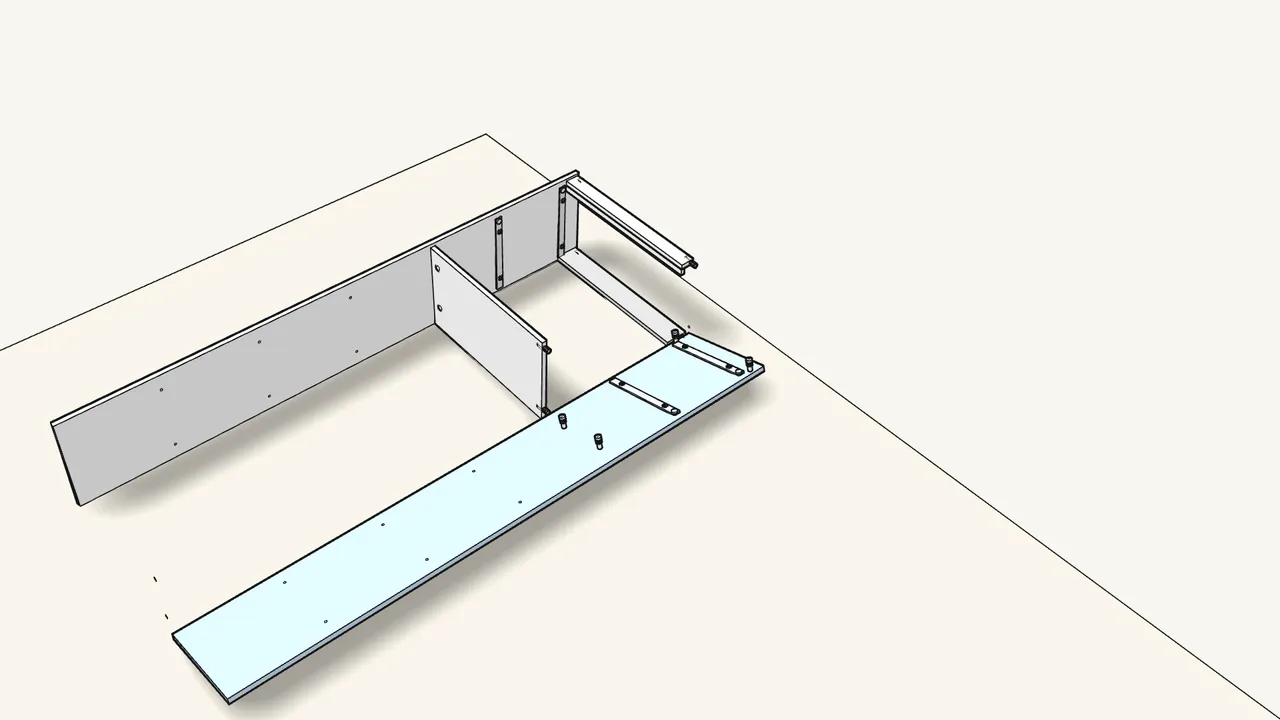
Step 5
Push 4 dowels into the other ends. Swing up both sides.
The frame now lies on its back edges.
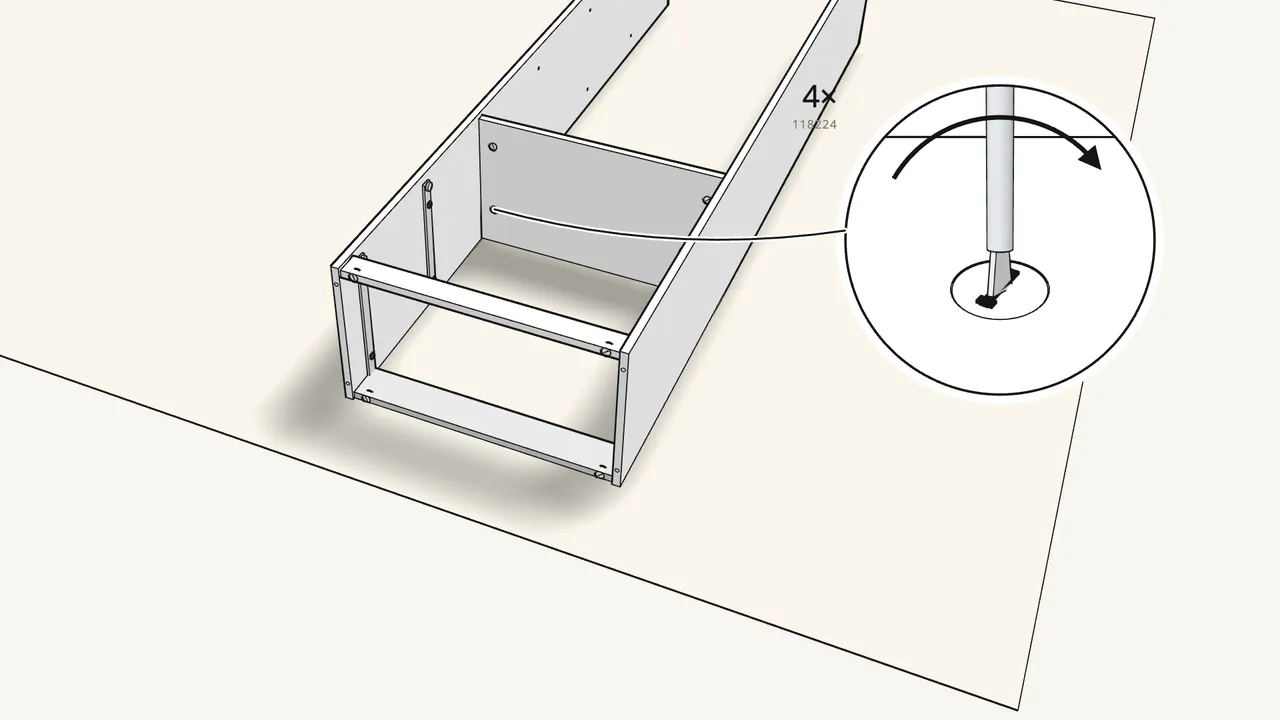
Step 6
Insert 4 more cam locks and turn them clockwise.
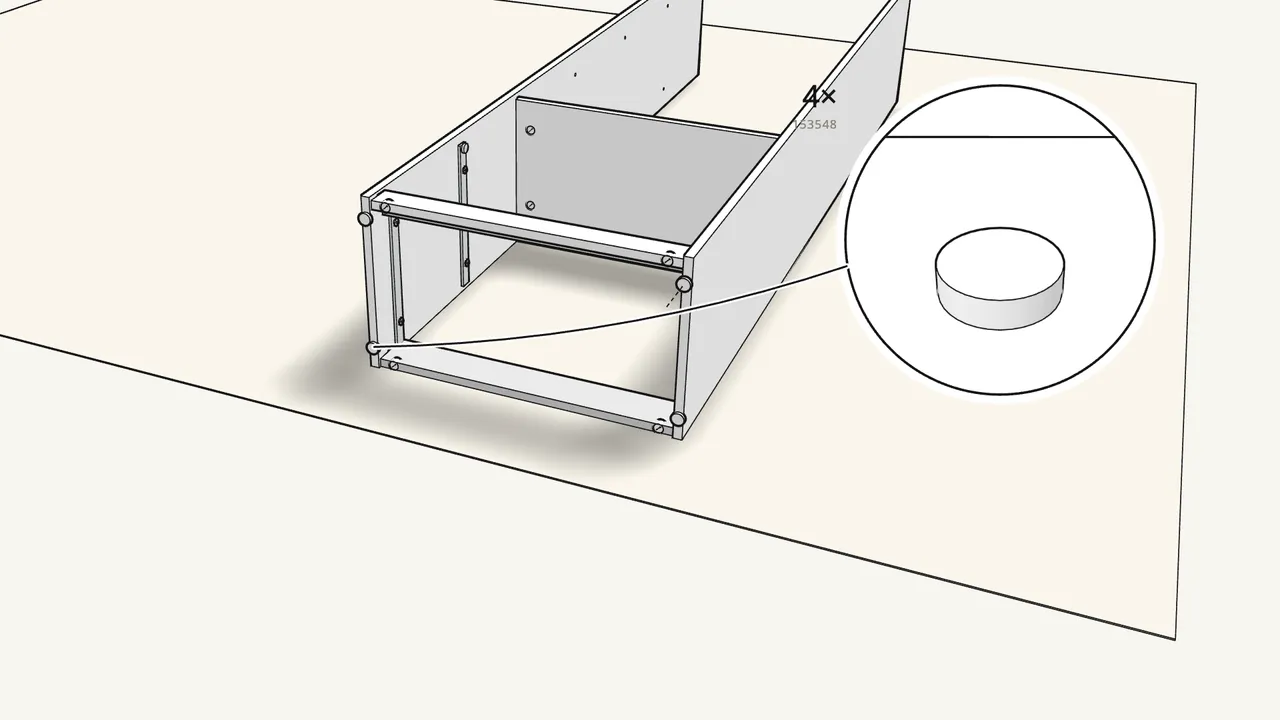
Step 7
Press 4 glides (153548) into the bottom ends of the sides.
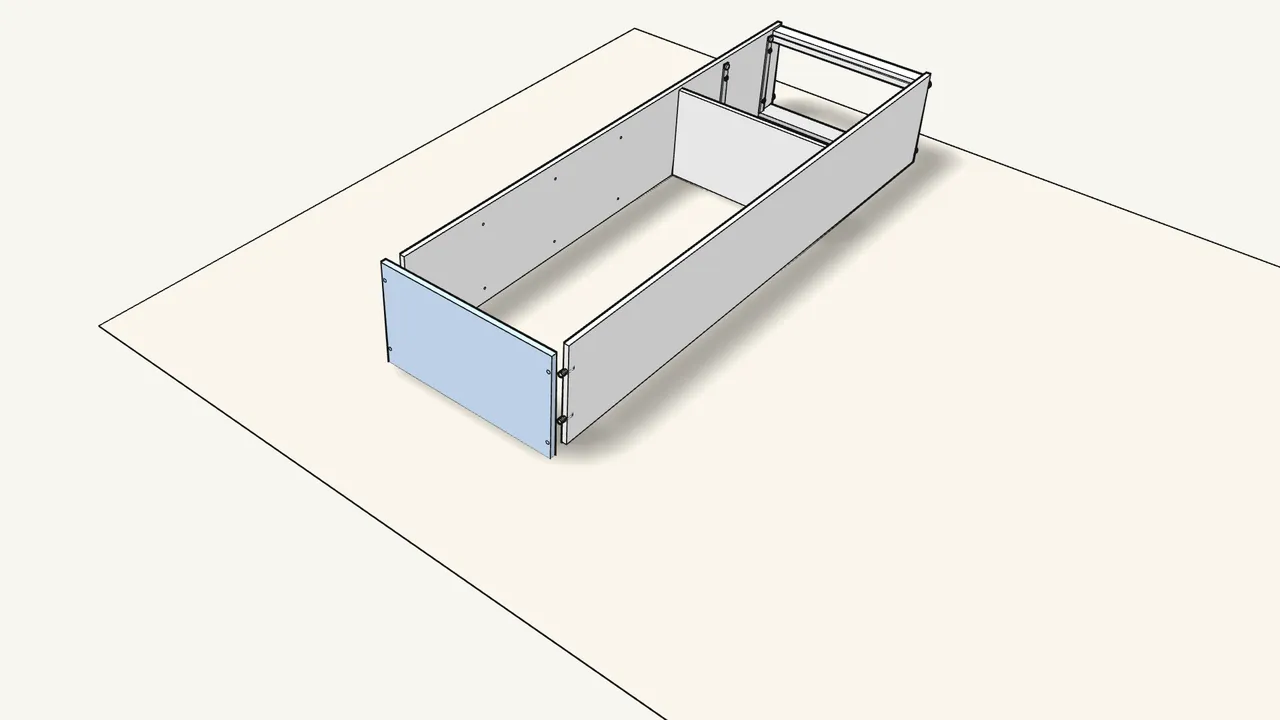
Step 8
Push 4 dowels into the top ends of the sides. Fit the top.
Check which way the top’s edge goes — see the manual, step 8.
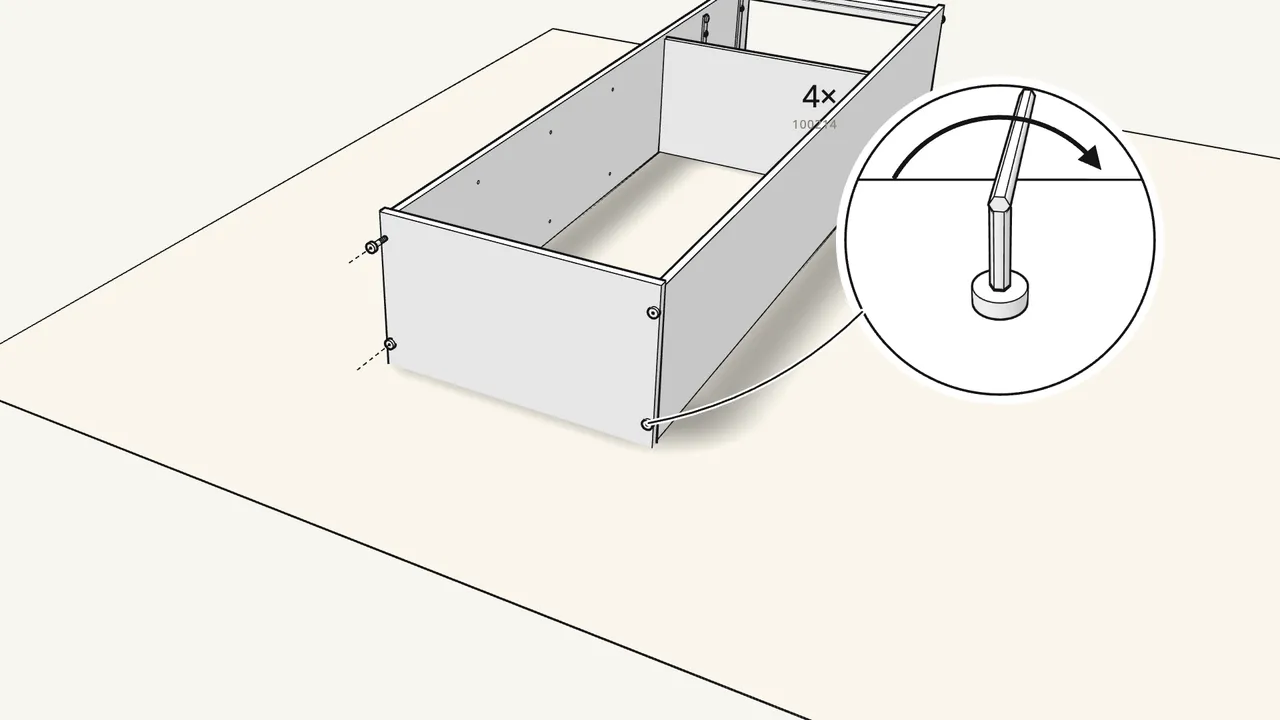
Step 9
Fix the top with 4 screws (100214) and the Allen key.
2 into the end of each side panel.
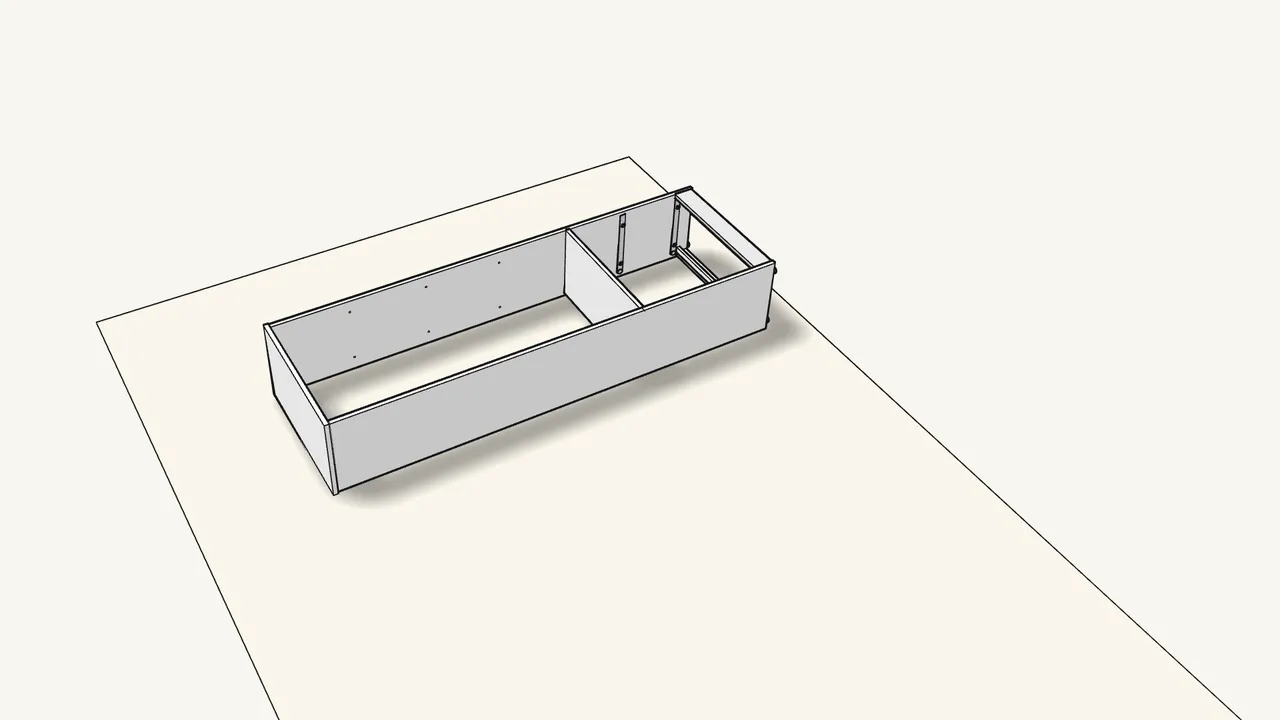
Step 10
Turn the frame over onto its front.
Mark the middle of the fixed shelf on the back edges of both sides with a pencil.
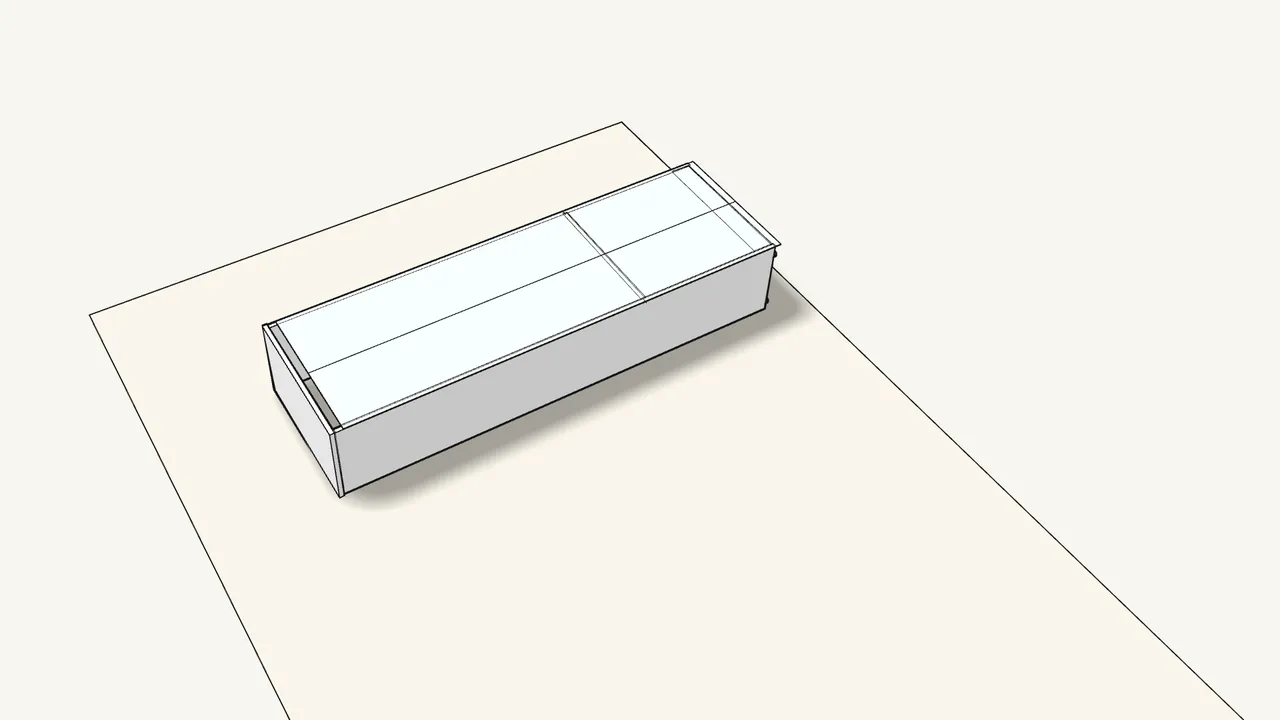
Step 11
Lay the back panel on the frame.
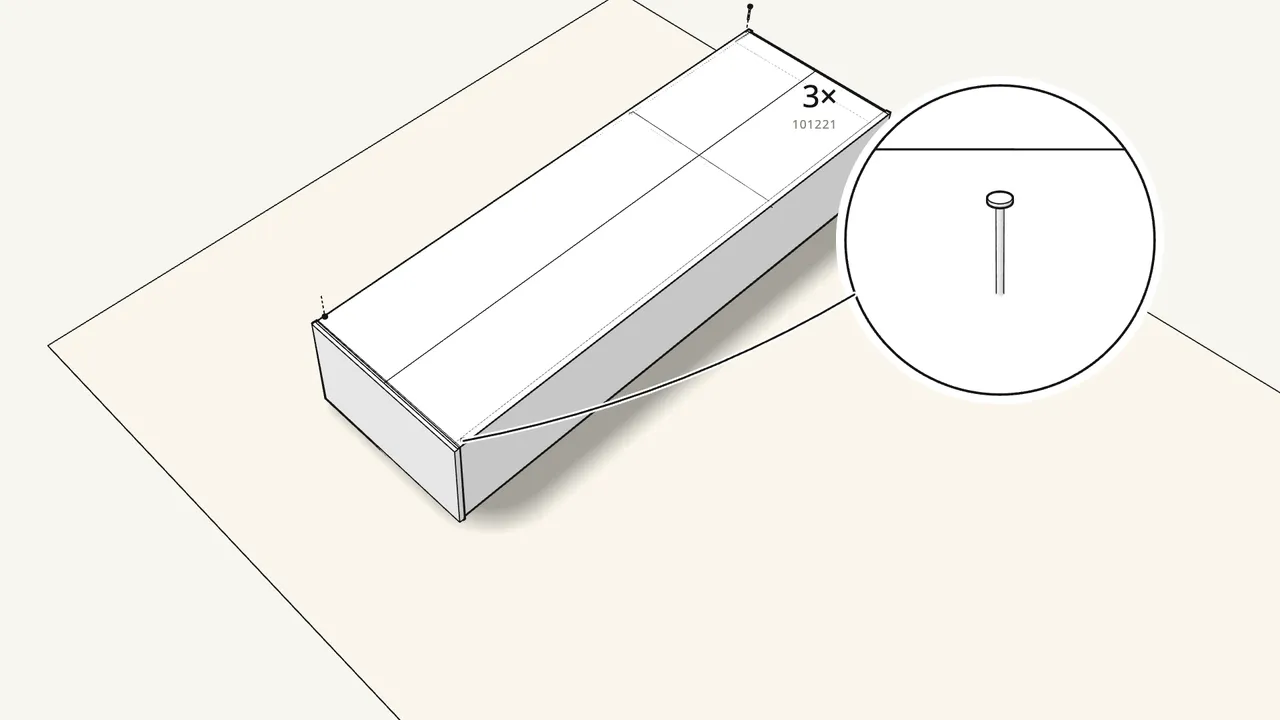
Step 12 · manual step 12–13
Push it into the groove in the top. Nail the corners first.
Line the edges up flush. Hold the nail (101221) with the nail guide (105494).
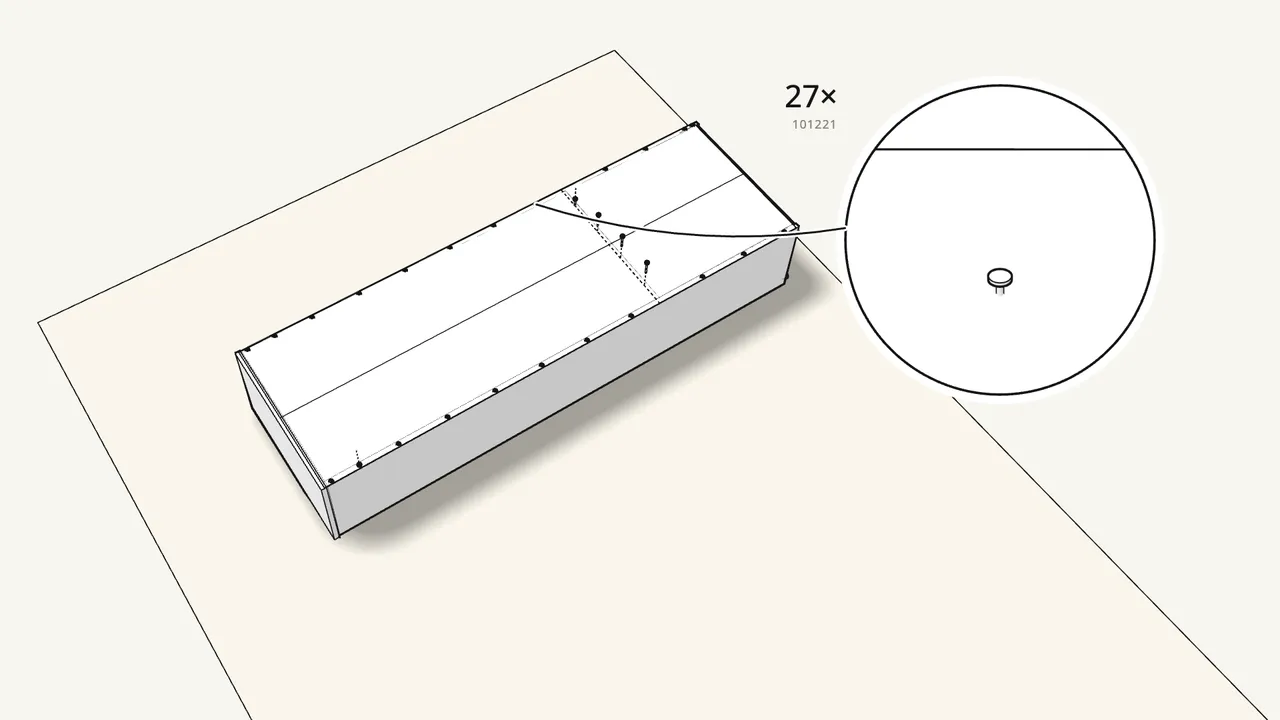
Step 13 · manual step 14–15
Draw a line across at the marks. Nail on the back with 27 nails.
Nail into the sides, the fixed shelf (along the line) and the bottom rail.
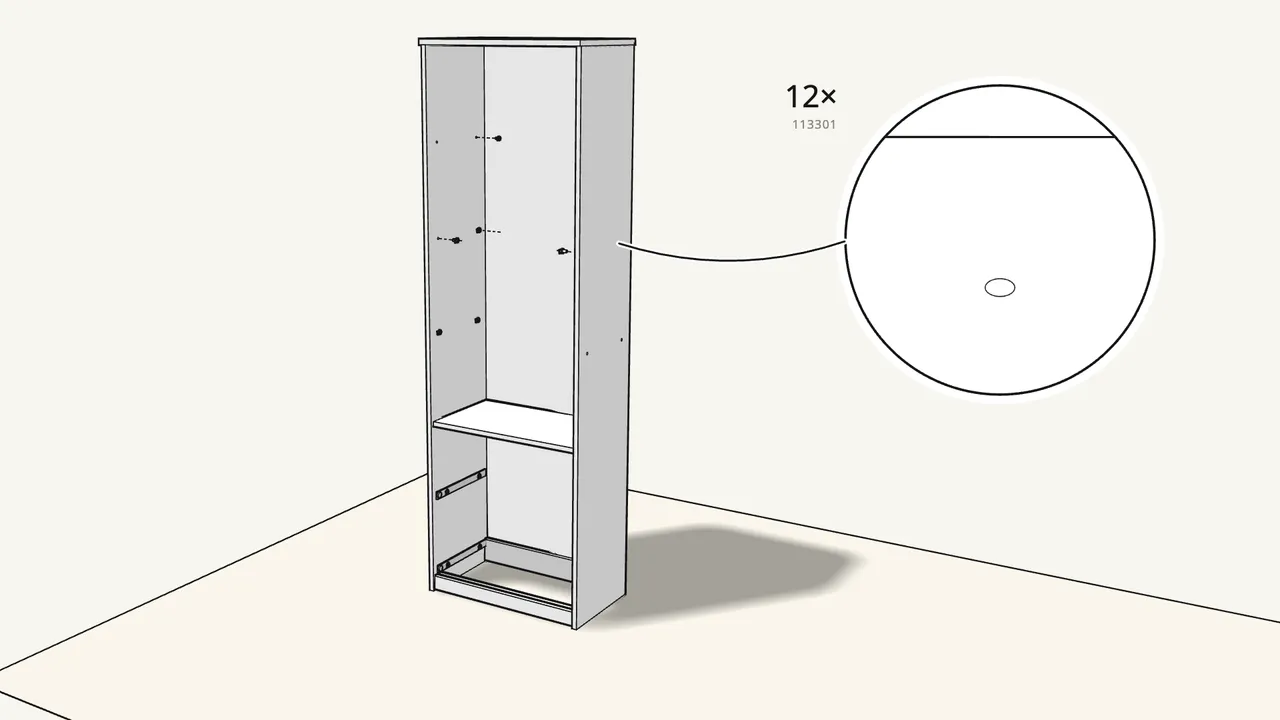
Step 14 · manual step 16
Stand the bookcase up. Push in 12 shelf supports (113301).
Get help — it is 190 cm tall. 4 supports per shelf.
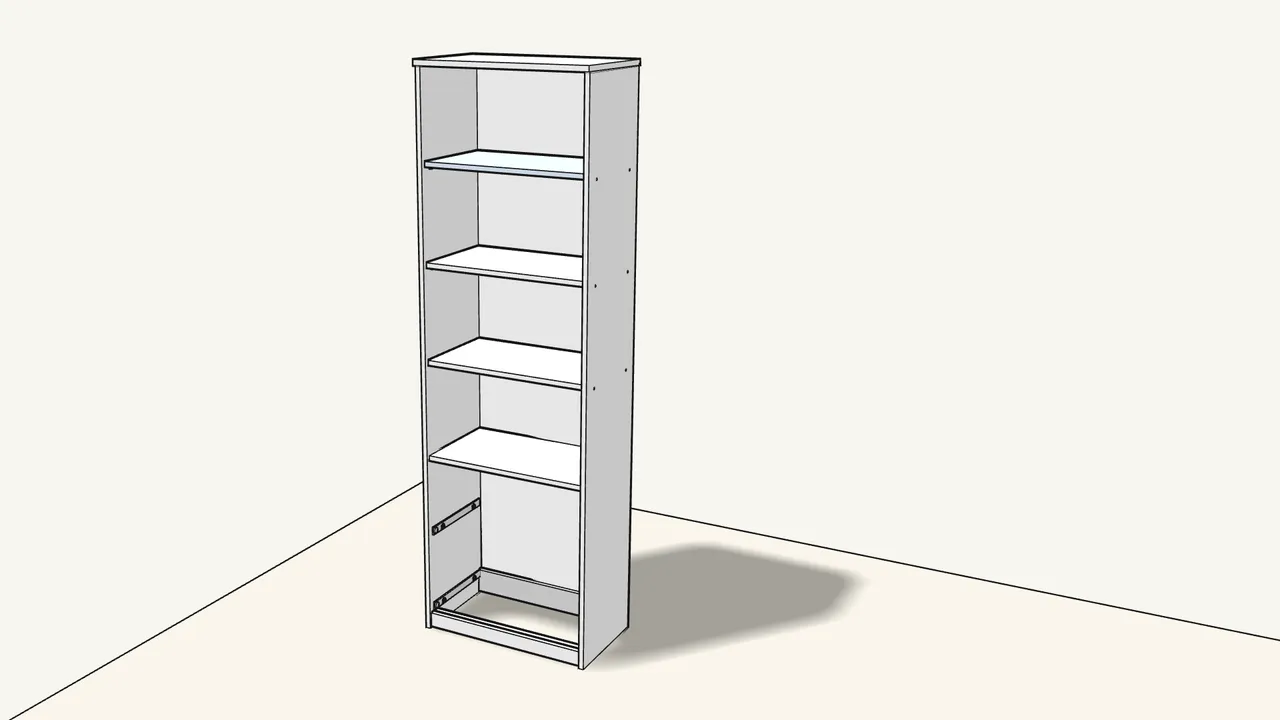
Step 15 · manual step 17
Lay the 3 shelves on the supports.
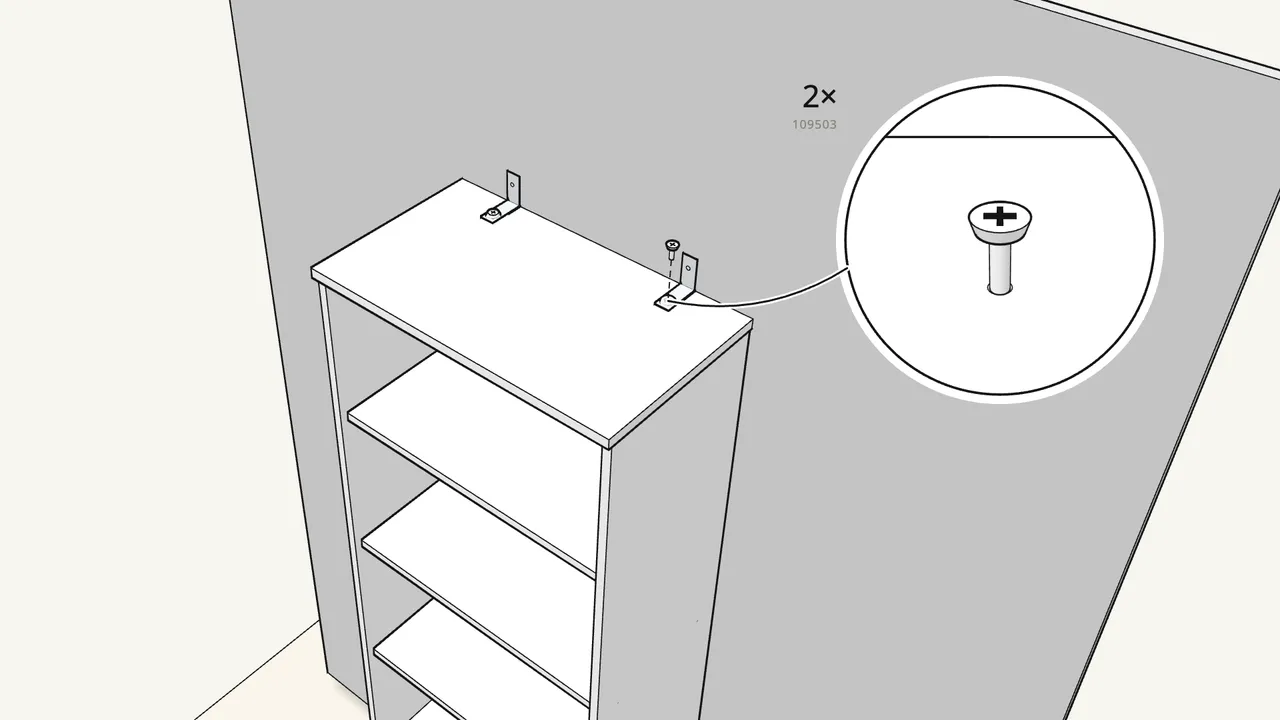
Step 16 · manual step 18
Screw 2 wall brackets (106989) onto the top.
Each with a screw (109503) and a washer (100823).
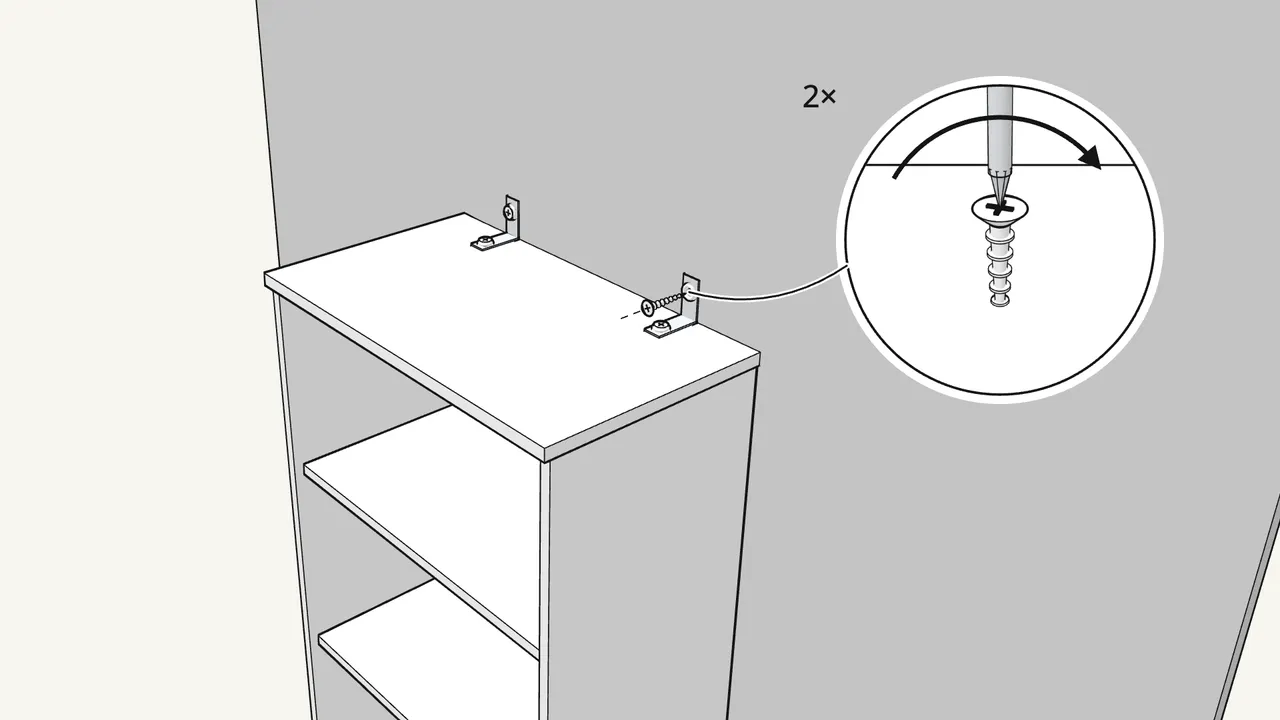
Step 17 · manual step 18
Fix the brackets to the wall.
Use a washer (100823) and wall screws and plugs that suit your wall — they are not included.
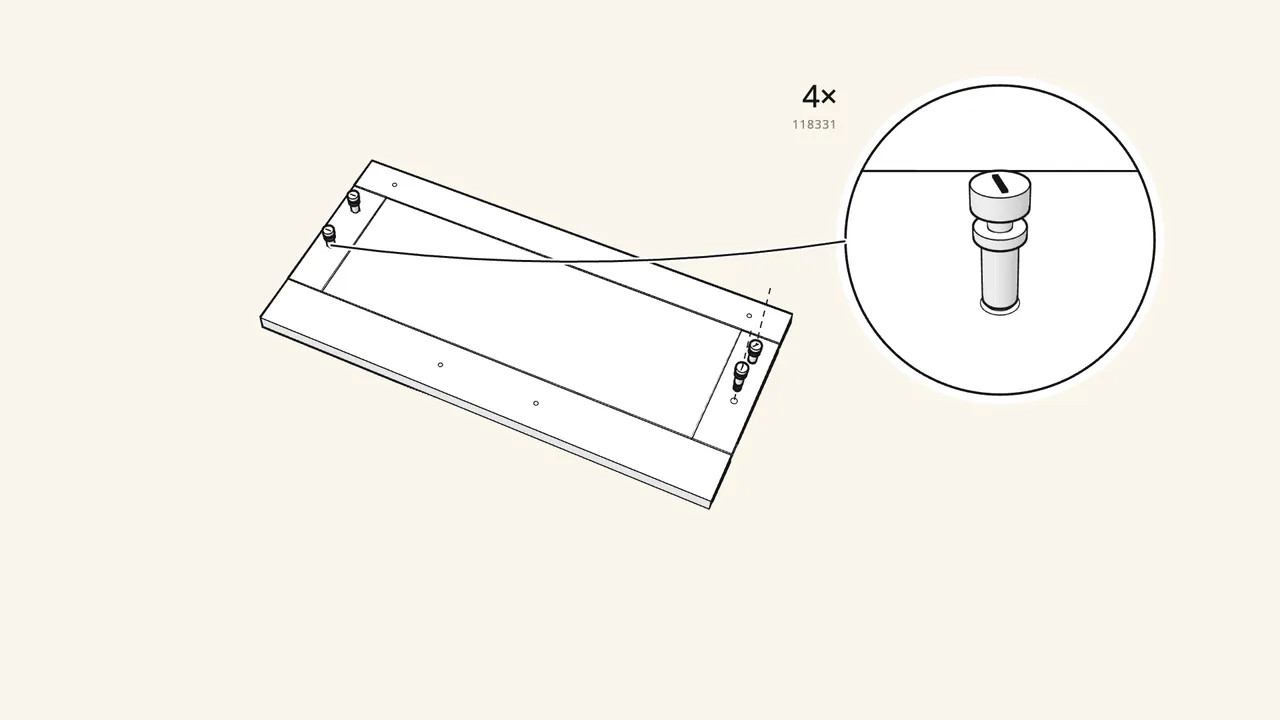
Step 18 · manual step 19
Now the 2 drawers. Screw 4 cam bolts (118331) into the drawer front.
Lay the front face-down on the rug.
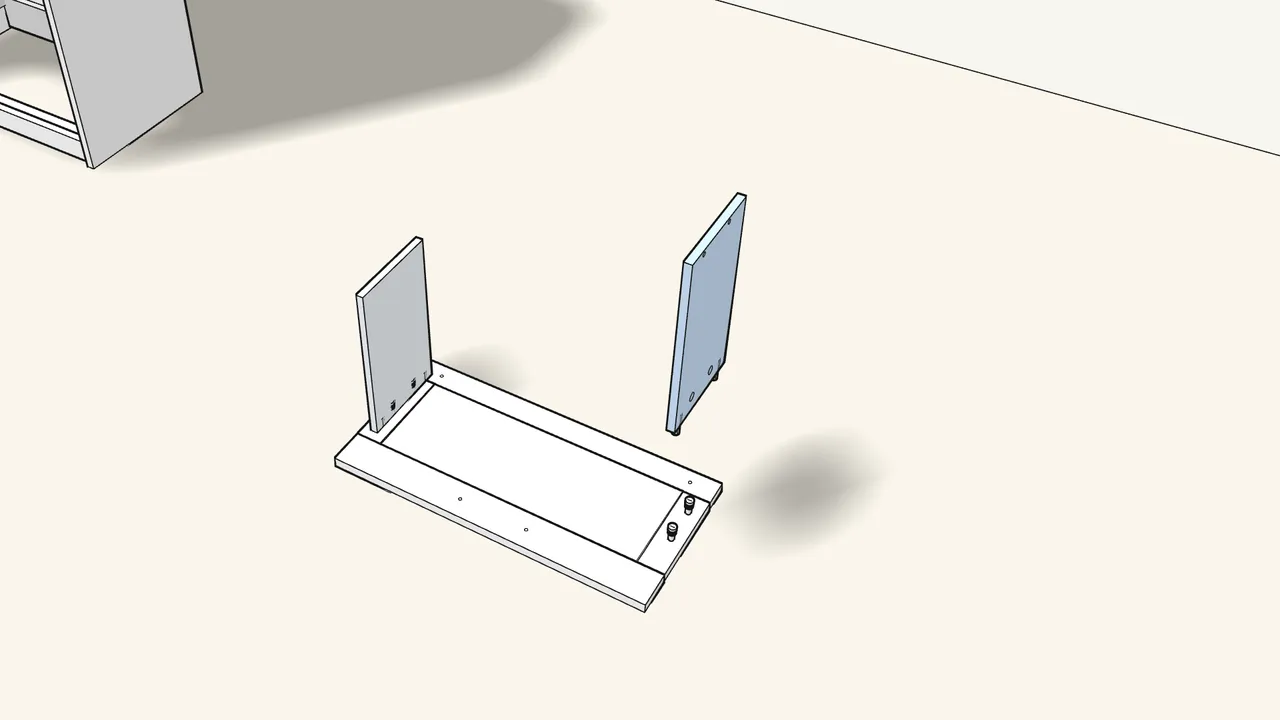
Step 19 · manual step 20
Push 4 dowels (101345) into the drawer sides. Fit them on.
The bolts and dowels go into the holes in the ends of the sides.
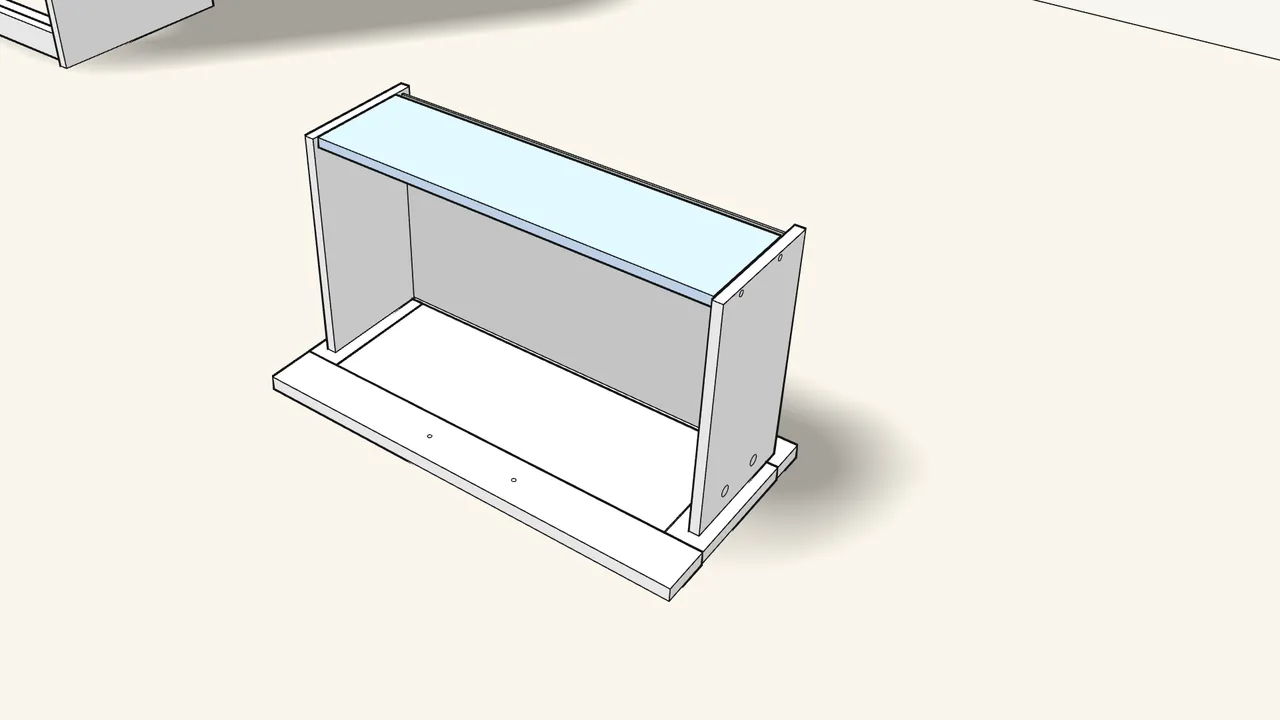
Step 20 · manual step 21–22
Slide the drawer bottom into the grooves. Fit the back.
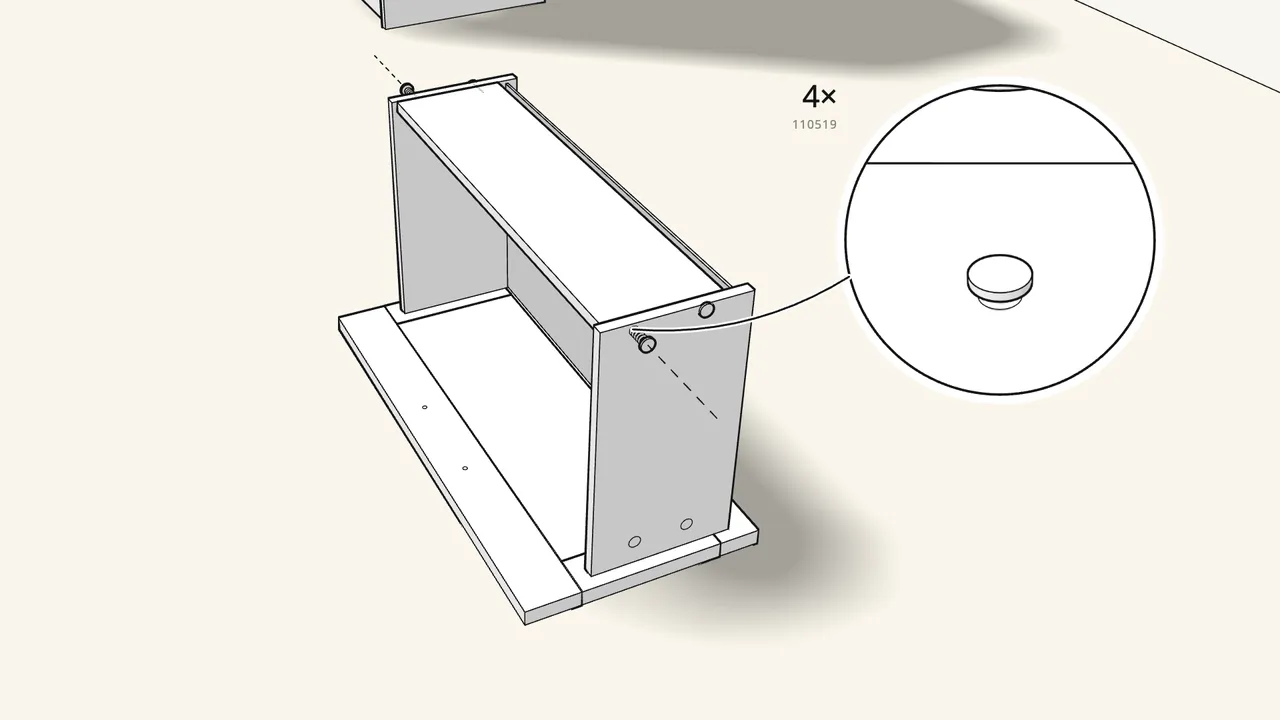
Step 21 · manual step 23
Hammer in 4 screws (110519) through the sides into the back.
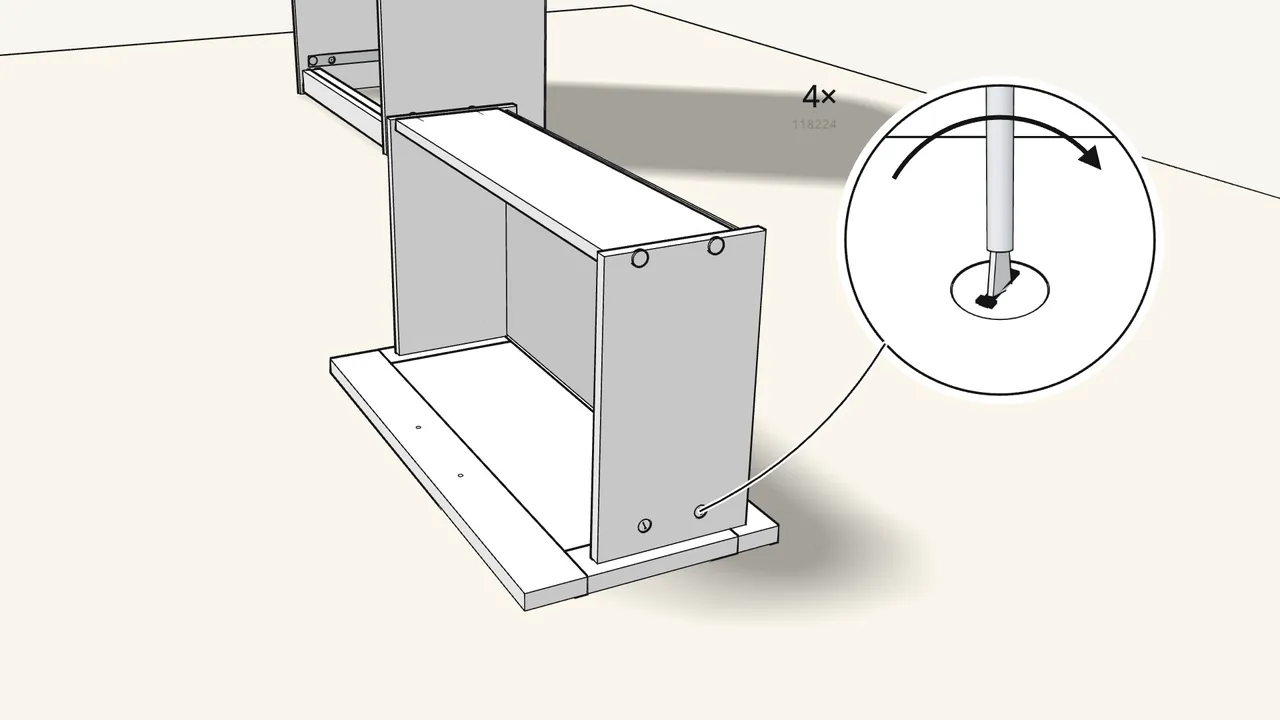
Step 22 · manual step 24
Insert 4 cam locks (118224) and turn them clockwise.
2 in each side, next to the front.
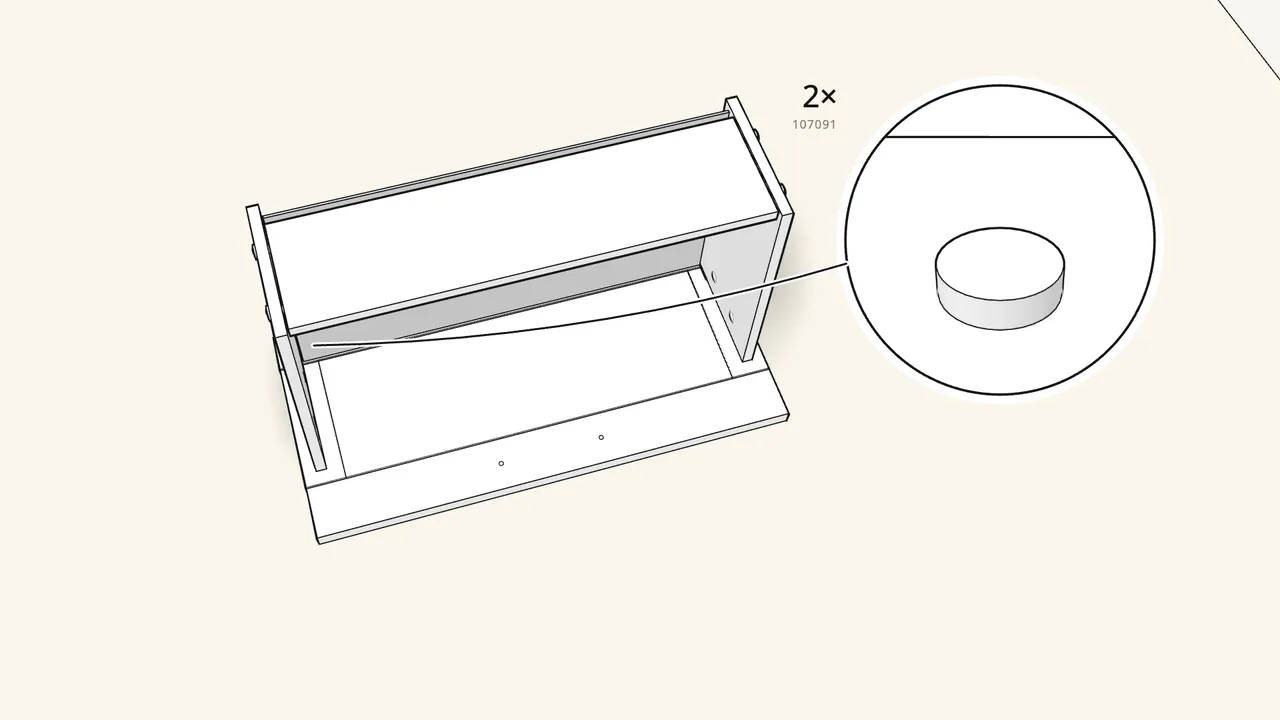
Step 23 · manual step 25
Stick 2 bumpers (107091) onto the inside of the front.
See the manual, step 25, for the exact spot.
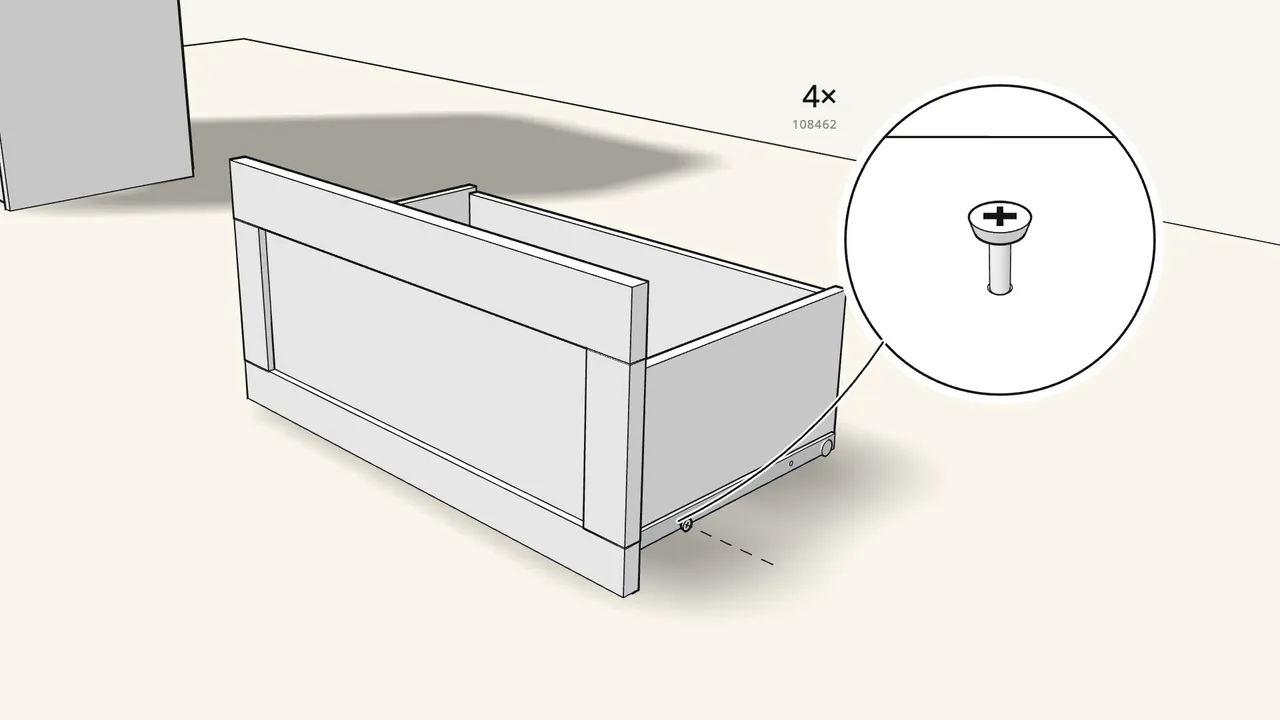
Step 24 · manual step 26–27
Turn the drawer upright. Screw on the 2 runners (130501).
2 screws (108462) per runner.
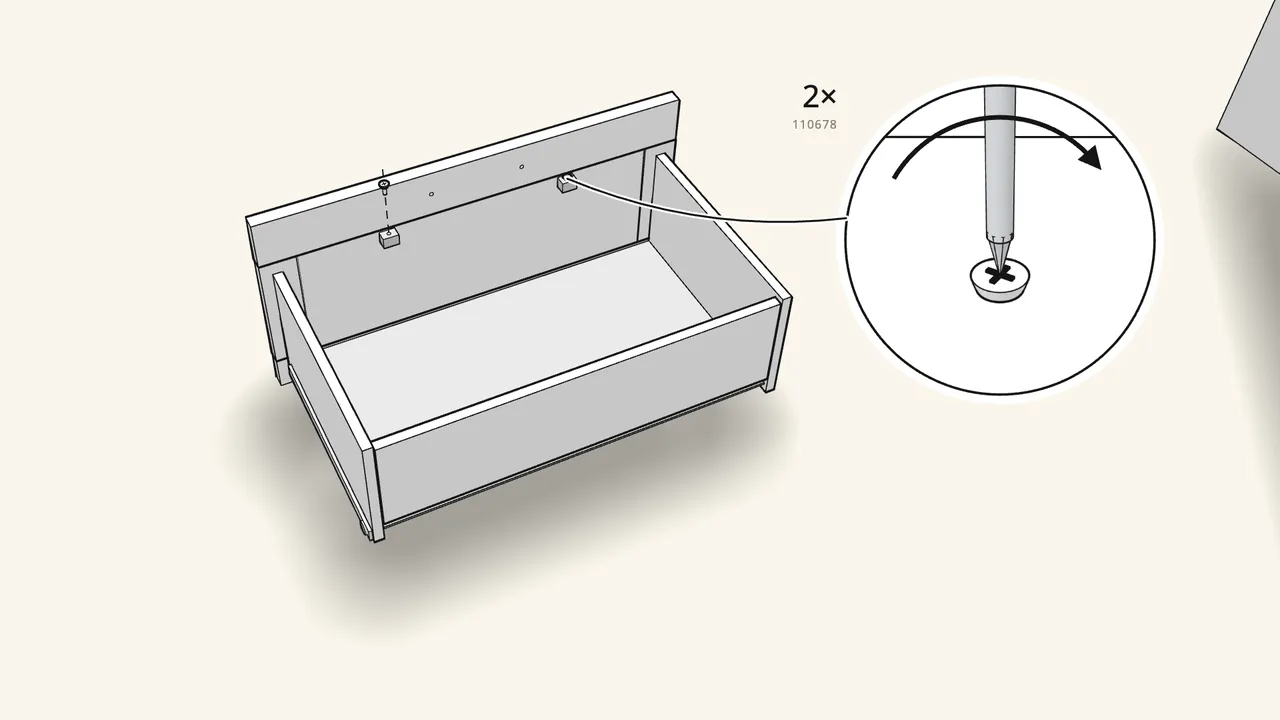
Step 25 · manual step 28
Screw on the 2 plastic fittings (110678).
See the manual, step 28, for where they go.
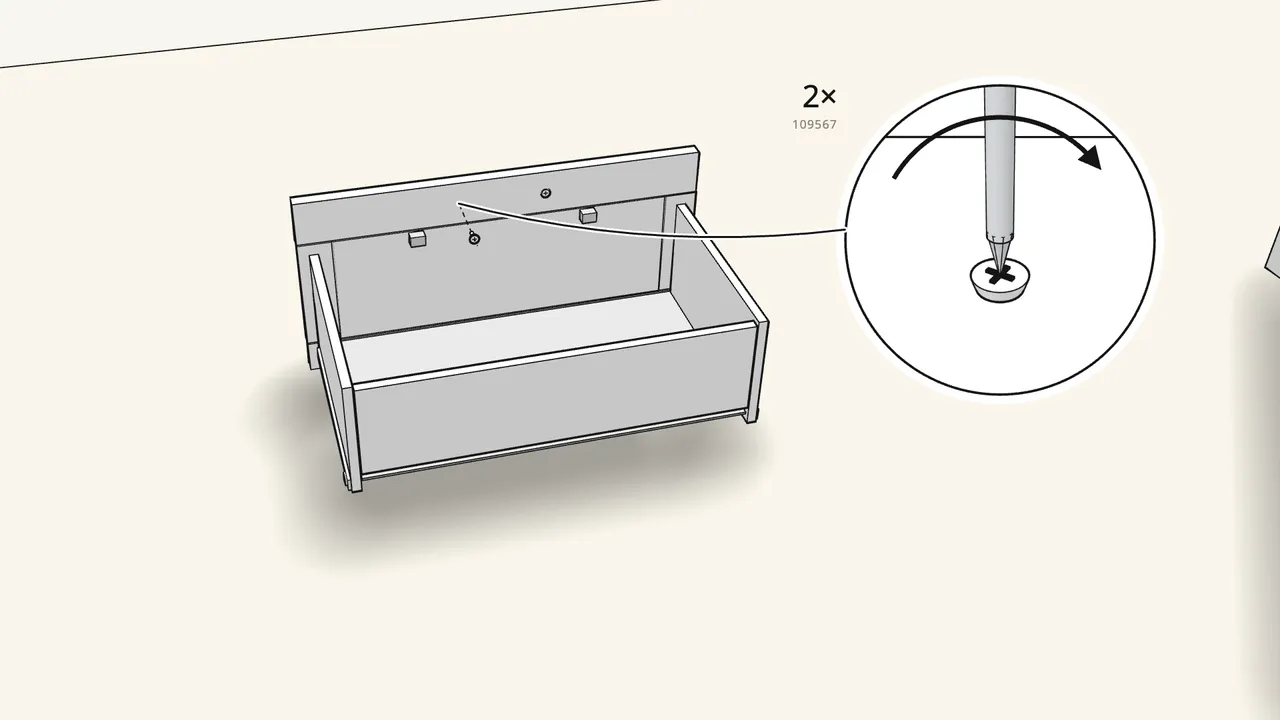
Step 26 · manual step 29
Screw the handle on with 2 screws (109567).
The screws go in from the inside of the drawer.
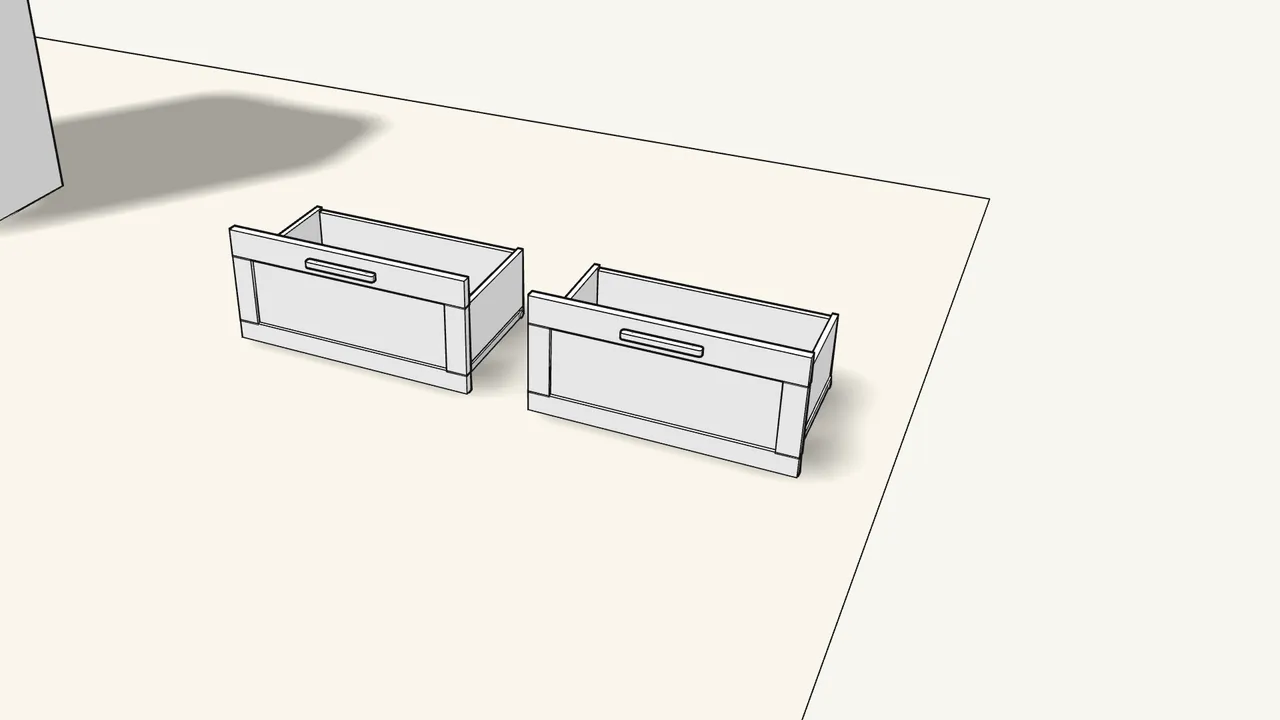
Step 27 · manual step 19–29
Build the second drawer the same way.
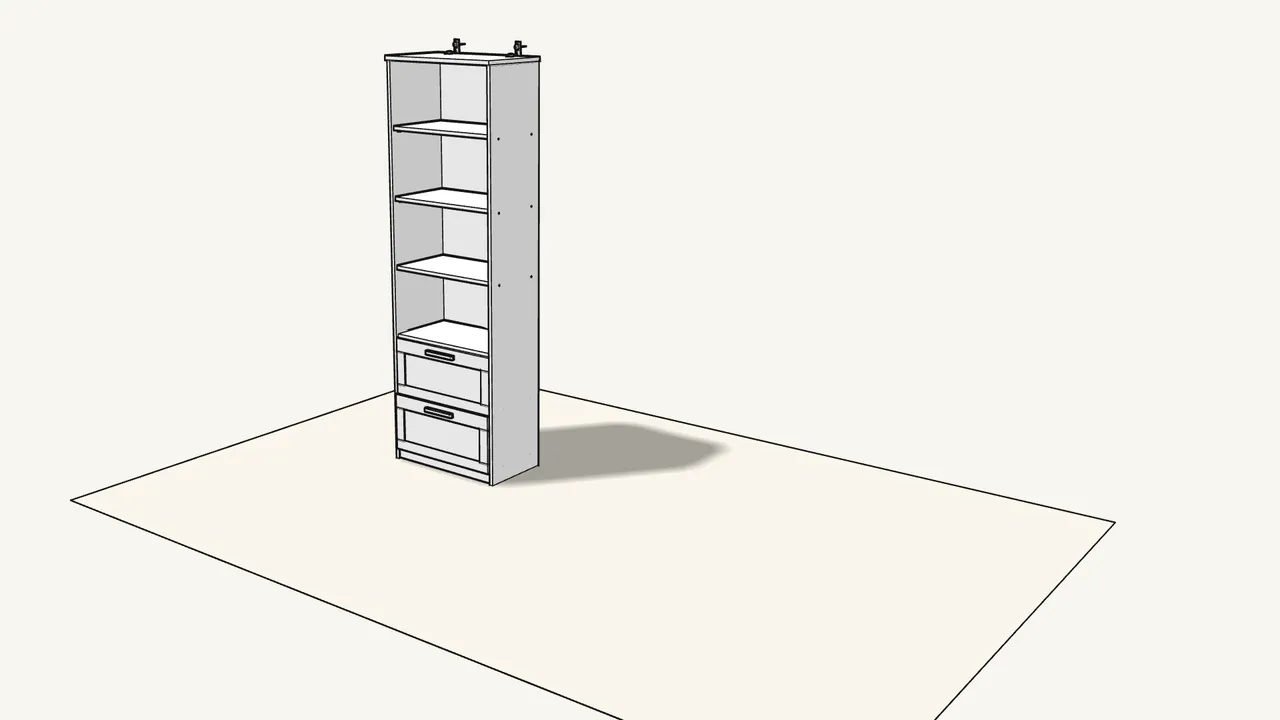
Step 28 · manual step 30
Slide the drawers into the runners and push them closed.
Tips & safety
- Always fix BRIMNES to the wall. Tip-over can cause serious or fatal crushing injuries. Wall screws and plugs are not included — use ones that suit your wall.
Official instructions
This guide follows IKEA's official assembly instructions (AA-1357641-10). Keep the printed manual to hand — if anything differs, the manual is right.