IKEA · Bookcases & Shelving
How to assemble IKEA BILLY Height Extension Unit
Step-by-step IKEA BILLY Height Extension Unit assembly: 14 illustrated steps, an animated video, the hardware list and the tools you need — following the official instructions (AA-2287627-4).
- 14 illustrated steps
- 12 steps in the manual
- 2:19 video
- 80×28×35 cm
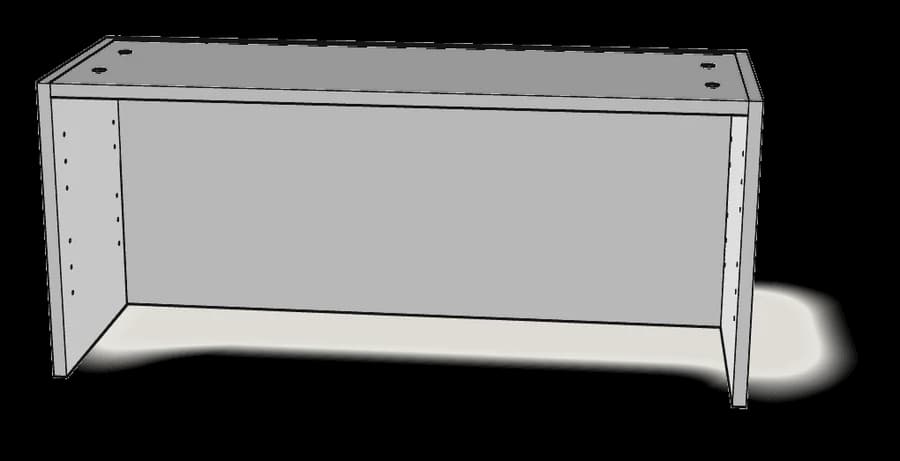
What you need
Tools
- Flat-head screwdriver
- Phillips screwdriver
You’ll need a flat-head and a Phillips screwdriver.
Hardware in the box
| Part no. (as printed in the manual) | Qty |
|---|---|
| 118331 | 6× |
| 101351 | 4× |
| 114667 | 1× |
| 101345 | 4× |
| 108001 | 2× |
| 119081 | 6× |
| 103114 | 2× |
| 109041 | 2× |
| 100823 | 4× |
| 106989 | 2× |
Step-by-step assembly
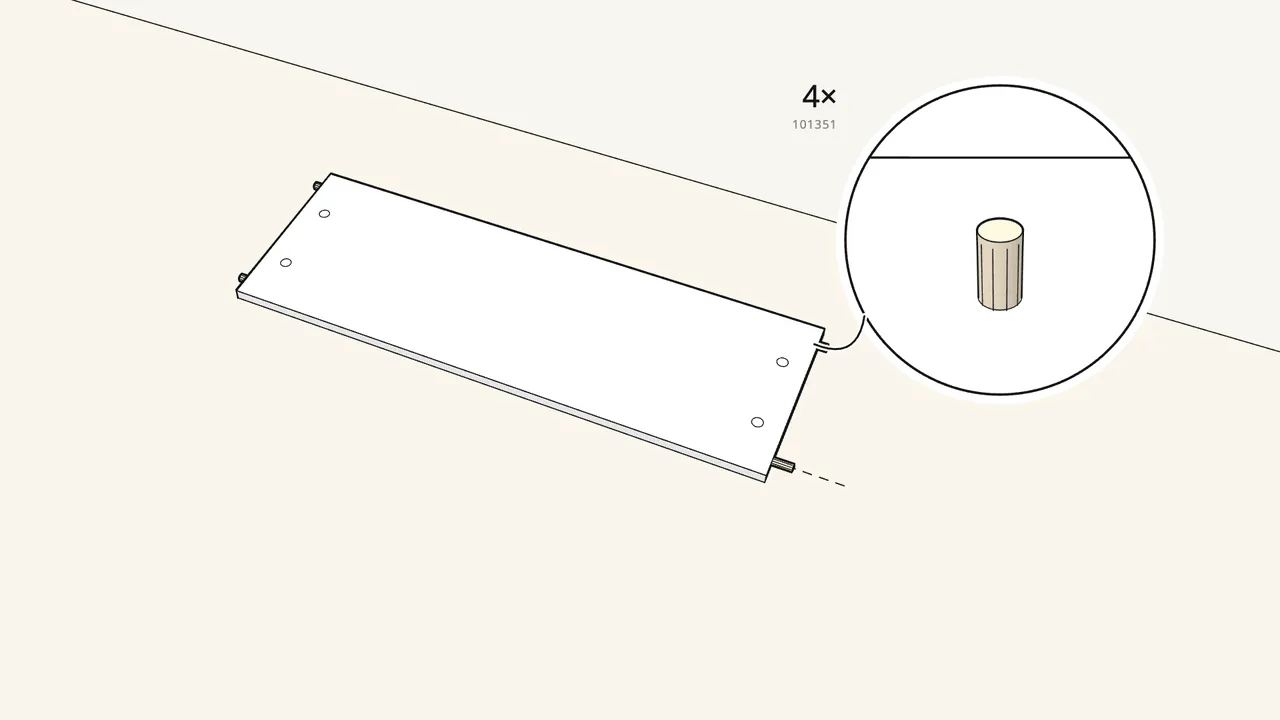
Step 1
Push 4 long dowels (101351) into the ends of the top panel.
Lay it on a rug, cam-lock holes facing up. 2 dowels in each end.
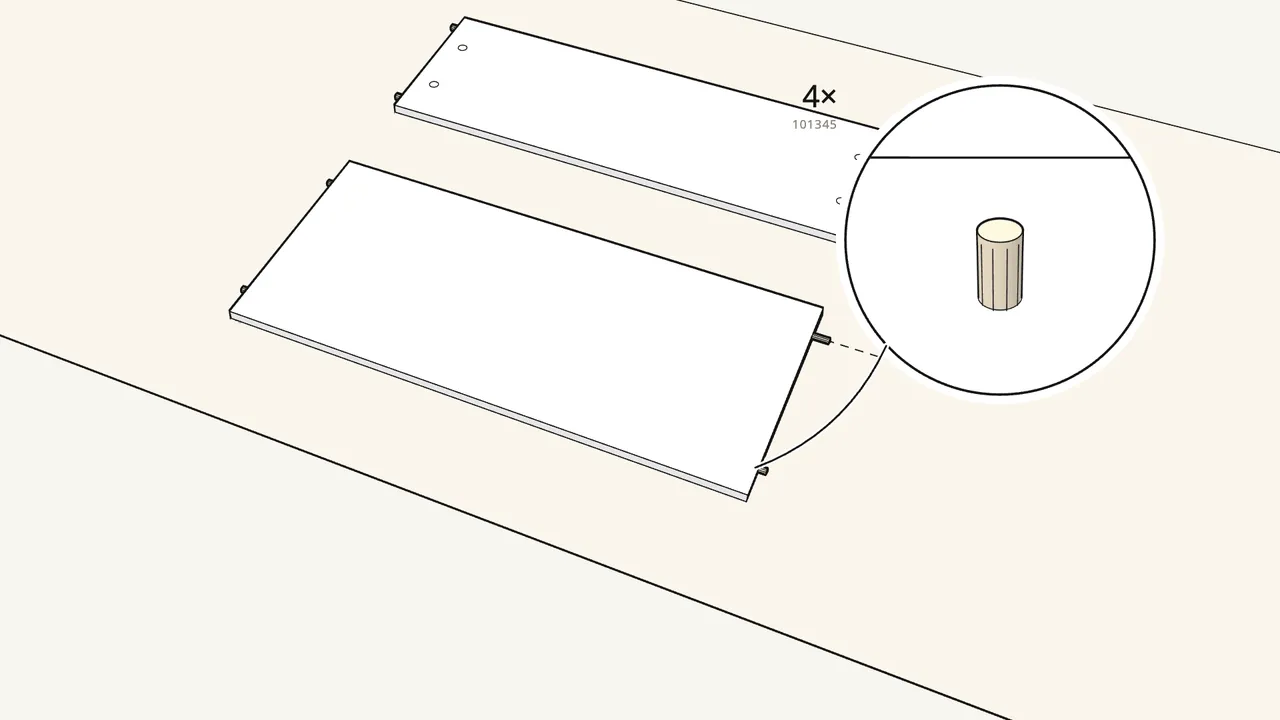
Step 2
Push 4 short dowels (101345) into the ends of the back panel.
The small hole near one long edge is for the screw in step 8.
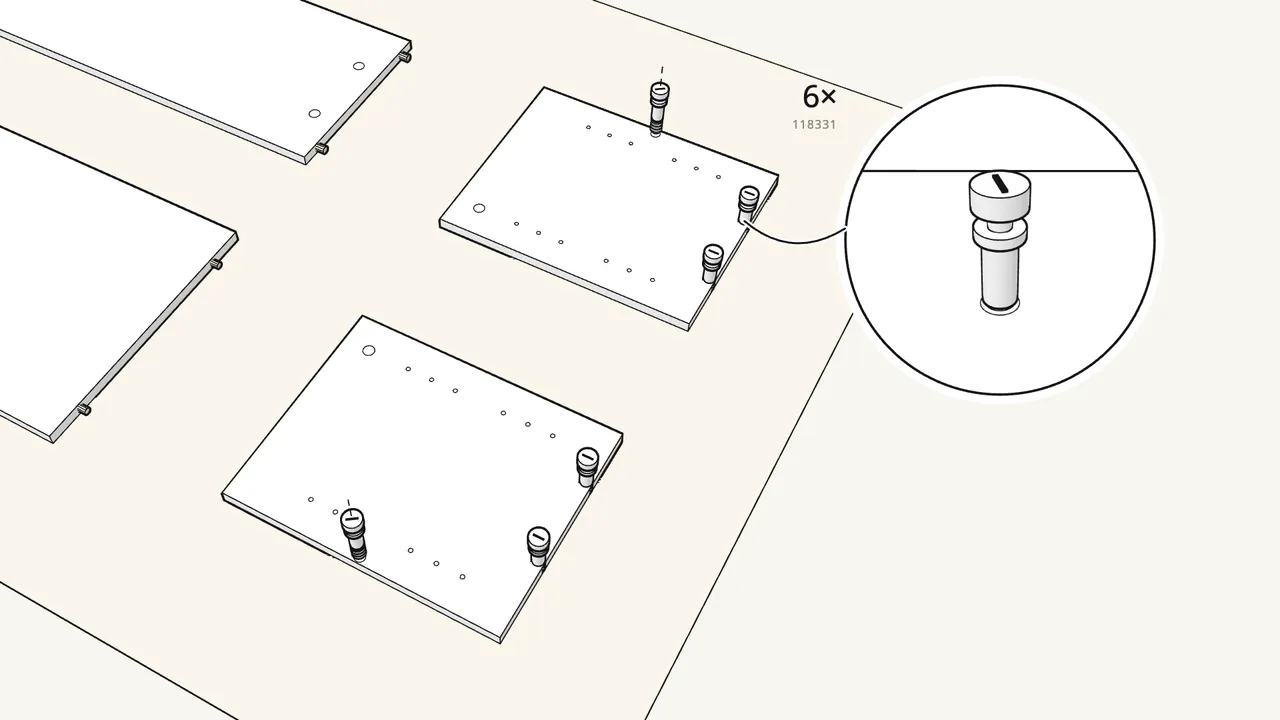
Step 3
Screw 6 cam bolts (118331) into the two side panels.
3 in each side, turned in by hand with a Phillips screwdriver.
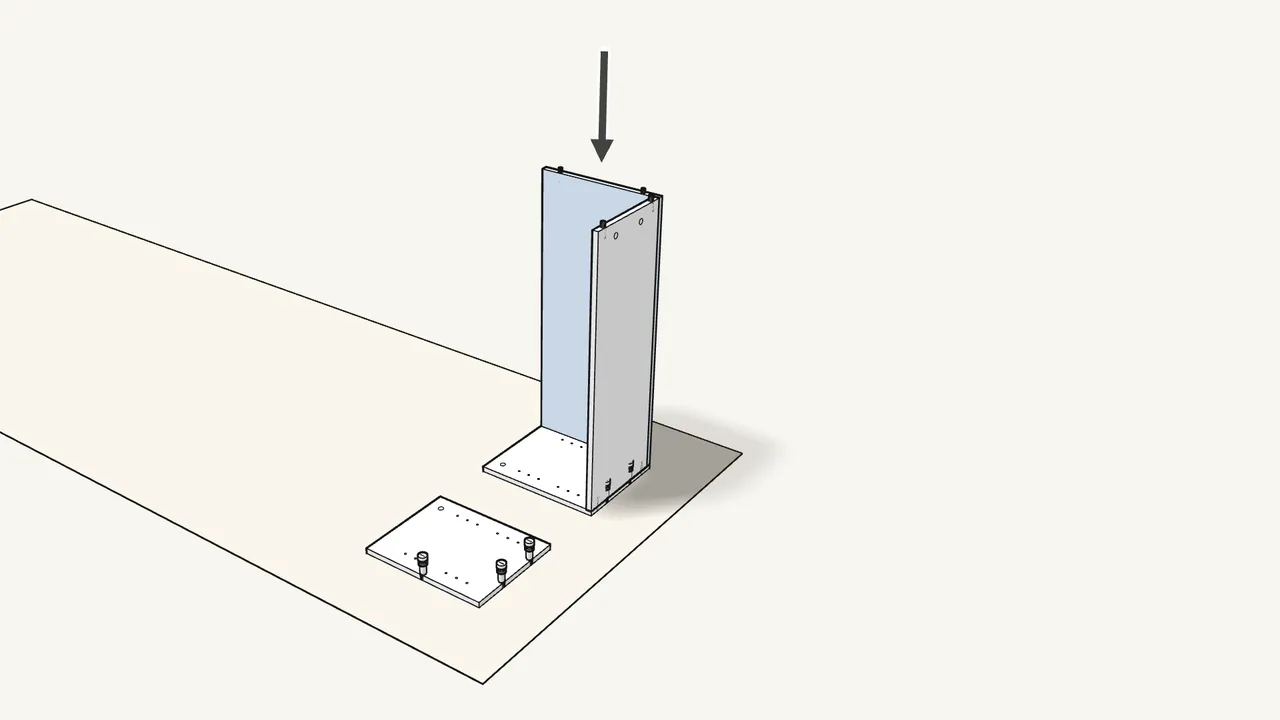
Step 4
Stand the top and back panels on one side panel.
Dowels and cam bolts go into the holes. Check the inset in the manual for the unfinished edge.
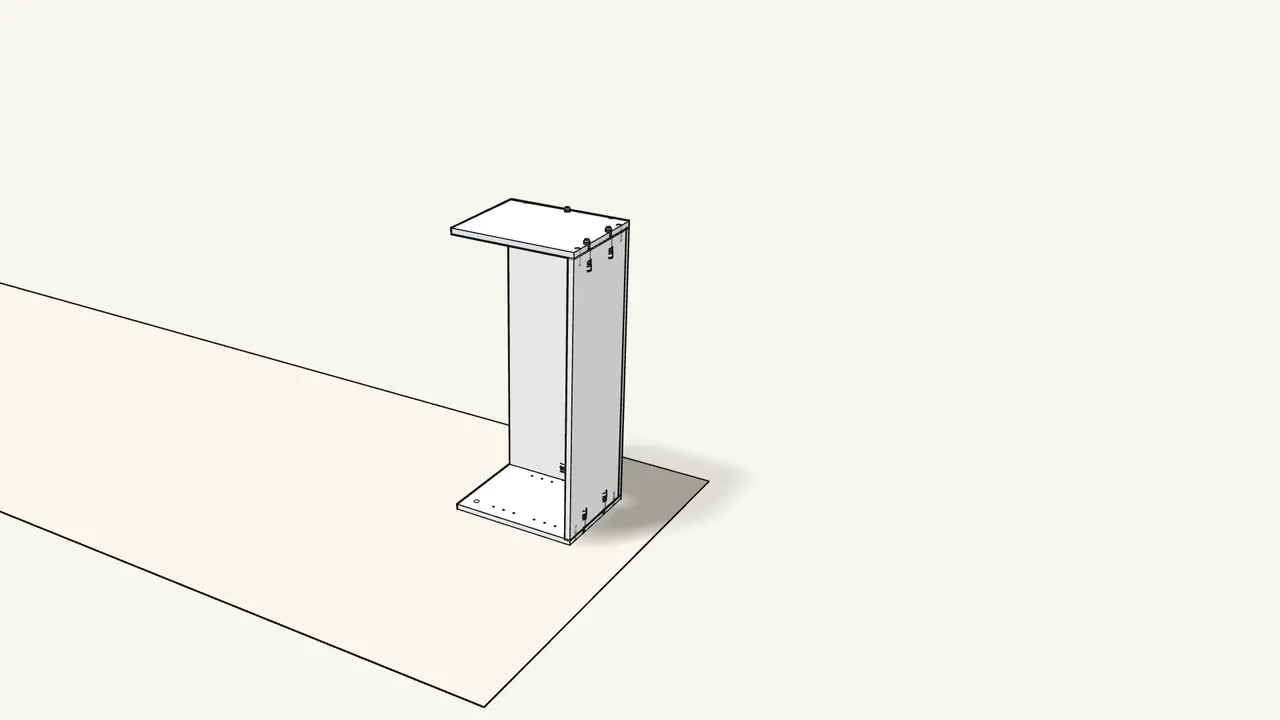
Step 5
Lay the second side panel on top.
Its cam bolts and the dowels line up with the holes in the panel ends.
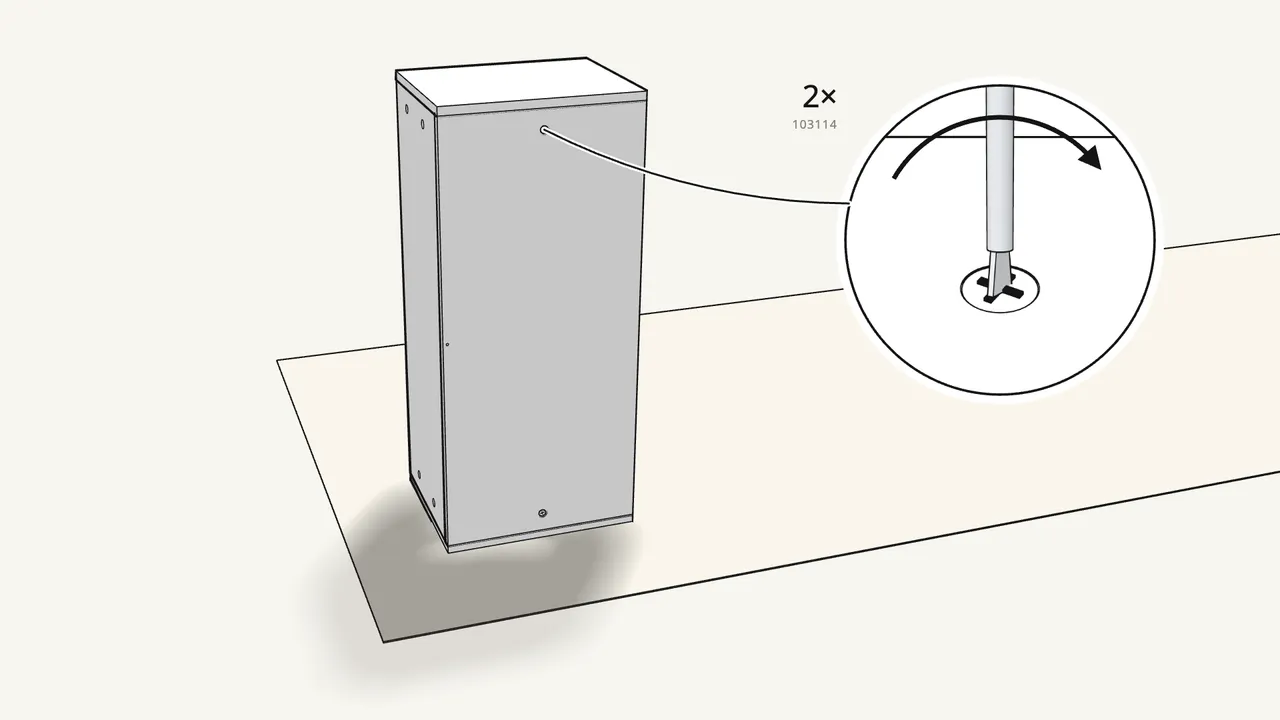
Step 6
Insert 2 cam locks (103114) in the back panel and turn them clockwise.
Use the small 103114 locks here, with a flat-head screwdriver — no power drill.
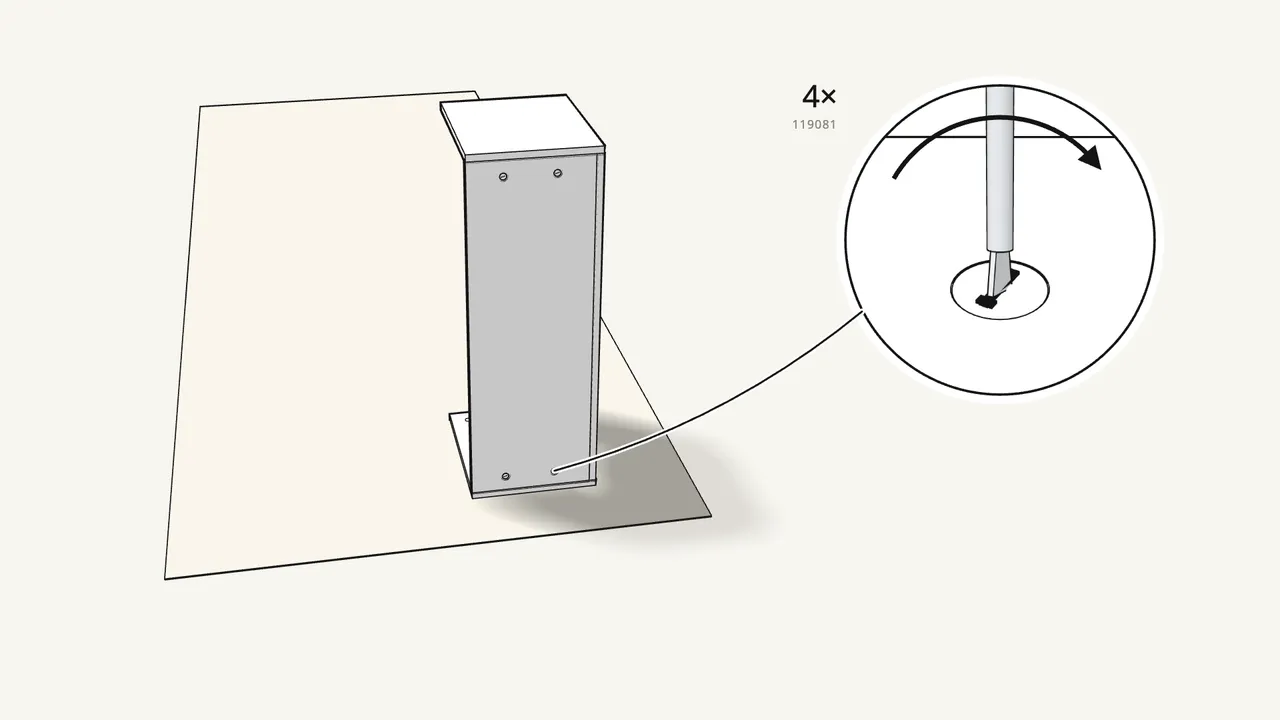
Step 7
Insert 4 cam locks (119081) in the top panel and turn them clockwise.
Tighten them by hand with the flat-head screwdriver.
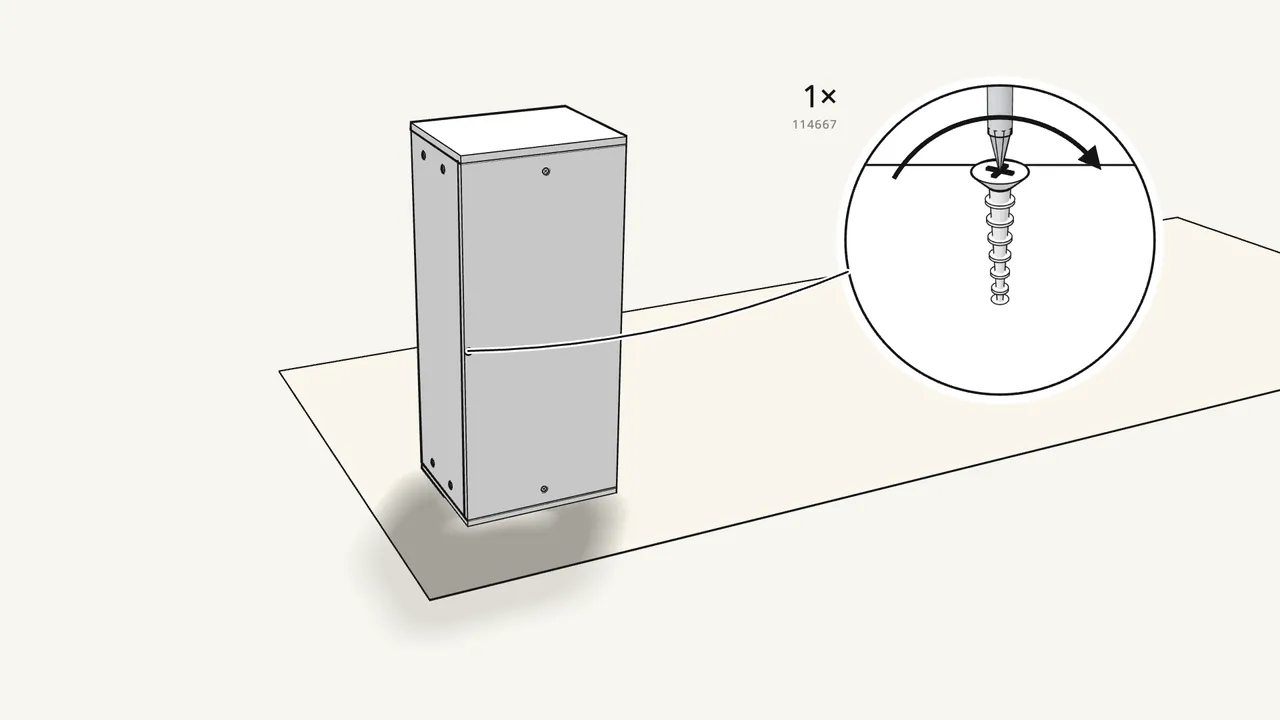
Step 8
Screw 1 screw (114667) through the back panel into the top.
It goes in the small hole in the middle of the back panel.
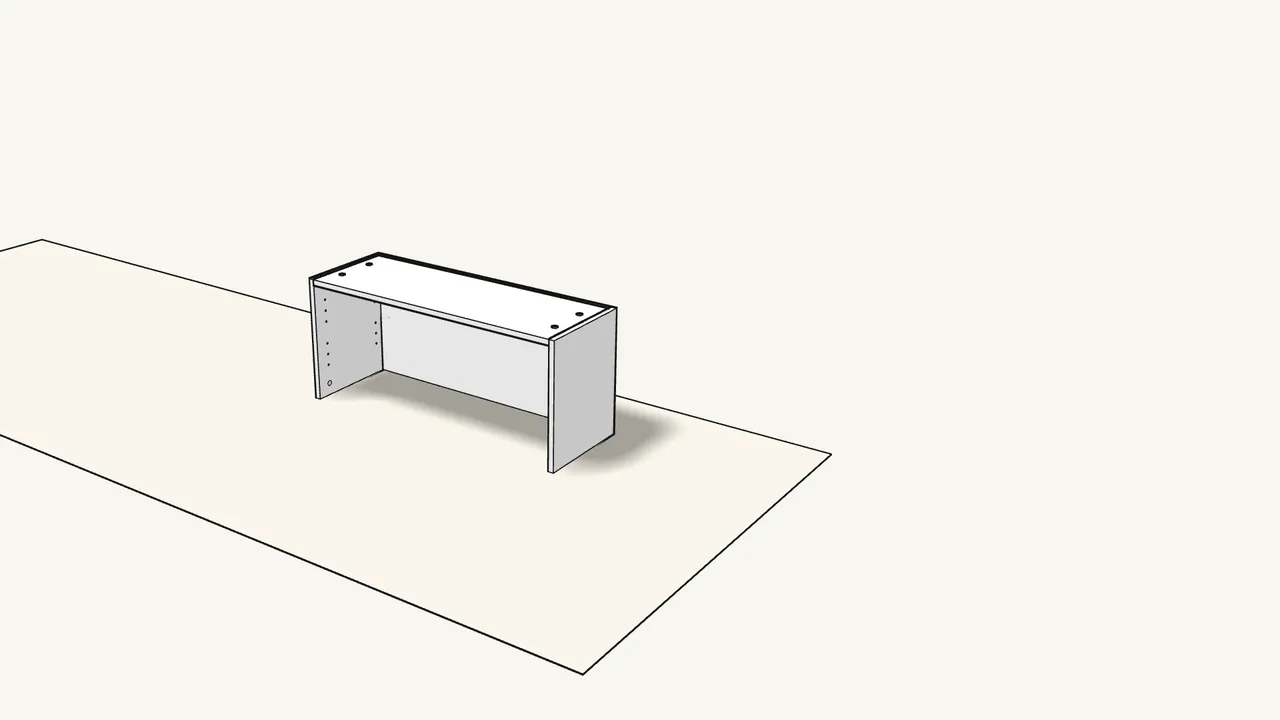
Step 9
Stand the unit upright.
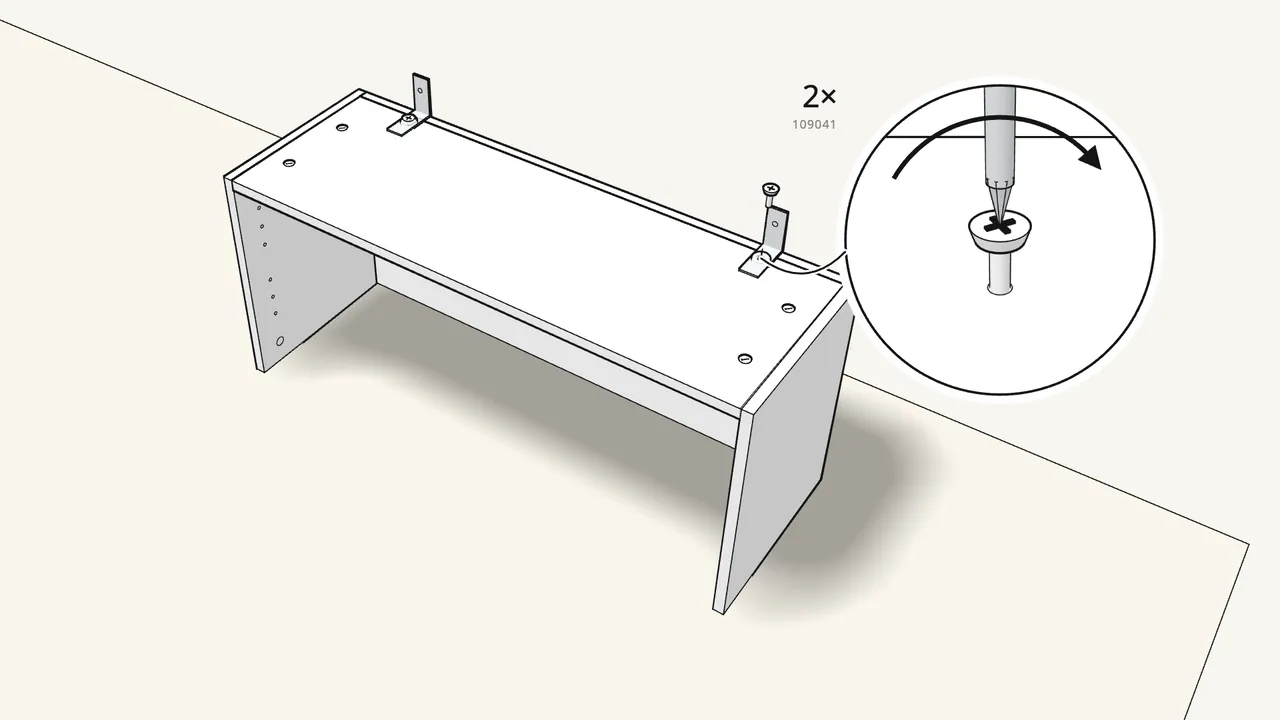
Step 10 · manual step 9
Screw 2 wall brackets (106989) to the top panel.
Each with a screw (109041) and a washer (100823), at the back edge.
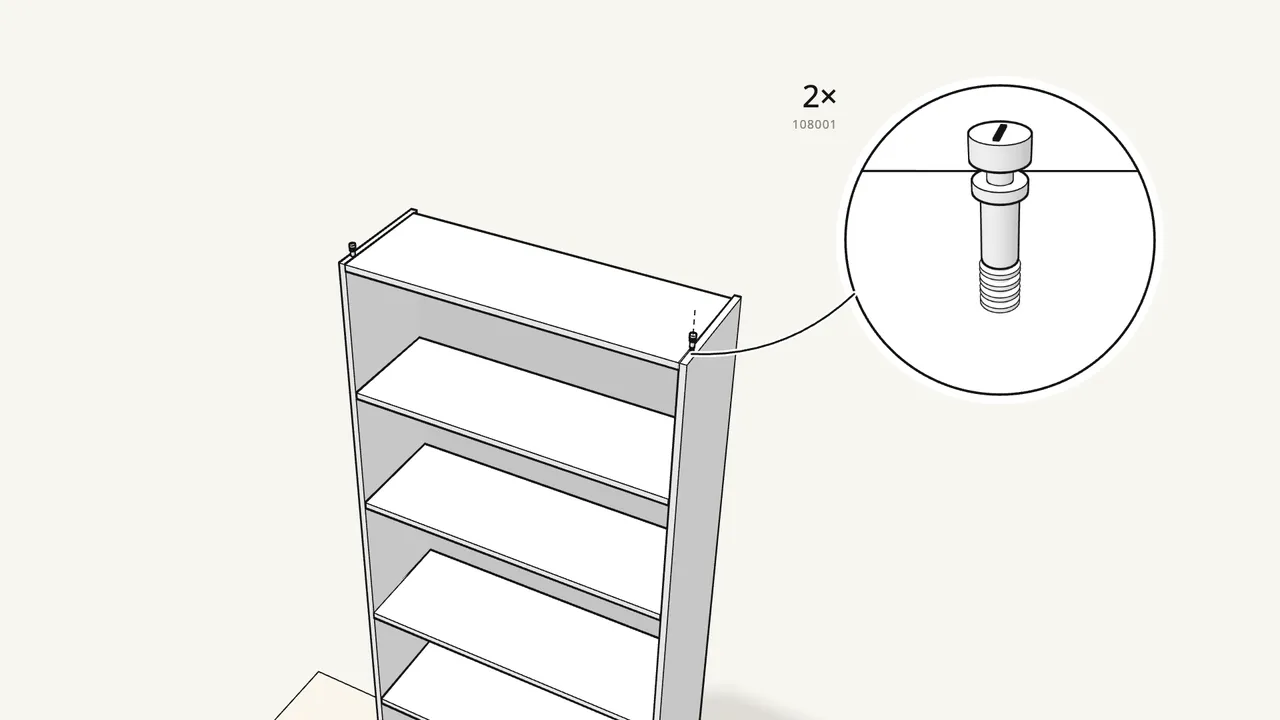
Step 11 · manual step 10
Screw 2 cam bolts (108001) into the top of the BILLY bookcase.
One into each side panel, near the front. Not the 118331 bolts.
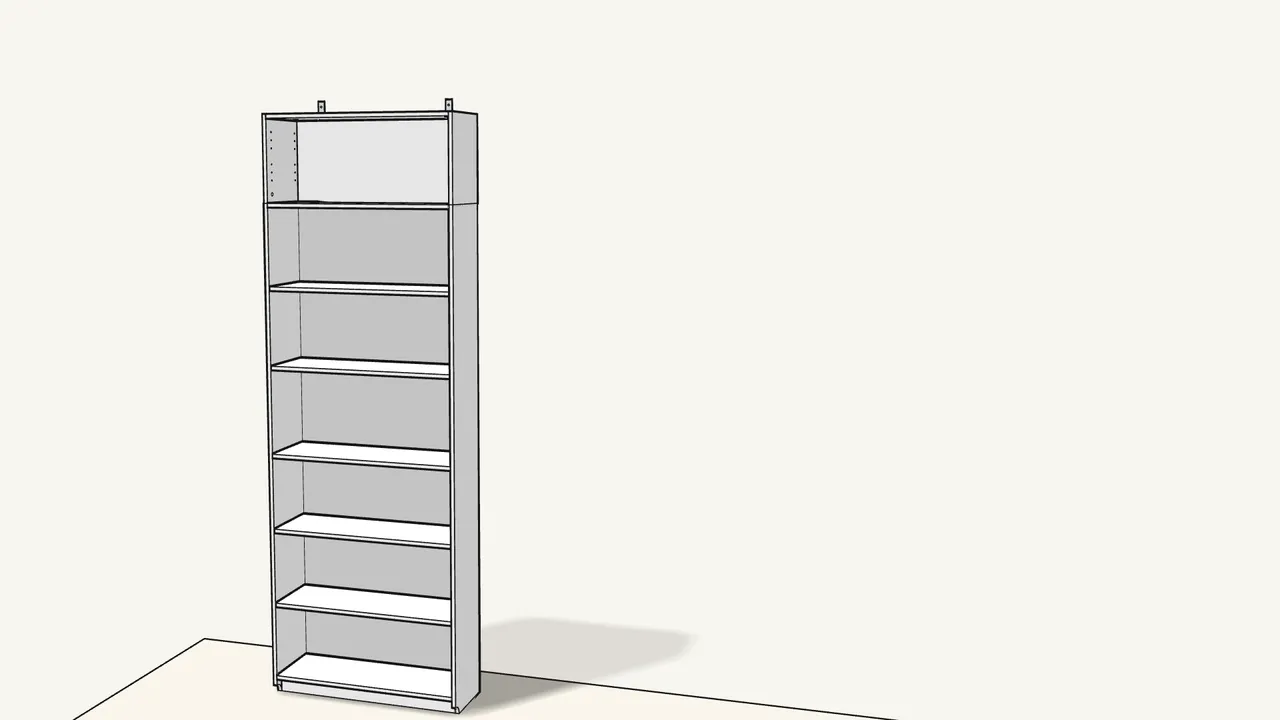
Step 12 · manual step 10
Lift the extension unit onto the bookcase.
The cam bolts go into the holes in the bottom of its sides.
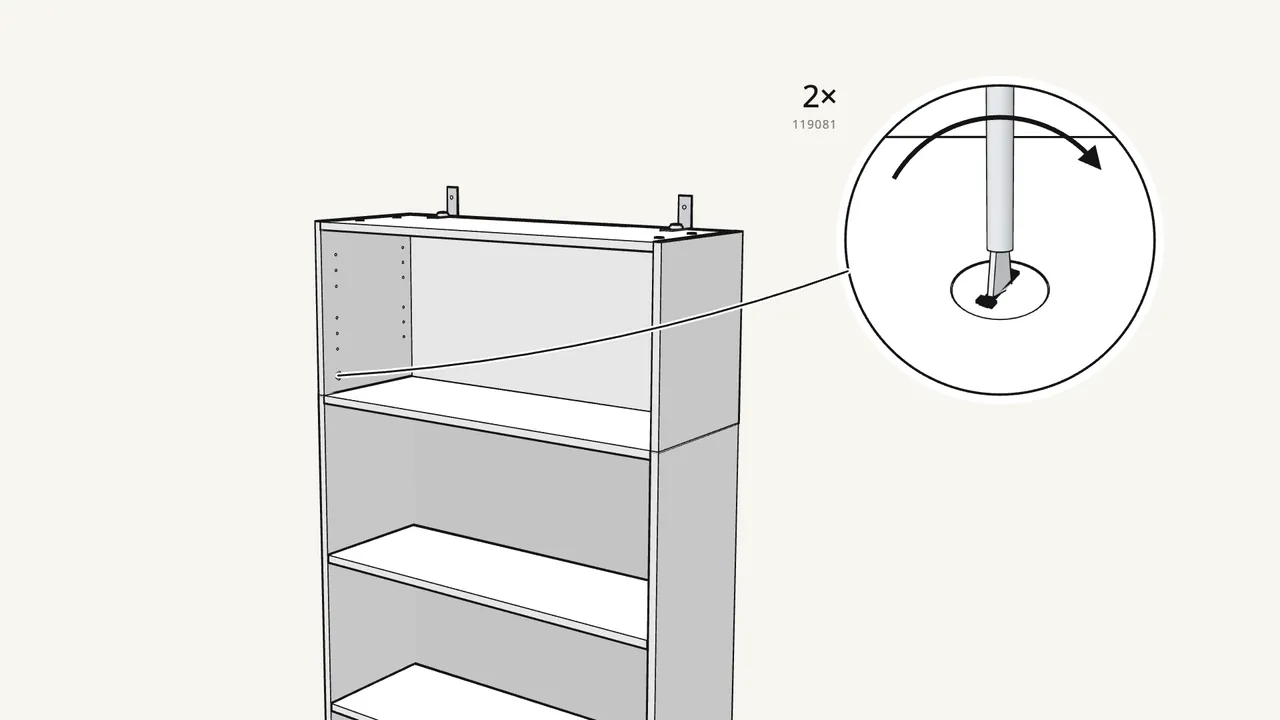
Step 13 · manual step 11
Insert 2 cam locks (119081) in the sides and turn them clockwise.
The holes are at the bottom front, on the inside. No power drill.
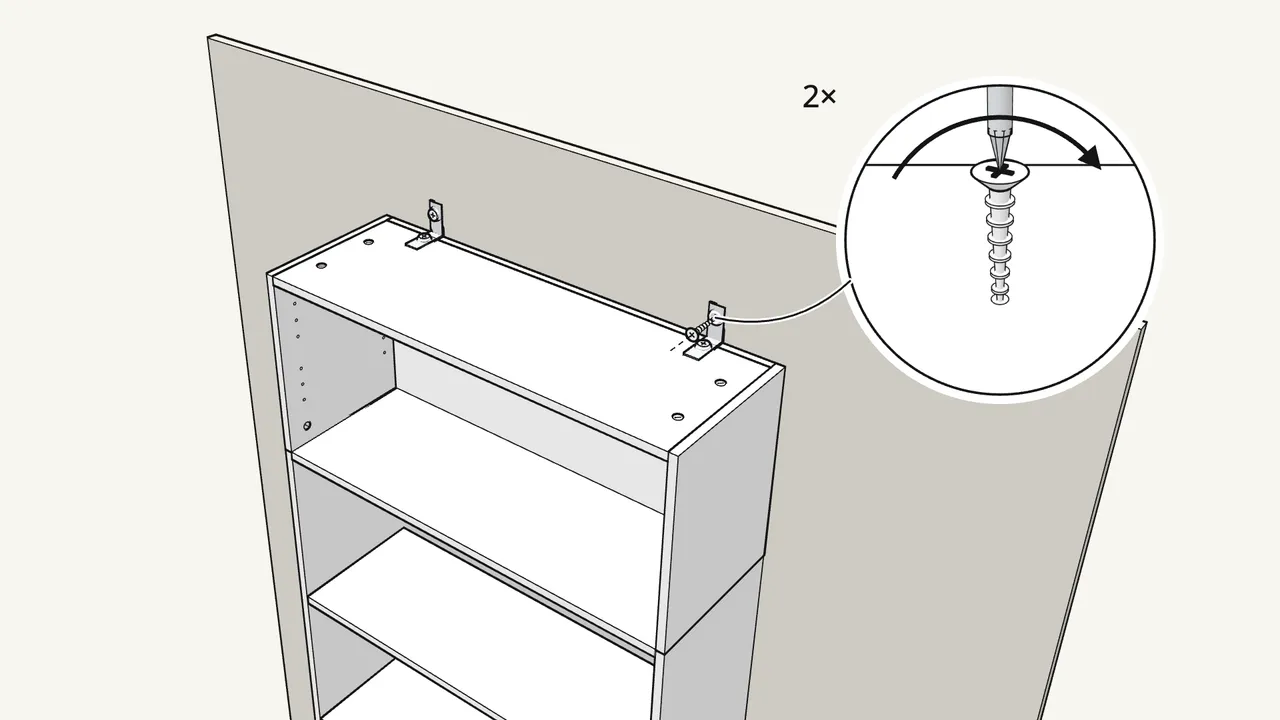
Step 14 · manual step 12
Fix the brackets to the wall.
Use a washer (100823) on each. Wall screws and plugs are not included — use ones suited to your wall.
Tips & safety
- Always fix the unit to the wall. Furniture tip-over can cause serious or fatal crushing injuries. Wall screws and plugs are not included.
- The BILLY bookcase is sold separately. This unit sits on top of a BILLY of the same width. Matching OXBERG doors are sold separately too.
Official instructions
This guide follows IKEA’s official assembly instructions (AA-2287627-4). Keep the printed manual to hand — if anything differs, the manual is right.