IKEA · Bookcases & Shelving
How to assemble IKEA BILLY Bookcase with Foldable Table
Step-by-step IKEA BILLY Bookcase with Foldable Table assembly: 27 illustrated steps, an animated video, the hardware list and the tools you need — following the official instructions (AA-2568863-4).
- 27 illustrated steps
- 37 steps in the manual
- 3:27 video
- 80×32×106 cm
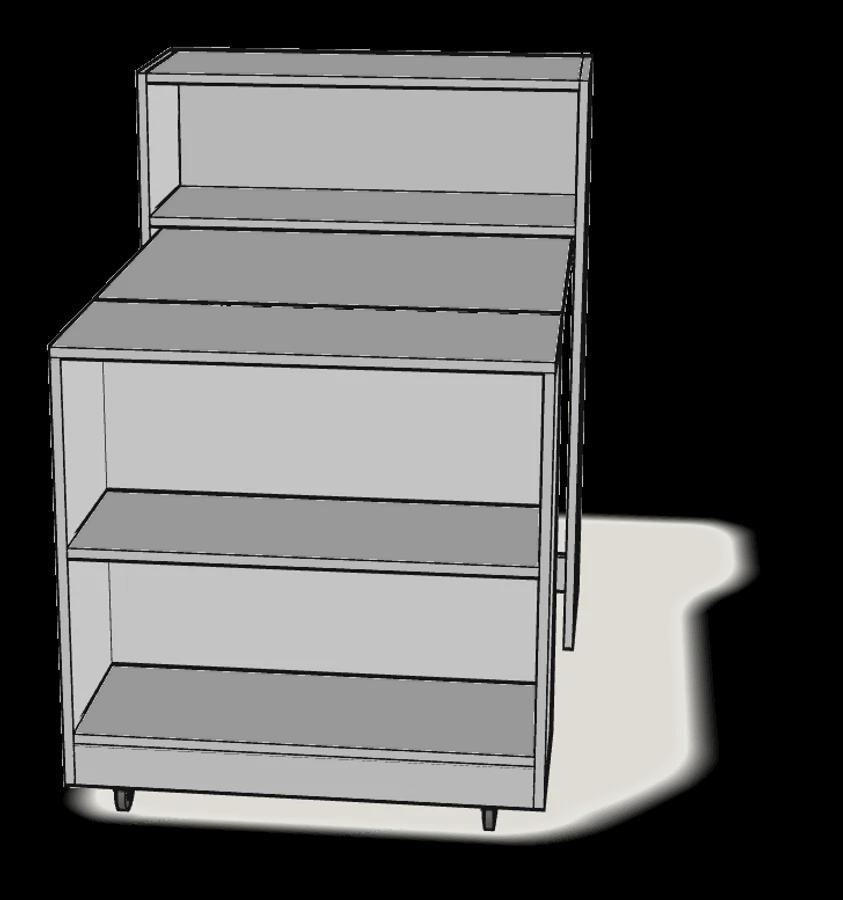
What you need
Tools
- Flat-head screwdriver
- Phillips screwdriver
- Allen key (included)
You’ll need: a flat-head and a Phillips screwdriver. The Allen key is included.
Hardware in the box
| Part no. (as printed in the manual) | Qty |
|---|---|
| 118331 | 32× |
| 101351 | 30× |
| 101343 | 4× |
| 119253 | 32× |
| 100358 | 36× |
| 120925 | 4× |
| 151706 | 12× |
| 151705 | 12× |
| 102591 | 2× |
| 103693 | 2× |
Step-by-step assembly
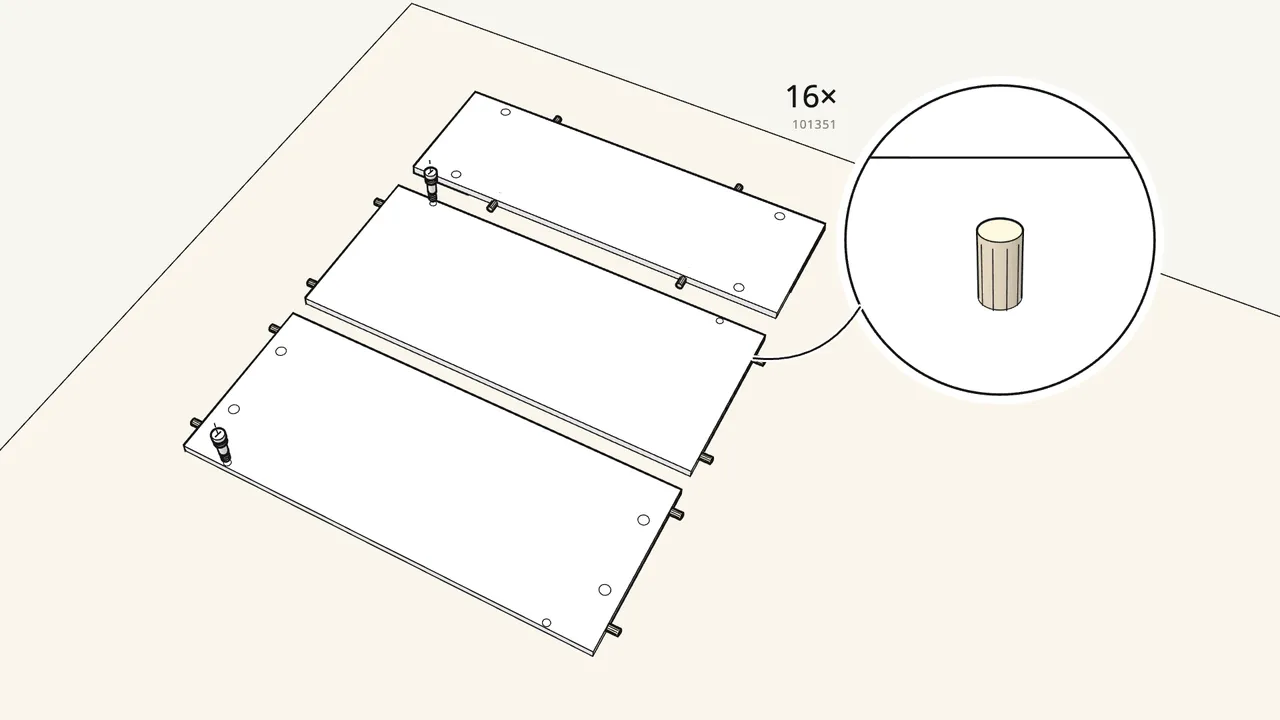
Step 1 · manual step 1–2
Push 16 dowels (101351) into the top, shelf and back panel.
Then turn the top over and screw 4 cam bolts into the top and the shelf.
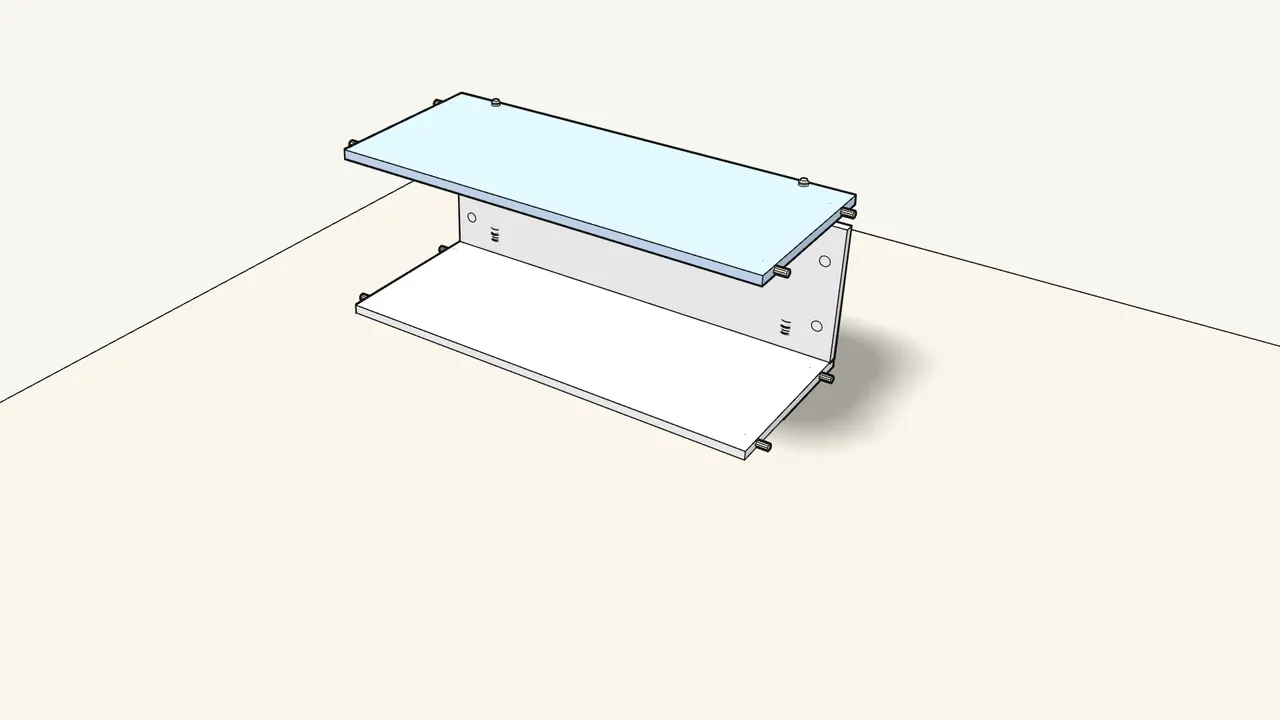
Step 2 · manual step 3–4
Stand the back panel on the shelf, then fit the top.
The top goes on with its cam bolts facing down. Get help to hold it.
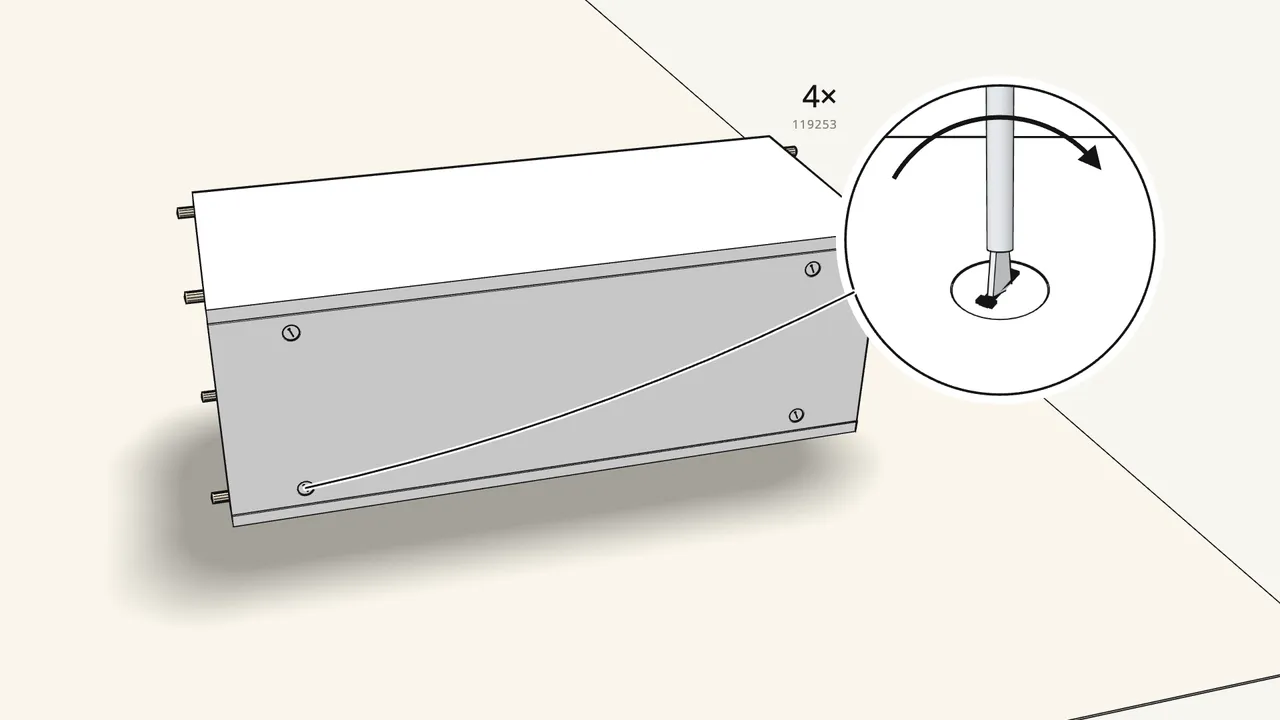
Step 3 · manual step 5
Insert 4 cam locks (119253) in the back panel and turn them.
Turn clockwise to lock.
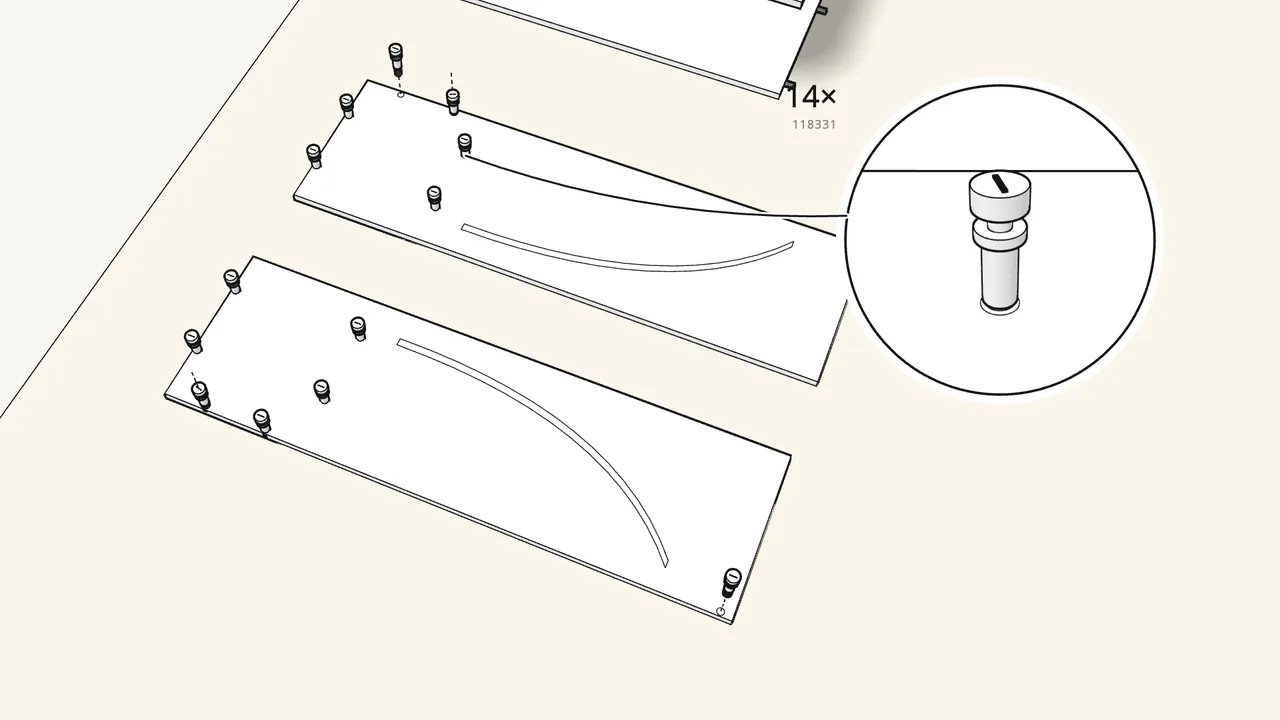
Step 4 · manual step 6
Screw 14 cam bolts (118331) into the two side panels.
Into the inner faces, the ones with the curved groove — 7 in each side.
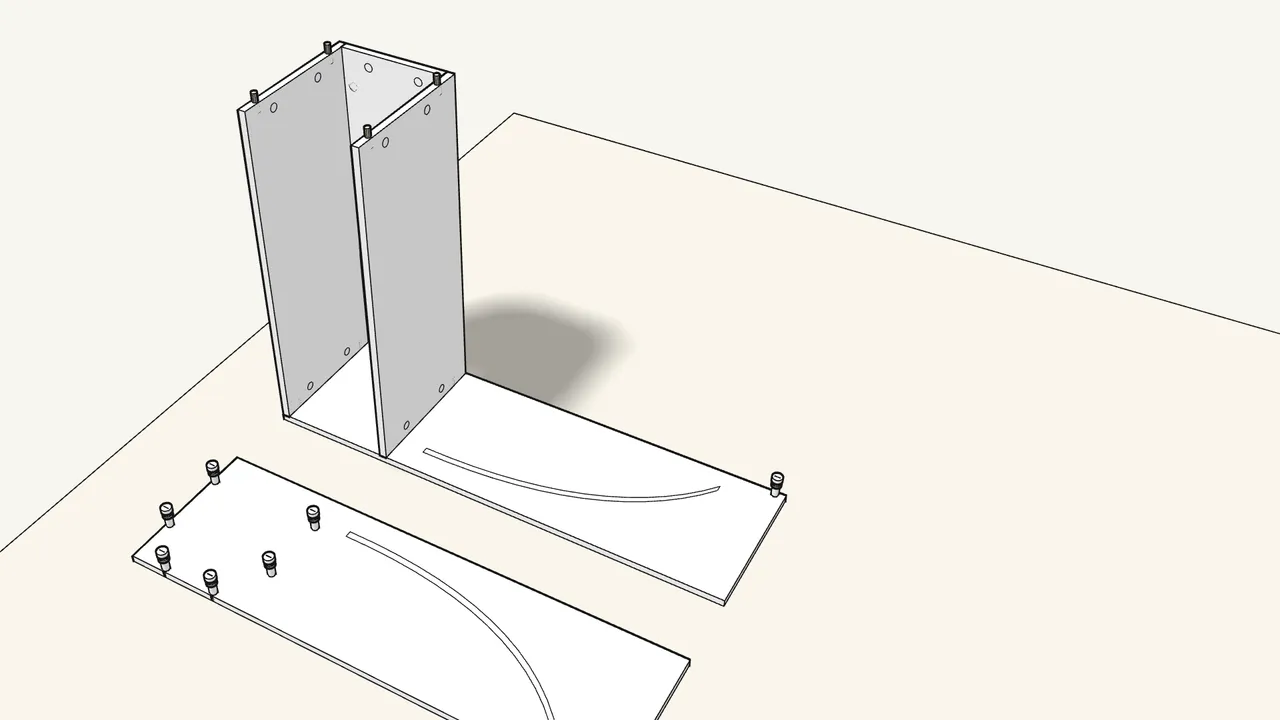
Step 5 · manual step 7
Turn the shelf box onto its end and stand it on one side.
Lay that side on the rug, groove up. The bolts go into the panel ends.
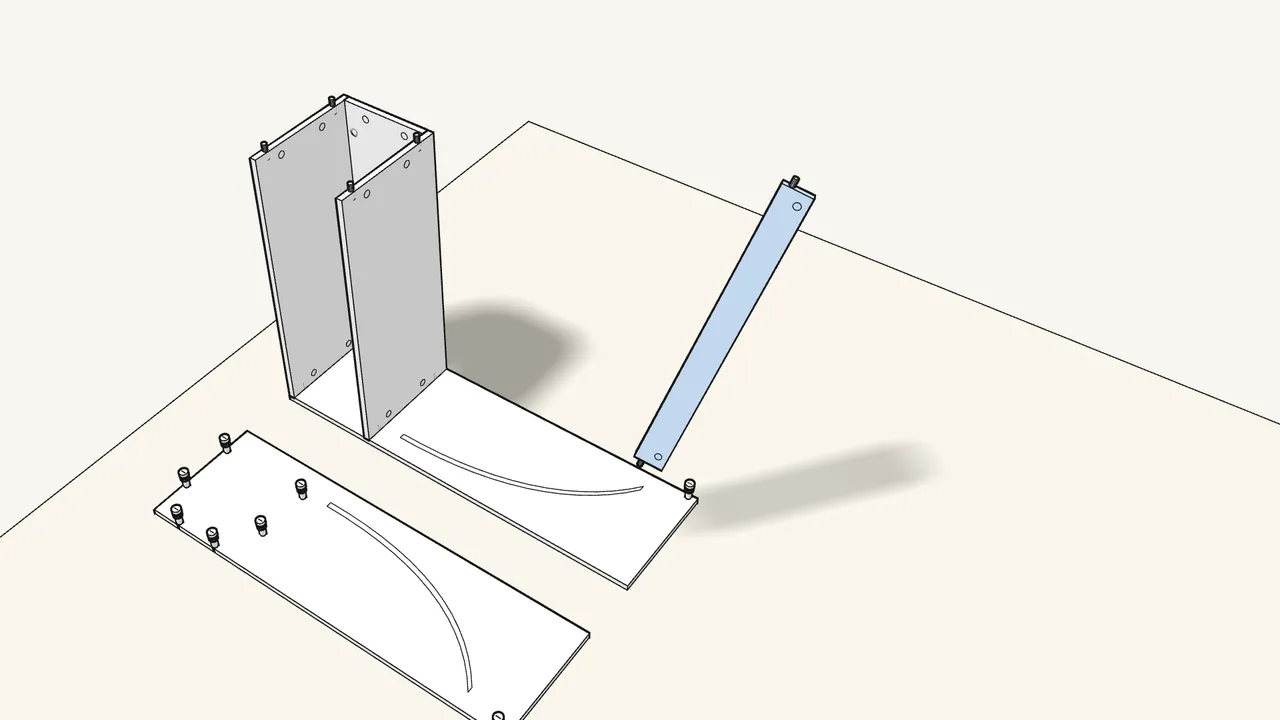
Step 6 · manual step 8–9
Push 2 dowels into the plinth and stand it at the bottom end.
It goes at the back edge of the side.
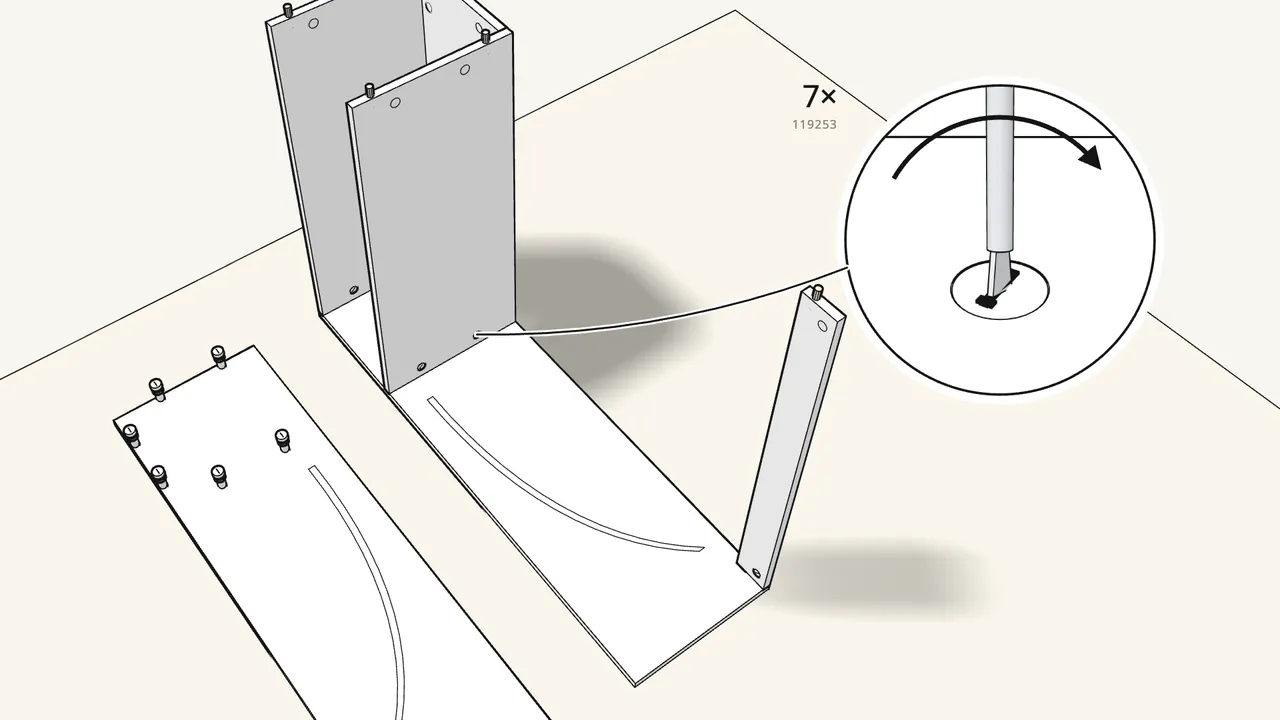
Step 7 · manual step 10
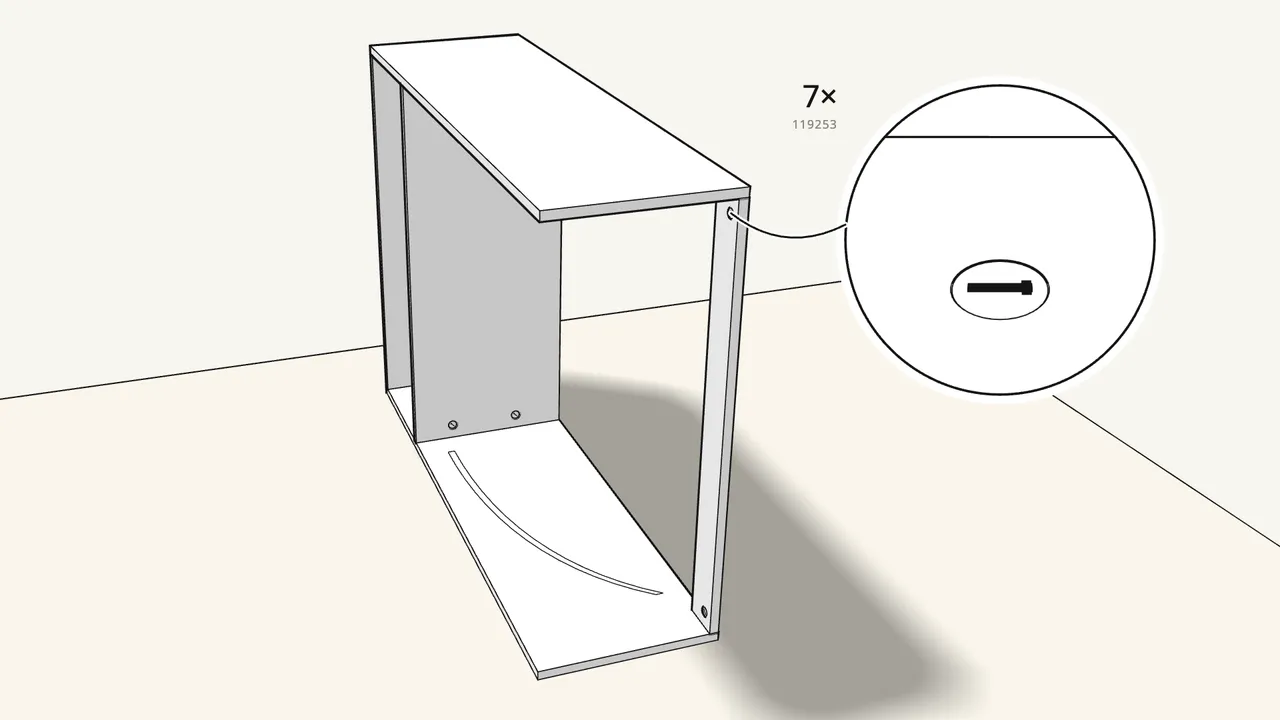
Insert 7 cam locks (119253) and turn them clockwise.
Top, fixed shelf, back panel and plinth — all against the side on the floor.
Step 8 · manual step 11–12
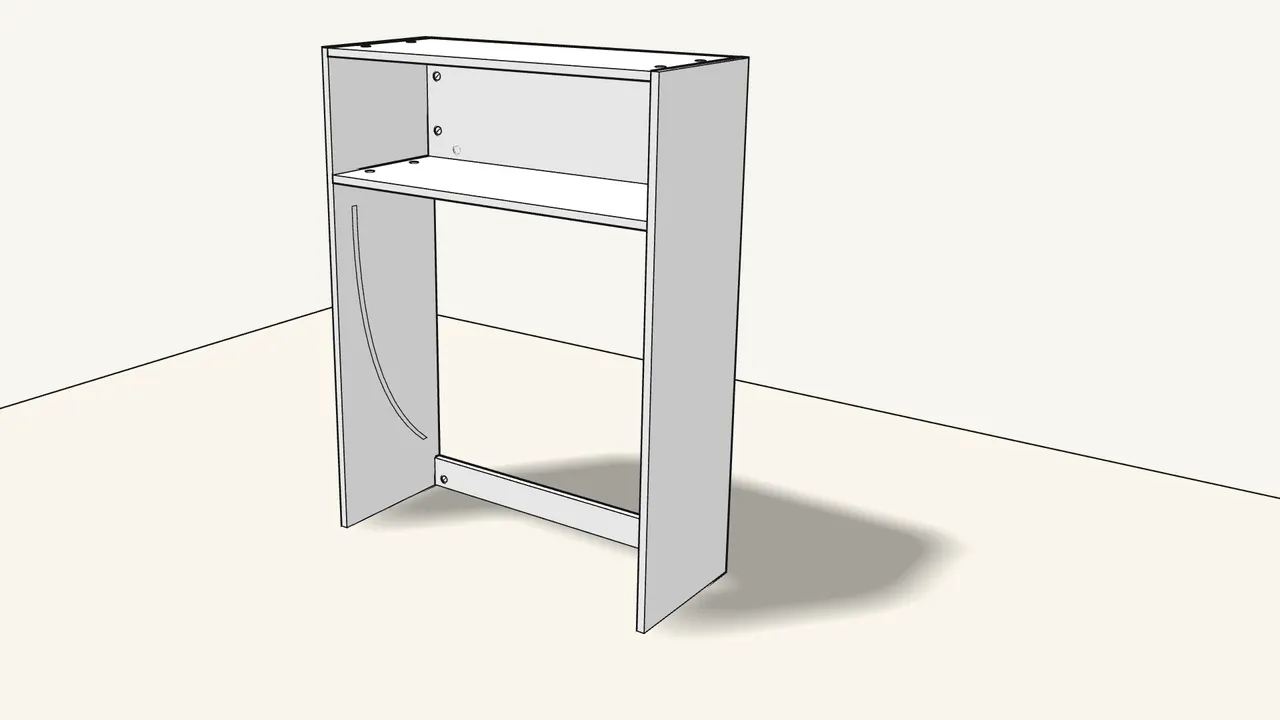
Lay the second side on top and lock it with 7 cam locks.
Groove facing in. Turn each lock clockwise.
Step 9 · manual step 13
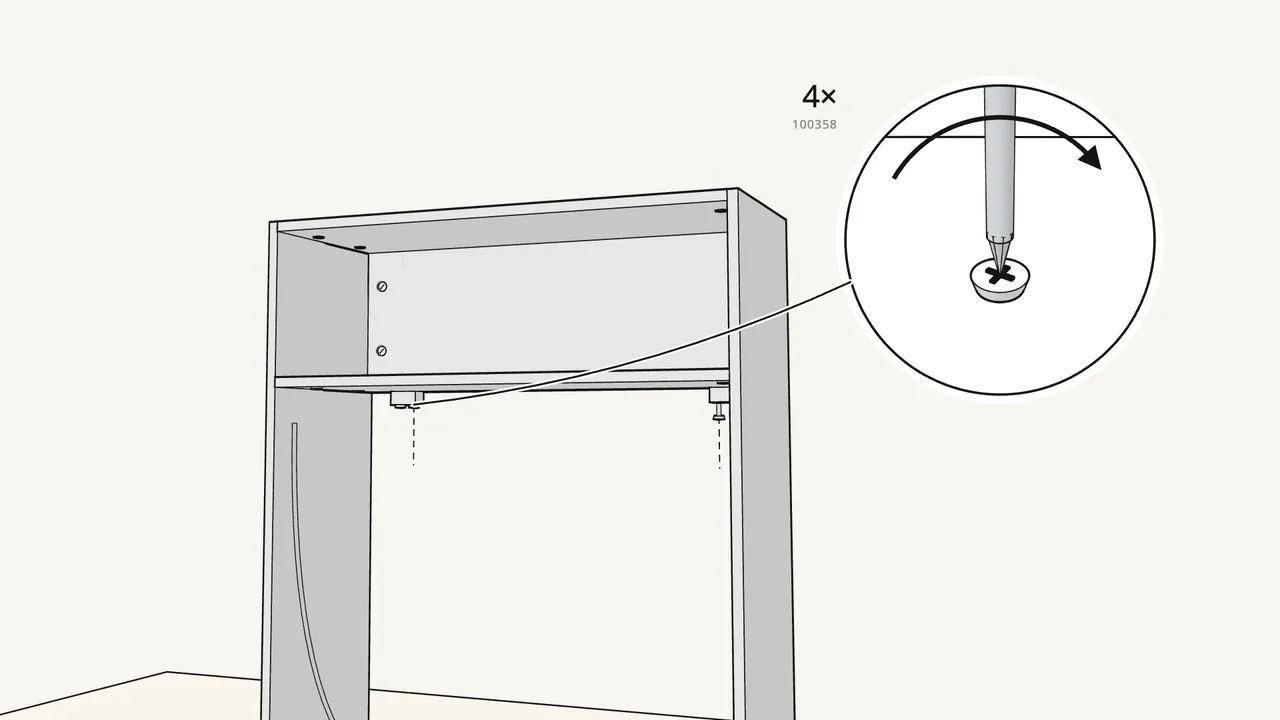
Stand the bookcase upright.
Get help — lift it, don’t drag it.
Step 10 · manual step 13
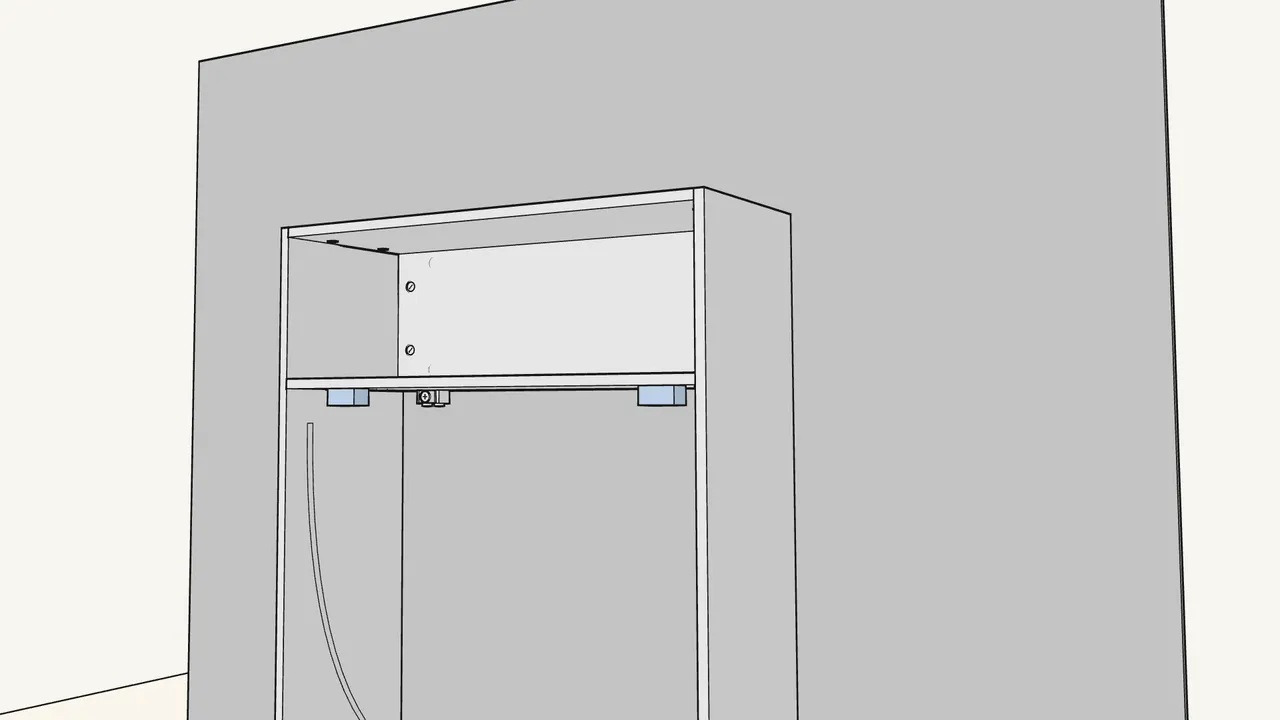
Screw 2 brackets (102591) under the fixed shelf.
At the back, near each side — 2 screws (100358) each.
Step 11 · manual step 14–15
Fix the bookcase to the wall, then clip on the covers.
Clip 103693 + a screw suited to your wall (not included), then cover 102220.
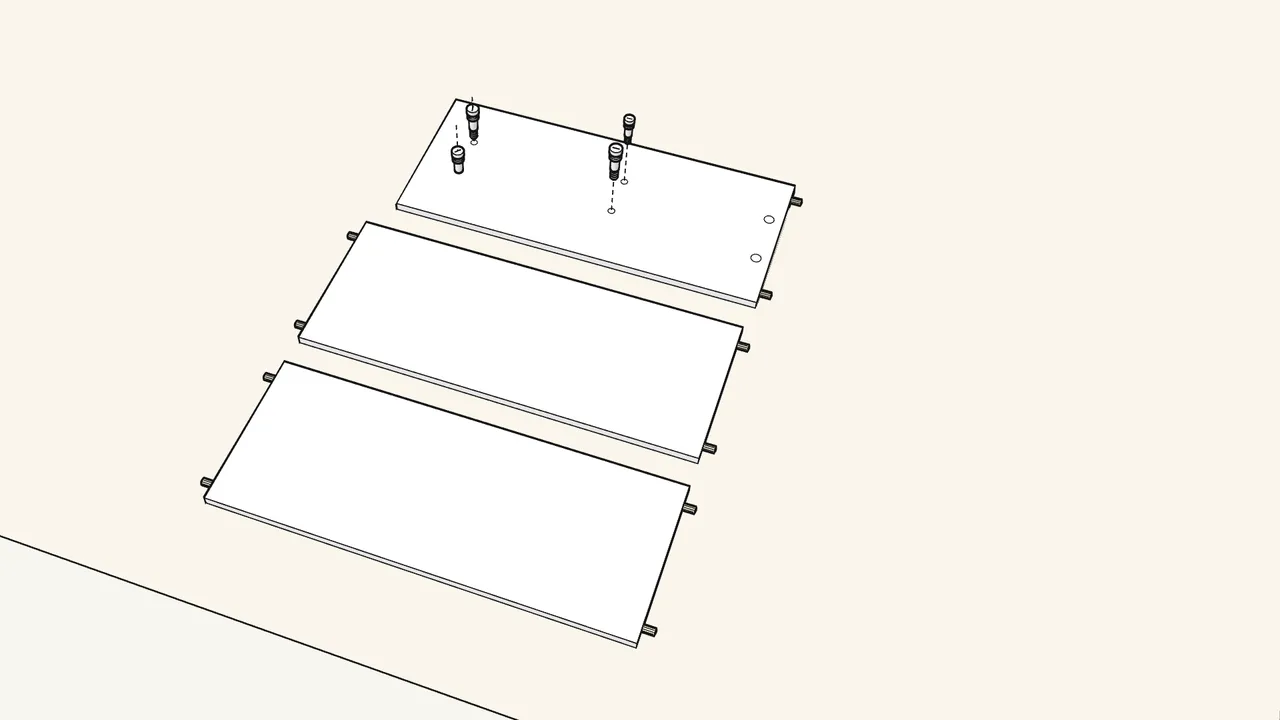
Step 12 · manual step 16–17
Cart: push 10 dowels into a side and both shelves.
Then screw 5 cam bolts (118331) into that side’s inner face.
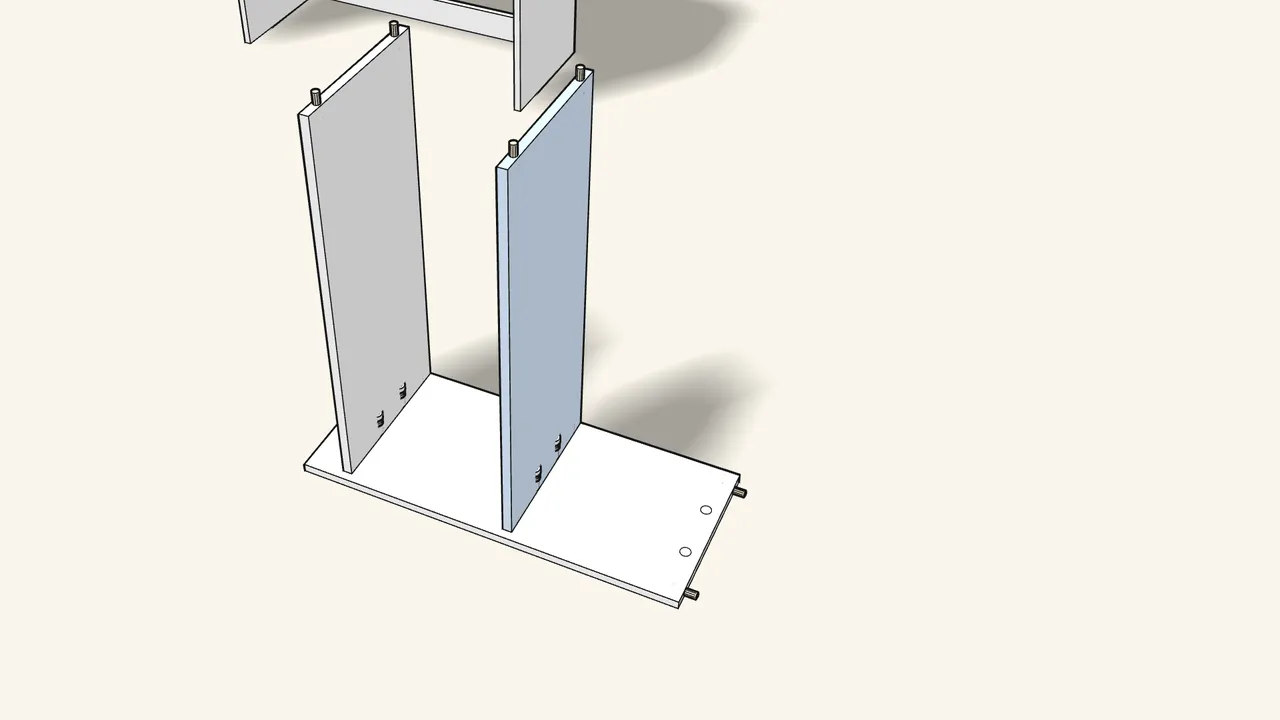
Step 13 · manual step 18
Stand both shelves on the cart side.
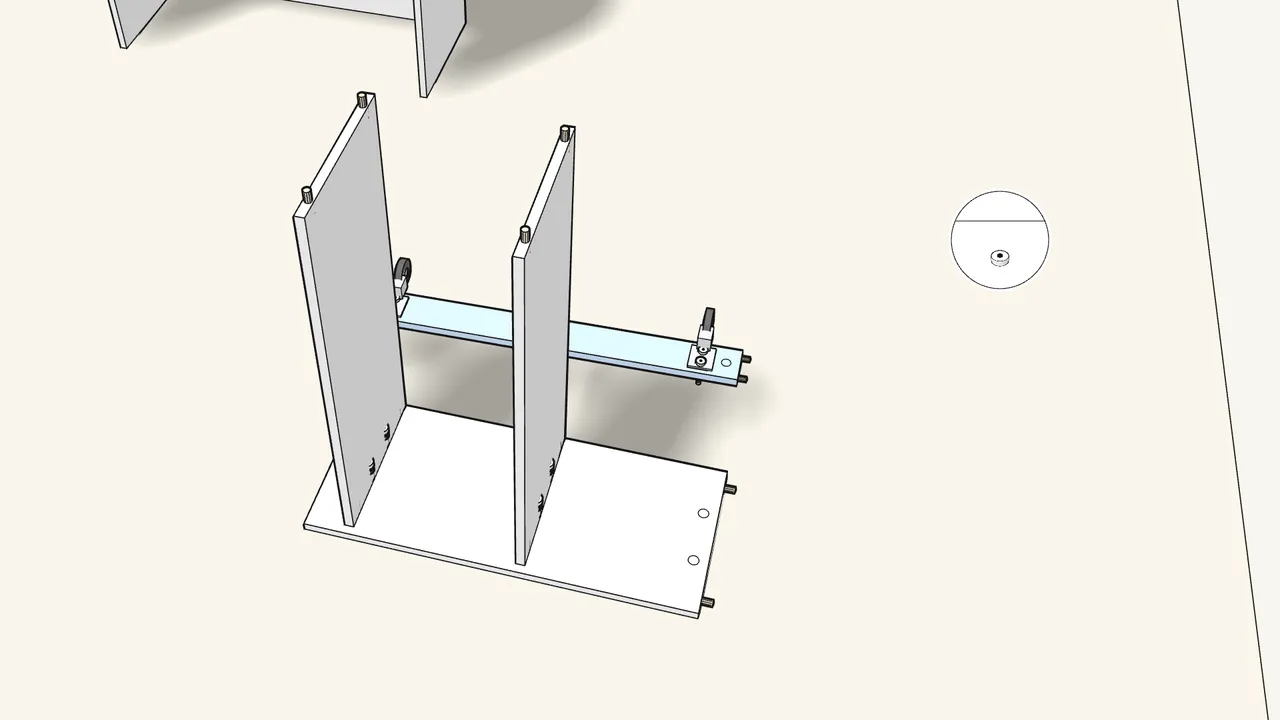
Step 14 · manual step 19–21
Fit 2 casters (10117892) to the bottom rail, then stand it on.
4 short dowels (101343) in the rail ends; 4 bolts (120925) with the Allen key.
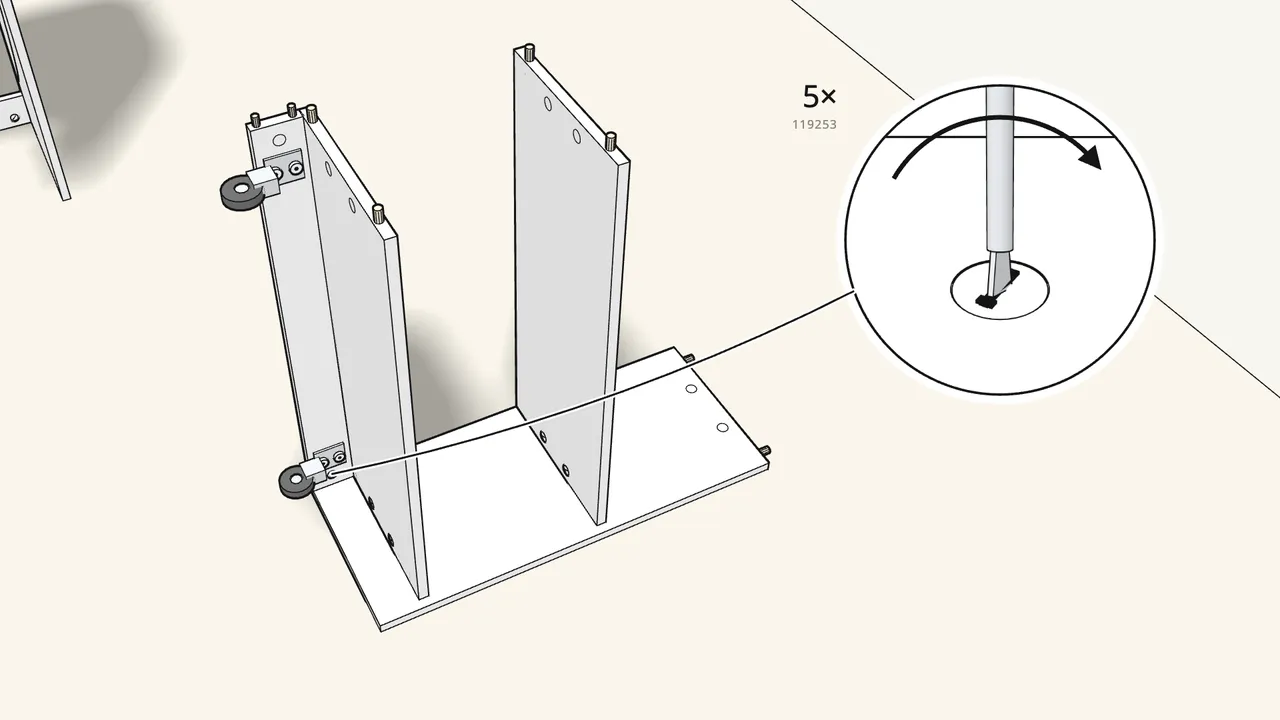
Step 15 · manual step 22
Insert 5 cam locks (119253) and turn them clockwise.
In both shelves and the rail, next to the side on the floor.
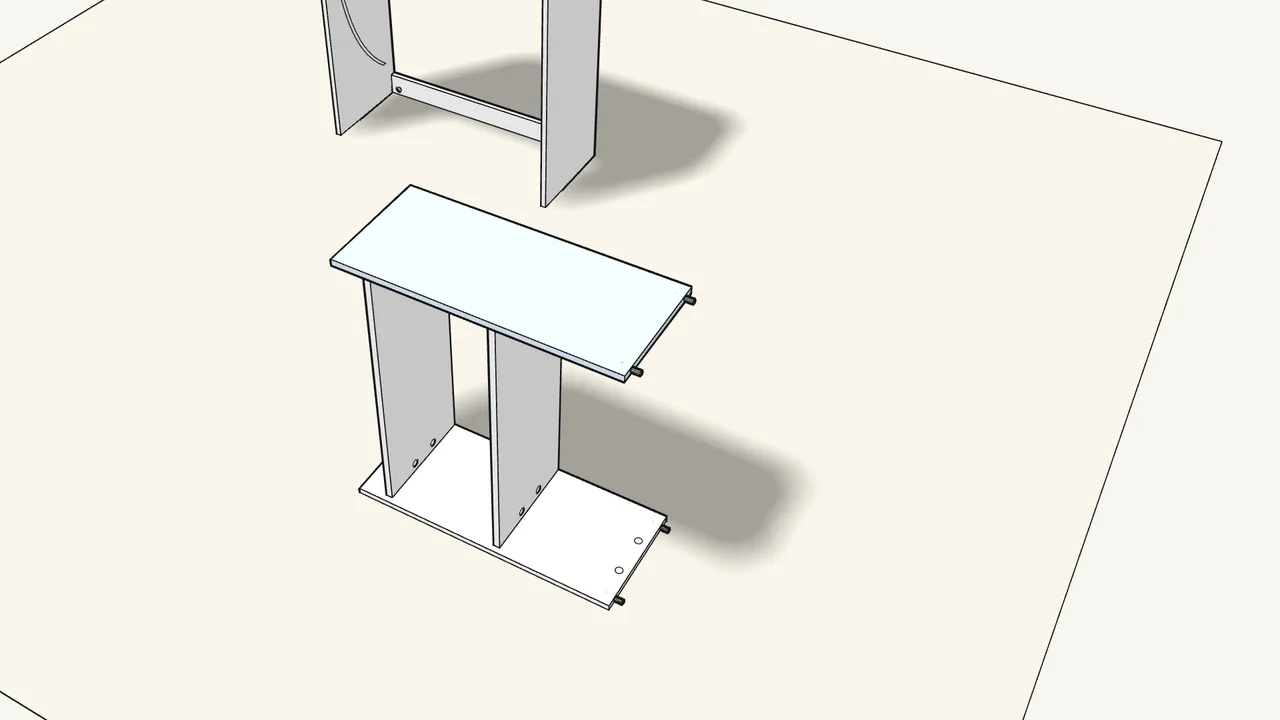
Step 16 · manual step 23–26
Prepare the second cart side and lay it on top.
2 dowels, 5 cam bolts, then lock it with 5 cam locks (119253).
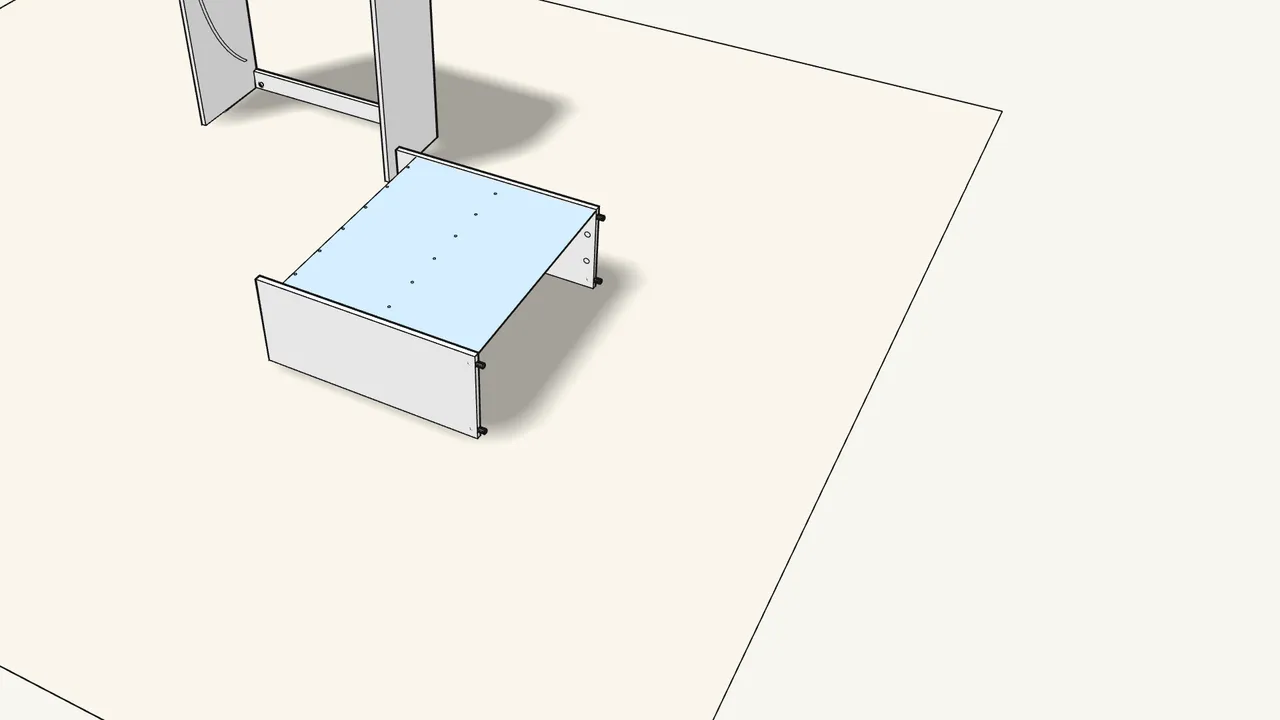
Step 17 · manual step 27
Lay the cart on its front and slide in the back panel.
Push it along the grooves until it stops at the bottom.
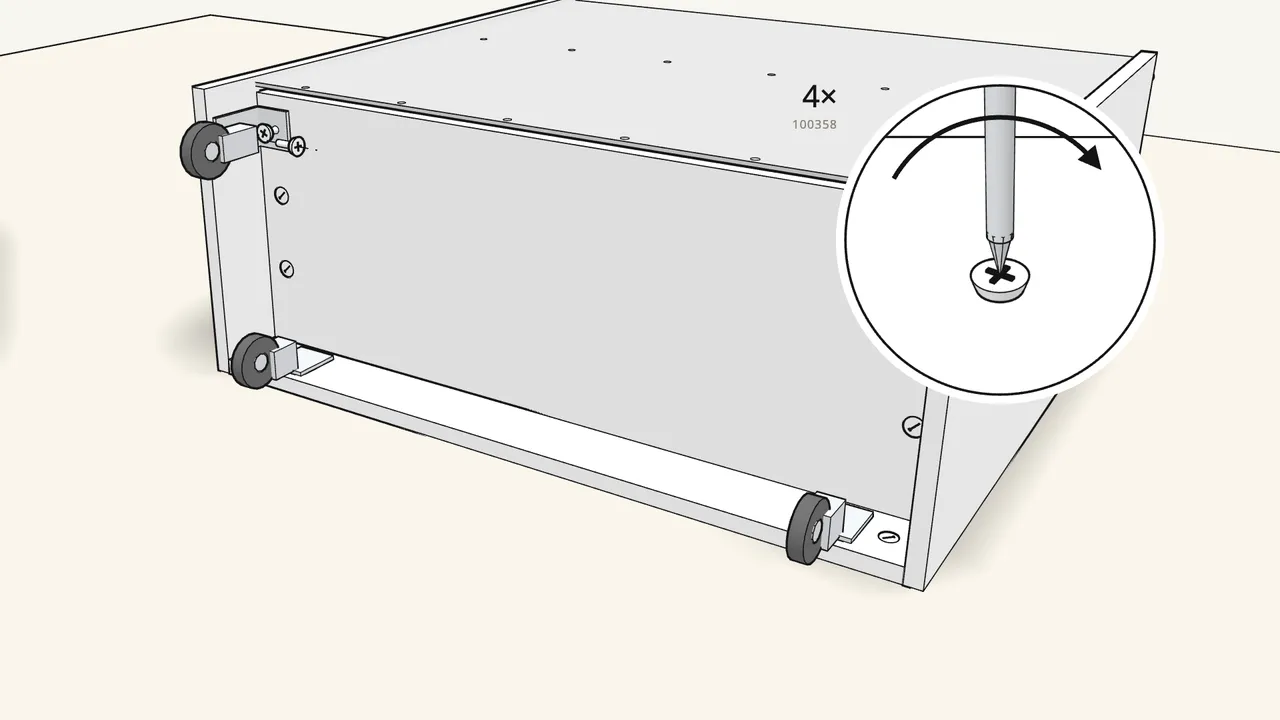
Step 18 · manual step 28
Screw on 2 casters (10118206) at the back of the cart bottom.
2 screws (100358) each.
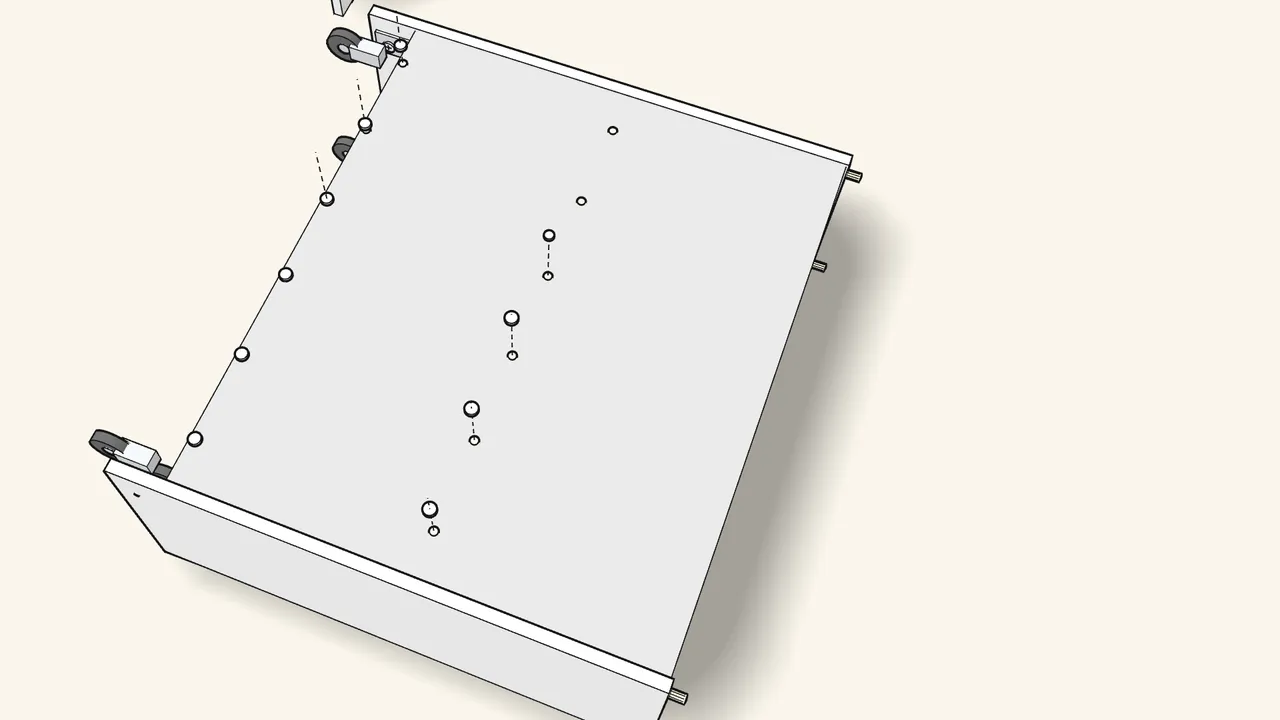
Step 19 · manual step 29
Push 12 plugs (151706) through the back panel.
Then press a pin (151705) into each plug to lock it.
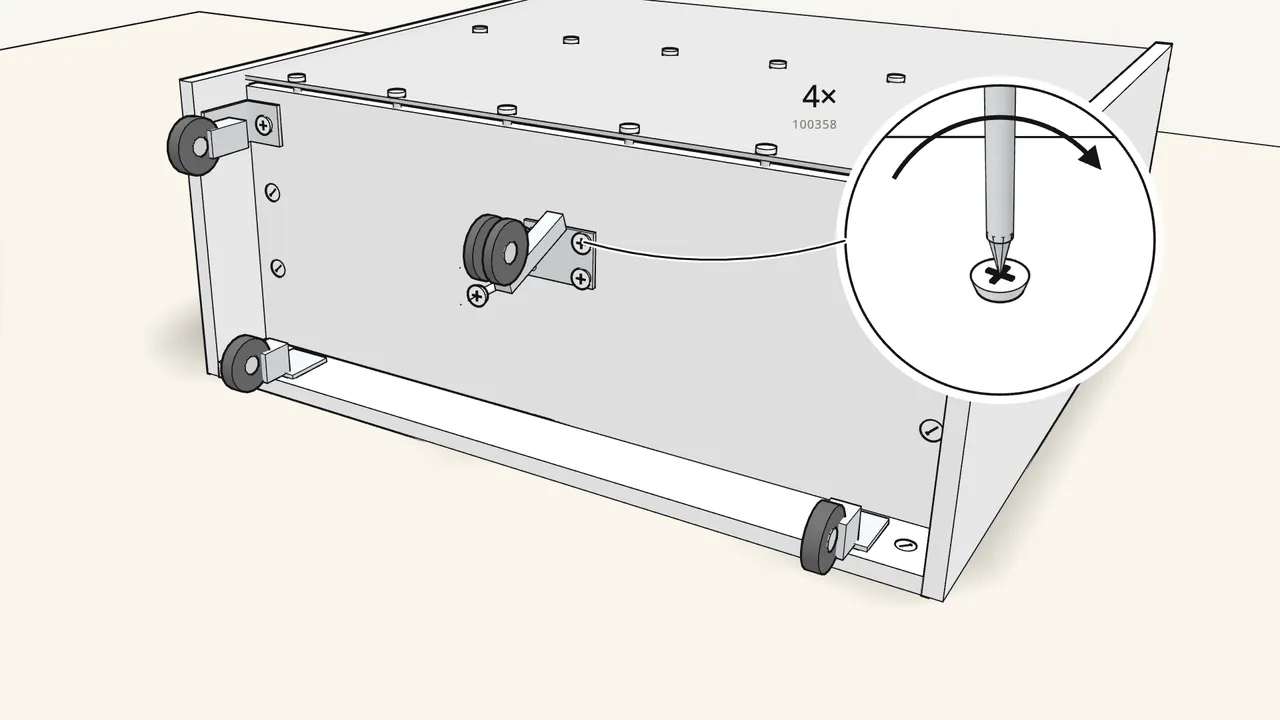
Step 20 · manual step 30
Screw the swing-arm caster (10121345) under the bottom shelf.
4 screws (100358).
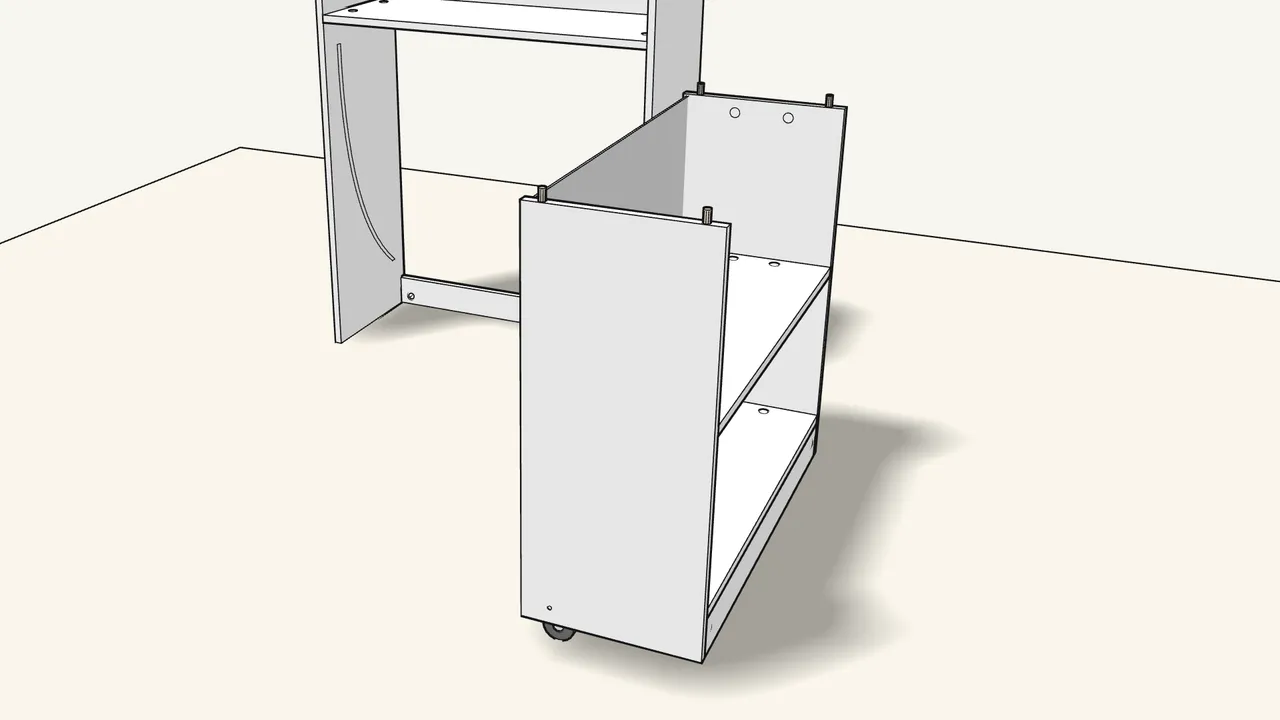
Step 21 · manual step 30
Stand the cart up on its casters.
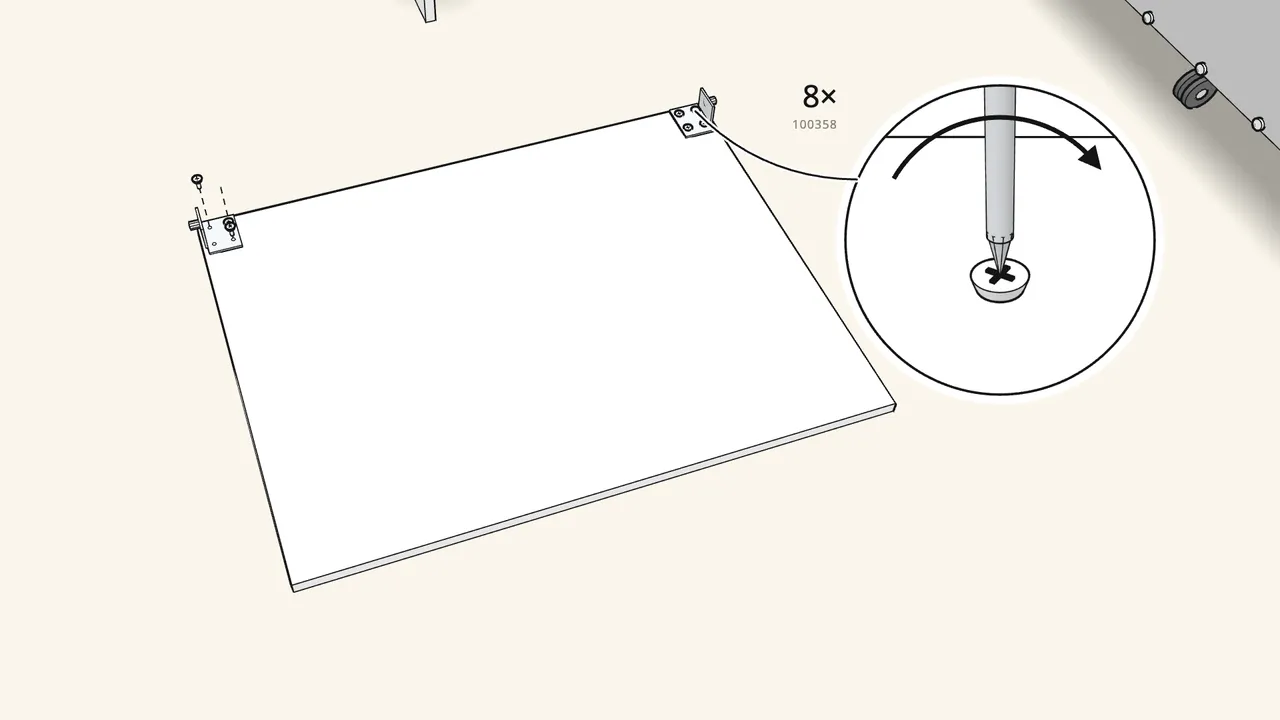
Step 22 · manual step 31
Table: screw 2 hooks (10121019) to the large leaf.
Lay it face-down. 4 screws (100358) per hook, at the back corners.
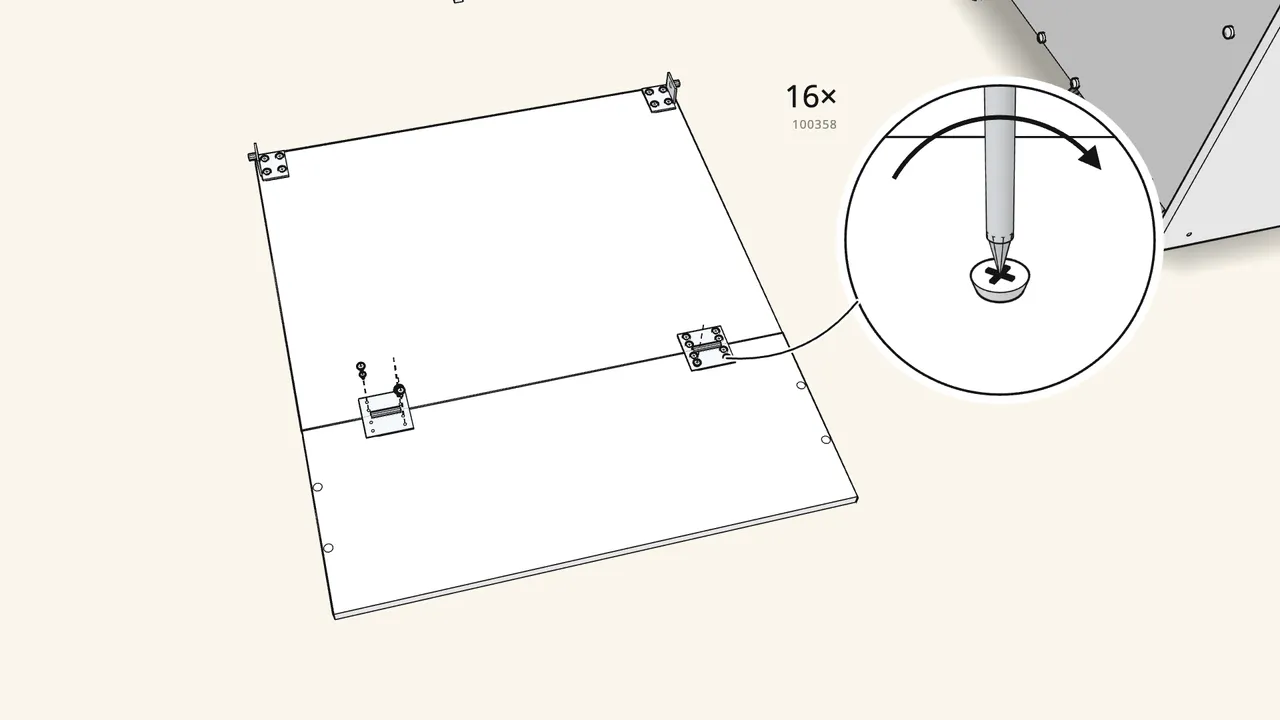
Step 23 · manual step 32–33
Push the narrow leaf against it and fit 2 hinges.
8 screws (100358) per hinge.
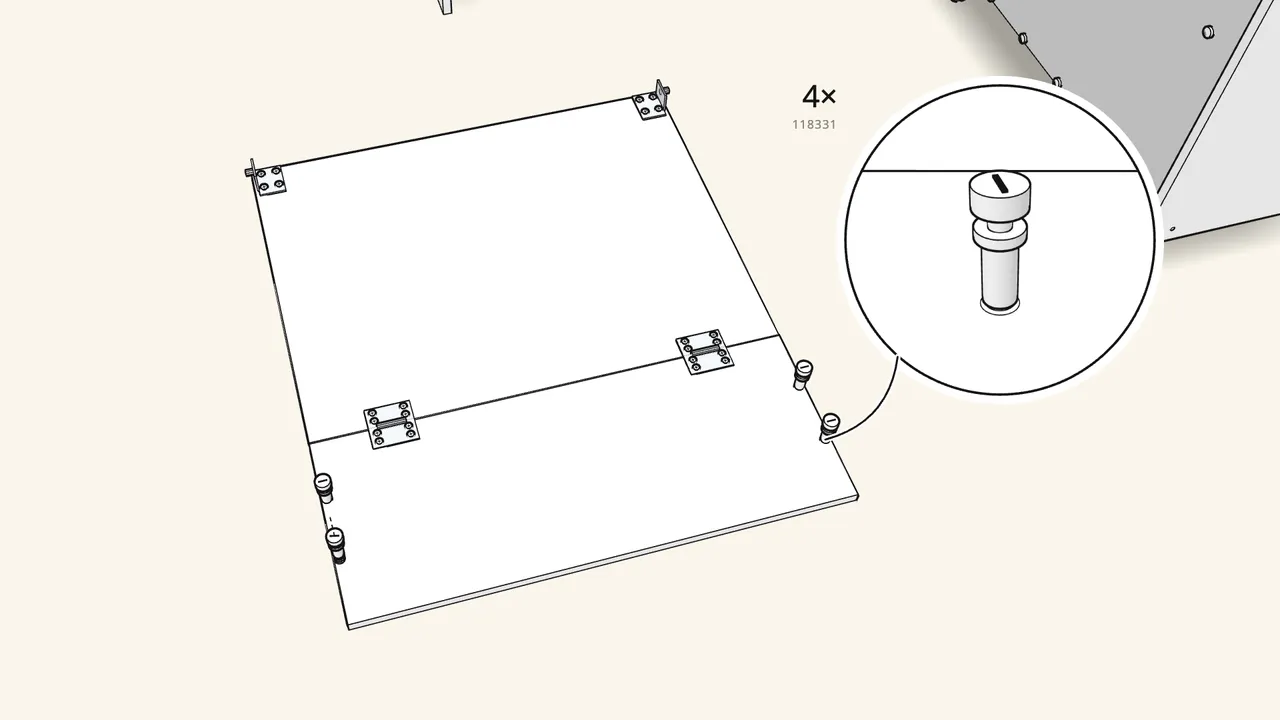
Step 24 · manual step 34
Screw 4 cam bolts (118331) into the narrow leaf.
Two near each end.
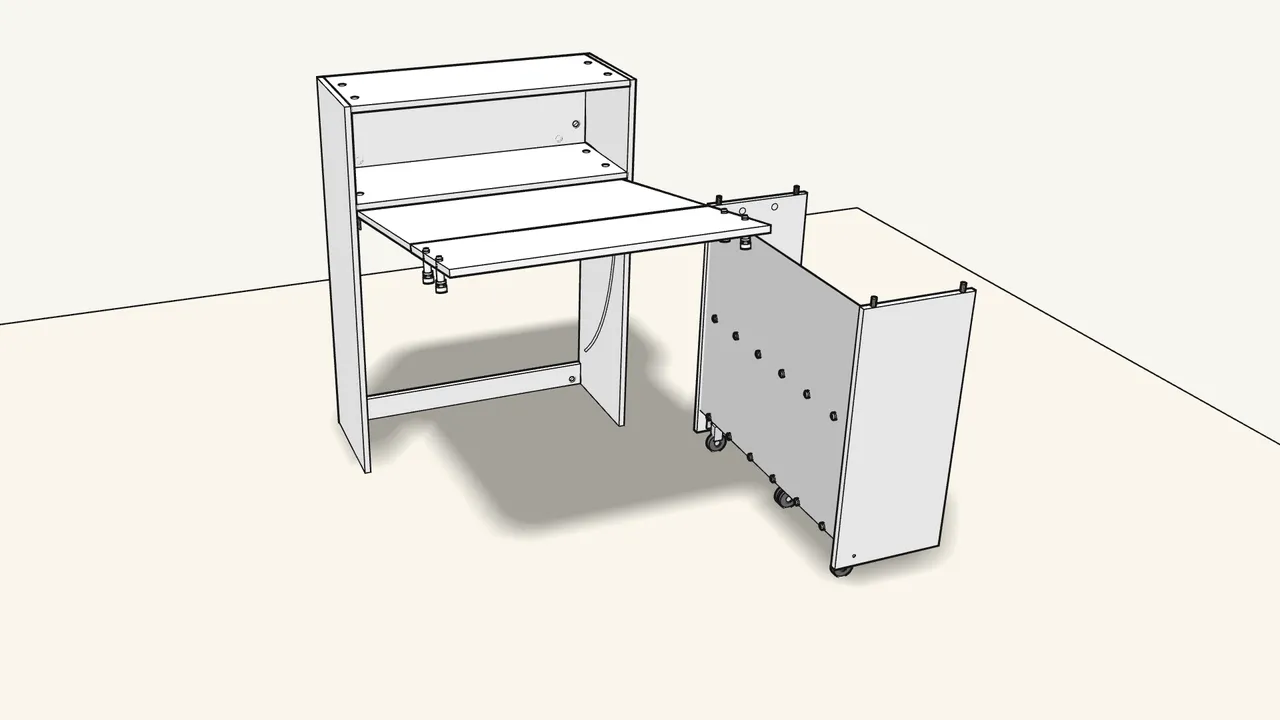
Step 25 · manual step 35
Turn the table over and hook it into the grooves.
The hooks at the back corners drop into the curved grooves in the sides.
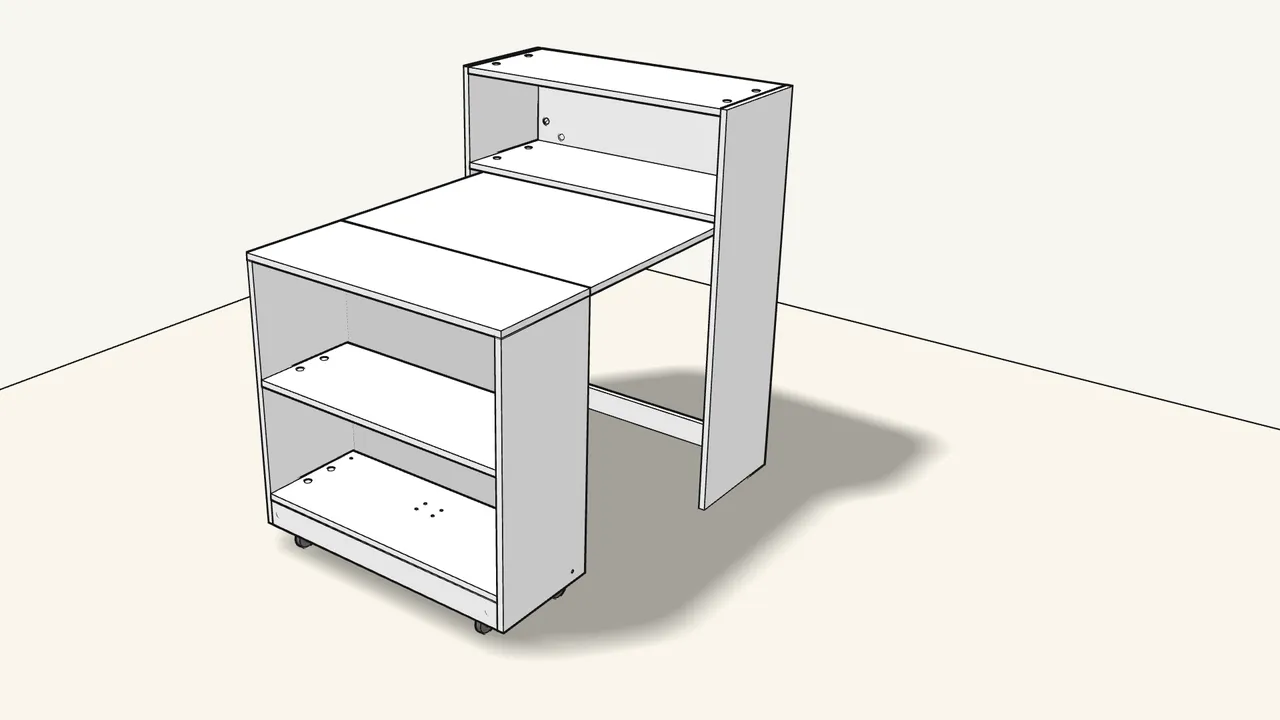
Step 26 · manual step 36
Roll the cart in under the table and lower the table onto it.
The cam bolts and dowels go into the holes on top of the cart sides.
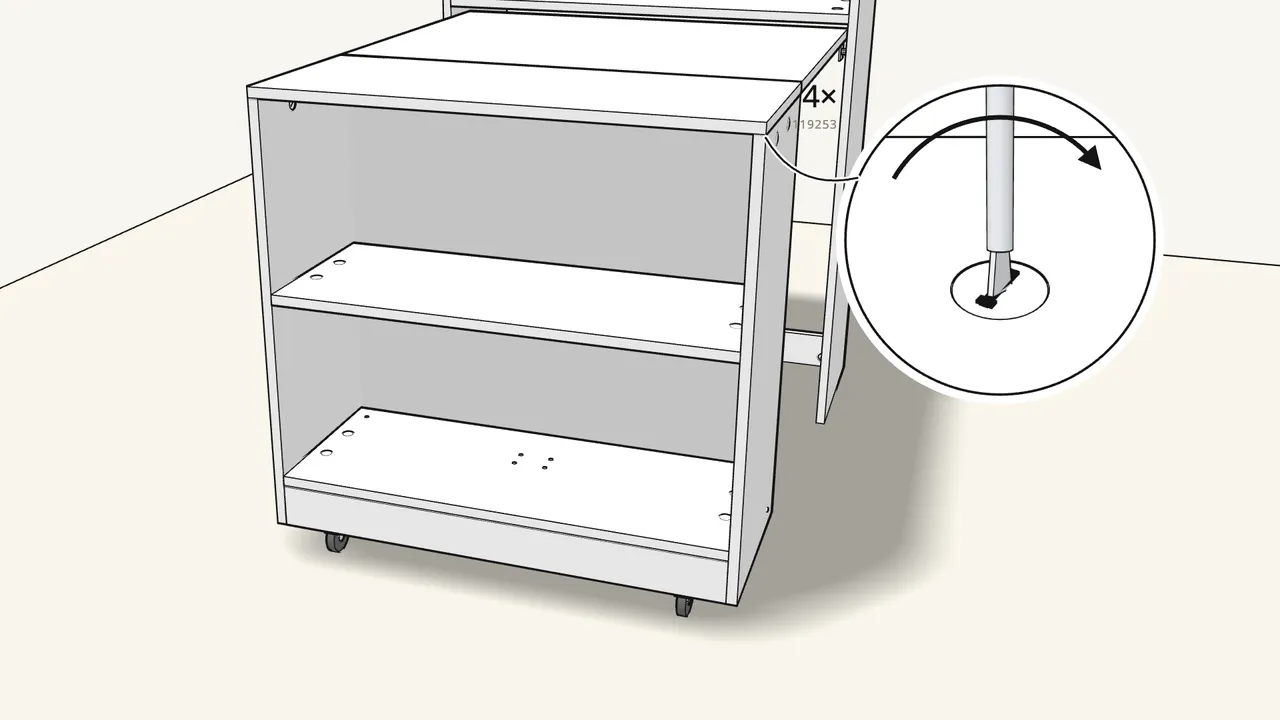
Step 27 · manual step 37
Insert 4 cam locks (119253) and turn them clockwise.
Inside the cart sides, just under the table.
Tips & safety
- Always fix the bookcase to the wall. Tip-over can cause serious or fatal crushing injuries. Wall screws and plugs are not included — use ones that suit your wall.
- To fold the table away, lift it at the bookcase end and push the cart in. To open it again, pull the cart out by the table — the manual’s last two pages show both moves.
Official instructions
This guide follows IKEA’s official assembly instructions (AA-2568863-4). Keep the printed manual to hand — if anything differs, the manual is right.