IKEA · Tables & Desks
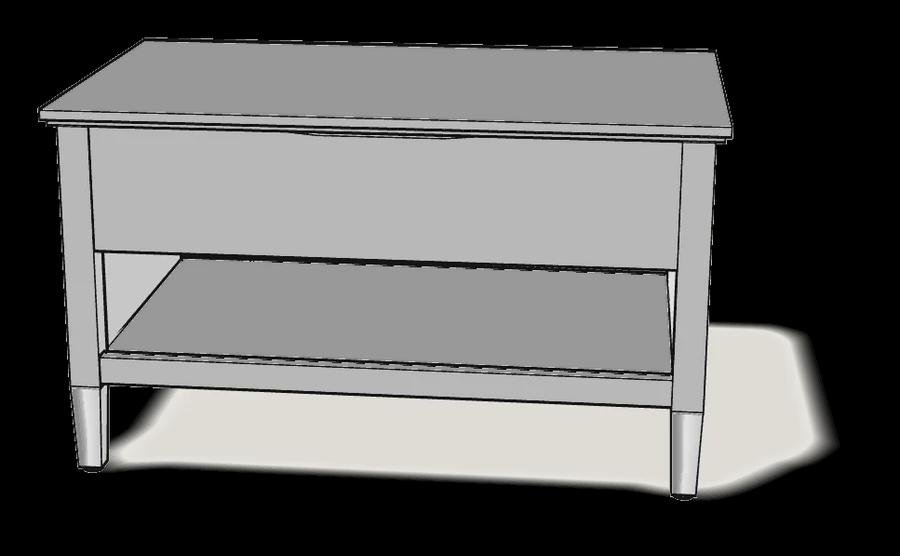
How to assemble IKEA VITTERYD Adjustable Coffee Table
Step-by-step IKEA VITTERYD Adjustable Coffee Table assembly: 26 illustrated steps, an animated video, the hardware list and the tools you need — following the official instructions (AA-2407469-4).
- 26 illustrated steps
- 36 steps in the manual
- 3:27 video
- 97×60×55 cm
What you need
Tools
- Flat-head screwdriver
- Phillips screwdriver
- Allen key (included)
Hardware in the box
| Part no. (as printed in the manual) | Qty |
|---|---|
| 118331 | 24× |
| 113434 | 24× |
| 101345 | 36× |
| 107625 | 1× |
| 10099387 | 4× |
| 105248 | 4× |
| 100842 | 4× |
| 10101114 | 15× |
| 10101111 | 15× |
| 10002547 | 4× |
Step-by-step assembly
Step 1
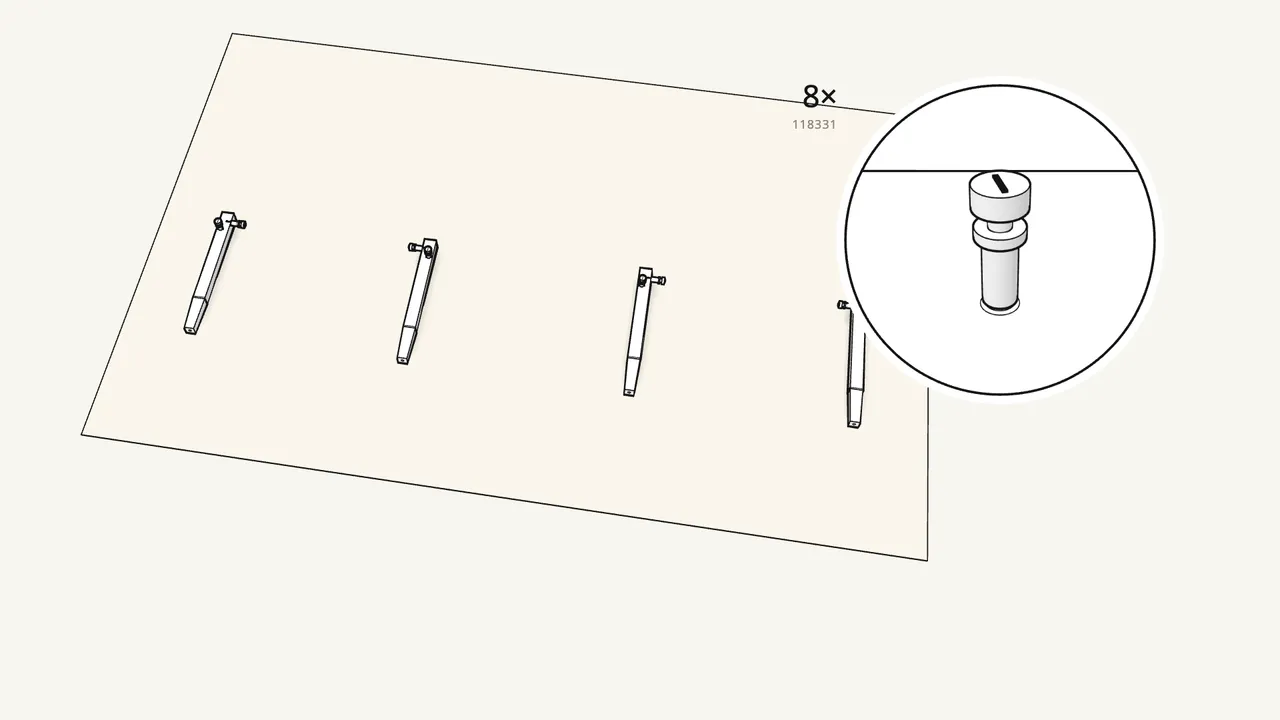
Screw 8 cam bolts (118331) into the tops of the 4 legs.
2 in each leg, by hand, all the way in.
Step 2
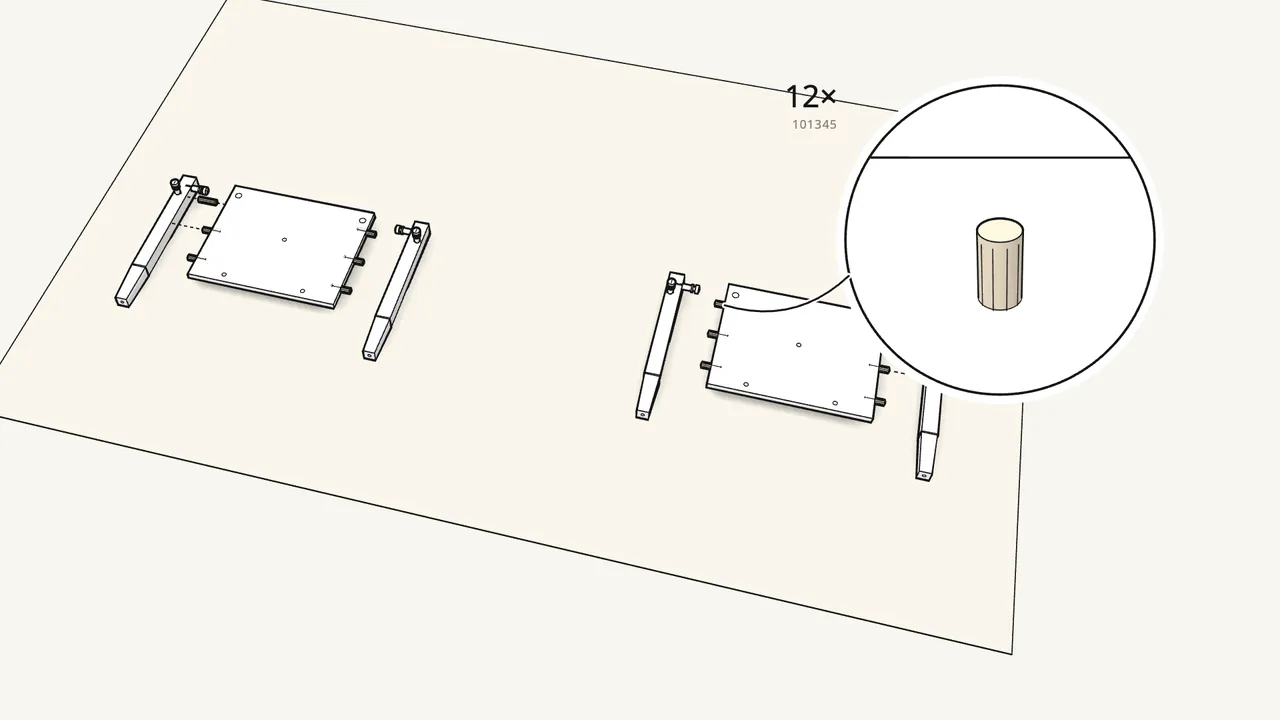
Push 12 dowels (101345) into the edges of the 2 end panels.
3 along each long edge.
Step 3
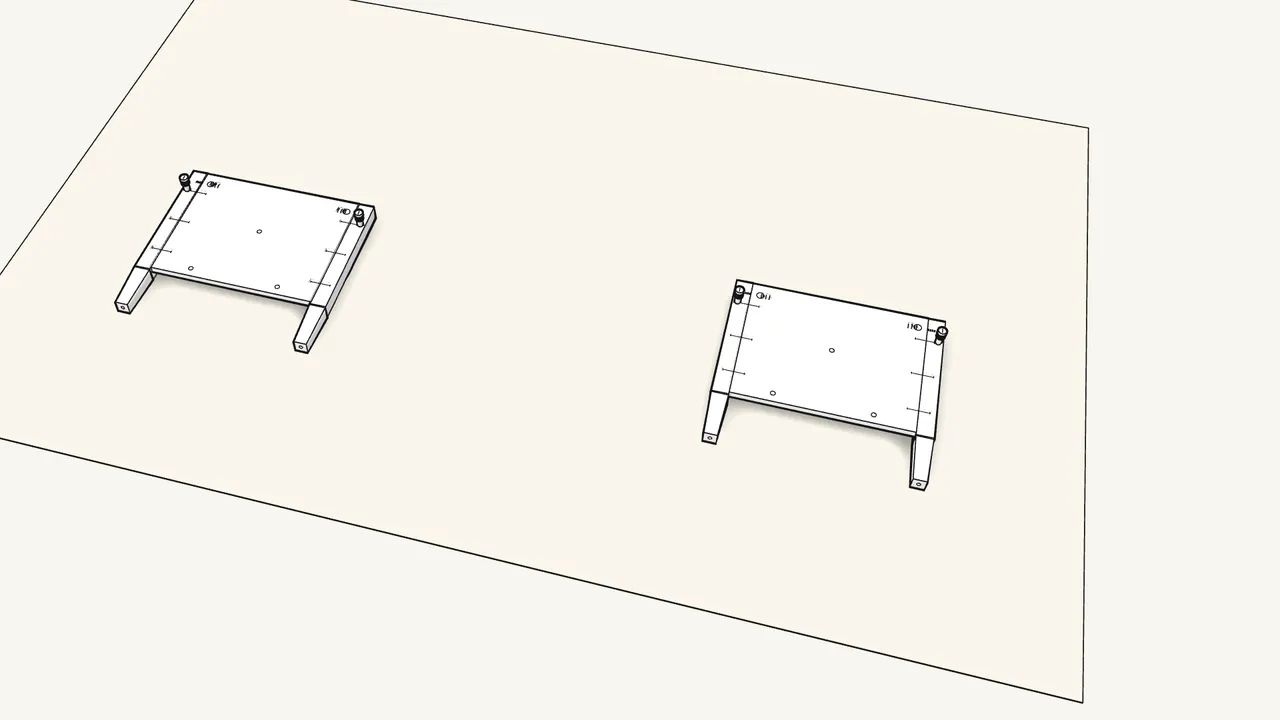
Push a leg onto each long edge of both end panels.
The cam bolts and dowels go into the panel edges.
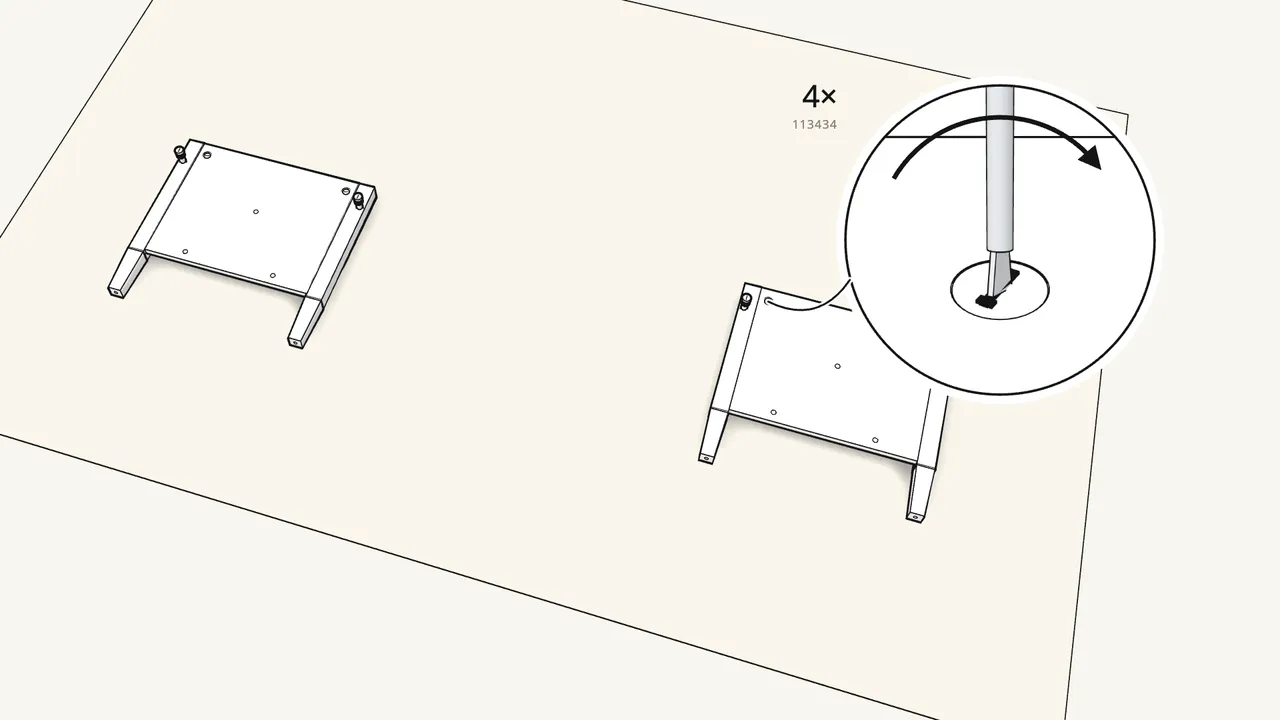
Step 4
Insert 4 cam locks (113434) and turn them clockwise.
One at the top corner of each leg.
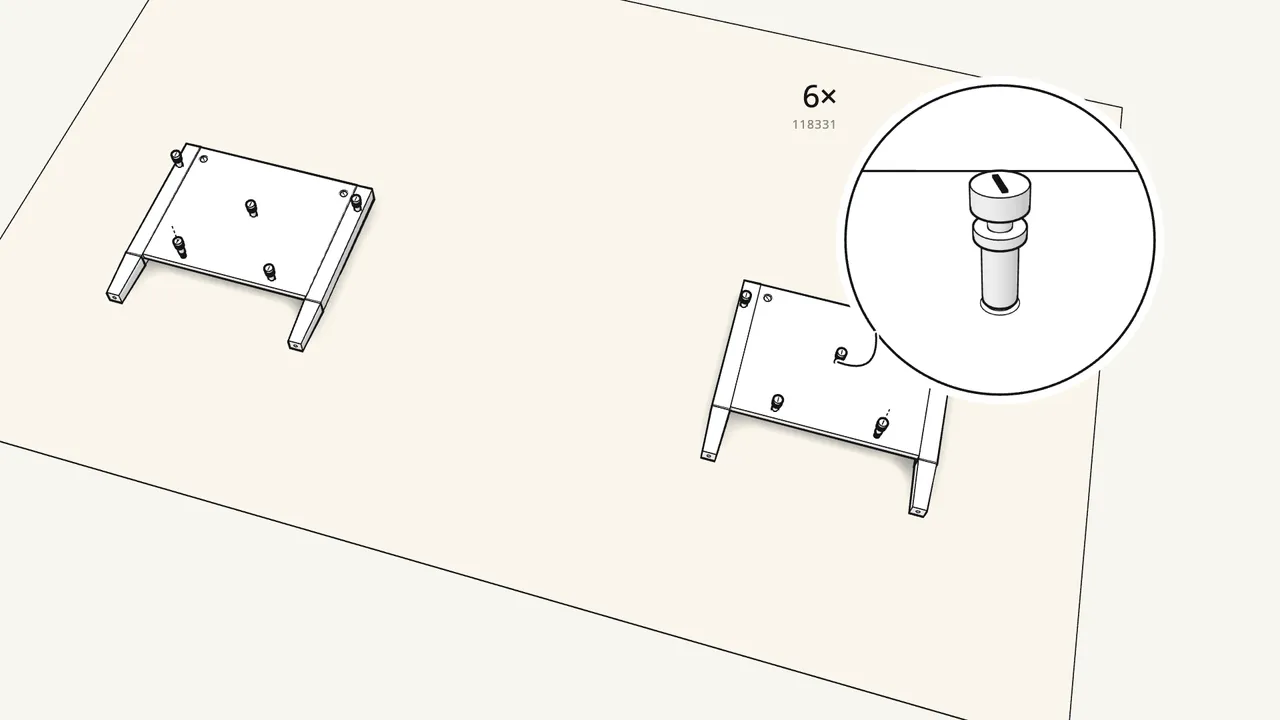
Step 5
Screw 6 cam bolts into the inside of the end panels.
3 in each panel, by hand.
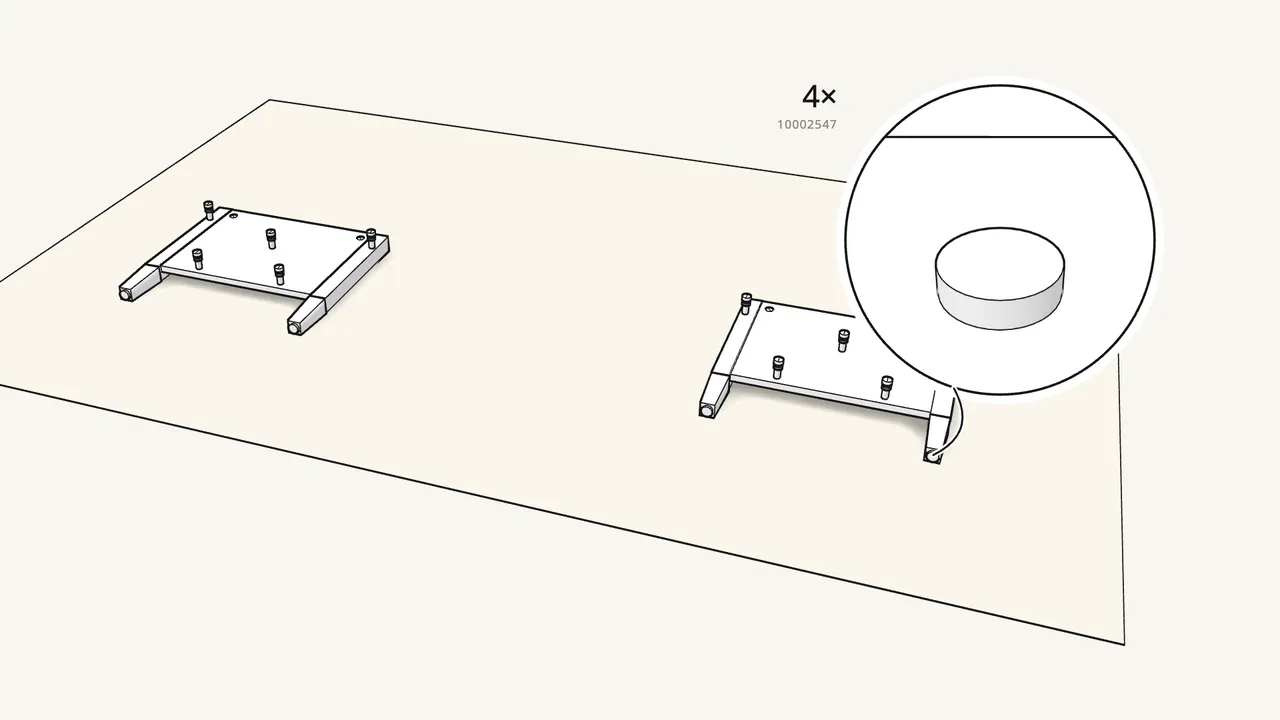
Step 6
Press 4 glides (10002547) into the ends of the legs.
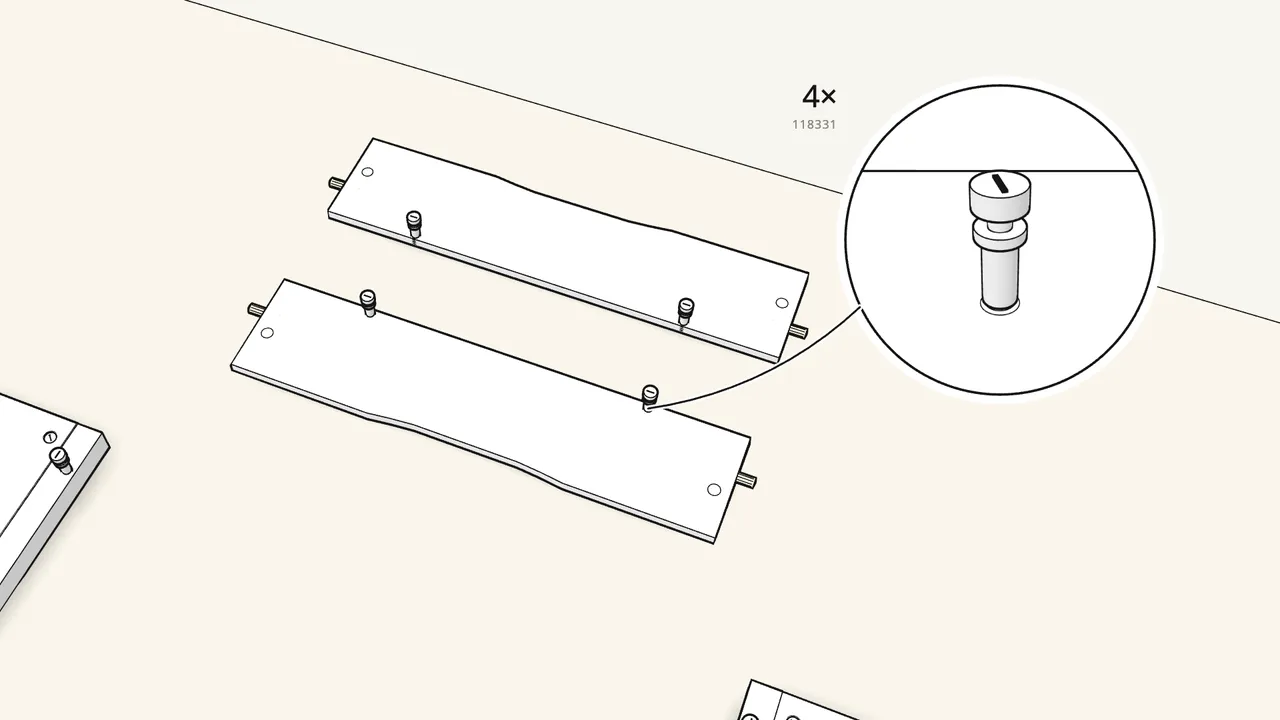
Step 7 · manual step 7–8
Fit 4 cam bolts and 4 dowels to the 2 long rails.
2 cam bolts in the inside face and a dowel in each end.
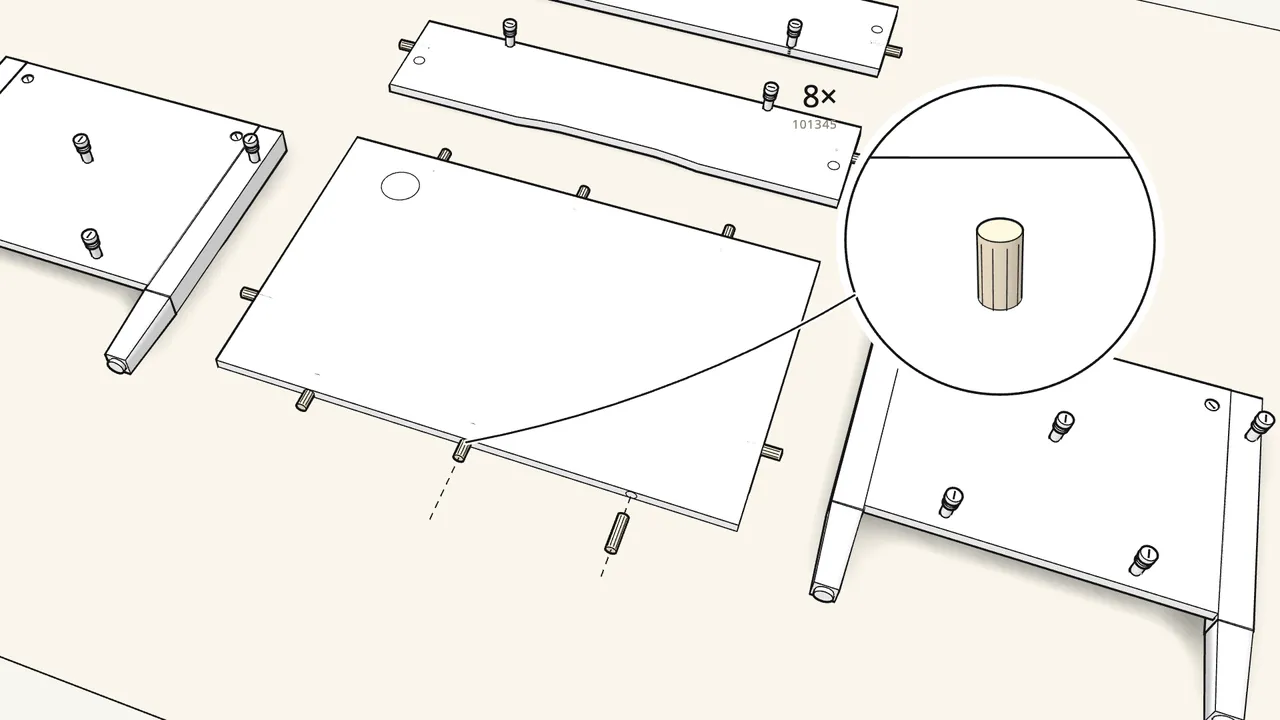
Step 8 · manual step 9
Push 8 dowels into the edges of the bottom panel.
The panel with the round cable hole.
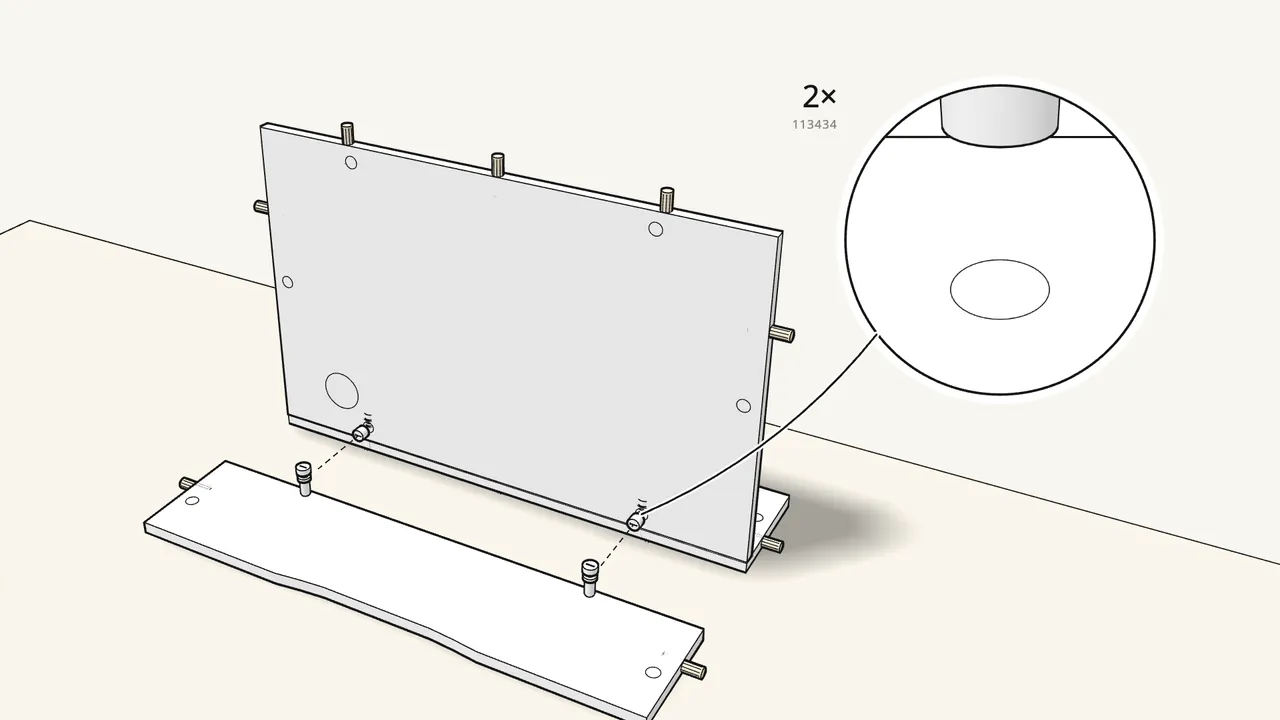
Step 9 · manual step 10–11
Stand the bottom panel on one rail; lock 2 cam locks.
Turn them clockwise with the flat screwdriver.
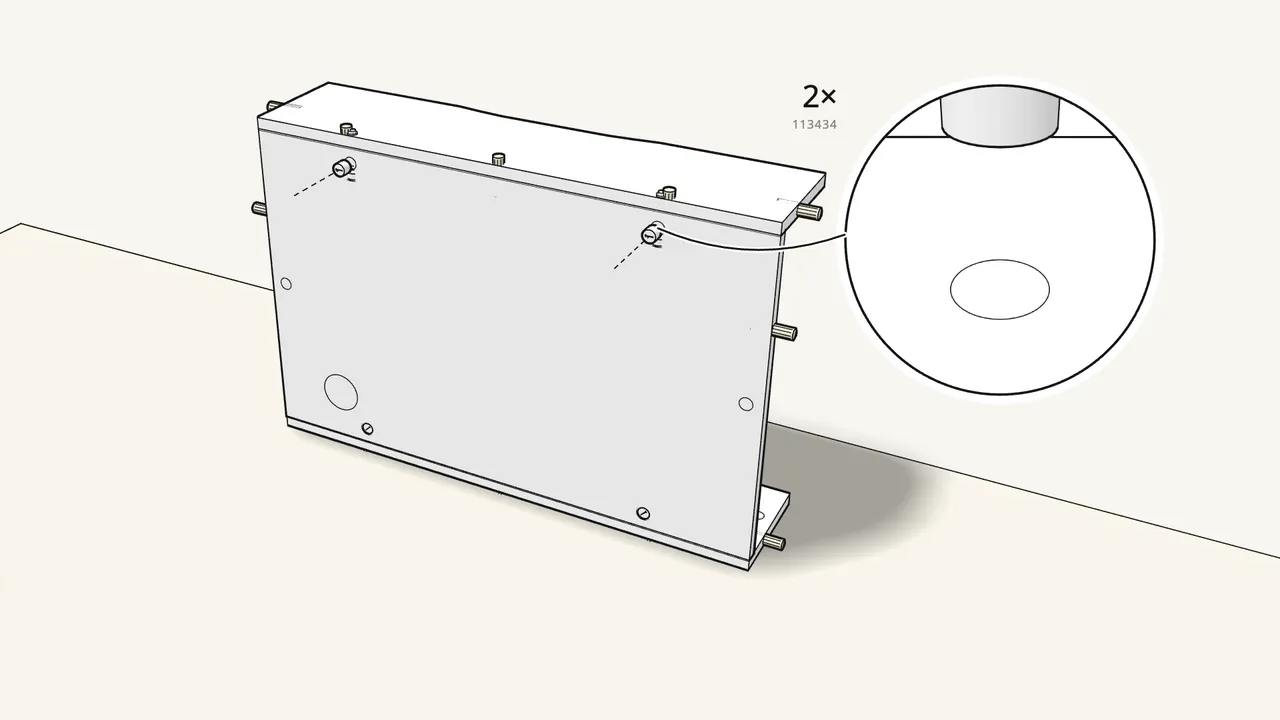
Step 10 · manual step 12–13
Fit the second rail on top; lock 2 more cam locks.
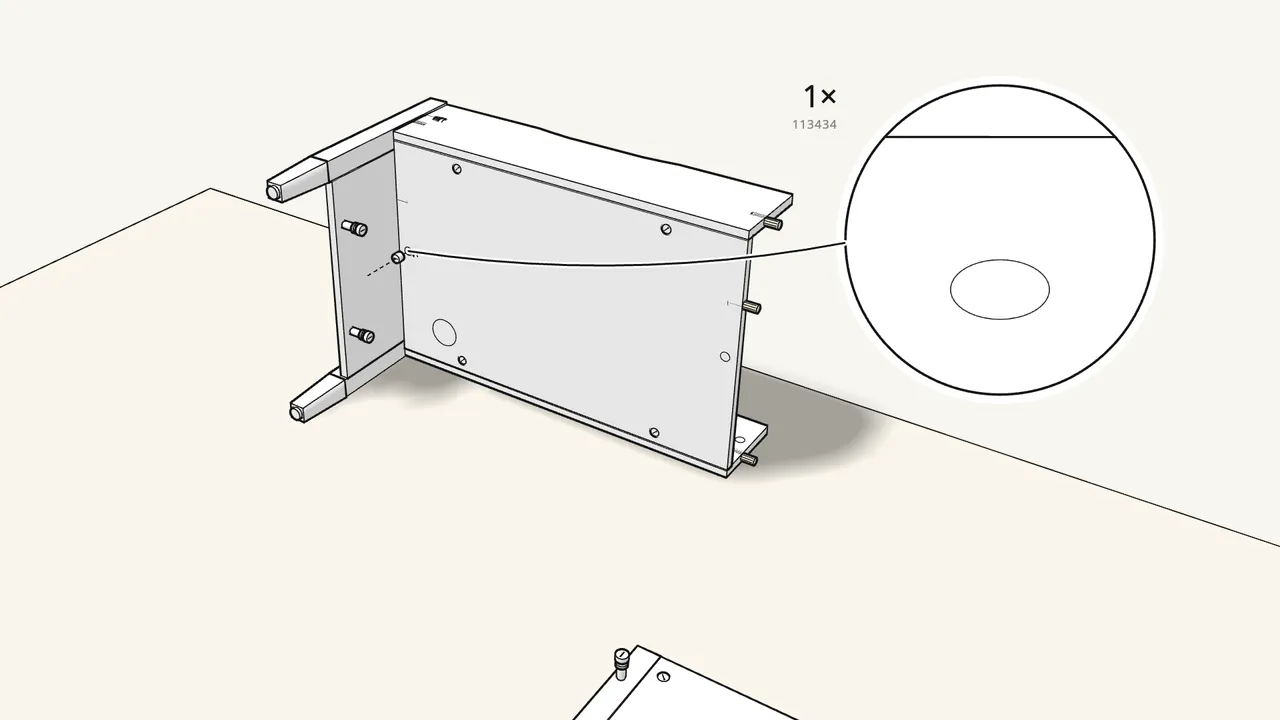
Step 11 · manual step 14–15
Push one end frame onto the box; lock 1 cam lock.
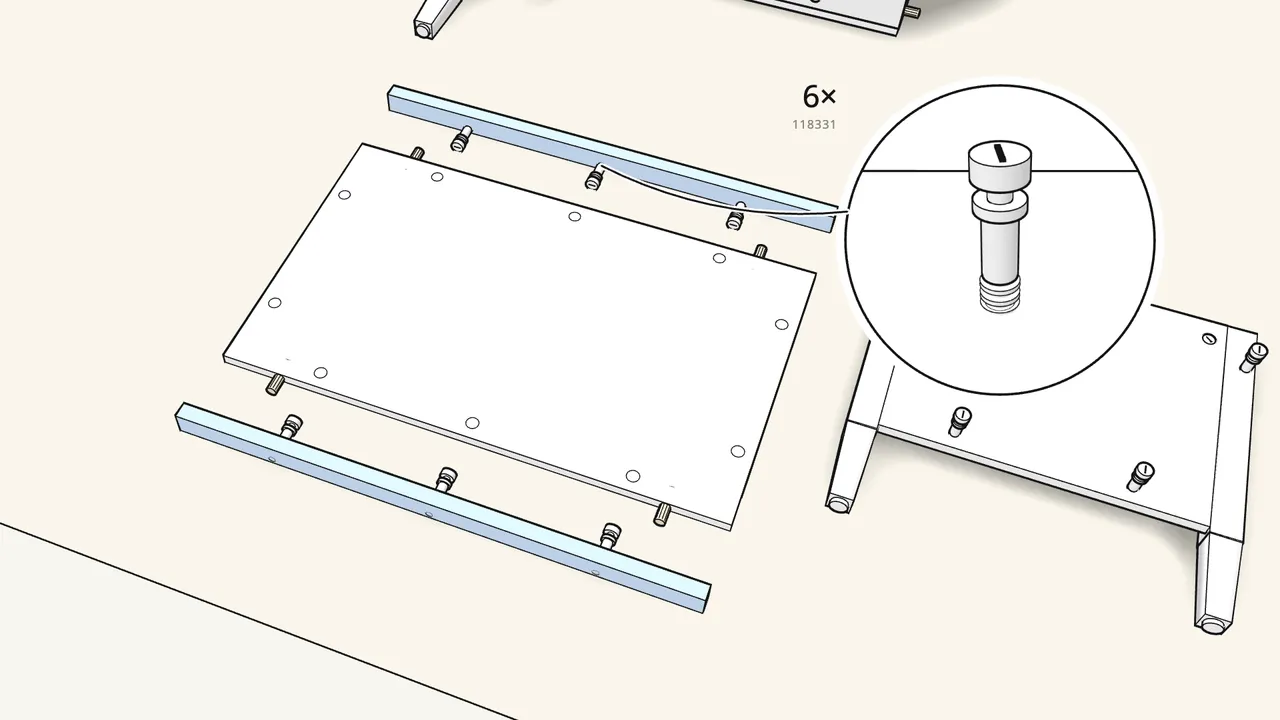
Step 12 · manual step 16–18
Fit the 2 rails onto the edges of the lower shelf.
4 dowels in the shelf, 3 cam bolts (118331) in each rail.
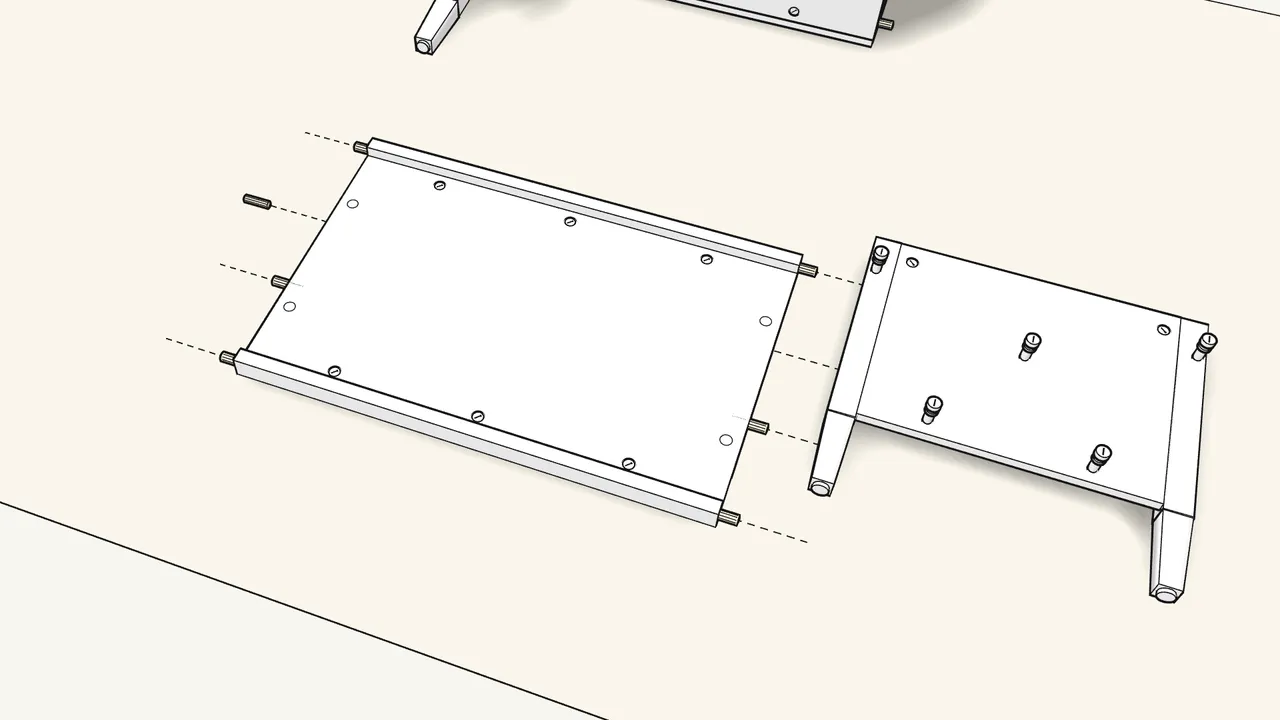
Step 13 · manual step 19–20
Lock 6 cam locks, then push 8 dowels into the shelf ends.
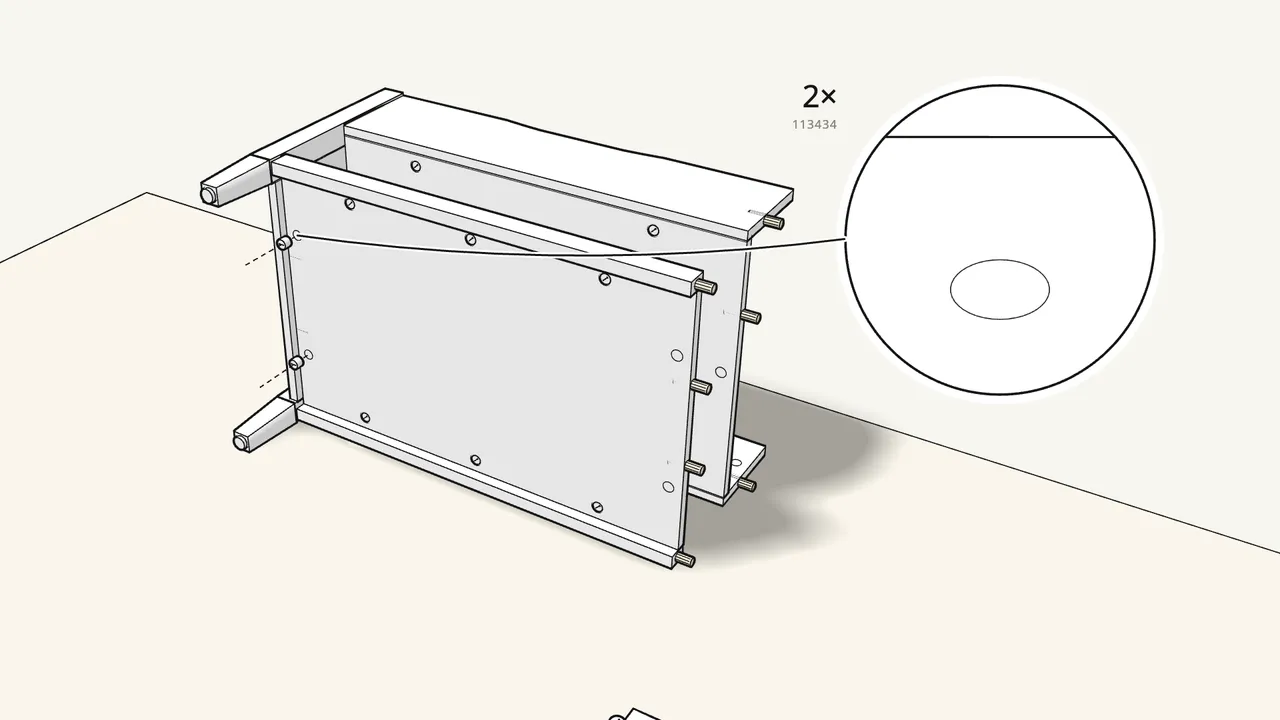
Step 14 · manual step 21–22
Slide the shelf onto the end frame; lock 2 cam locks.
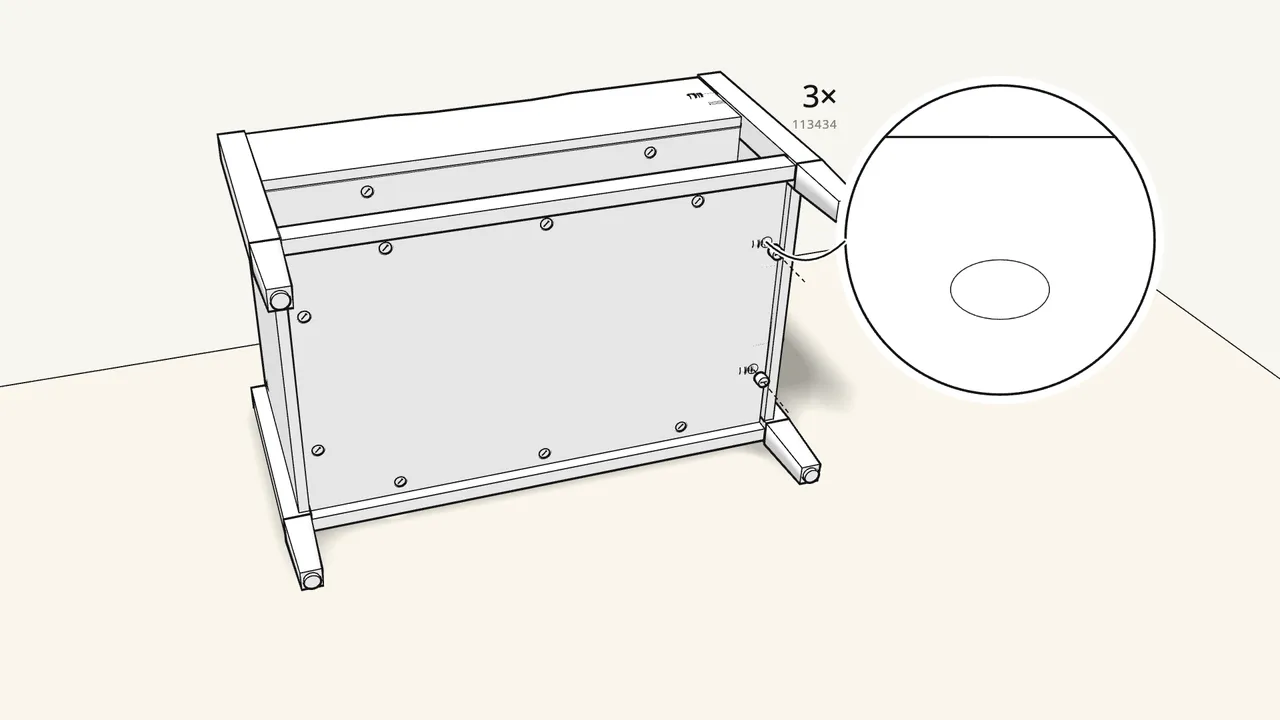
Step 15 · manual step 23–24
Push on the second end frame; lock 3 cam locks.
1 in the bottom panel, 2 in the shelf.
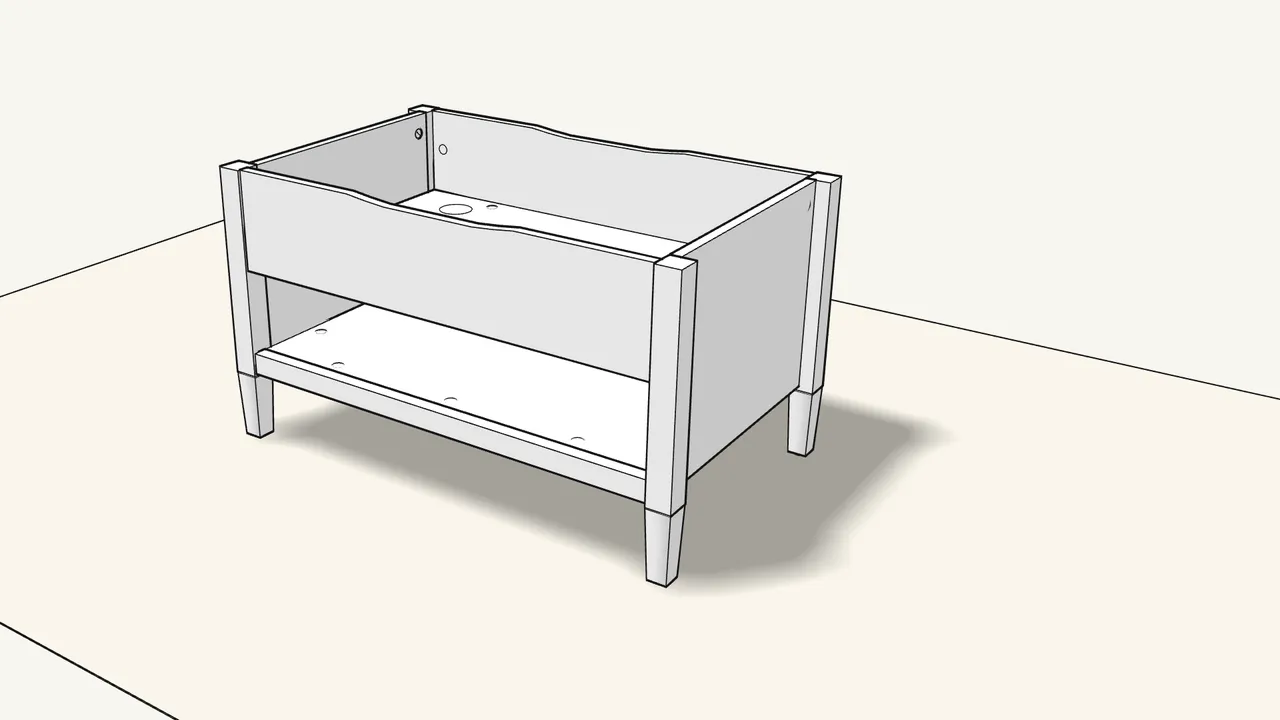
Step 16 · manual step 25
Stand the table upright.
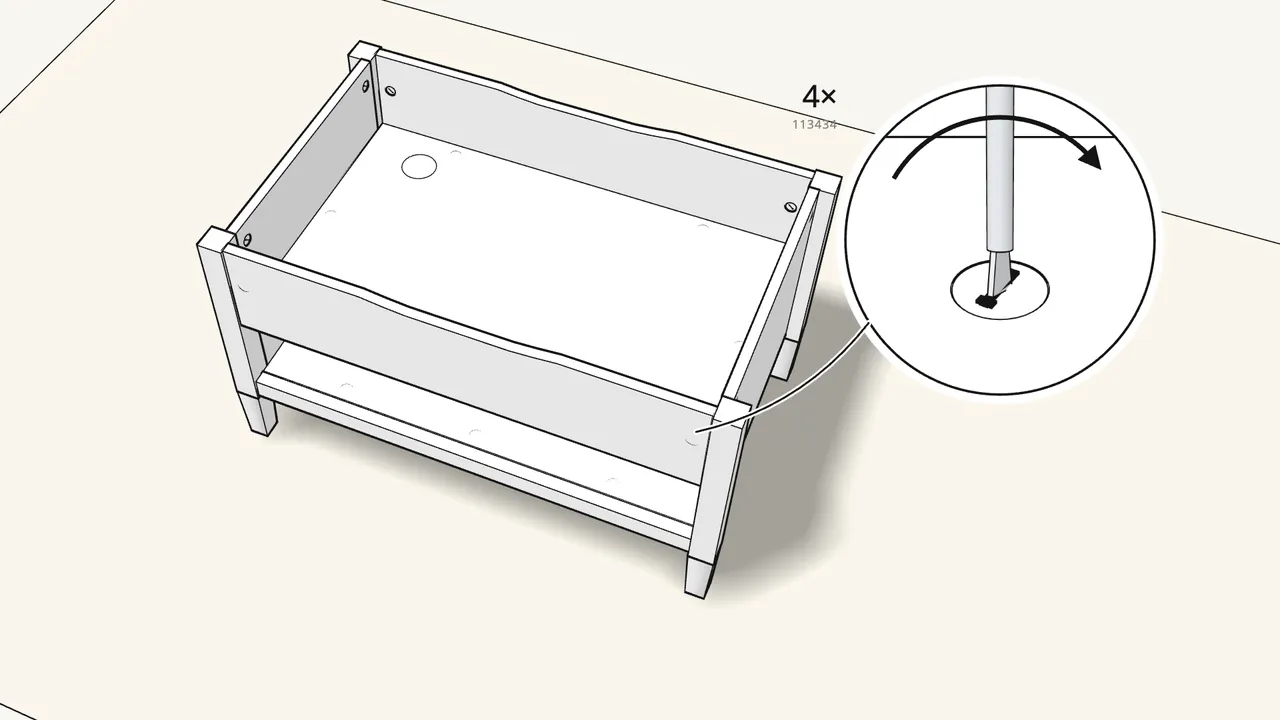
Step 17 · manual step 25
Insert 4 cam locks in the long rails and turn them clockwise.
One at each end, inside the box.
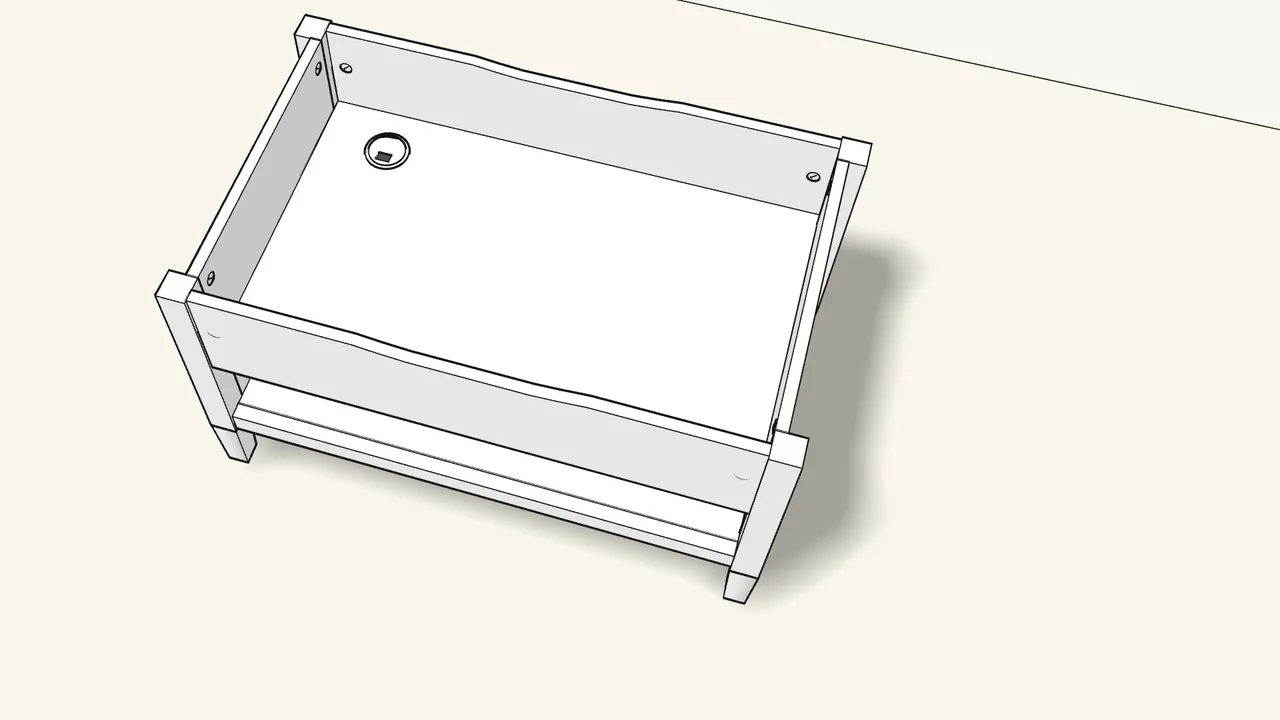
Step 18 · manual step 26
Press the cable grommet into the hole in the bottom.
Ring first, then the cover.
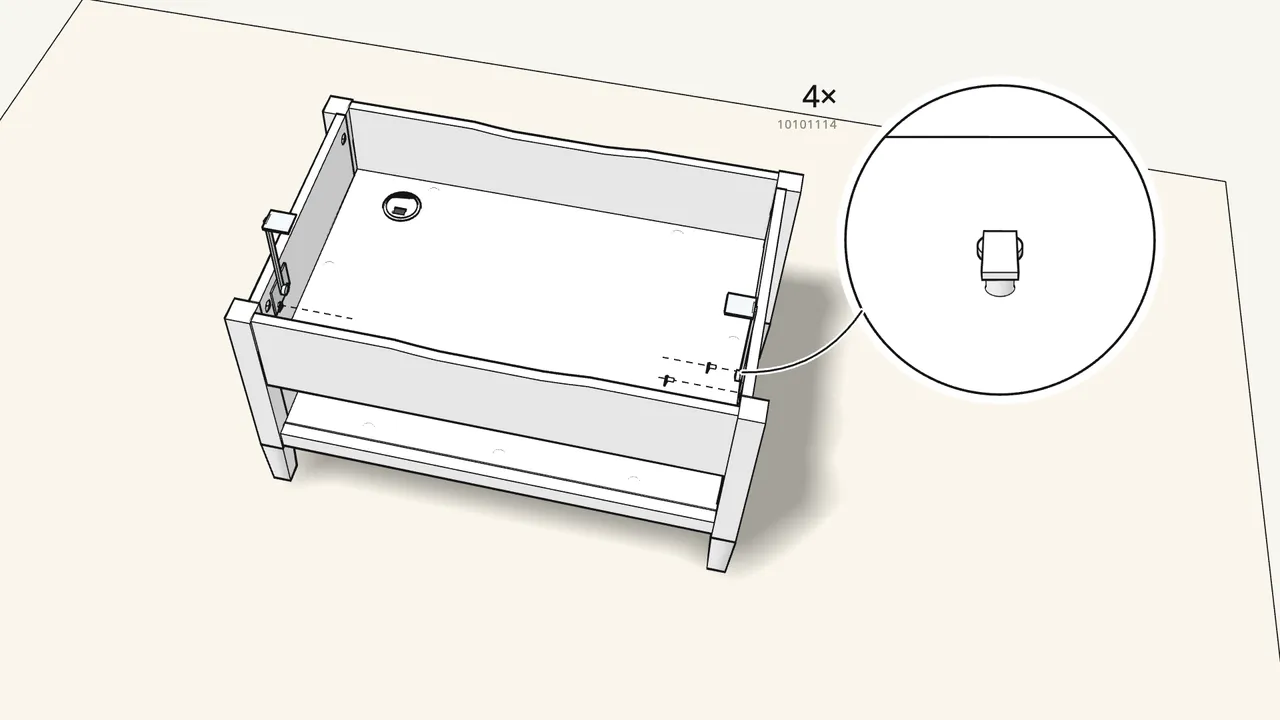
Step 19 · manual step 27–28
Fit the 2 smaller lift arms inside the end panels.
10103712 and 10103691 — each with 2 inserts (10101111) and 2 pins (10101114).
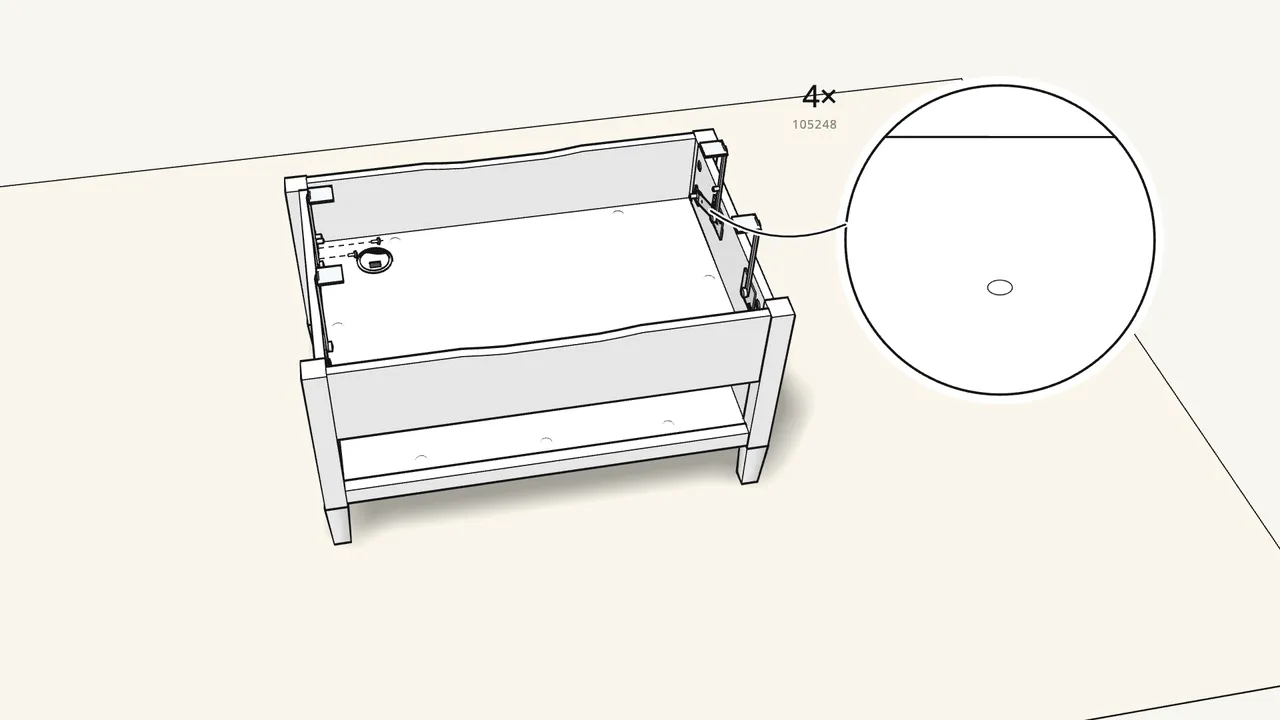
Step 20 · manual step 29–31
Fit the 2 larger lift arms the same way, plus 4 screws.
10103714 and 10103706 — 2 inserts, 2 pins and 2 screws (105248) each.
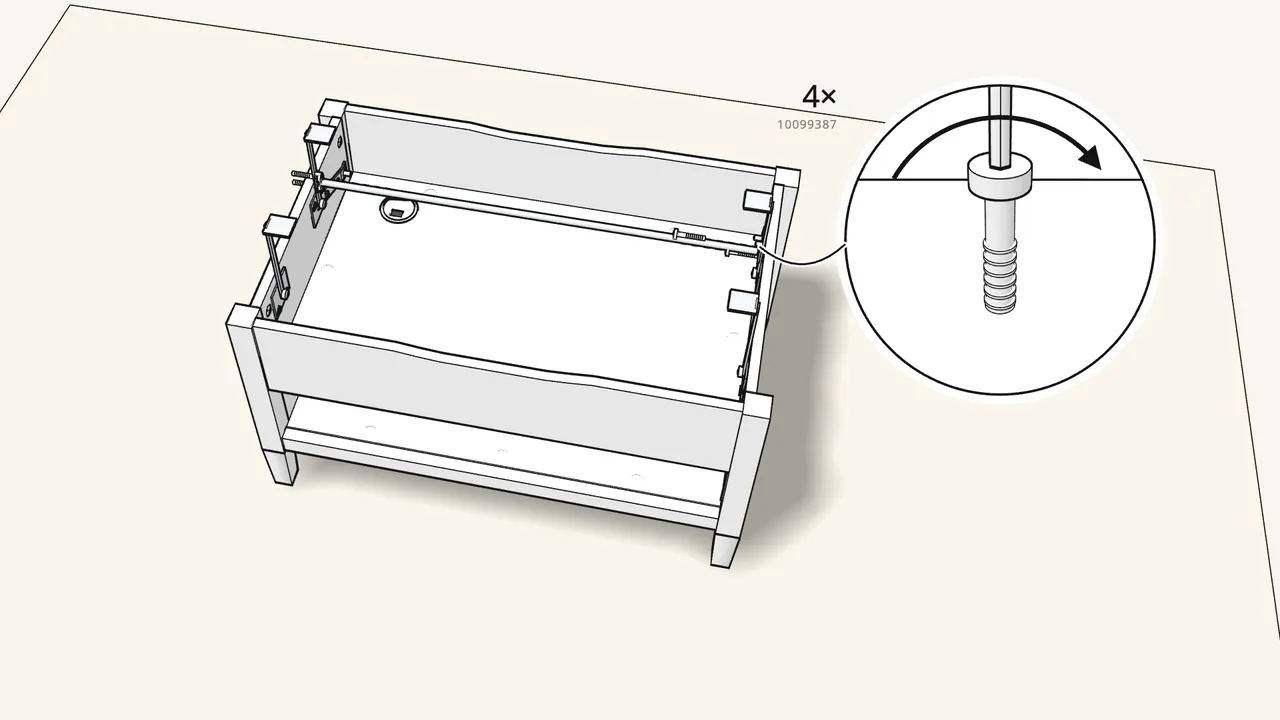
Step 21 · manual step 32
Fit the connecting rod with 4 bolts and washers.
Only hand-tight for now — no Allen key yet.
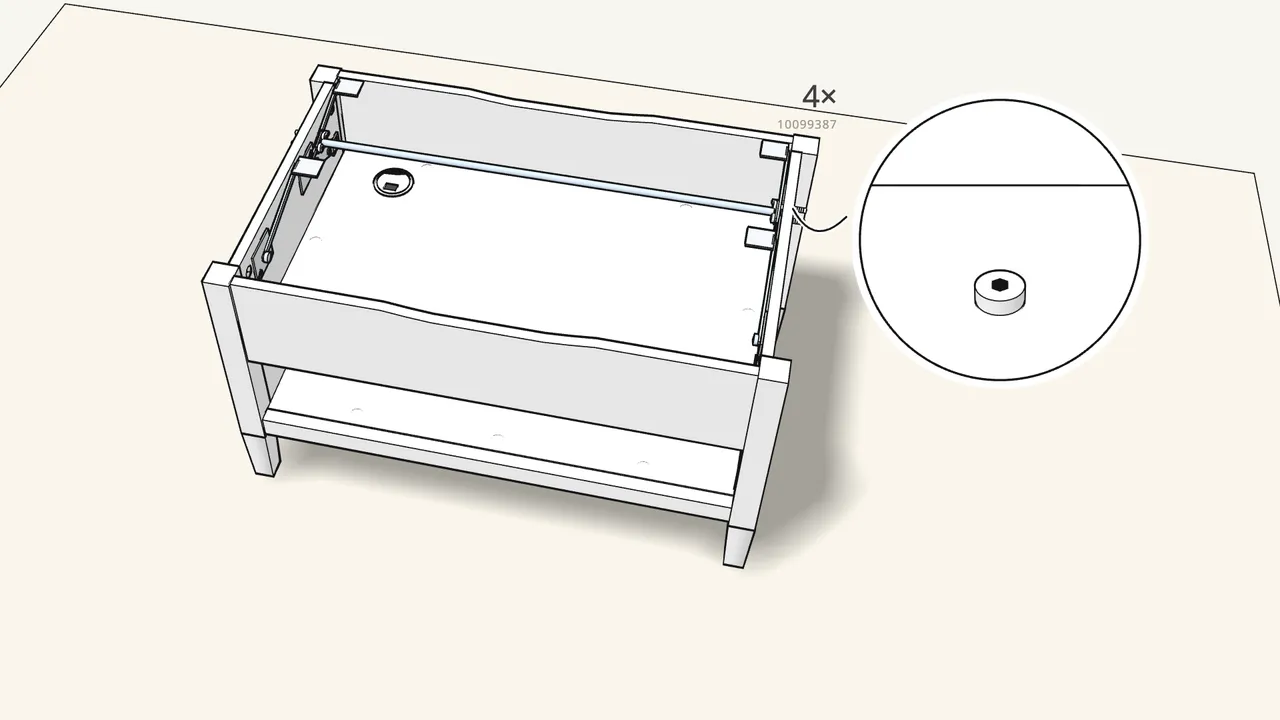
Step 22 · manual step 33
Fold the arms down, then tighten the 4 bolts with the Allen key.
Lift the arms back up afterwards.
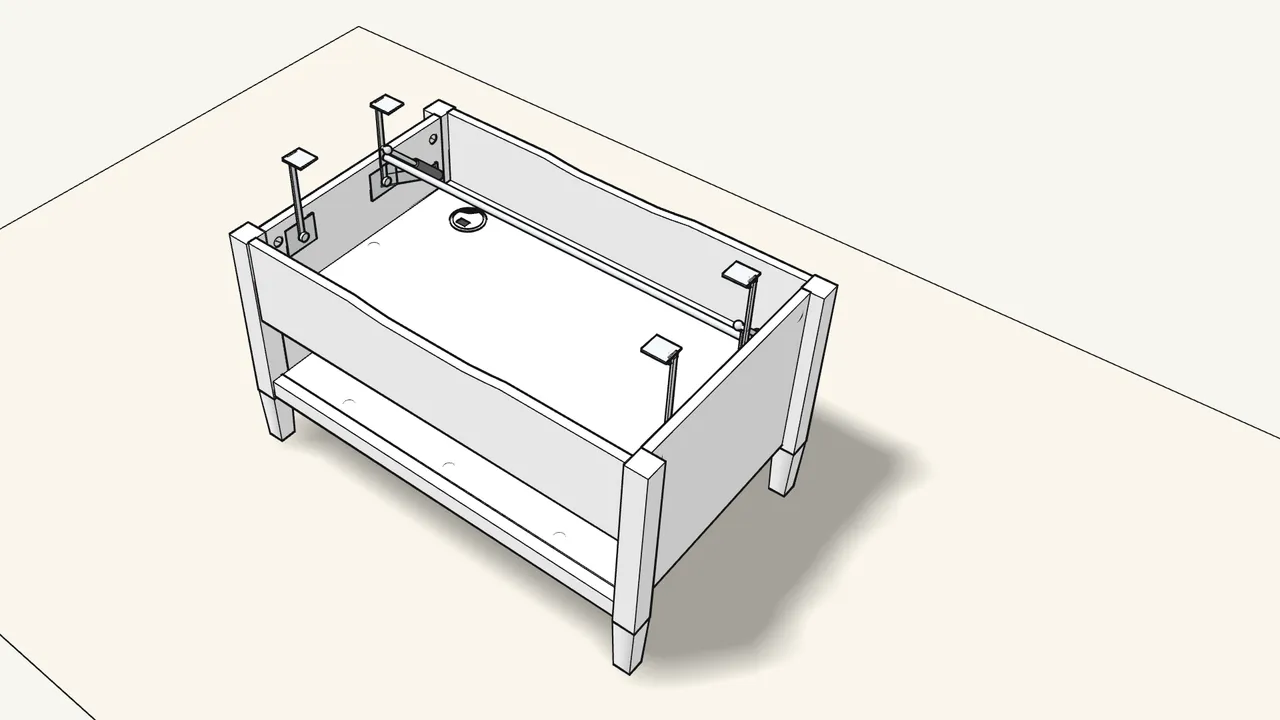
Step 23 · manual step 34
Click the 2 gas springs (10103716) onto the arms.
Mind the direction — see the manual, step 34.
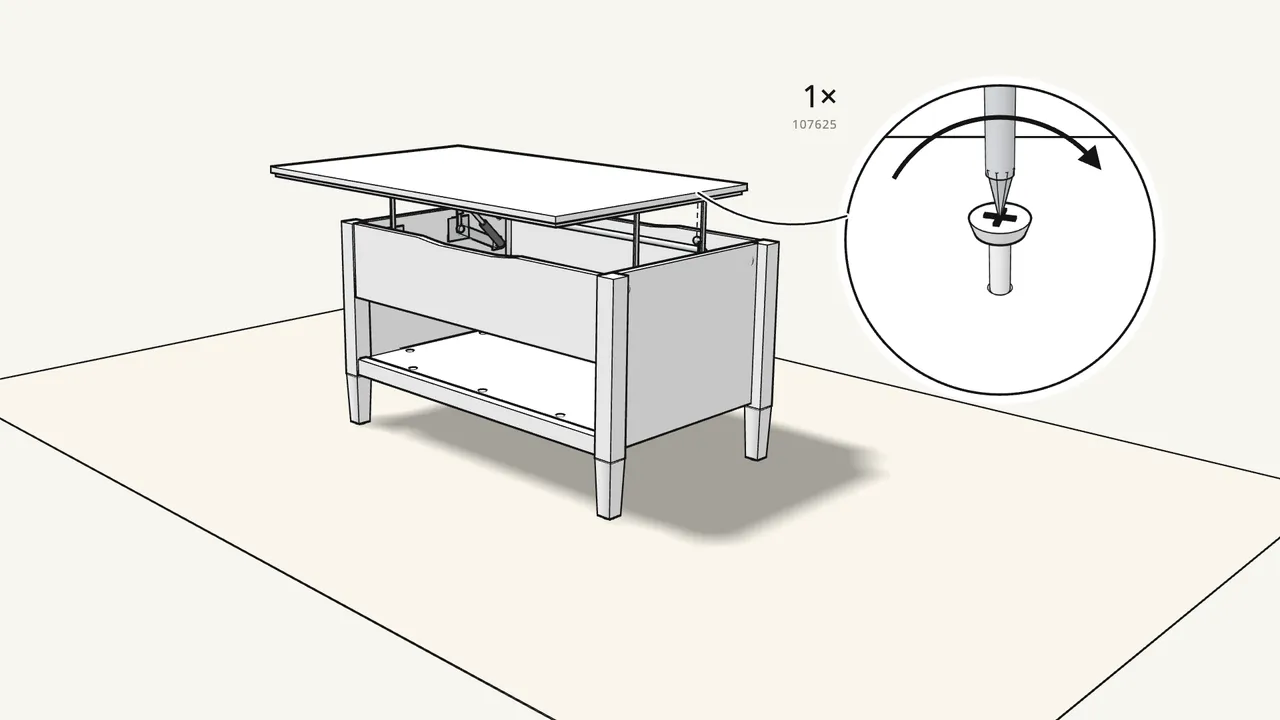
Step 24 · manual step 35
Lay the top on the arm plates and fix it with 1 screw (107625).
Centre it — check the picture in the manual, step 35.
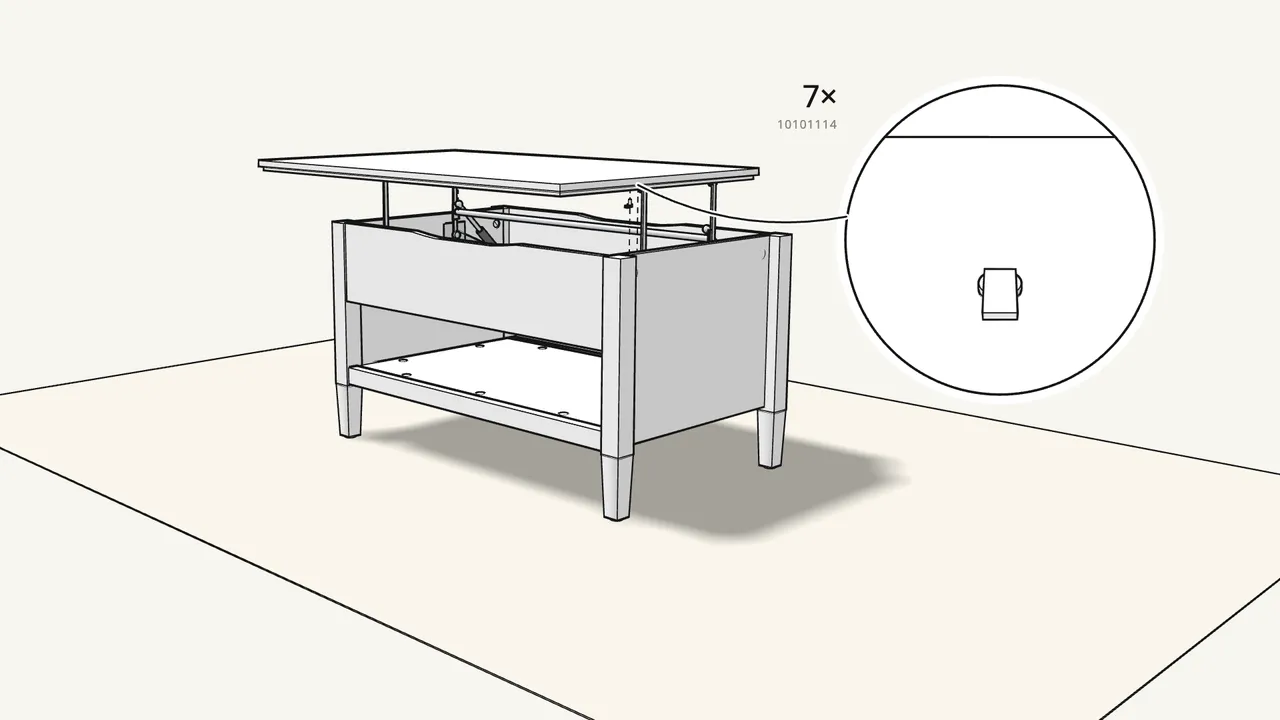
Step 25 · manual step 36
Fix the top with the other 7 inserts and pins.
Through the arm plates into the underside of the top.
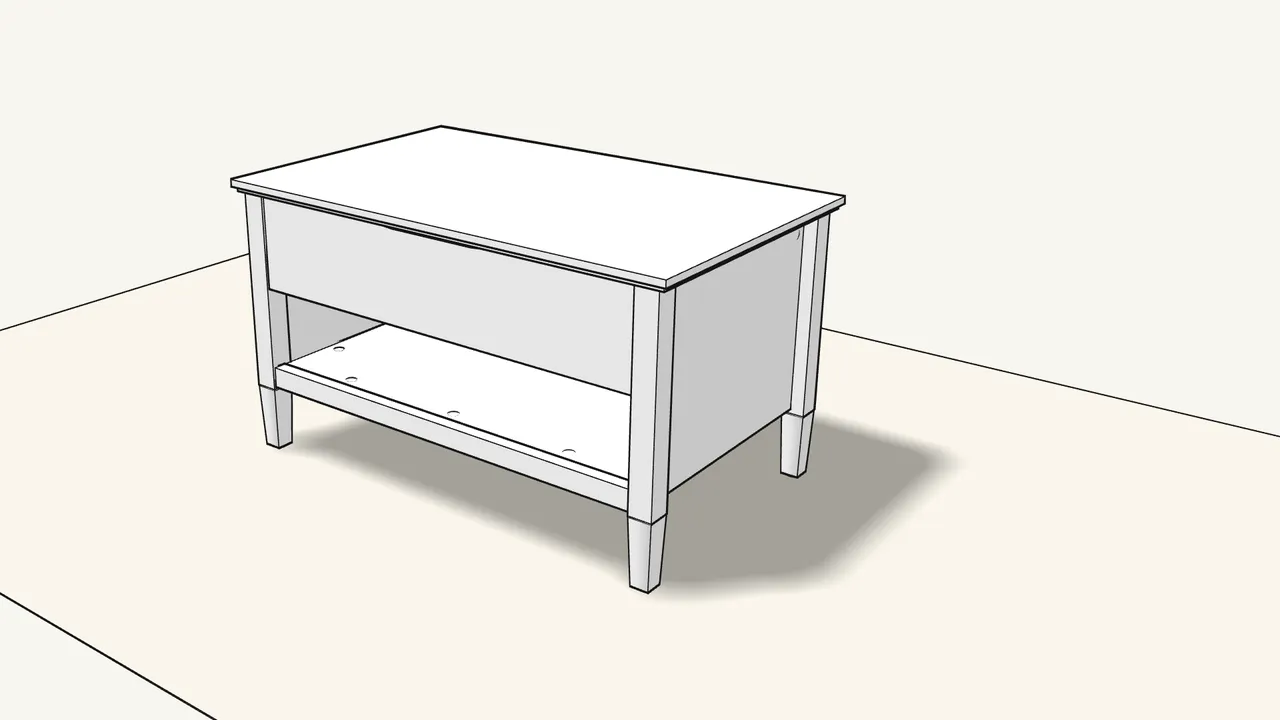
Step 26
Press the top down to close the table.
The arms have a lock — see the manual p. 25 to lock and release it.
Tips & safety
- The raised top takes max. 15 kg (33 lb). That is the load limit the manual gives for the lifted top.
- Mind your fingers when you lower the top. Hold it by the edges — the gap closes and can pinch.
Official instructions
This guide follows IKEA’s official assembly instructions (AA-2407469-4). Keep the printed manual to hand — if anything differs, the manual is right.



