IKEA · Tables & Desks
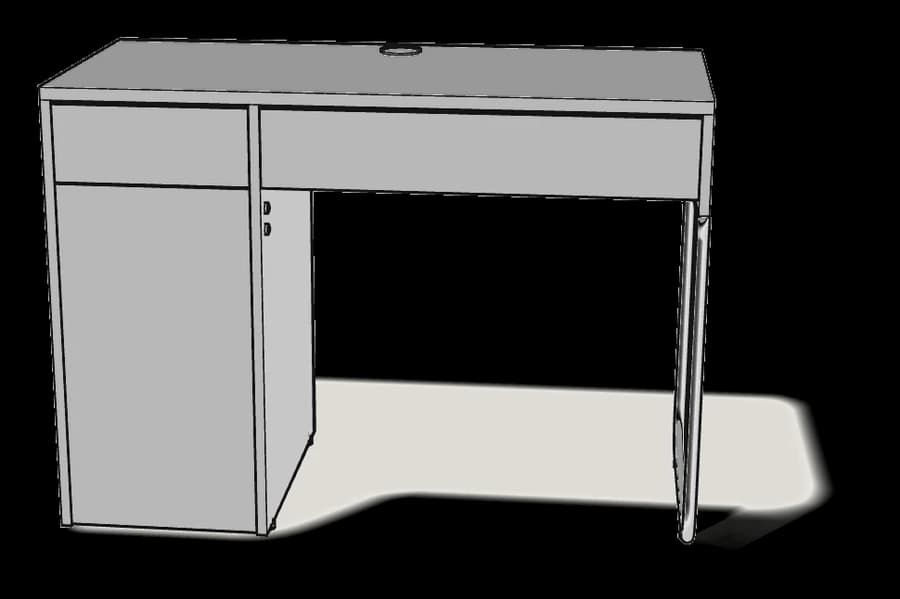
How to Assemble IKEA MICKE Desk
Step-by-step IKEA MICKE desk assembly: 28 illustrated steps, an animated video, the hardware list and the tools you need — following the official instructions (AA-476615-12).
- 28 illustrated steps
- 35 steps in the manual
- 3:51 video
- 105×50×75 cm
What you need
Tools
- Flat-head screwdriver
- Phillips screwdriver
- Hammer
- Allen key (included)
Hardware in the box
| Part no. (as printed in the manual) | Qty |
|---|---|
| 100086 | 3× |
| 110519 | 4× |
| 118331 | 22× |
| 110126 | 10× |
| 103430 | 8× |
| 103114 | 4× |
| 100365 | 20× |
| 113287 | 4× |
| 101514 | 8× |
| 101344 | 20× |
| 153549 | 4× |
| 104663 | 2× |
| 10081375 | 2× |
Step-by-step assembly

Step 1 · manual step 1–2
Screw 2 cam bolts into the drawer front, then fit both sides.
Lay the front face-down on the rug. Each side gets a wooden dowel (101344) in its end.
Step 2 · manual step 3
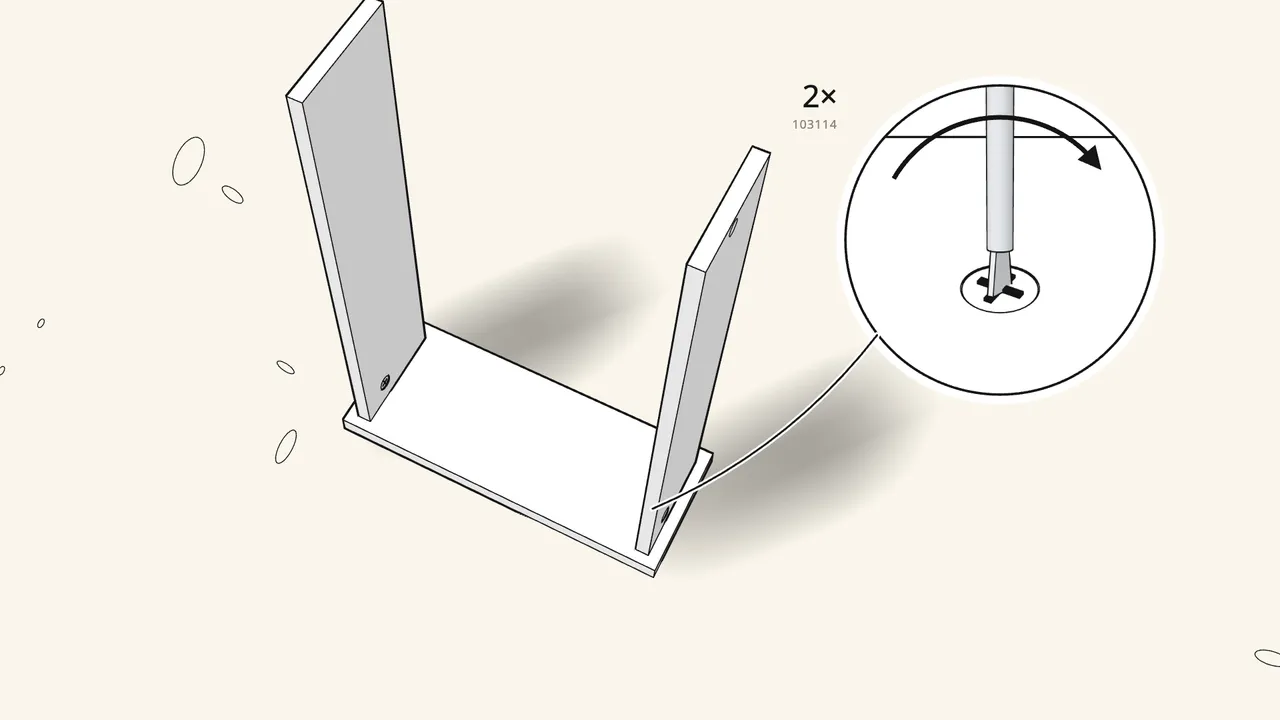
Insert 2 cam locks (103114) and turn them to lock.
Use the small 103114 locks here — not 110126 or 103430.
Step 3 · manual step 4–5
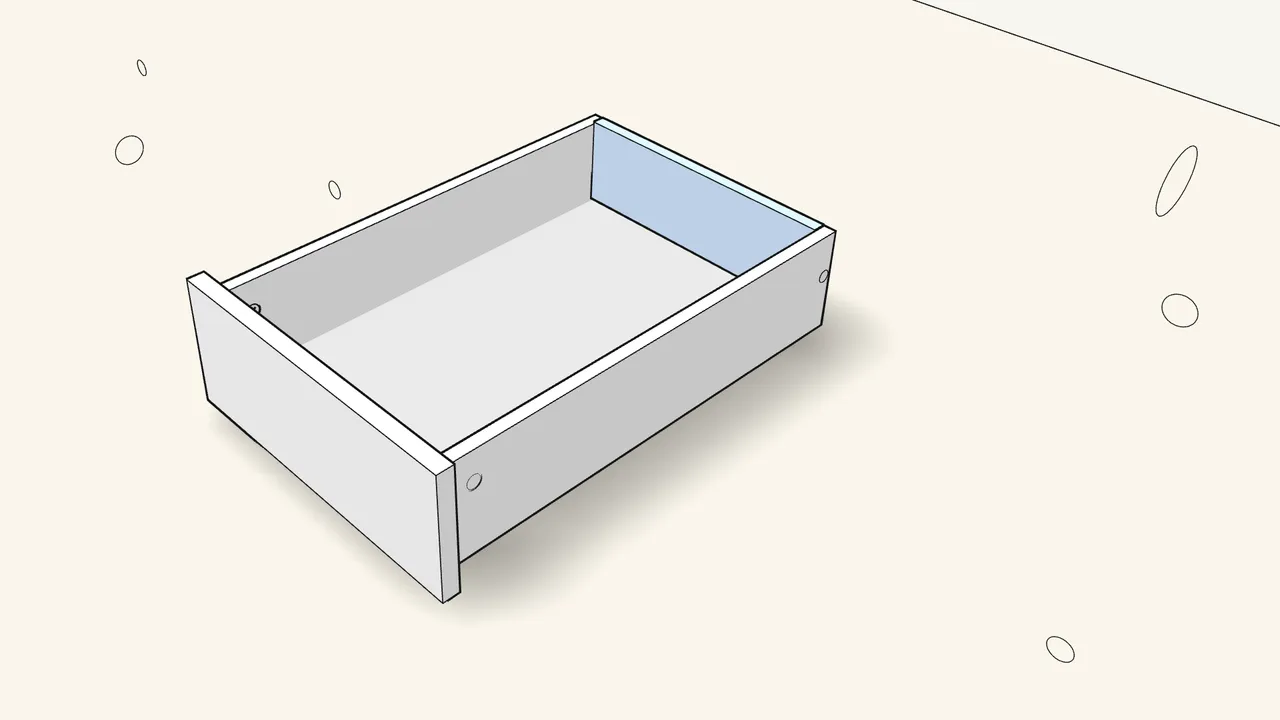
Turn the drawer upright, slide in the bottom, then fit the back.
Check which side of the bottom faces up — see the manual, step 4.

Step 4 · manual step 6
Tap in 2 screw-dowels (110519) with a hammer.
One through each side, into the drawer back.
Step 5 · manual step 7–8
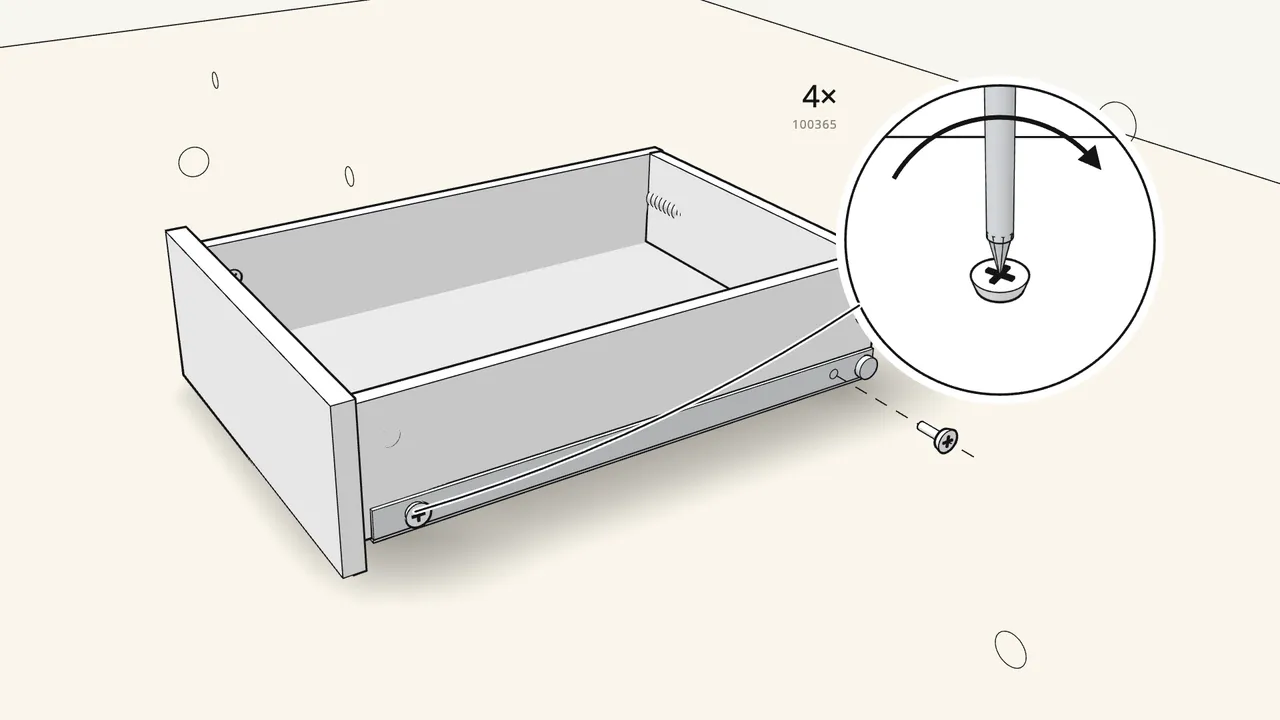
Place a runner on each side and fix it with 2 screws (100365).
Use the 100365 screws — not 113287. Phillips screwdriver.

Step 6 · manual step 1–8
Build the wide drawer the same way.
Both drawers use the same steps and hardware.
Step 7 · manual step 9–10
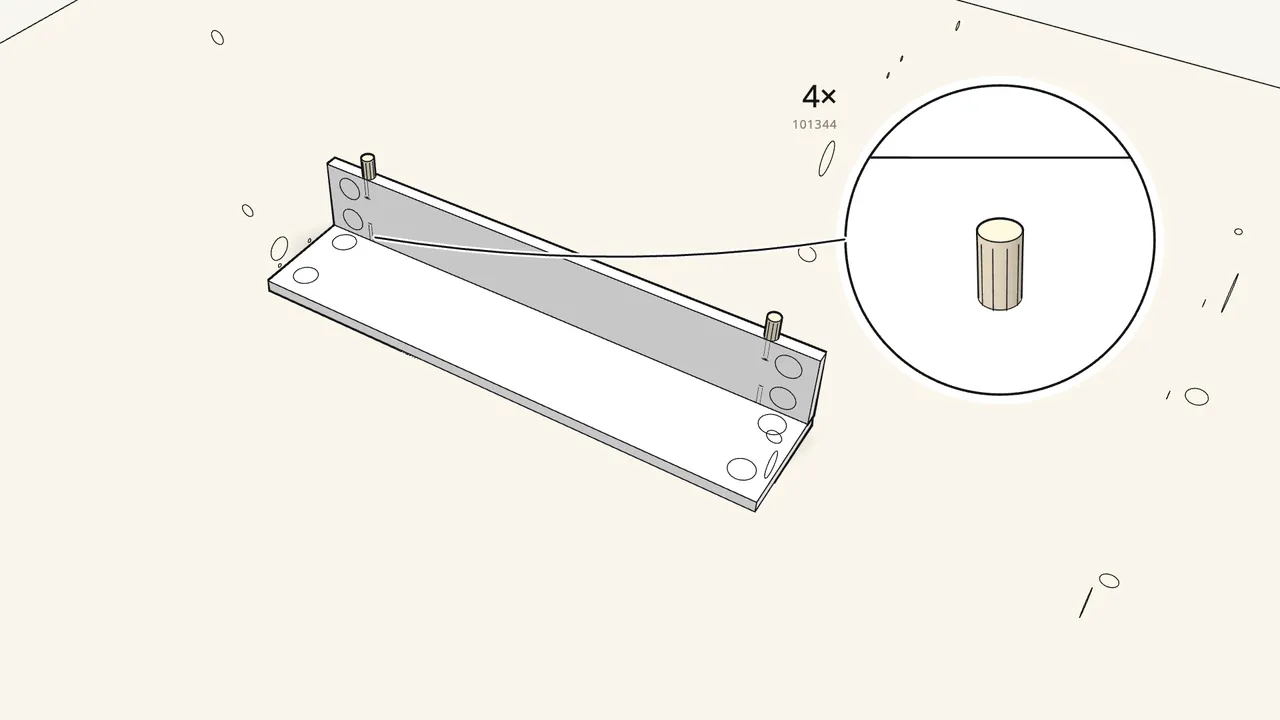
Build the rear rail from 3 parts with 4 wooden dowels (101344).
This video shows the cabinet on the left. For a right-hand cabinet, follow page 25 onward.
Step 8 · manual step 11
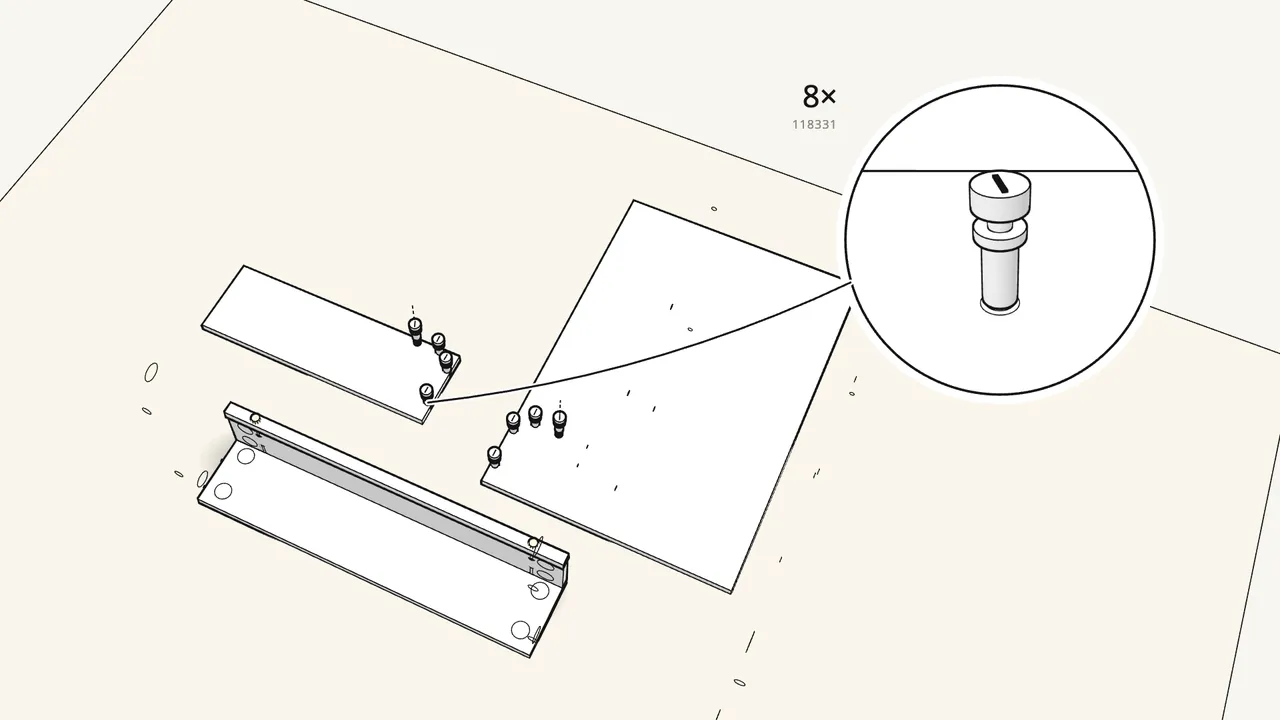
Screw 8 cam bolts (118331) into the end panel and the side panel.
4 in each panel.
Step 9 · manual step 12
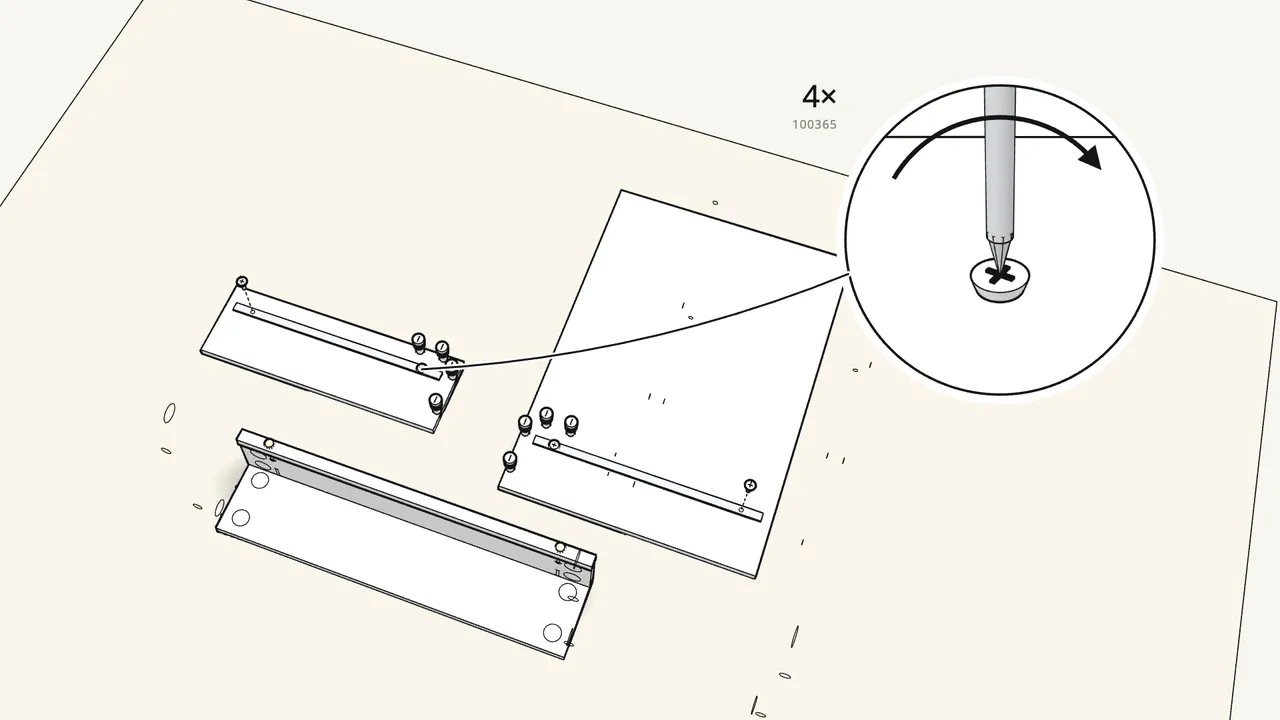
Screw a drawer runner onto each panel — 2 screws (100365) each.
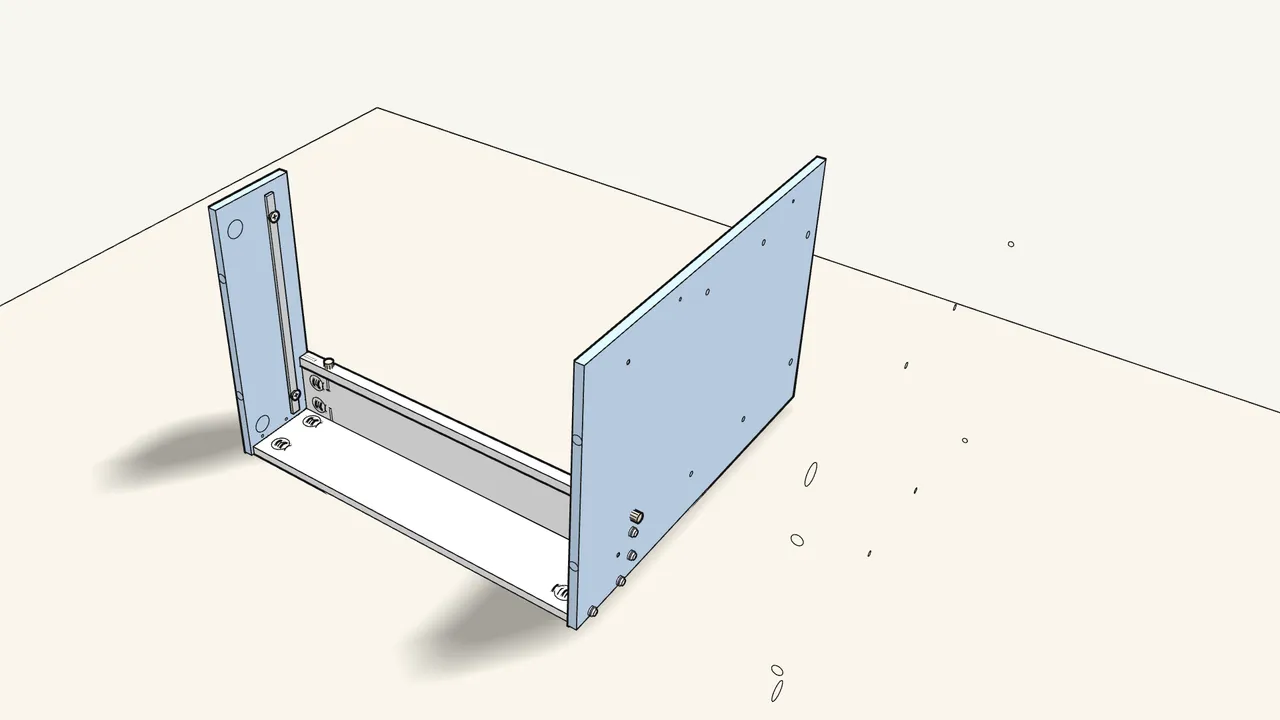
Step 10 · manual step 13
Push 2 dowels into the rail ends, then stand both panels onto the rail.
The cam bolts go into the holes in the rear rail.
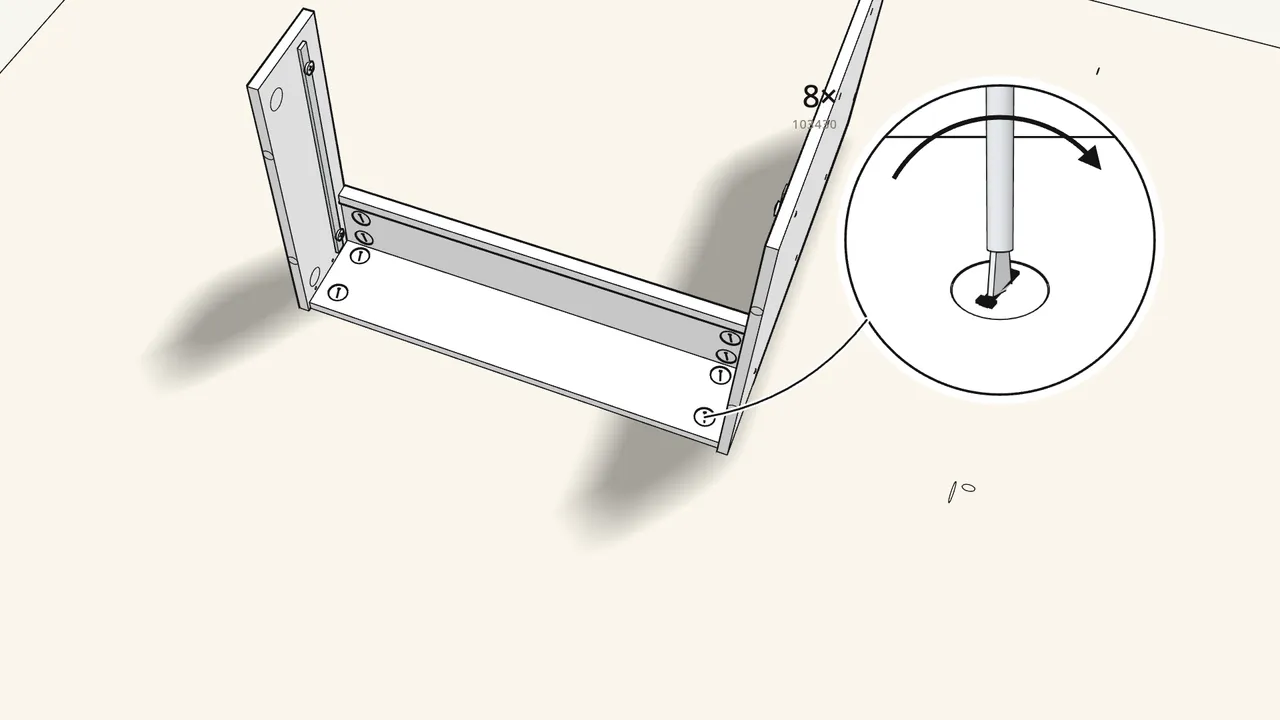
Step 11 · manual step 14
Insert 8 cam locks (103430) and turn them clockwise.
Use 103430 here — not 110126.
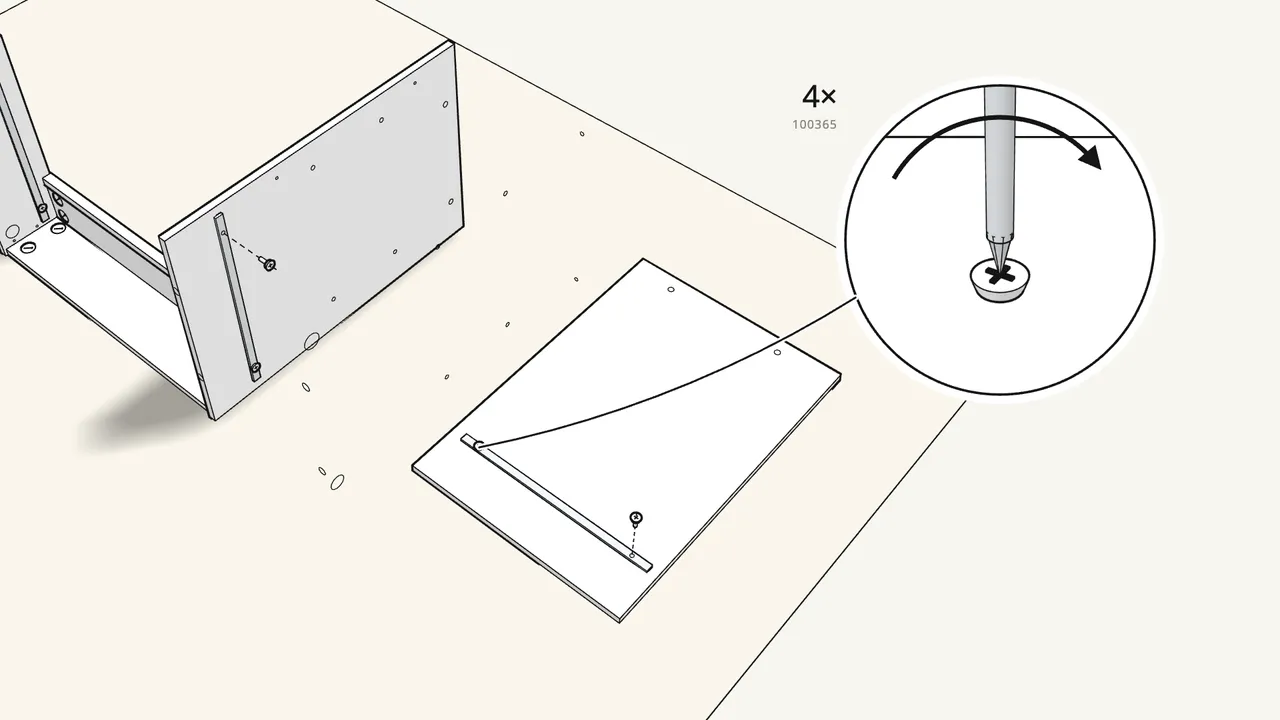
Step 12 · manual step 15
Screw the cabinet runners onto both cabinet sides.
2 screws (100365) per runner.
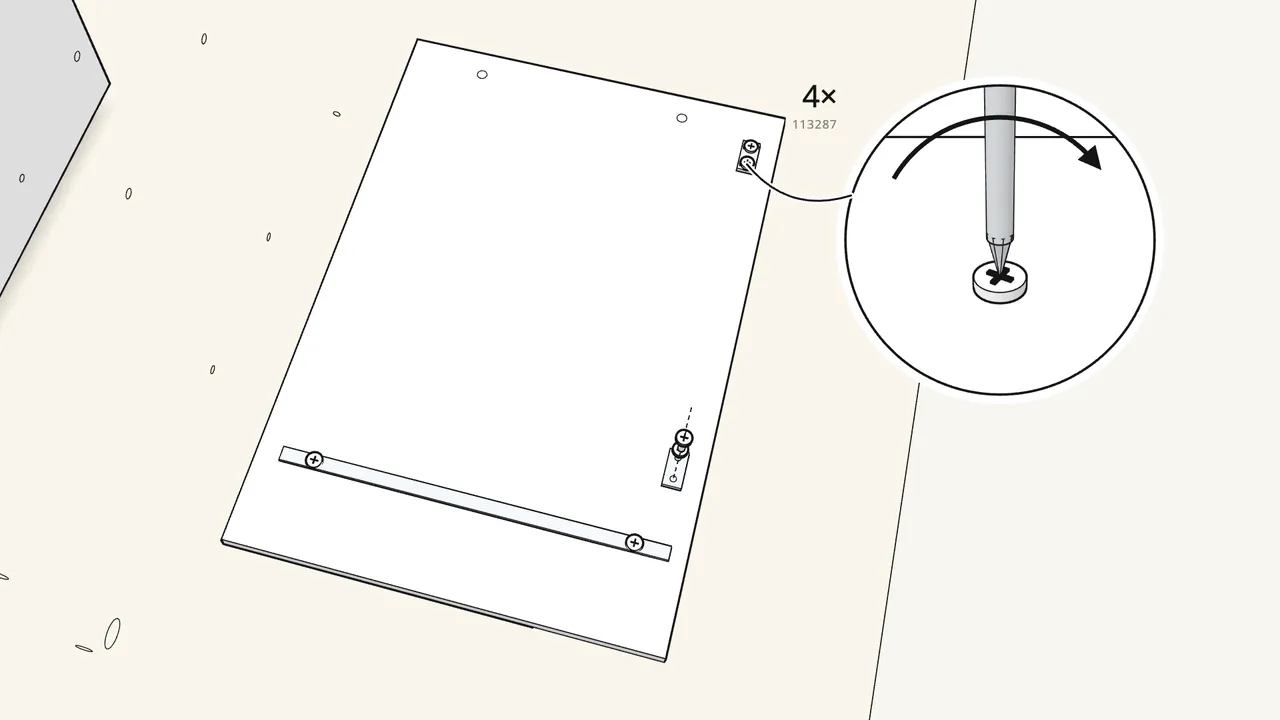
Step 13 · manual step 16
Screw the 2 hinge plates (109221) onto the outer side.
2 screws (113287) per plate — not 100365.
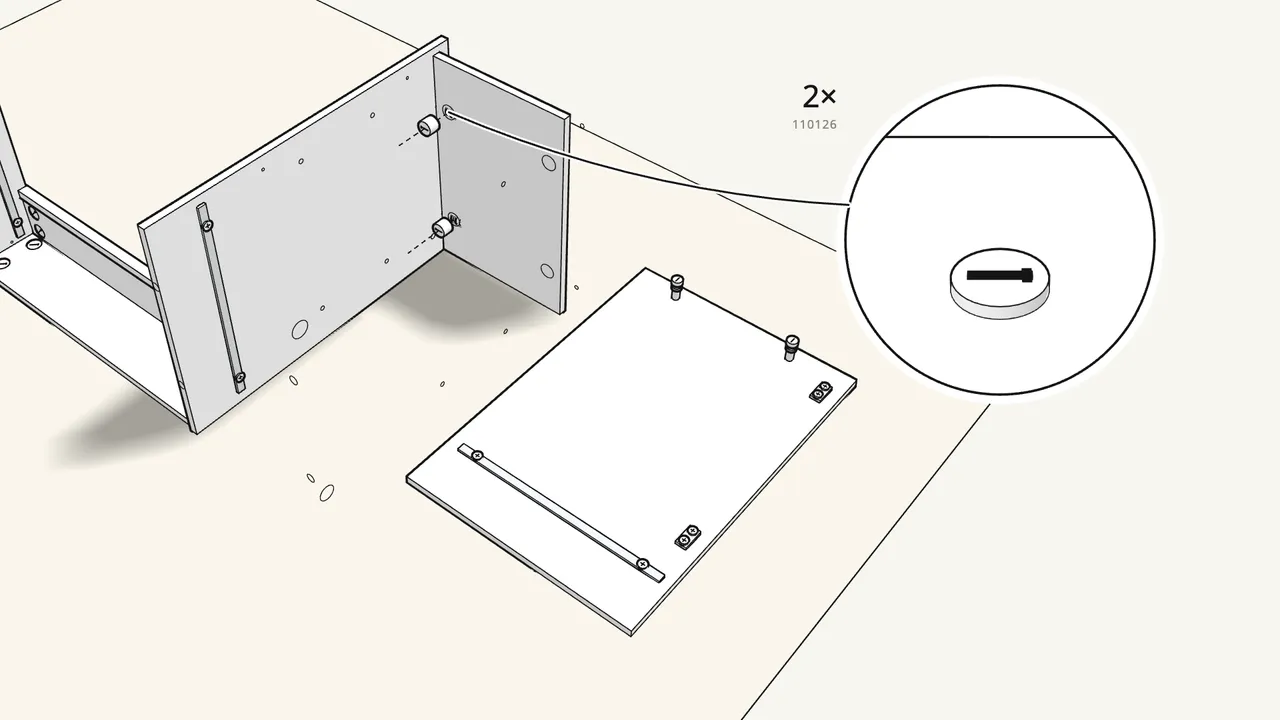
Step 14 · manual step 17–19
Add 4 cam bolts, fit the cabinet bottom, lock it with 2 cam locks (110126).
2 bolts (118331) go in each cabinet side.
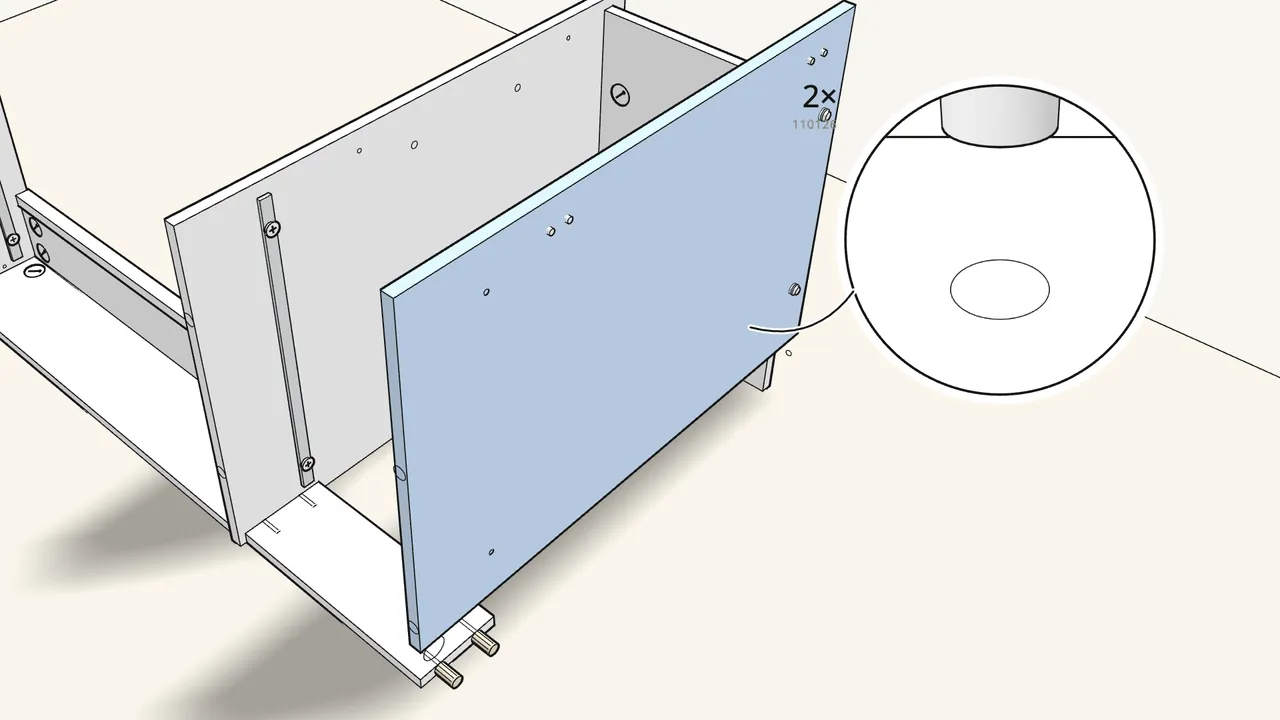
Step 15 · manual step 20–22
Fit the small back rail with 4 dowels, then the outer side.
Lock with 2 cam locks (110126).
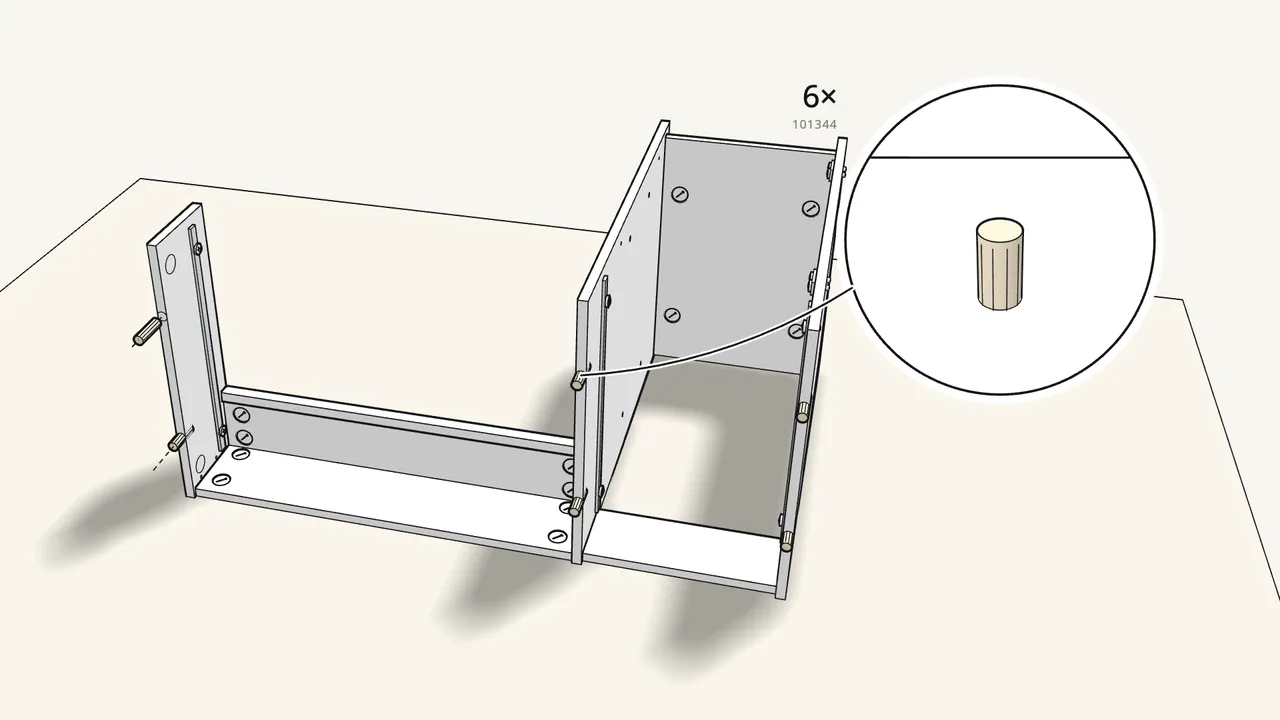
Step 16 · manual step 23
Push 6 wooden dowels (101344) into the top edges.
2 in each cabinet side and 2 in the end panel.
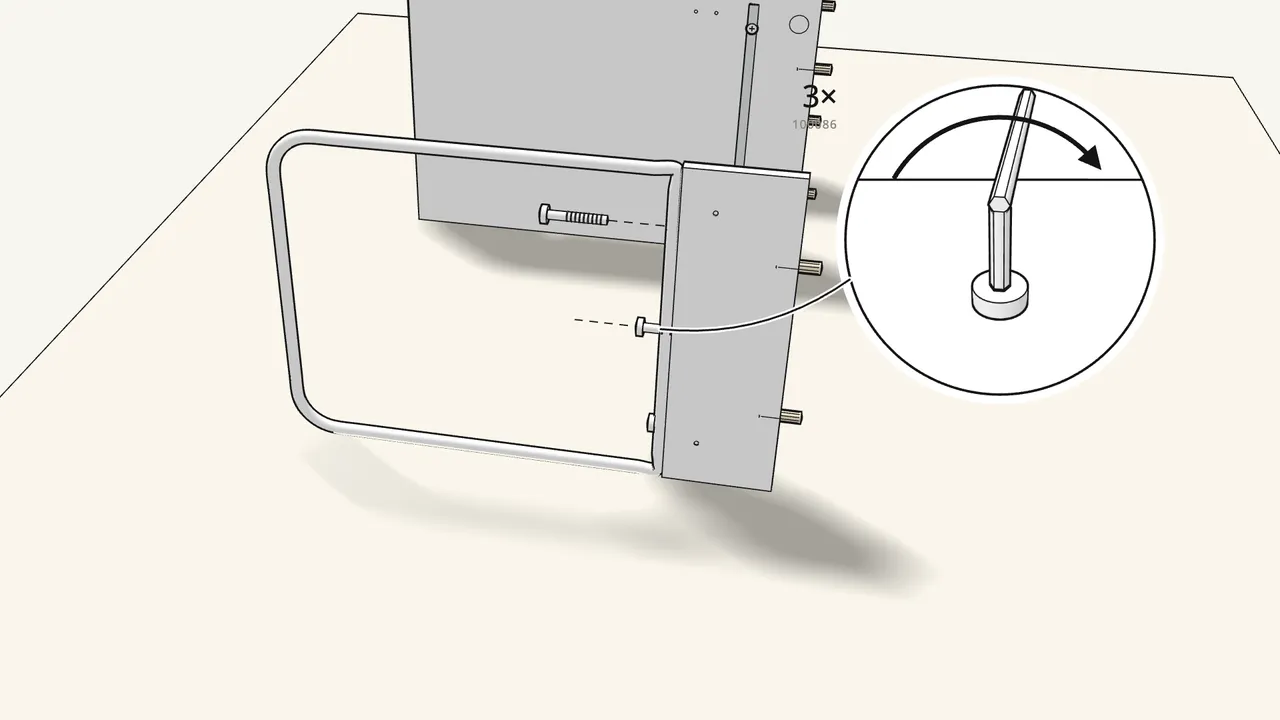
Step 17 · manual step 24
Bolt the leg frame to the end panel with 3 bolts (100086).
Use the Allen key (100092) — it clips into the holder (121030).
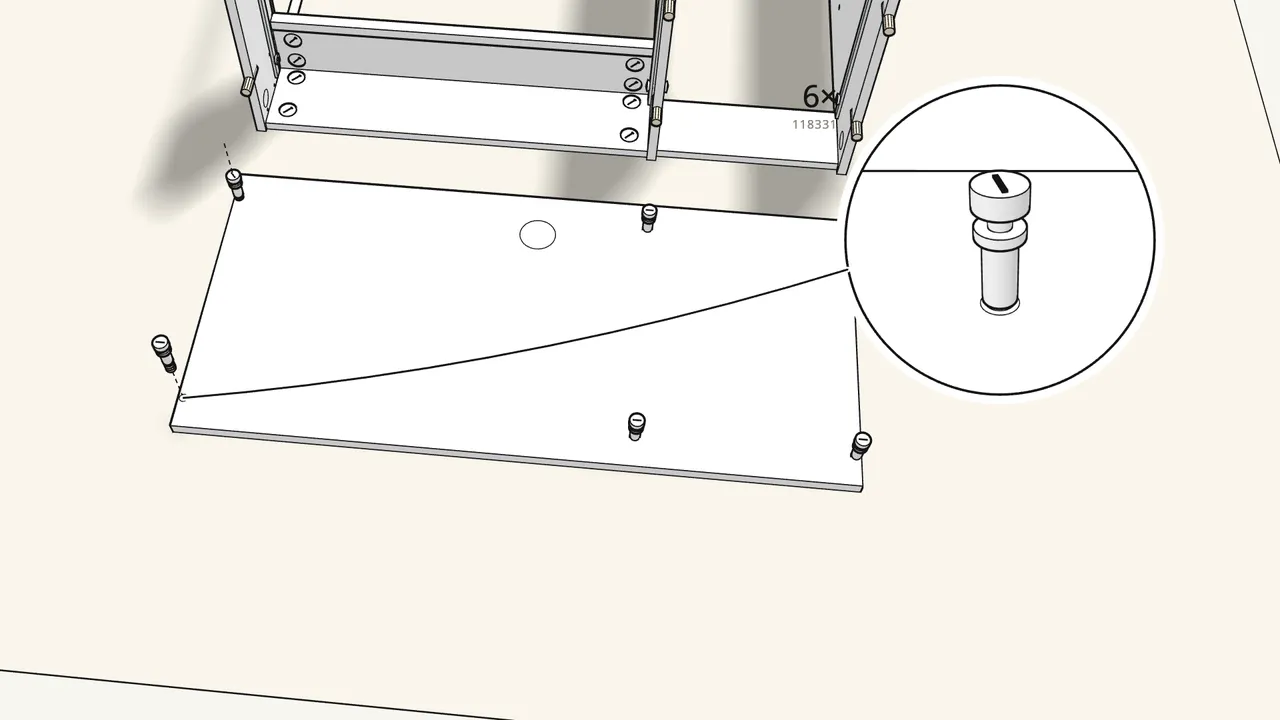
Step 18 · manual step 25
Lay the desktop face-down and screw in 6 cam bolts (118331).
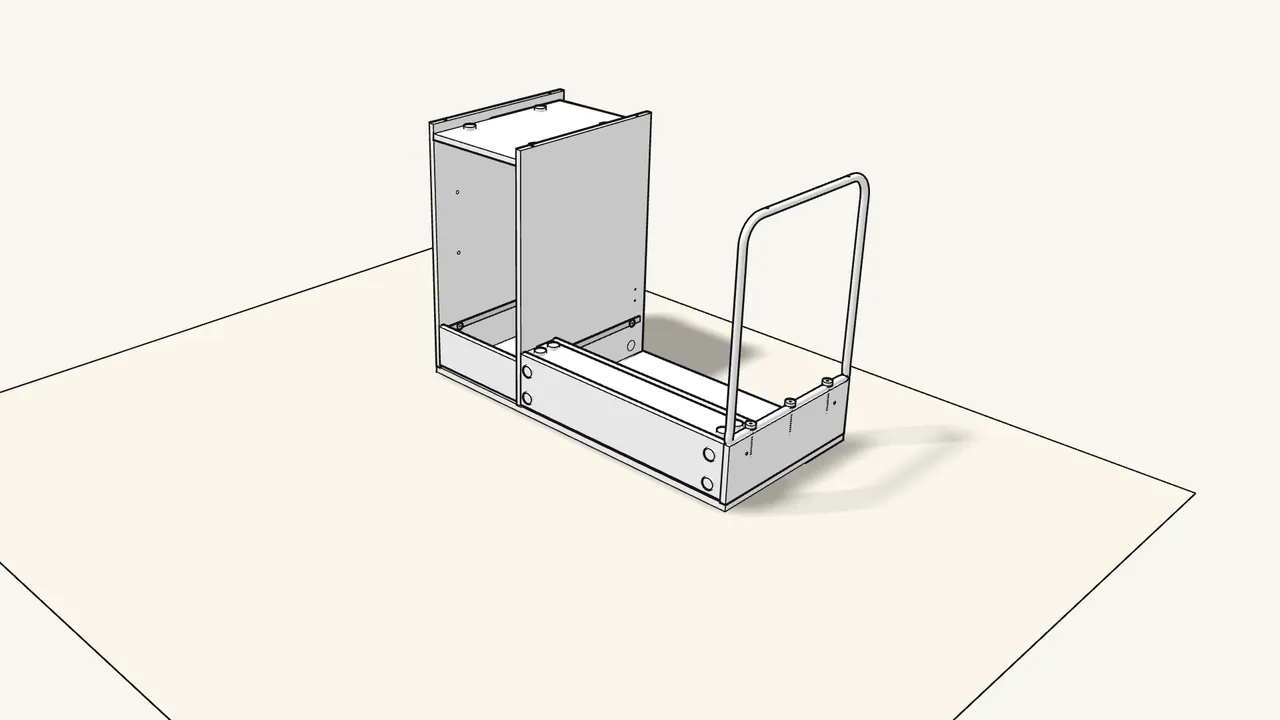
Step 19 · manual step 26
Turn the frame over and lower it onto the desktop.
The bolts and dowels go into the holes — see the manual for which way round.
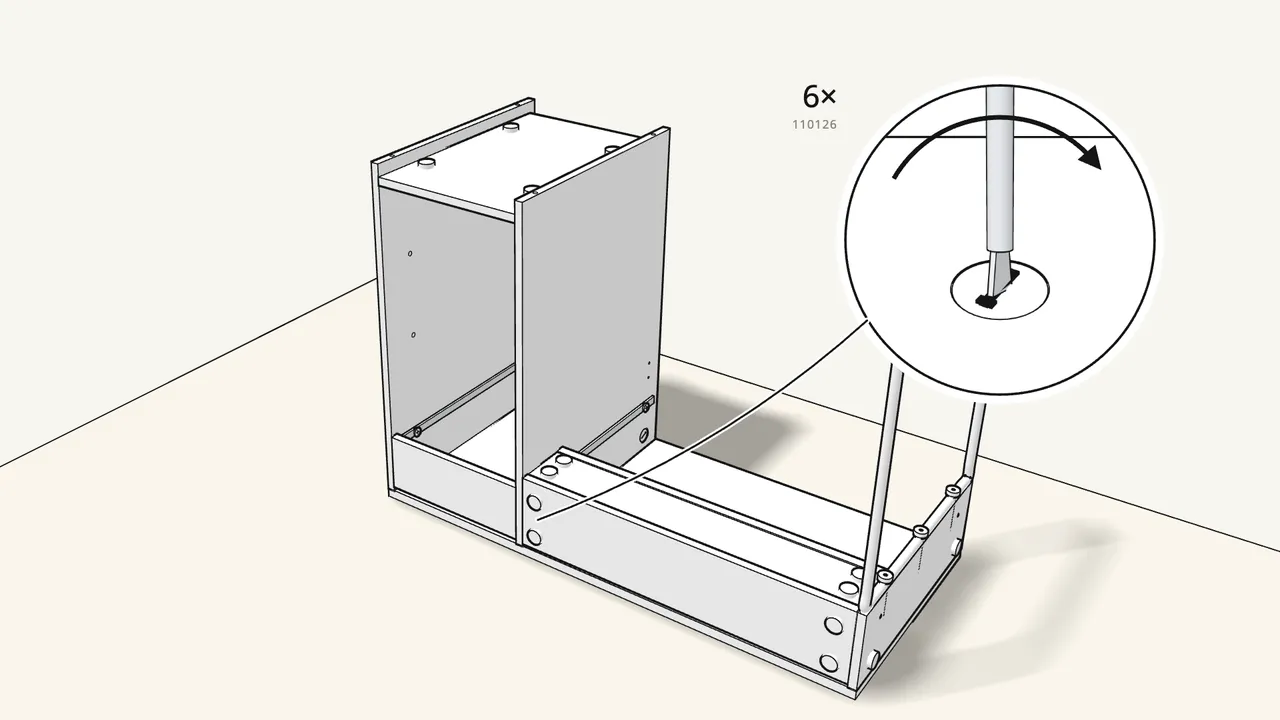
Step 20 · manual step 27
Insert 6 cam locks (110126) and turn them clockwise.
2 per panel — this pulls the frame tight to the desktop.
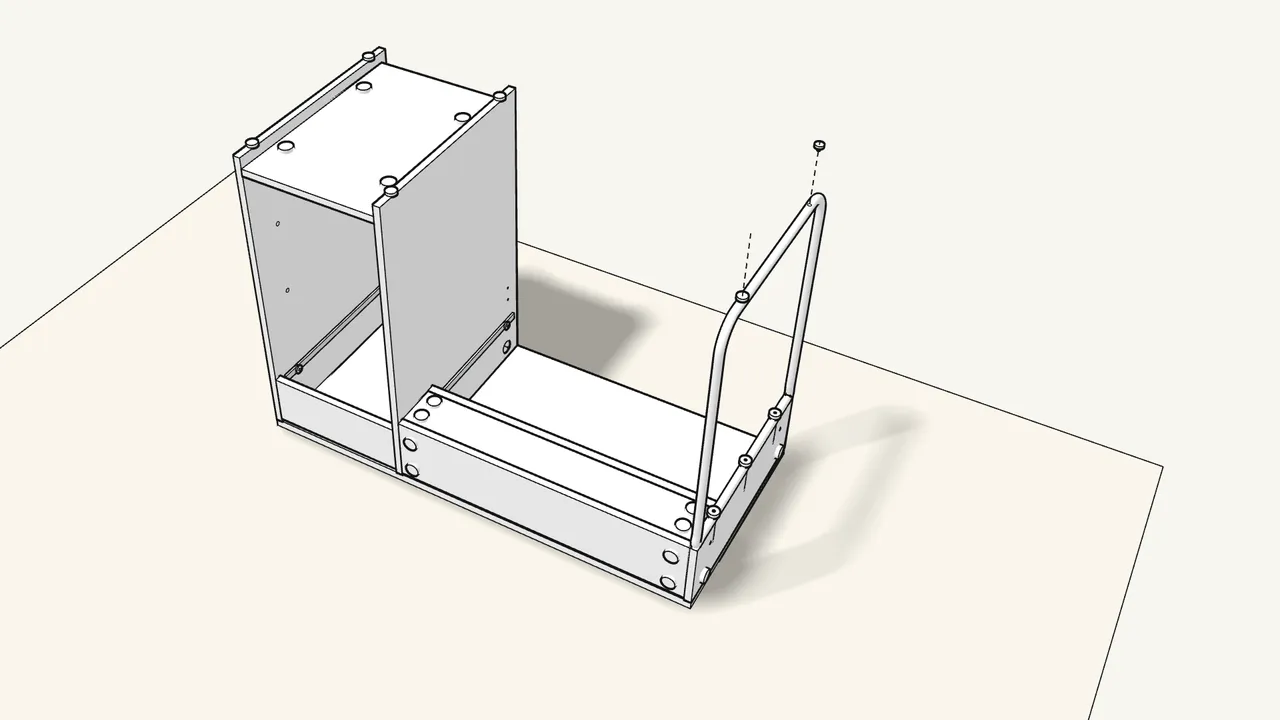
Step 21 · manual step 28–29
Press 4 glides (153549) onto the cabinet and 2 pads onto the leg frame.
Use the hexagonal pads (10081375), not the round ones.
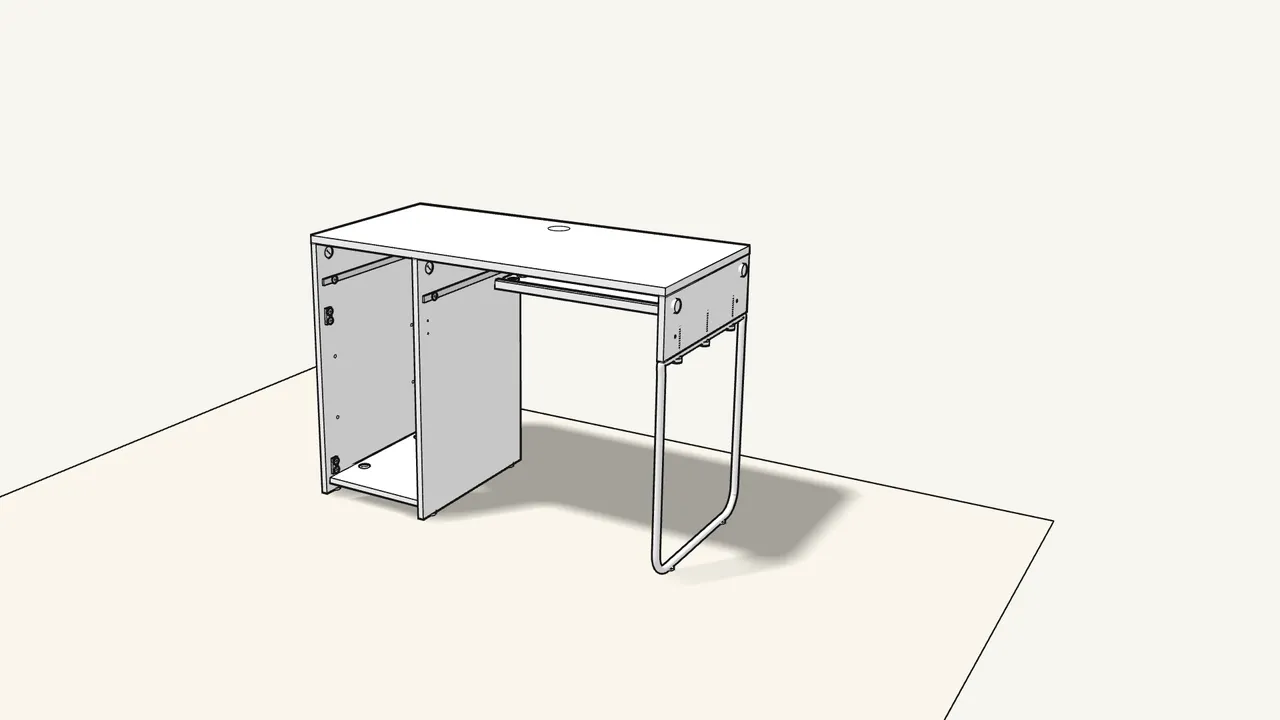
Step 22
Turn the desk upright.
It’s big — get a second person to help.
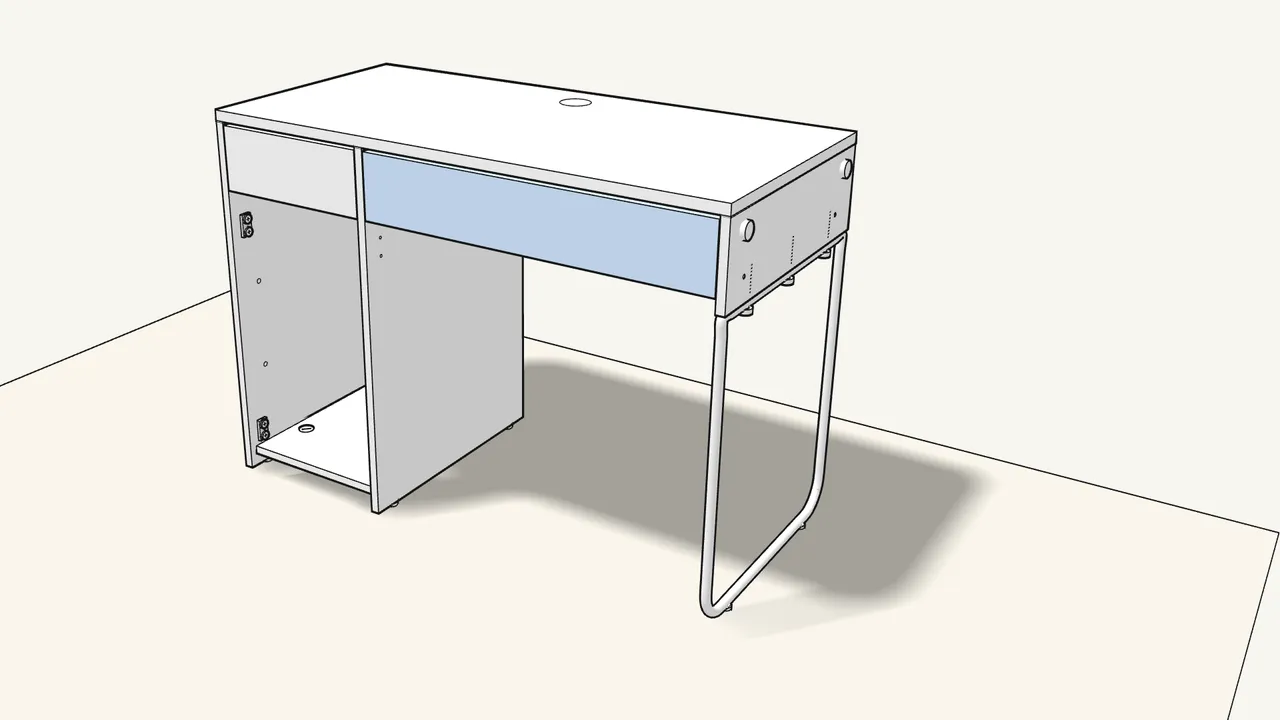
Step 23 · manual step 30
Slide both drawers onto their runners.
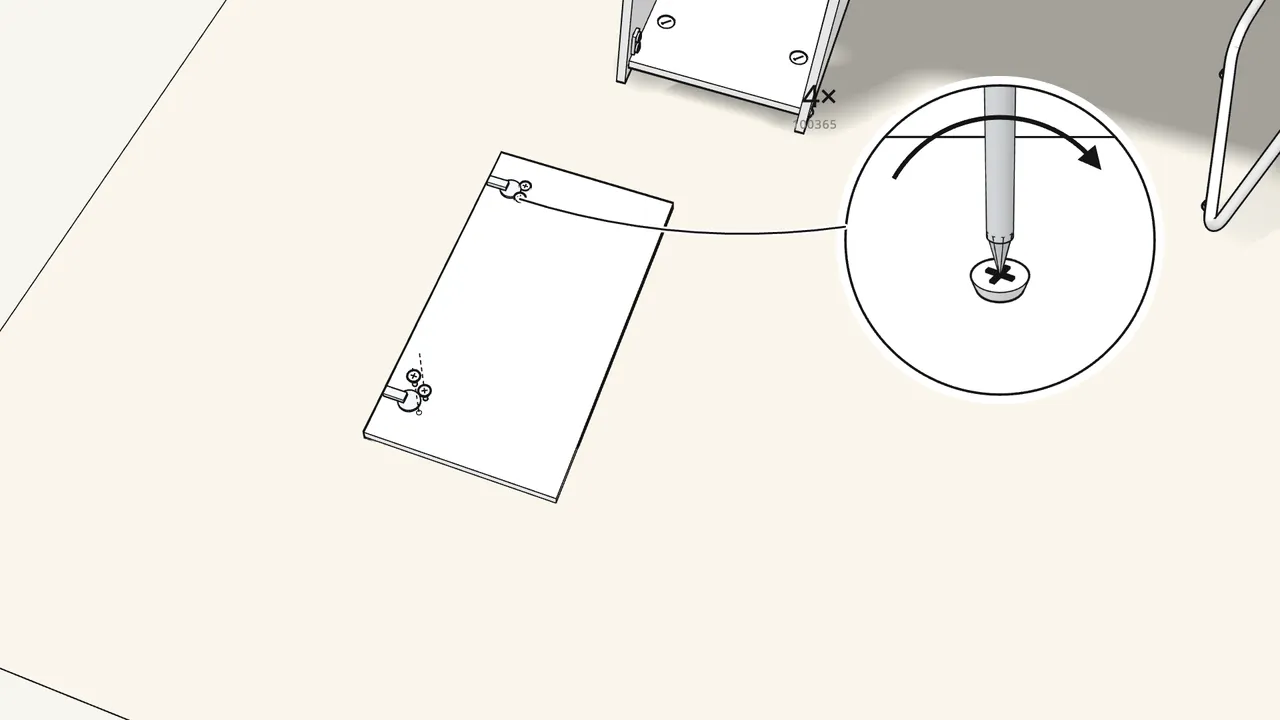
Step 24 · manual step 31
Screw the 2 hinges (109338) onto the door.
2 screws (100365) per hinge.
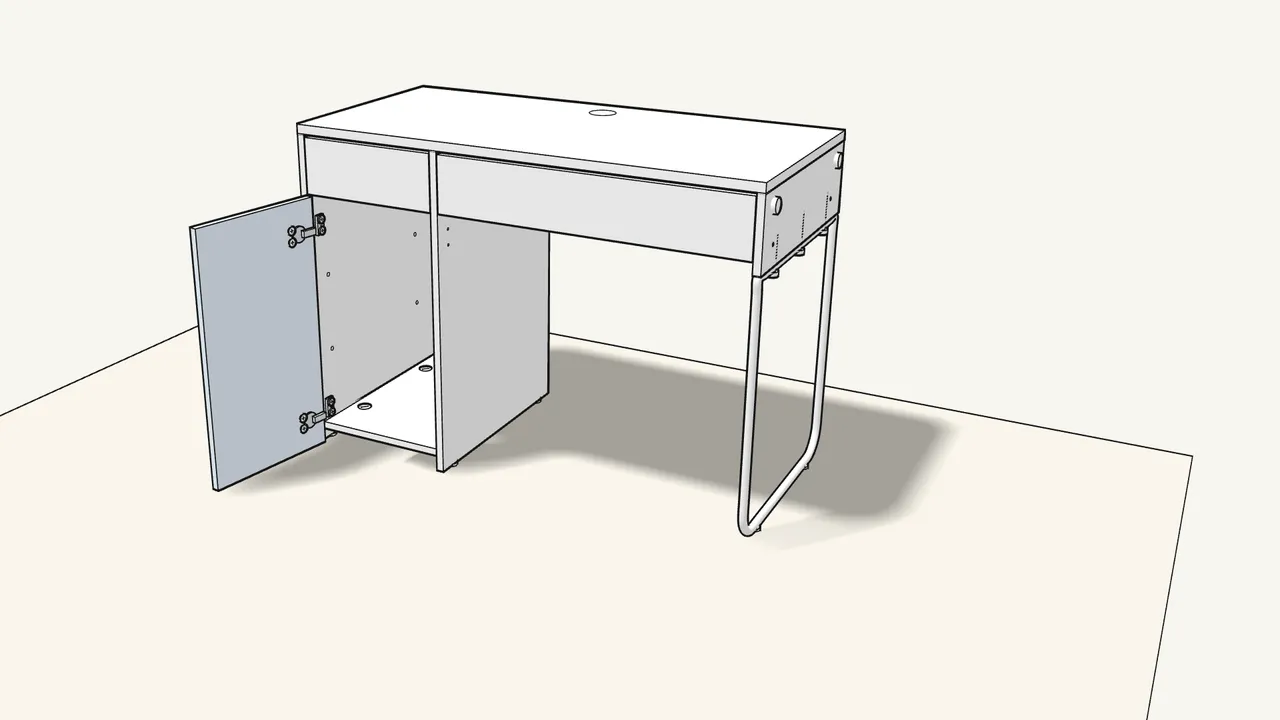
Step 25 · manual step 32
Clip the door onto the hinge plates.
Hook the hinge on, then press until it clicks into place.
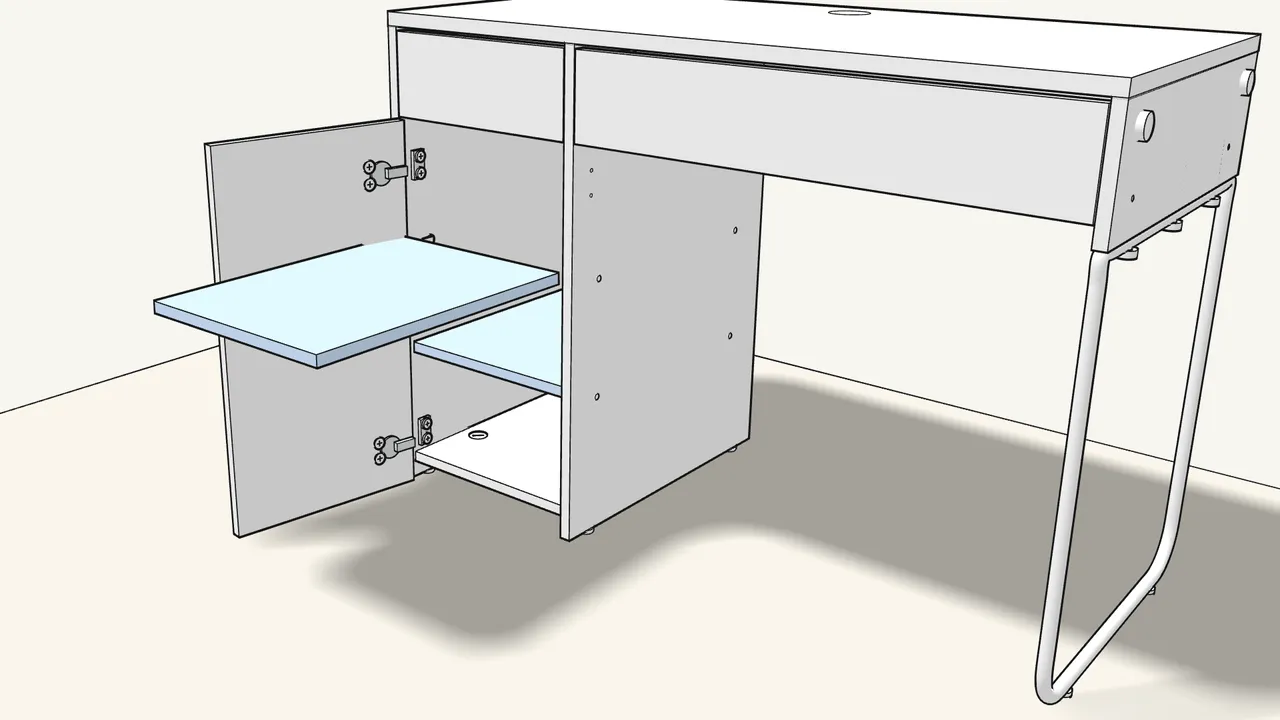
Step 26 · manual step 33
Push in 8 shelf pins (101514) and lay the 2 shelves on them.
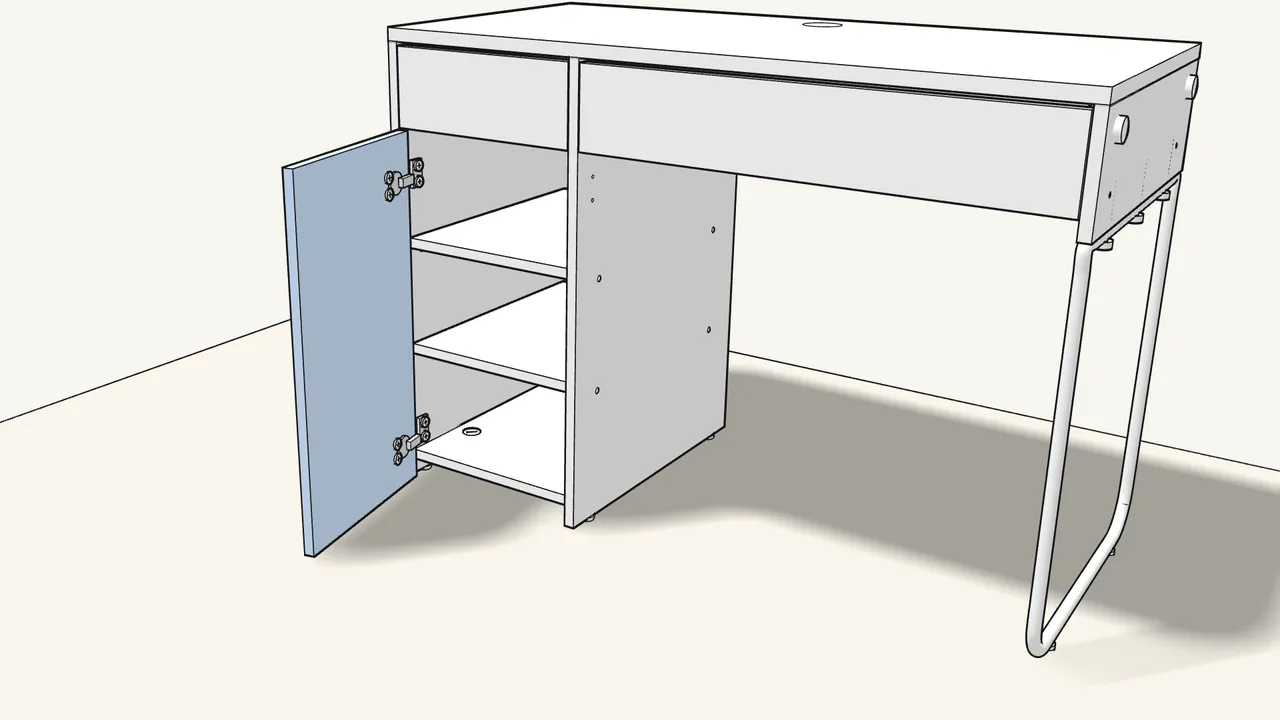
Step 27 · manual step 34
Stick the 2 bumpers (104663) inside the cabinet, then close the door.
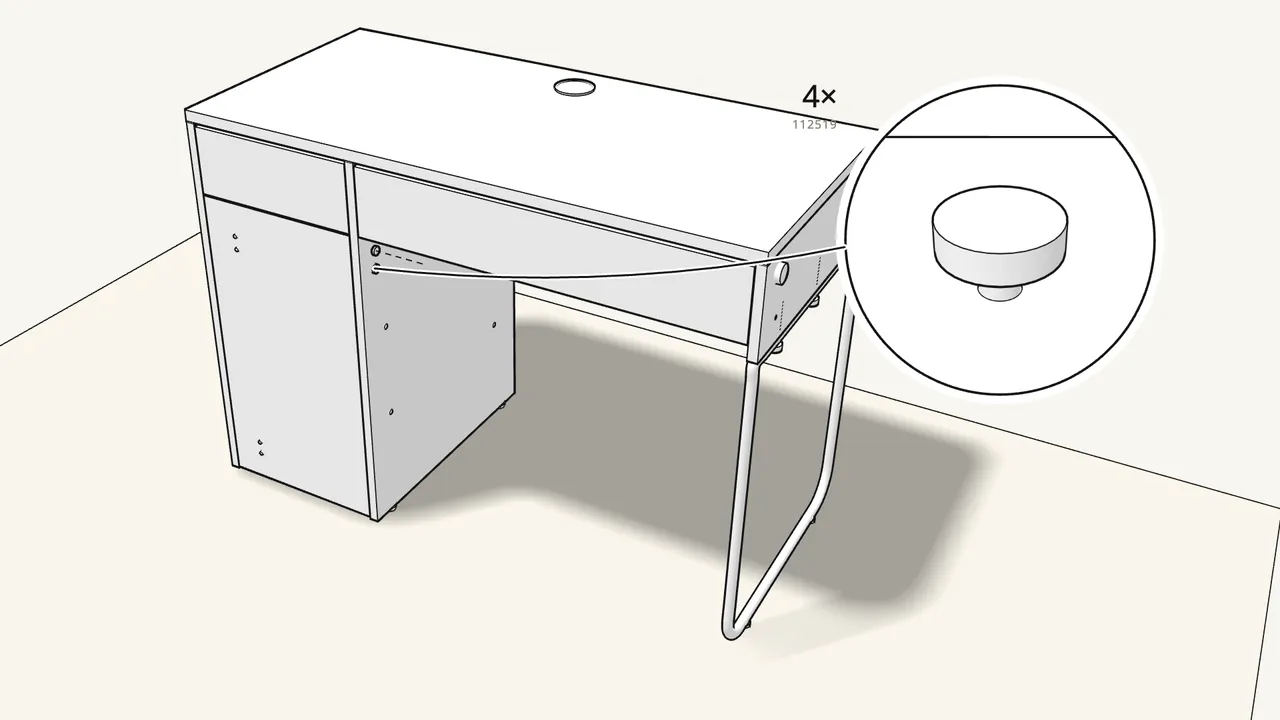
Step 28 · manual step 35
Fit the cable grommet, then press 4 cover caps into the holes.
Cover caps: 112519 — see step 35 for which holes.
Tips & safety
- Door not straight? Adjust the hinge screws to move it up/down, sideways or in/out — see the last page of the manual.
- Want the cabinet on the right? The manual has a mirrored version of steps 9–35, starting on page 25.
Official instructions
This guide follows IKEA's official assembly instructions (AA-476615-12). Keep the printed manual to hand — if anything differs, the manual is right.