IKEA · Tables & Desks
How to assemble IKEA VIHALS Extendable Table
Step-by-step IKEA VIHALS Extendable Table assembly: 26 illustrated steps, an animated video, the hardware list and the tools you need — following the official instructions (AA-2506501-4).
- 26 illustrated steps
- 19 steps in the manual
- 3:31 video
- 120/180×74×75 cm cm
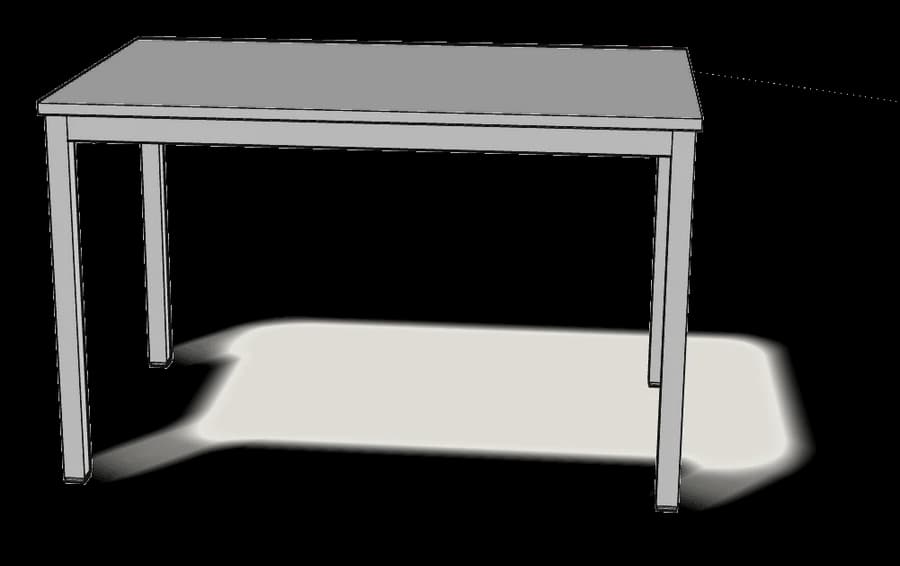
What you need
Tools
- Allen key (included)
- Spanner (included)
Hardware in the box
| Part no. (as printed in the manual) | Qty |
|---|---|
| 155677 | 9× |
| 10040001 | 4× |
| 115461 | 4× |
| 109180 | 8× |
| 117217 | 4× |
| 130912 | 4× |
Step-by-step assembly
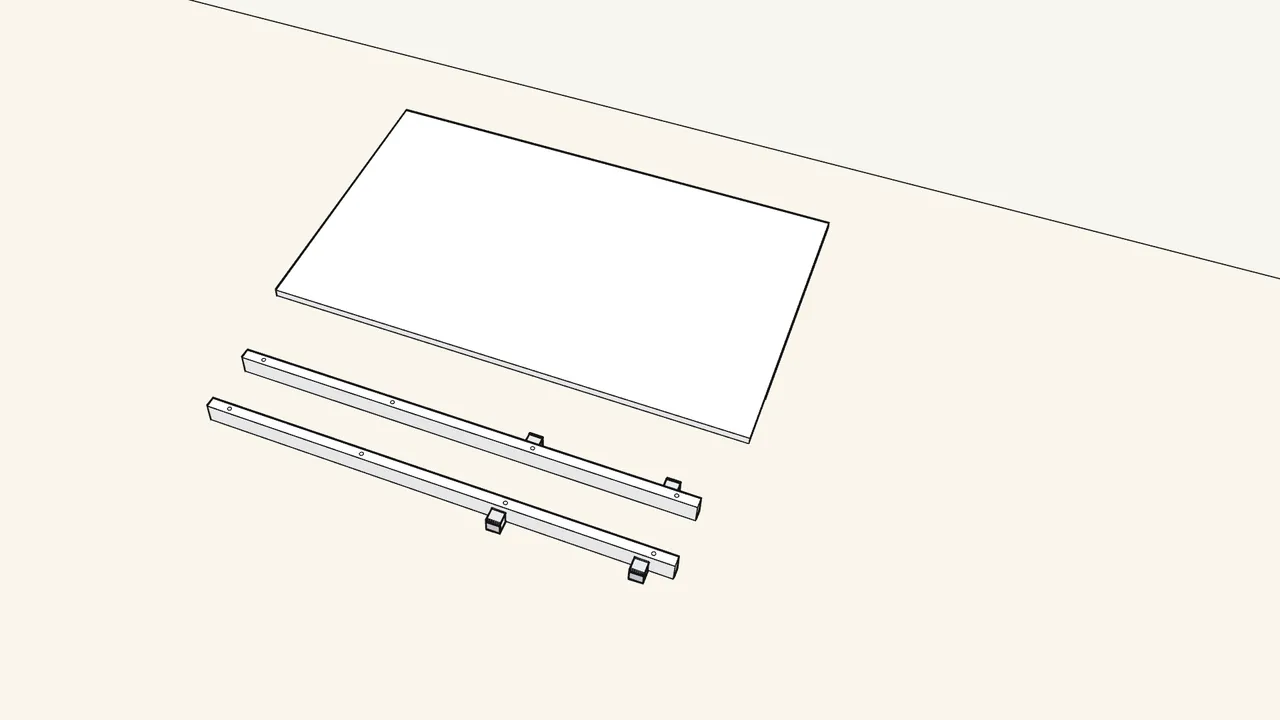
Step 1
Press 4 plastic sleeves (155869) onto the 2 long rails.
2 on each rail — push them on, then turn them to lock.
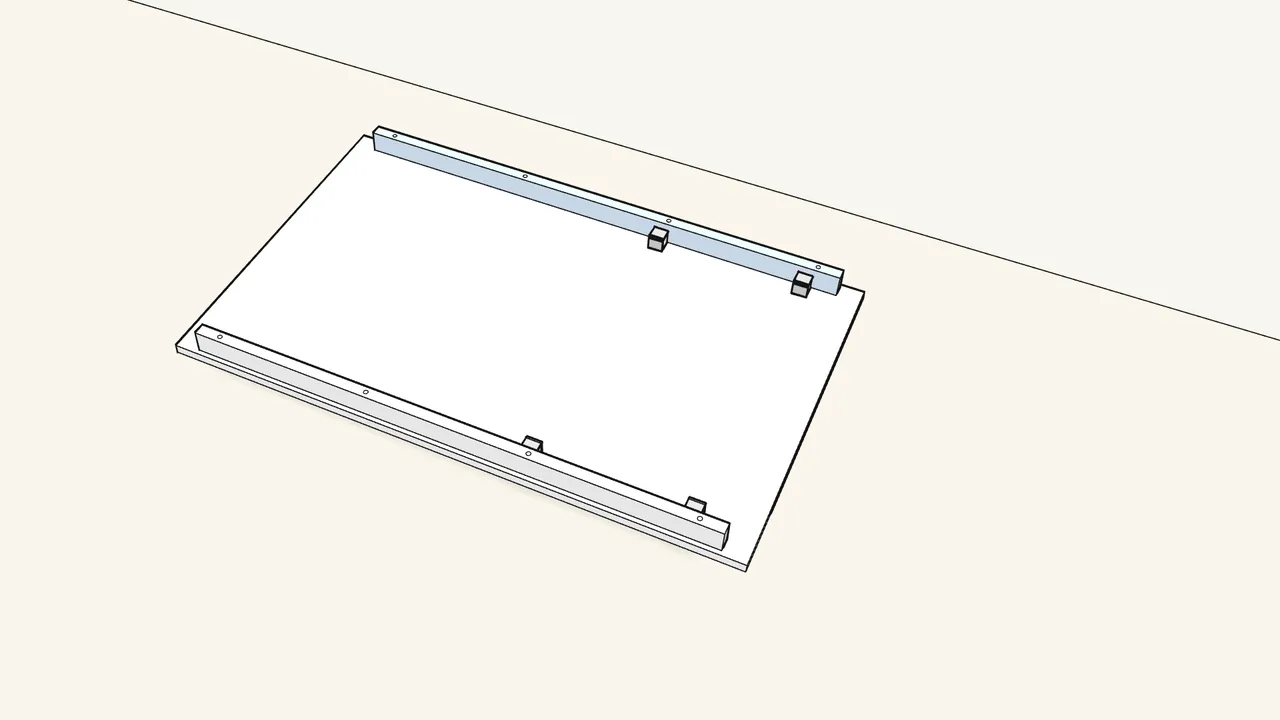
Step 2
Place both rails on the underside of the tabletop.
Lay the top face-down on a rug. The sleeves’ plugs go into the holes in the top.
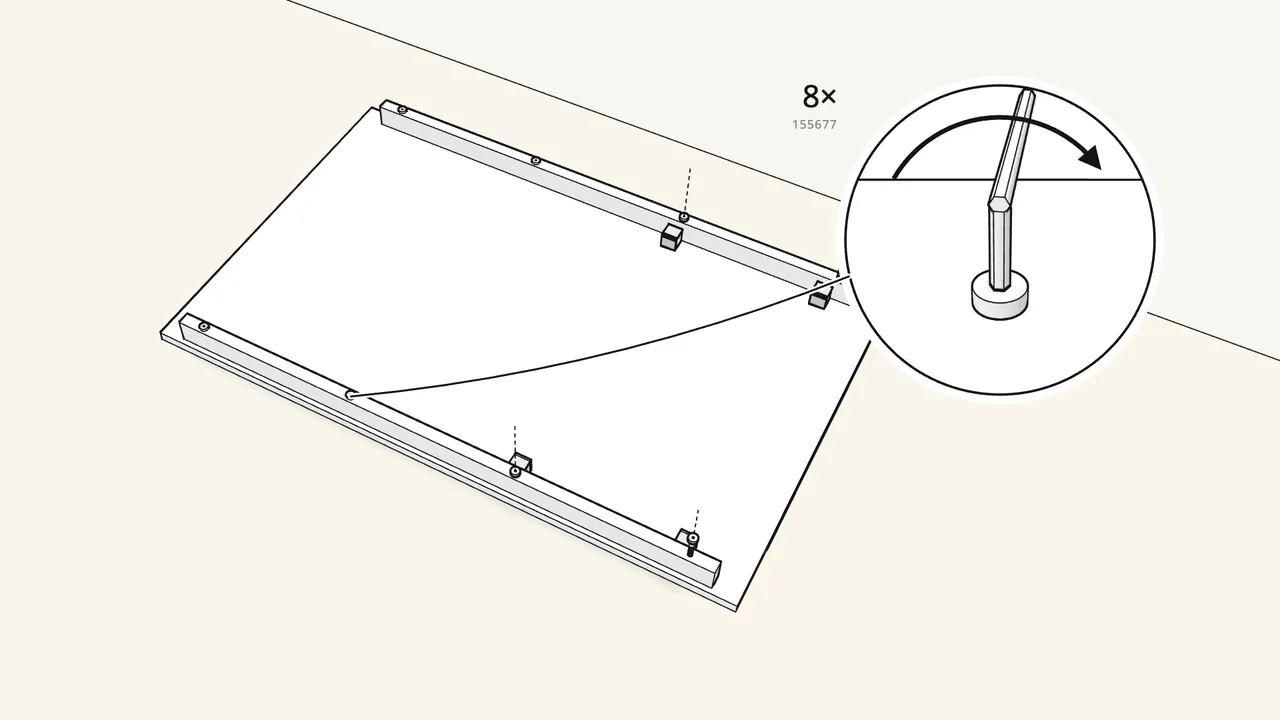
Step 3
Fix the rails with 8 bolts (155677).
4 in each rail, tightened with the Allen key.
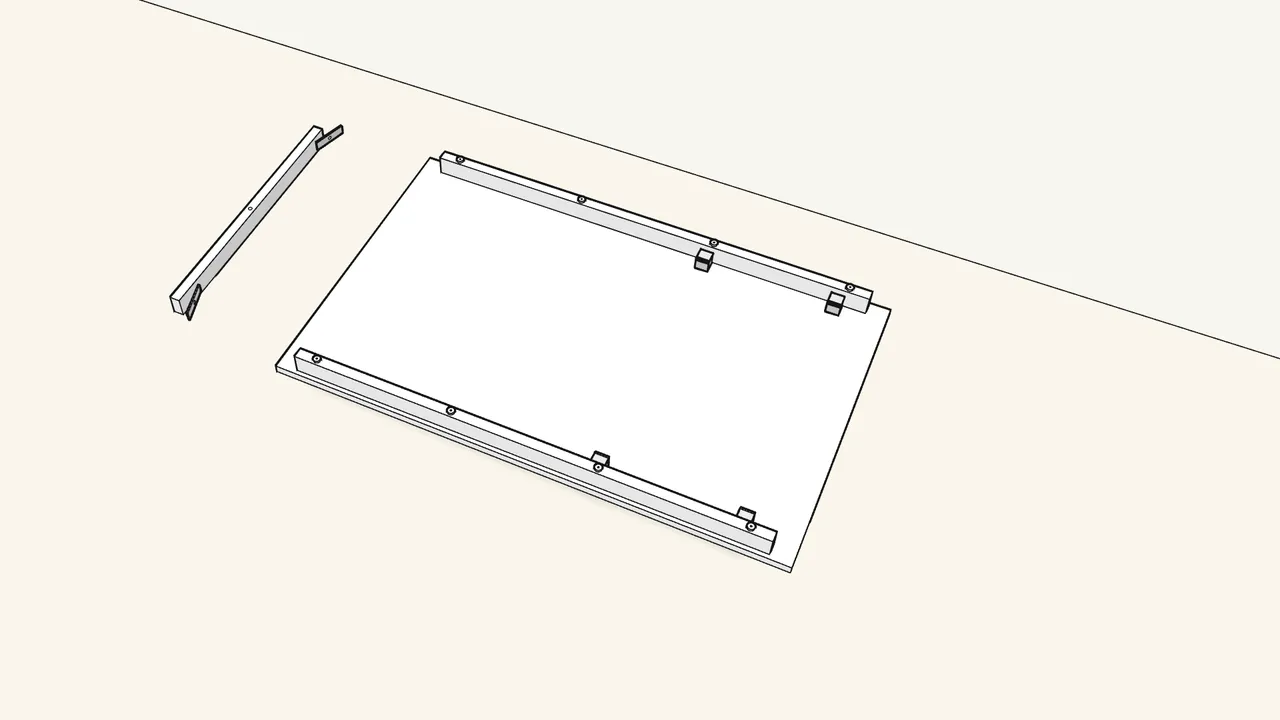
Step 4
Push 2 brackets (158208) into the ends of an end rail.
Check which side of the rail faces up — manual step 4.
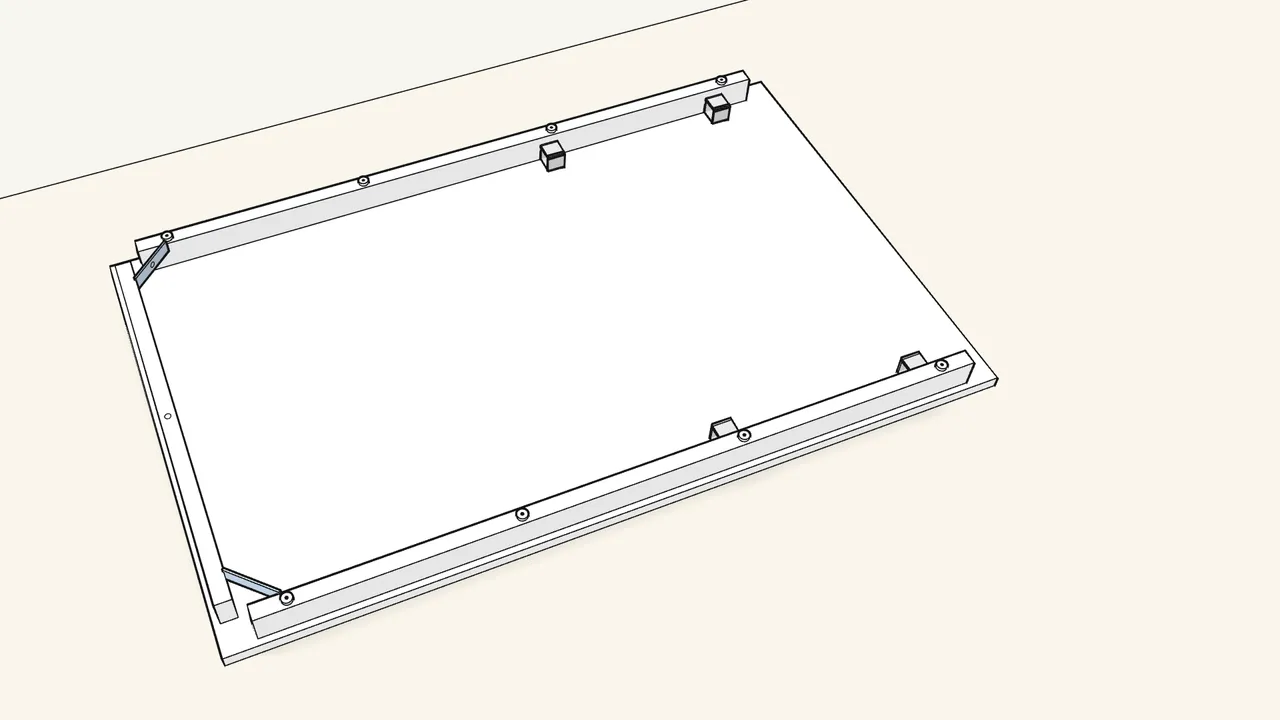
Step 5
Fit the end rail between the long rails and turn the brackets.
Turn both brackets into the slots to lock it.
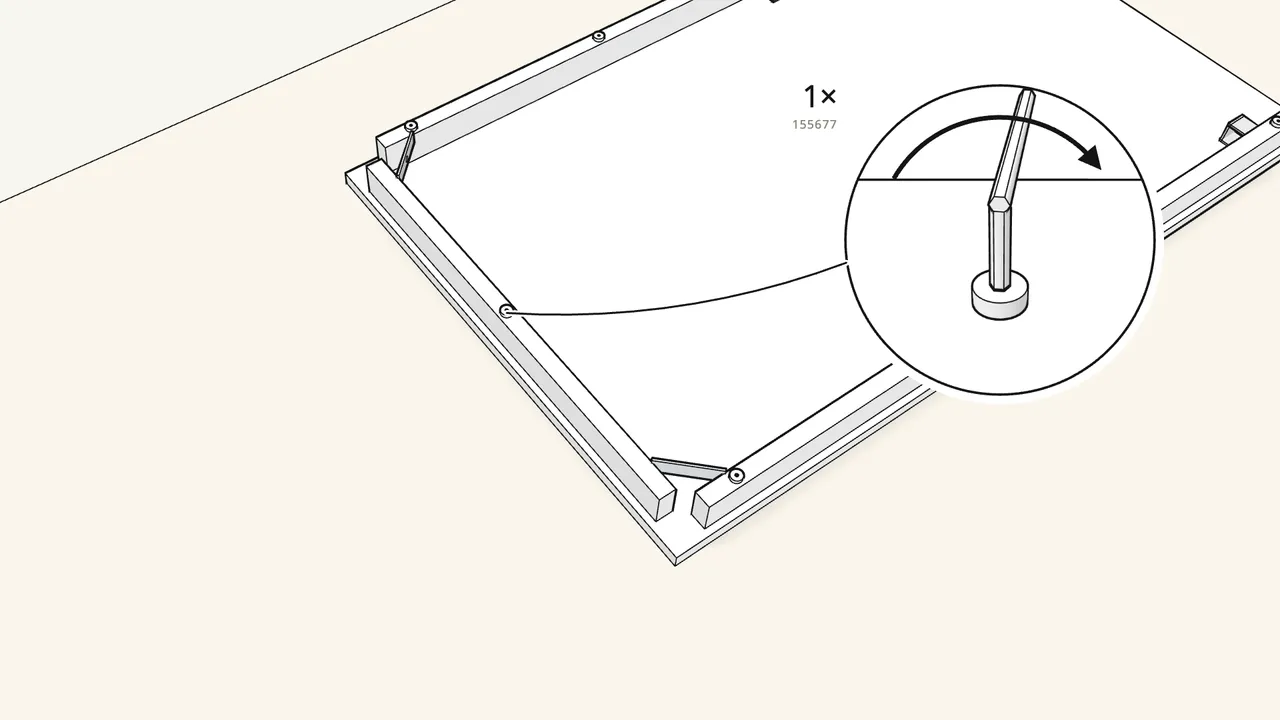
Step 6
Fix the end rail with 1 bolt (155677).
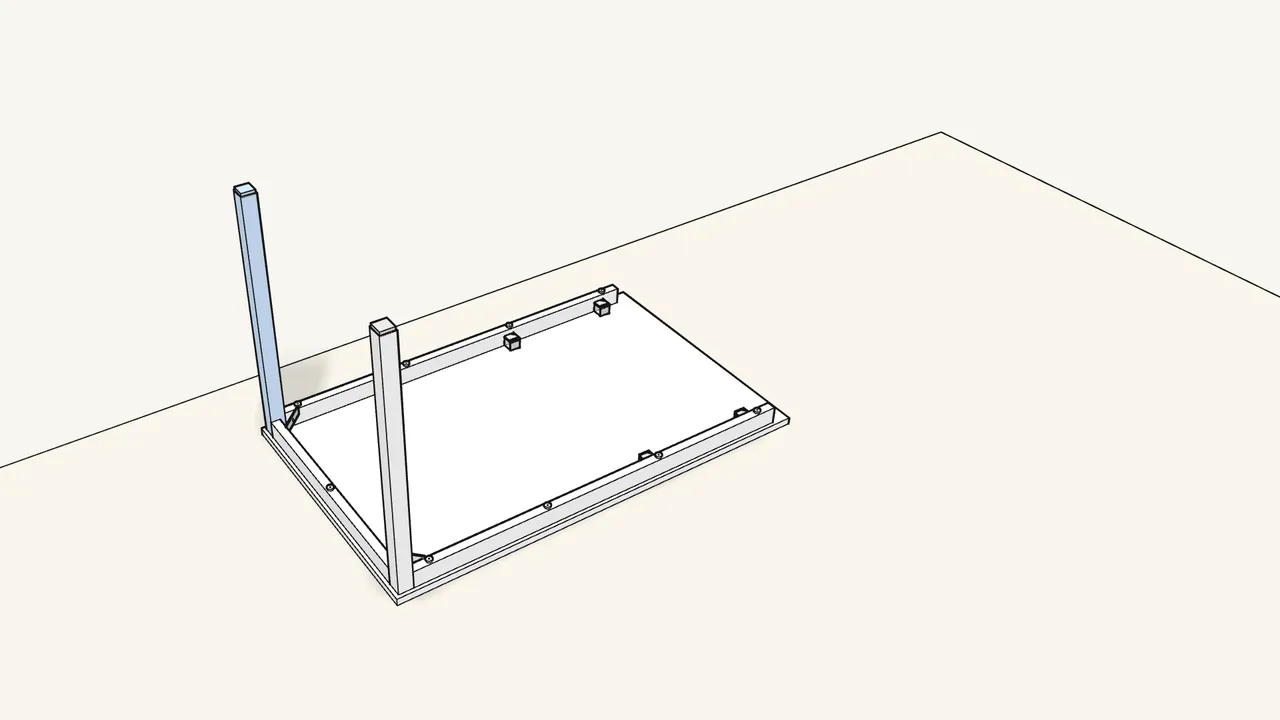
Step 7
Stand 2 legs in the corners at this end.
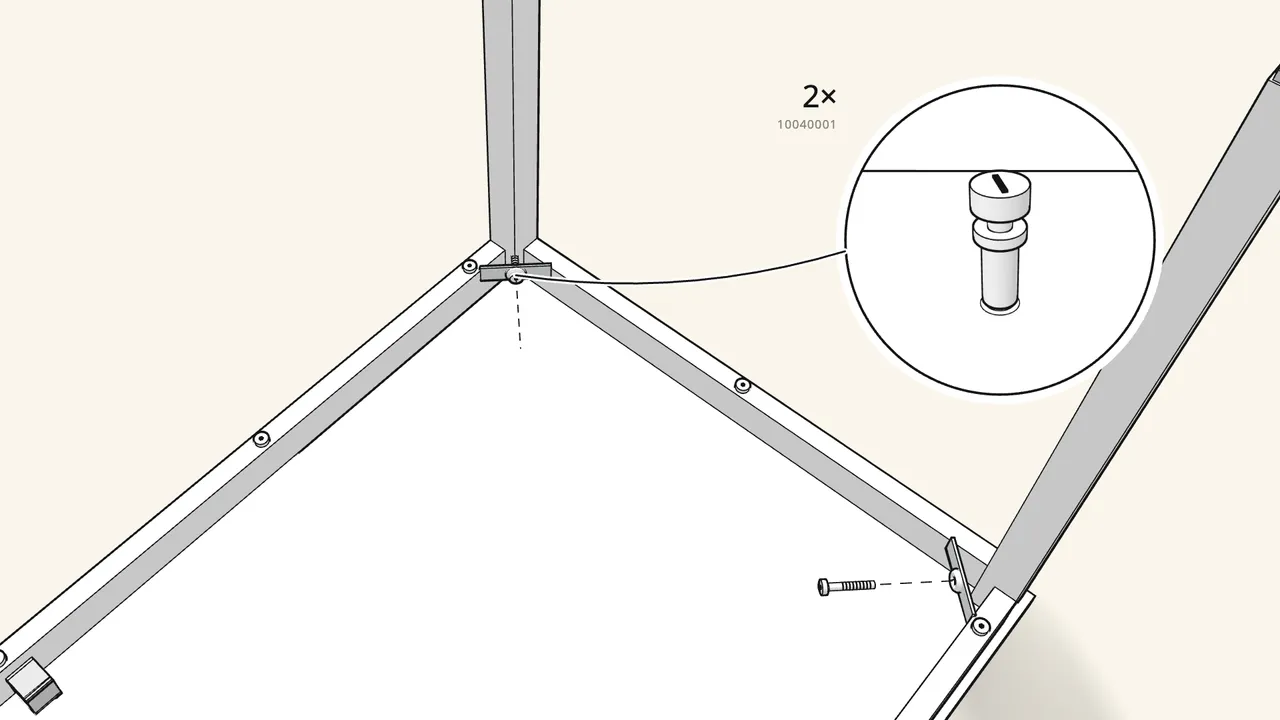
Step 8 · manual step 7
Fix each leg with a washer (117217), spring washer (130912) and bolt (10040001).
In that order, through the bracket — only hand-tight for now.
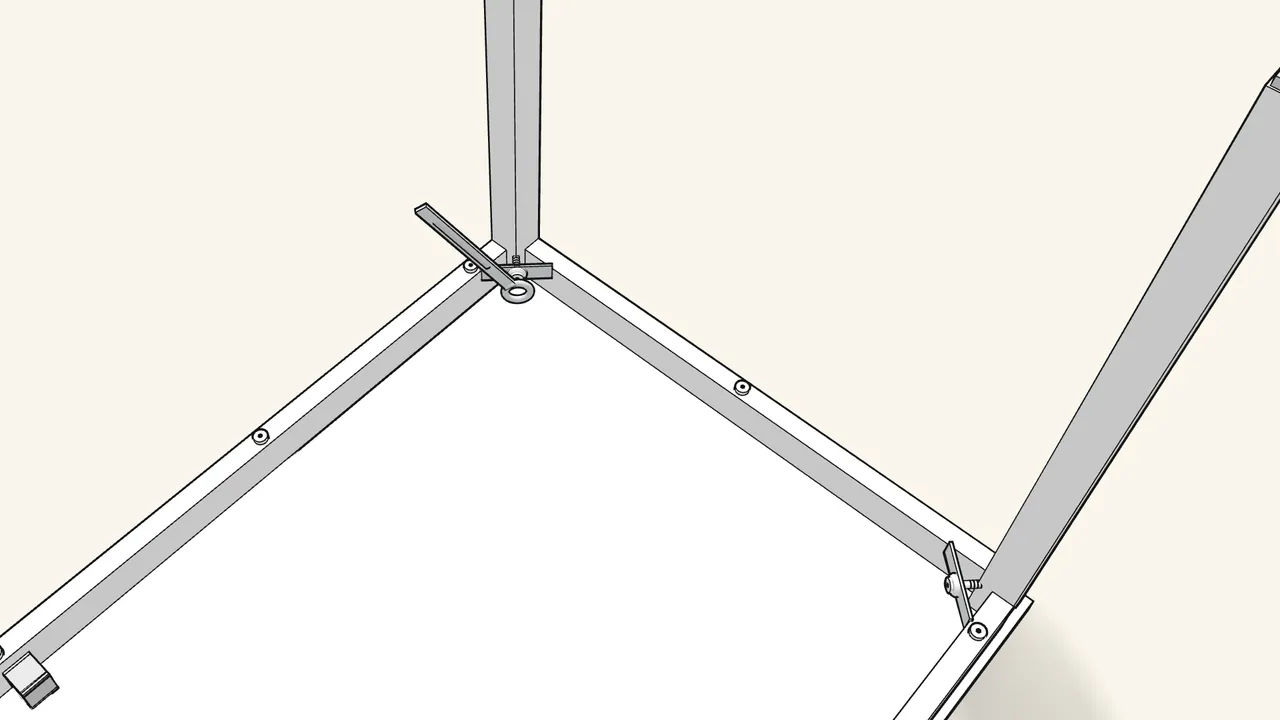
Step 9 · manual step 8
Tighten both bolts firmly with the spanner (157680).
The washers must sit flat against the bracket.
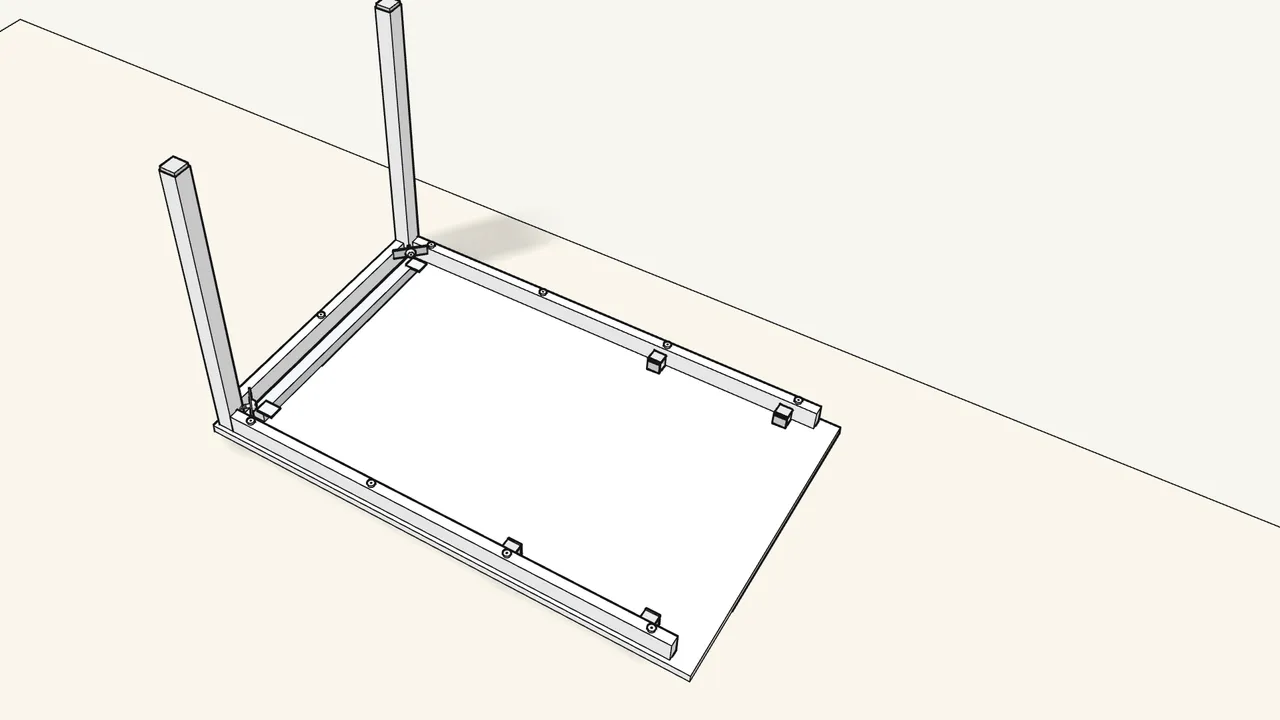
Step 10 · manual step 9
Place the metal channel inside the end rail.
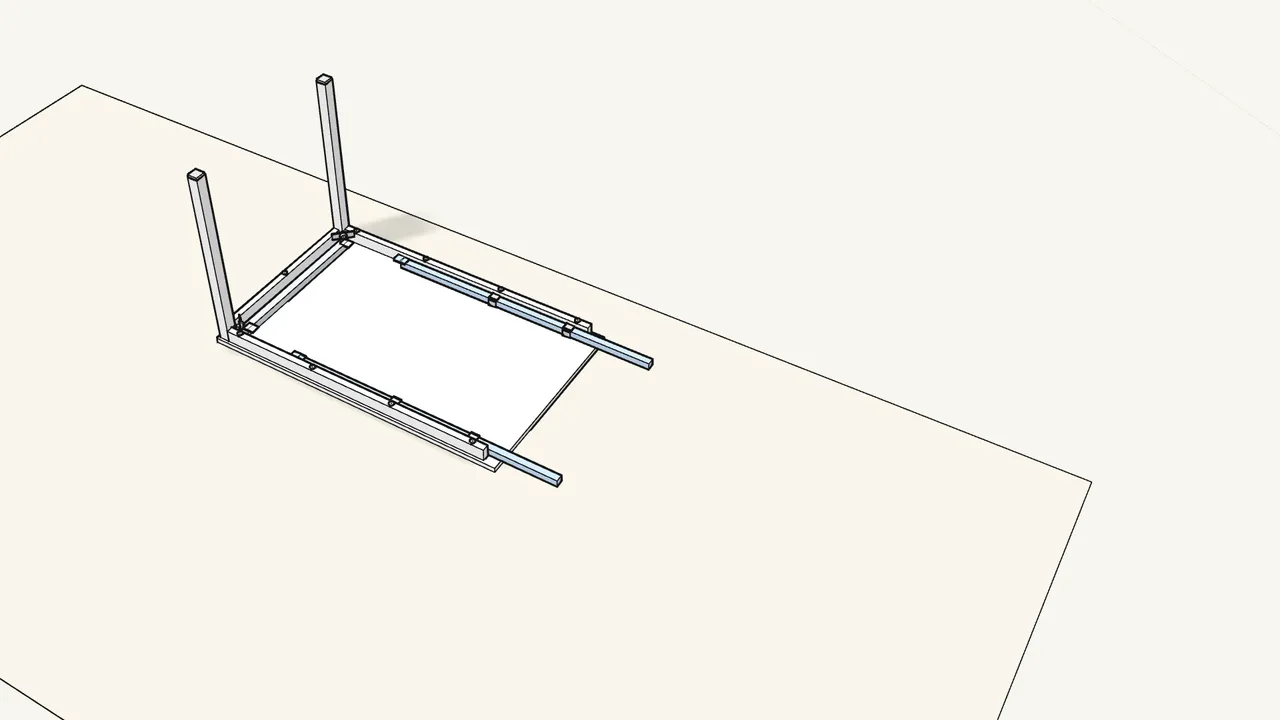
Step 11 · manual step 10
Slide the 2 square tubes in through the plastic sleeves.
Notched end first — see the close-ups in step 10.
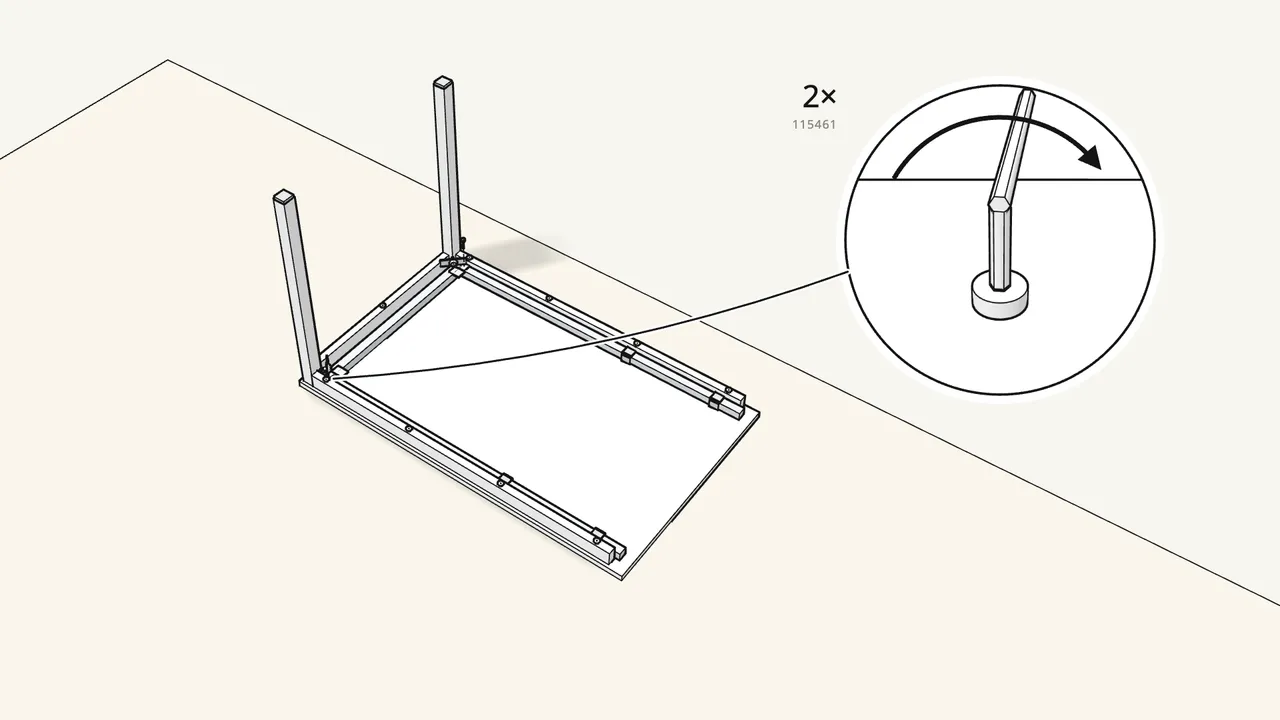
Step 12 · manual step 11
Push the tubes to the end and fix them with 2 bolts (115461).
The tube ends slide under the channel’s plates.
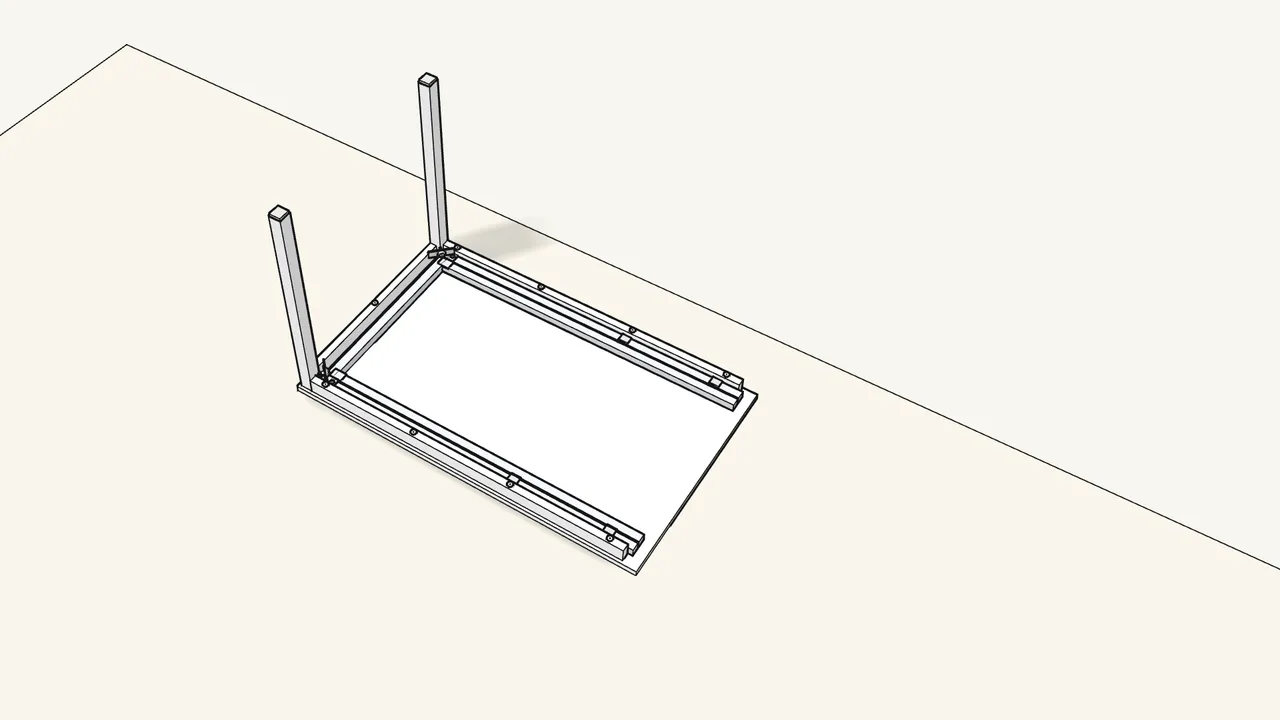
Step 13 · manual step 12
Fit the 2 long channels next to the tubes.
Their ends hook into the openings in the tube ends — manual step 12.
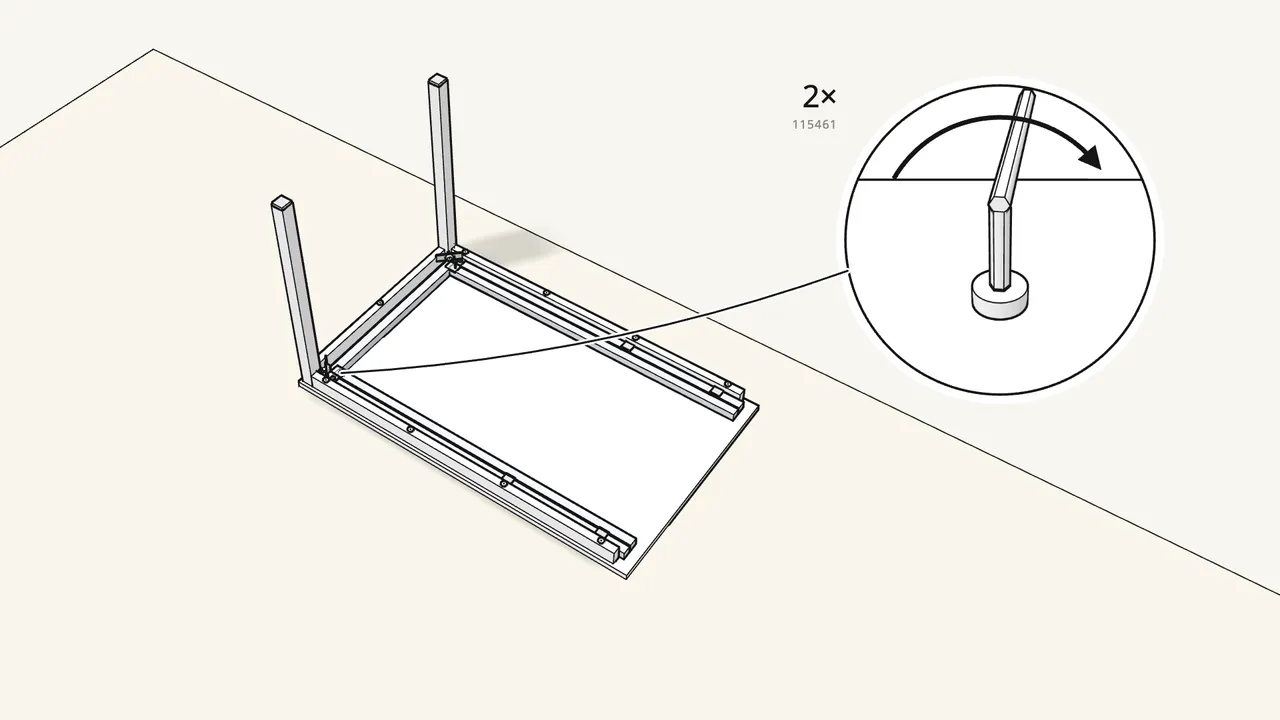
Step 14 · manual step 13
Fix the channels with 2 bolts (115461).
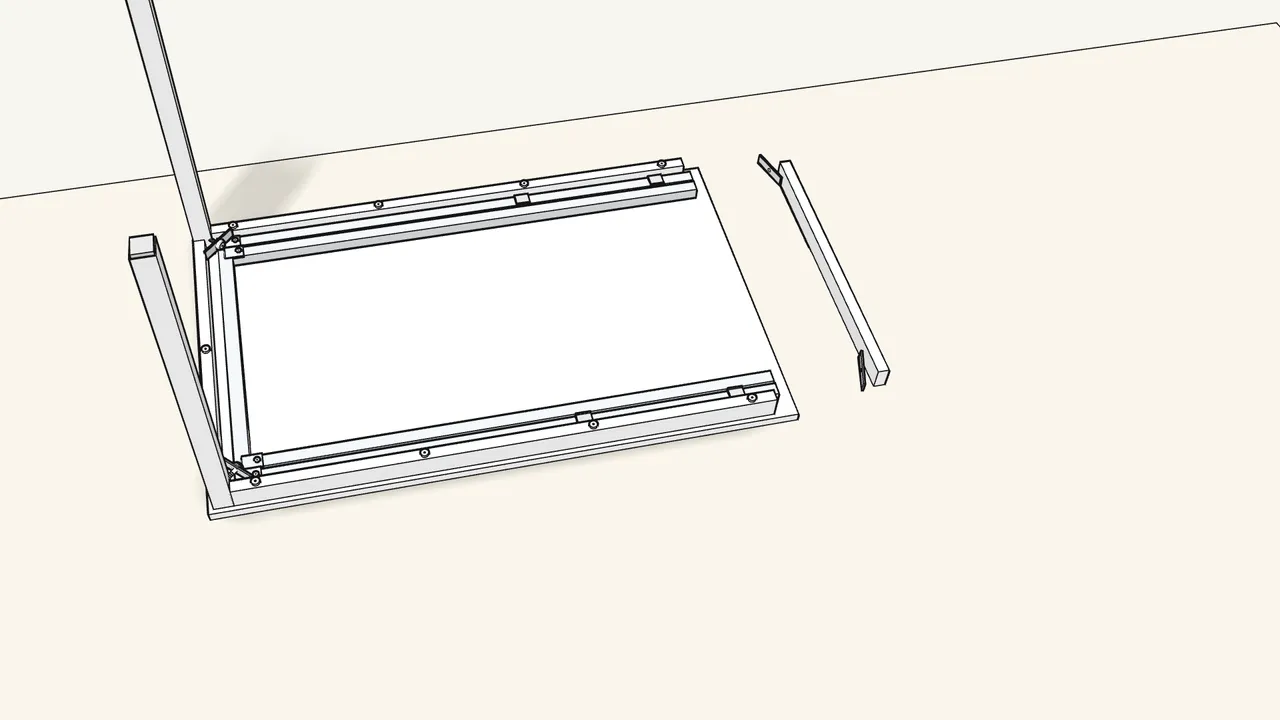
Step 15 · manual step 14
Push 2 brackets (158208) into the second end rail.
Check which side faces up, as before.
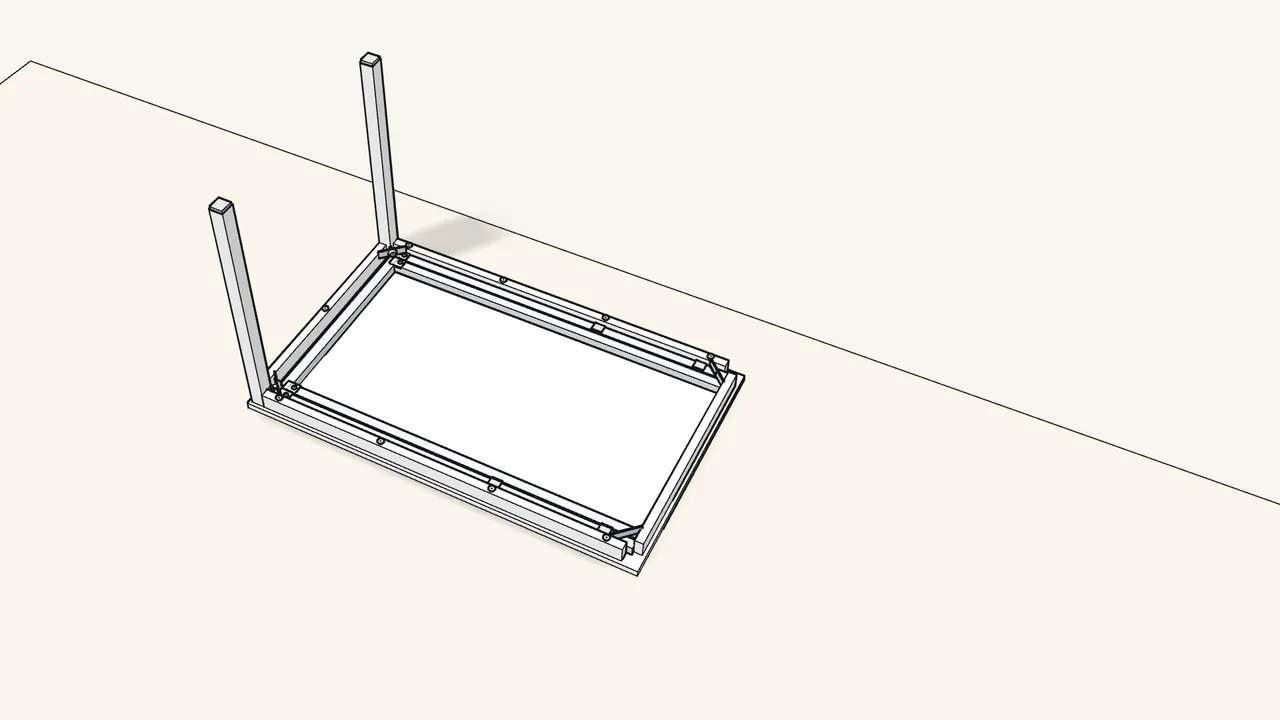
Step 16 · manual step 15
Fit it onto the tube ends and turn the brackets to lock.
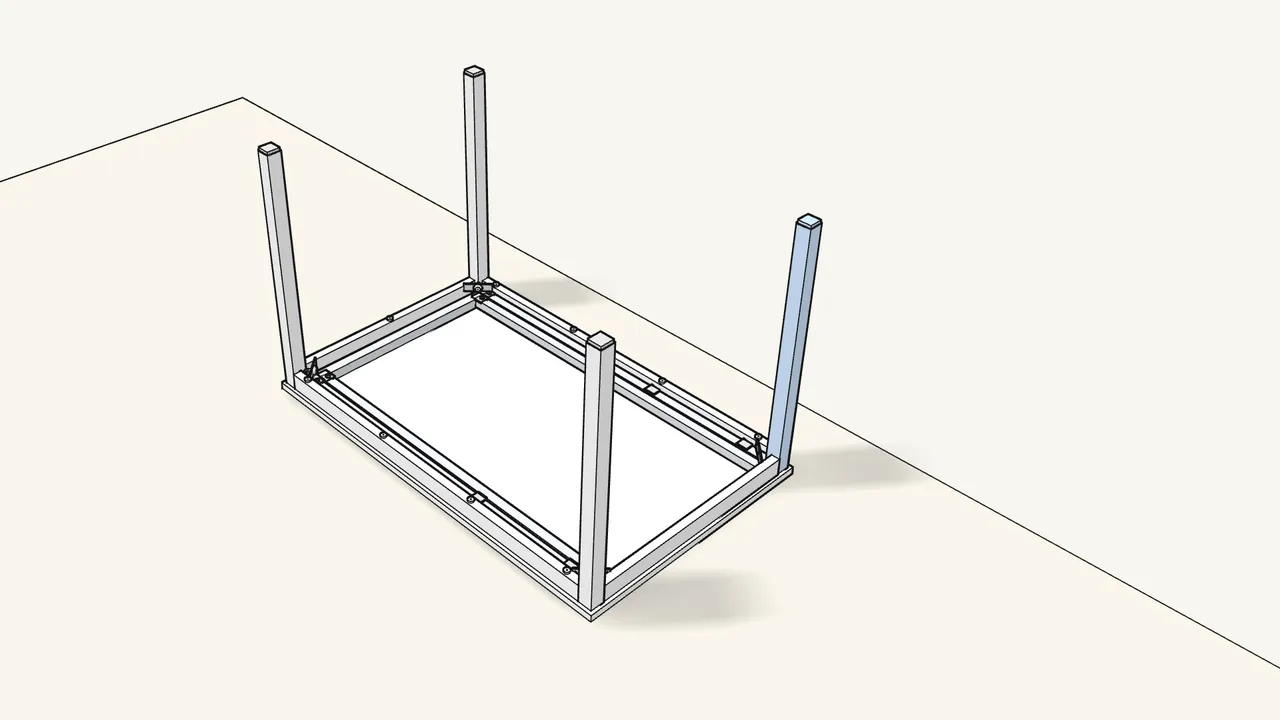
Step 17 · manual step 16
Stand the other 2 legs in the corners.
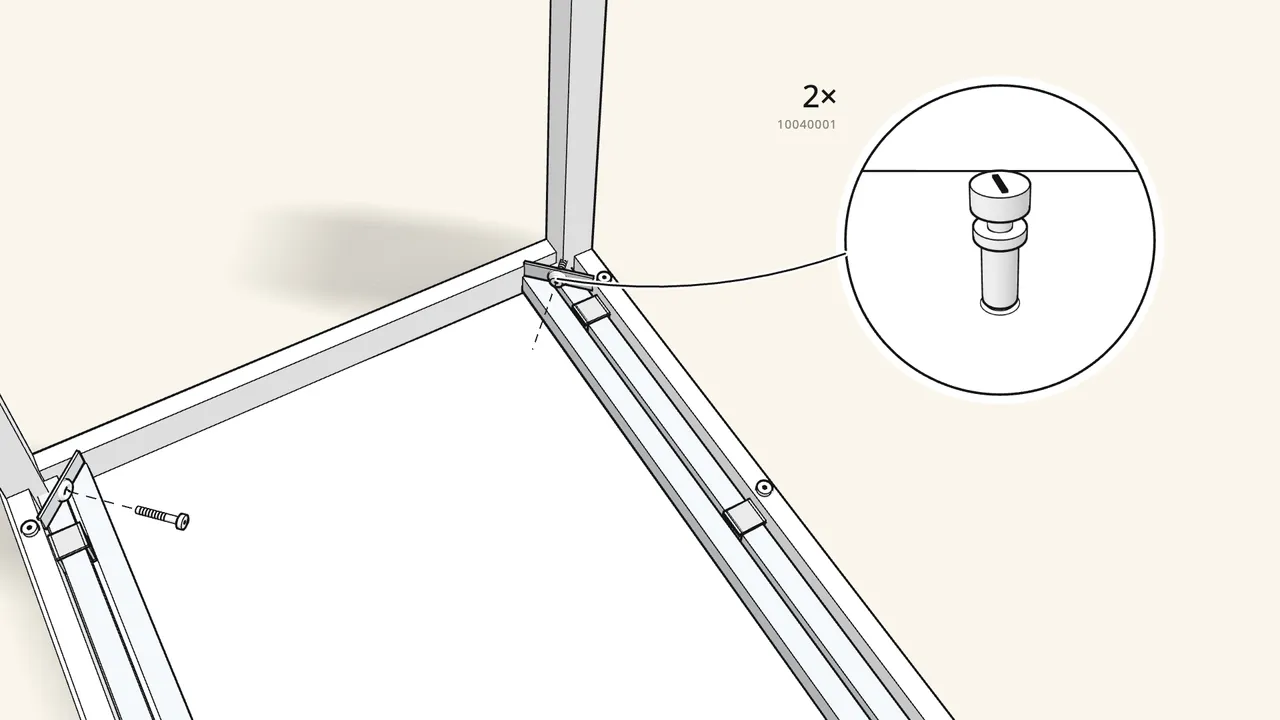
Step 18 · manual step 16
Fix them with washers, spring washers and bolts, as before.
Hand-tight first, as in step 7.
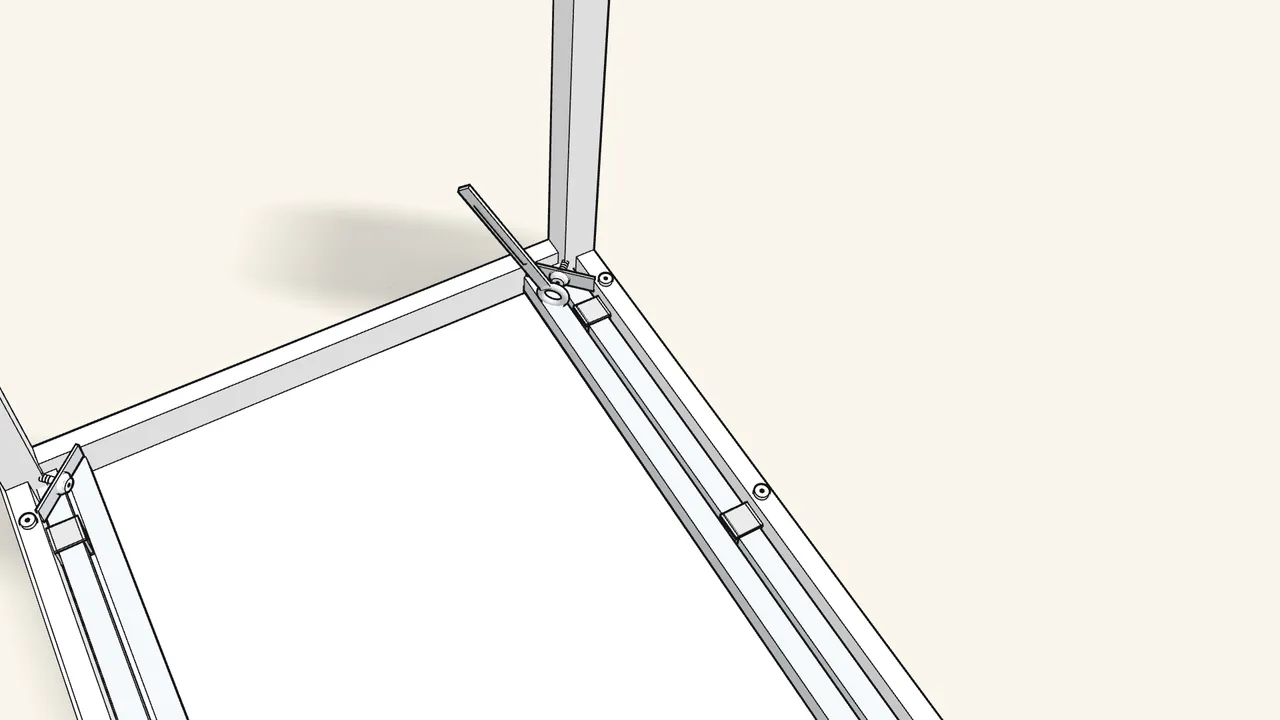
Step 19 · manual step 17
Tighten both bolts with the spanner.
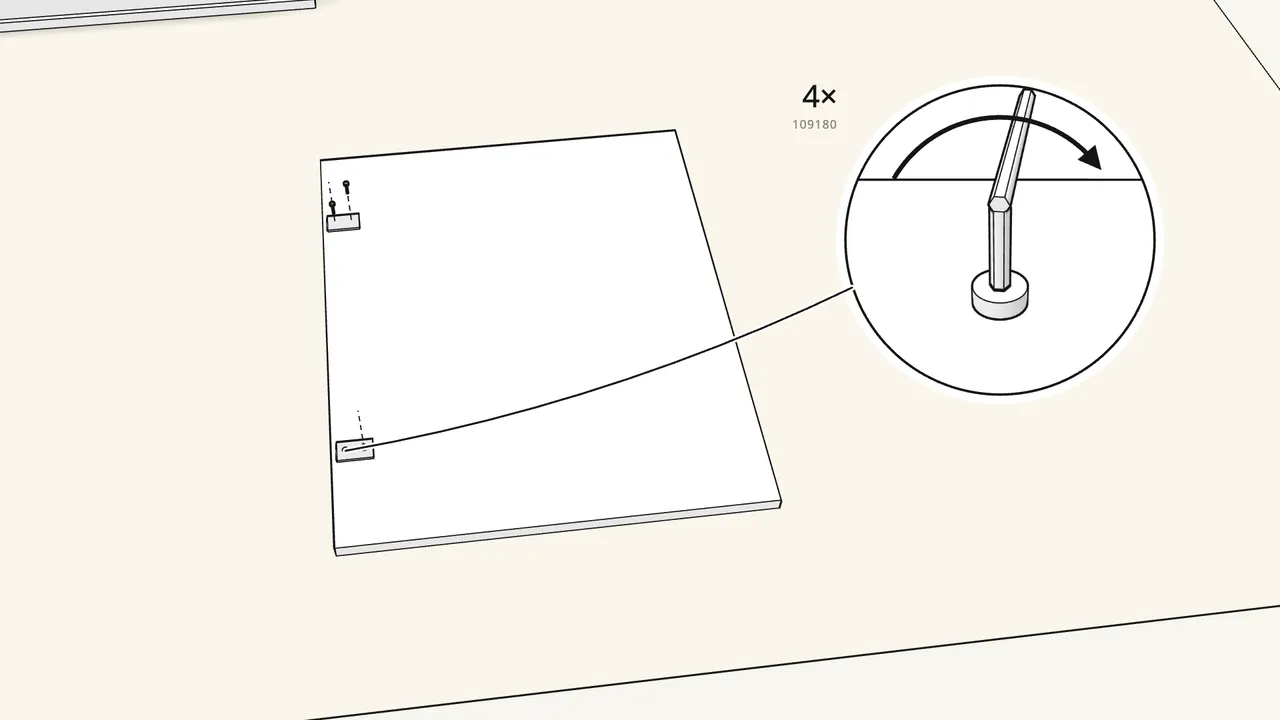
Step 20 · manual step 18
Screw 2 fittings (155866) under one edge of the leaf.
4 screws (109180), Allen key. Use these fittings, not 10120183 — manual step 18.
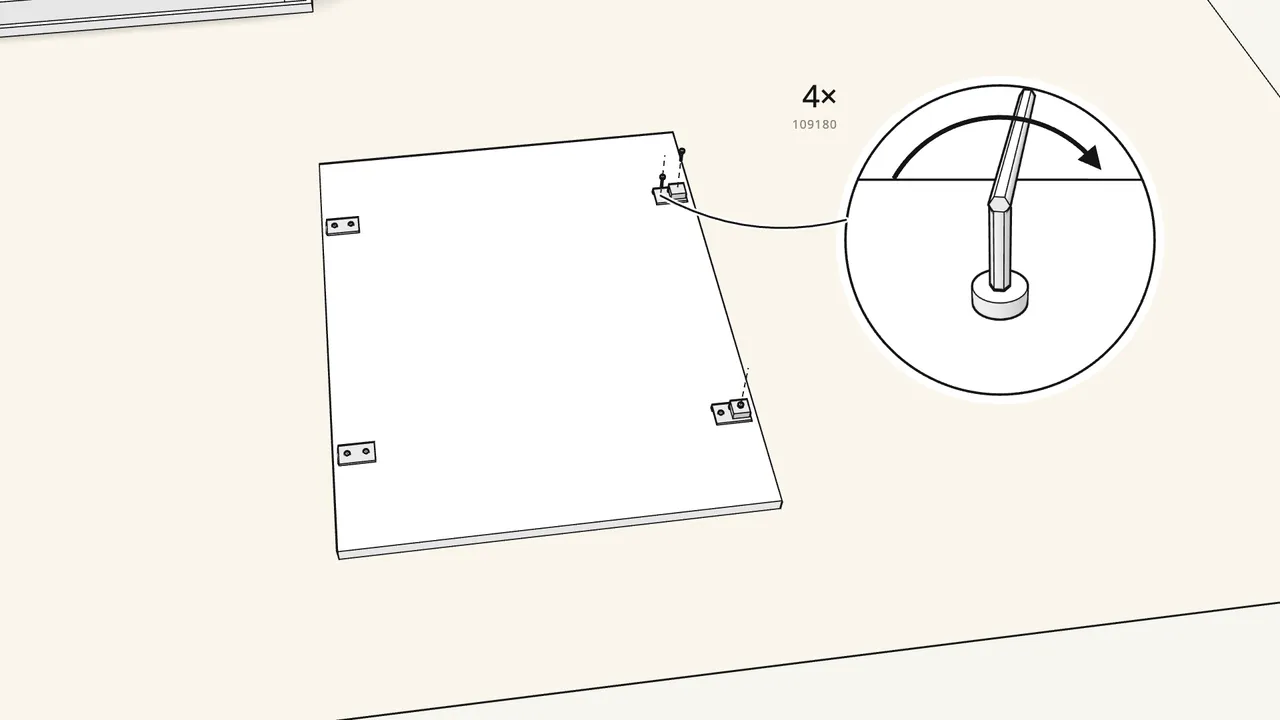
Step 21 · manual step 19
Screw 2 fittings (155868) under the opposite edge.
Another 4 screws (109180).
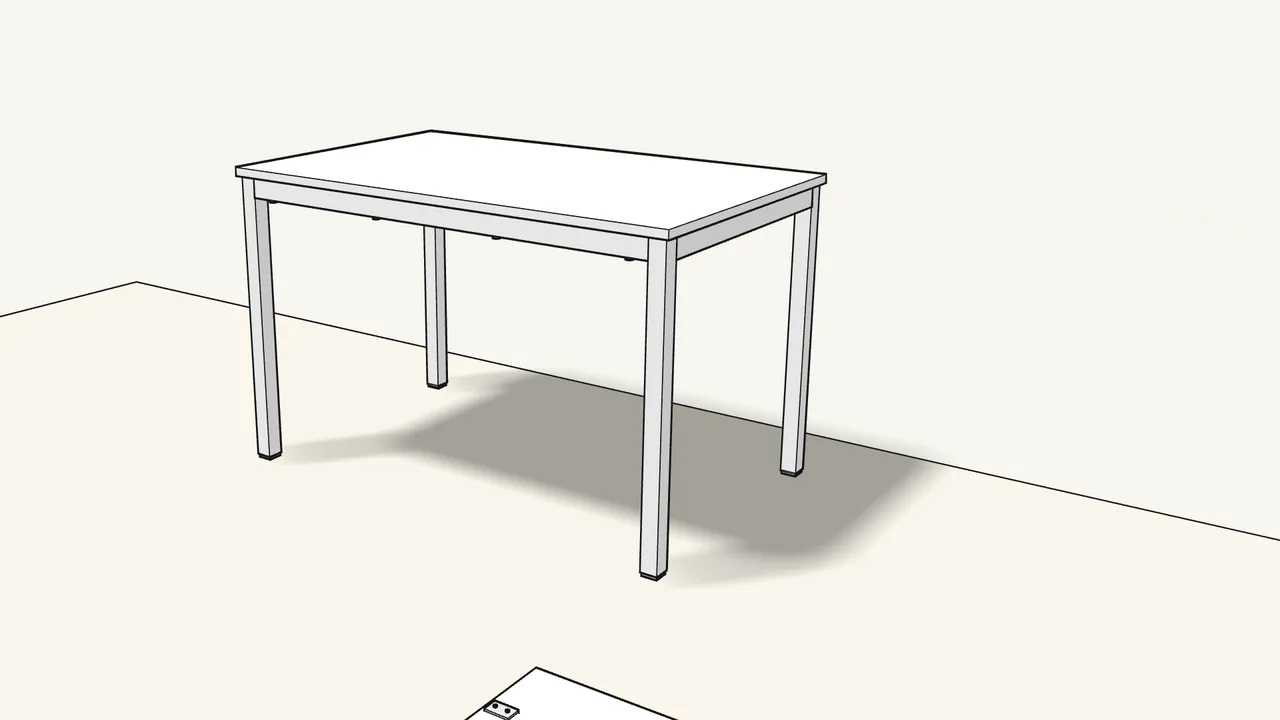
Step 22
Turn the table over onto its legs — with two people.
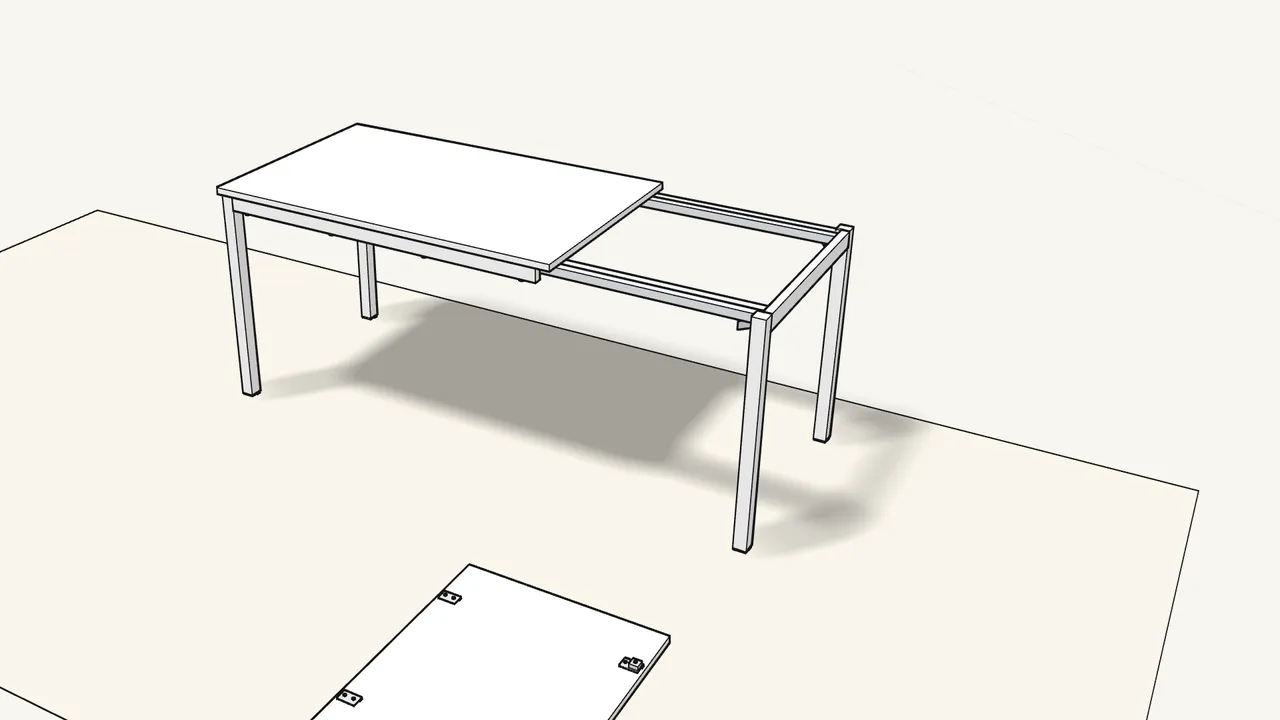
Step 23
To extend: pull the end of the table out.
Manual p. 24, step 1.
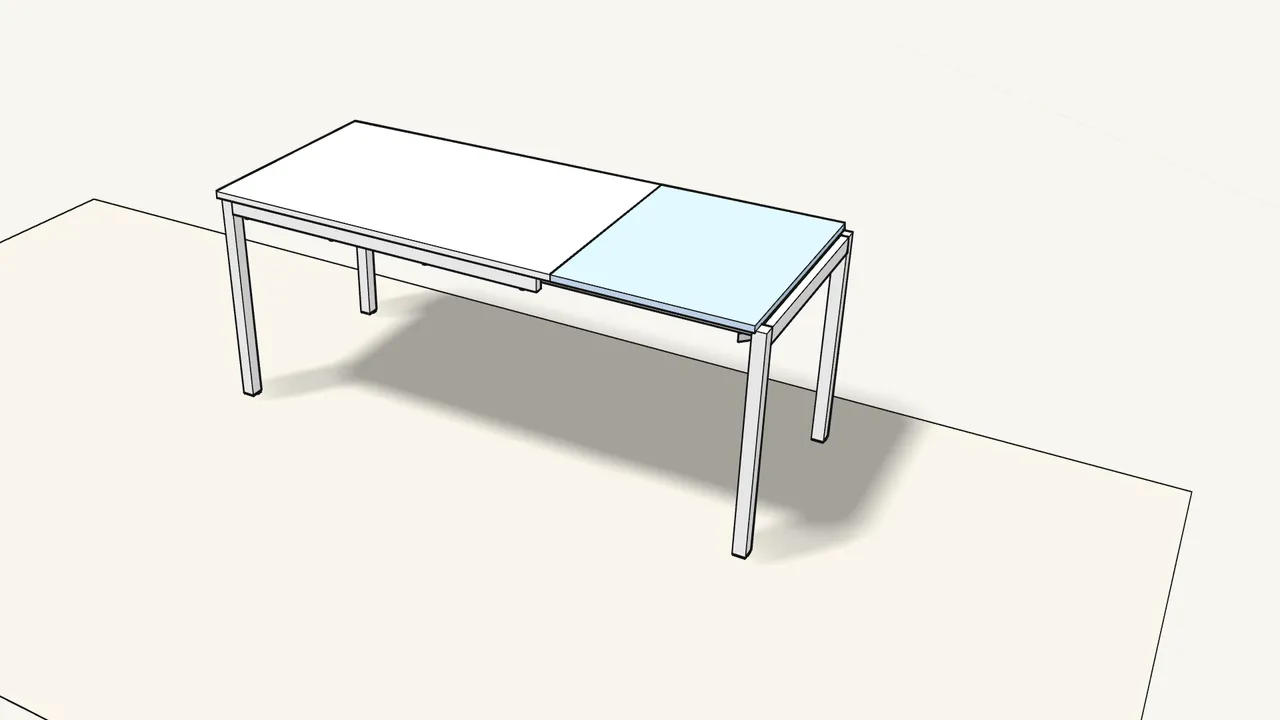
Step 24
Turn the leaf over and lower it into the gap.
Fittings 155866 towards the tabletop — manual p. 25.
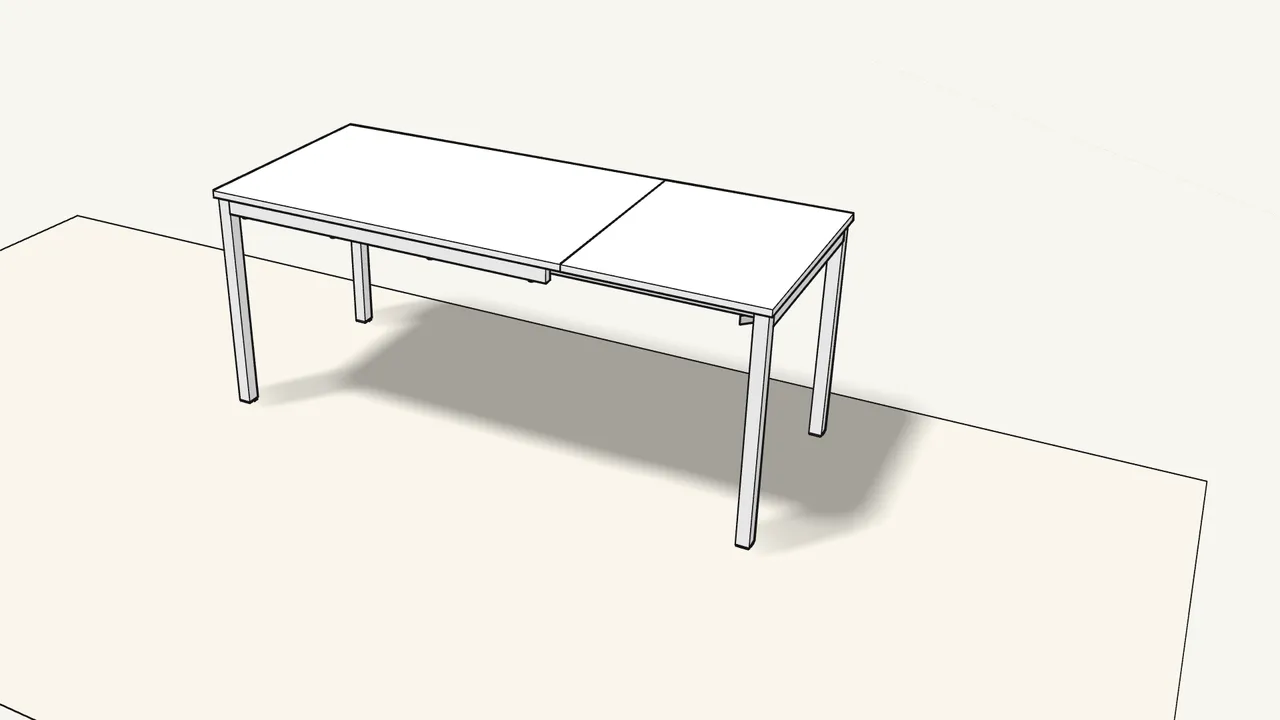
Step 25
Push the end in until the leaf locks — now 180 cm.
Manual p. 26.
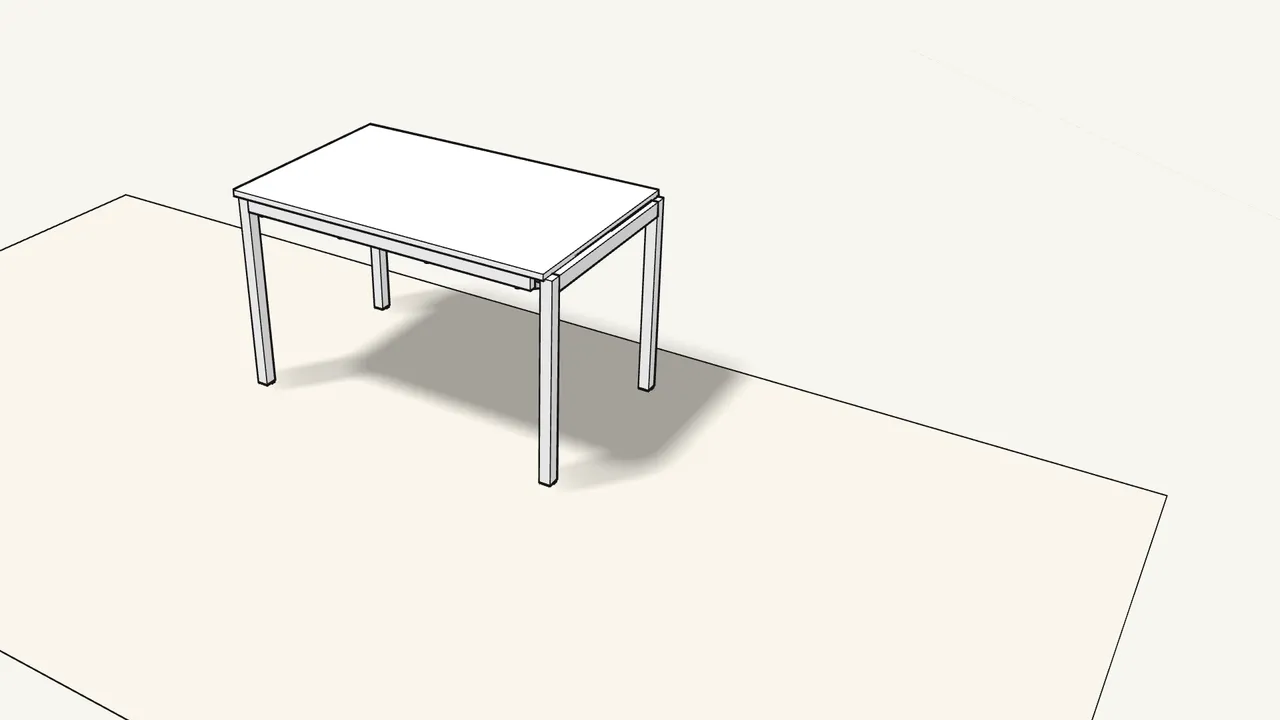
Step 26
To shorten: pull the end out, lift out the leaf, push the end back.
Manual p. 27–28.
Tips & safety
- Assemble with two people. The manual (p. 2) shows two people. Work on a rug so the tabletop doesn’t get scratched.
- Washers flat, bolts tight. Steps 7–8 and 16–17: washer, spring washer, bolt — the washers must sit flat, then tighten with the spanner.
Official instructions
This guide follows IKEA’s official assembly instructions (AA-2506501-4). Keep the printed manual to hand — if anything differs, the manual is right.



