IKEA · Tables & Desks
How to assemble IKEA OLSERÖD Side Table
Step-by-step IKEA OLSERÖD Side Table assembly: 16 illustrated steps, an animated video, the hardware list and the tools you need — following the official instructions (AA-2544531-1).
- 16 illustrated steps
- 17 steps in the manual
- 2:28 video
- 53×50×64 cm
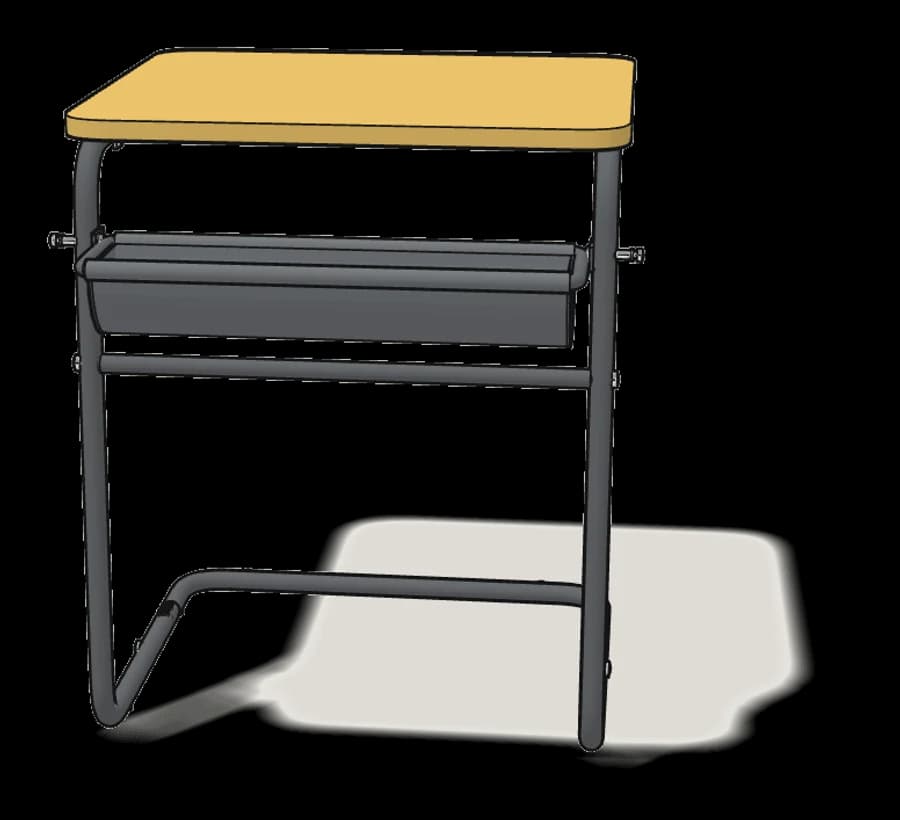
What you need
Tools
- Phillips screwdriver
- Allen key (included)
Hardware in the box
| Part no. (as printed in the manual) | Qty |
|---|---|
| 194765 | 2× |
| 195312 | 2× |
| 131996 | 2× |
| 10091763 | 2× |
| 10005471 | 12× |
| 10005485 | 12× |
| 10092086 | 8× |
| 107616 | 8× |
| 10094827 | 4× |
Step-by-step assembly
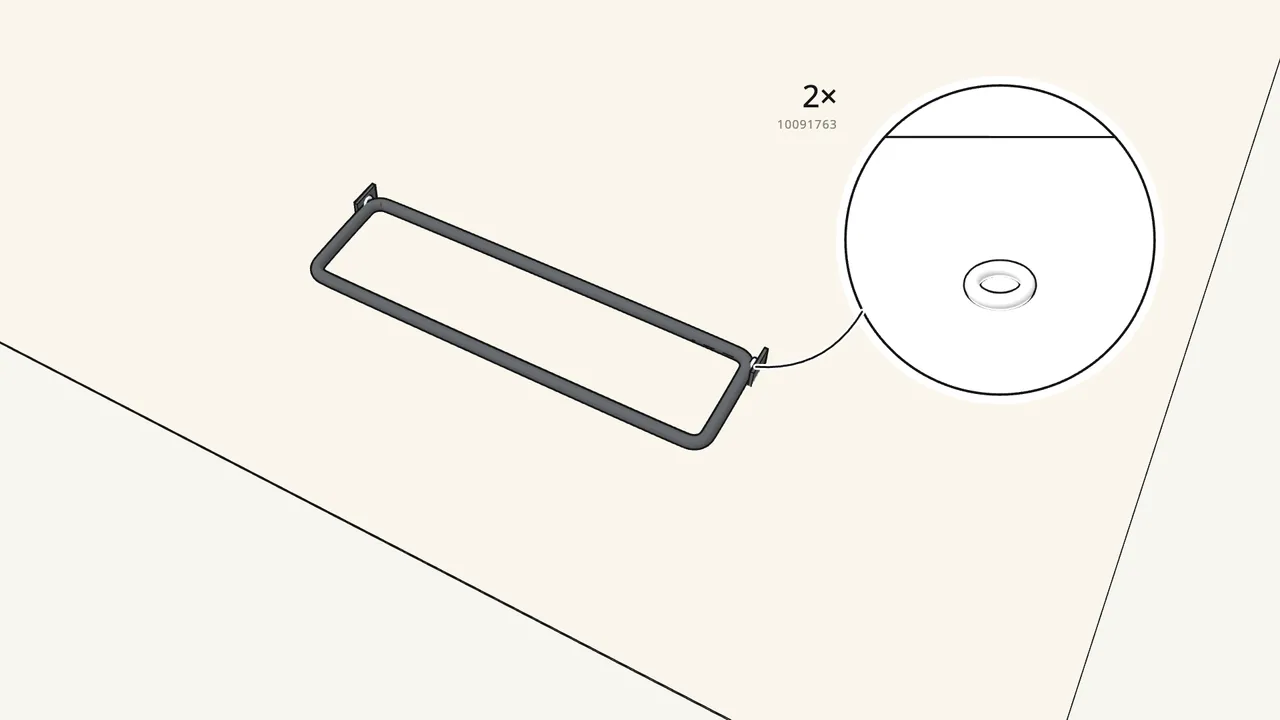
Step 1
Press 2 bushings (10091763) into the eyes of the tray frame.
One at each end of the tray frame.
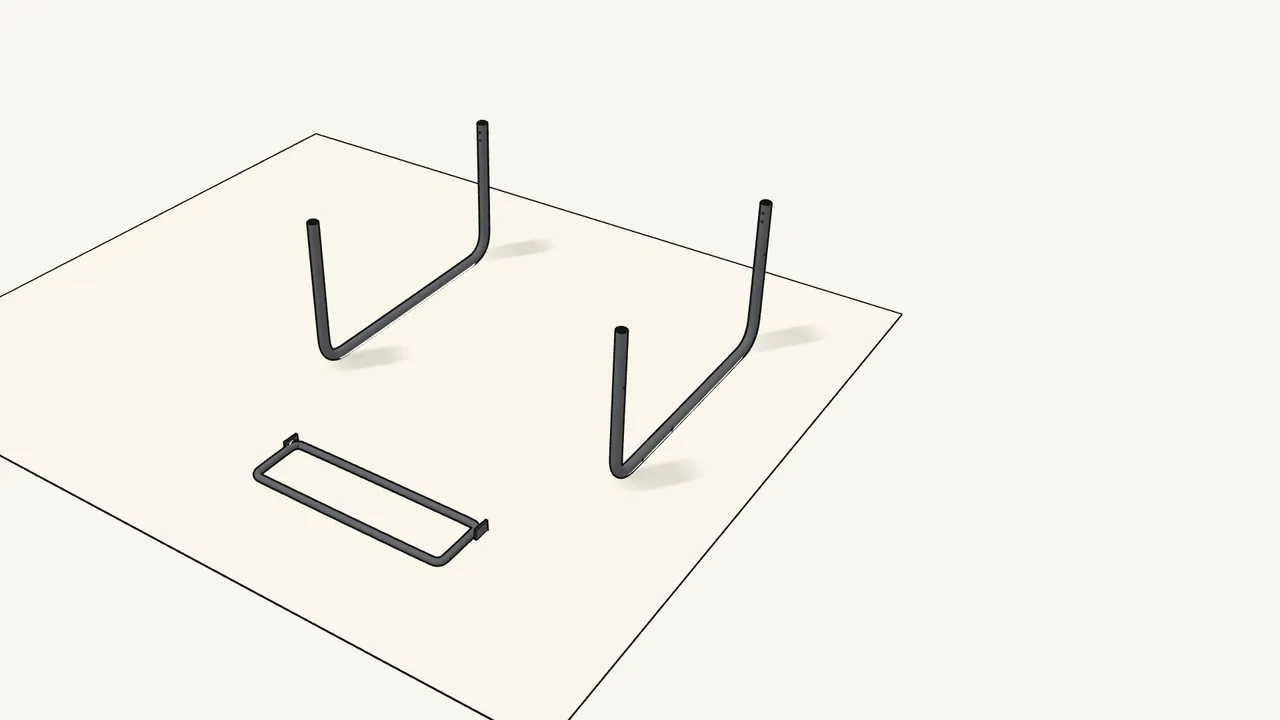
Step 2
Lay out the two U-shaped tubes as shown.
Check the hole positions against the close-ups in the manual.
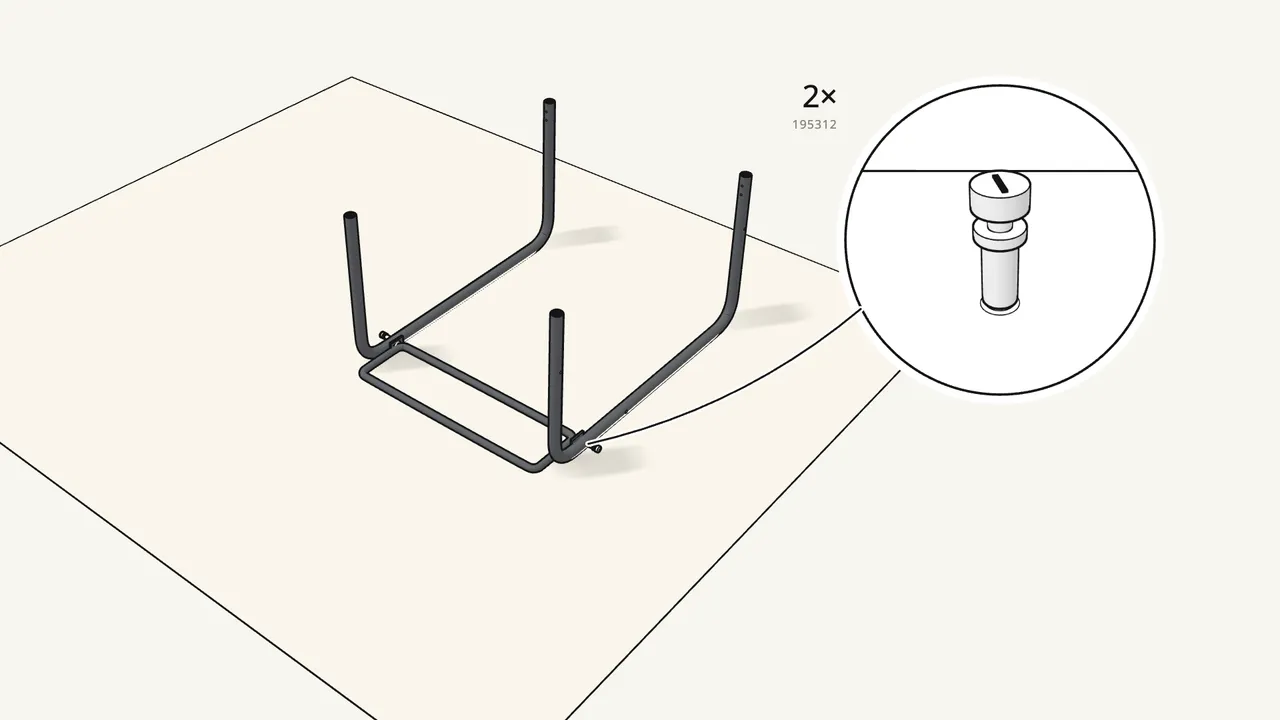
Step 3
Fix the tray frame between the U-tubes with 2 knob screws (195312).
Turn them in by hand.
Step 4
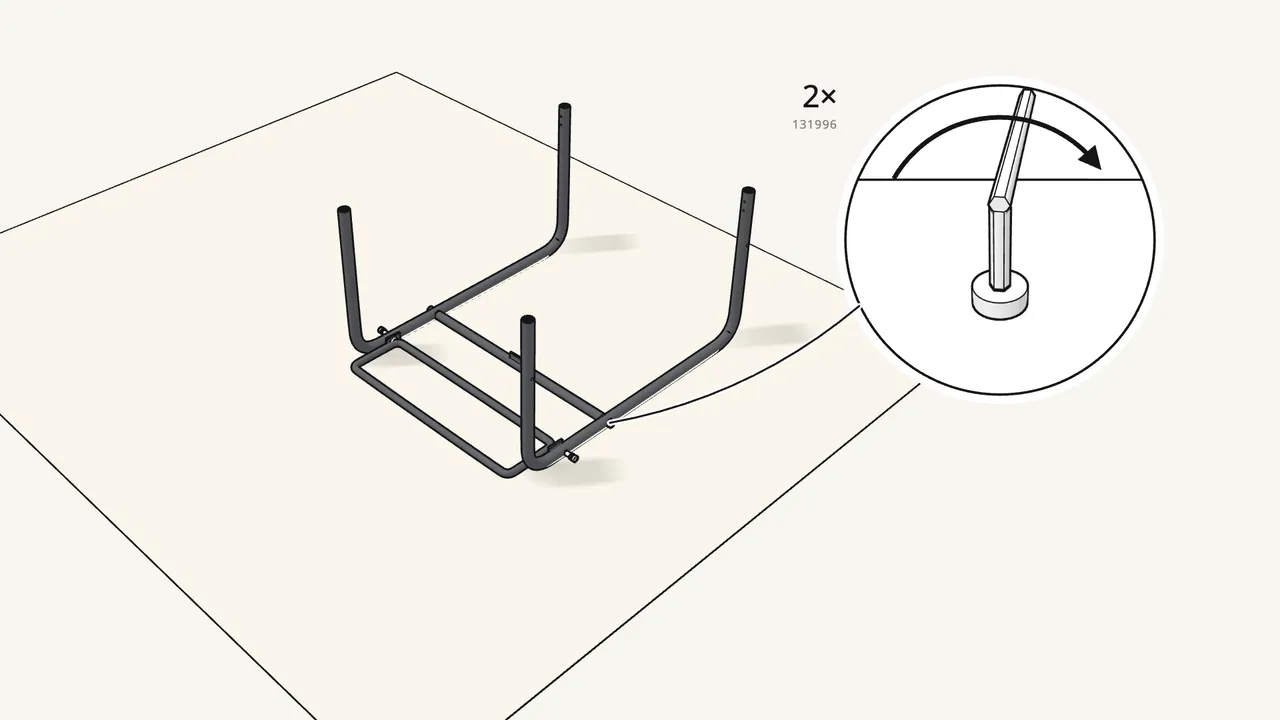
Fit the crossbar with 2 bolts (131996) and the Allen key.
The small tab on the crossbar points up, as in the manual.
Step 5
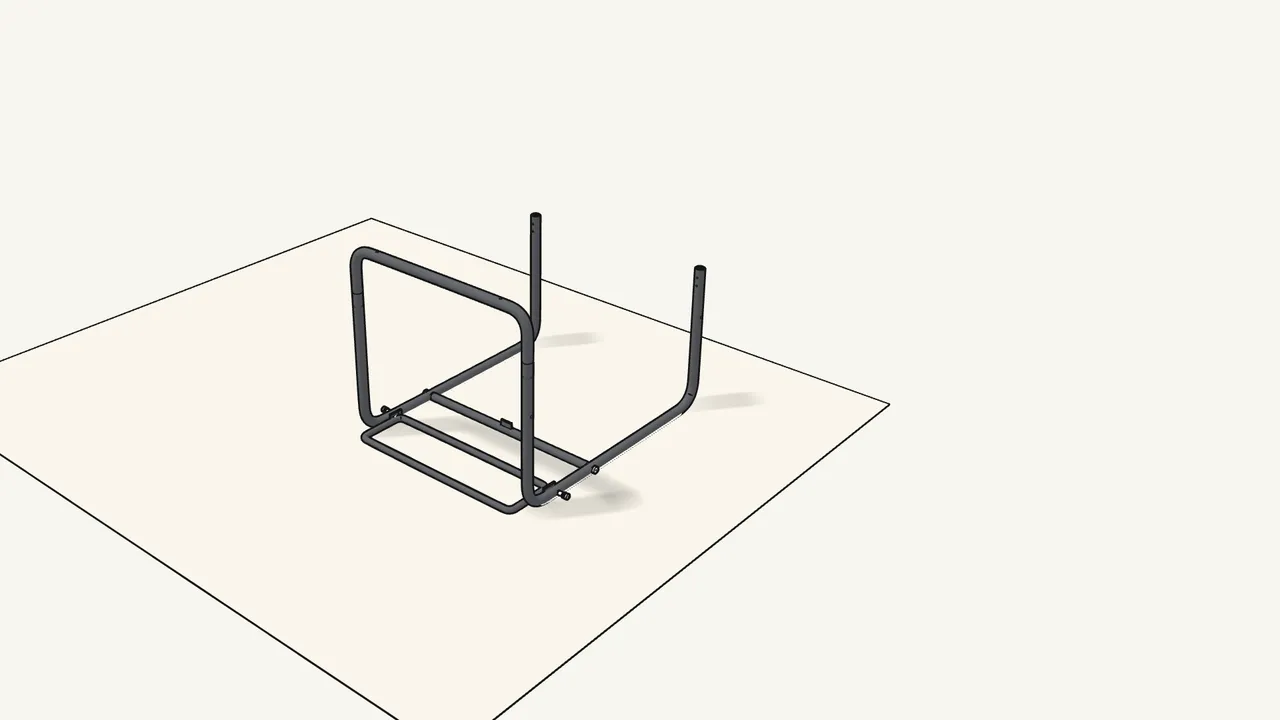
Push one bow onto the two front tube ends.
Turn it so its holes face the same way as in the close-up.
Step 6
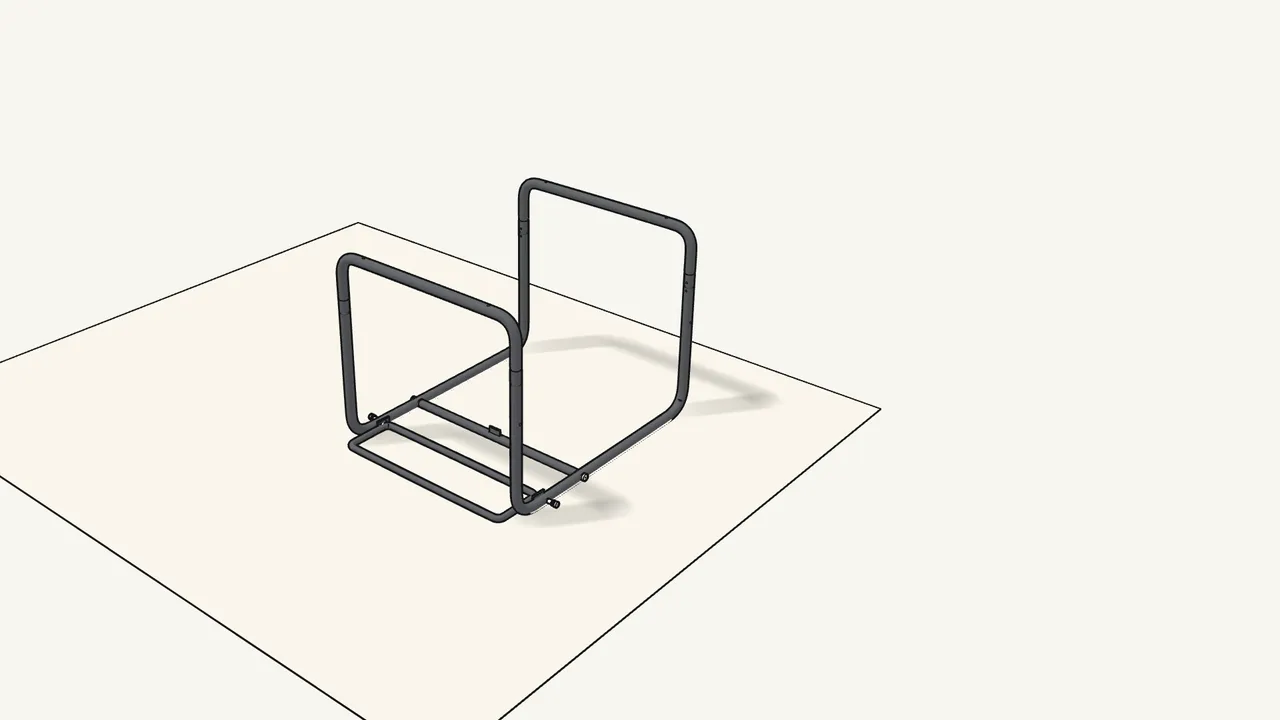
Push the other bow onto the two back tube ends.
Check the holes again.
Step 7
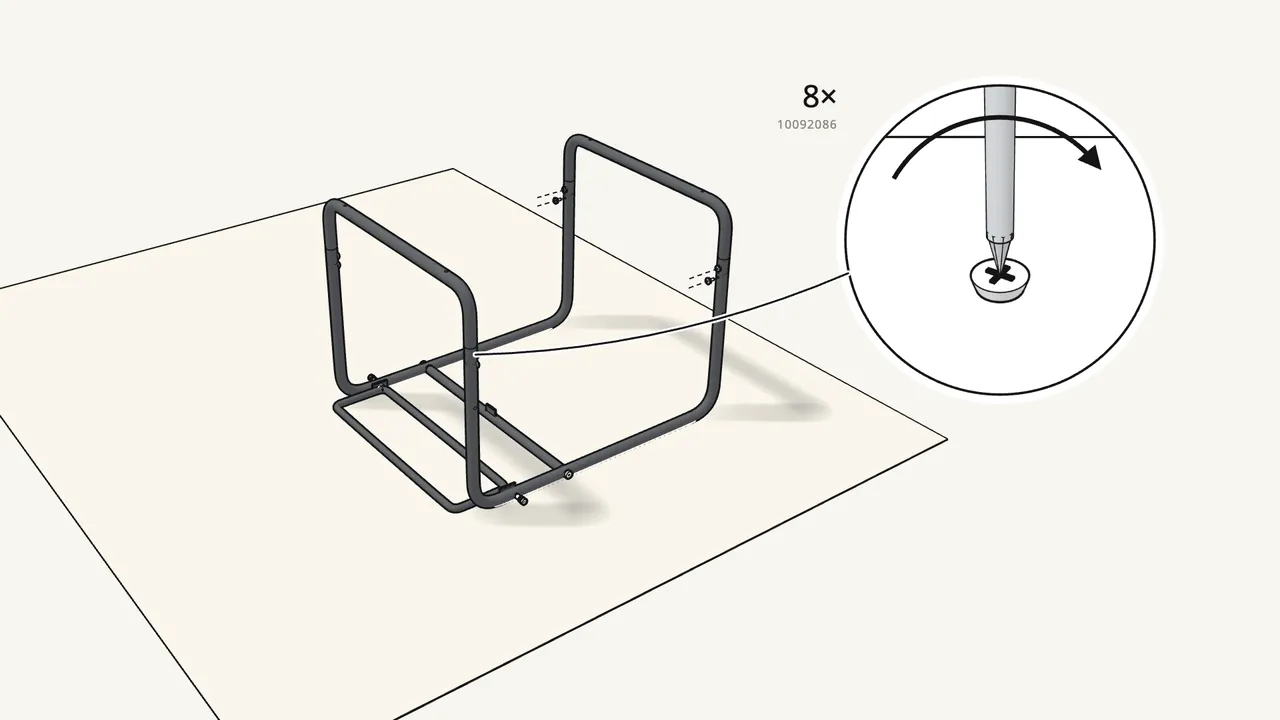
Fix each joint with 2 screws (10092086) — 8 in total.
Use the Phillips screwdriver. Don’t use the 107616 screws here.
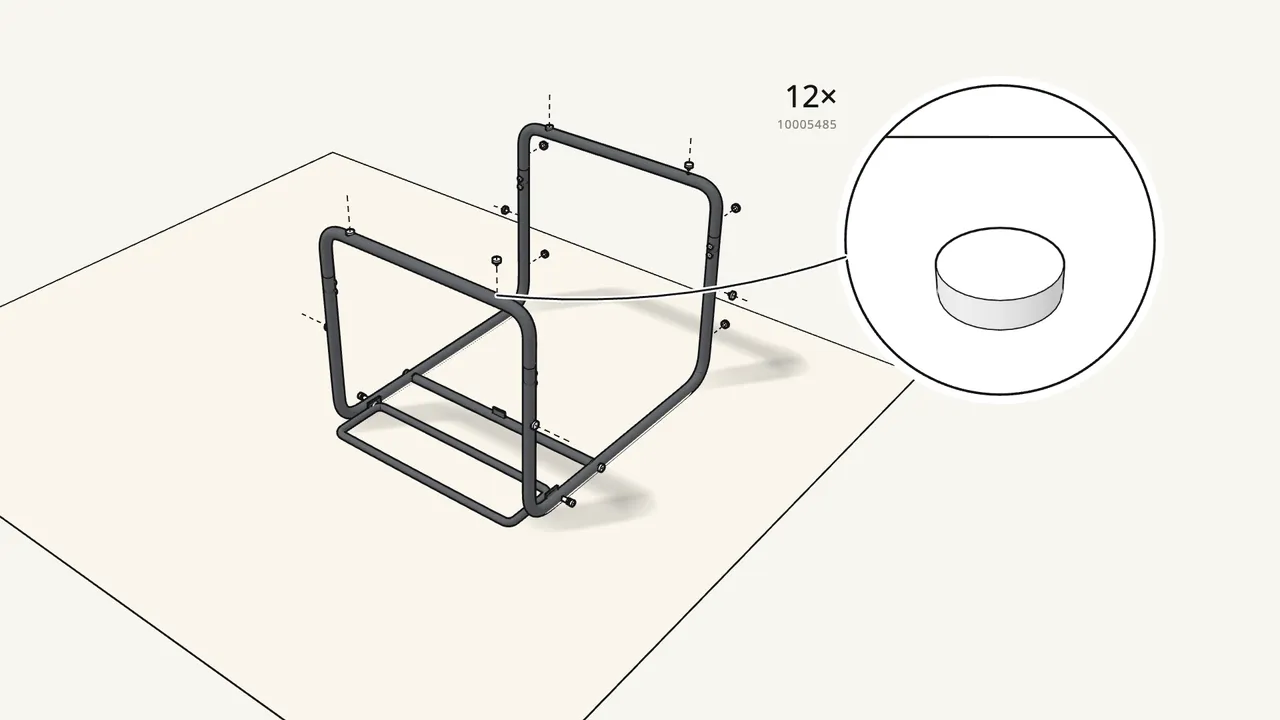
Step 8
Press 12 inserts (10005471) into the holes, then 12 bumpers (10005485).
Push them in with your finger — positions as in the manual, step 8.
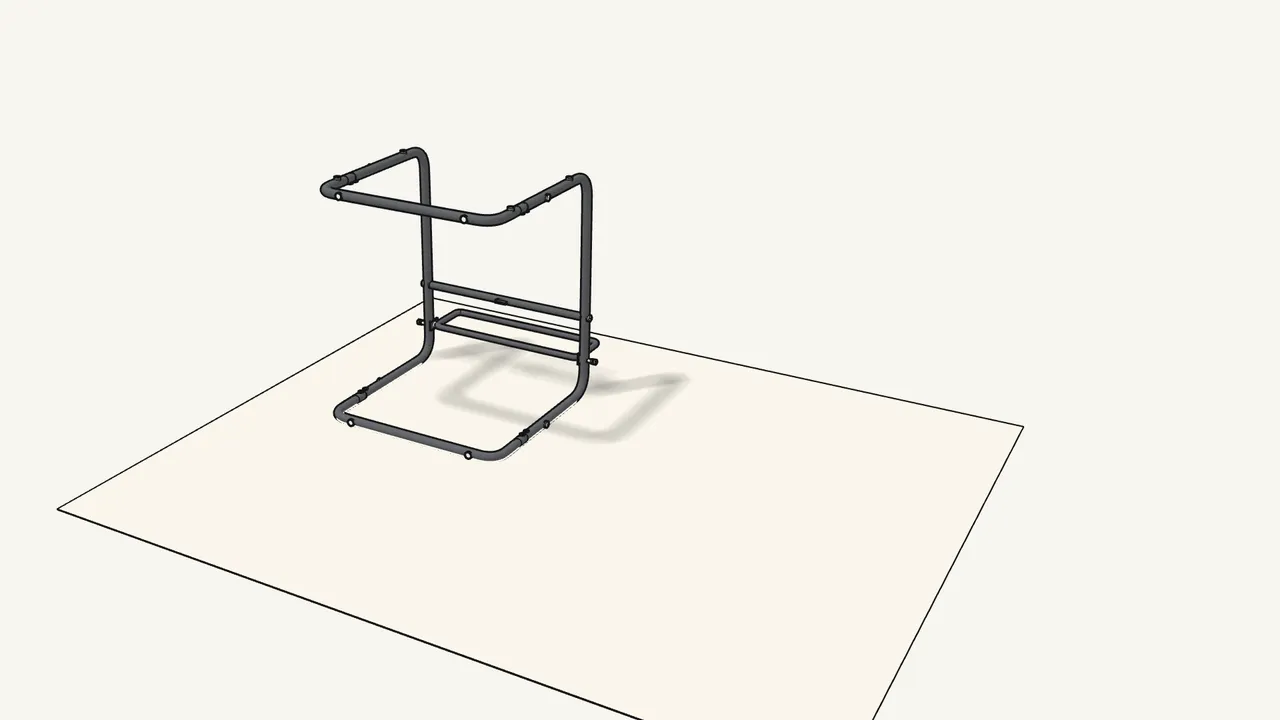
Step 9 · manual step 8
Turn the frame over.
The tray frame swings out to the front.
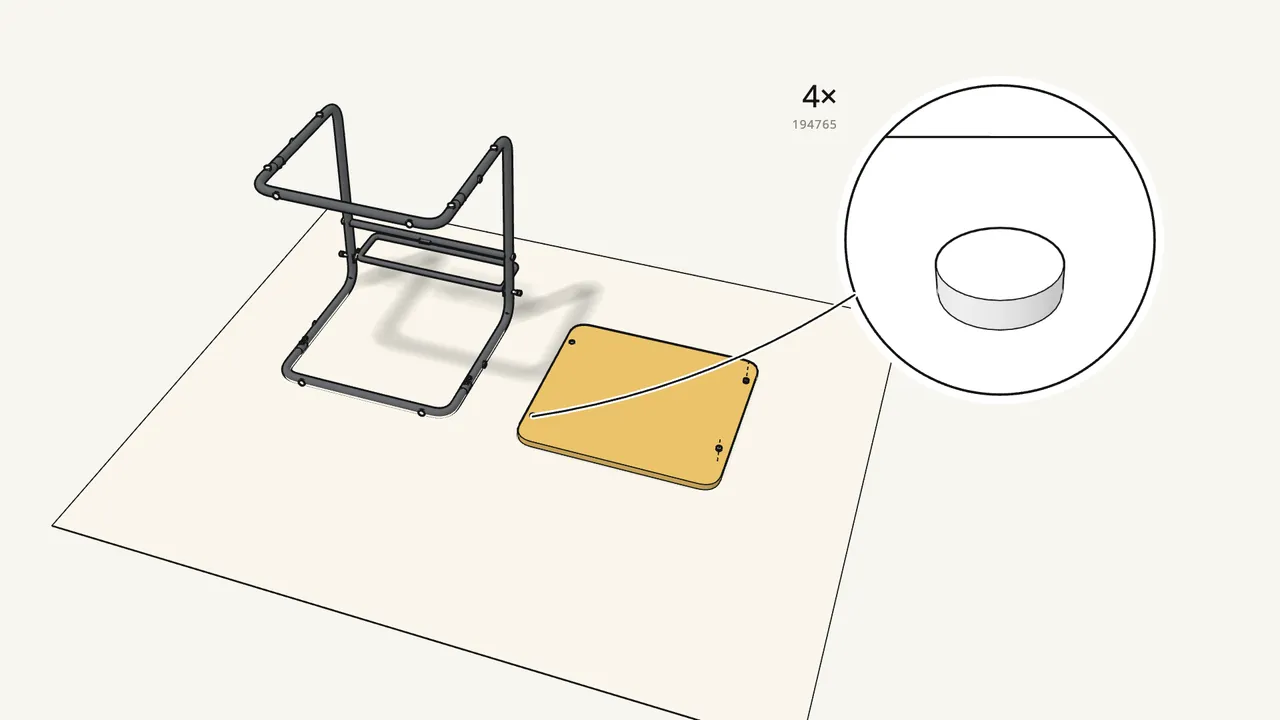
Step 10 · manual step 9
Lay the table top face down on the rug.
Stick the 4 felt pads (194765) on as the manual shows.
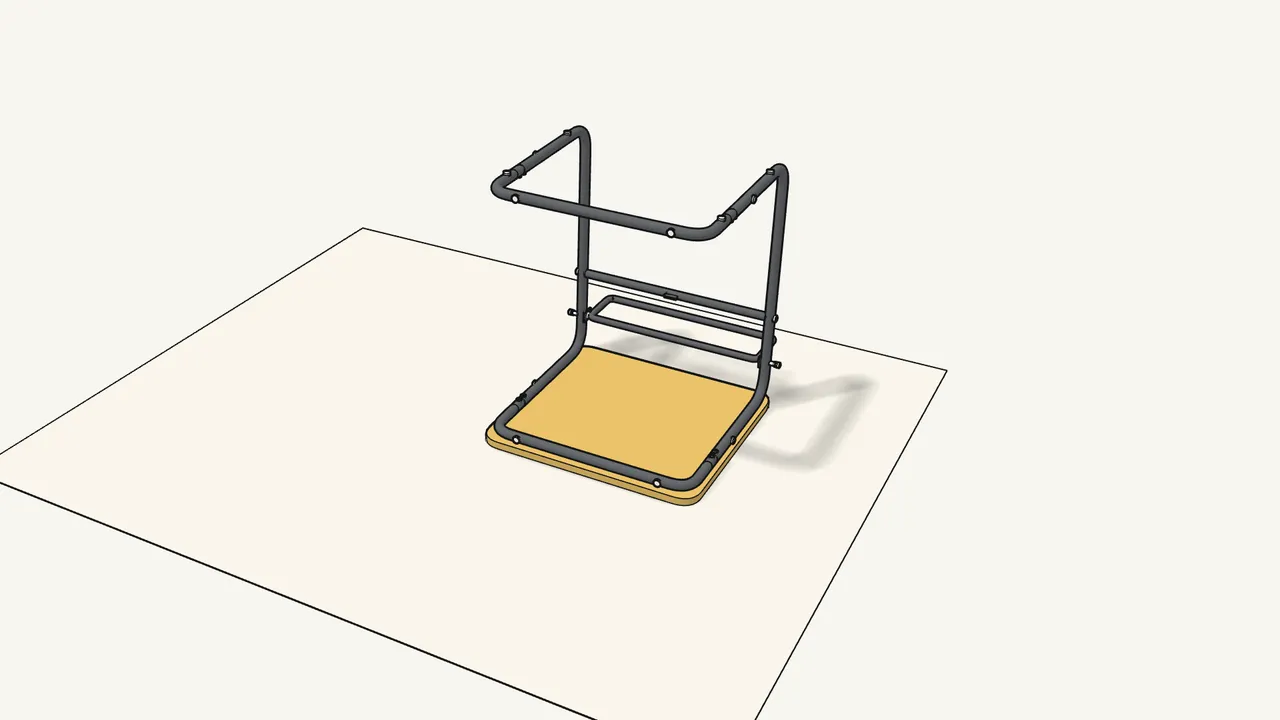
Step 11 · manual step 10
Place the frame upside down onto the table top.
Line it up with the edges of the top.
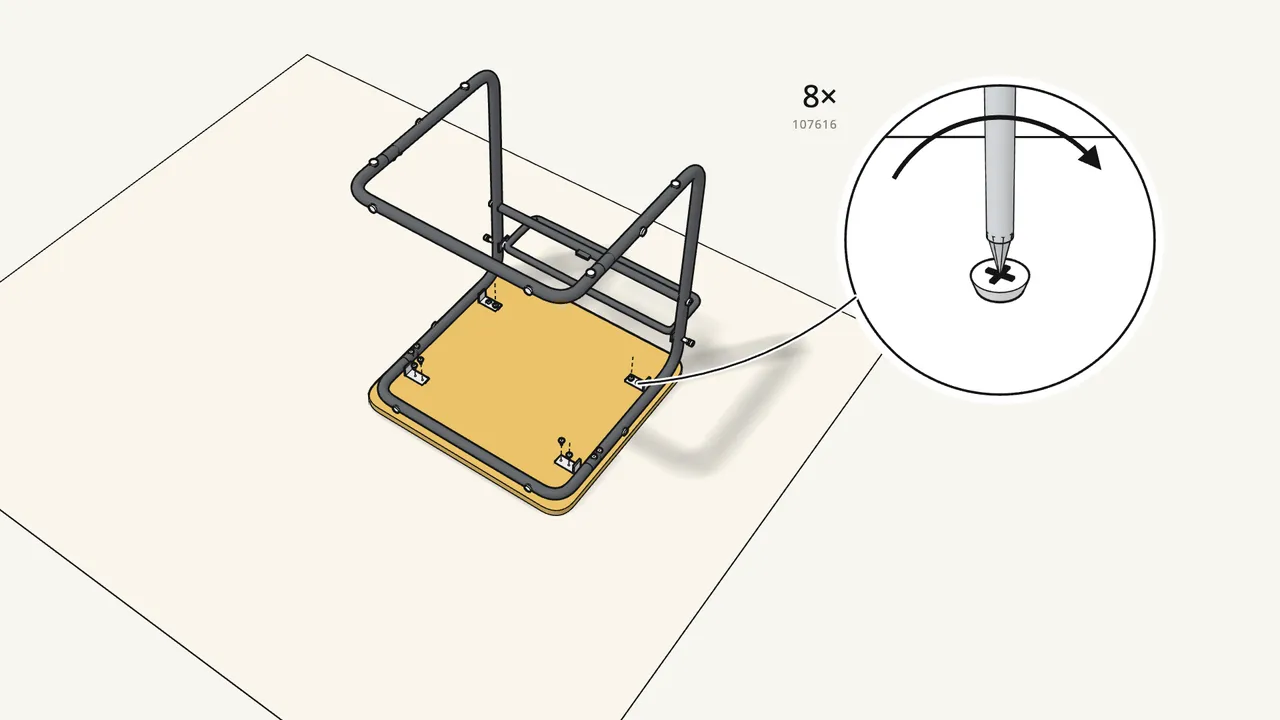
Step 12 · manual step 11
Fit 4 clips (10094827) with 8 screws (107616).
Do not tighten the screws fully yet.
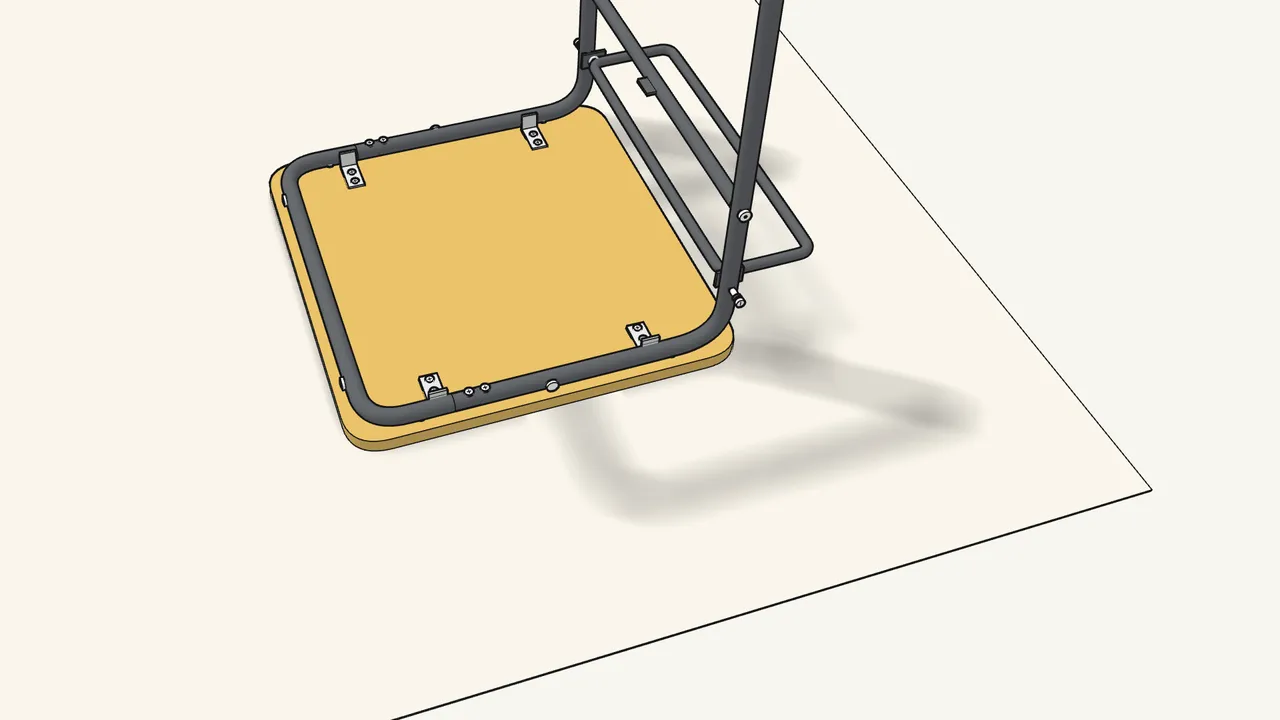
Step 13 · manual step 12
Push each clip against the tube, then tighten the screws.
The clip must sit tight against the tube, as in the manual.
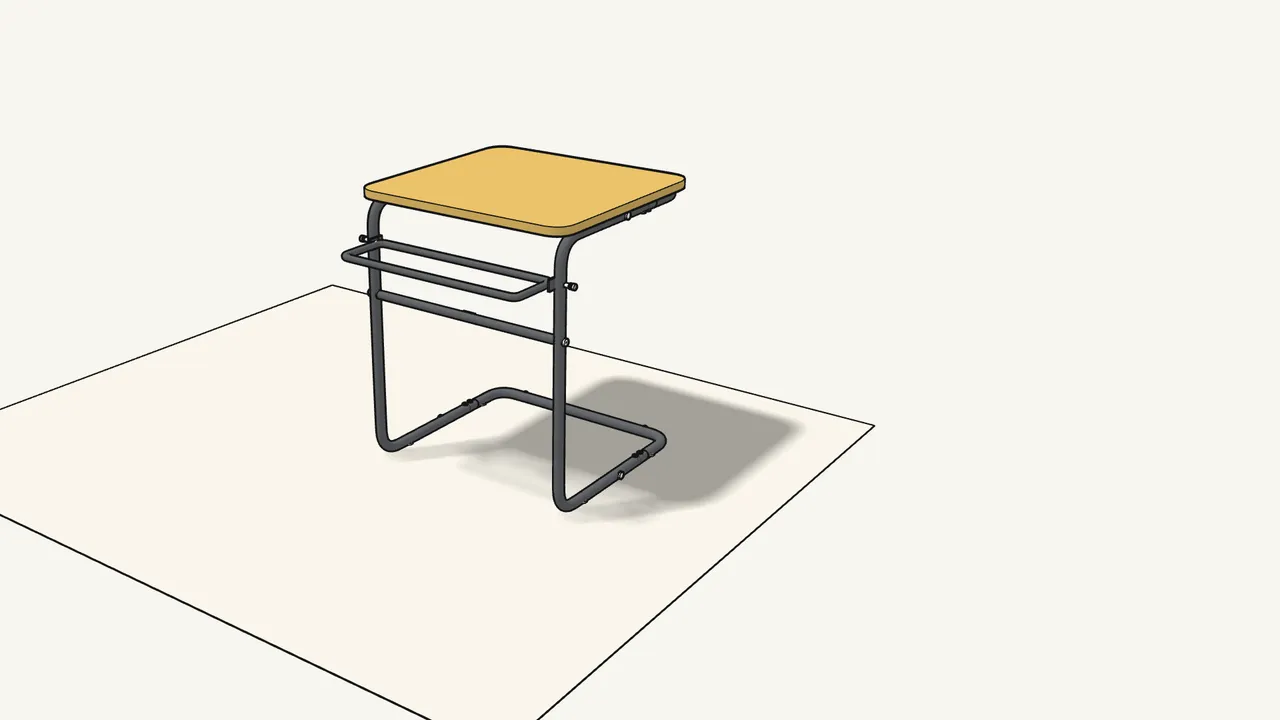
Step 14 · manual step 12
Turn the table the right way up.
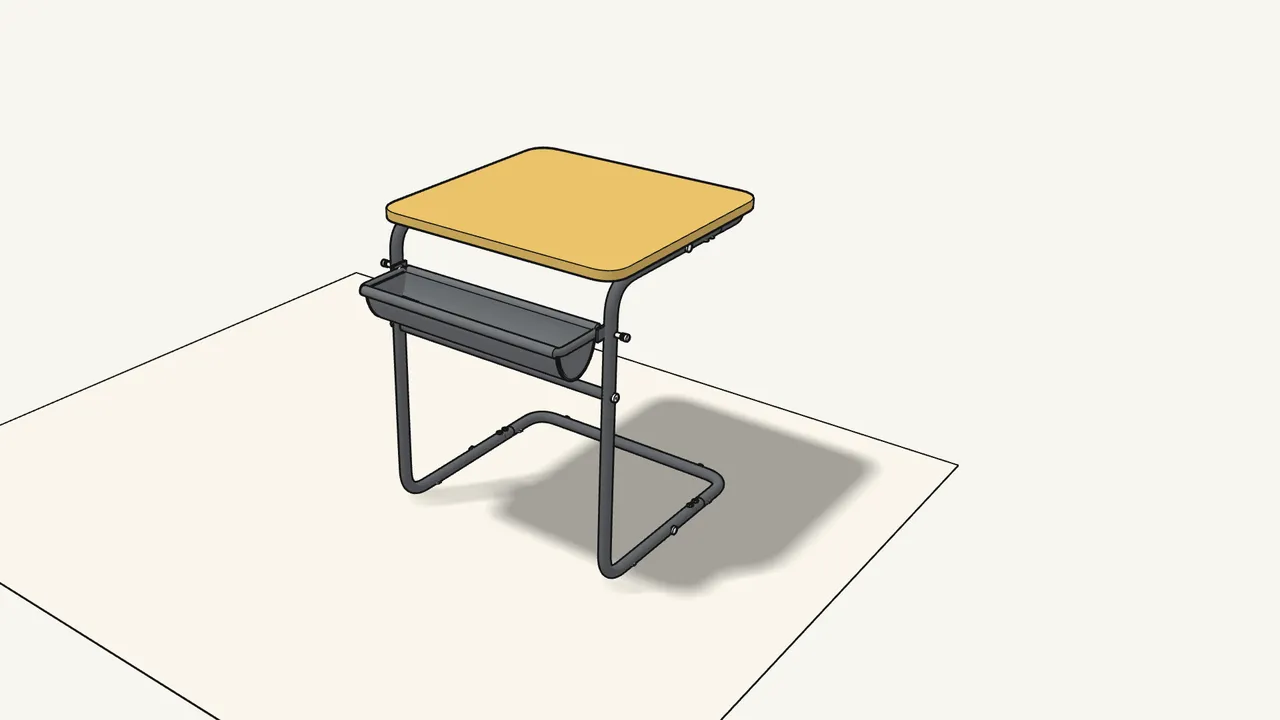
Step 15 · manual step 13
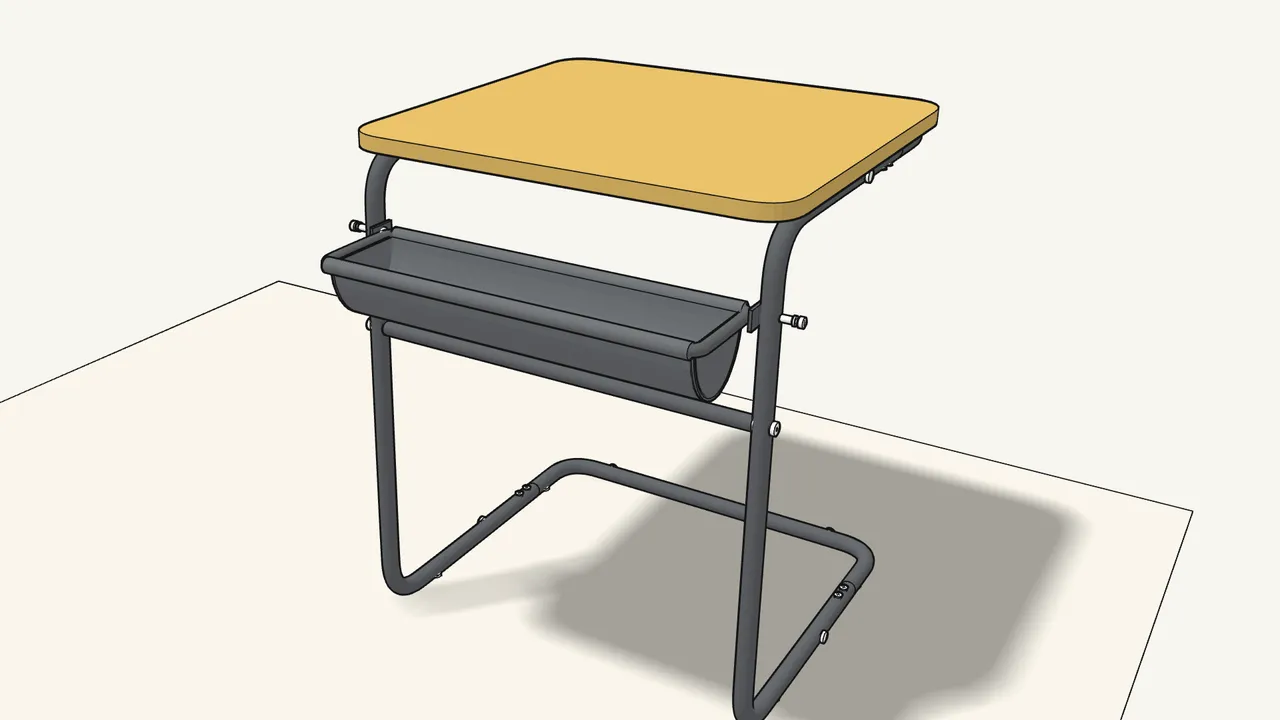
Lower the tray into the tray frame.
Fold its edges over the two tubes of the frame.
Step 16 · manual step 14
Press the edge of the tray into place along the tube.
See the close-up in the manual, step 14.
Tips & safety
- Max 15 kg on the top, 2 kg in the tray. Delicate table — do not sit on it or put heavy things on it.
- Want it lower? OLSERÖD can be turned and used as a low table. Unclip the top, turn the frame and clip the top back on — see the manual, steps 15–17.
Official instructions
This guide follows IKEA’s official assembly instructions (AA-2544531-1). Keep the printed manual to hand — if anything differs, the manual is right.



