IKEA · Tables & Desks
How to assemble IKEA NORDVIKEN Drop-Leaf Table
Step-by-step IKEA NORDVIKEN Drop-Leaf Table assembly: 21 illustrated steps, an animated video, the hardware list and the tools you need — following the official instructions (AA-2130378-1).
- 21 illustrated steps
- 17 steps in the manual
- 3:26 video
- 74/104×74×75 cm
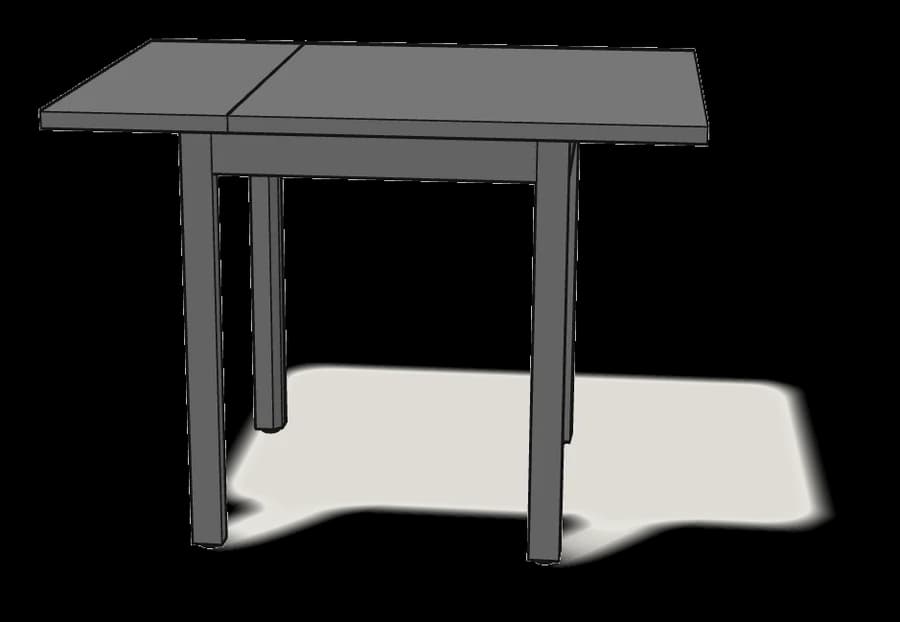
What you need
Tools
- Flat-head screwdriver
- Phillips screwdriver
- Hammer
Hardware in the box
| Part no. (as printed in the manual) | Qty |
|---|---|
| 118331 | 2× |
| 110630 | 2× |
| 101350 | 4× |
| 109568 | 2× |
| 109049 | 2× |
| 109021 | 28× |
| 110733 | 12× |
| 100033 | 8× |
| 110912 | 4× |
| 100712 | 8× |
| 100843 | 8× |
| 114418 | 2× |
| 117559 | 4× |
| 120171 | 4× |
Step-by-step assembly
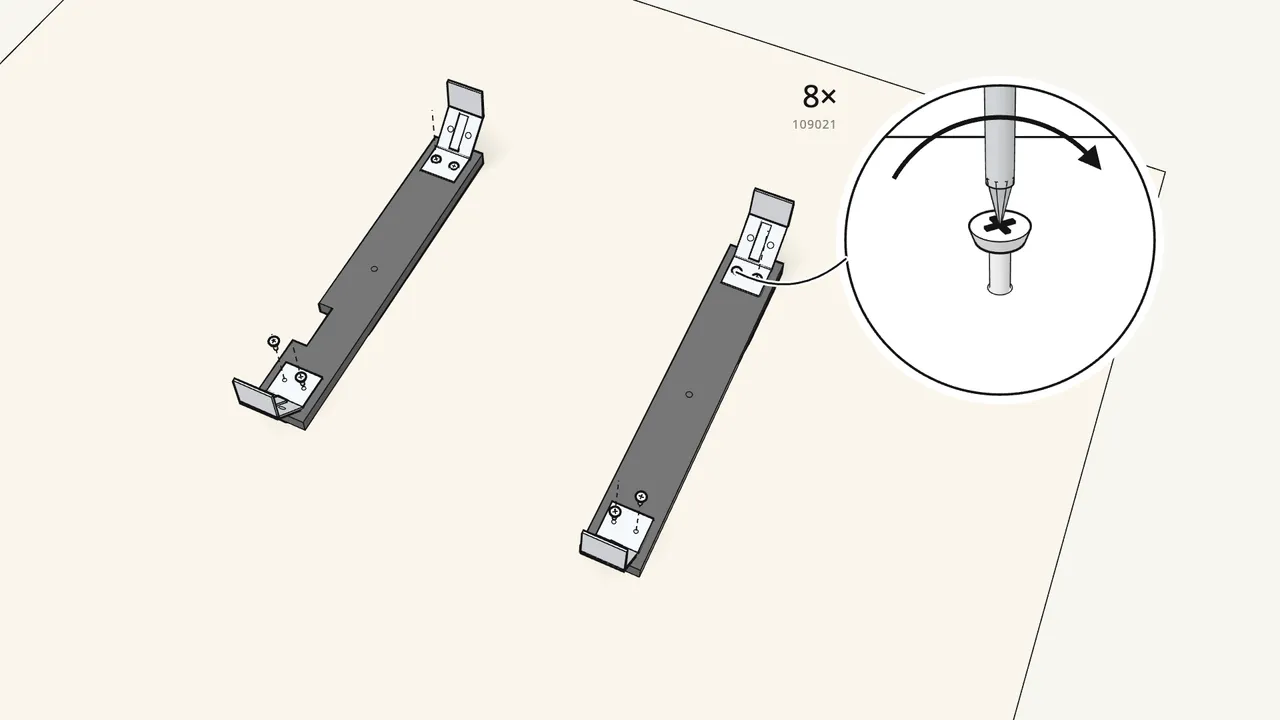
Step 1
Screw a corner bracket (120171) to each end of the 2 bracket rails.
2 screws (109021) per bracket — not the 110733 ones.
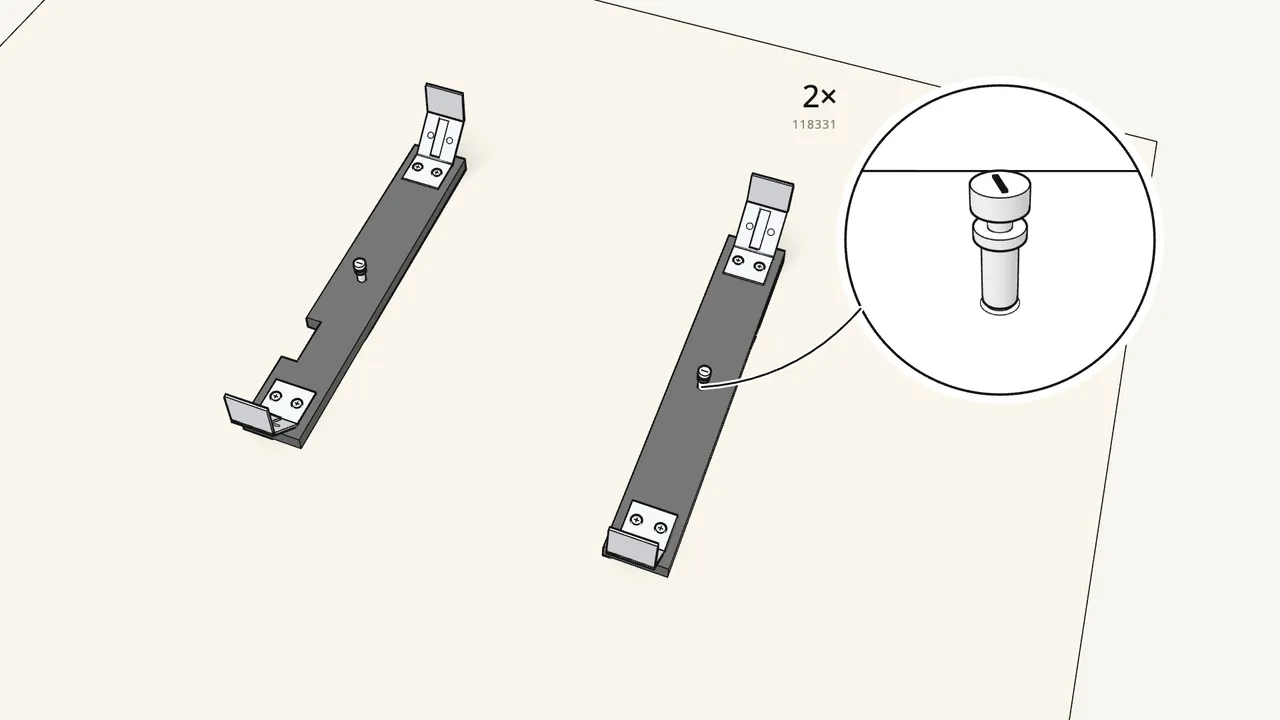
Step 2
Screw a cam bolt (118331) into the middle of each bracket rail.
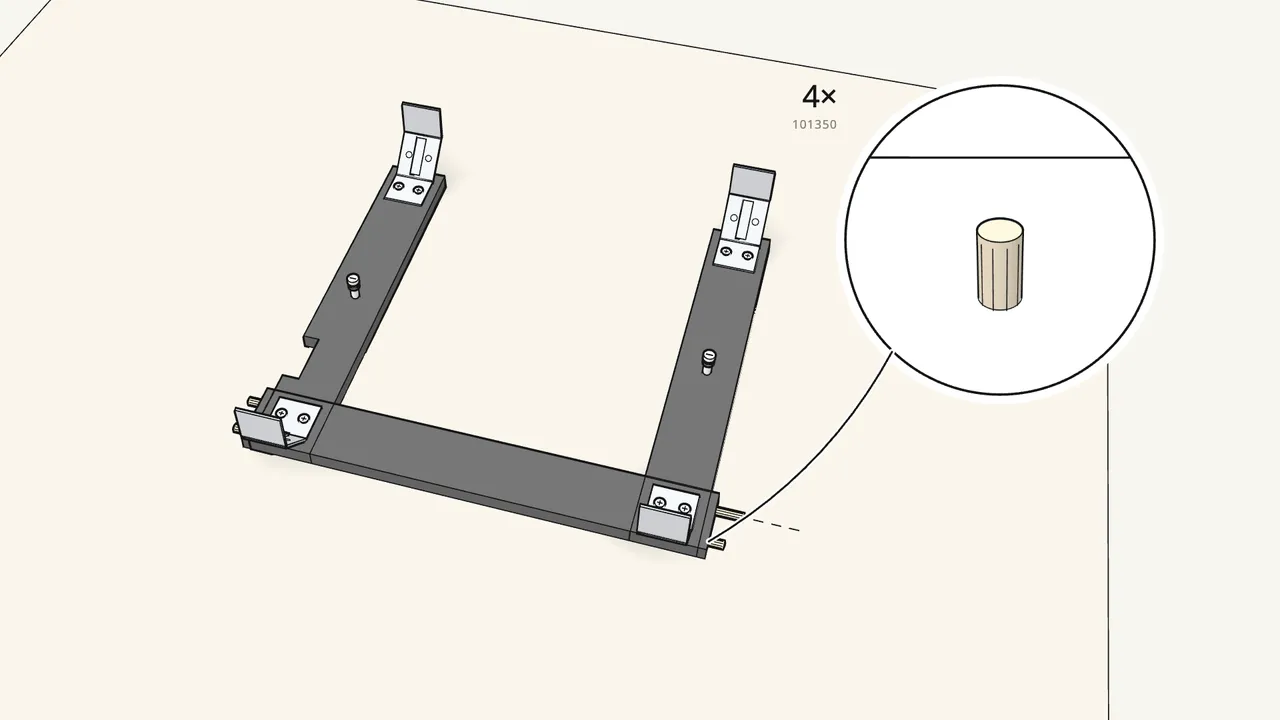
Step 3
Push 4 dowels (101350) into the ends of the centre rail.
Check which way round the centre rail goes — manual, step 3.
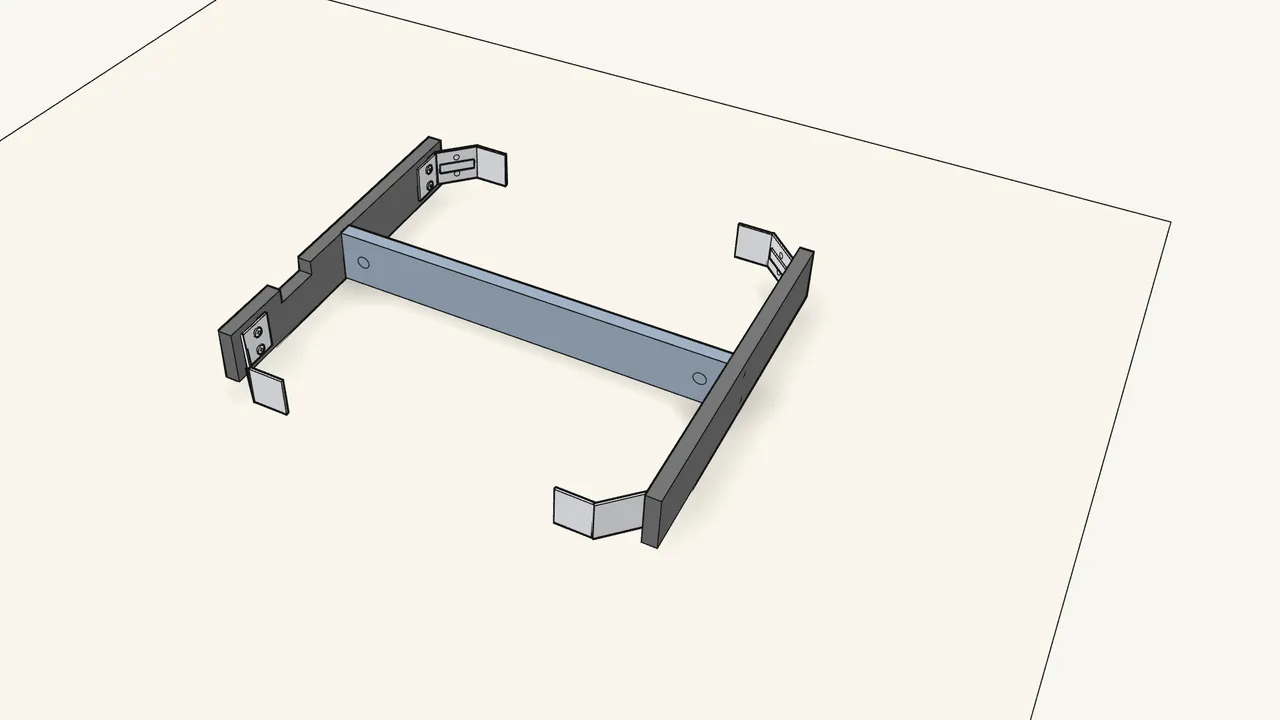
Step 4 · manual step 3
Stand the bracket rails on edge and join them with the centre rail.
The cam bolts go into the holes in the centre rail.
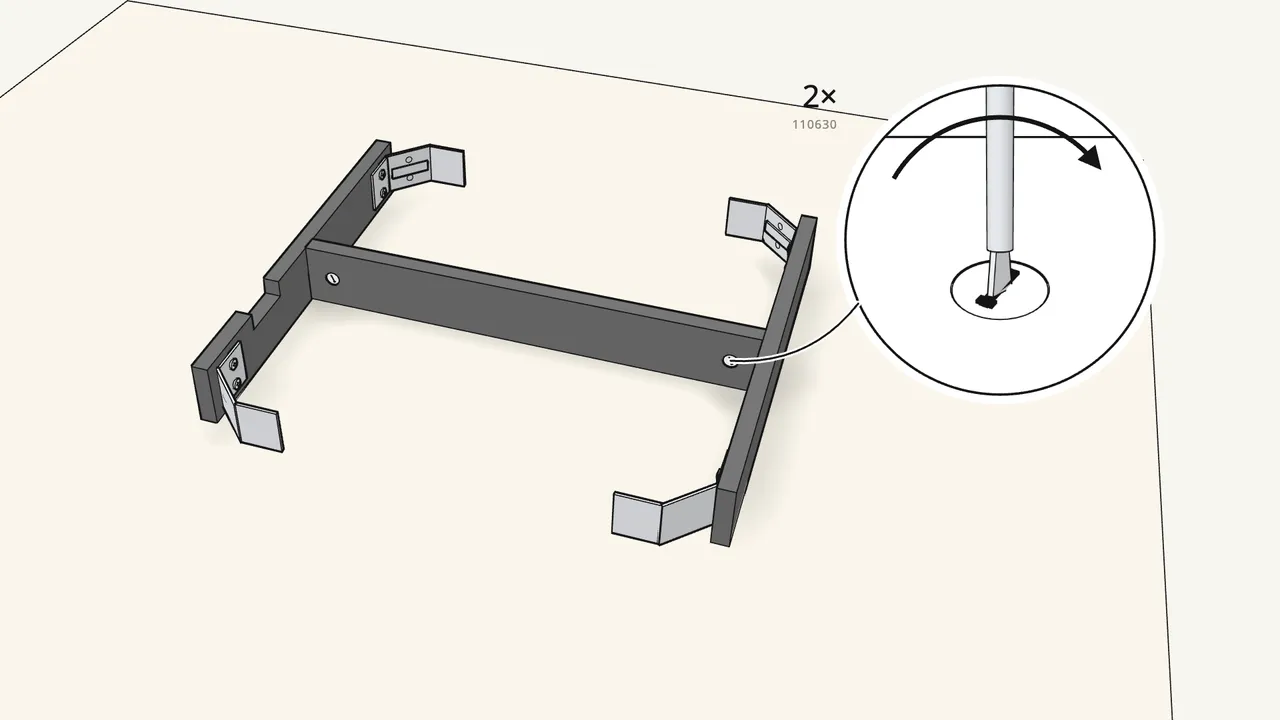
Step 5 · manual step 4
Insert 2 cam locks (110630) and turn them clockwise.
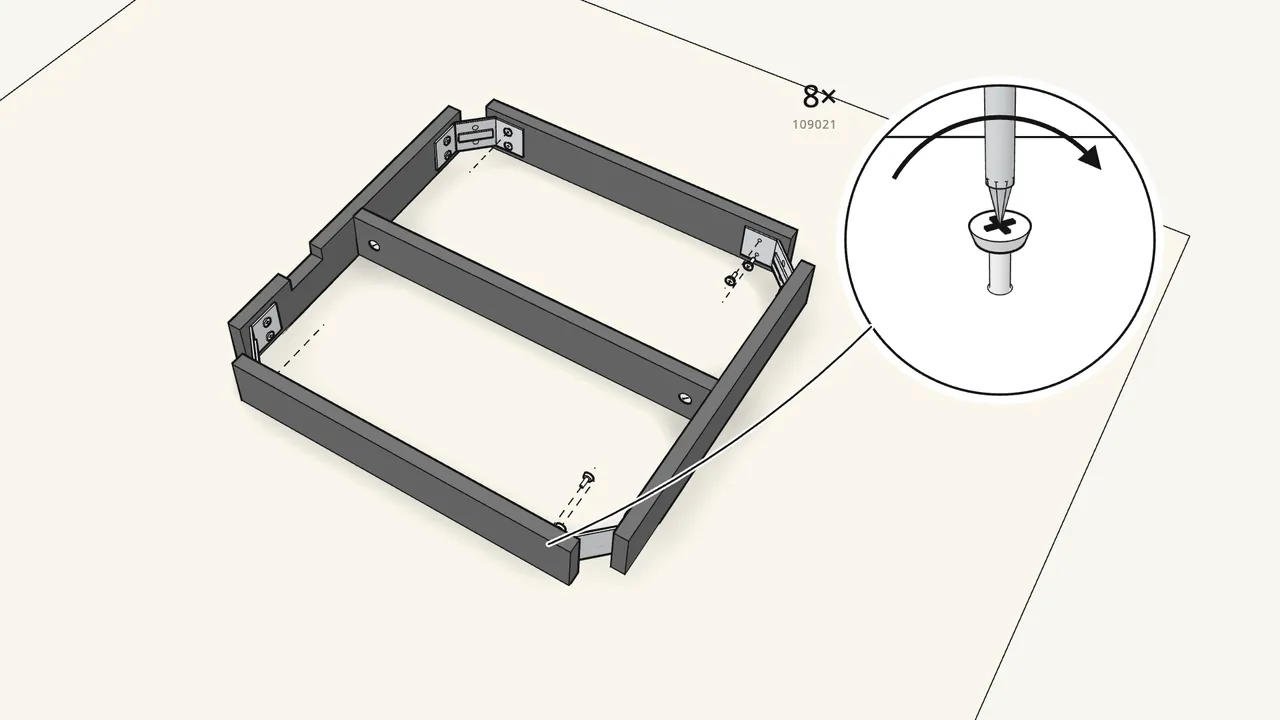
Step 6 · manual step 5–6
Screw the 2 end rails onto the corner brackets.
2 screws (109021) per bracket. Turn the frame as shown in steps 5 and 6.
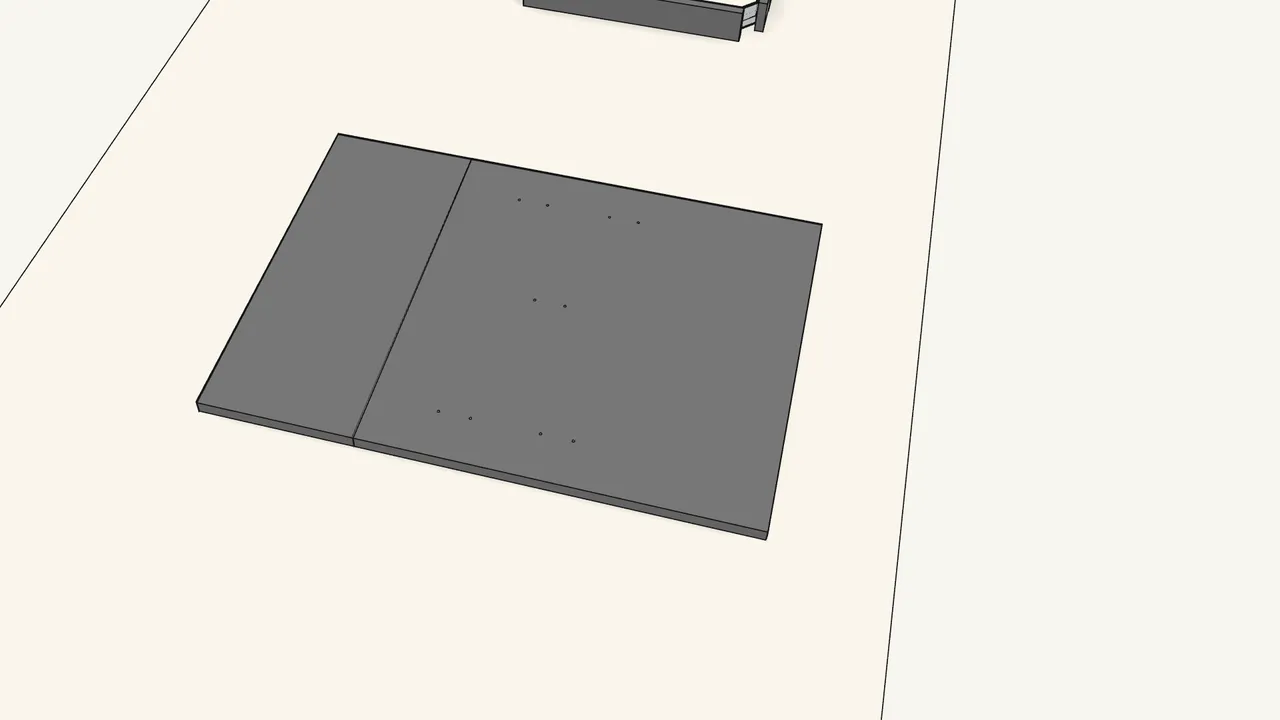
Step 7
Lay both tabletop pieces face down on a rug and push them together.
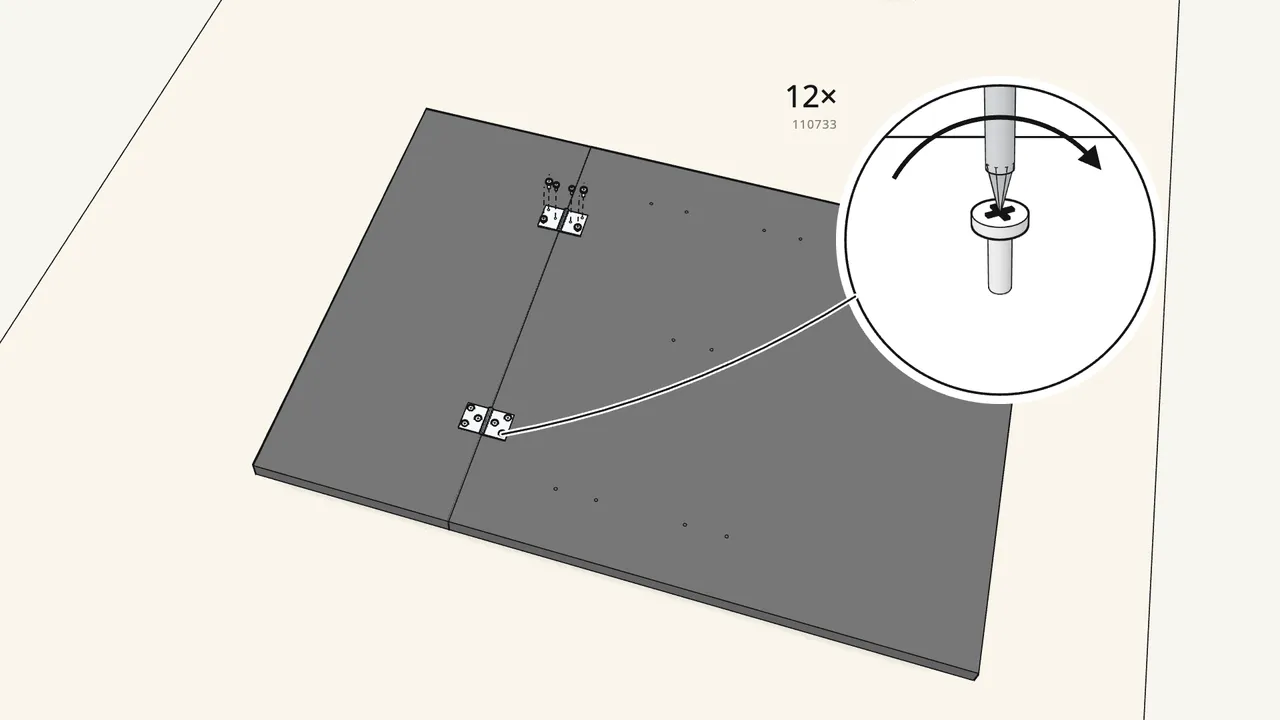
Step 8
Fit the 2 hinges (110597) across the joint.
6 screws (110733) per hinge.
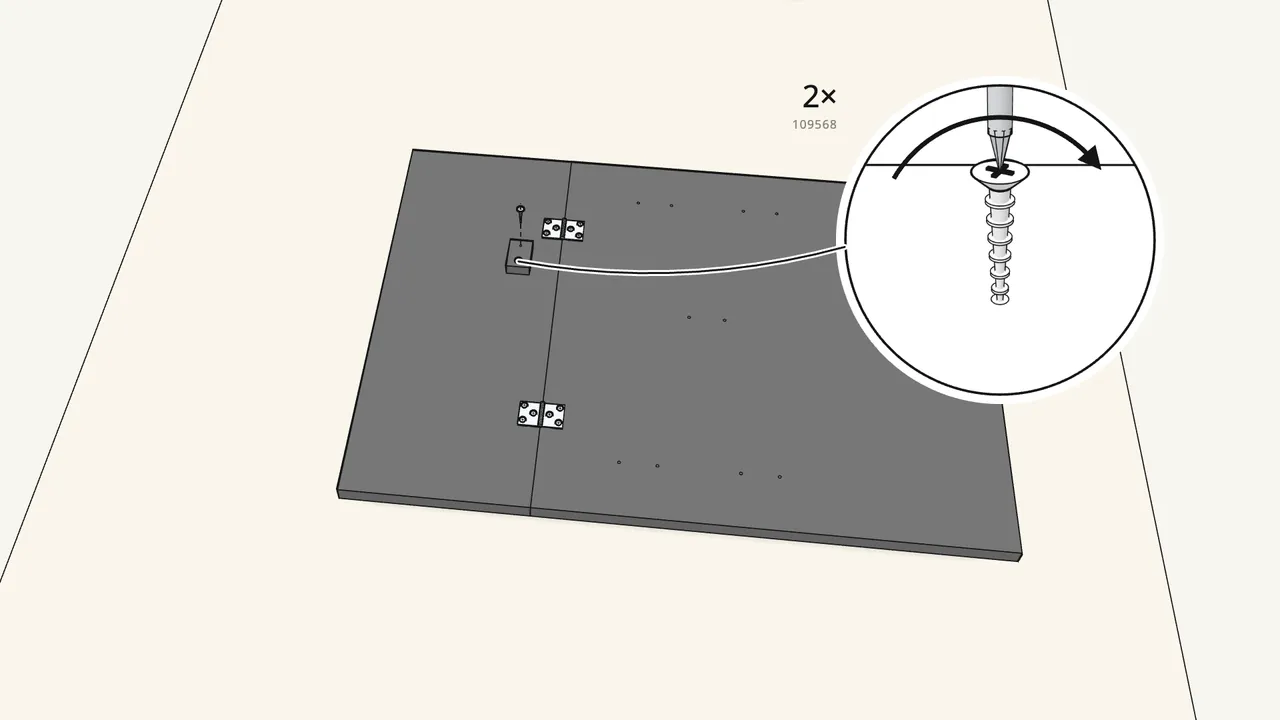
Step 9
Screw the block onto the leaf, next to the joint.
2 long screws (109568).
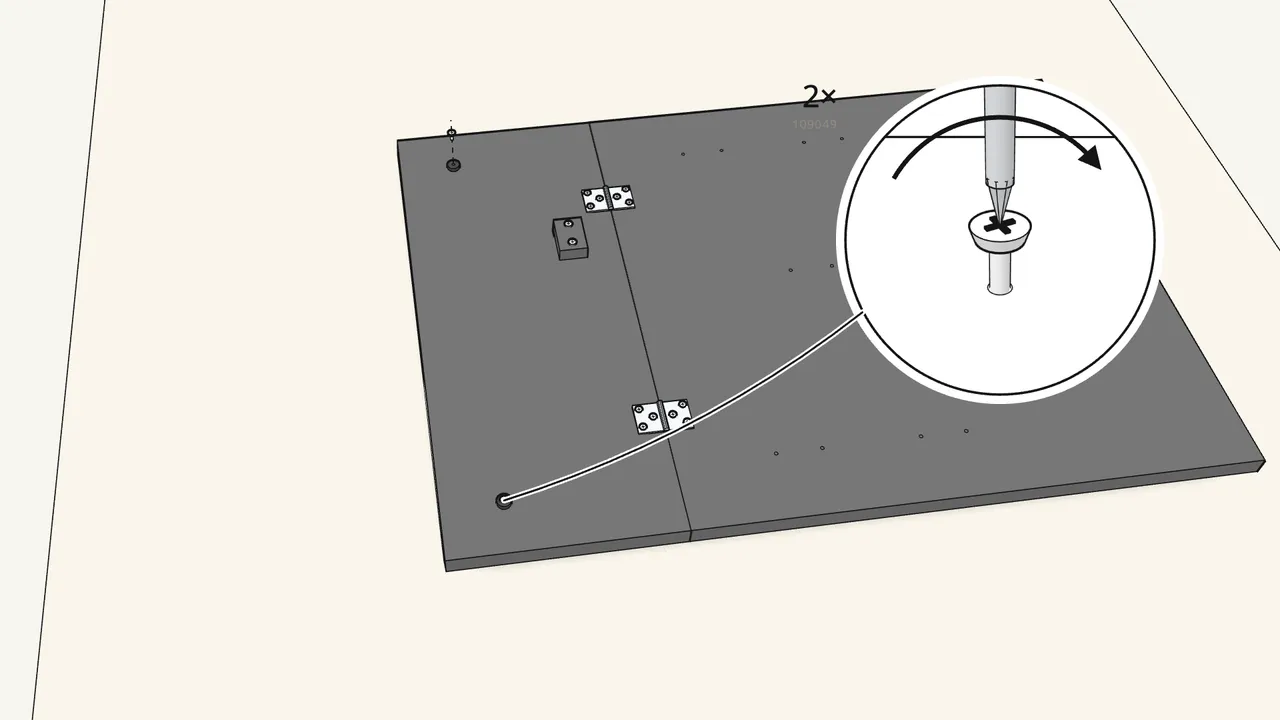
Step 10
Screw the 2 bumpers (114418) onto the leaf.
1 screw (109049) each.
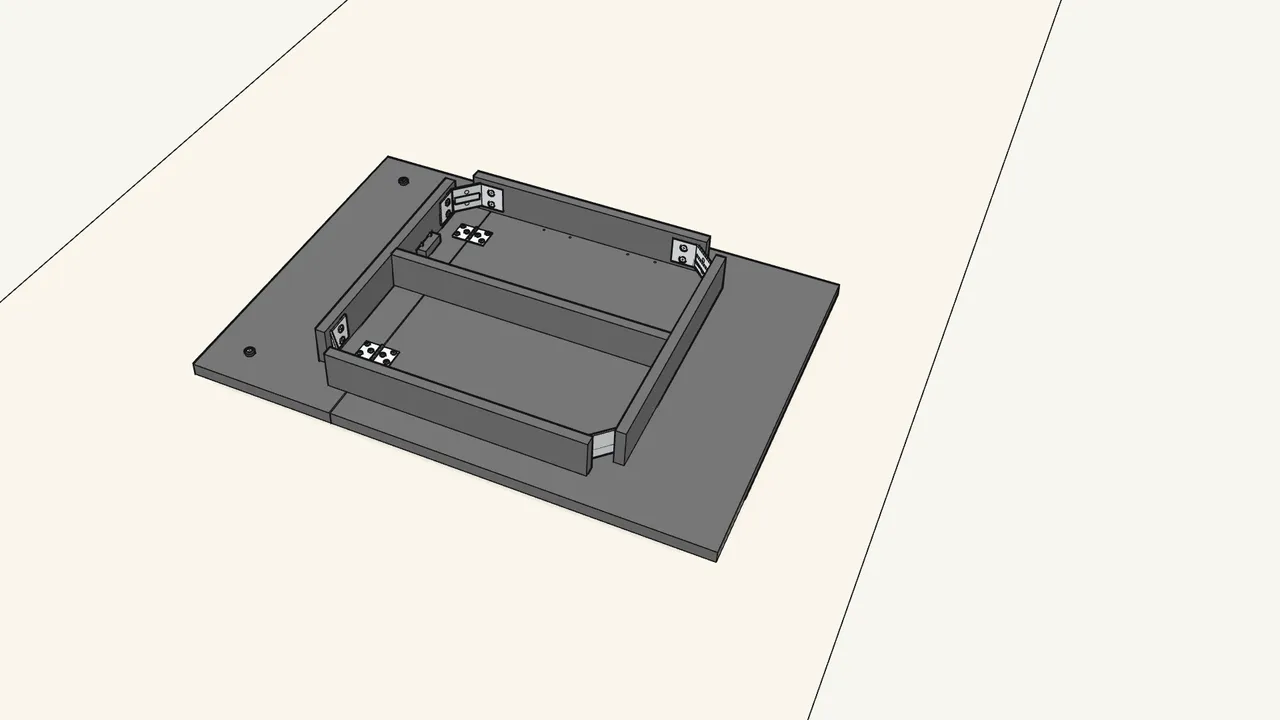
Step 11
Turn the frame over and set it on the top.
The block on the leaf goes into the notch in the bracket rail.
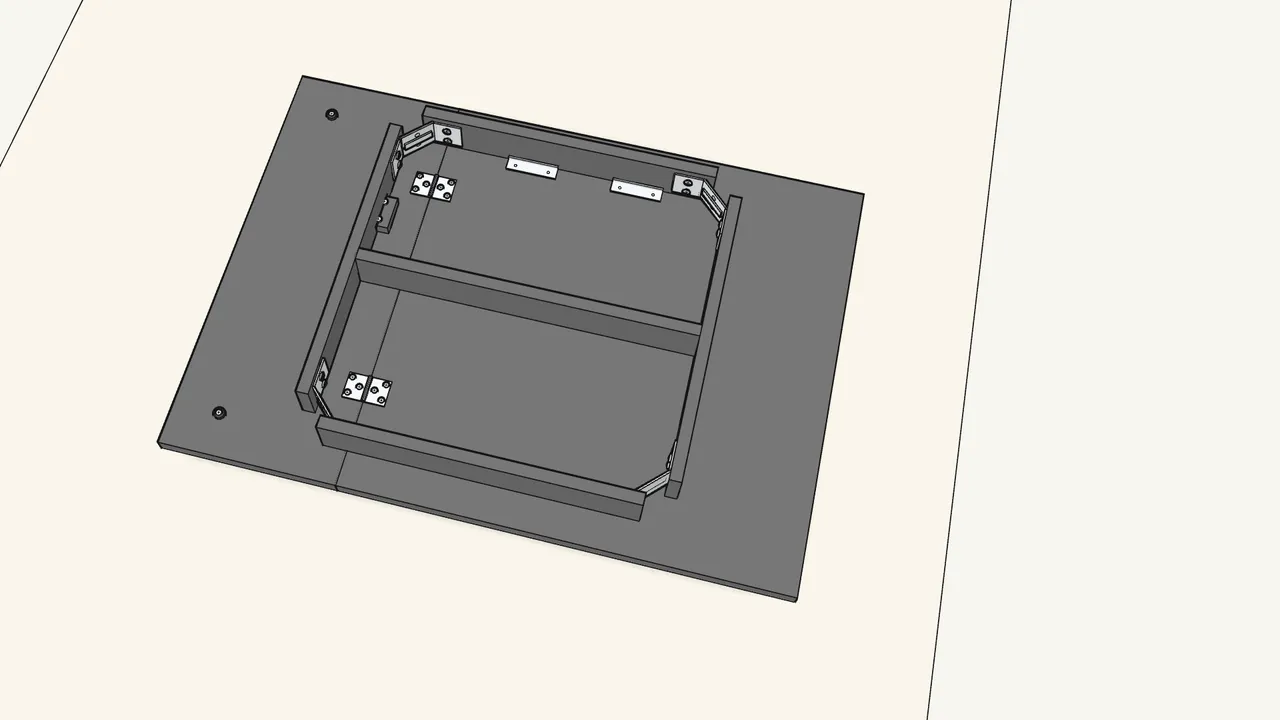
Step 12
Push the 5 guides (117841) into the grooves of the rails.
2 in each end rail, 1 on the centre rail.
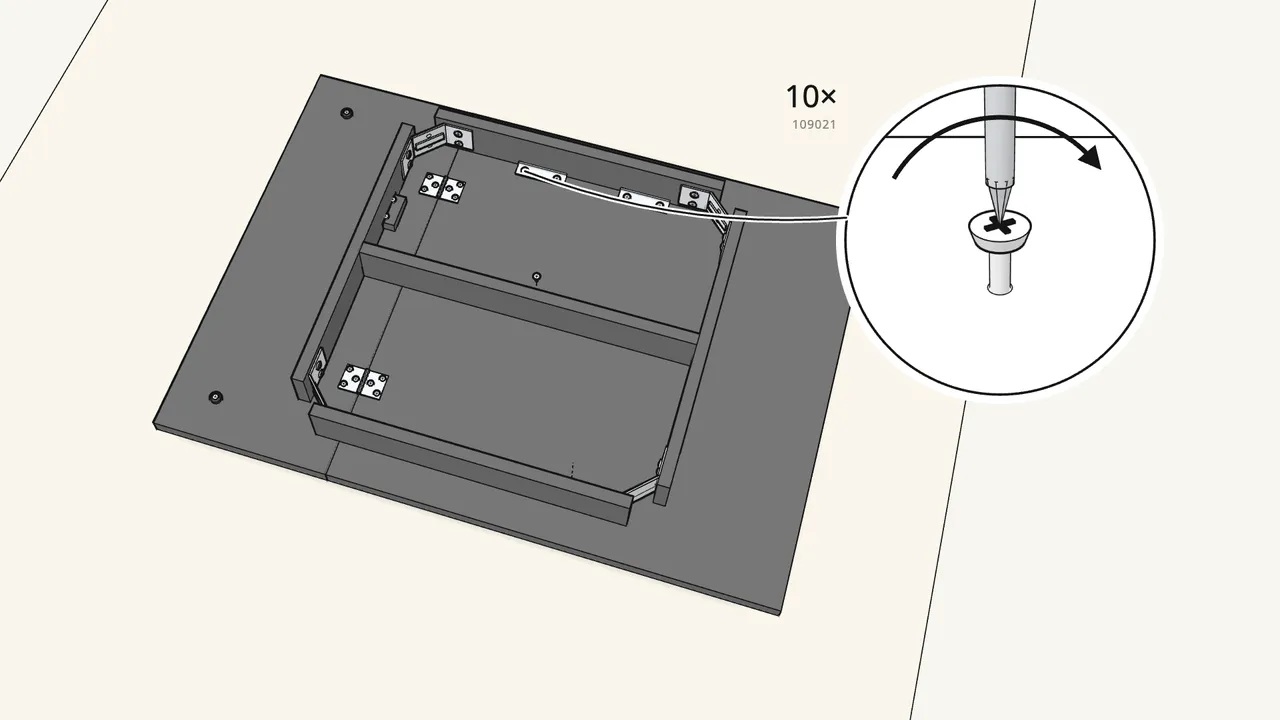
Step 13
Screw the guides to the top with 10 screws (109021).
2 per guide — Phillips screwdriver.
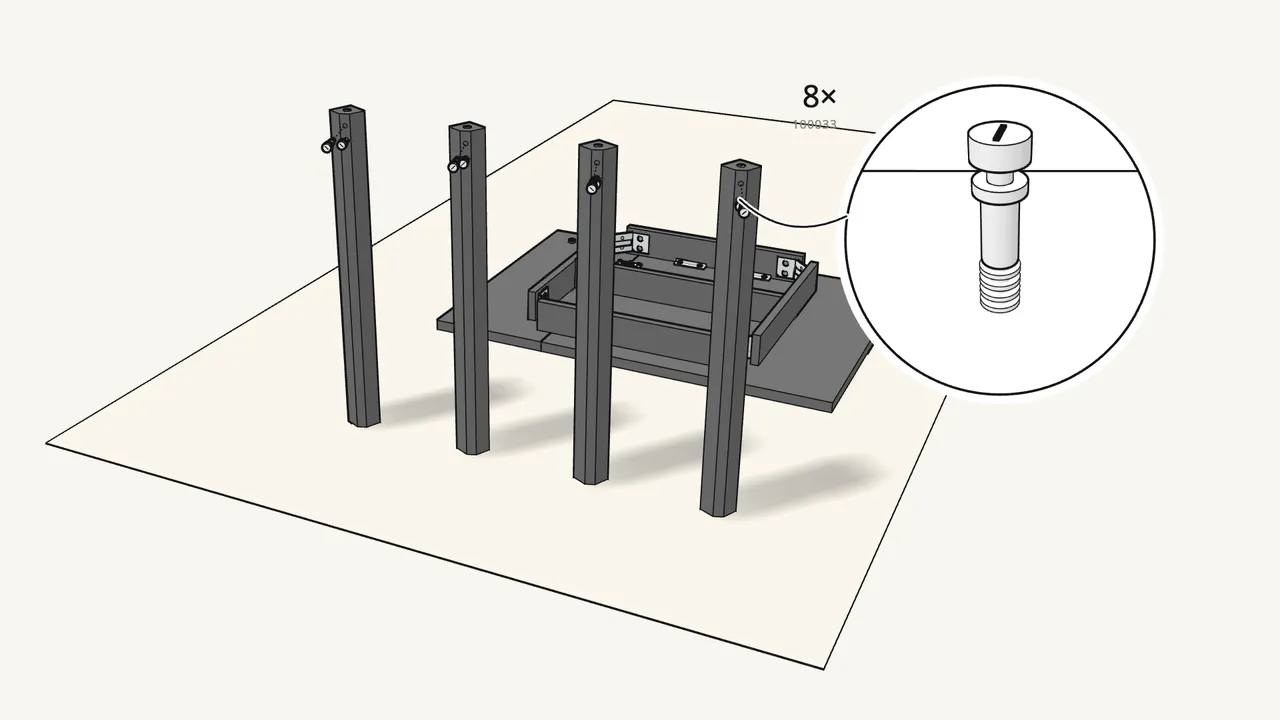
Step 14
Push a cross dowel (110912) into the top of each leg.
Then screw 2 hanger bolts (100033) into each leg — 8 in all.
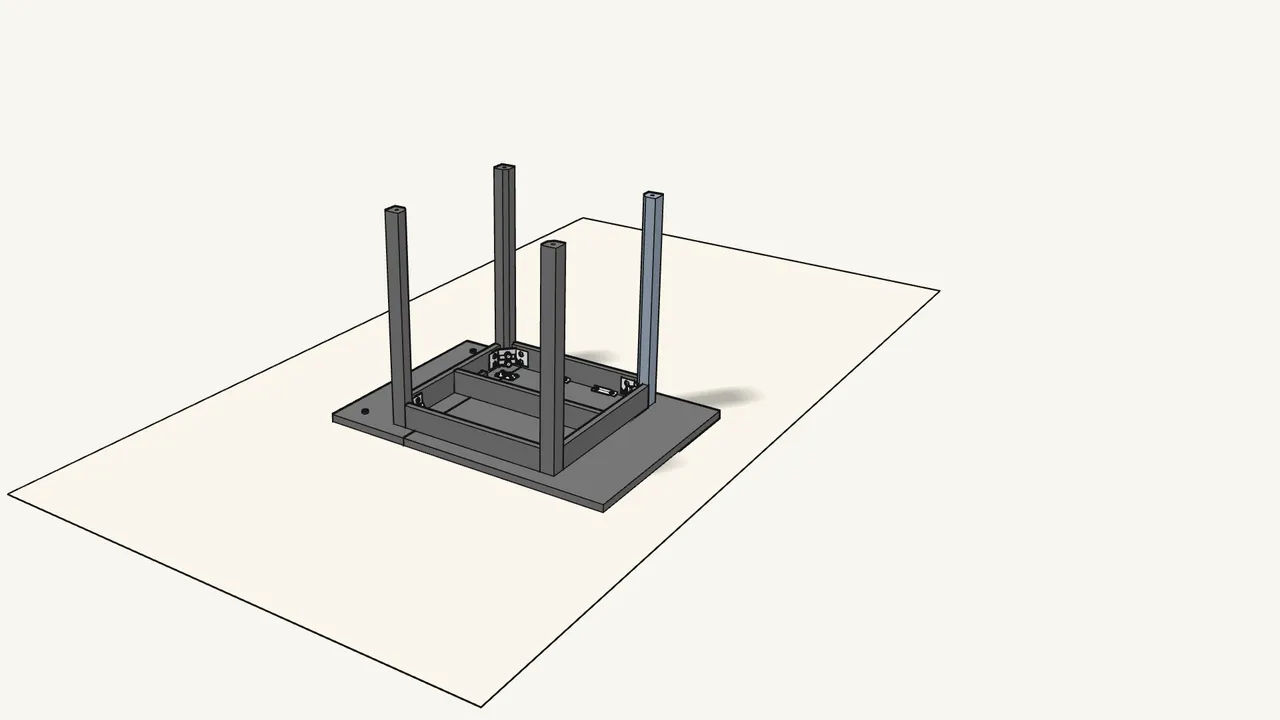
Step 15
Fit a leg into each corner, bolts through the bracket.
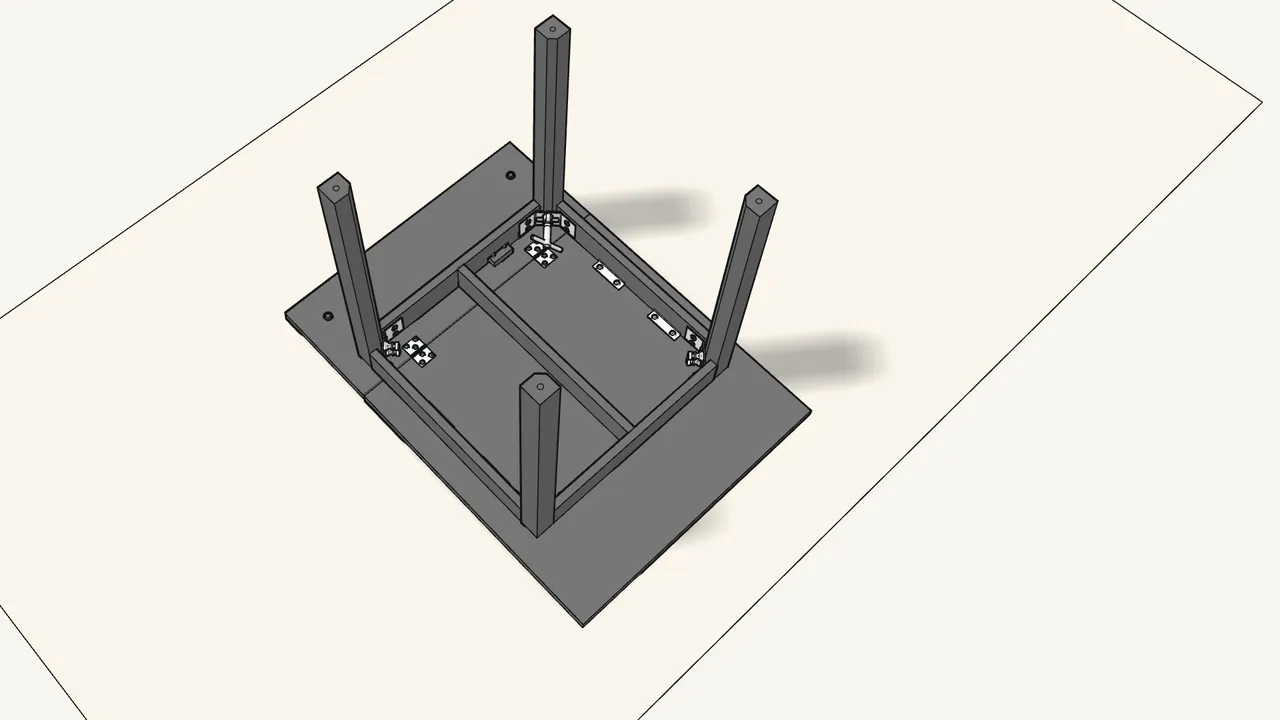
Step 16 · manual step 15
Add a spring washer (100843) and a nut (100712) to each bolt.
Tighten with the box spanner (120202).
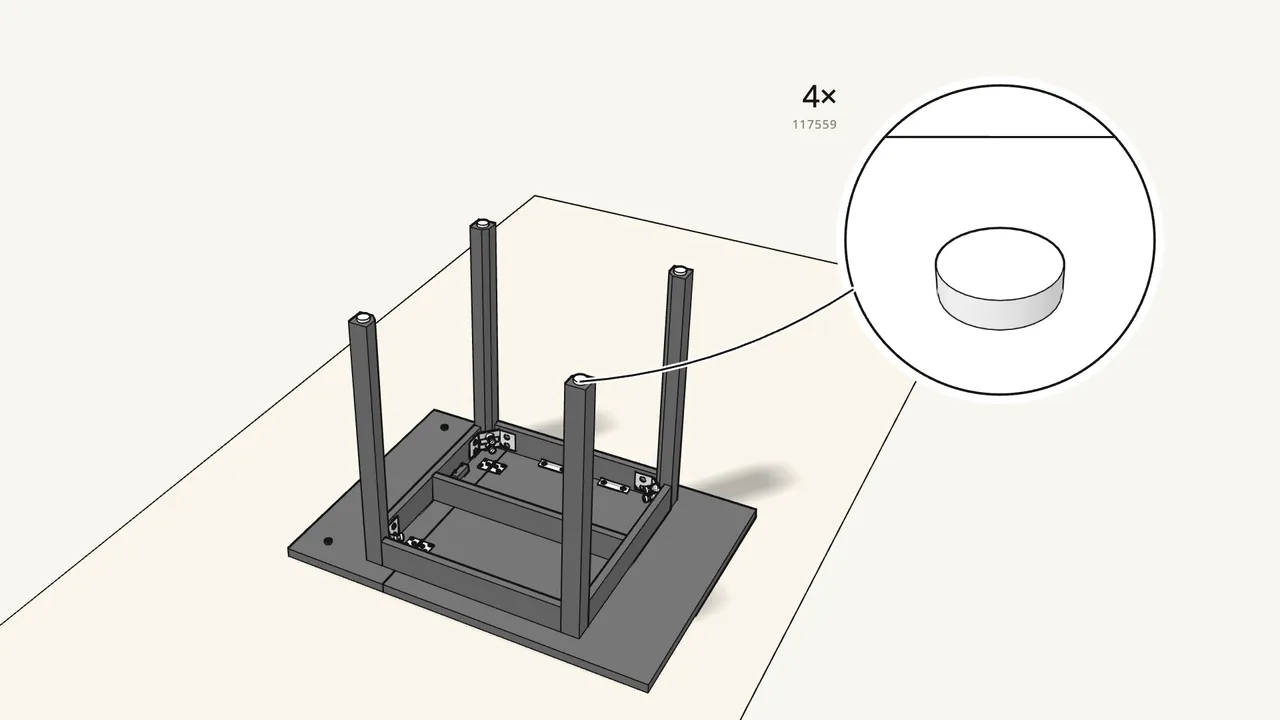
Step 17 · manual step 16
Tap a glide (117559) onto each leg with the hammer.
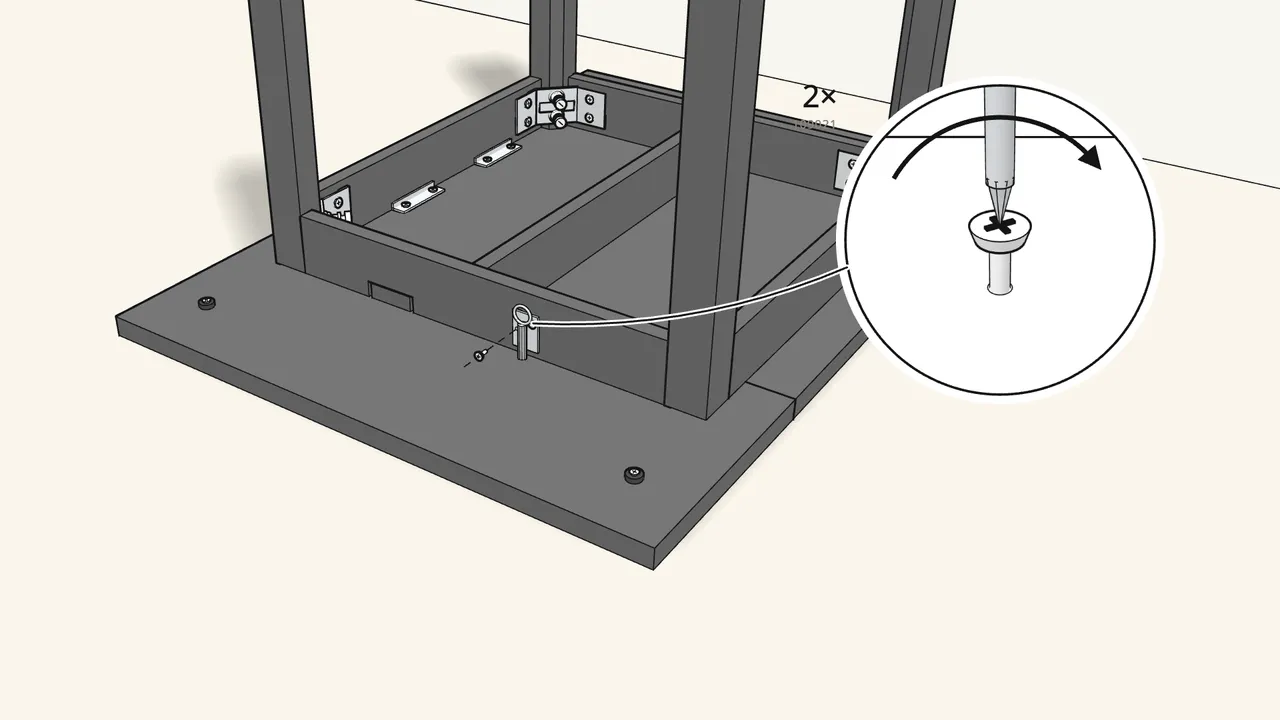
Step 18 · manual step 17
Screw the latch (10004702) onto the leaf-side rail.
2 screws (109021). Its pin points up into the top.
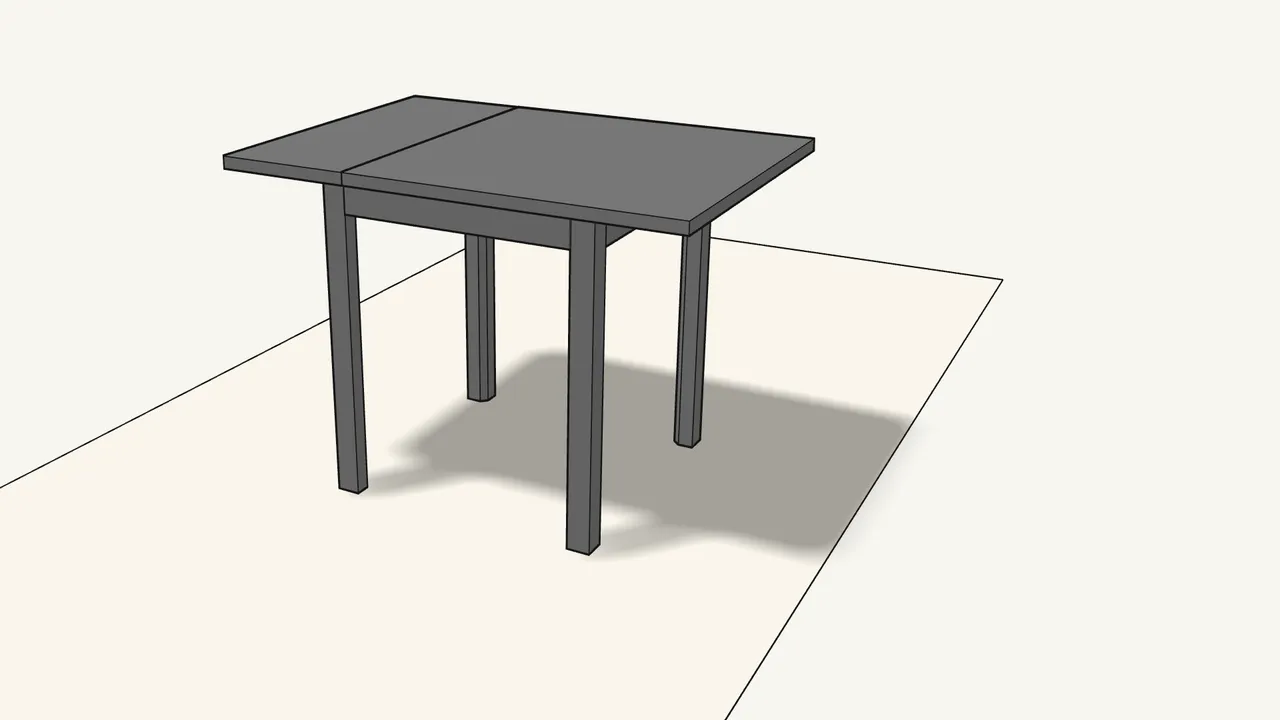
Step 19 · manual step 17
Turn the table over onto its legs.
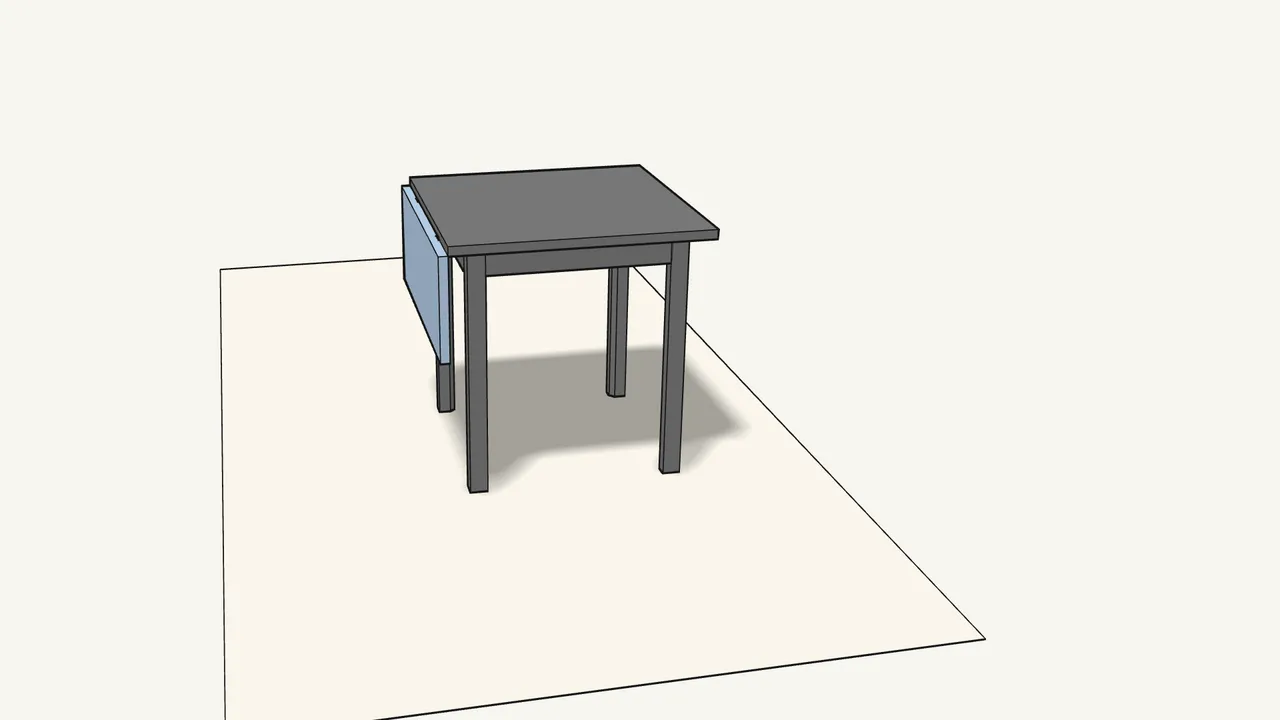
Step 20
To lower the leaf: pull the ring down and slide the top toward the leaf.
Then fold the leaf down — manual, last page.
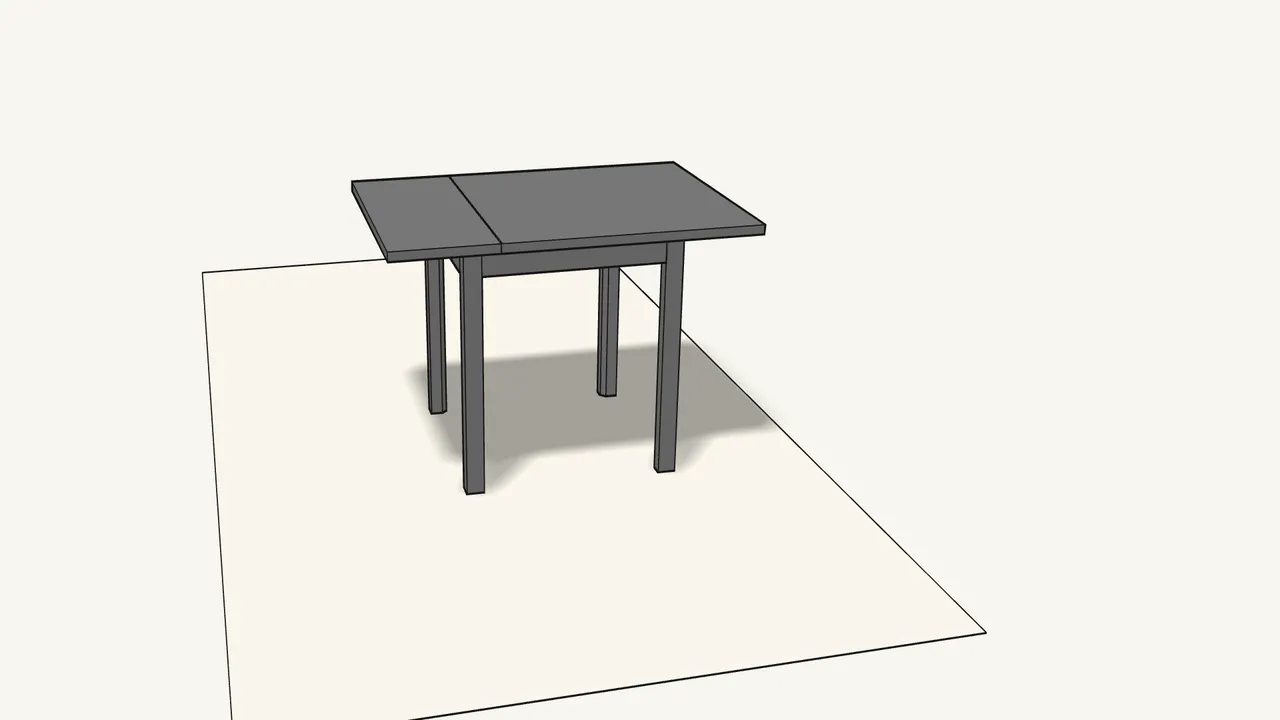
Step 21
To raise it again, do the same in reverse.
The latch clicks when the top is locked in place.
Tips & safety
- Unlock before you slide. Pull the latch ring down, slide the top, and let it click into place — manual, last page.
- Missing a part or unsure about a step? The manual says: contact your IKEA store.
Official instructions
This guide follows IKEA’s official assembly instructions (AA-2130378-1). Keep the printed manual to hand — if anything differs, the manual is right.



