IKEA · Tables & Desks
How to assemble IKEA MITTZON Desk Sit/Stand
Step-by-step IKEA MITTZON Desk Sit/Stand assembly: 19 illustrated steps, an animated video, the hardware list and the tools you need — following the official instructions (AA-2405369-6).
- 19 illustrated steps
- 28 steps in the manual
- 3:05 video
- 160×80×63–128 cm (shown at 77 cm) cm
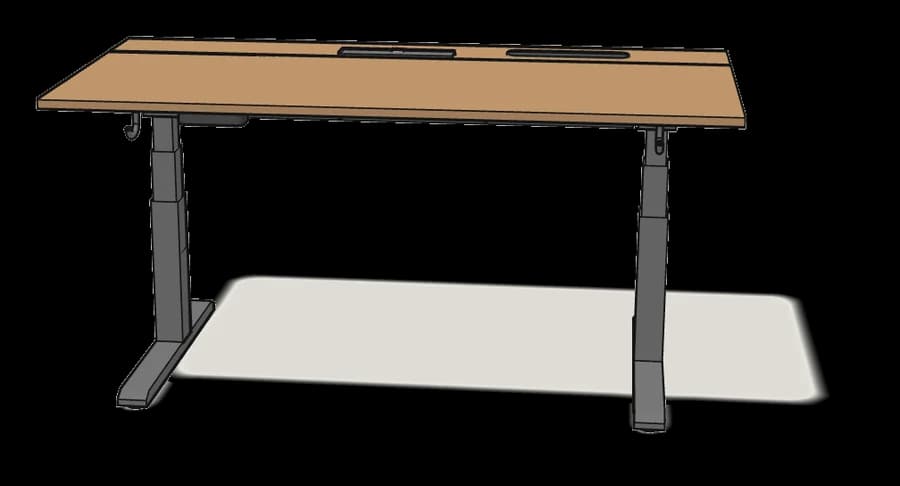
What you need
Tools
- Flat-head screwdriver
- Phillips screwdriver
- Allen key (included)
- Spanner (included)
- Spirit level
You’ll need: flat-head and Phillips screwdrivers, a spirit level and a knife. The 2 Allen keys and the spanner are in the box.
Hardware in the box
| Part no. (as printed in the manual) | Qty |
|---|---|
| 100099 | 4× |
| 115461 | 16× |
| 101083 | 18× |
| 108098 | 2× |
| 10106860 | 4× |
| 104875 | 12× |
| 10112910 | 4× |
| 112762 | 4× |
| 10112862 | 1× |
| 10100036 | 2× |
| 10100047 | 2× |
| 10095882 | 4× |
Step-by-step assembly
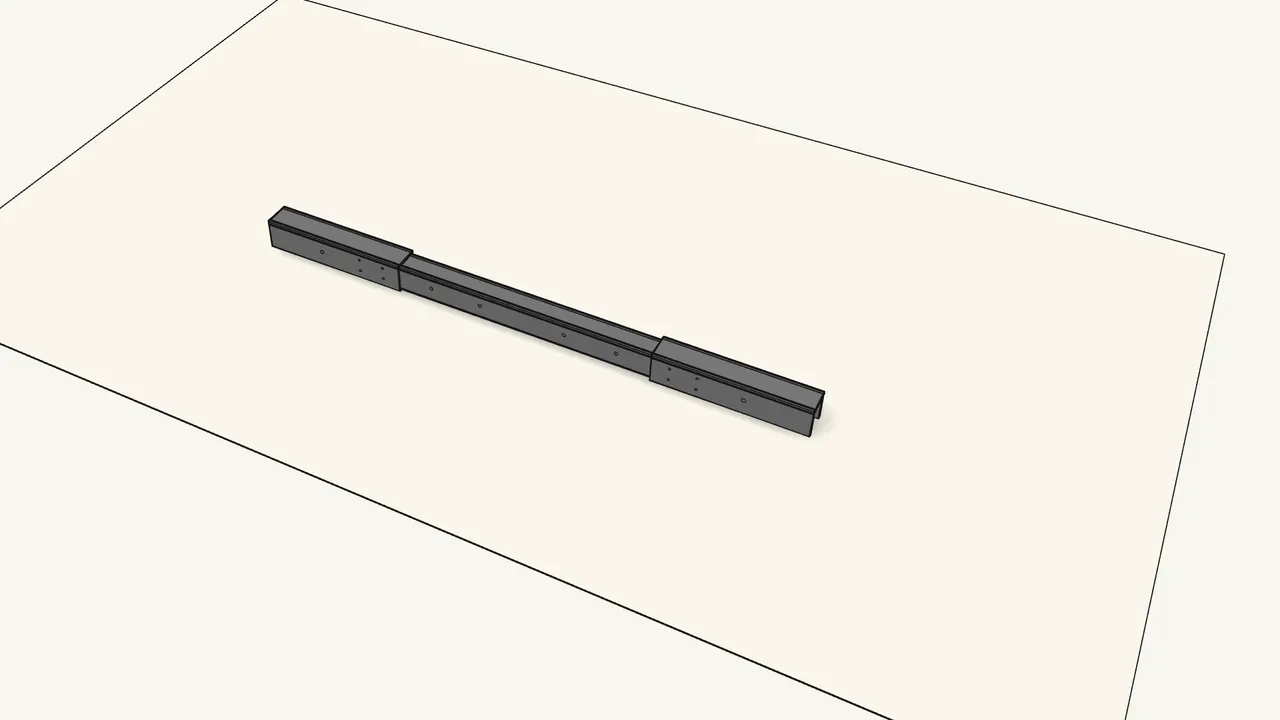
Step 1
Slide the three beam sections together.
For the 160 cm (63") desk use the 1600 mm position — see the inset in step 1.
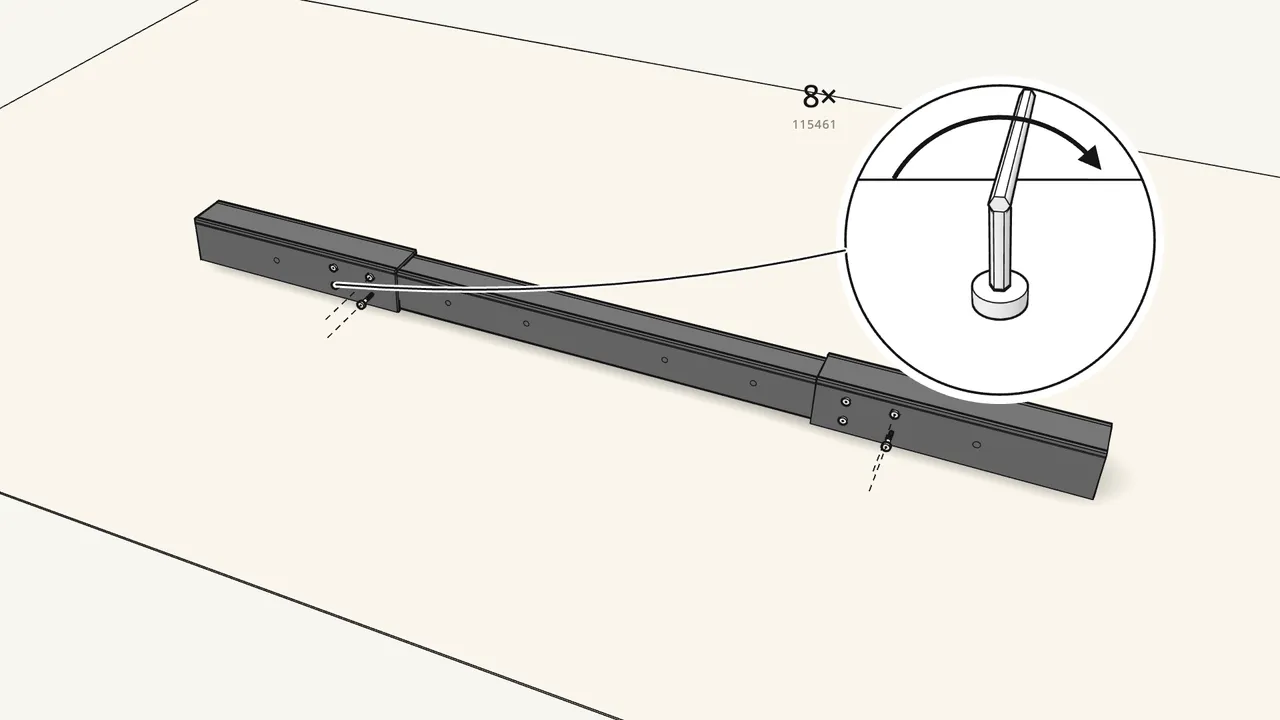
Step 2
Join the sections with 8 bolts (115461) and 8 nuts (104875).
Allen key 130445 and spanner 100089. Use 115461 here — not 101083.
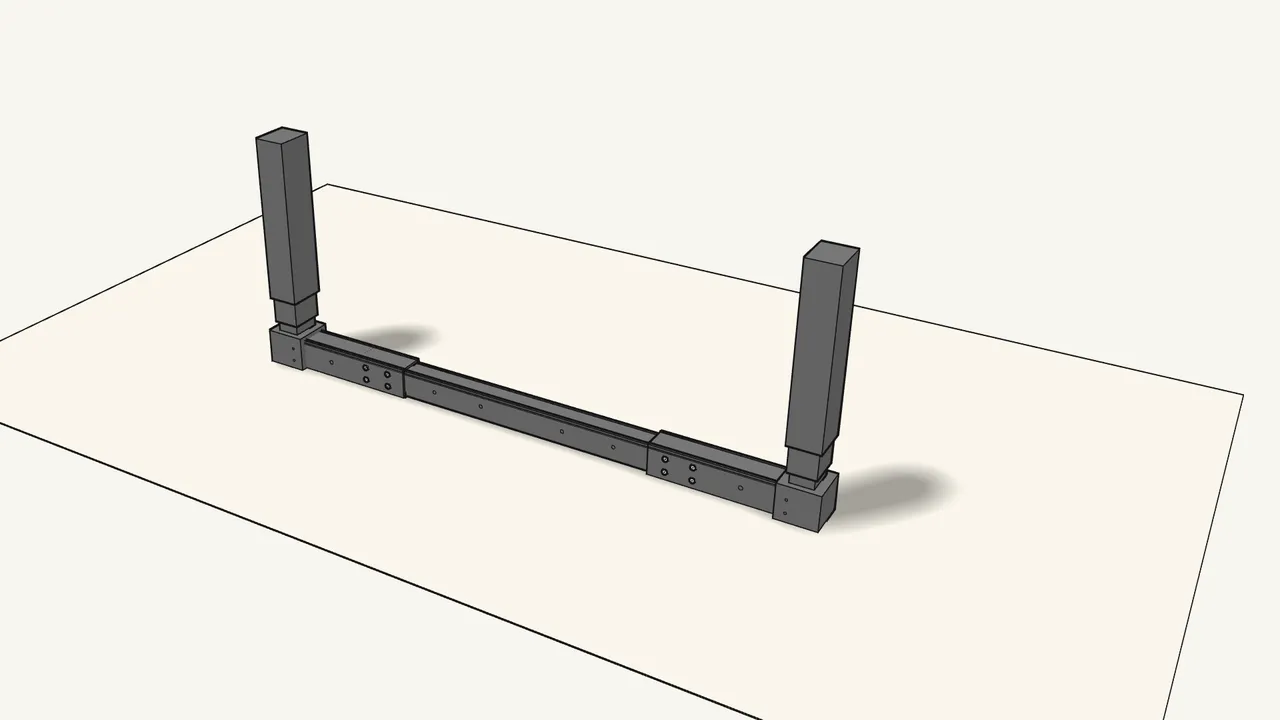
Step 3
Slide a leg onto each end of the beam.
Keep the beam upside down — the legs point up.
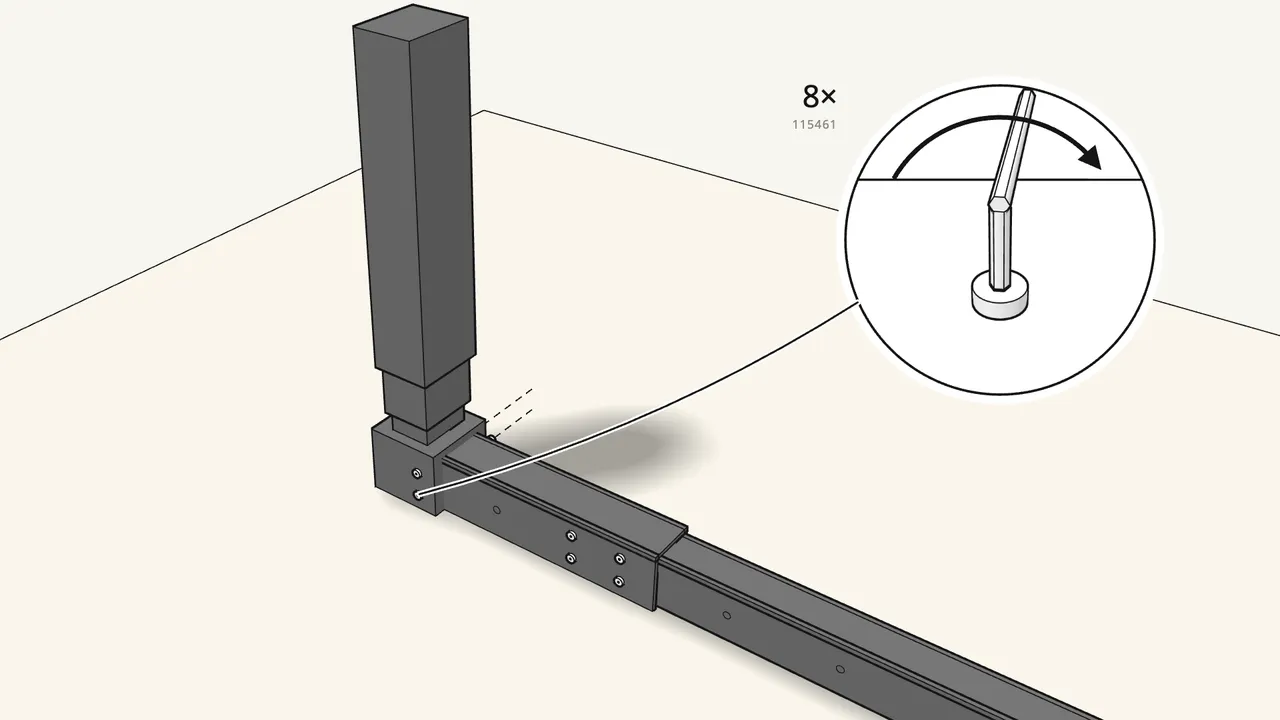
Step 4
Fix each leg with 4 bolts (115461).
8 bolts in total — Allen key 130445.
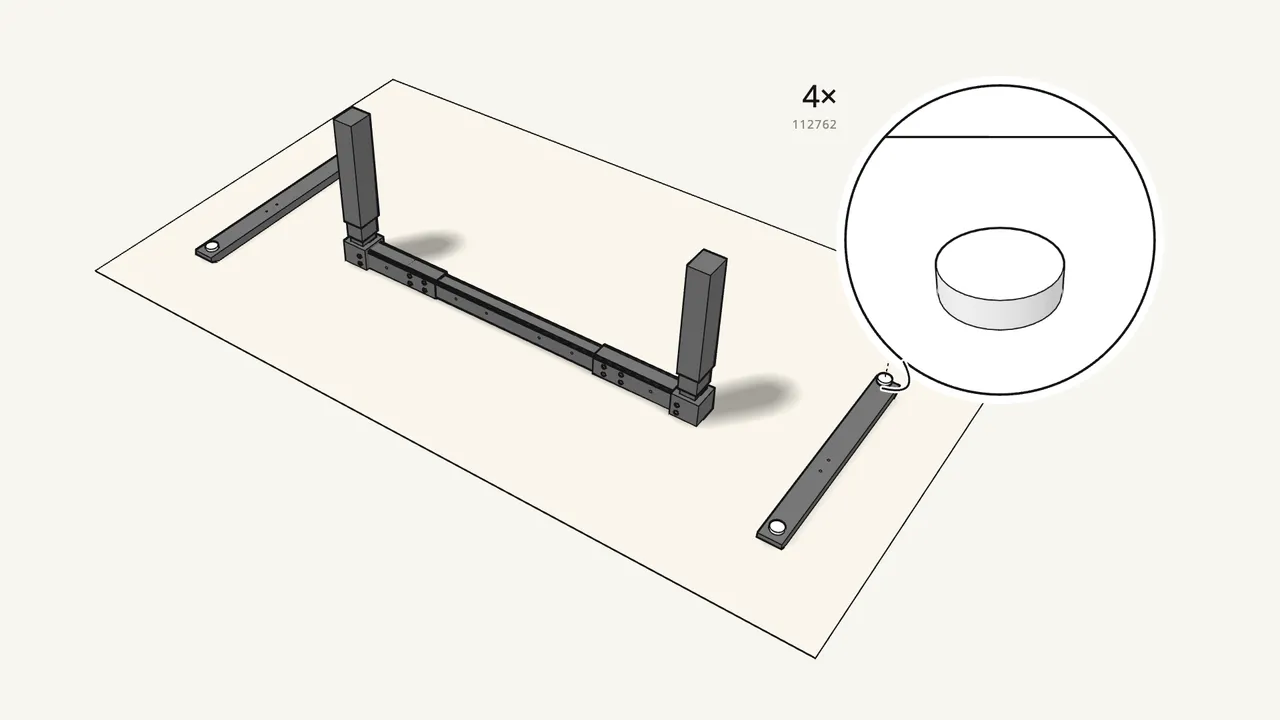
Step 5
Screw the 4 adjustable feet (112762) into the foot rails.
Lay the foot rails bottom side up.
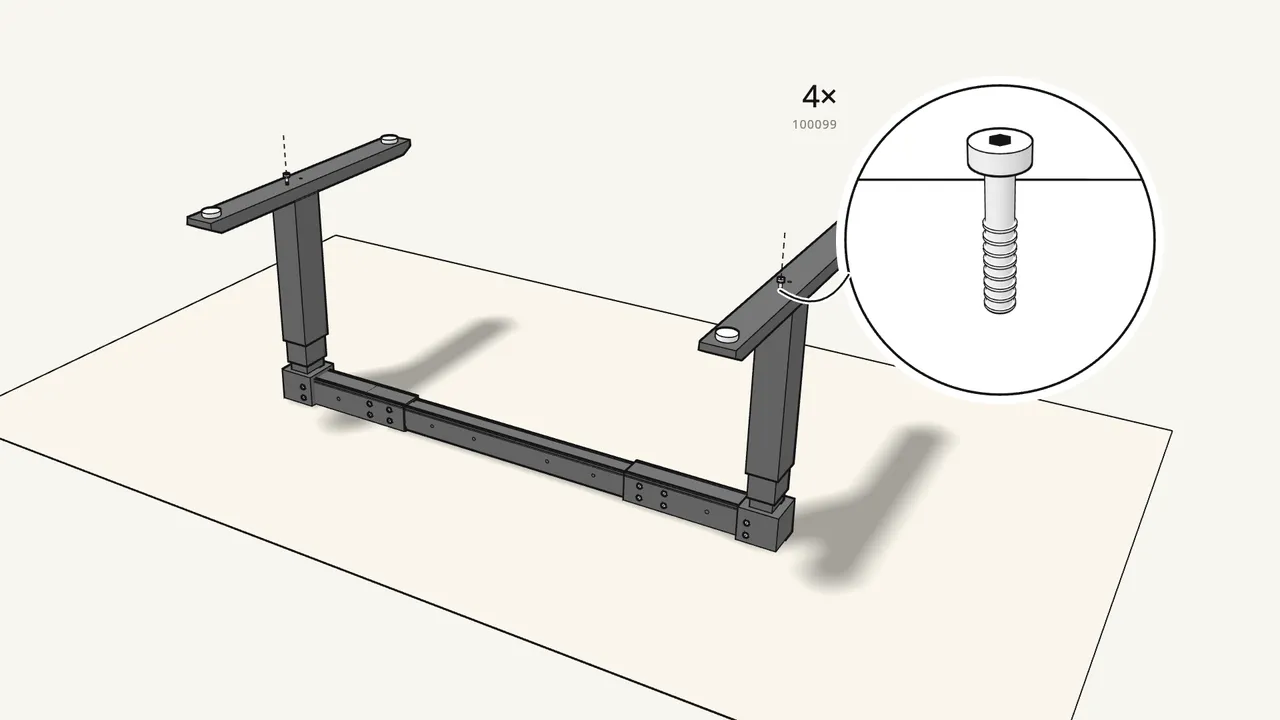
Step 6
Fit the foot rails onto the legs with 4 bolts (100099).
Allen key 108490. Check which way round the rails go — see the ! in step 6.
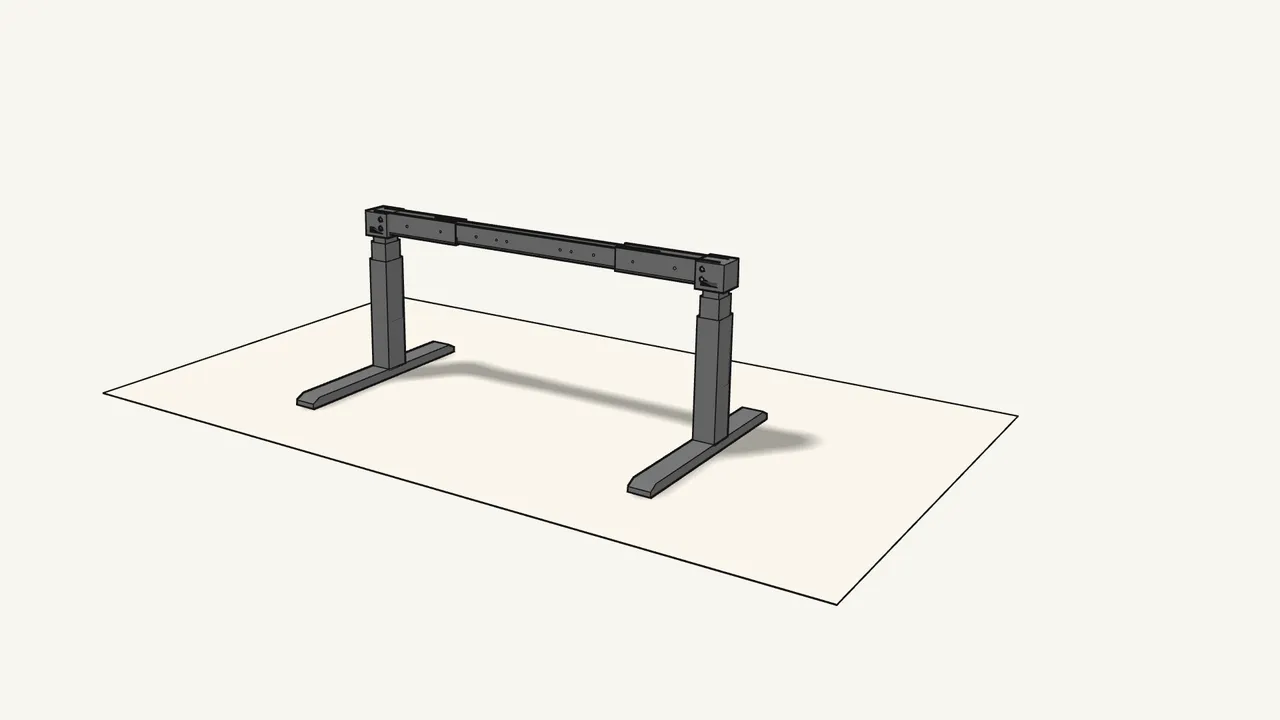
Step 7
Turn the frame over onto its feet.
It’s heavy — do this with two people.
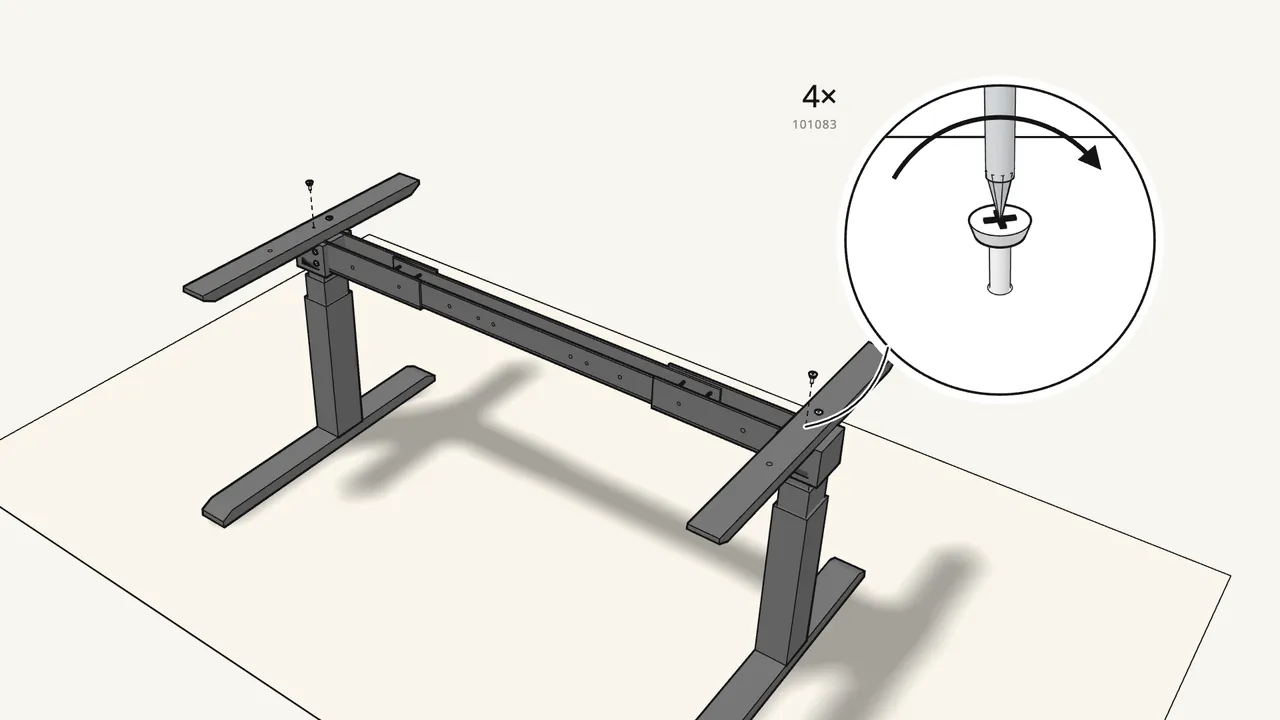
Step 8 · manual step 7
Screw the 2 arms onto the legs: 4 screws (101083) and 4 nuts (104875).
Phillips screwdriver and spanner 100089. Check the arms’ direction — see the ! in step 7.
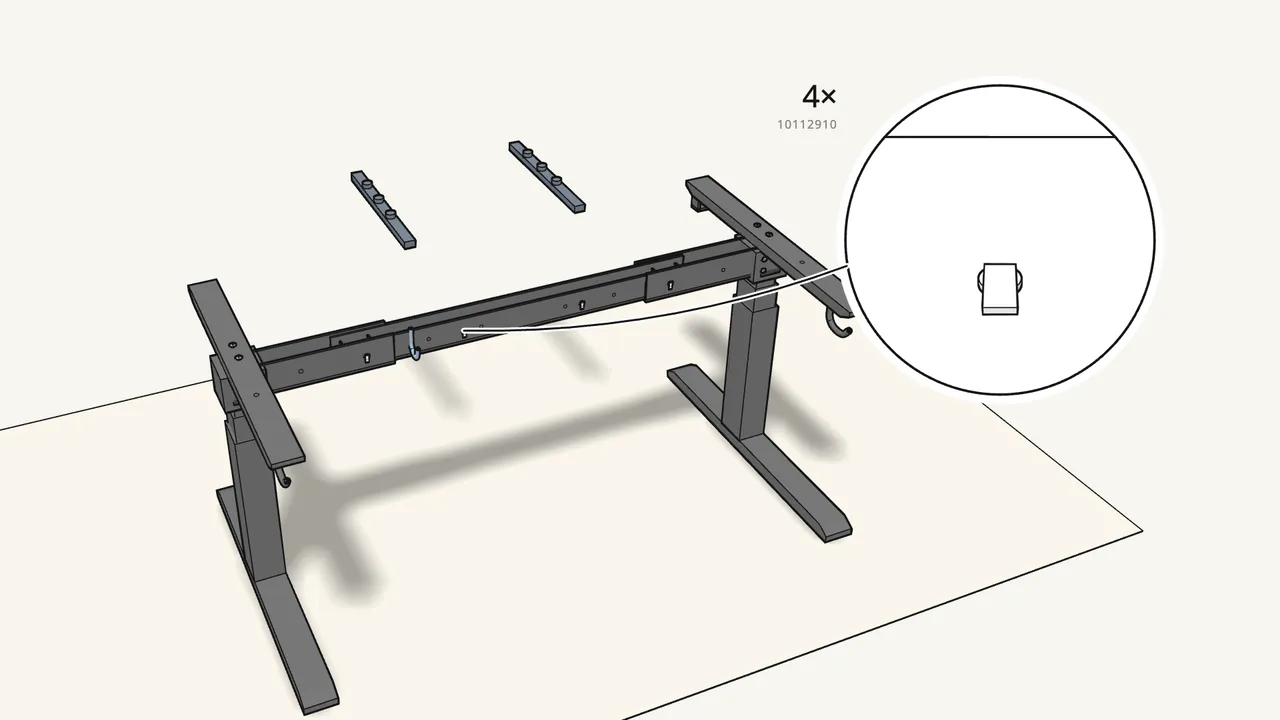
Step 9 · manual step 8–12
Fit the hooks, 4 cable clips (10112910) and the 2 cable holders.
Hooks 10100047 and 10100036 on the arms, U-hook 10112862 on the beam — see the manual, steps 8–12.
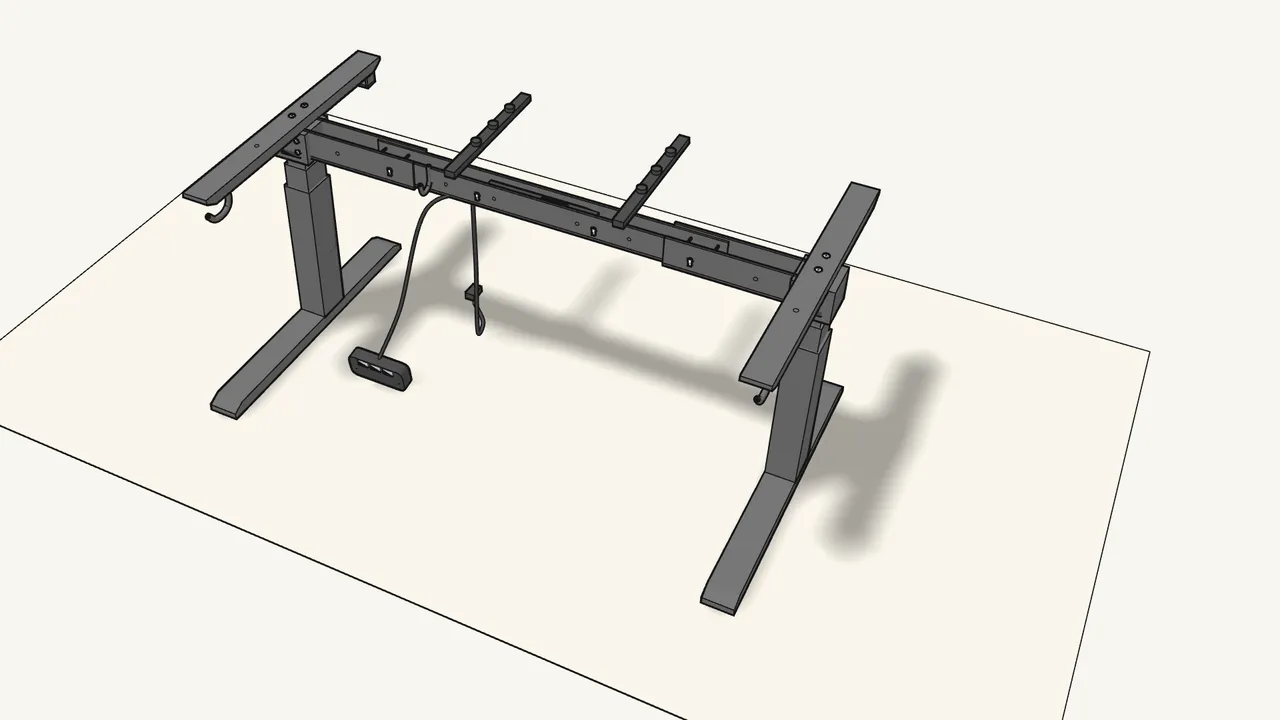
Step 10 · manual step 13–16
Put the control box in the beam and connect all the cables.
Legs, power cable and control panel. Keep the cables inside the beam (manual p. 16).
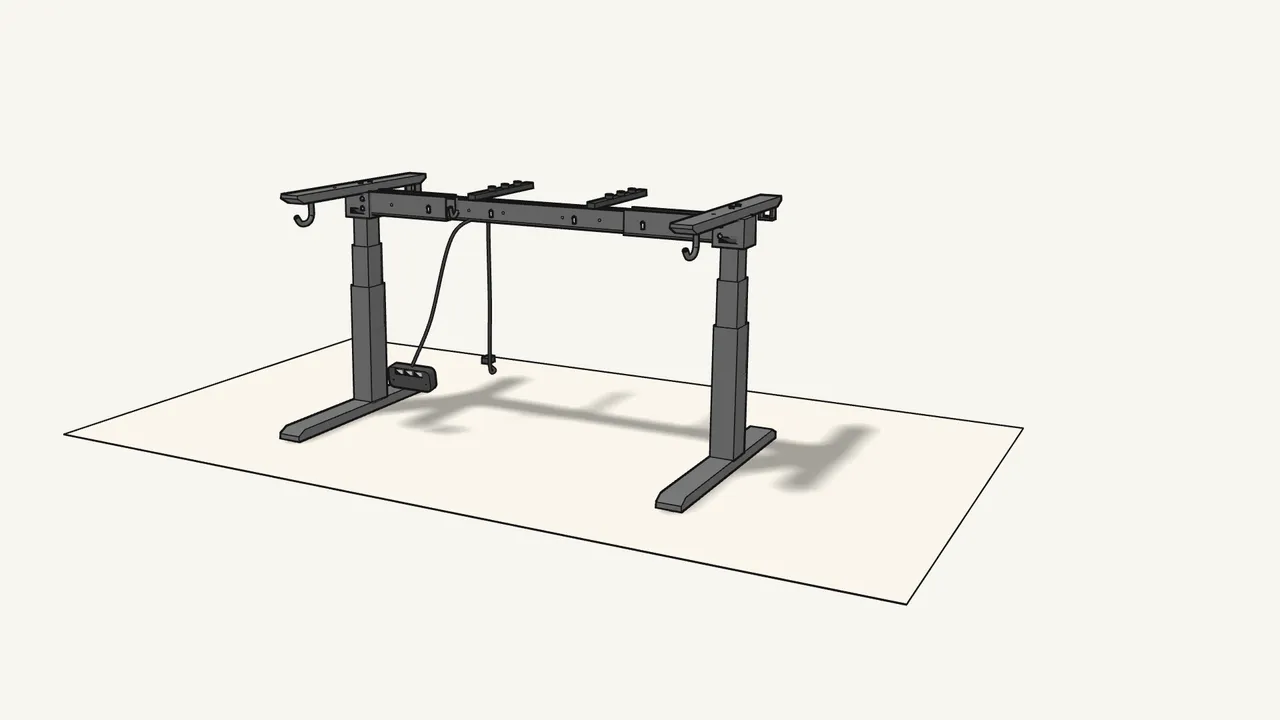
Step 11 · manual step 16
Plug in and test: press the up button — the legs rise.
See the info box after step 16.
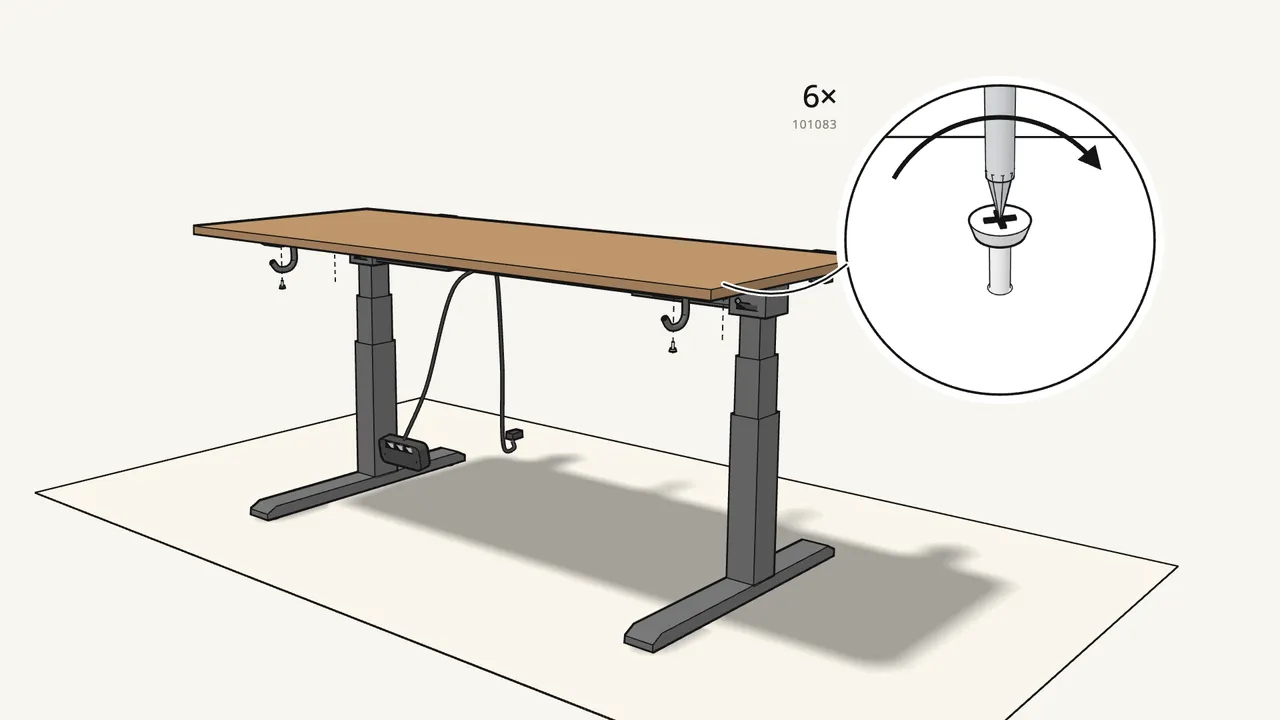
Step 12 · manual step 17
Lay the main desktop on the arms and fix it with 6 screws (101083).
Drive them up through the arms. For the 80 cm depth — see the inset in step 17.
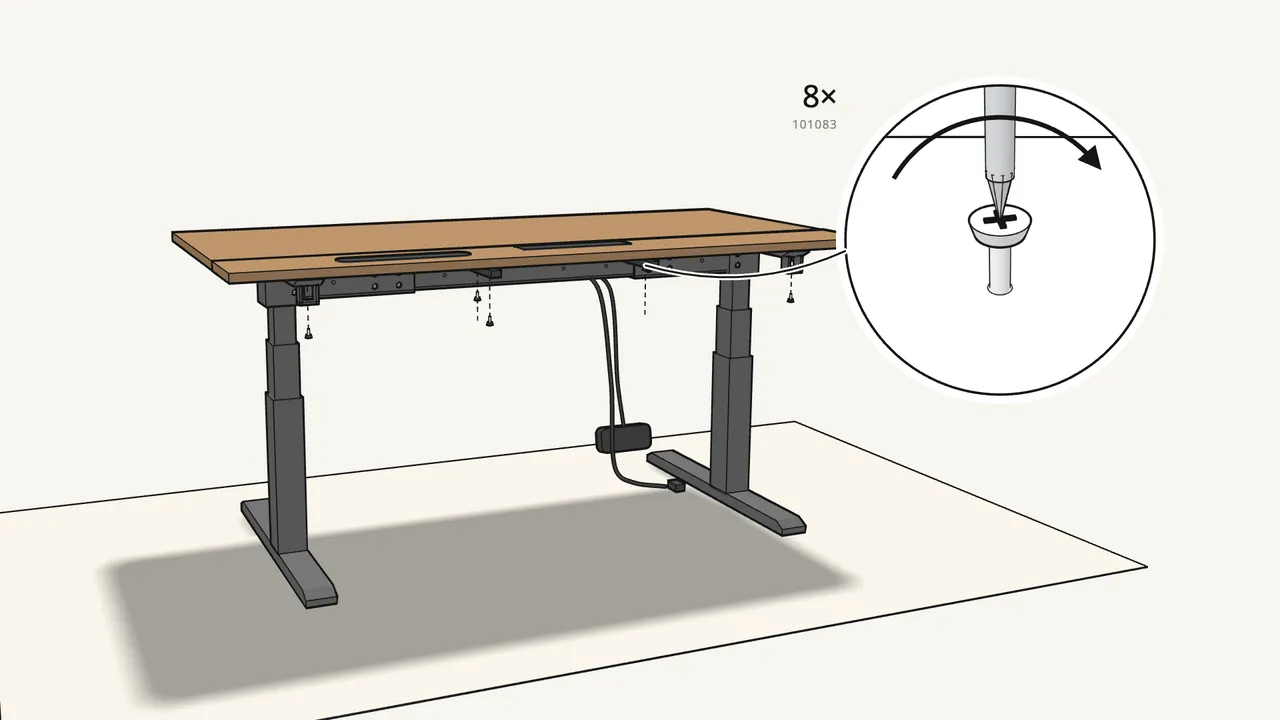
Step 13 · manual step 18–19
Add the rear strip and fix it with 8 screws (101083) from below.
1 screw in step 18, 7 in step 19.
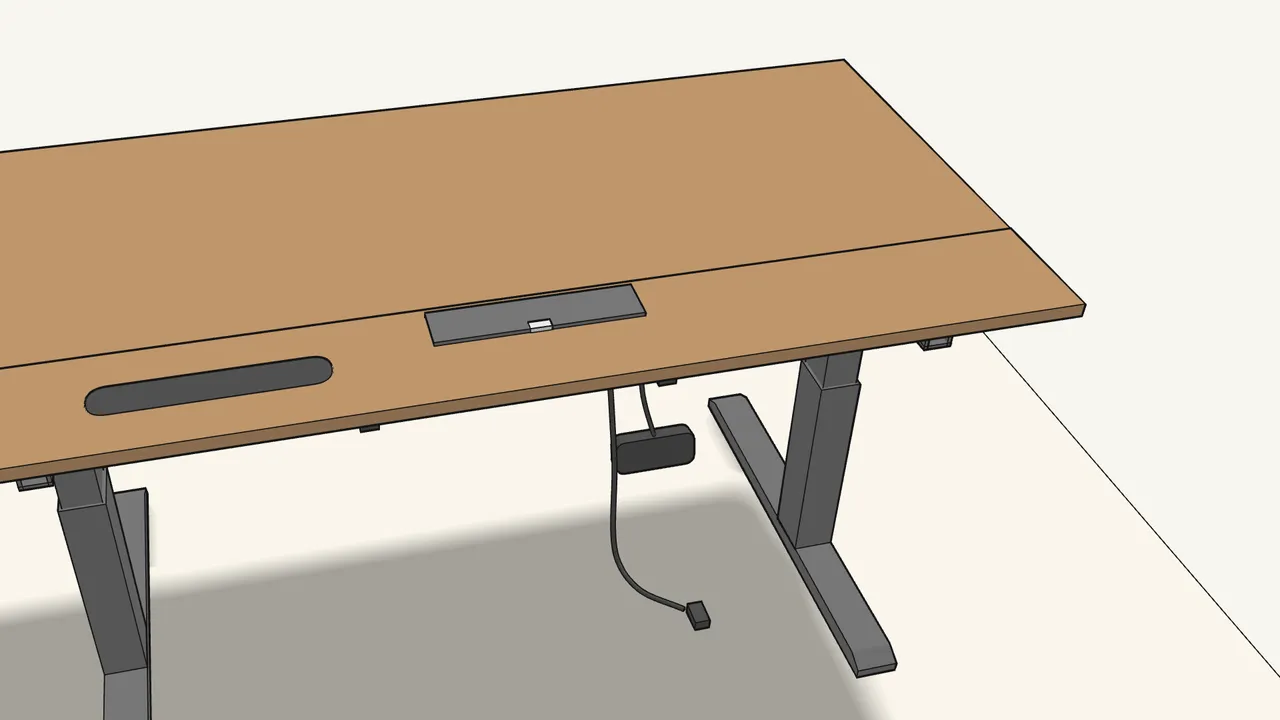
Step 14 · manual step 20
Fit the cable lid in the rear strip.
With the screw (108172) and washer (100825) supplied with the desktop — see step 20.
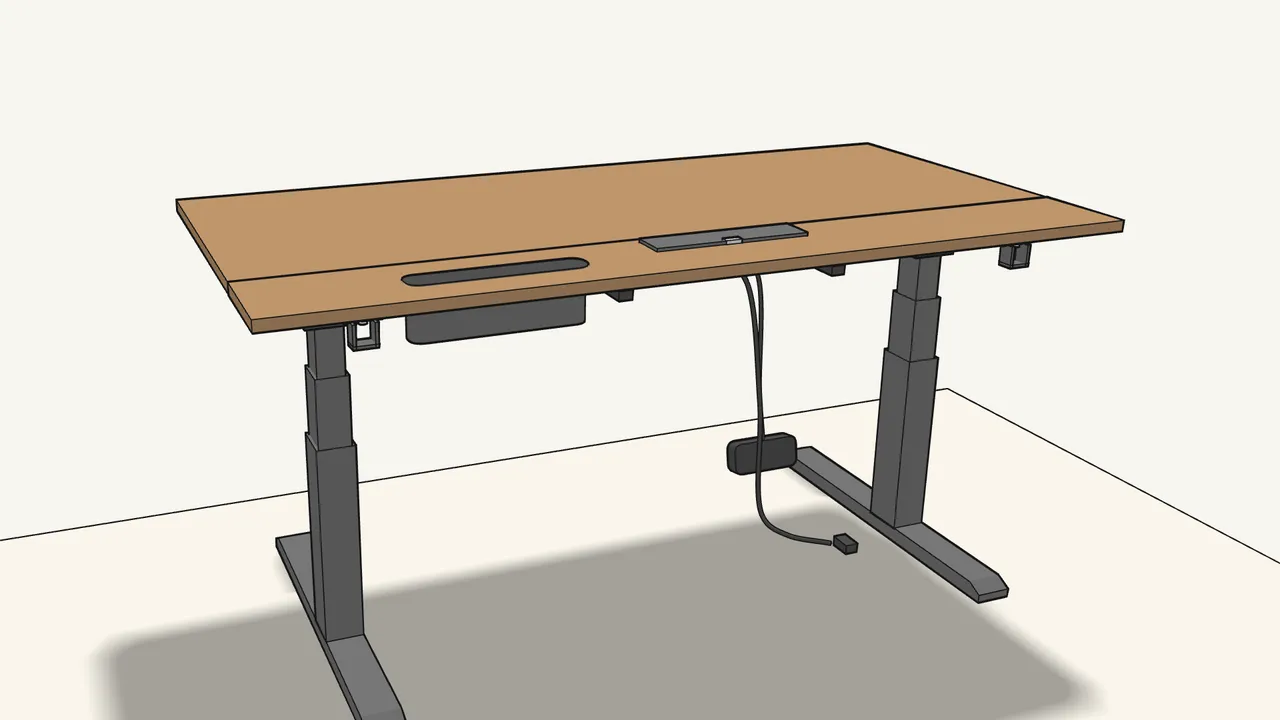
Step 15 · manual step 21–22
Join the 2 tray halves and hang the tray in the slot.
With the hooks (10095882). KOPPLA power strip sold separately — cut out cable openings with a knife if needed.
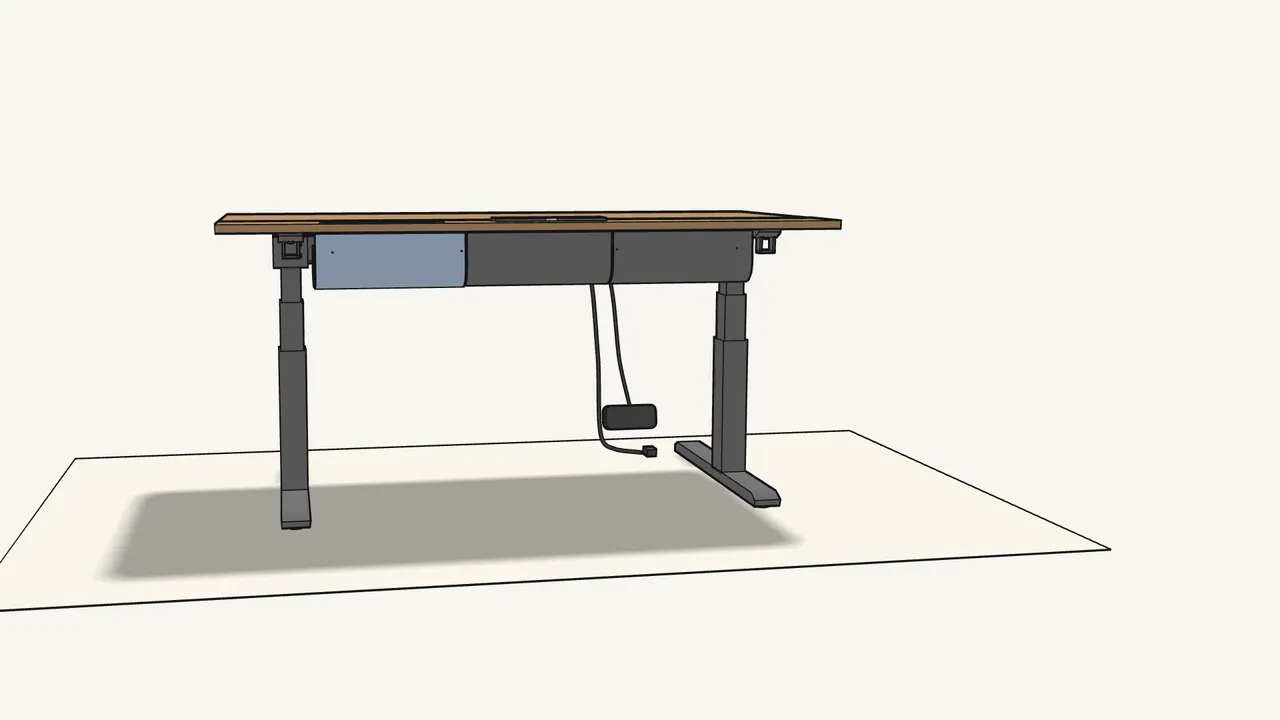
Step 16 · manual step 23–25
Hook the 3 cable sheets on at the back, then fold them up.
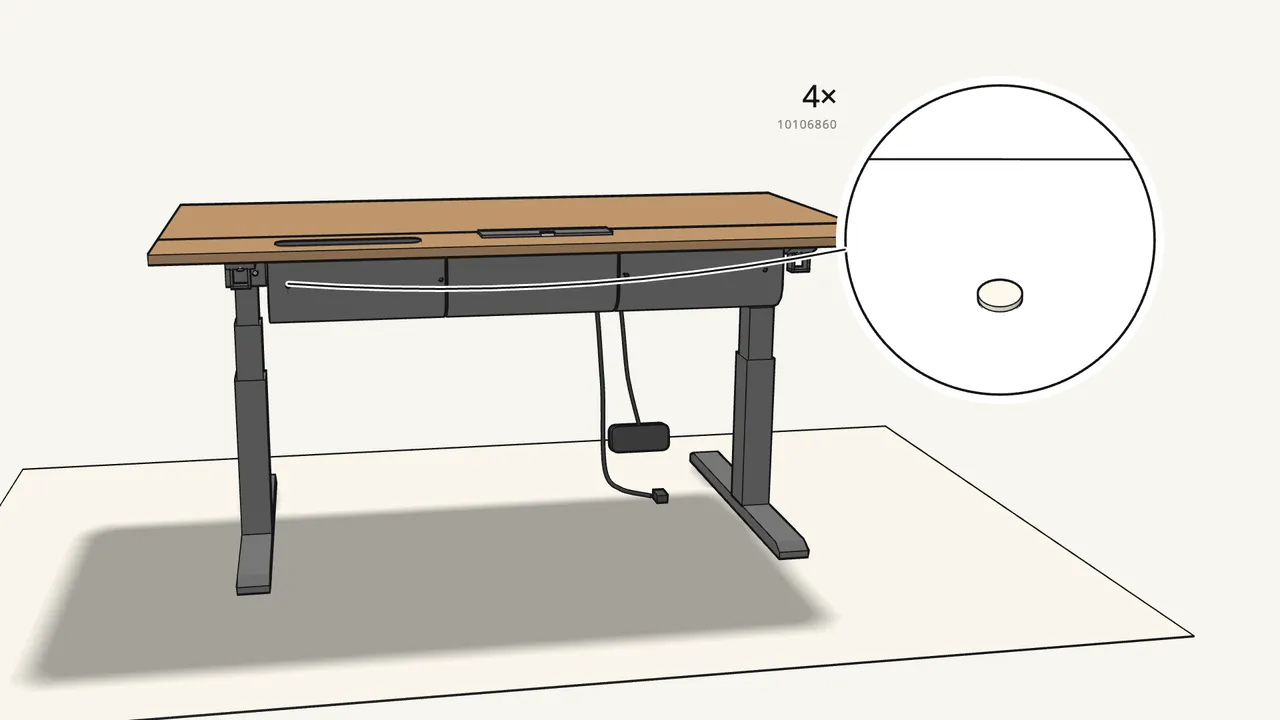
Step 17 · manual step 26
Fix the cable sheets with 4 push rivets (10106860).
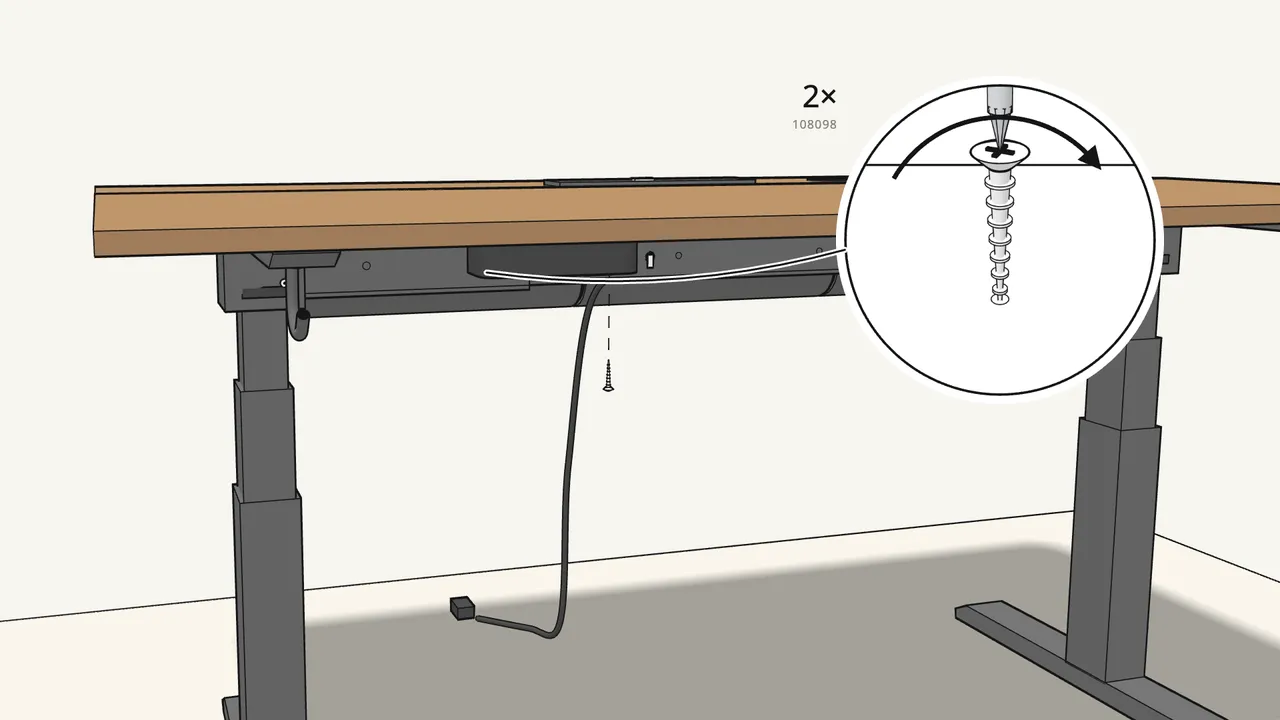
Step 18 · manual step 27
Screw the control panel under the front edge with 2 screws (108098).
Phillips screwdriver.
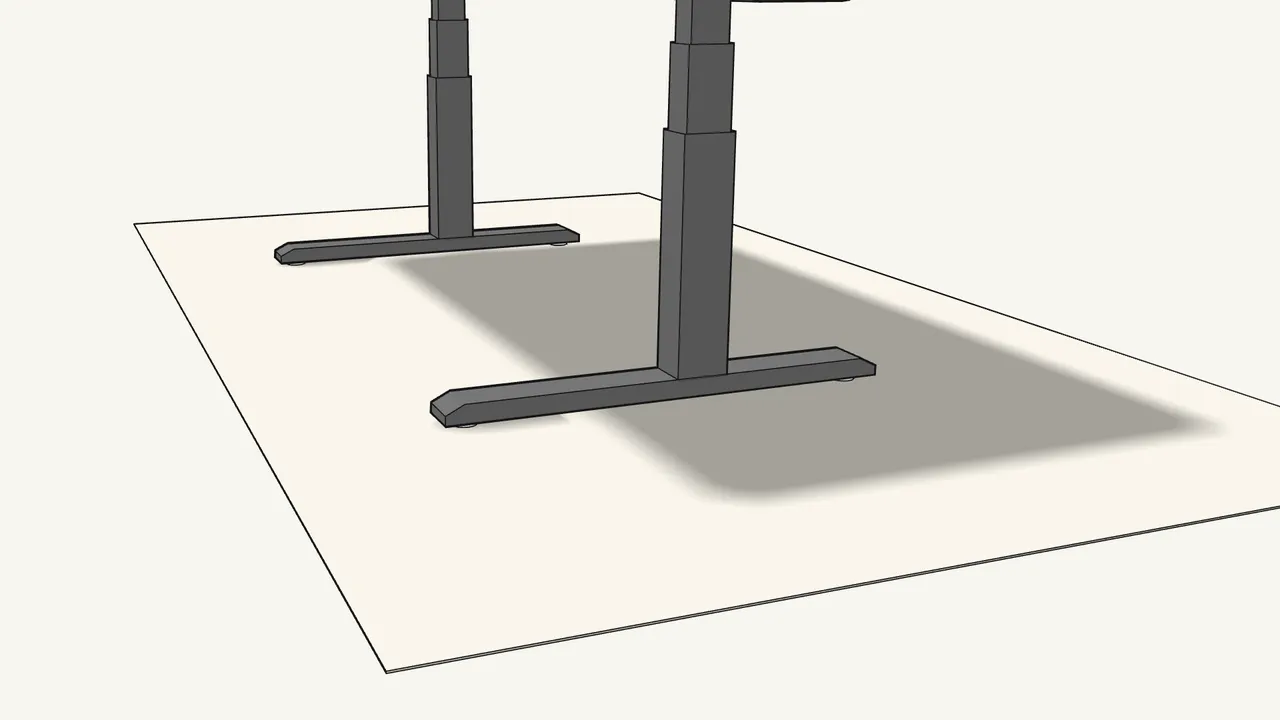
Step 19 · manual step 28
Level the desk: turn the adjustable feet in or out.
Check with a spirit level on the desktop.
Tips & safety
- Max load: 80 kg (176 lb). Spread the weight over the desktop — see the info page at the end of the manual.
- Keep the cables inside the beam. Loose loops can get caught when the desk moves (manual p. 16).
- Keep the reset pin and the control-panel guide. You need them to reset the control panel — see manual p. 24.
Official instructions
This guide follows IKEA’s official assembly instructions (AA-2405369-6). Keep the printed manual to hand — if anything differs, the manual is right.



