IKEA · Tables & Desks
How to Assemble IKEA GLADOM Tray Table
Step-by-step IKEA GLADOM tray table assembly: 5 illustrated steps, an animated video, the hardware list and the tools you need — following the official instructions (AA-2544925-1).
- 5 illustrated steps
- 4 steps in the manual
- 1:10 video
- 45 dia×53 cm

What you need
Tools
- Allen key (included)
You’ll need: the Allen key (100006). It’s in the box.
Hardware in the box
| Part no. (as printed in the manual) | Qty |
|---|---|
| 123451 | 1× |
| 122202 | 3× |
Step-by-step assembly
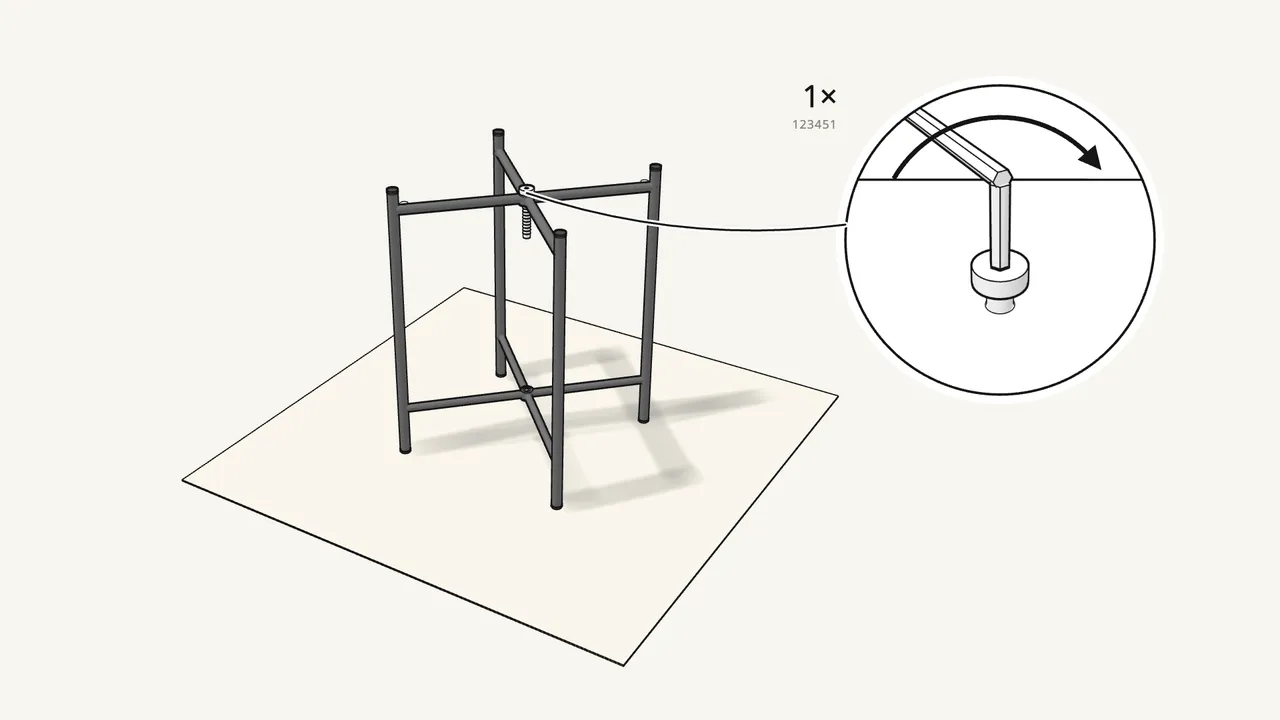
Step 1
Screw the leg frames together at the top crossing.
Use the longer screw 123451 here — not 122202.
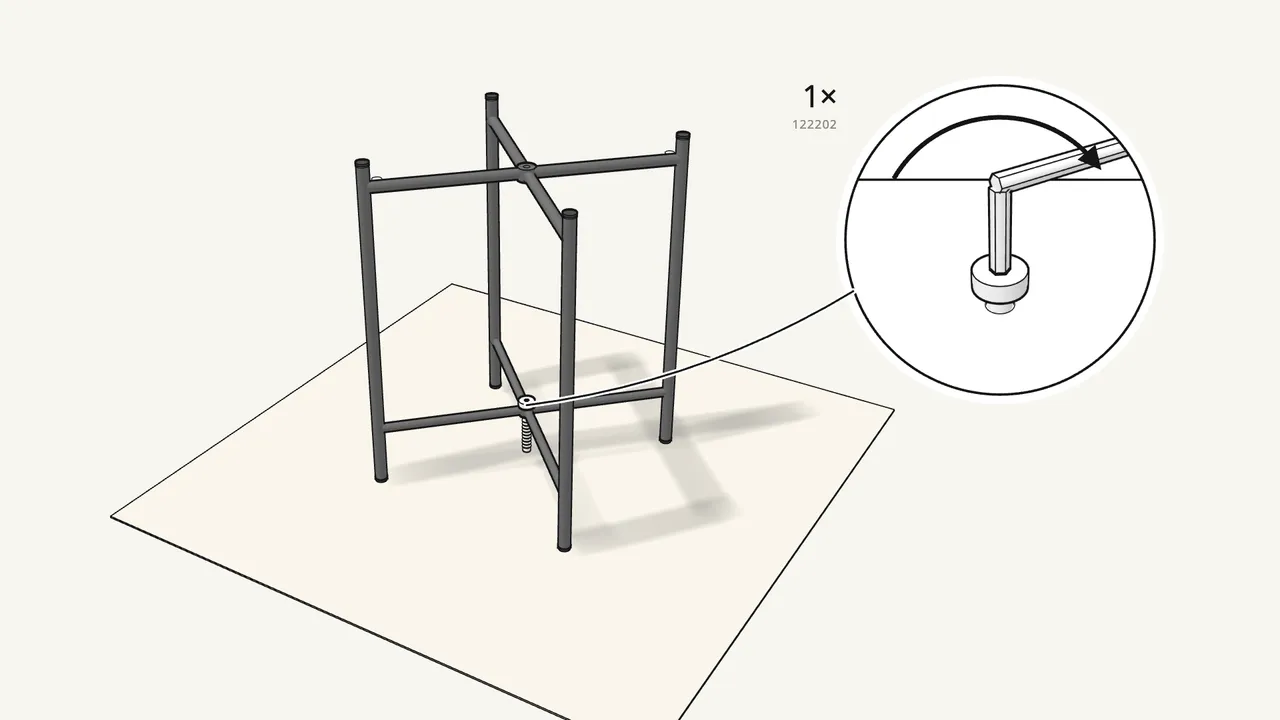
Step 2
Screw the frames together at the bottom crossing.
Screw 122202, tightened with the Allen key.
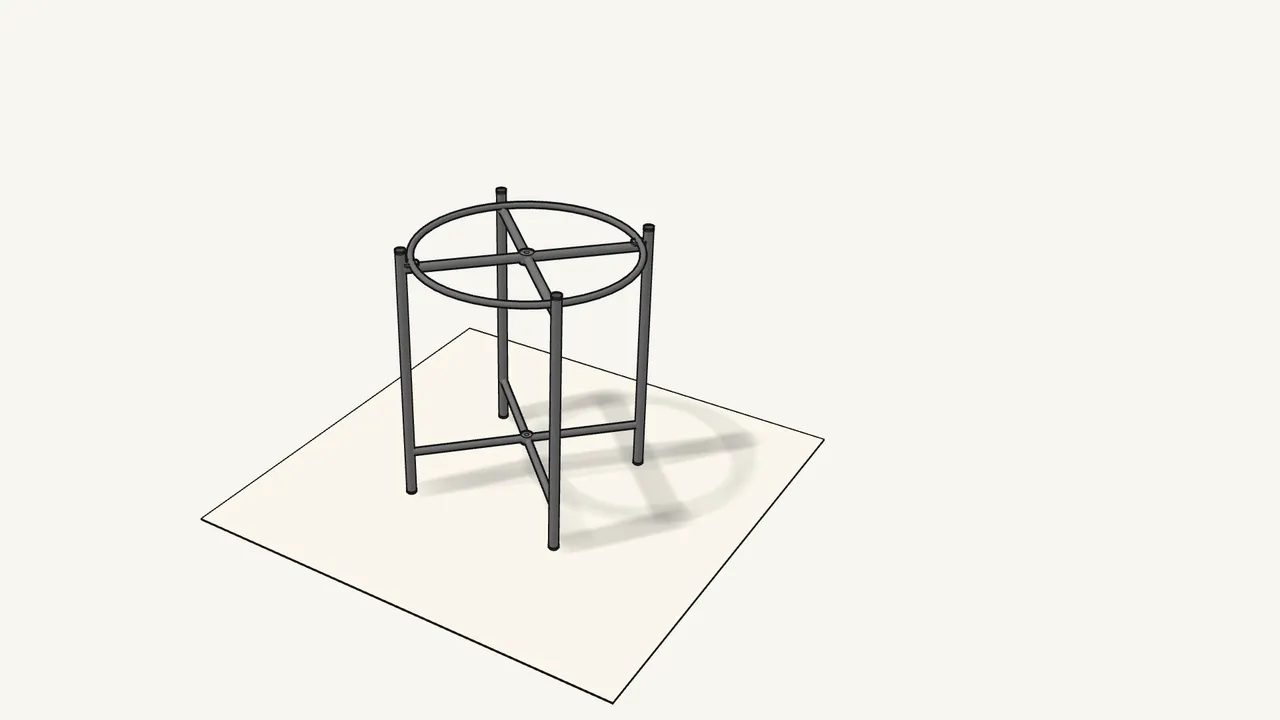
Step 3
Lower the ring onto the top of the frame.
The two tabs lie flat on the ends of one crossbar.
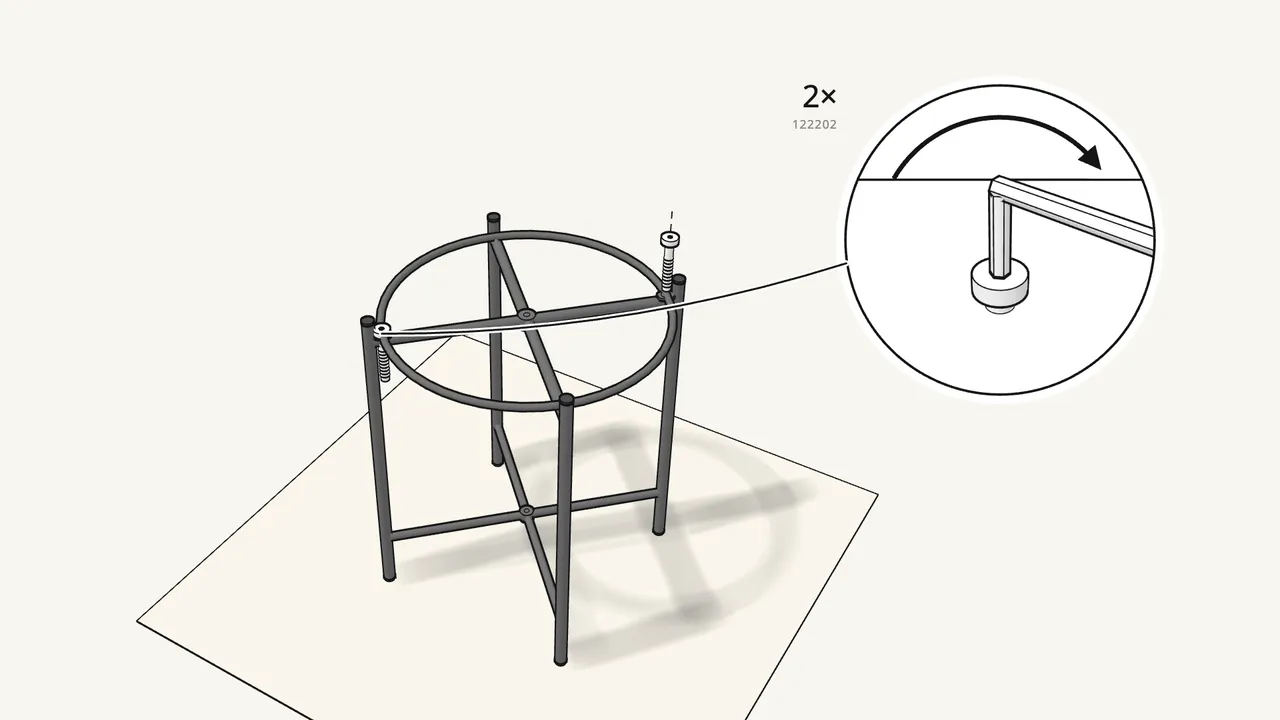
Step 4 · manual step 3
Fix the ring with 2 screws (122202).
Check each tab sits flat, not tilted, before tightening.
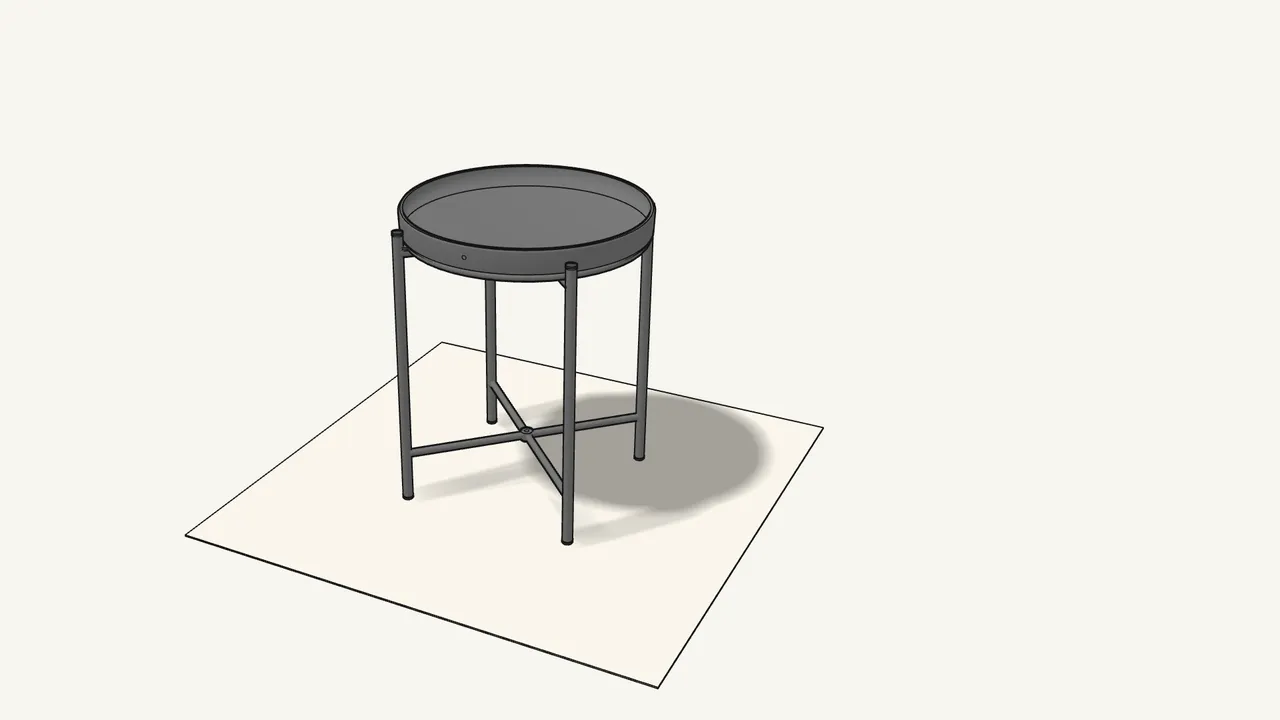
Step 5 · manual step 4
Place the tray in the ring.
Tips & safety
- The tray is not screwed down. It rests in the ring — lift it off to carry things.
- Delicate table: maximum load 10 kg (22 lb). Don’t sit on it.
Official instructions
This guide follows IKEA's official assembly instructions (AA-2544925-1). Keep the printed manual to hand — if anything differs, the manual is right.