IKEA · Tables & Desks
How to assemble IKEA HEMNES Dressing Table with Mirror
Step-by-step IKEA HEMNES Dressing Table with Mirror assembly: 24 illustrated steps, an animated video, the hardware list and the tools you need — following the official instructions (AA-303777-9).
- 24 illustrated steps
- 30 steps in the manual
- 3:23 video
- 100×50×157 cm cm
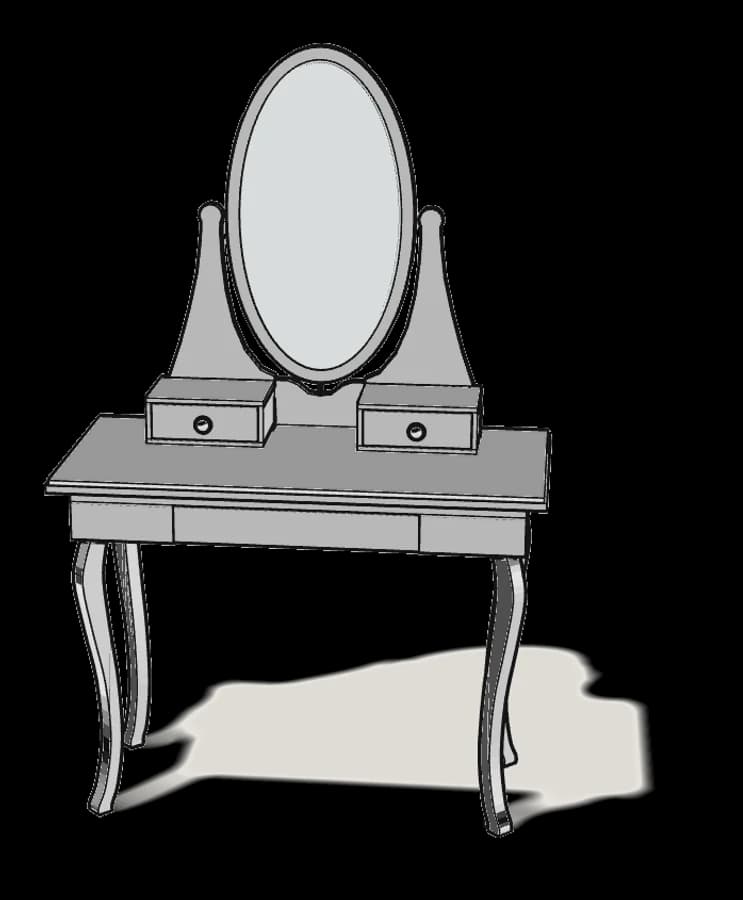
What you need
Tools
- Flat-head screwdriver
- Phillips screwdriver
- Allen key (included)
- Spanner (included)
Hardware in the box
| Part no. (as printed in the manual) | Qty |
|---|---|
| 110526 | 4× |
| 100136 | 2× |
| 109578 | 6× |
| 105111 | 2× |
| 109029 | 4× |
| 100410 | 2× |
| 112996 | 19× |
| 106720 | 4× |
| 110630 | 15× |
| 101350 | 20× |
| 101344 | 8× |
| 100365 | 8× |
| 105307 | 16× |
| 104859 | 4× |
| 121122 | 2× |
| 100833 | 4× |
| 100867 | 6× |
| 100829 | 2× |
| 100710 | 2× |
| 100712 | 4× |
| 105867 | 1× |
Step-by-step assembly
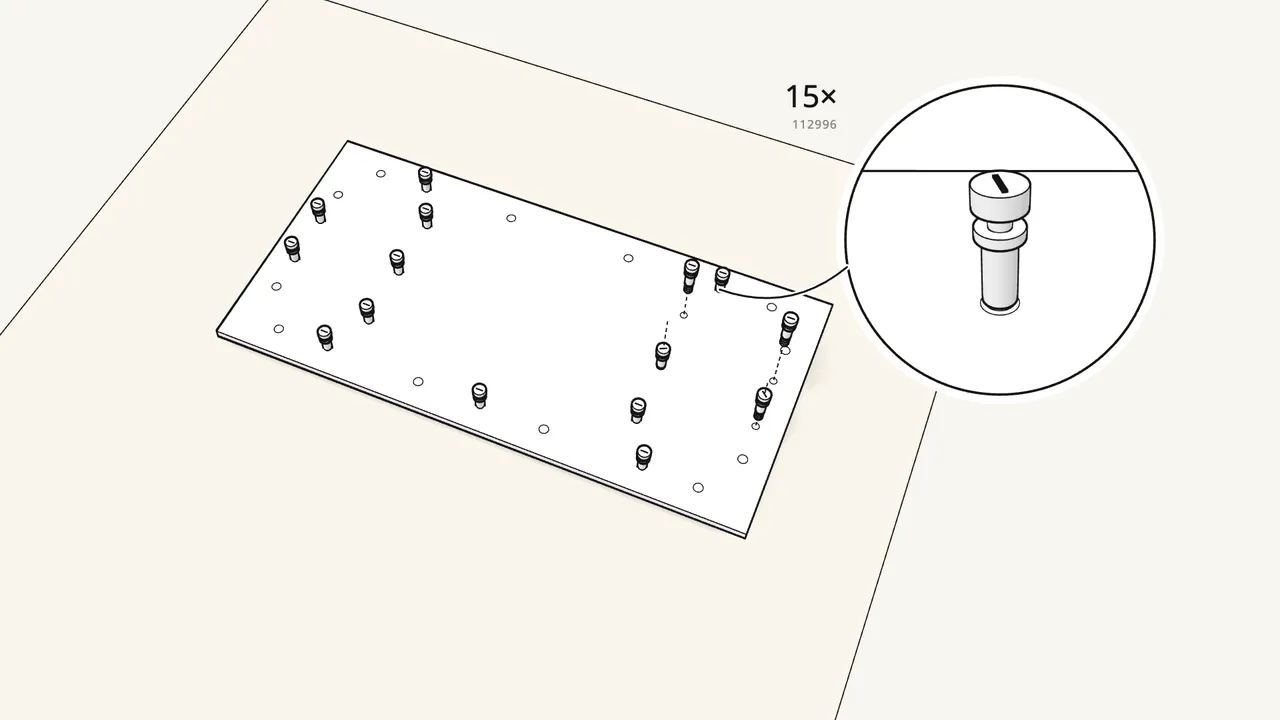
Step 1
Screw 15 cam bolts (112996) into the table top.
Lay the top upside down on the rug.
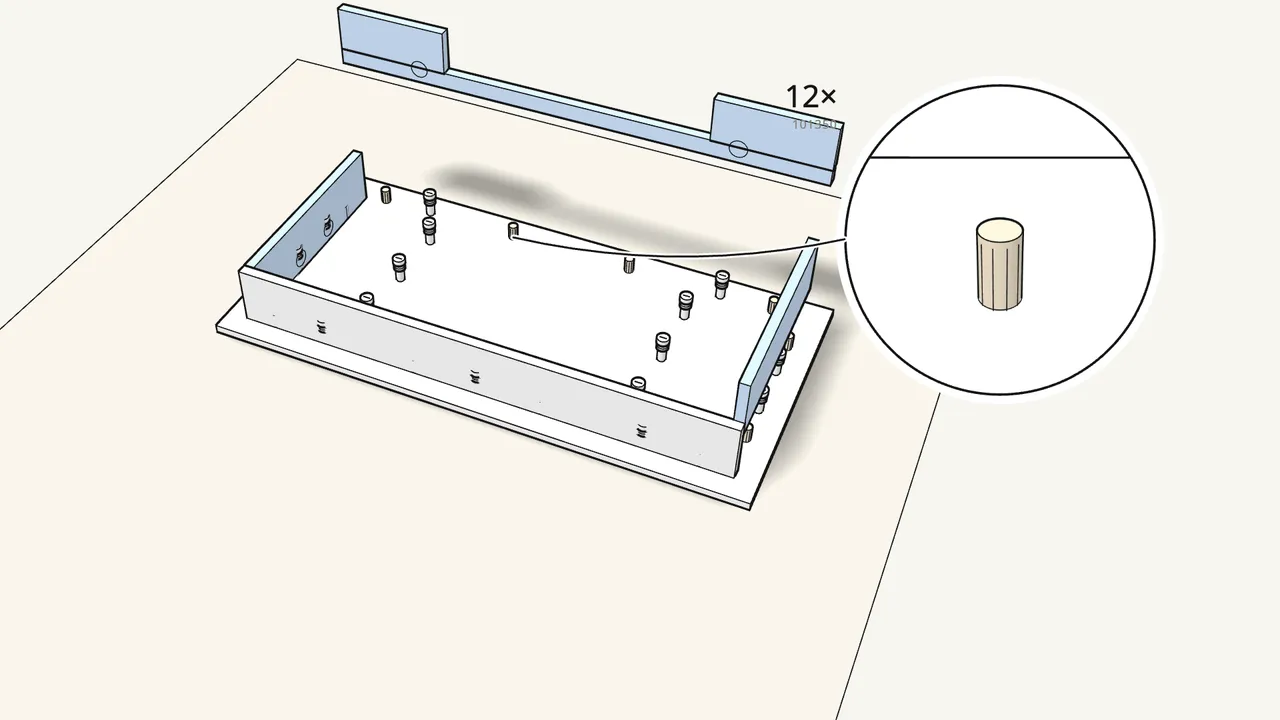
Step 2
Push in 12 dowels (101350) and fit the 4 rails.
Use the thick dowels 101350 here, not 101344.
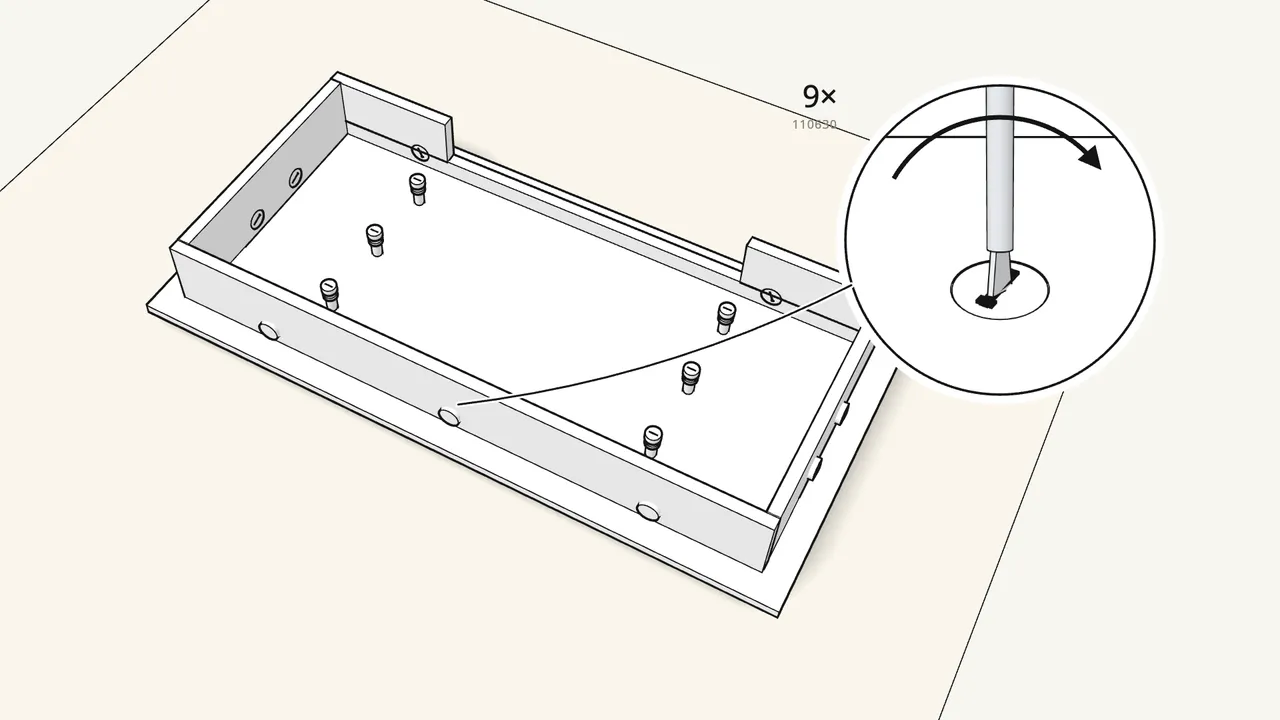
Step 3
Insert 9 cam locks (110630) and turn them to lock.
Not the 106720 locks — those are for the drawer.
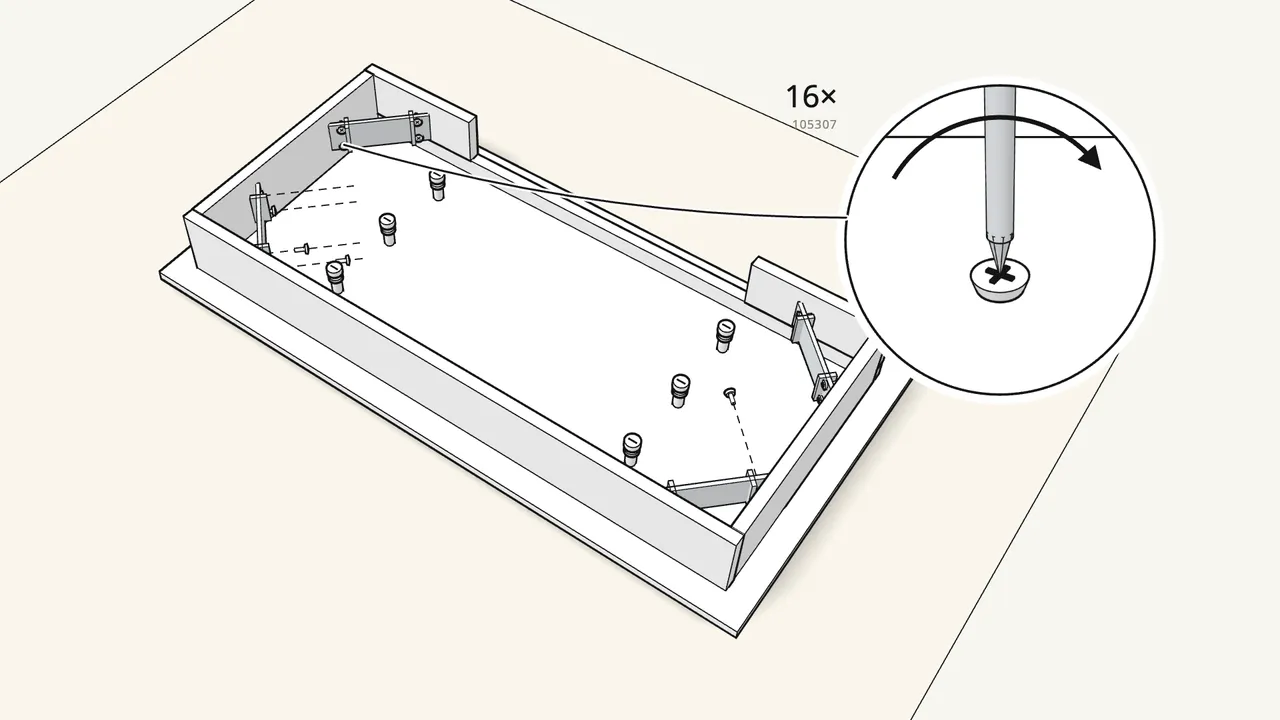
Step 4
Screw a corner bracket (118254) into each corner.
4 screws (105307) per bracket — 16 in total.
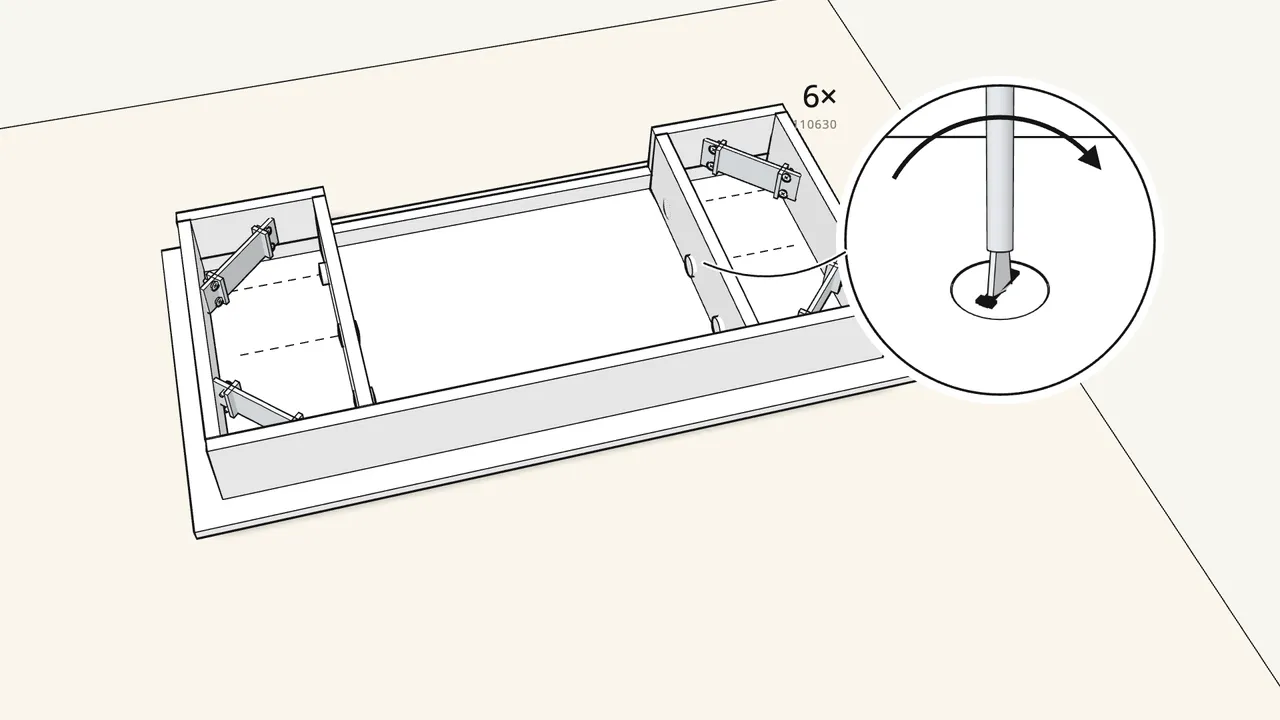
Step 5 · manual step 5–6
Fit the 2 drawer support boards.
2 dowels (101350) in each, then lock with 6 cam locks (110630).
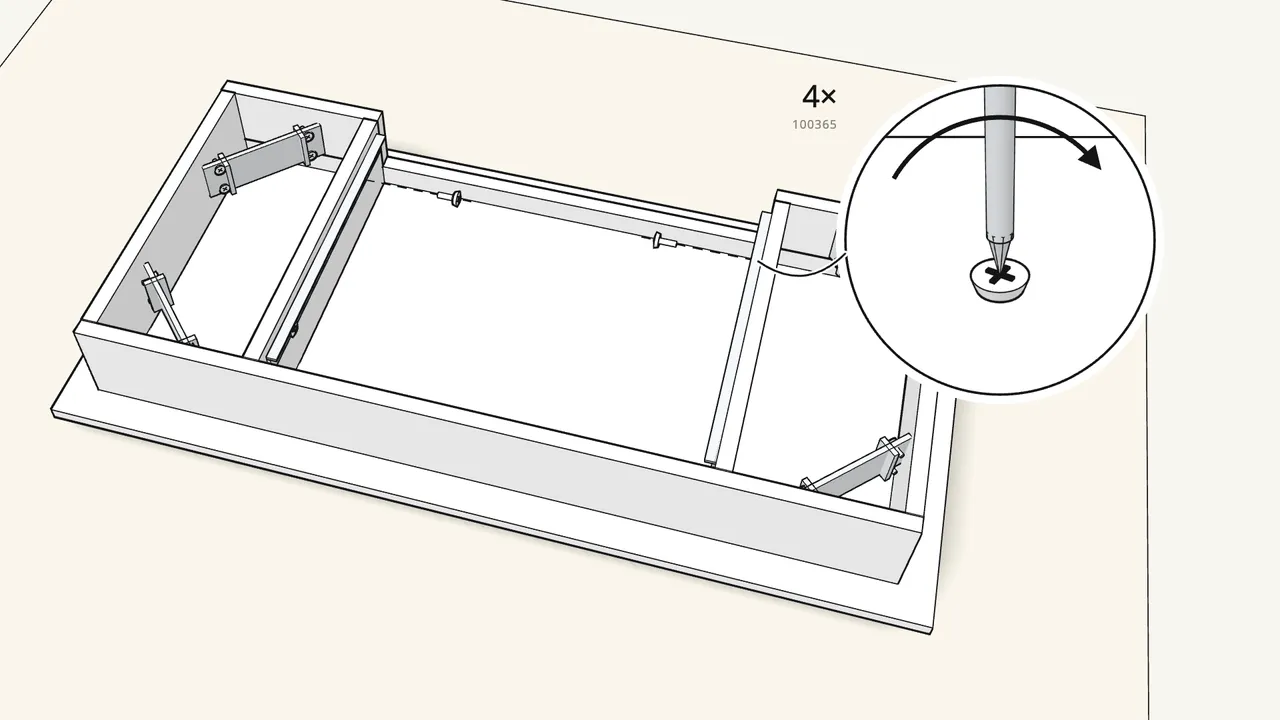
Step 6 · manual step 7
Screw the cabinet runners (105530) to the support boards.
2 screws (100365) per runner. Check the runner direction in the manual.
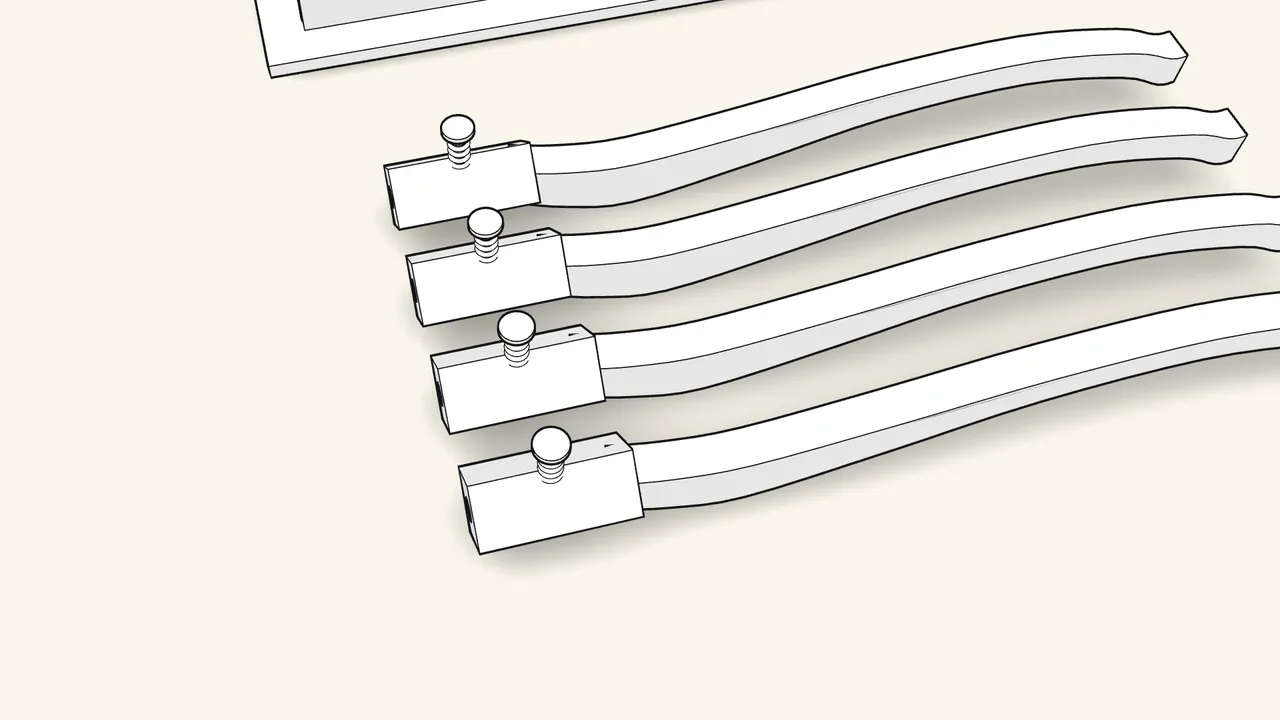
Step 7 · manual step 8
Prepare the 4 legs.
A cross dowel (104859) in the top, then screw in a threaded rod (110526).
Step 8 · manual step 9
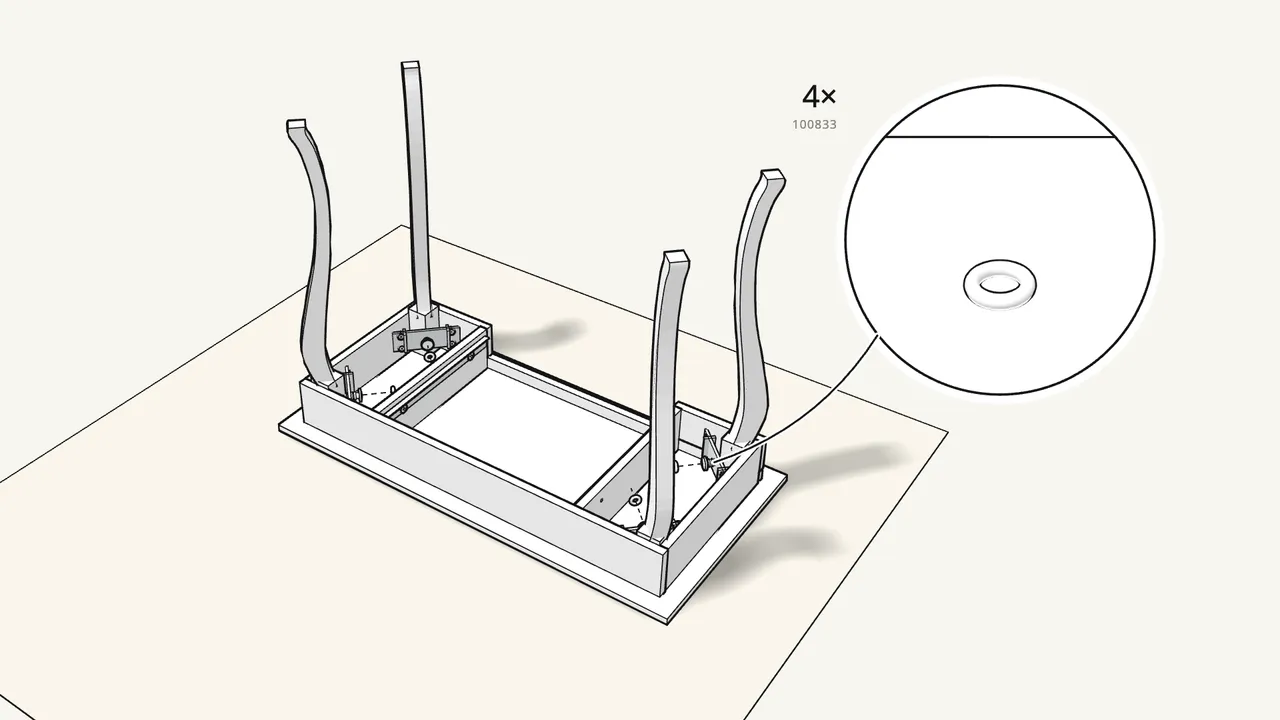
Fit the legs into the corners.
Washer (100833) and nut (100712) on each rod — tighten with the spanner (103675).
Step 9 · manual step 10
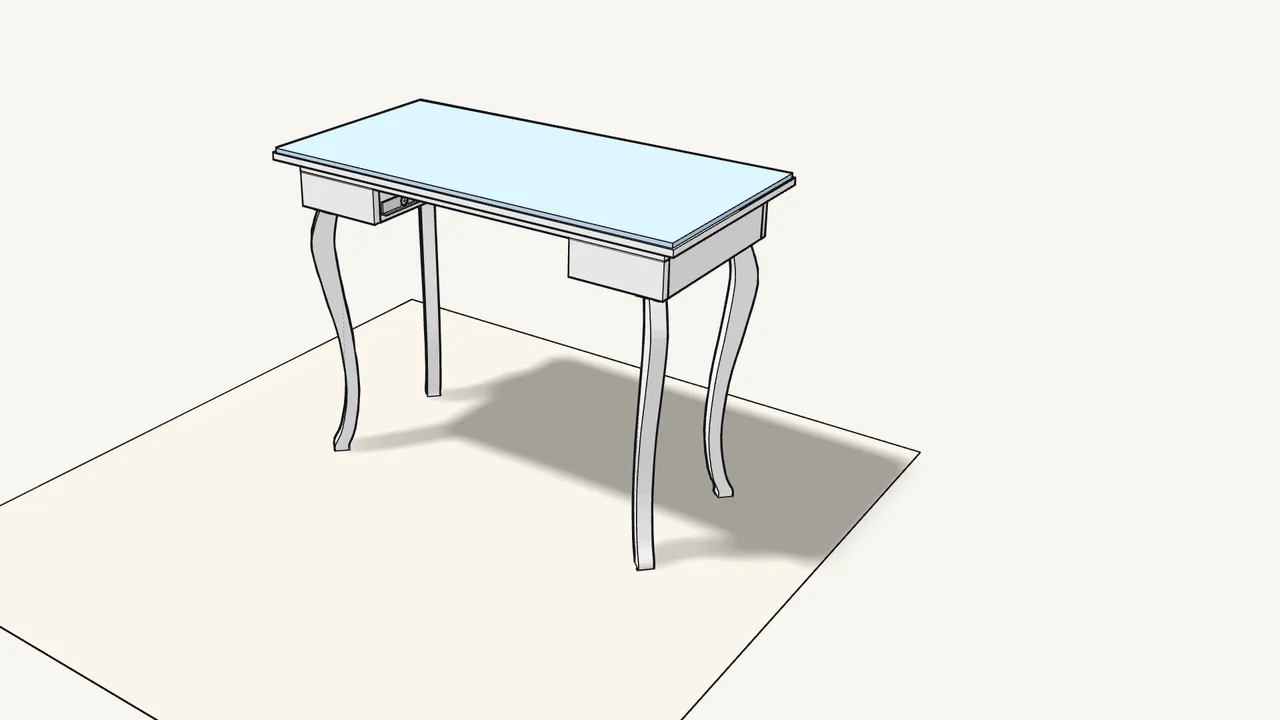
Turn the table over and lay the glass top on it.
Step 10 · manual step 11
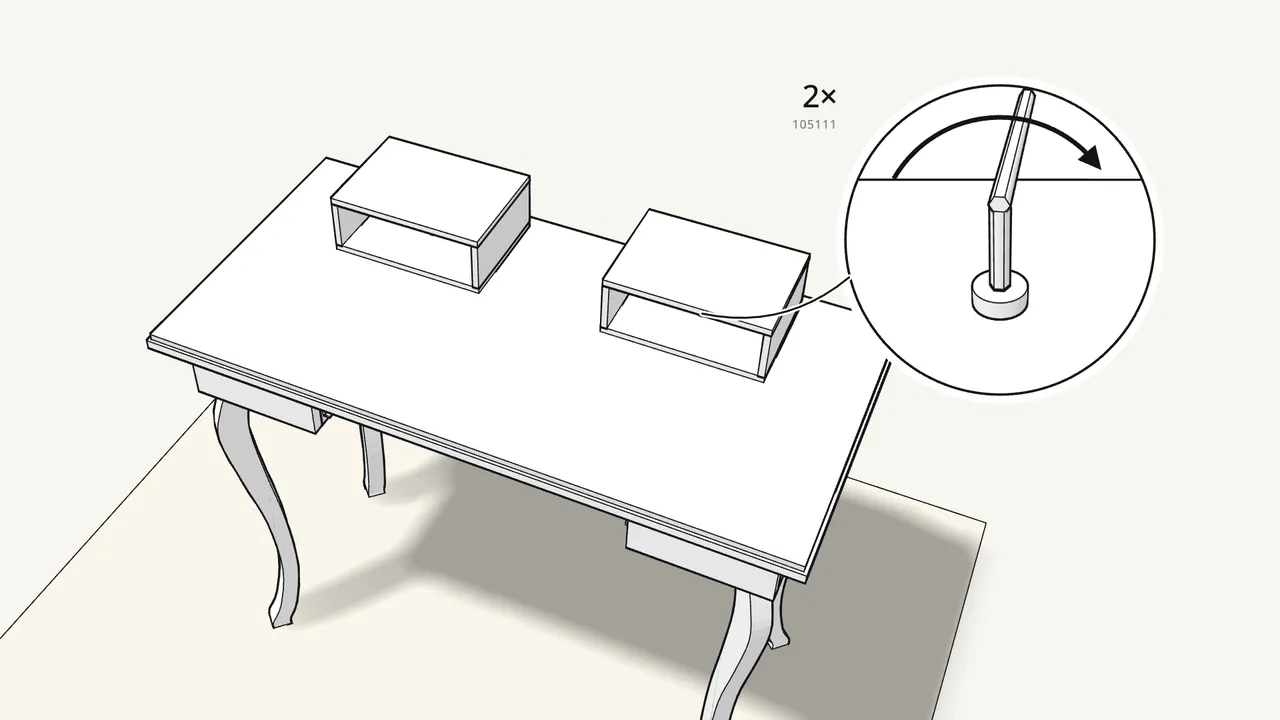
Place the 2 small boxes and fix each with a bolt (105111).
The bolt goes down through the top. Use the Allen key.
Step 11 · manual step 12
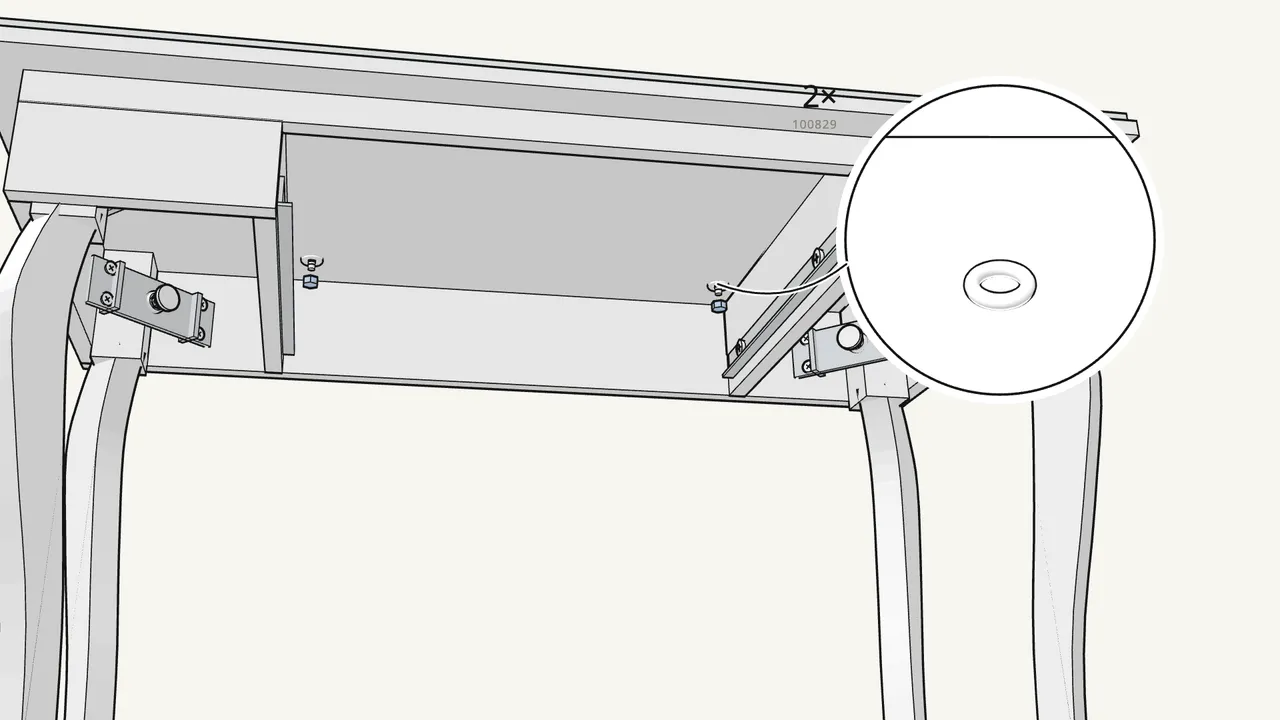
From below: washer (100829) and nut (100710) on each bolt.
Tighten with the spanner (103675) while holding the bolt with the Allen key.
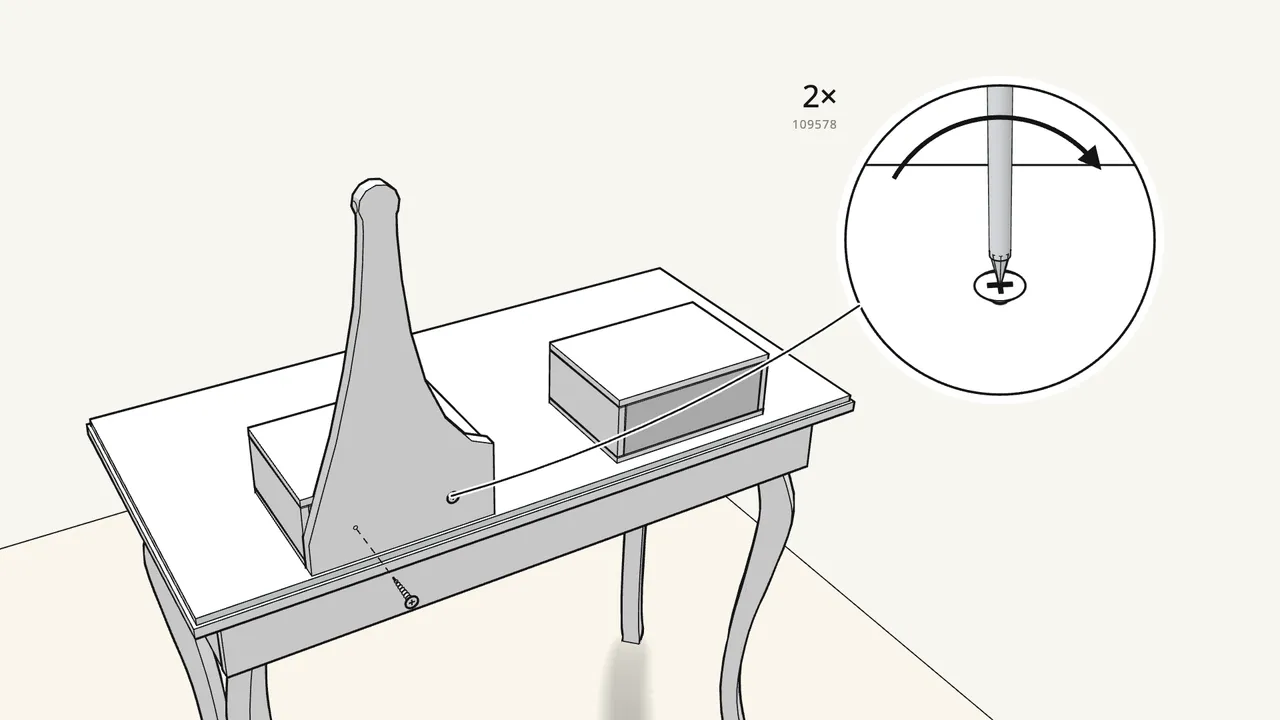
Step 12 · manual step 13
Fit the right mirror support with 2 screws (109578).
Seen from the back, so the right support is on the left here.
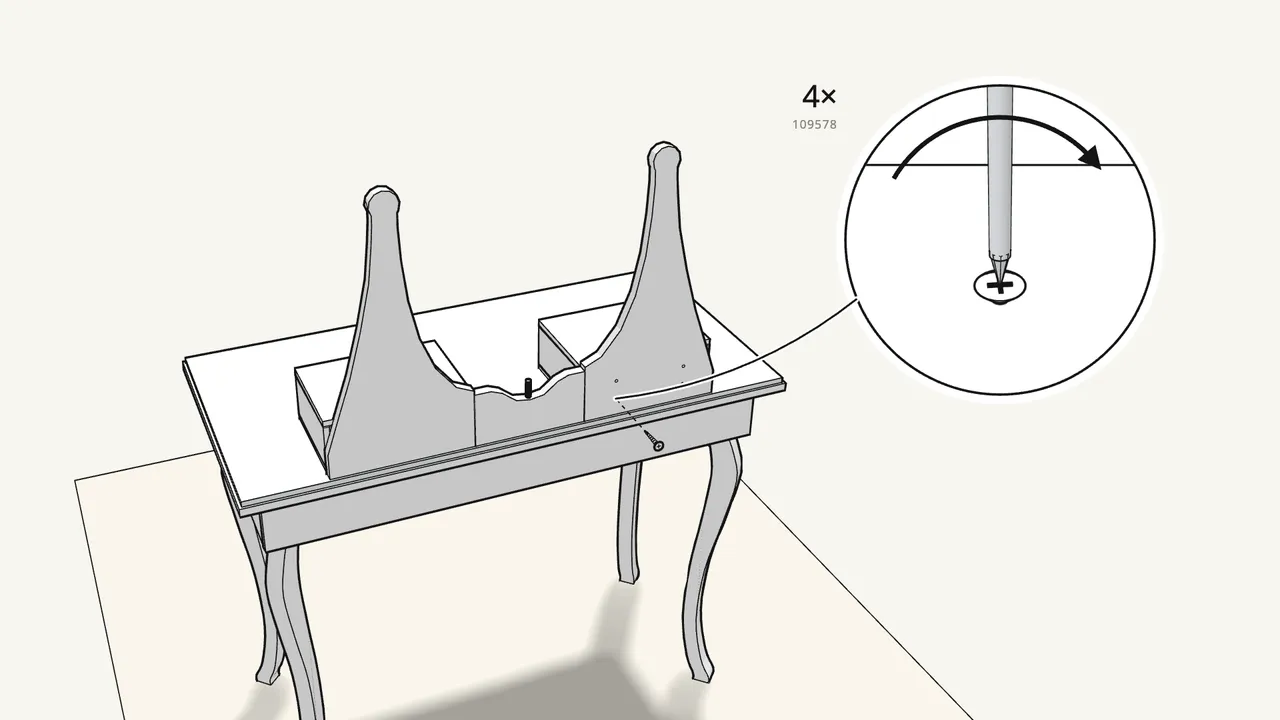
Step 13 · manual step 14–15
Fit the centre panel and the left support (seen from the back).
4 dowels (101350) in the panel ends; fix the left support with 4 screws (109578).
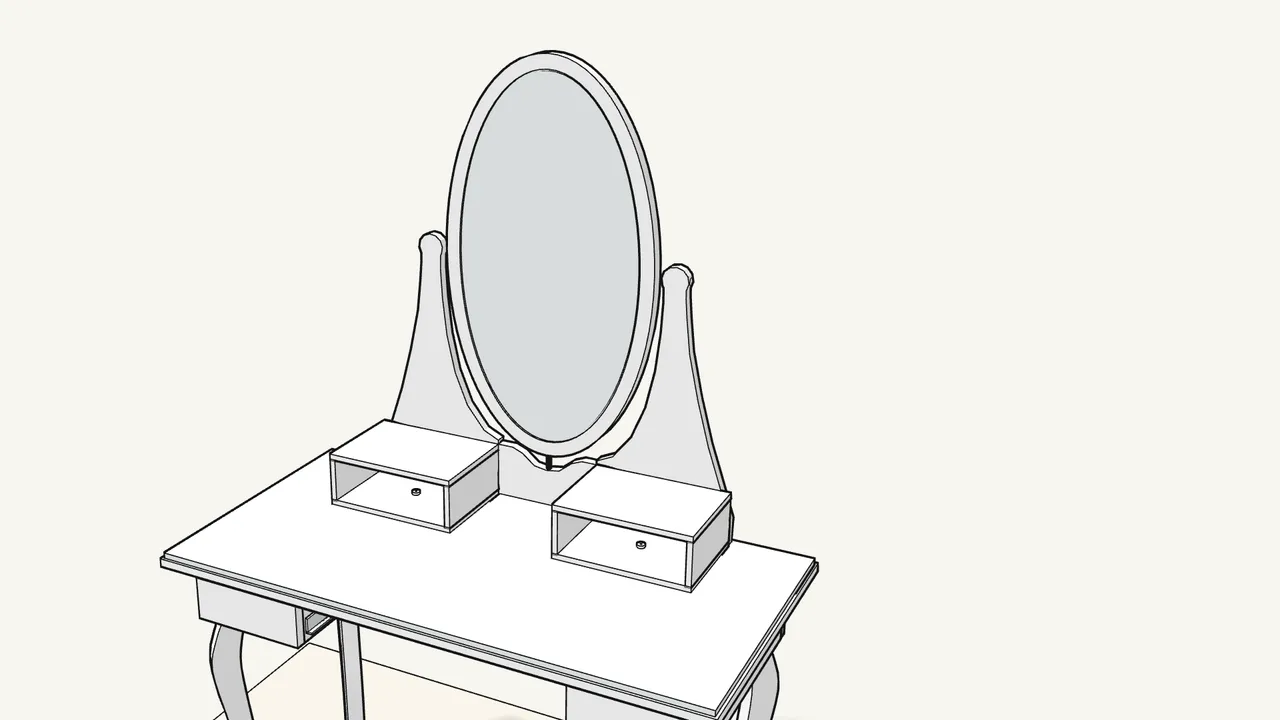
Step 14 · manual step 16
Lower the mirror between the two supports.
It sits on the small peg in the middle of the centre panel.
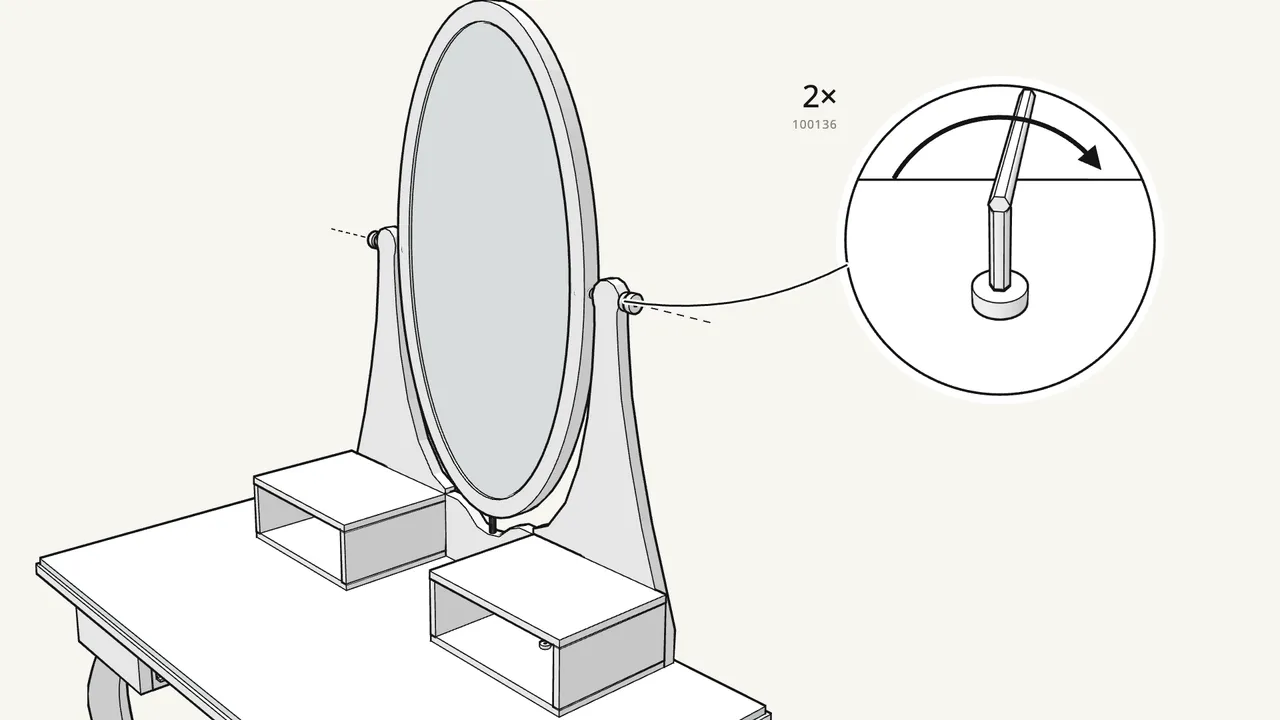
Step 15 · manual step 17
Fix the mirror with 2 bolts (100136) — two people.
Cross nut 121122 in each side of the mirror; washers 100867 on the bolt. Allen key.
Step 16 · manual step 18
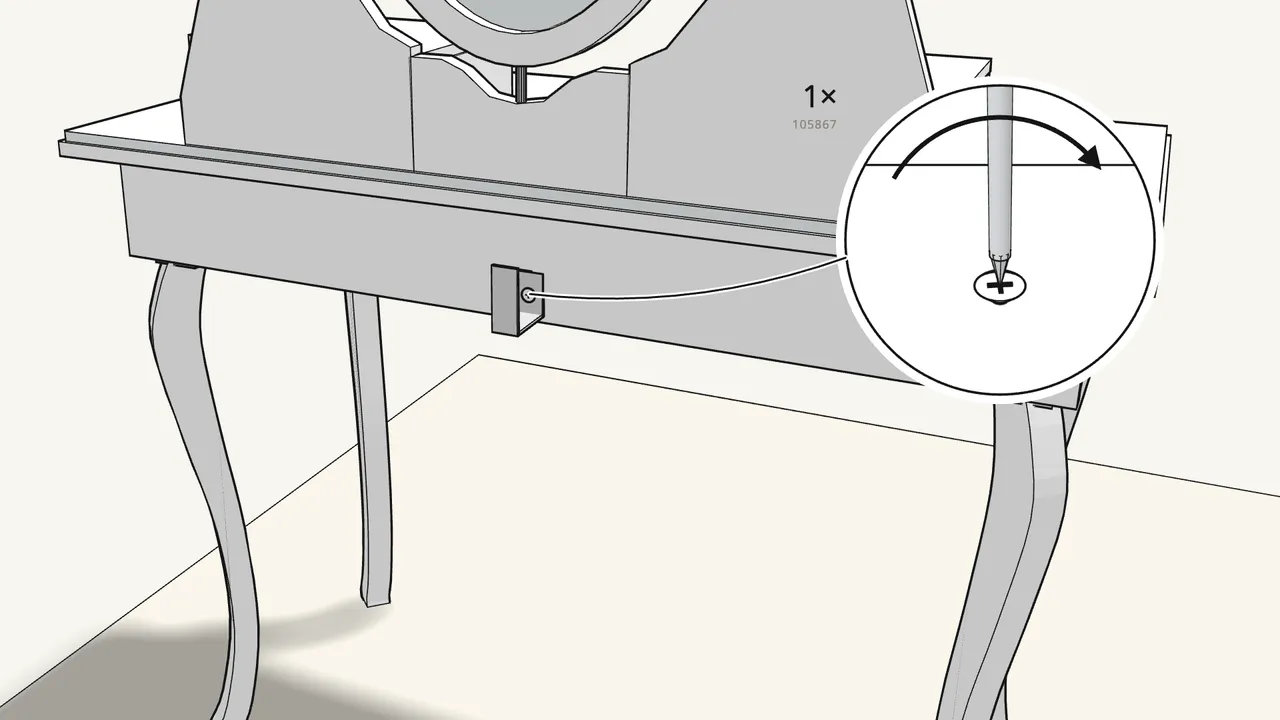
Screw the safety strap (105867) to the back rail.
Read the safety leaflet in the bag first.
Step 17 · manual step 19
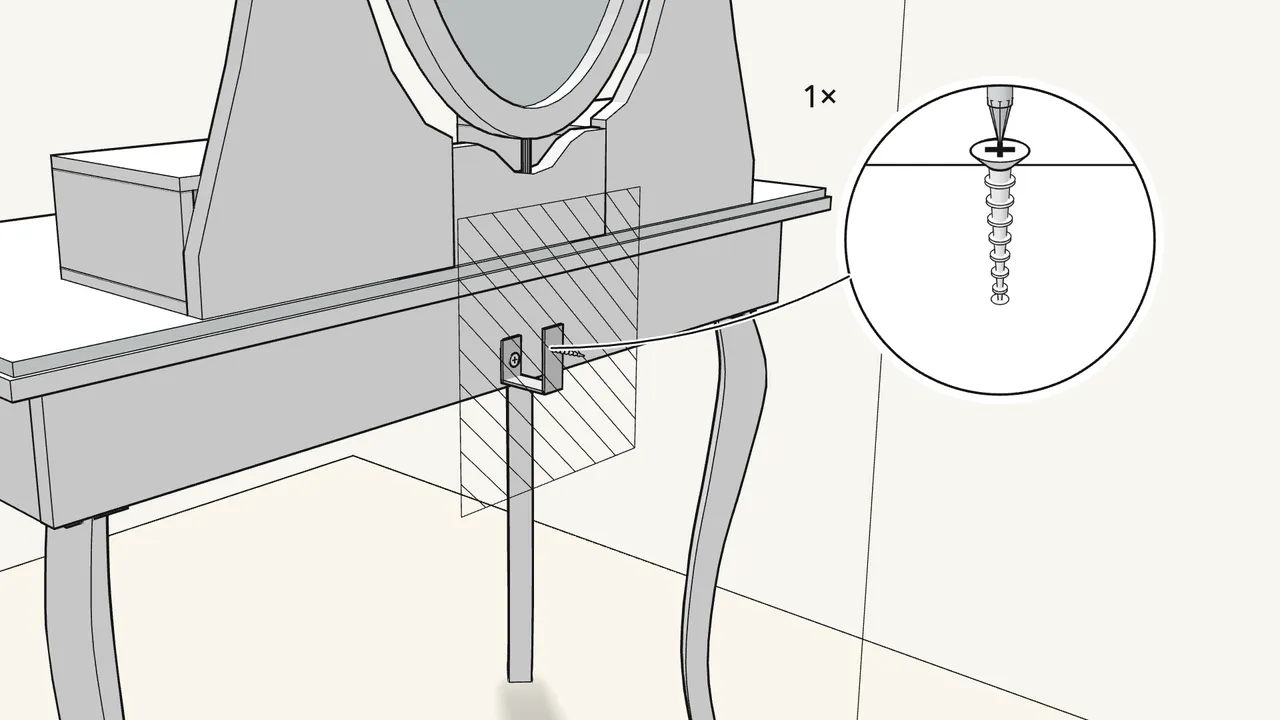
Then screw the strap to the wall.
Choose a screw that suits your wall — see the leaflet.
Step 18 · manual step 20–21
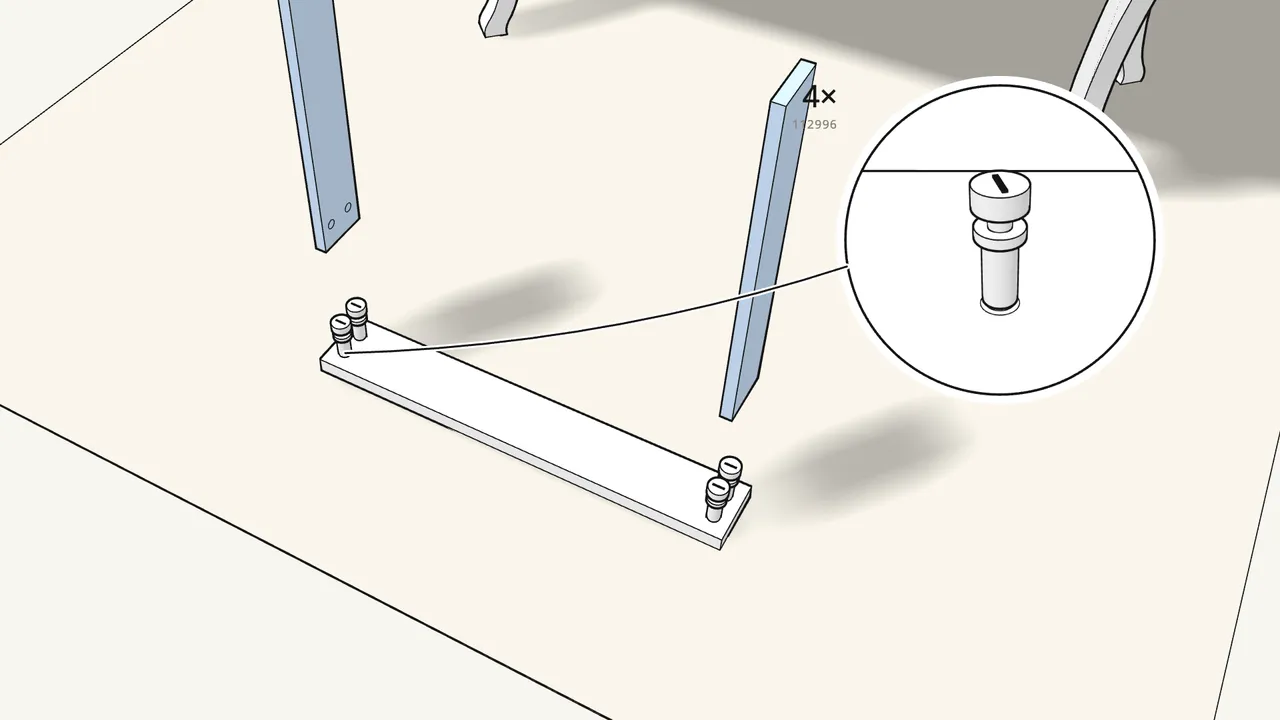
Drawer: screw 4 cam bolts (112996) into the front.
Lay the front face-down, then stand the 2 sides on the bolts.
Step 19 · manual step 22
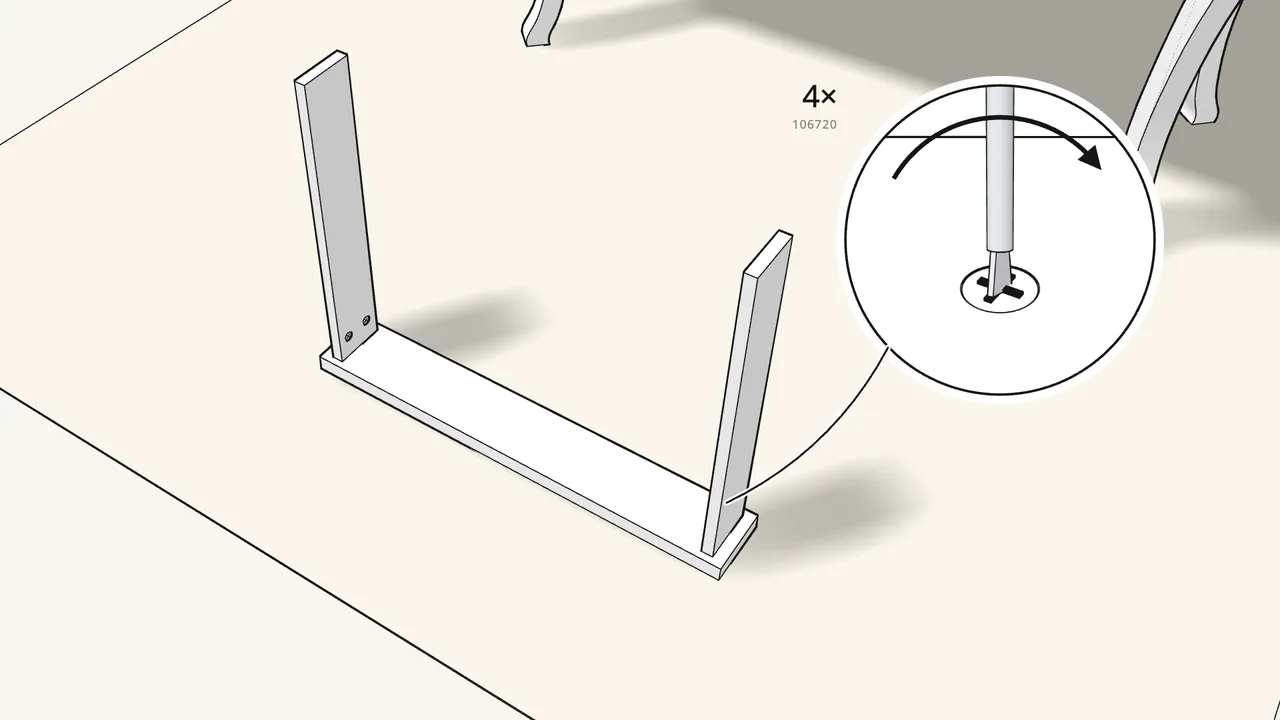
Lock the sides with 4 cam locks (106720).
Use the 106720 locks here.
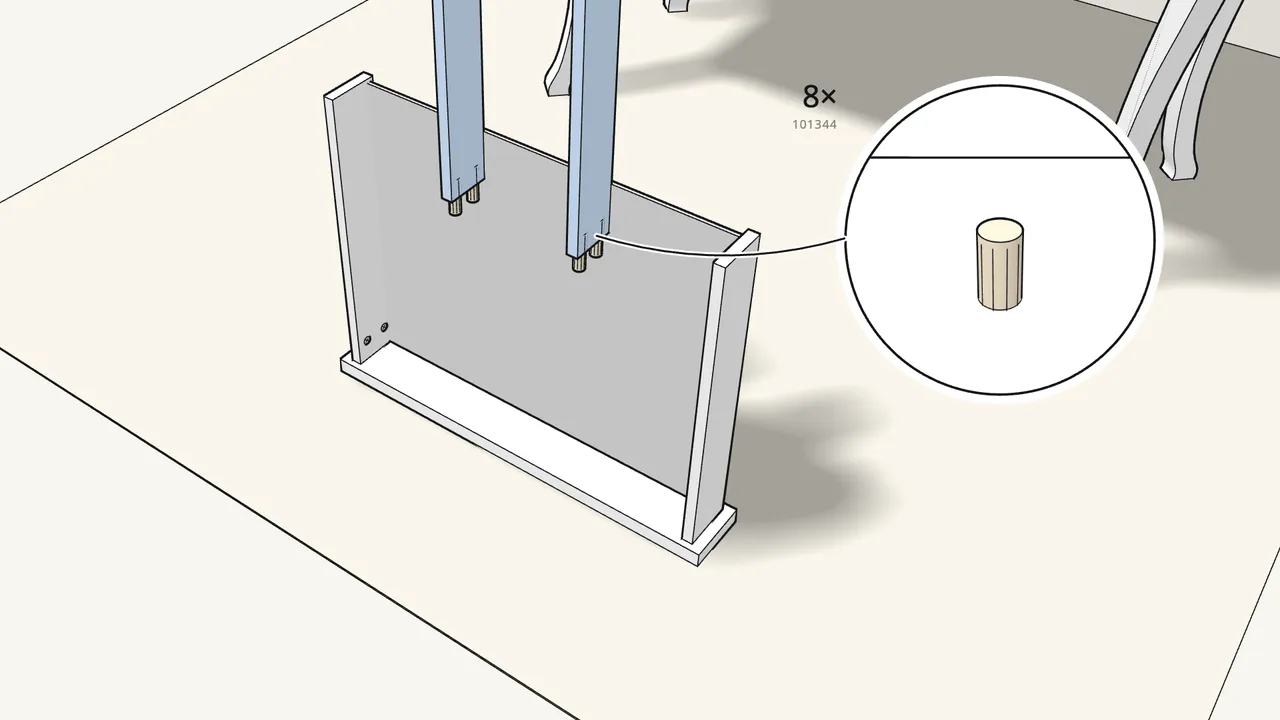
Step 20 · manual step 23–24
Slide in the bottom, then fit the 2 dividers.
8 thin dowels (101344) go into the divider ends.
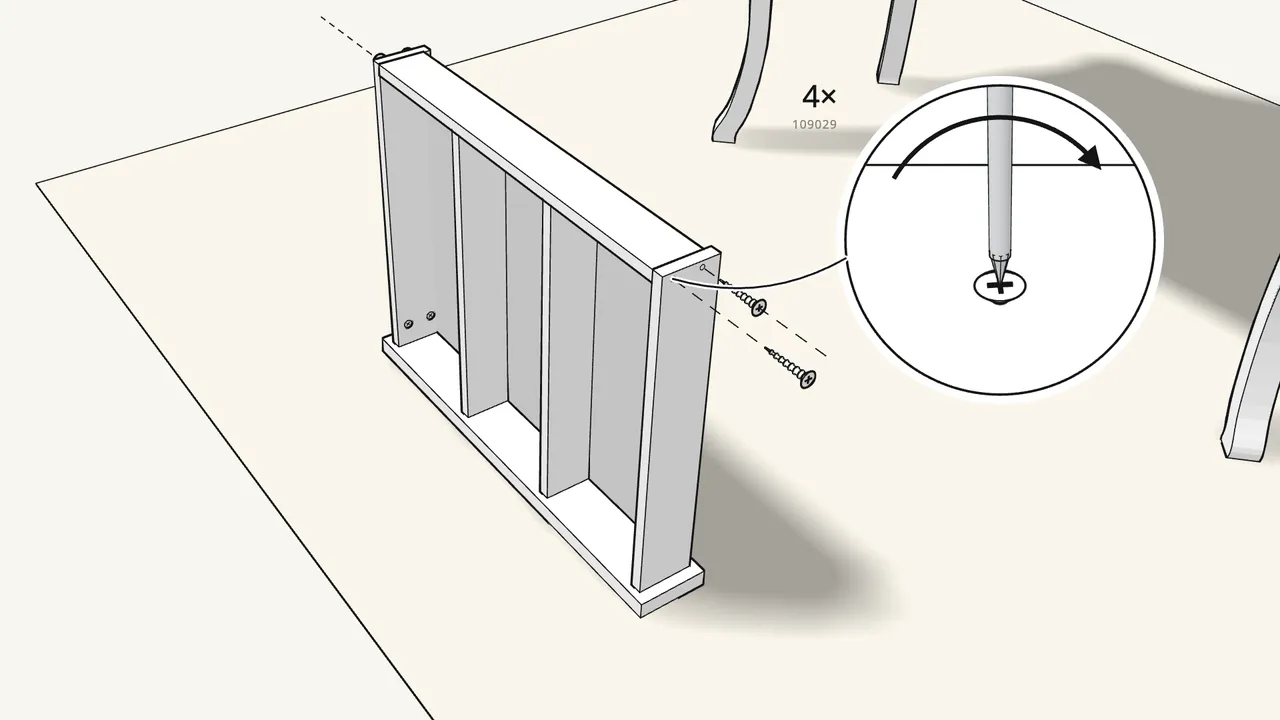
Step 21 · manual step 25–26
Fit the drawer back and fix it with 4 screws (109029).
2 screws through each side.
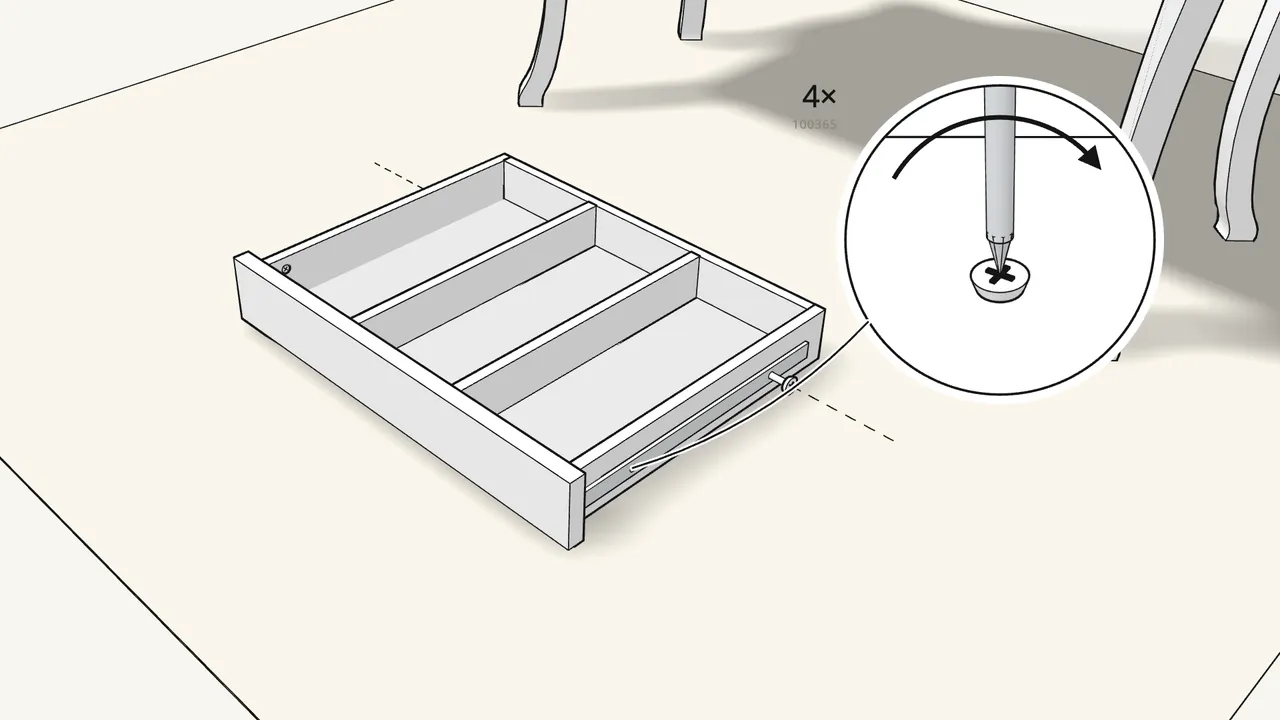
Step 22 · manual step 27
Turn the drawer over and screw on the drawer runners.
2 screws (100365) per runner.
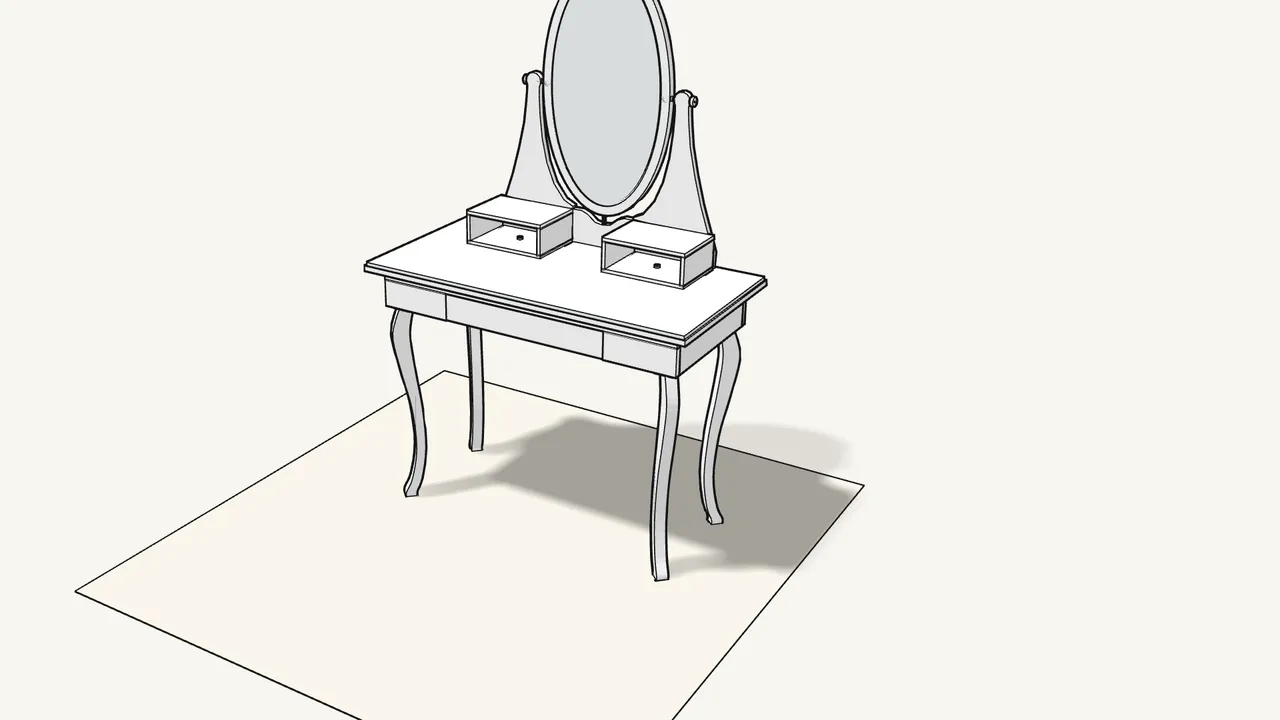
Step 23 · manual step 28
Slide the drawer into the table.
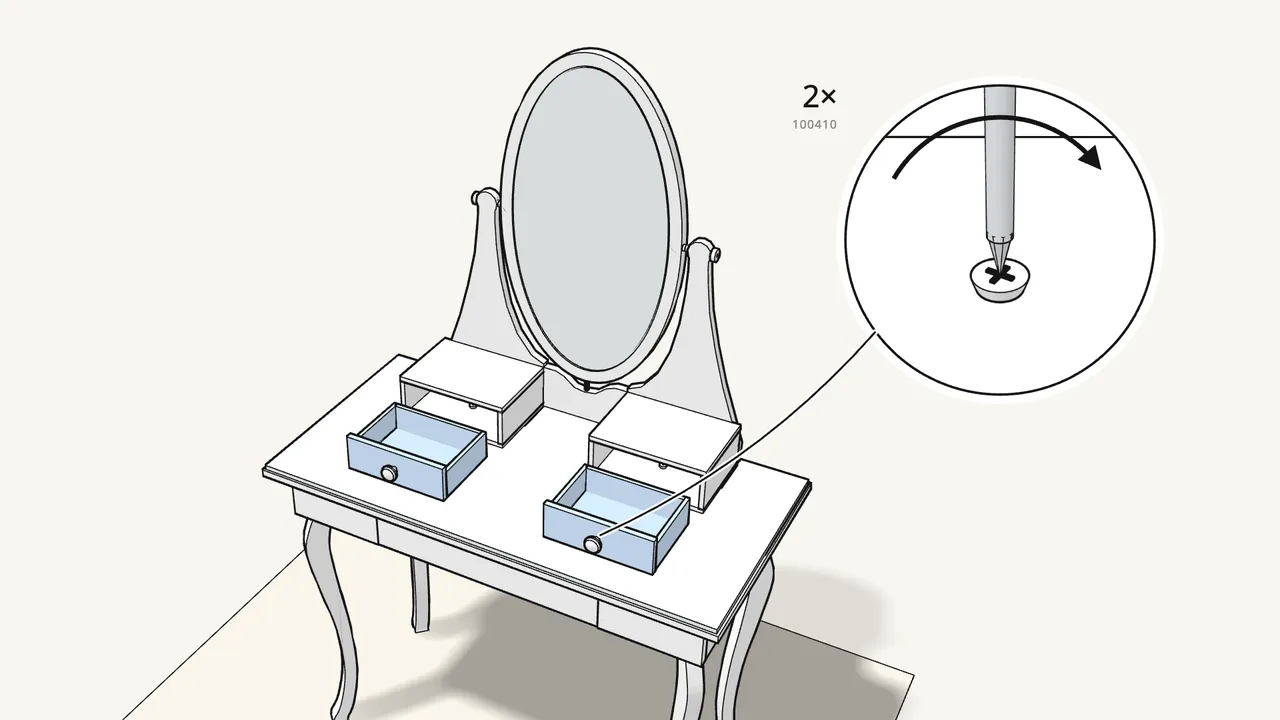
Step 24 · manual step 29–30
Screw a knob (117616) onto each small drawer, then slide them in.
1 screw (100410) per knob, from inside the drawer.
Tips & safety
- Always fix the table to the wall. Use the safety strap (105867) — steps 18–19. Choose wall screws that suit your wall.
- Fit the mirror with two people. One holds the mirror while the other tightens the bolts (manual step 17).
Official instructions
This guide follows IKEA’s official assembly instructions (AA-303777-9). Keep the printed manual to hand — if anything differs, the manual is right.



