IKEA · Tables & Desks
How to Assemble IKEA BJÖRKÅSEN Laptop Stand
Step-by-step IKEA BJÖRKÅSEN laptop stand assembly: 8 illustrated steps, an animated video, the hardware list and the tools you need — following the official instructions (AA-2551146-1).
- 8 illustrated steps
- 3 steps in the manual
- 1:32 video
- 58×42×71 cm (estimated from the manual drawings) cm
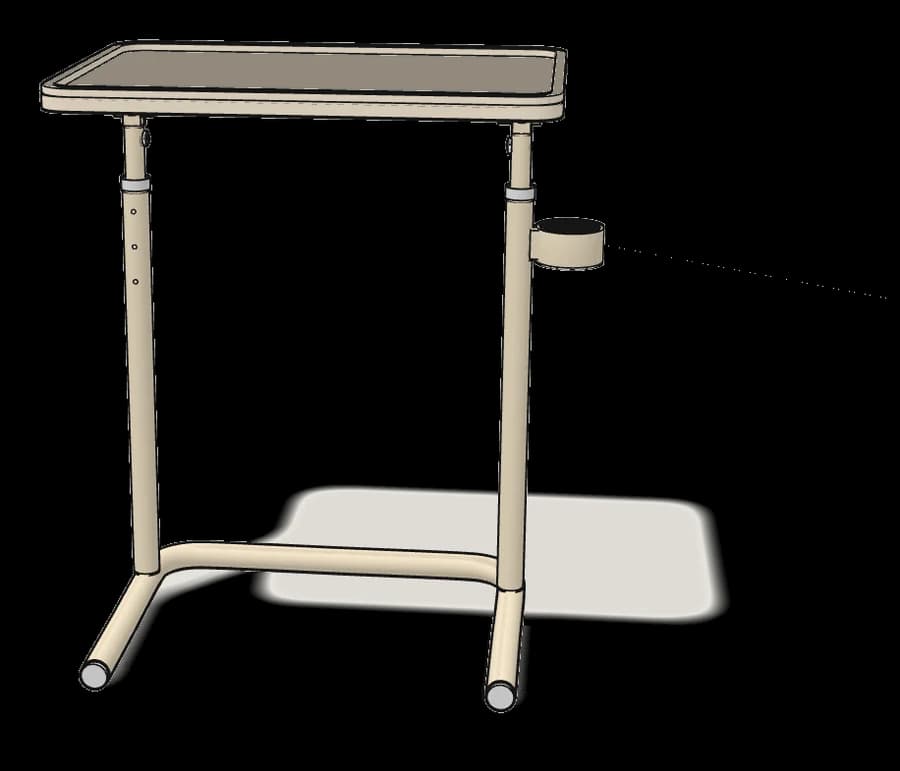
What you need
Tools
- Allen key (included)
- Phillips screwdriver
You’ll need: a Phillips screwdriver. The Allen key (108490) is in the box.
Hardware in the box
| Part no. (as printed in the manual) | Qty |
|---|---|
| 100272 | 2× |
| 100408 | 2× |
Step-by-step assembly
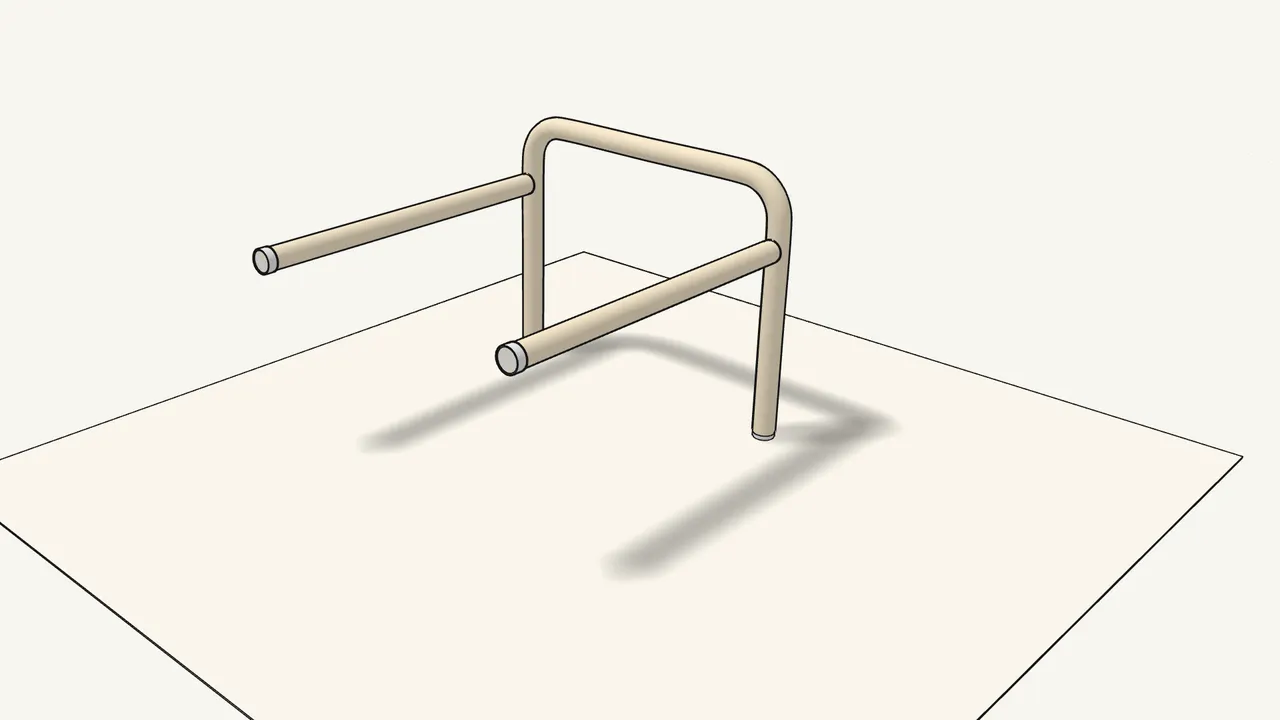
Step 1
Lay the base on its side and push in the 2 long tubes.
Check the insets for which tube has the row of holes — see the manual, step 1.
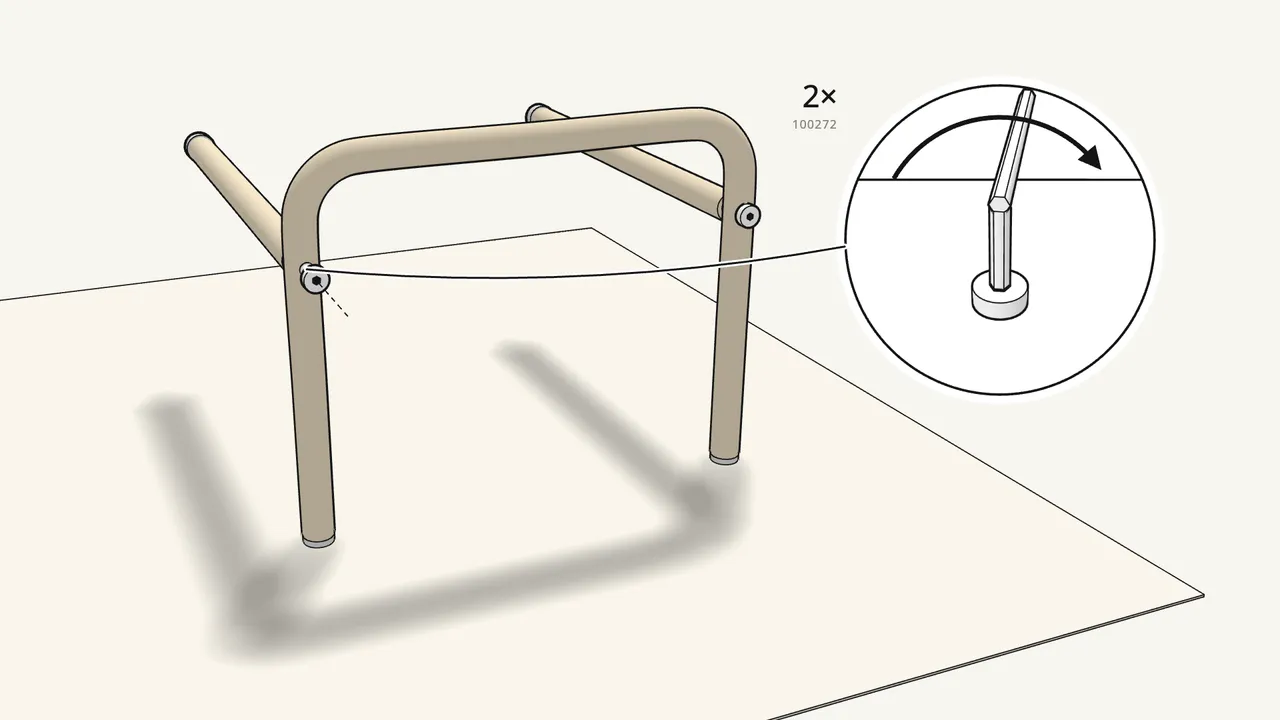
Step 2 · manual step 1
Fix each tube with 1 bolt (100272) and the Allen key.
The bolts go in from the outside of the base.
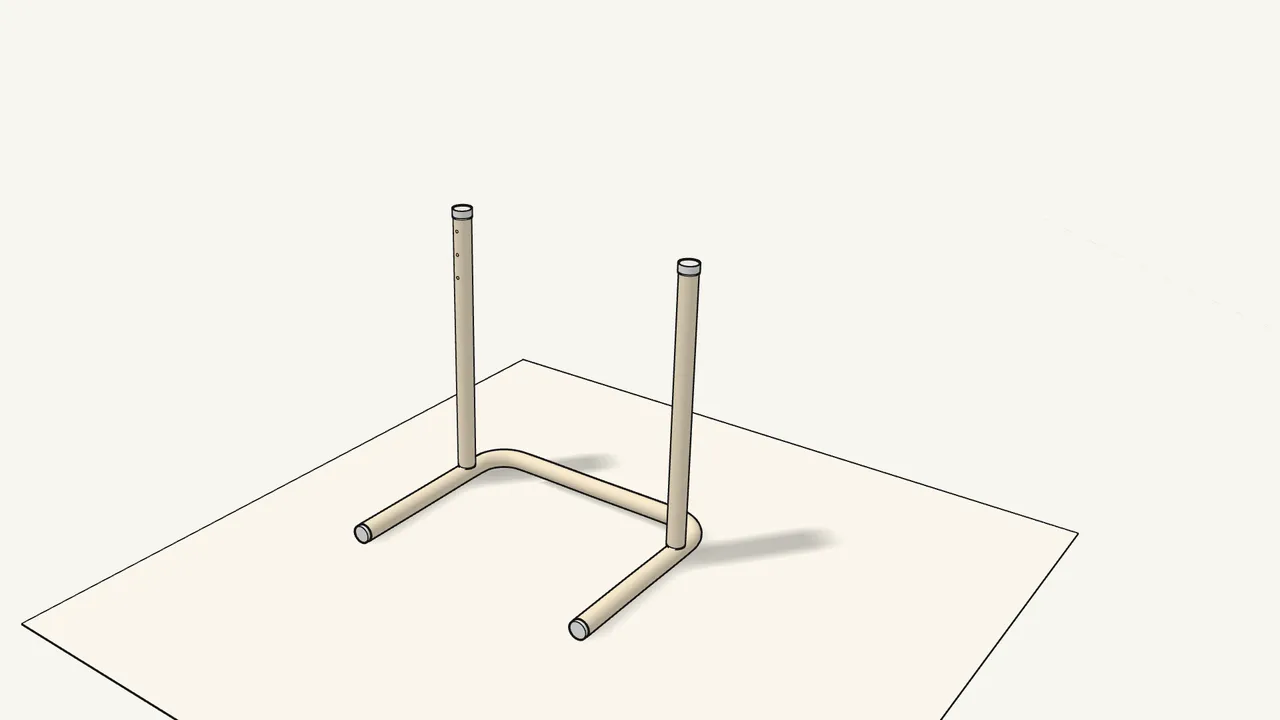
Step 3 · manual step 2
Stand the base on the floor with the tubes pointing up.
Turn it the way shown — see the manual, step 2.
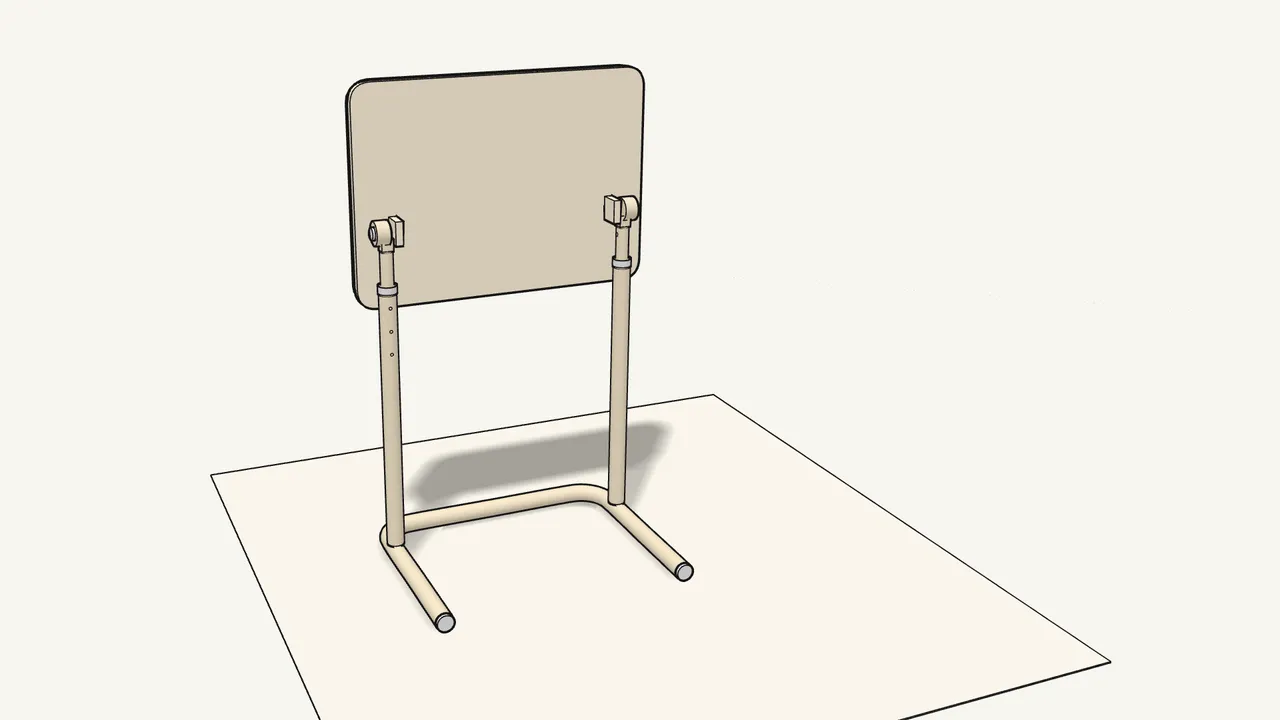
Step 4 · manual step 2
Slide the 2 posts of the top down into the tubes.
The tabletop stays folded up for now.
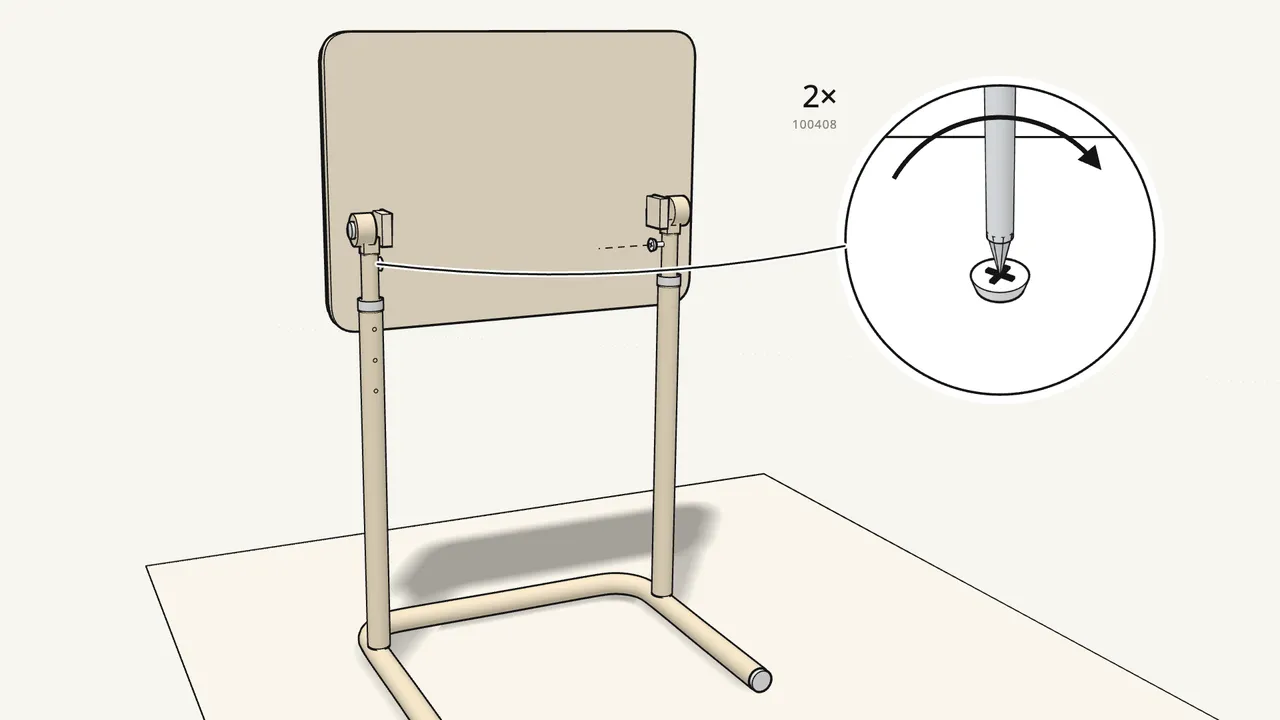
Step 5 · manual step 3
Fix each post with 1 screw (100408).
Use the Phillips screwdriver.
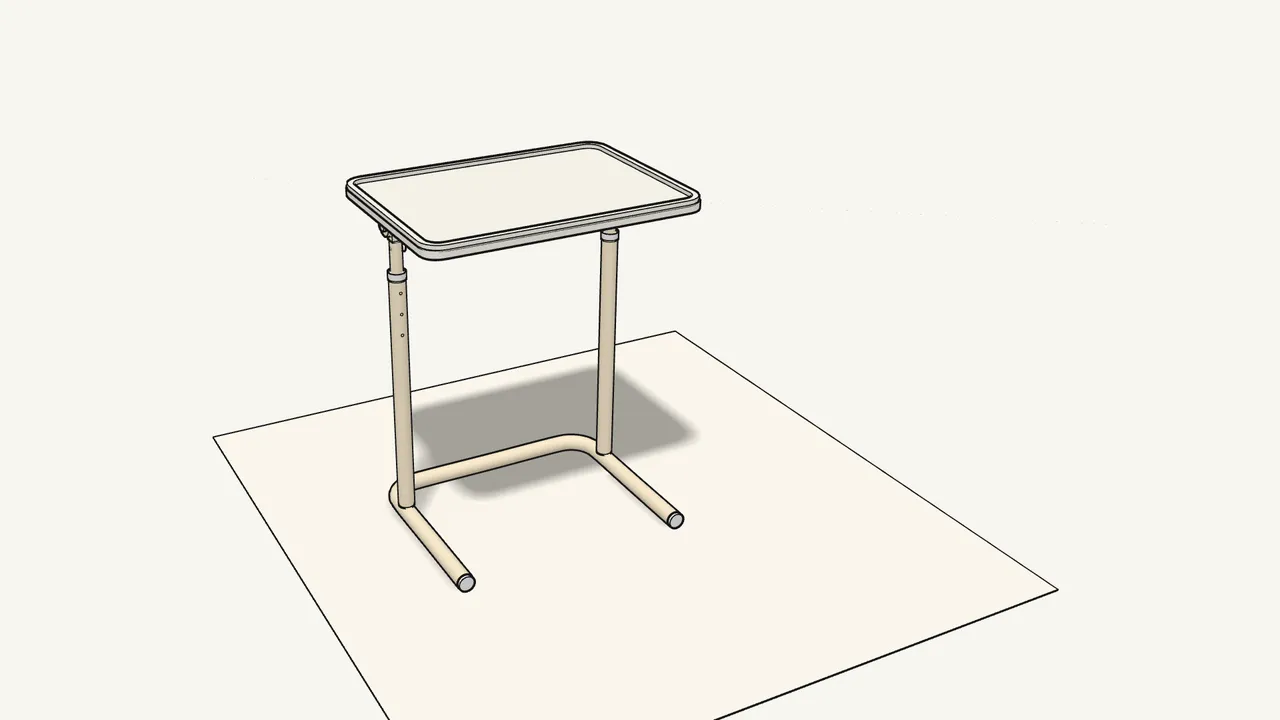
Step 6
Press both hinge buttons and tilt the tabletop down.
Manual, info page after step 3.
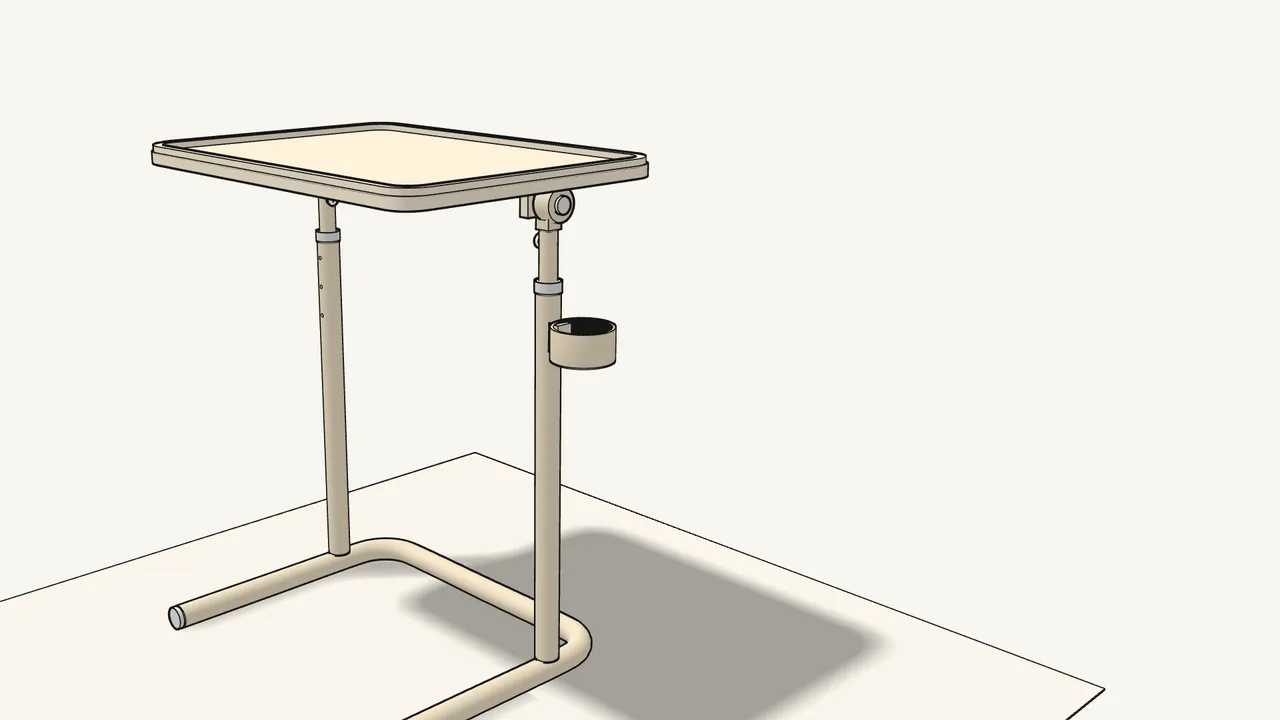
Step 7
Click the cup holder onto the leg.
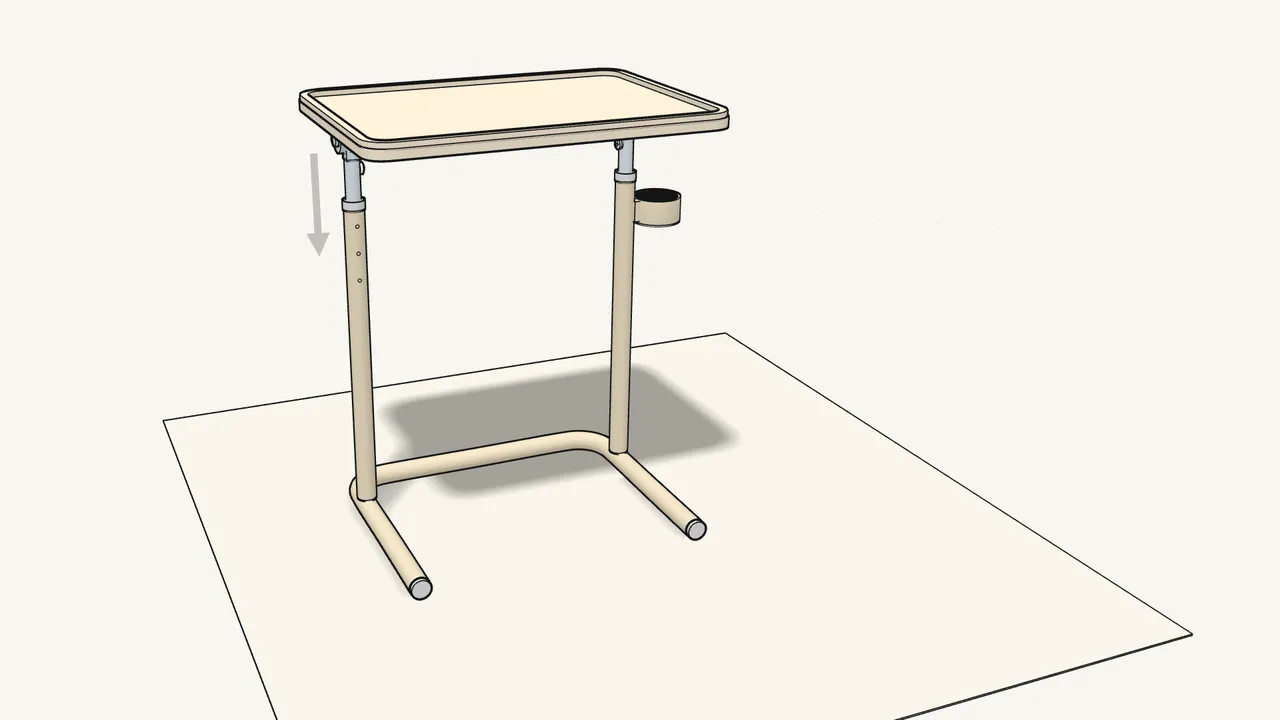
Step 8
To change the height, press the pins and slide until it clicks.
Do the same on both legs.
Tips & safety
- Maximum load 10 kg (22 lb). Do not place heavy objects on the tabletop.
- Do not sit on the product. Warning from the manual.
Official instructions
This guide follows IKEA's official assembly instructions (AA-2551146-1). Keep the printed manual to hand — if anything differs, the manual is right.