IKEA · Beds
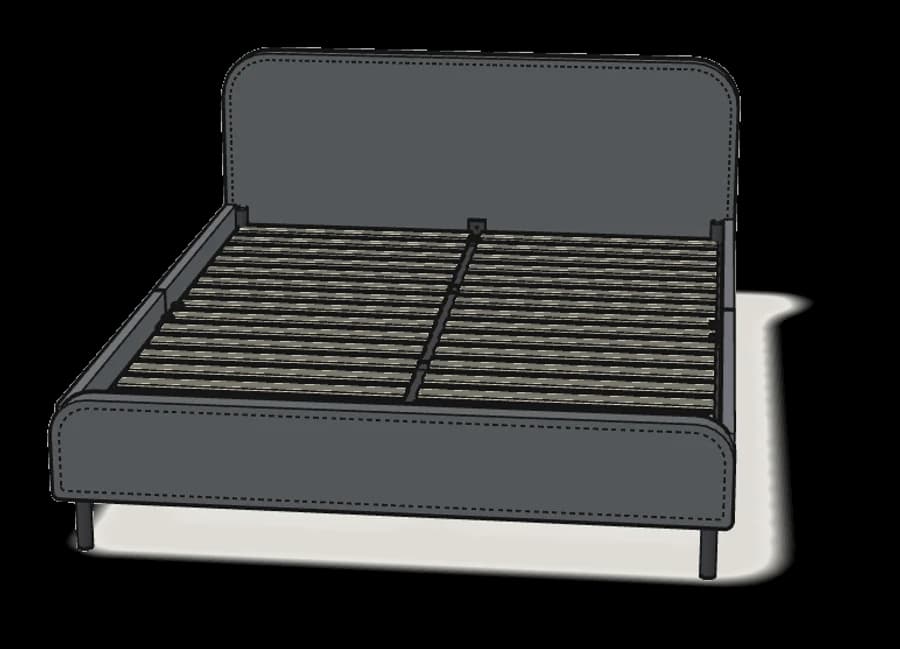
How to assemble IKEA SLATTUM Upholstered Bed Frame
Step-by-step IKEA SLATTUM Upholstered Bed Frame assembly: 22 illustrated steps, an animated video, the hardware list and the tools you need — following the official instructions (AA-2141869-4).
- 22 illustrated steps
- 23 steps in the manual
- 3:16 video
- 161×210×85 cm
What you need
Tools
- Allen key (included)
No extra tools needed — everything is in the box.
Hardware in the box
| Part no. (as printed in the manual) | Qty |
|---|---|
| 146655 | 3× |
| 128574 | 26× |
| 105107 | 4× |
| 112091 | 12× |
| 10054995 | 1× |
| 191315 | 8× |
Step-by-step assembly
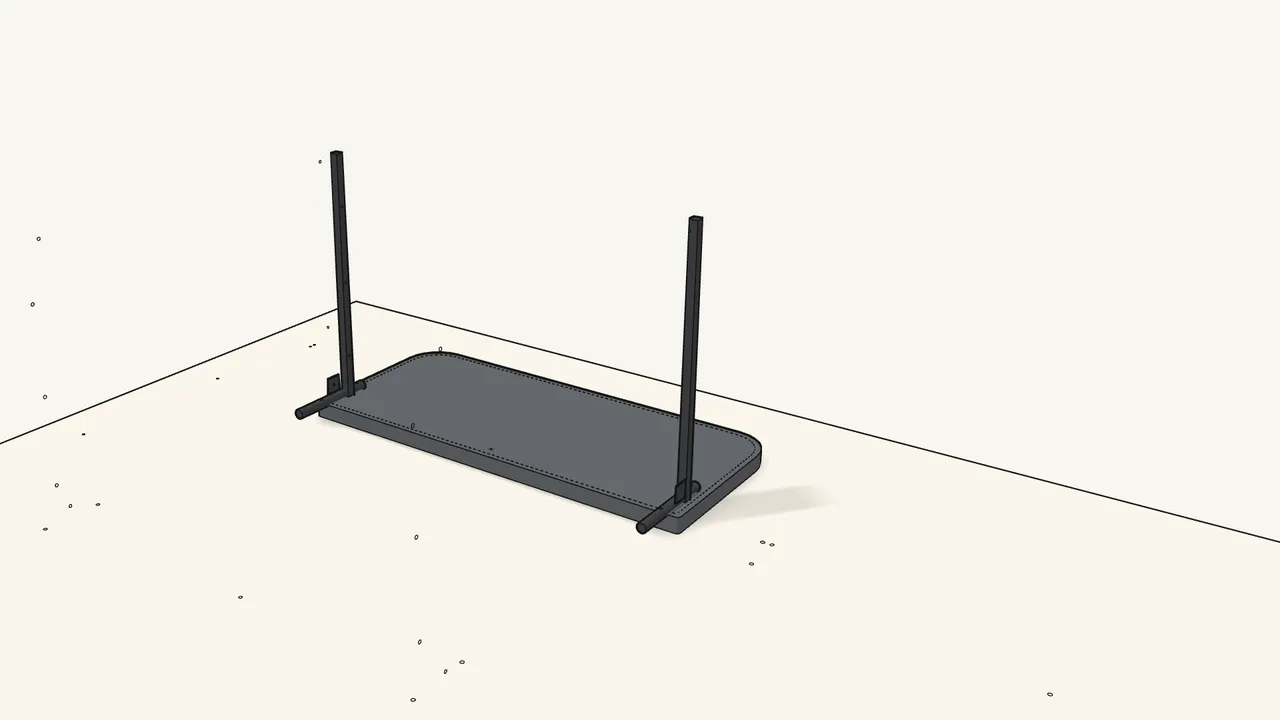
Step 1
Lay the headboard face down and fit both leg frames.
The flat tabs face the outer edges — see the manual, step 1.
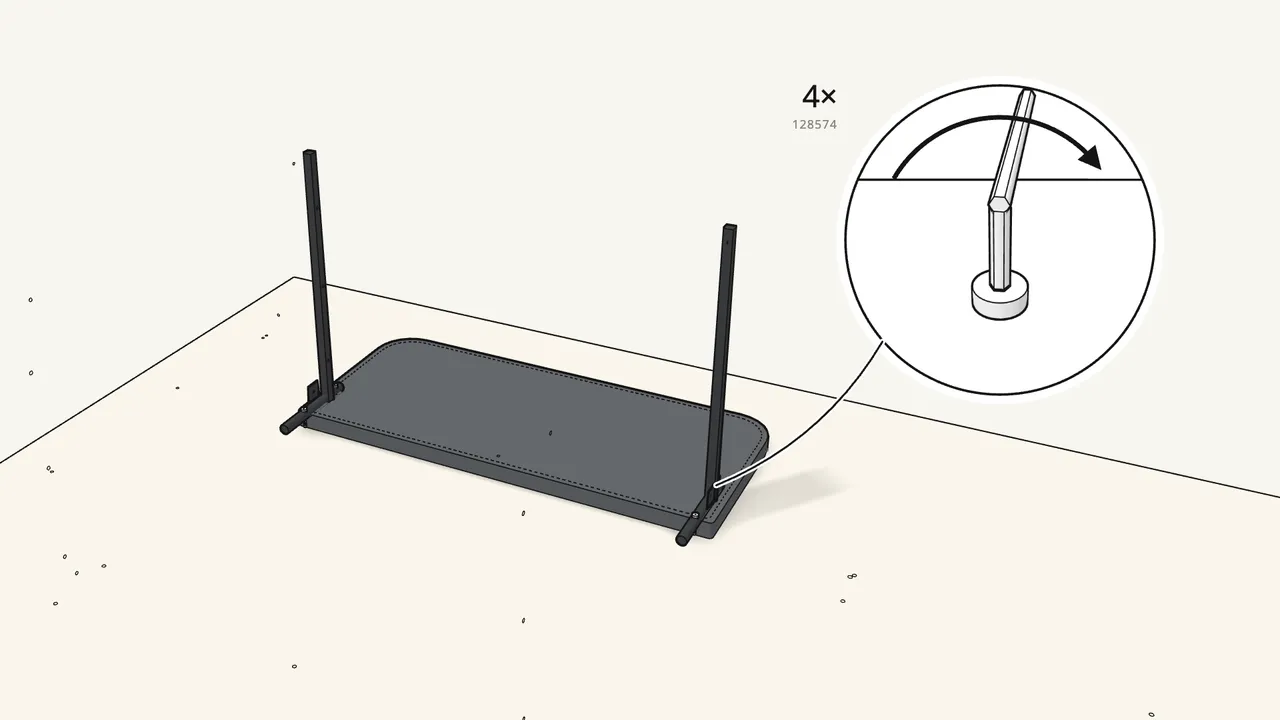
Step 2
Fix each leg with 2 bolts (128574).
Use the Allen key in its handle. Tighten until the bolt head sits flush — 4 bolts.
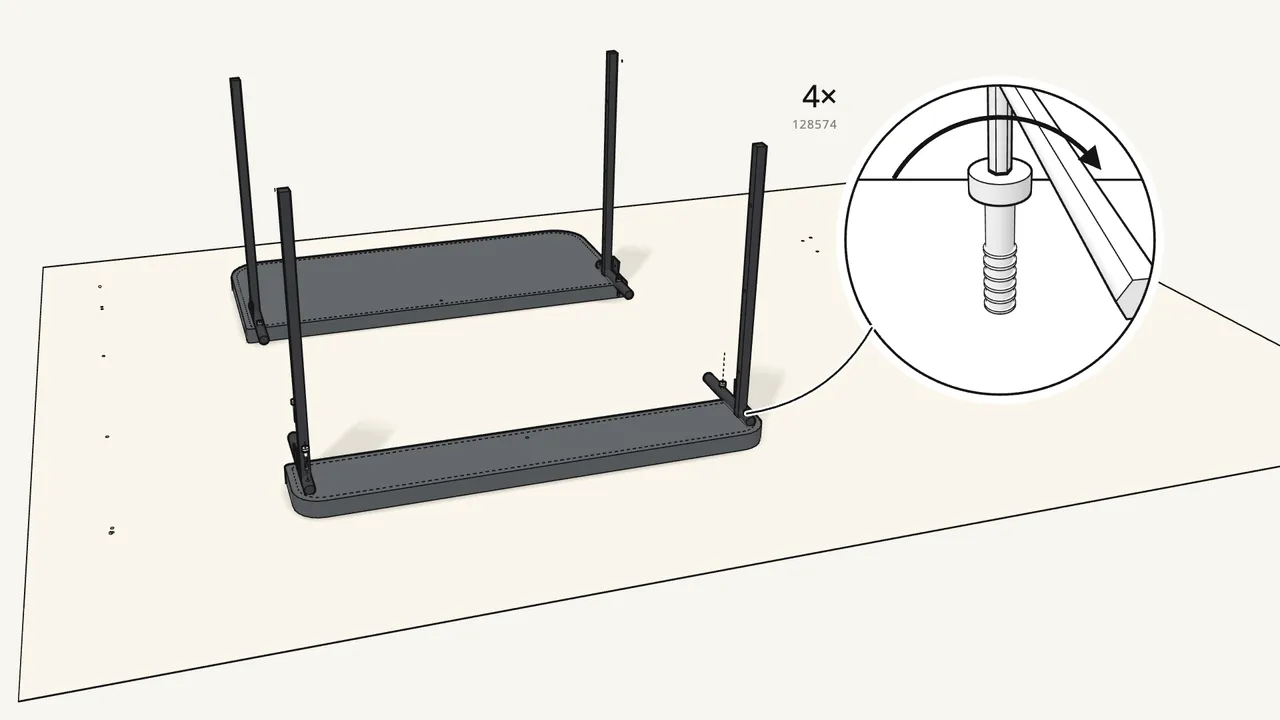
Step 3 · manual step 3–4
Do the same with the footboard.
Two leg frames, then 4 bolts (128574). Here the tabs are angled — see the manual, step 3.
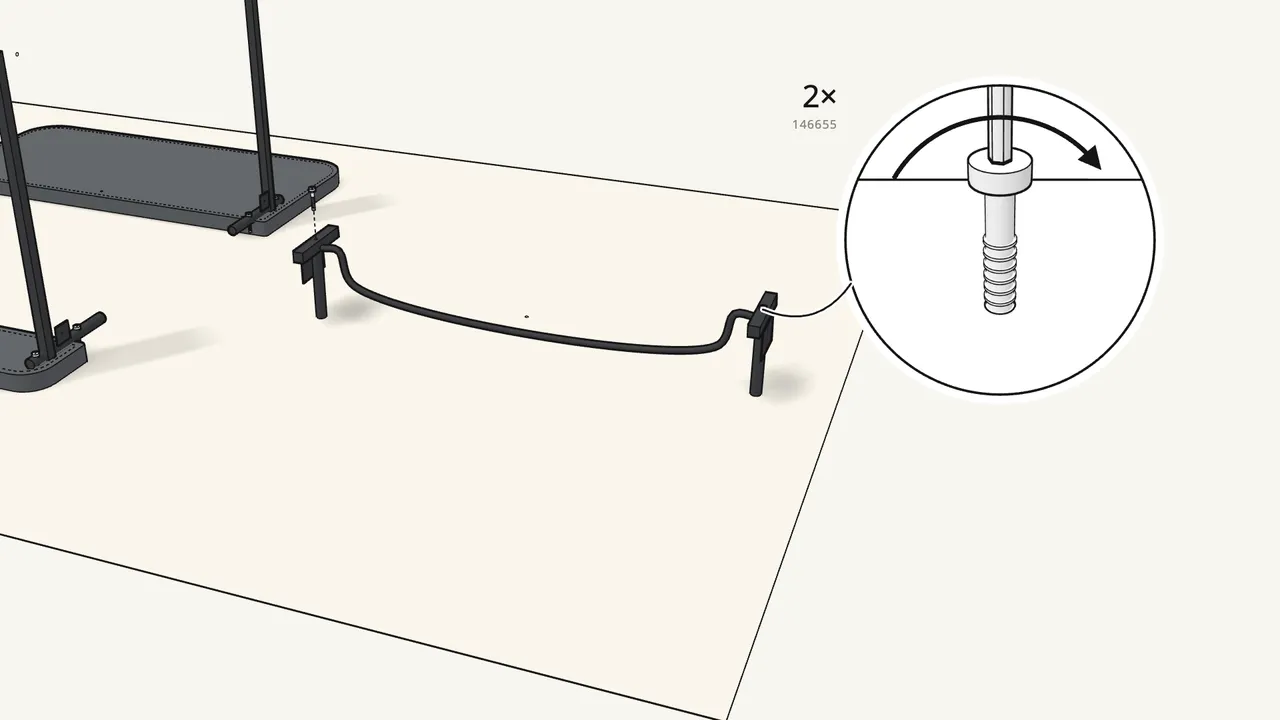
Step 4 · manual step 5
Bolt the two middle legs under the cross frame.
One long bolt (146655) through each connector tube.
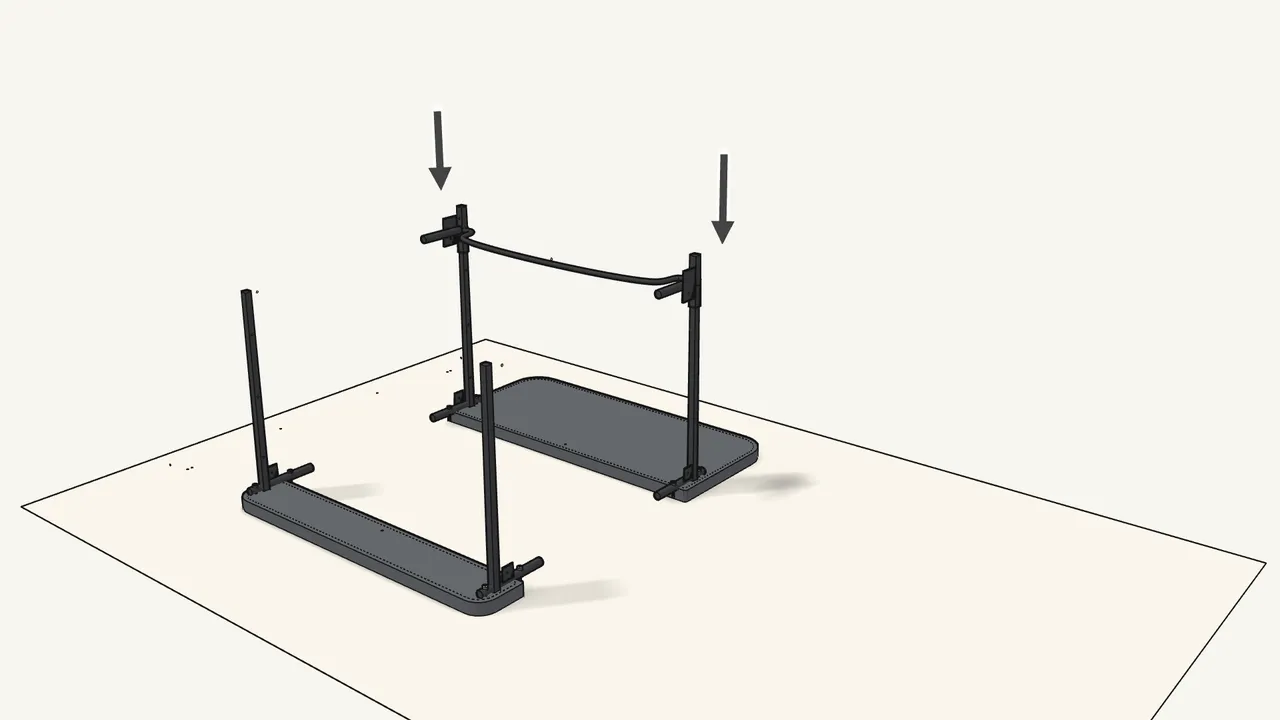
Step 5 · manual step 6
Lower the cross frame onto the headboard rails.
The rail ends slide into the connector tubes. Mind your fingers.
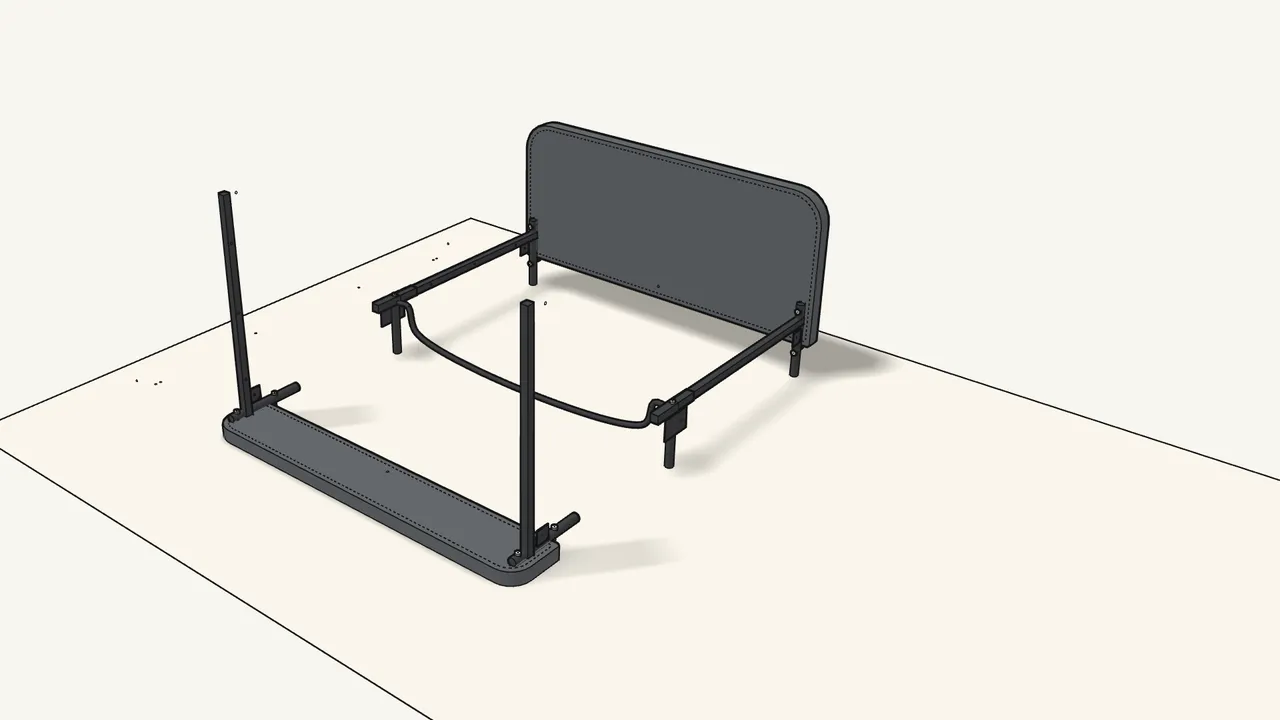
Step 6 · manual step 7
Stand the headboard up on its legs.
Two people: lift it carefully together.
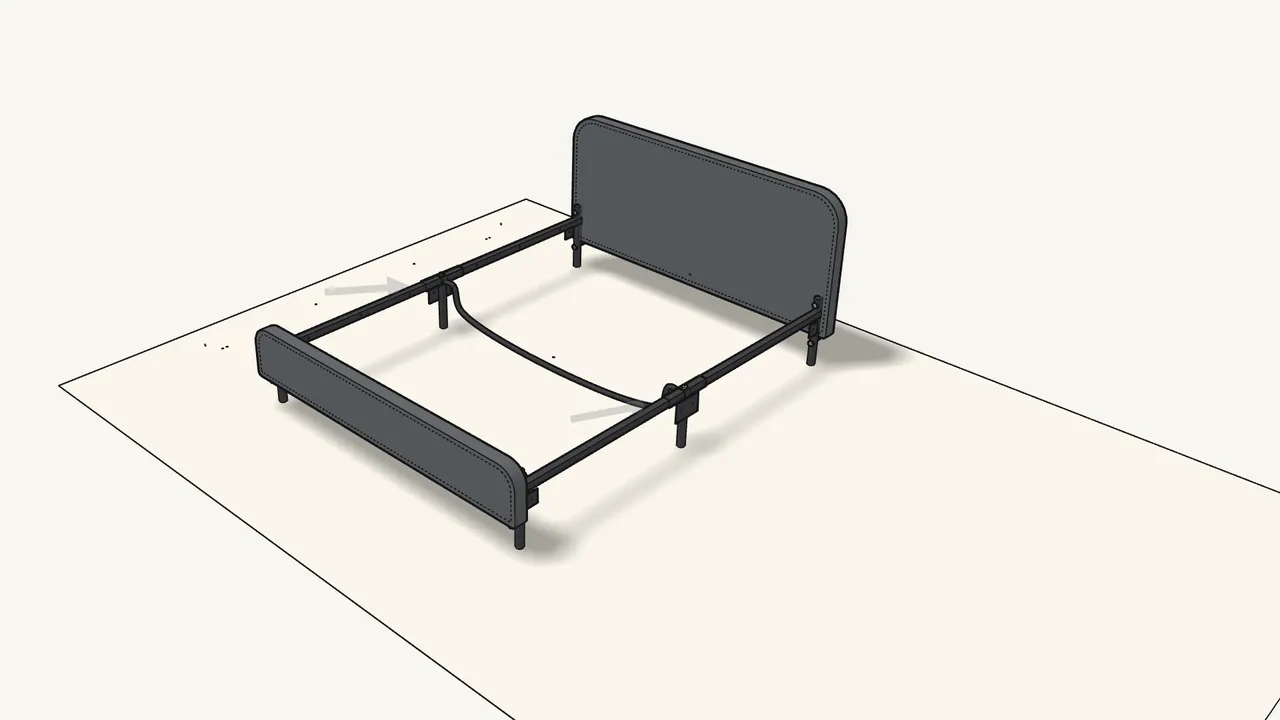
Step 7
Stand the footboard up and push its rails into the connectors.
Both rails at the same time. Mind your fingers.
Step 8
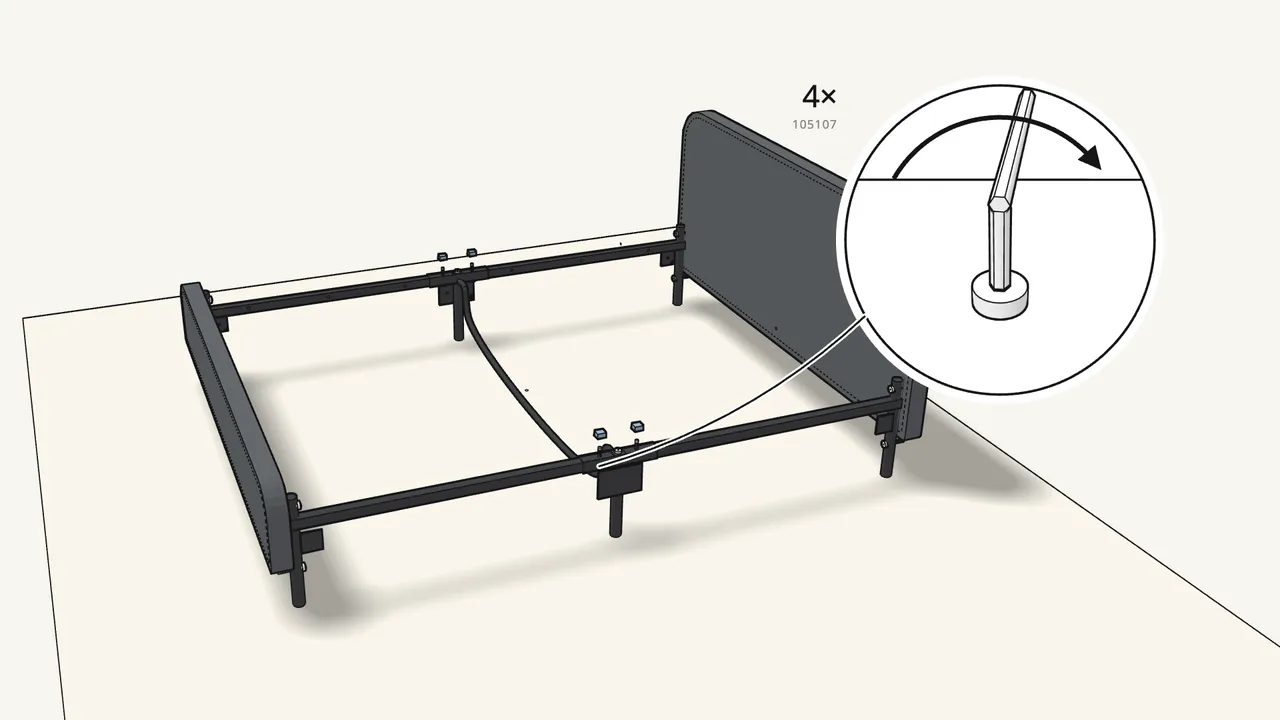
Lock the joints: 4 bolts (105107) from below, 4 caps (191315) on top.
One bolt and one cap at each rail end in the connectors.
Step 9
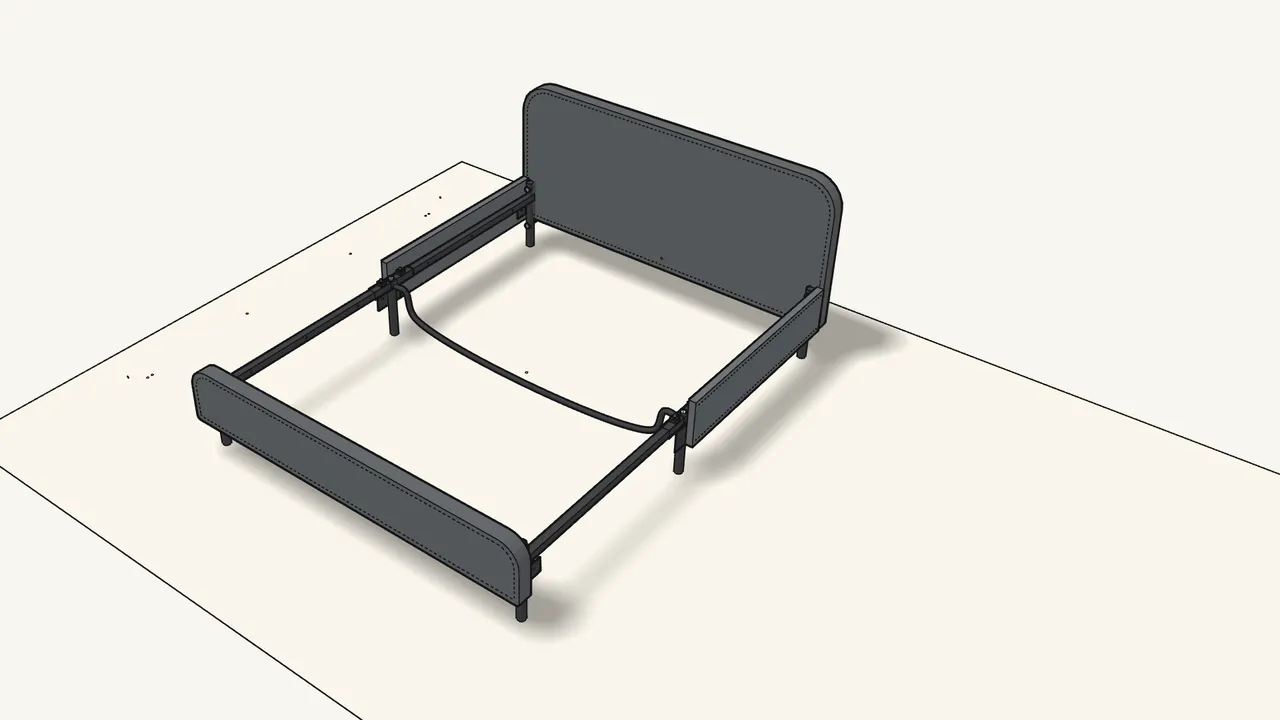
Hang the two rear side panels on the outside of the rails.
Step 10
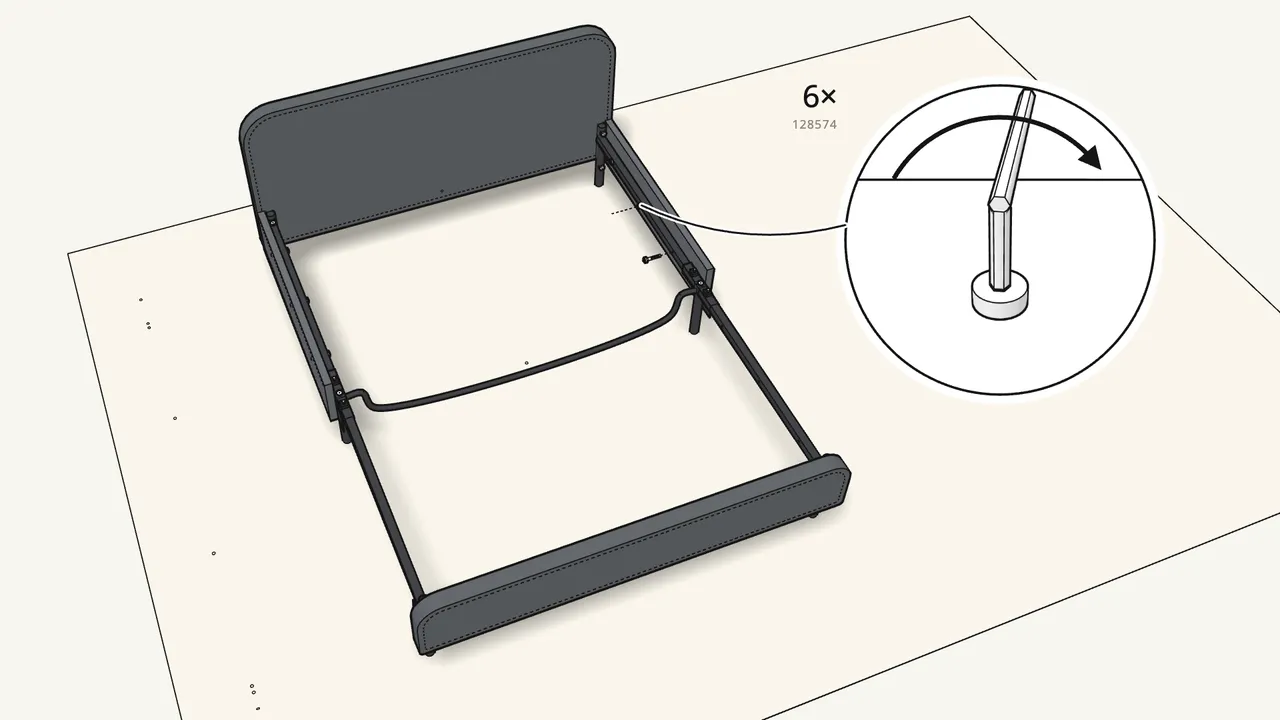
Bolt them on from the inside: 6 bolts (128574).
Three through each rail.
Step 11
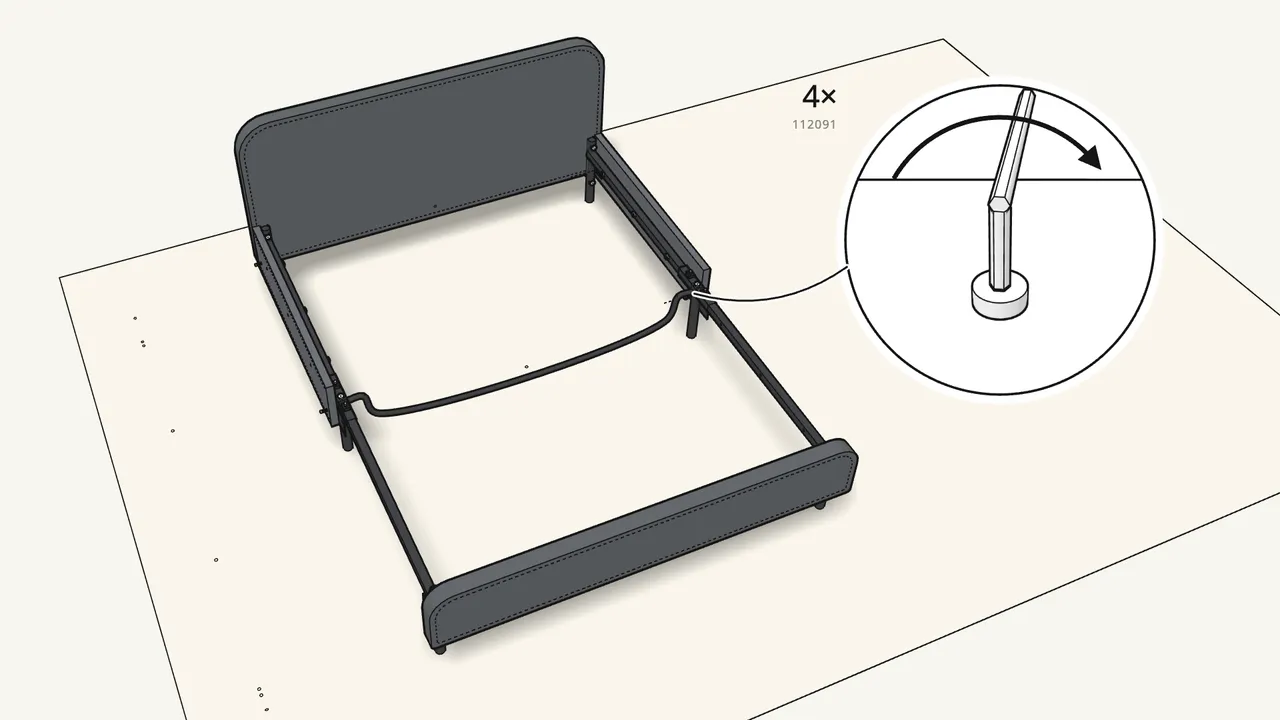
Add 4 short bolts (112091) through the tabs.
At the headboard legs and the middle-leg plates.
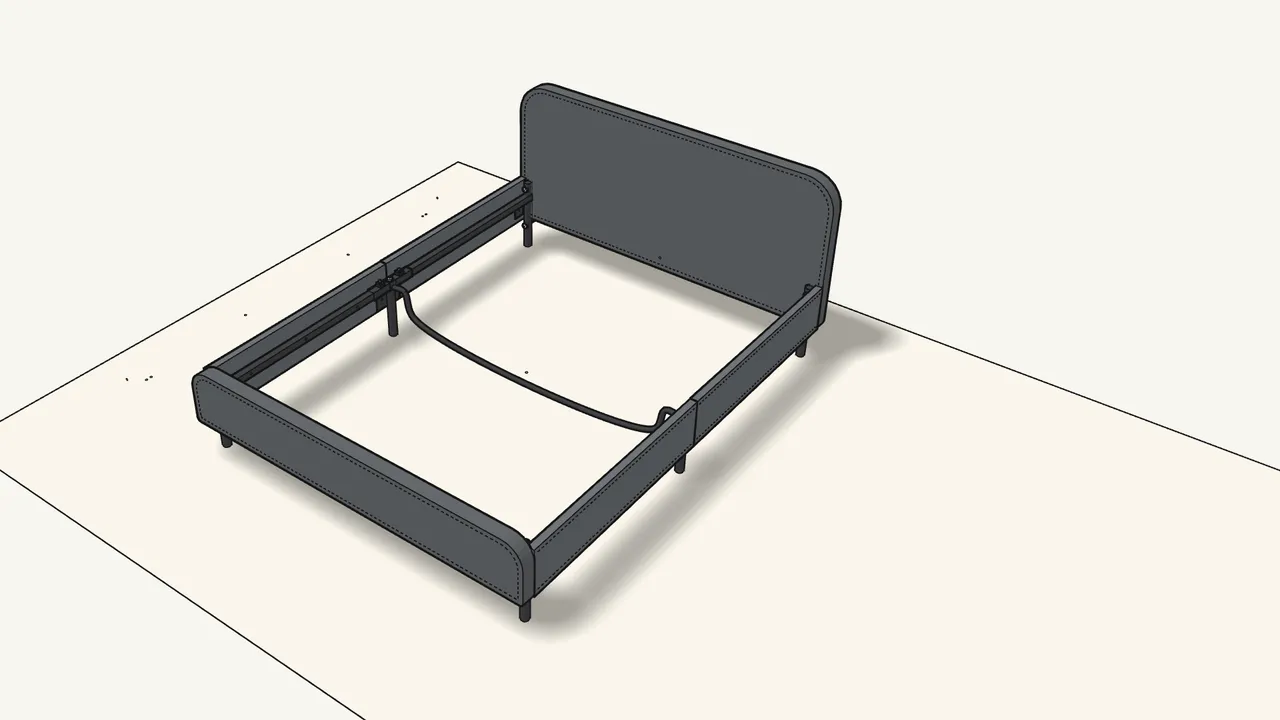
Step 12
Hang the two front side panels.
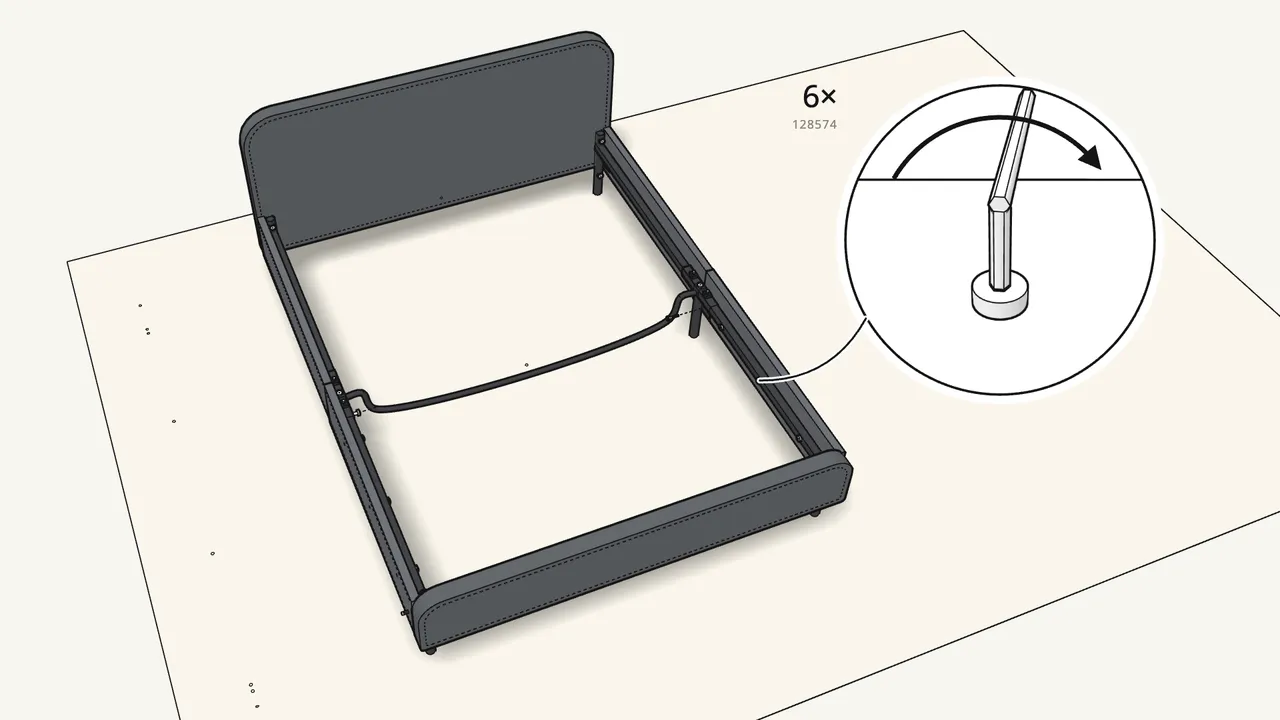
Step 13 · manual step 13–14
Bolt them on: 6 bolts (128574), then 4 short bolts (112091).
Same as steps 10 and 11, at the footboard end.
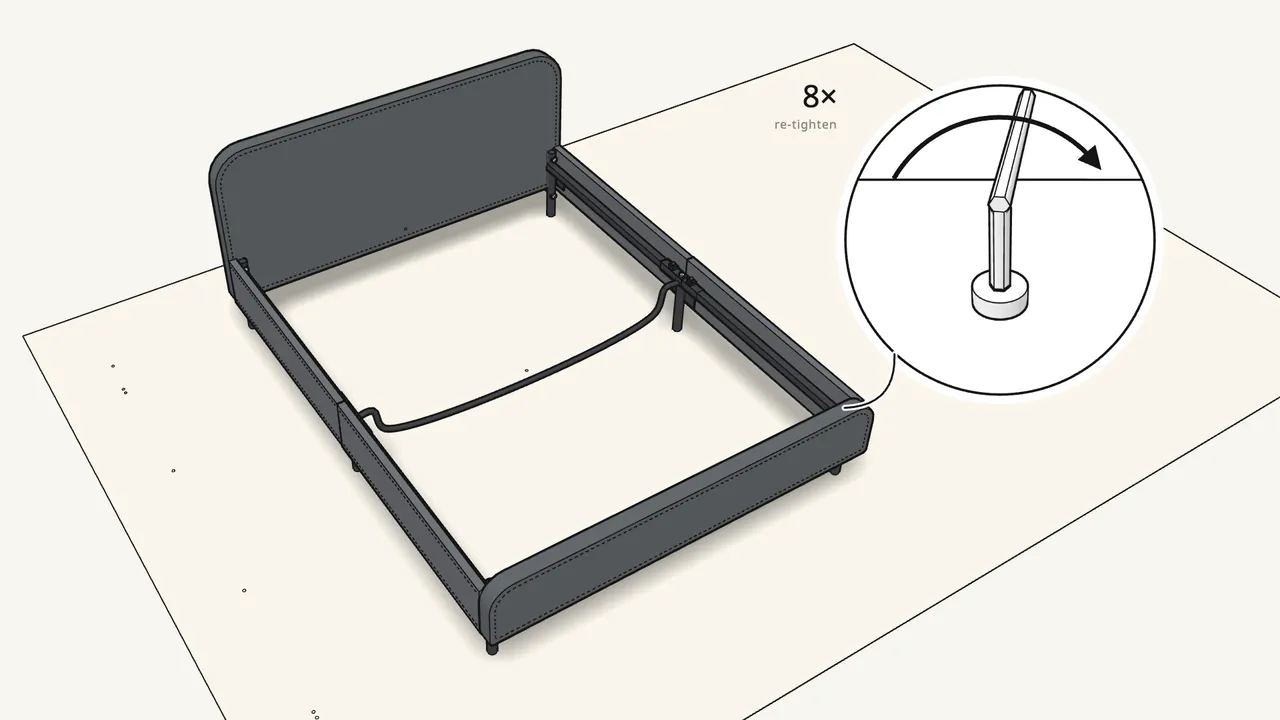
Step 14 · manual step 15
Re-tighten the 8 leg bolts from steps 2 and 4.
No new bolts — go round the corner legs with the Allen key once more.
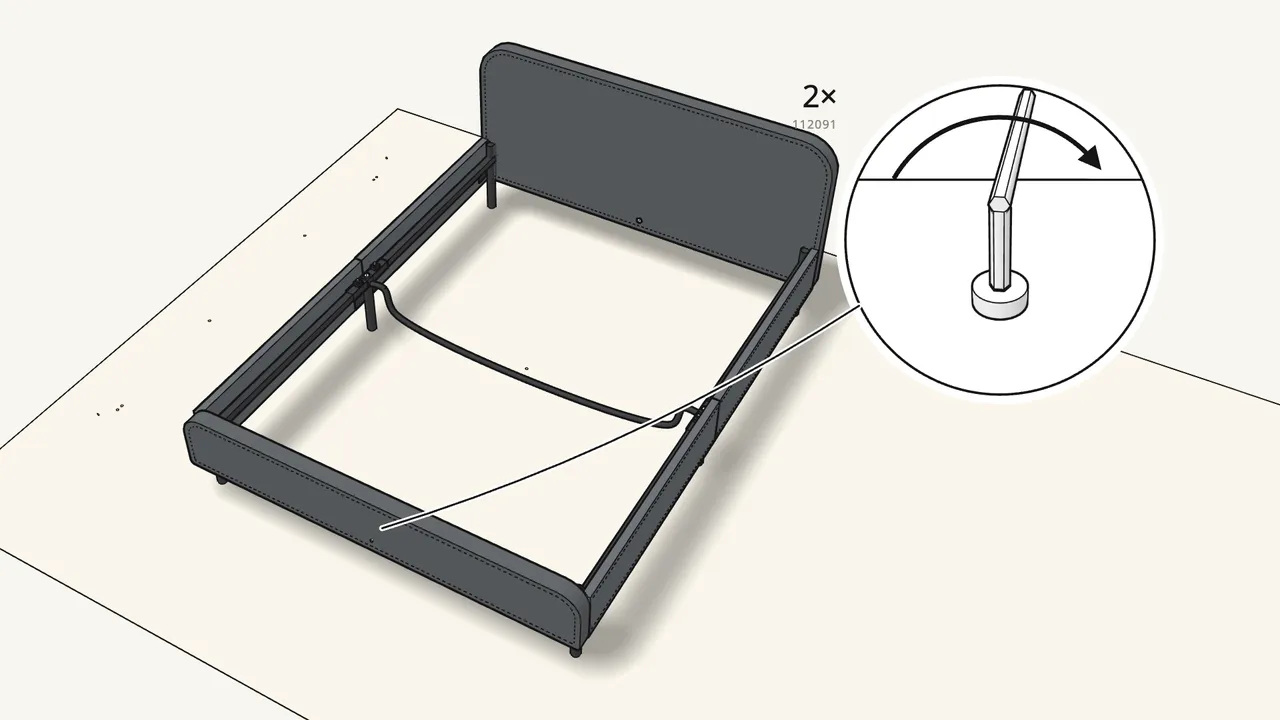
Step 15 · manual step 16
Screw a short bolt (112091) part-way into the headboard and footboard.
Centred, low down. Leave a gap under the head — the beam hooks on here.
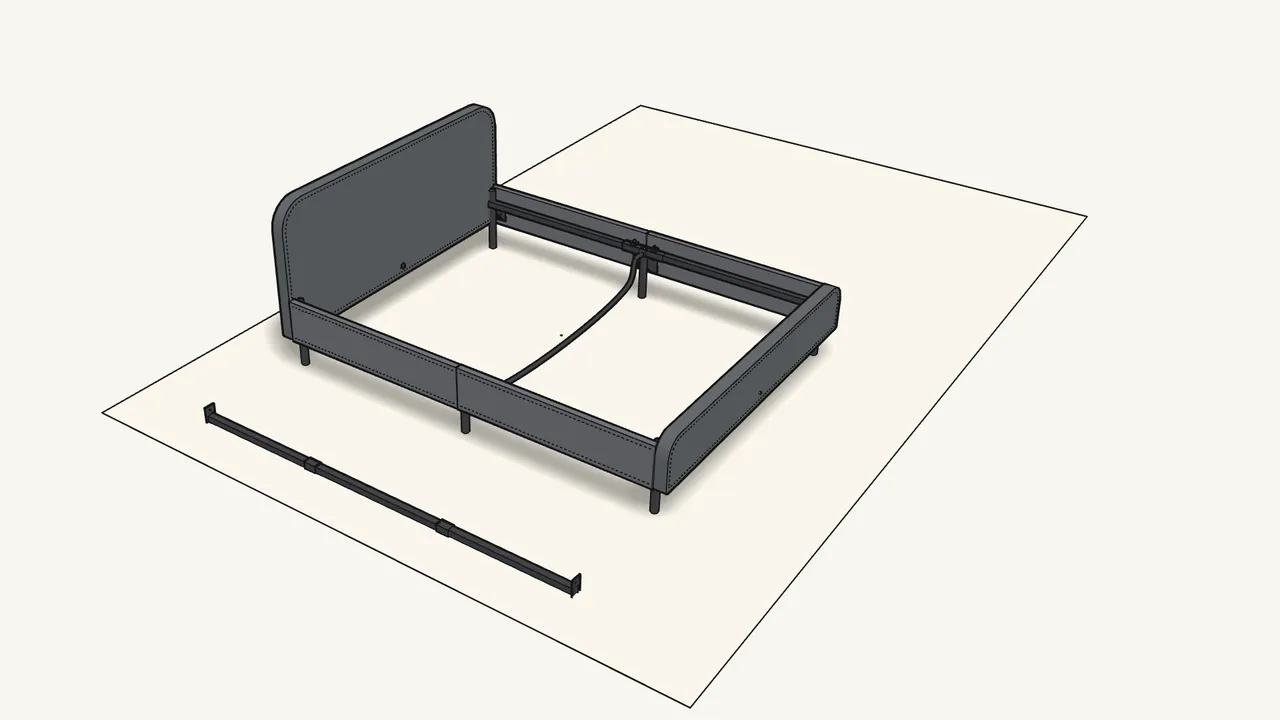
Step 16 · manual step 17
Join the three sections of the centre beam.
Push the ends together until the holes line up. Mind your fingers.
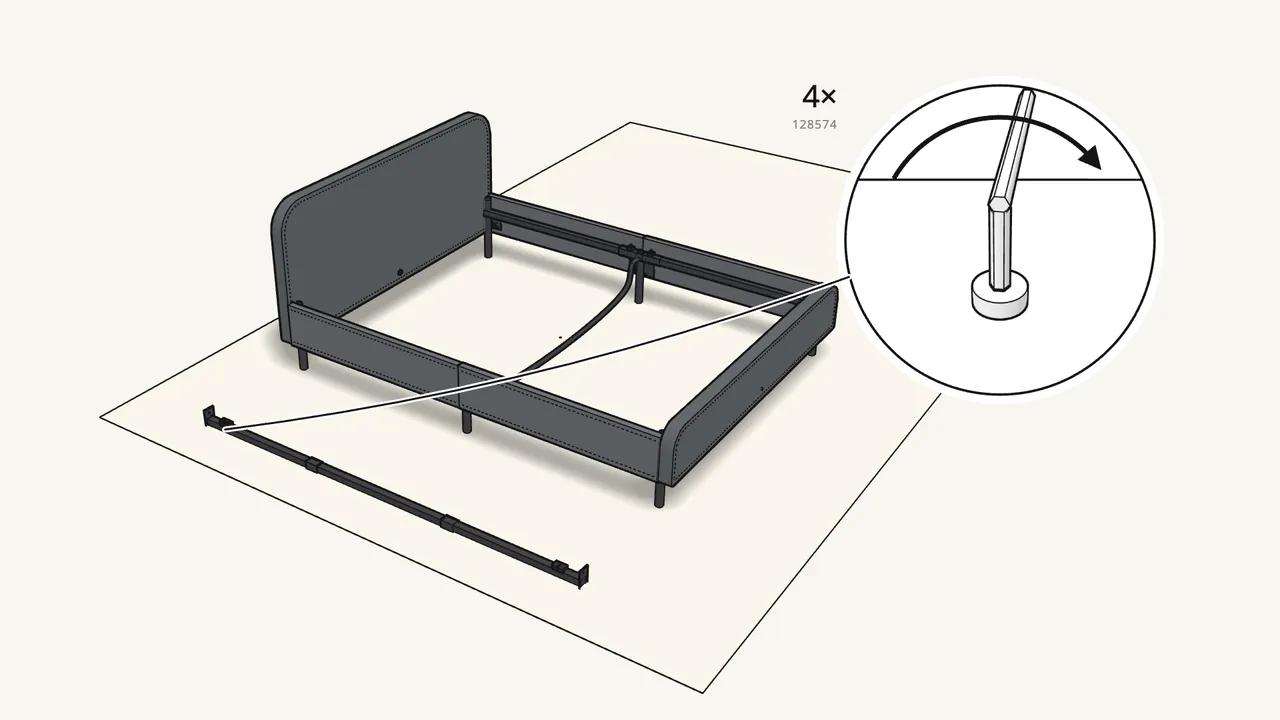
Step 17 · manual step 18
Fit 4 caps (191315) with 4 bolts (128574) at the beam ends.
Two at each end, bolted from below.
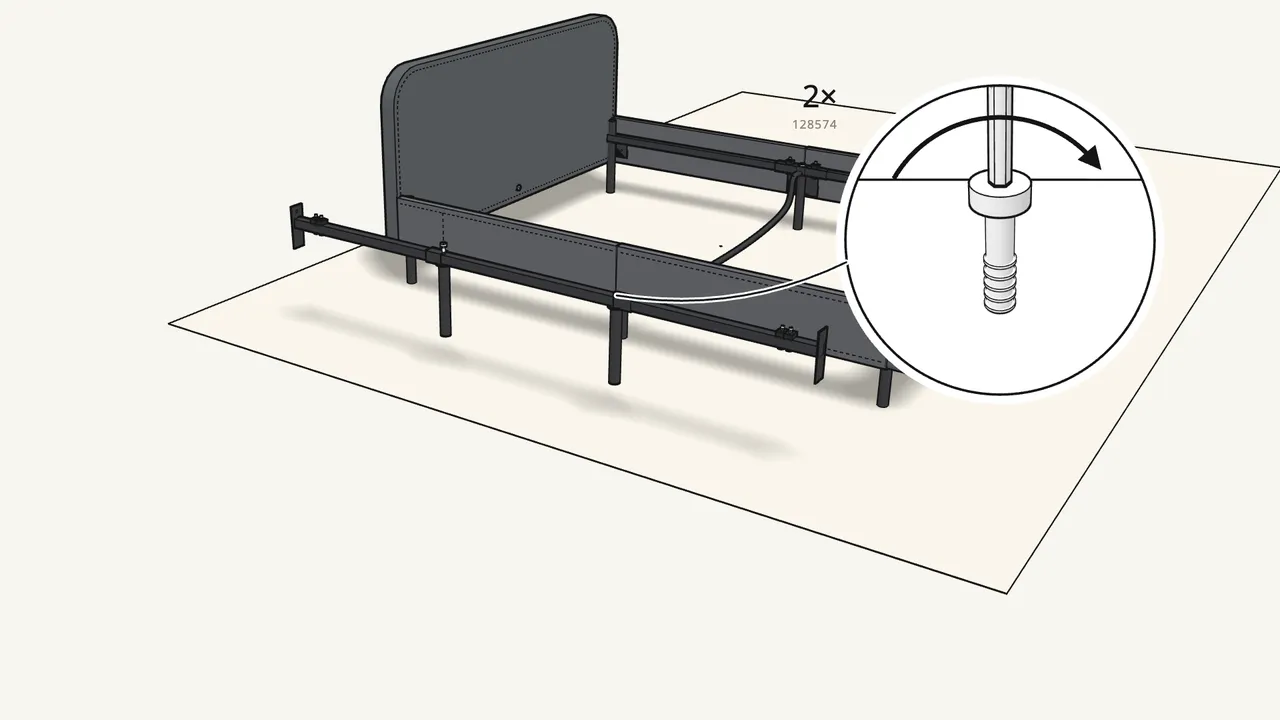
Step 18 · manual step 19
Bolt the two legs under the beam joints.
One bolt (128574) from the top into each leg.
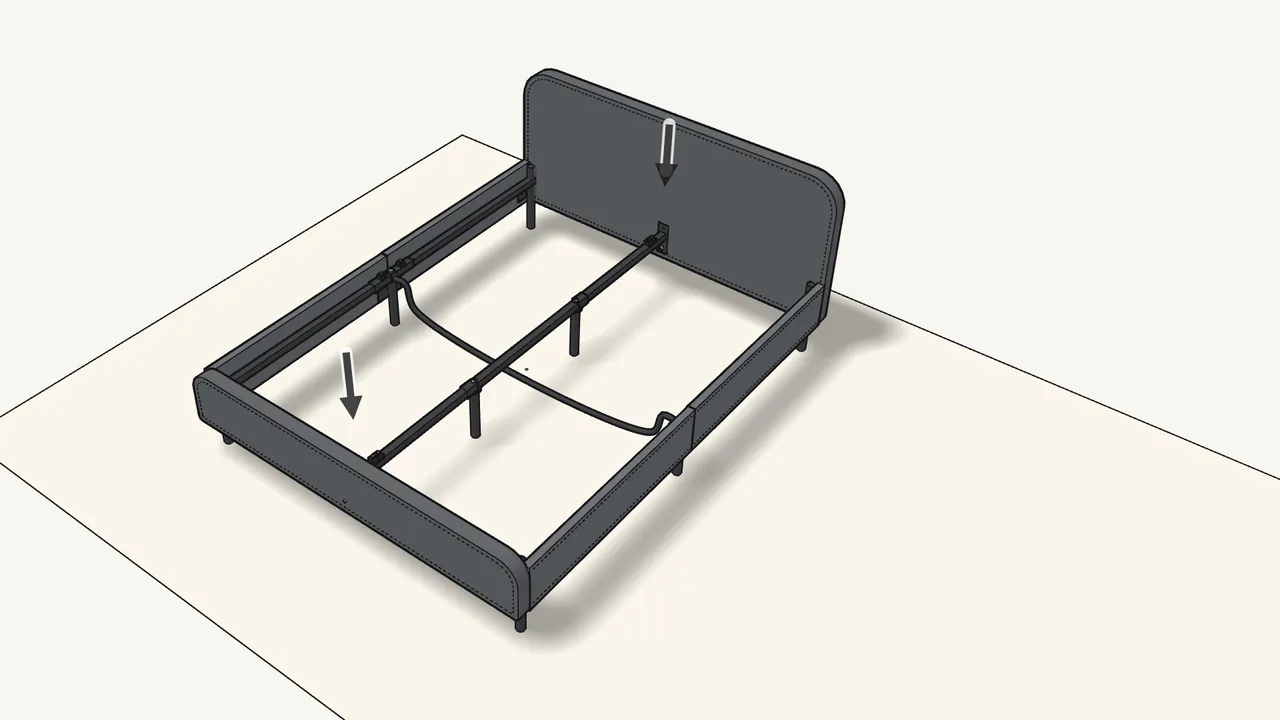
Step 19 · manual step 20
Lift the beam in and hook its slotted plates over the bolts.
Lower it straight down at both ends.
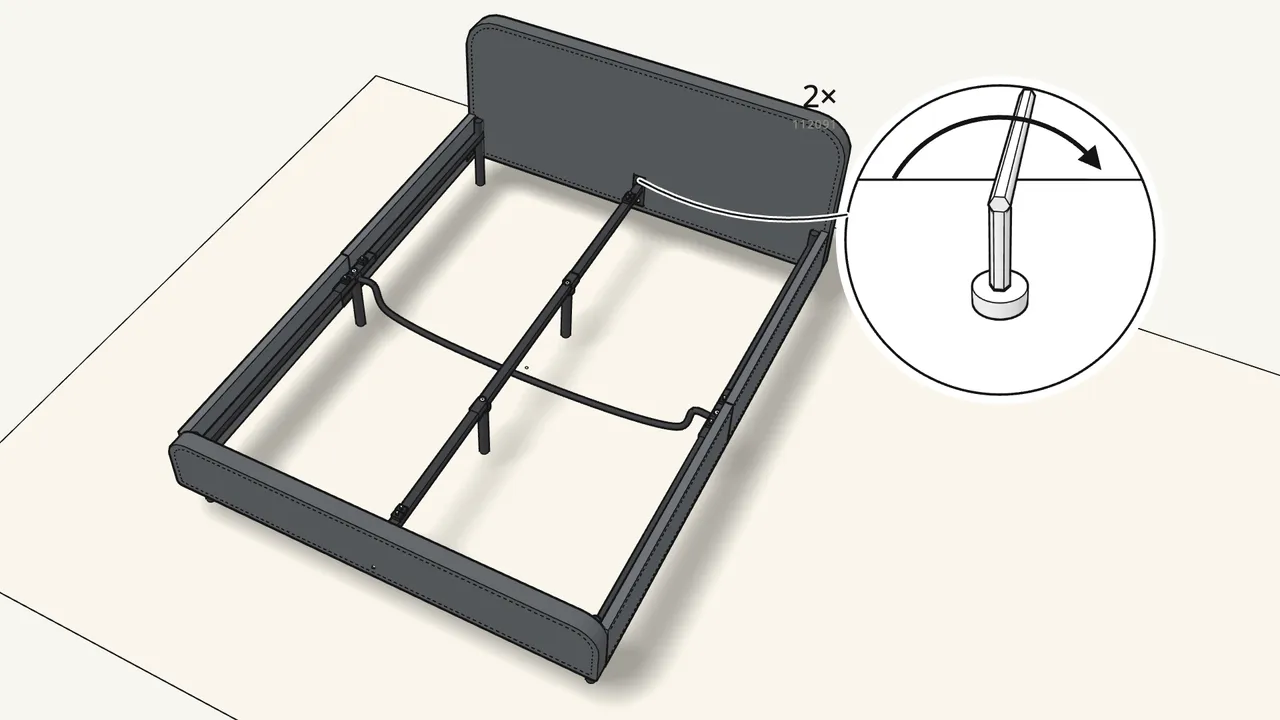
Step 20 · manual step 21
Add 2 short bolts (112091) in the upper holes, then tighten all four.
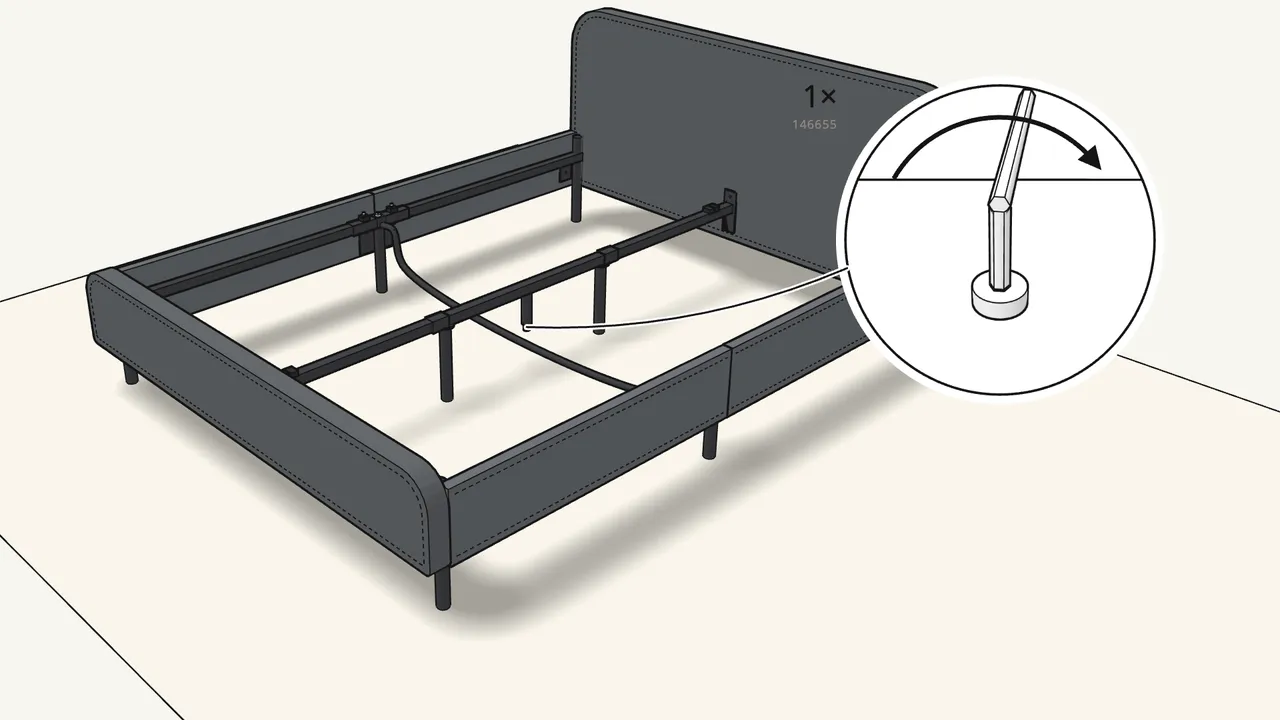
Step 21 · manual step 22
Swing the support post (10054995) under the beam and bolt it.
It stands on the middle cross bar — one bolt (146655) from below.
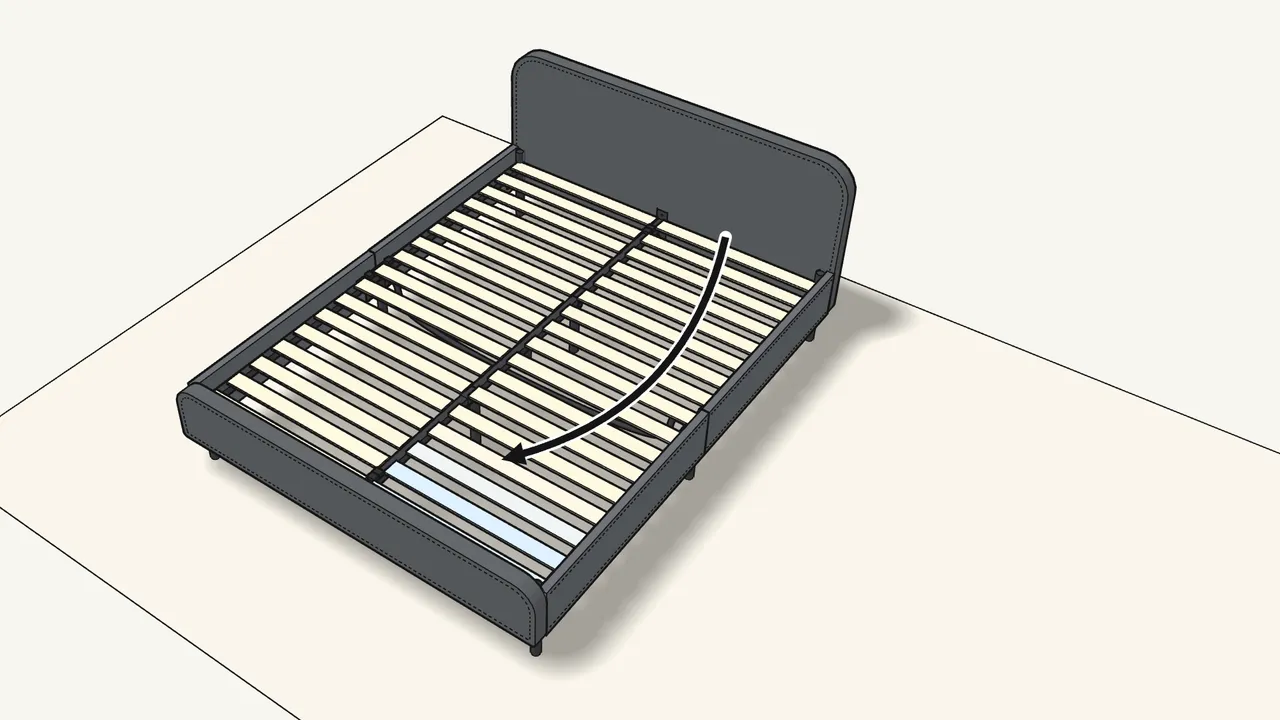
Step 22 · manual step 23
Roll out the slats on both sides of the centre beam.
Then check all 8 plastic caps (191315) — see the manual, step 23.
Tips & safety
- Two people are needed. Steps 6 and 7 — lifting the frames and joining the rails — are done by two people in the manual.
- Mind your fingers at the tube joints. The manual warns about pinching when the rails slide into the connectors (steps 6, 7 and 17).
Official instructions
This guide follows IKEA’s official assembly instructions (AA-2141869-4). Keep the printed manual to hand — if anything differs, the manual is right.