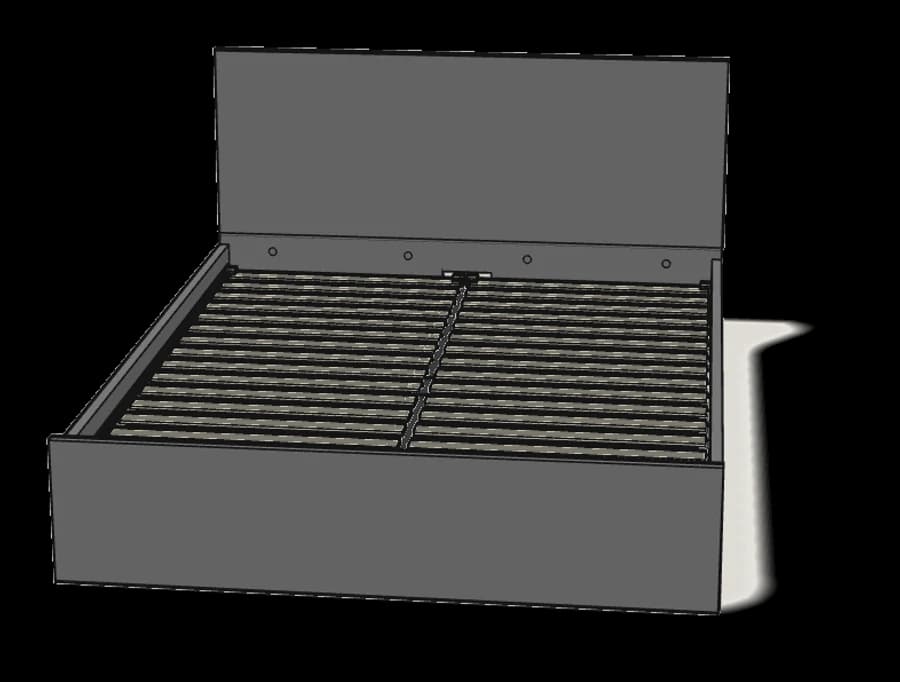
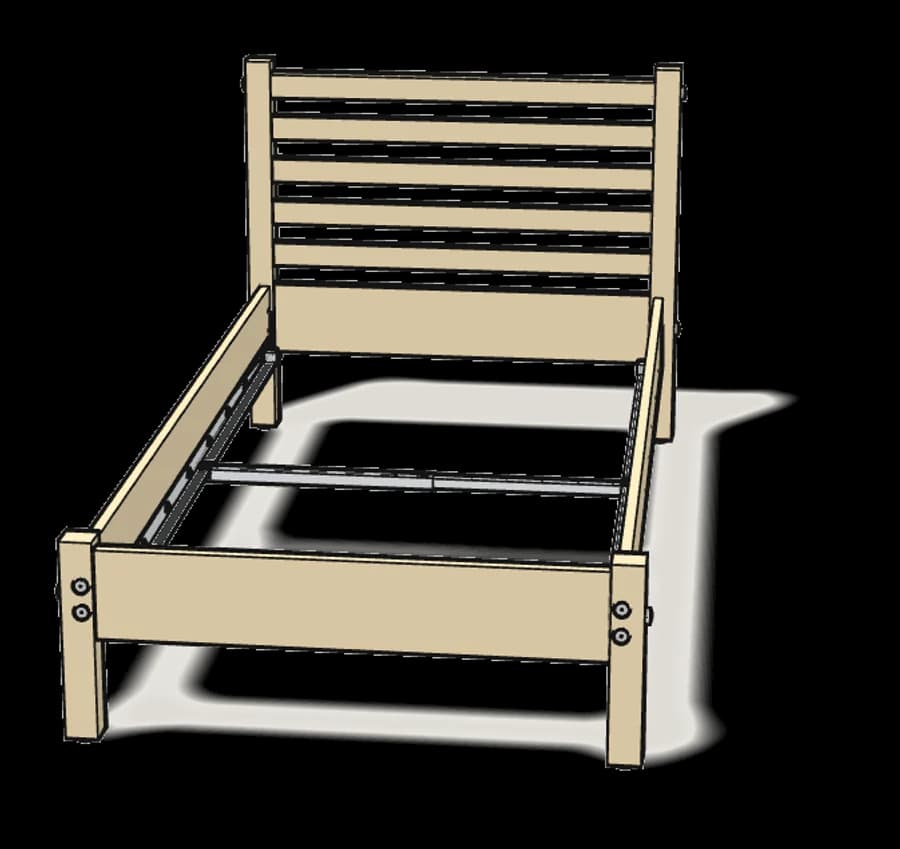
IKEA · Beds
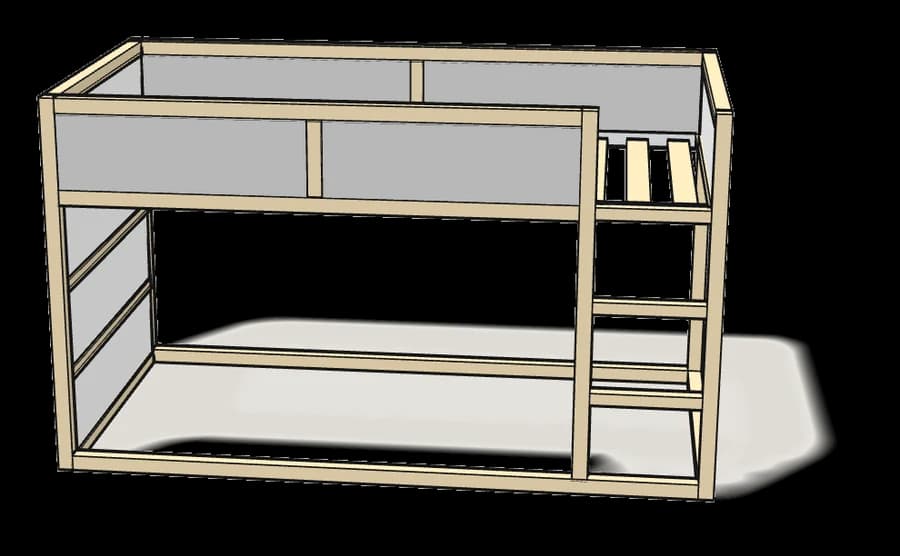
How to Assemble IKEA KURA Reversible Bed
Step-by-step IKEA KURA reversible bed assembly: 23 illustrated steps, an animated video, the hardware list and the tools you need — following the official instructions (AA-843436-8).
- 23 illustrated steps
- 27 steps in the manual
- 3:24 video
- 105×199×116 cm
What you need
Tools
- Flat-head screwdriver
- Allen key (included)
You’ll need a flat-head screwdriver.
Hardware in the box
| Part no. (as printed in the manual) | Qty |
|---|---|
| 100391 | 4× |
| 128745 | 27× |
| 100215 | 1× |
| 100343 | 18× |
| 104850 | 28× |
| 105160 | 28× |
| 121122 | 4× |
Step-by-step assembly
Step 1
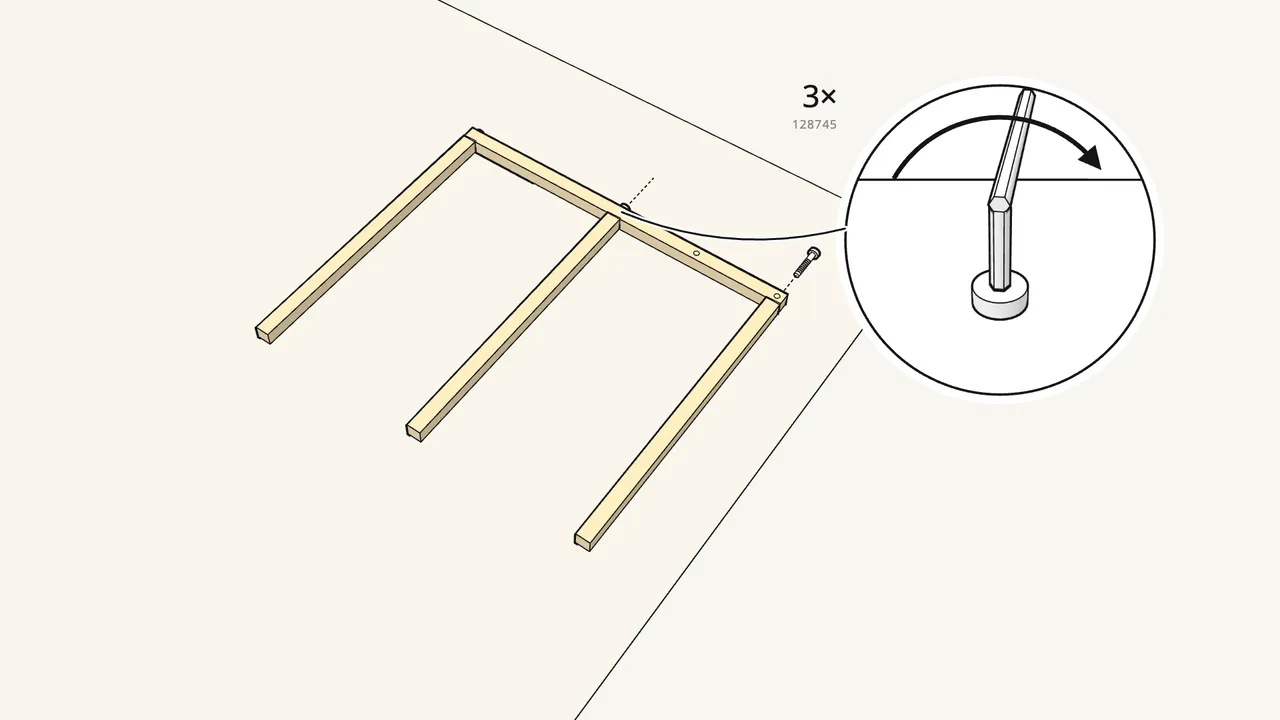
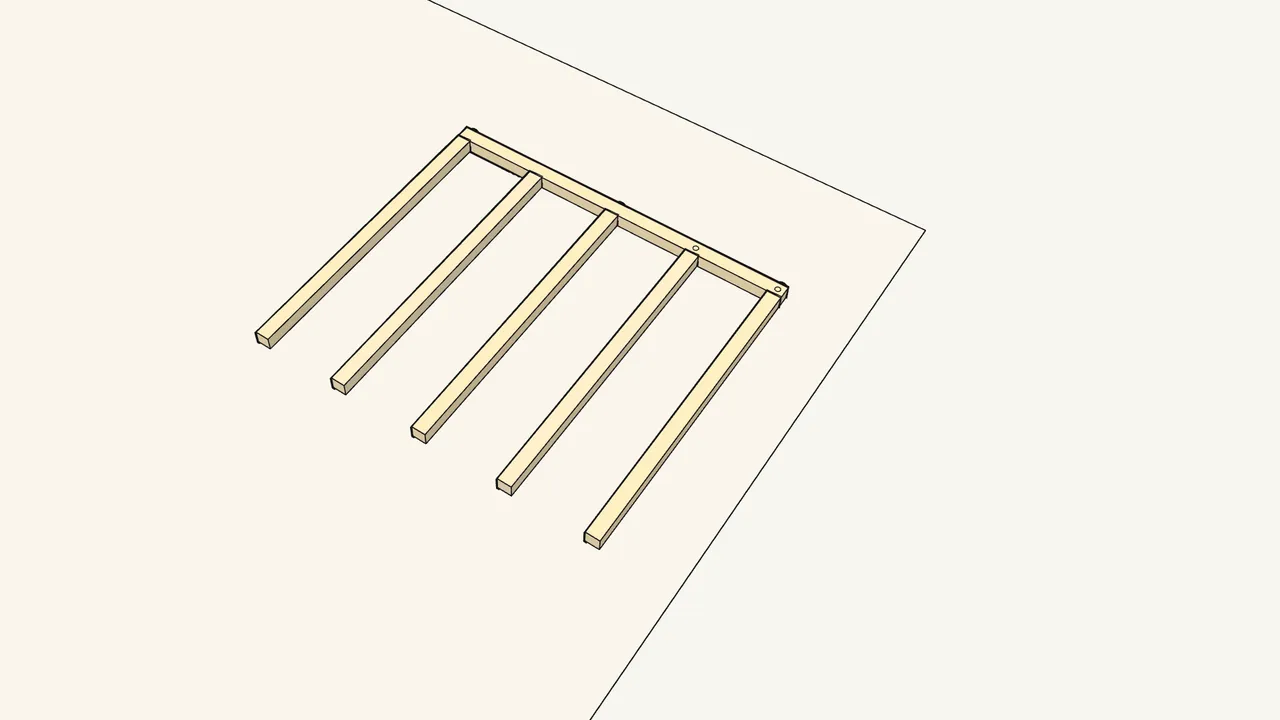
Screw the three cross rails to the first end post.
Lay the parts flat. 3 screws (128745) with the Allen key in the handle.
Step 2
Add the two remaining cross rails.
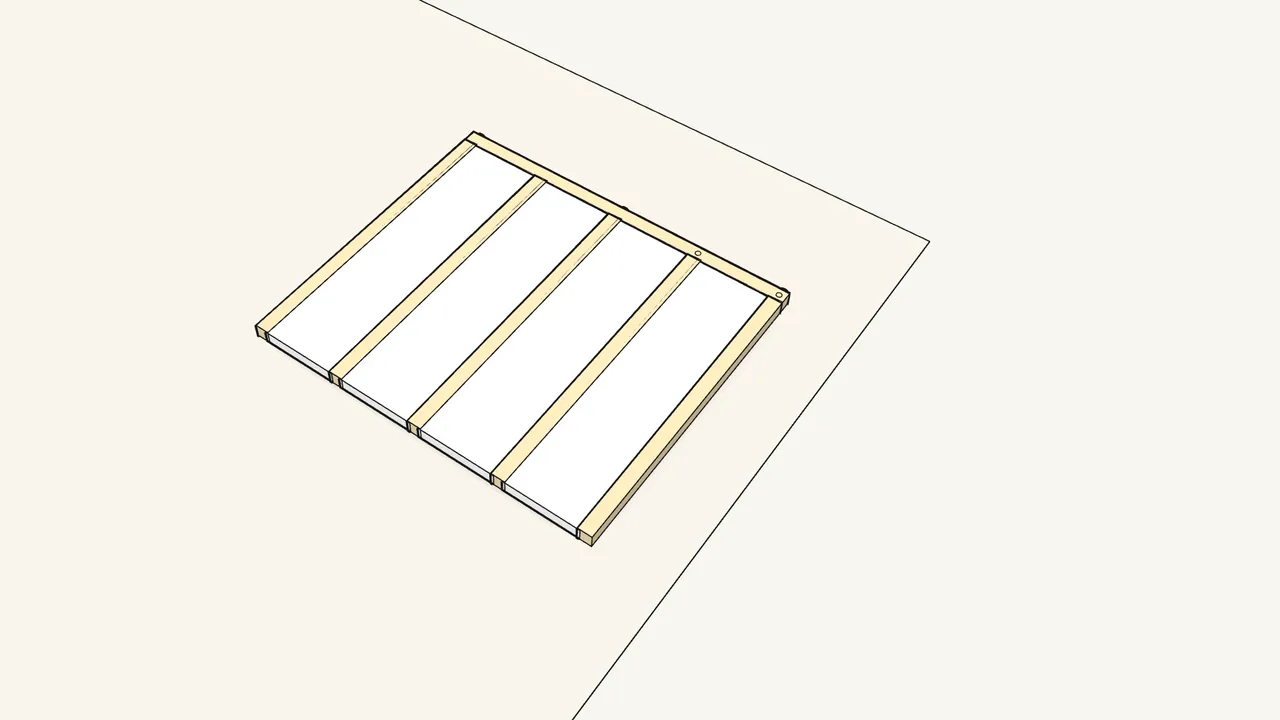
Step 3
Slide the four white panels into the grooves.
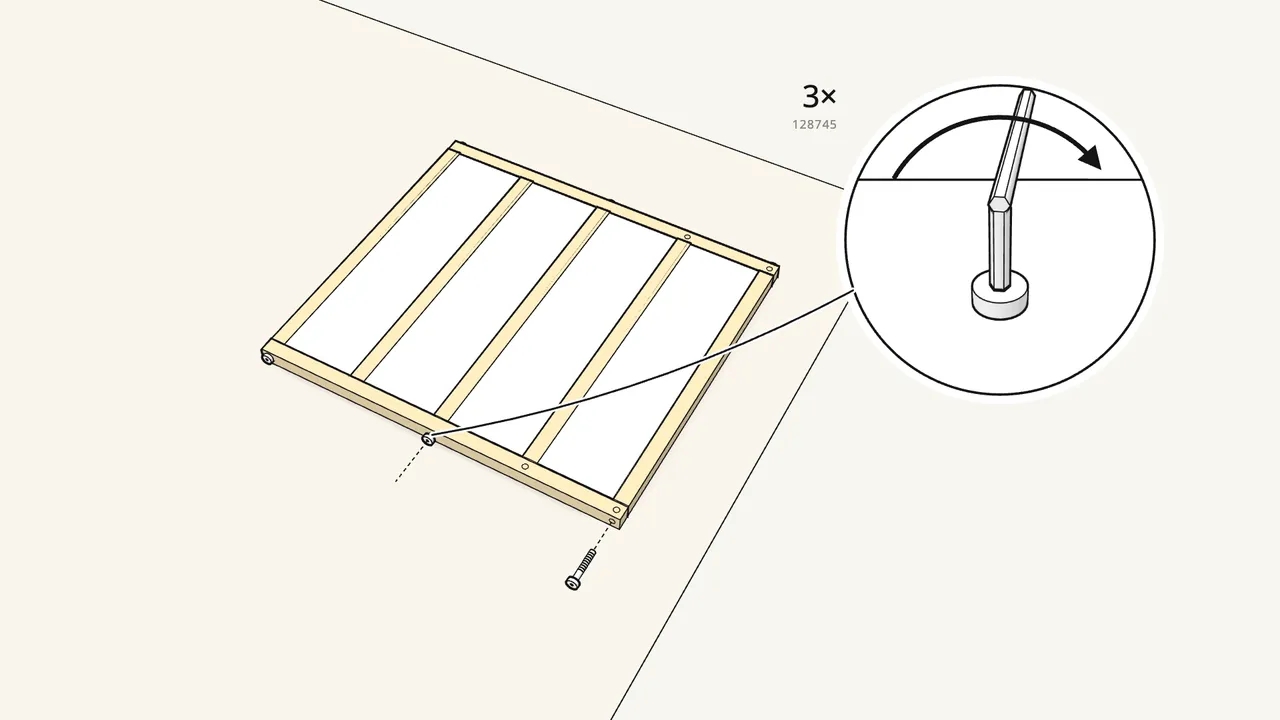
Step 4
Fit the second end post and fix it with 3 screws (128745).
End frame A is done.
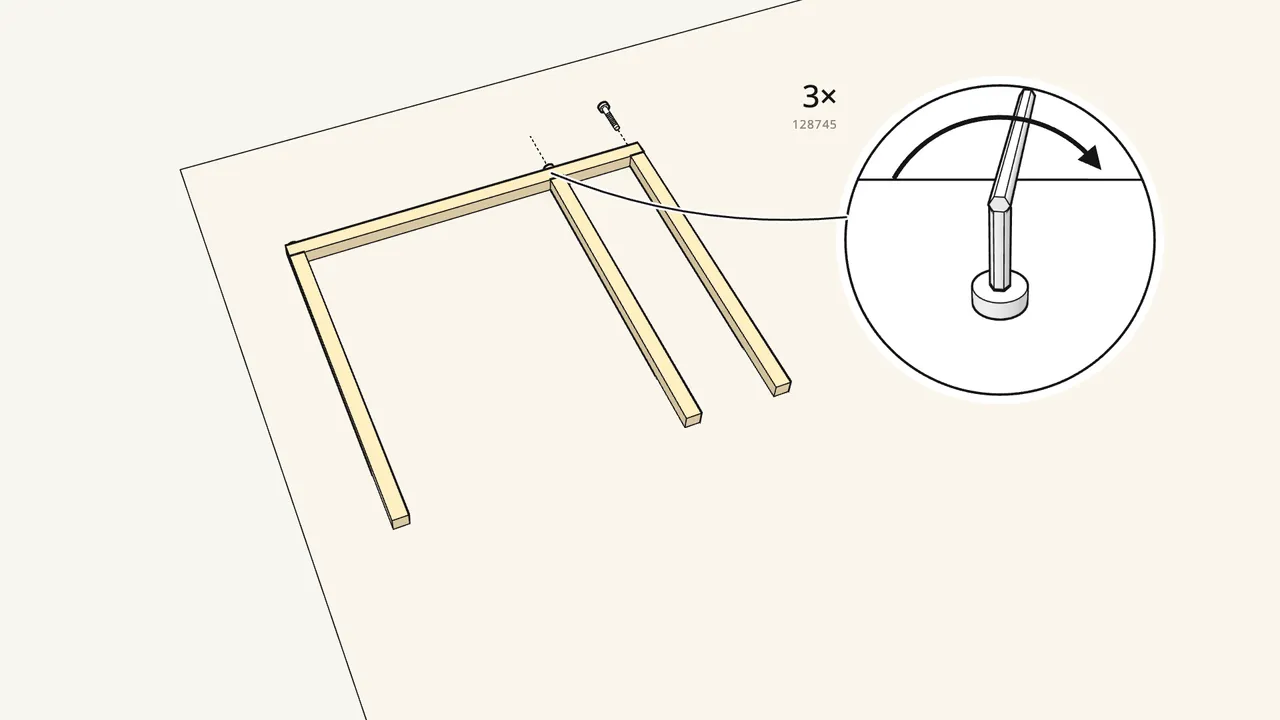
Step 5
Build the ladder-end frame the same way.
First post and three cross rails: 3 screws (128745).
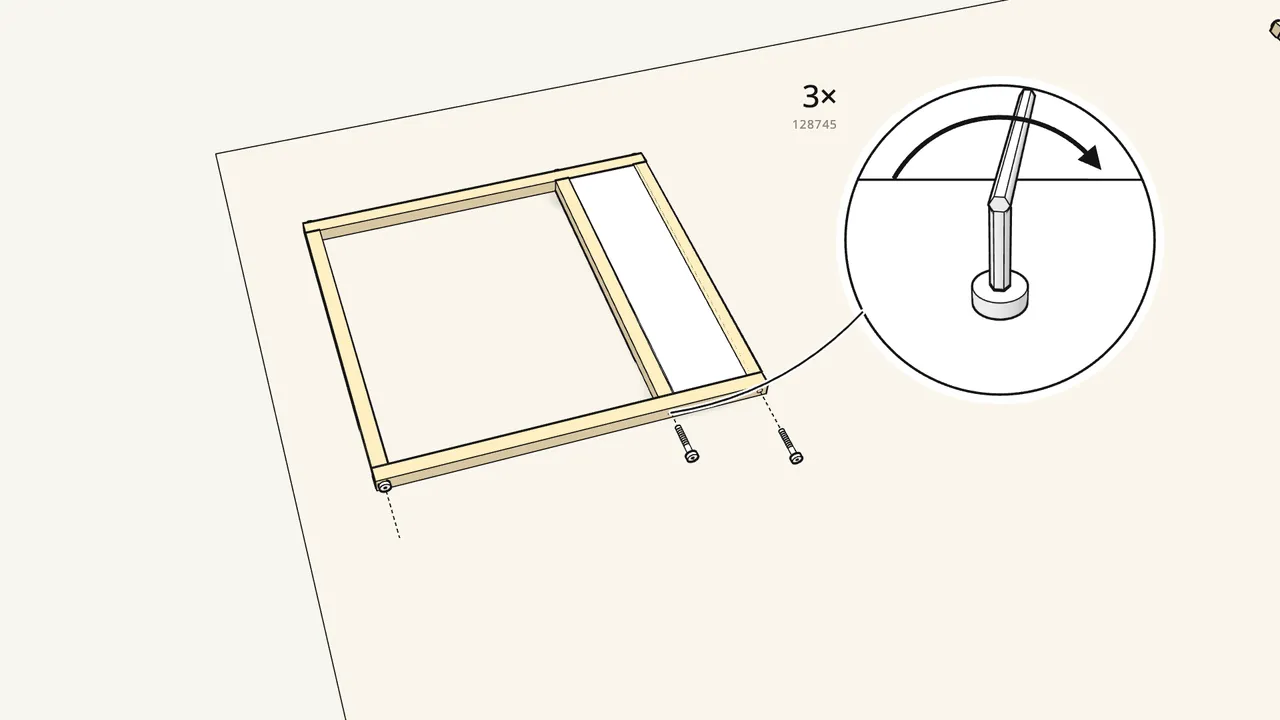
Step 6 · manual step 6–7
Slide in its one panel, then fit the second post.
3 more screws (128745).
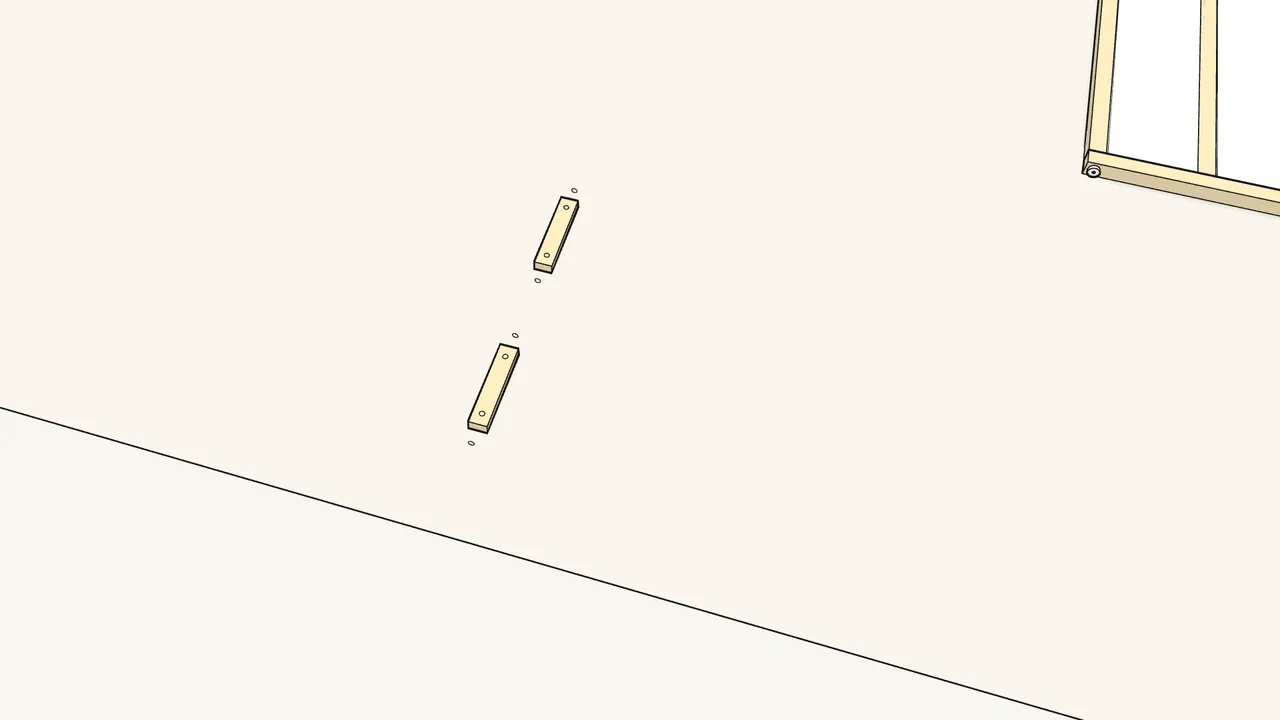
Step 7
Now the two long side panels.
Both are built the same way.
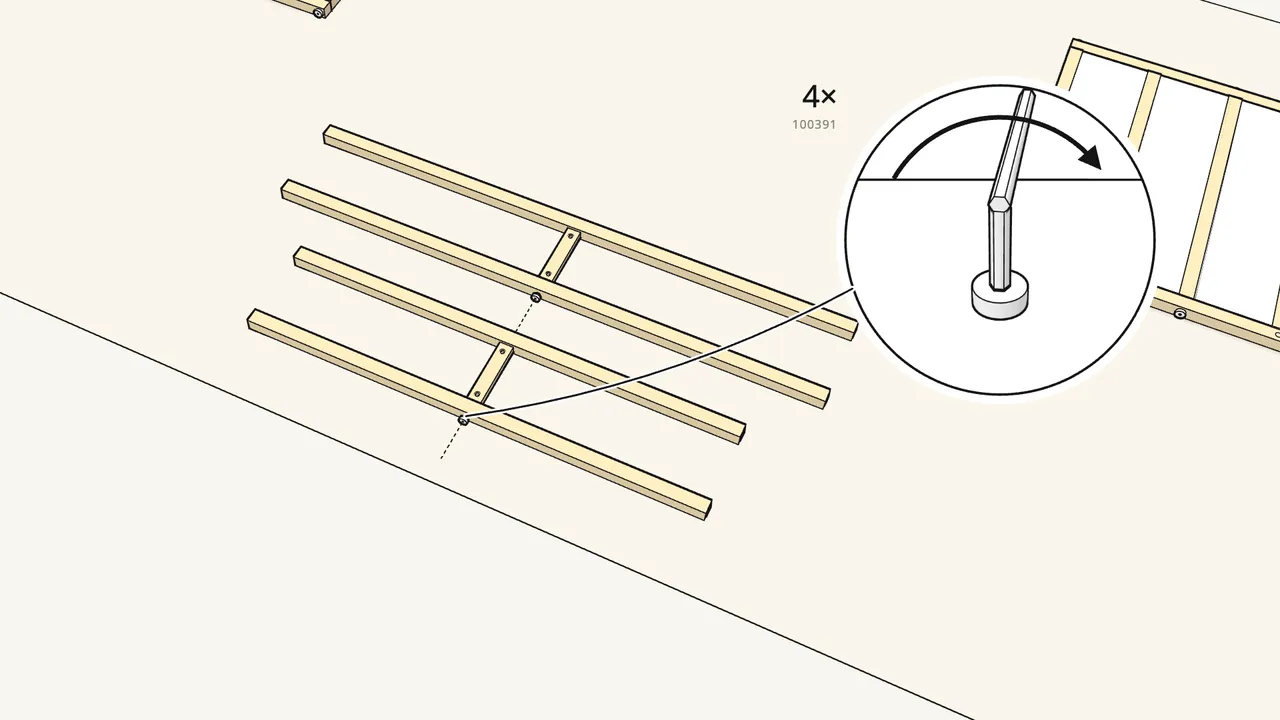
Step 8
Join each pair of rails to the middle upright.
Barrel nuts (121122), then long bolts (100391) with key 100002 — don’t tighten fully yet.
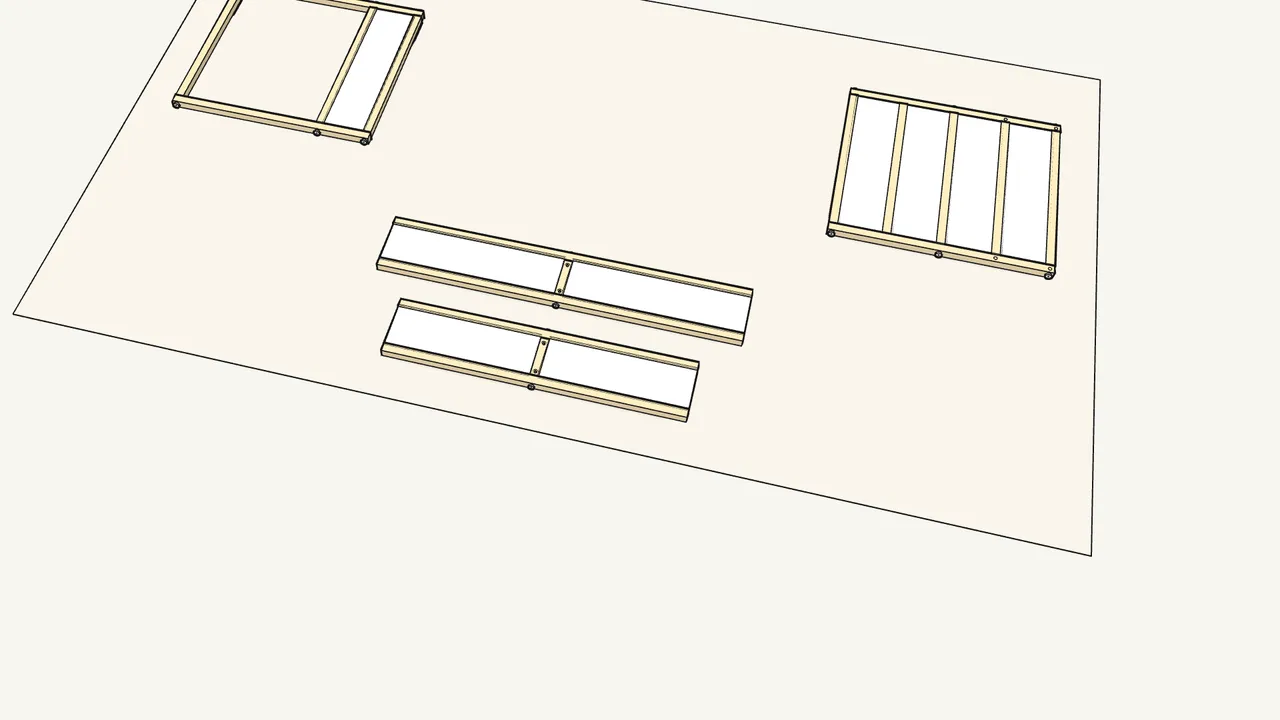
Step 9
Slide the white panels in from both ends.
Two per side panel.
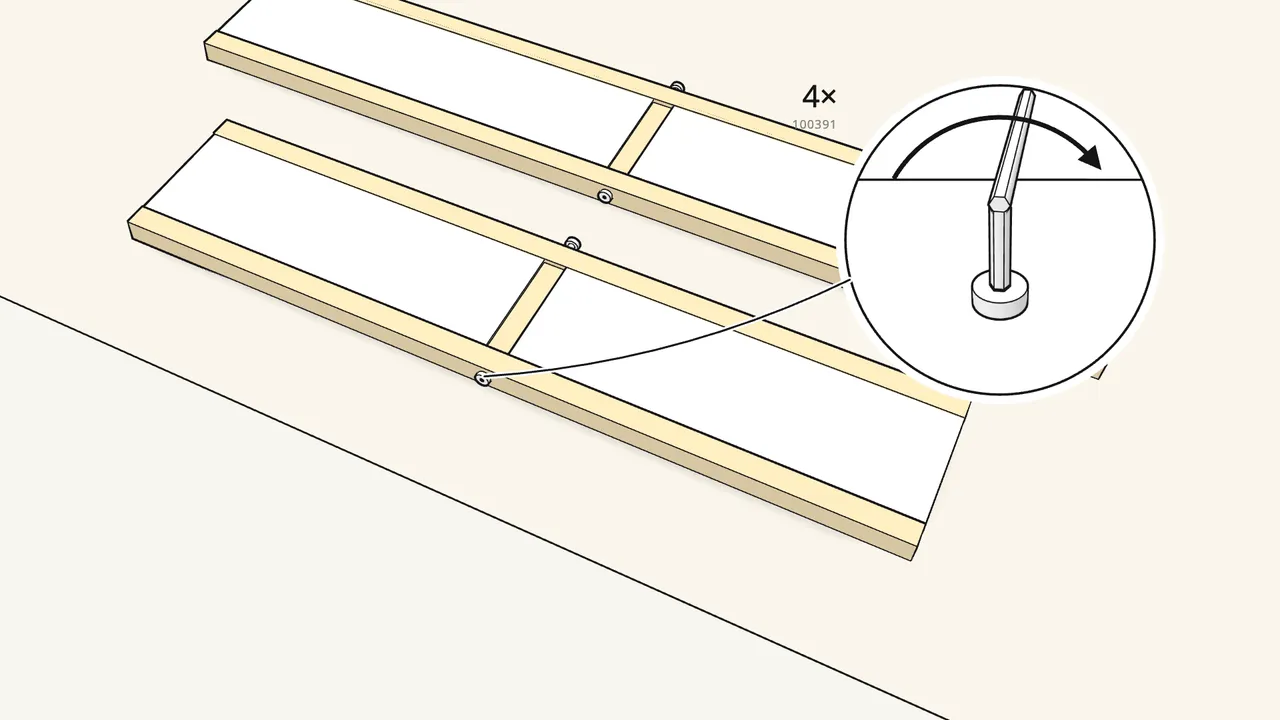
Step 10
Now tighten the 4 bolts with key 100002.
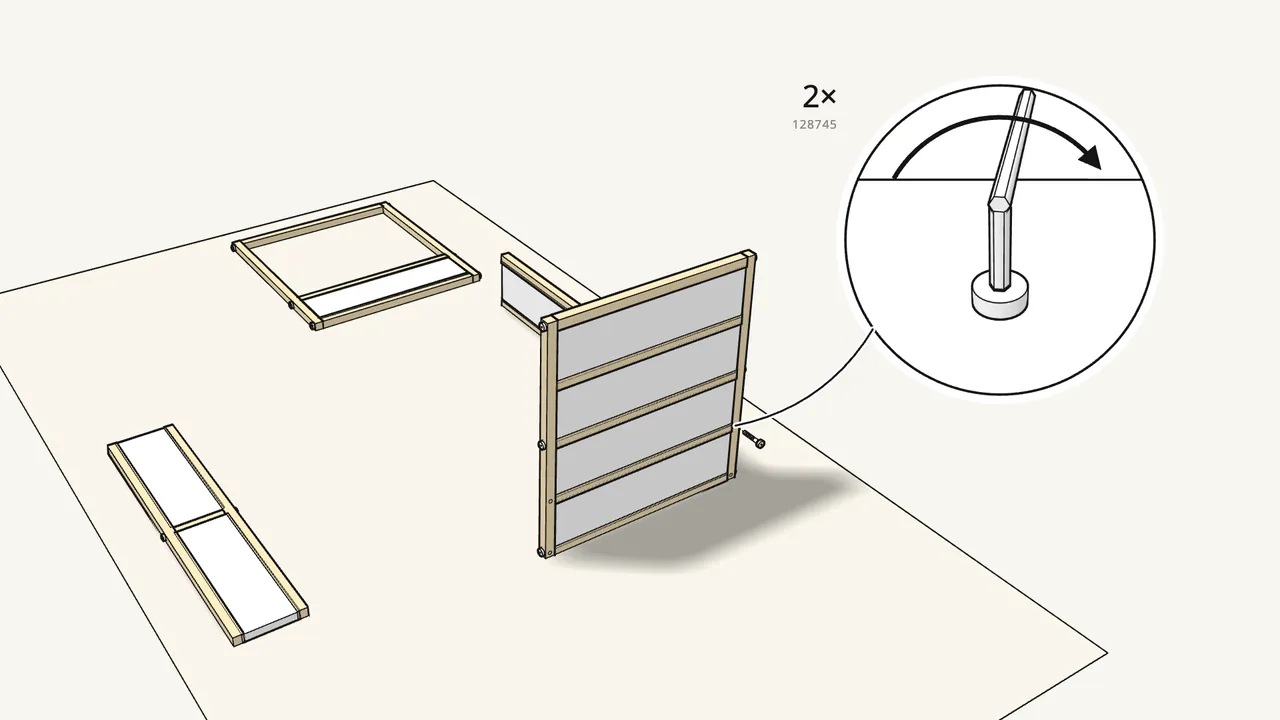
Step 11
Screw one side panel to end frame A — 2 screws.
The frame is built upside down: the side panels sit on the floor.
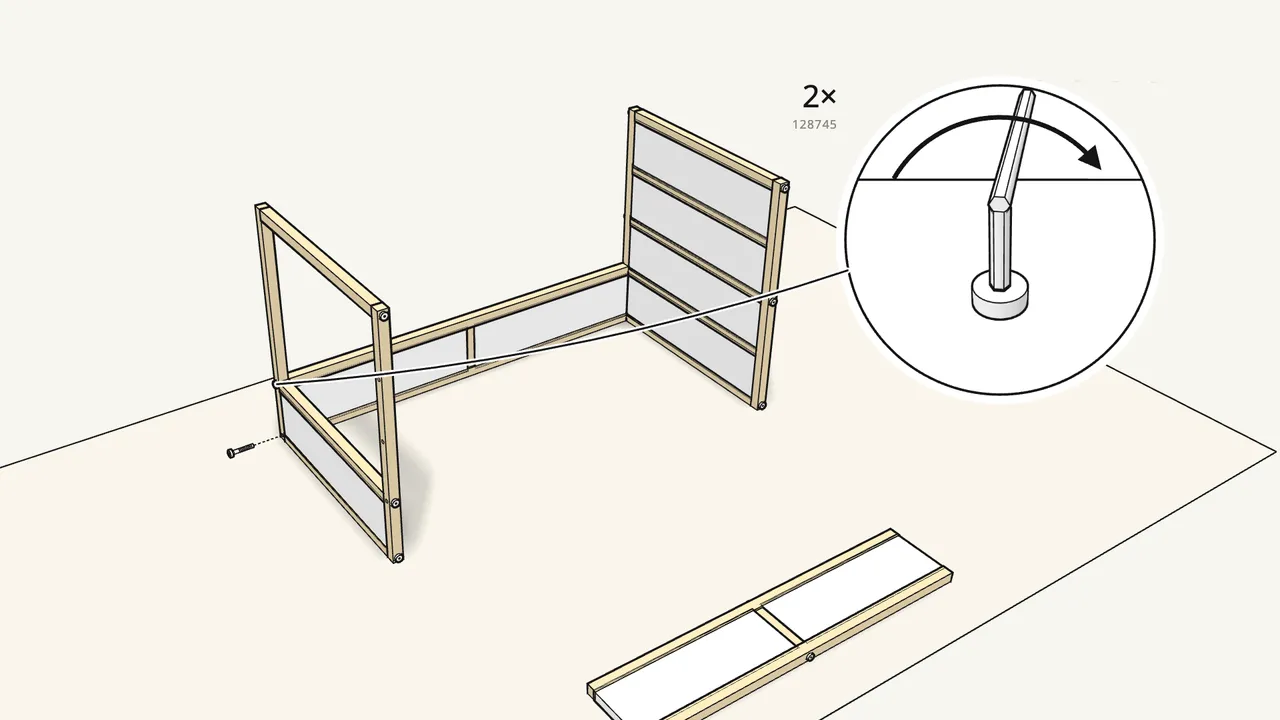
Step 12
Screw end frame B to the other end — 2 screws.
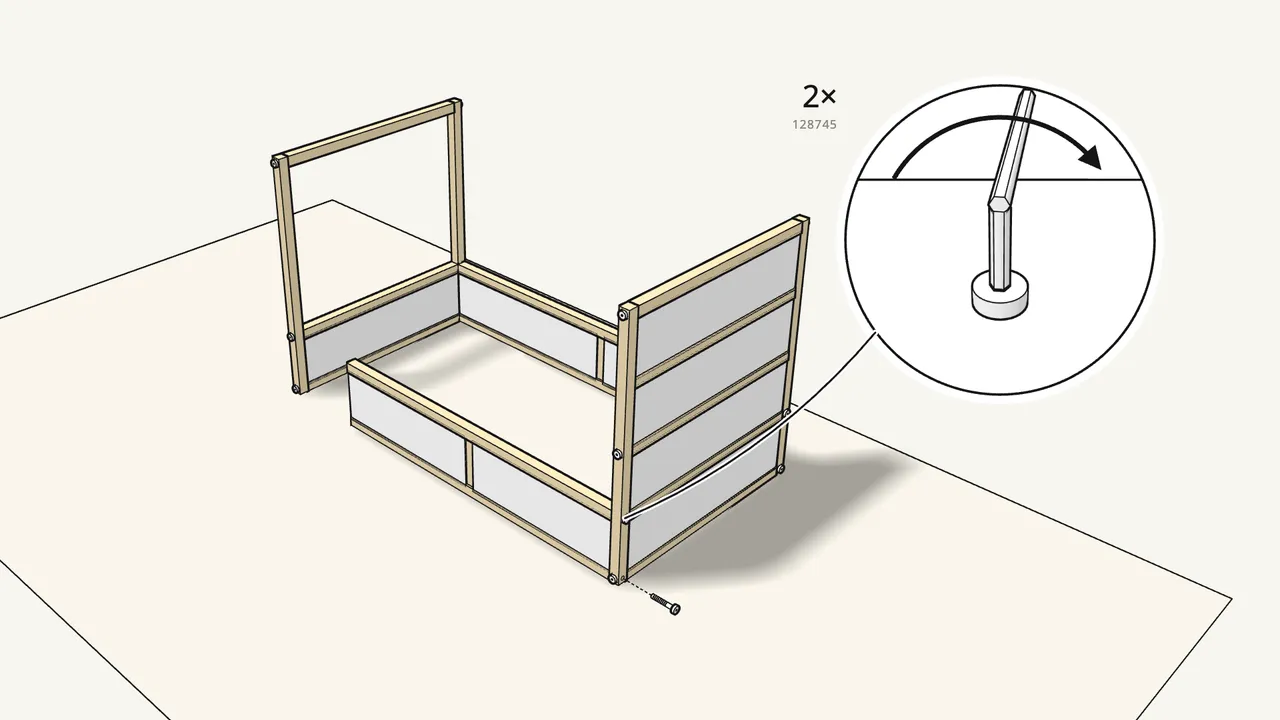
Step 13
Fix the front side panel to end frame A — 2 screws.
Its other end stays free for the ladder.
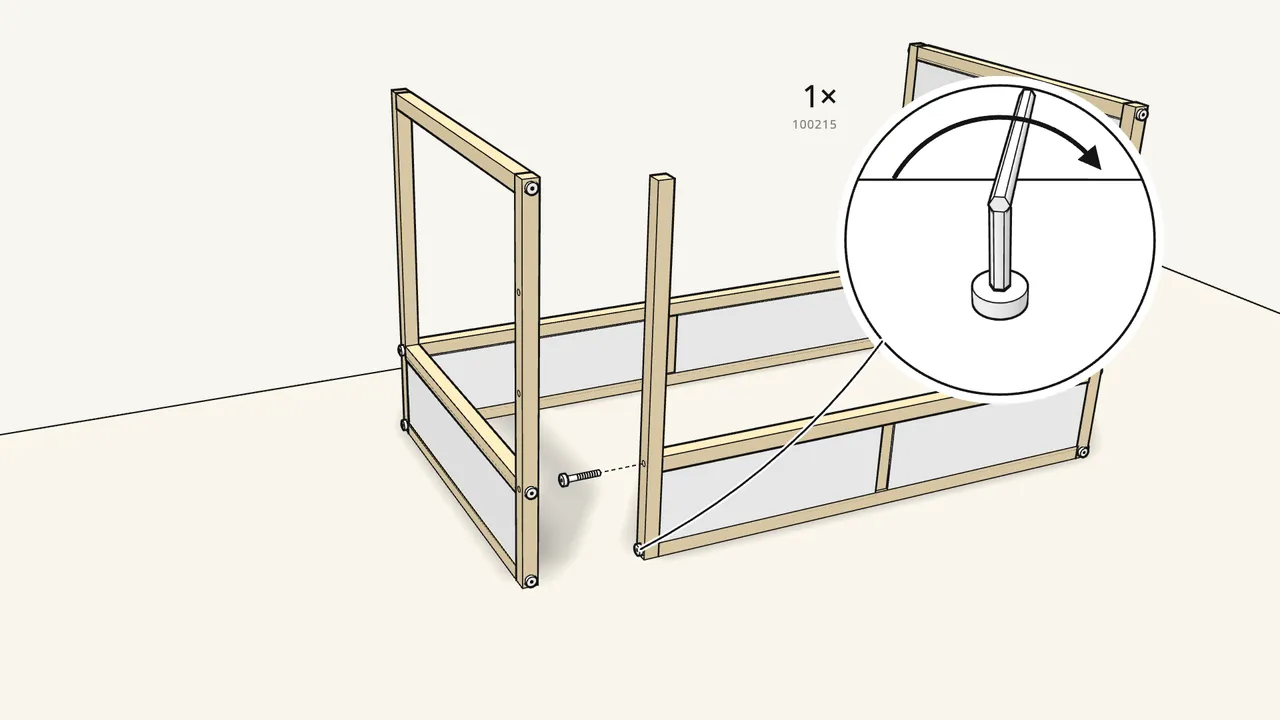
Step 14 · manual step 14–15
Fit the ladder post to the free end of the front panel.
1 screw 100215 (with key 100092) and 1 screw 128745.
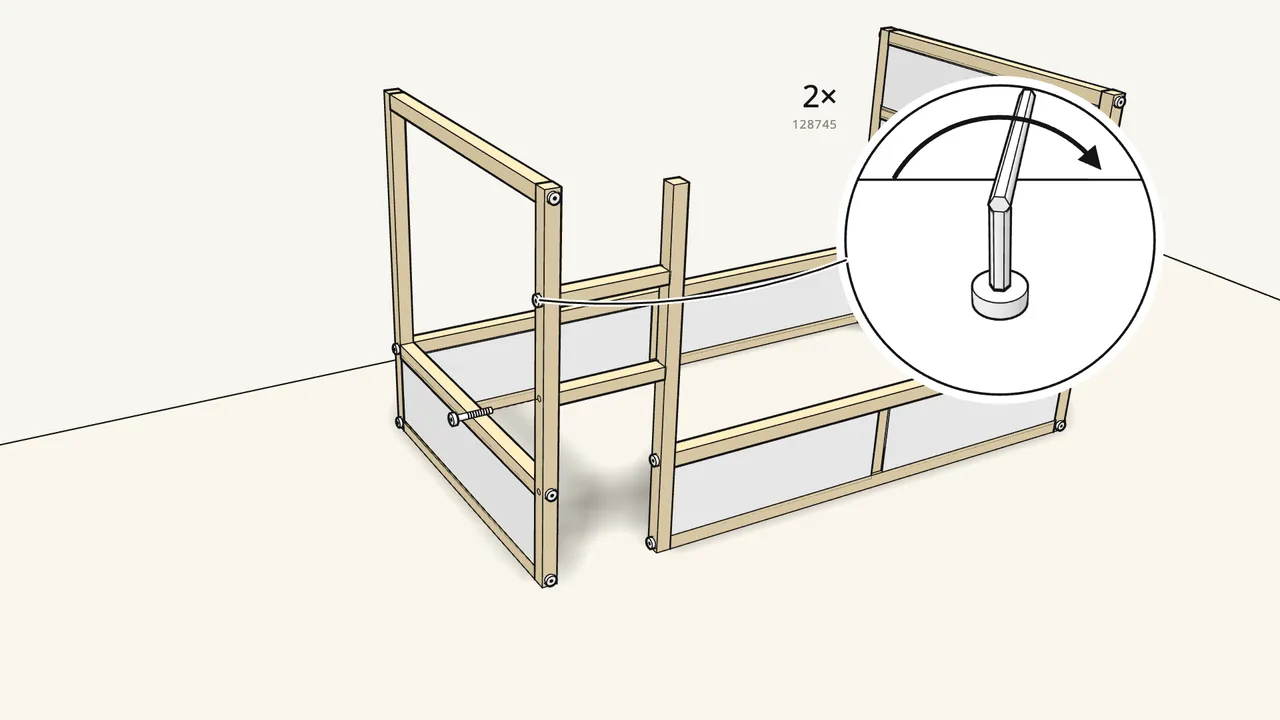
Step 15 · manual step 16–17
Push in two ladder rungs and screw them to the end frame.
2 screws (128745) through the end post.
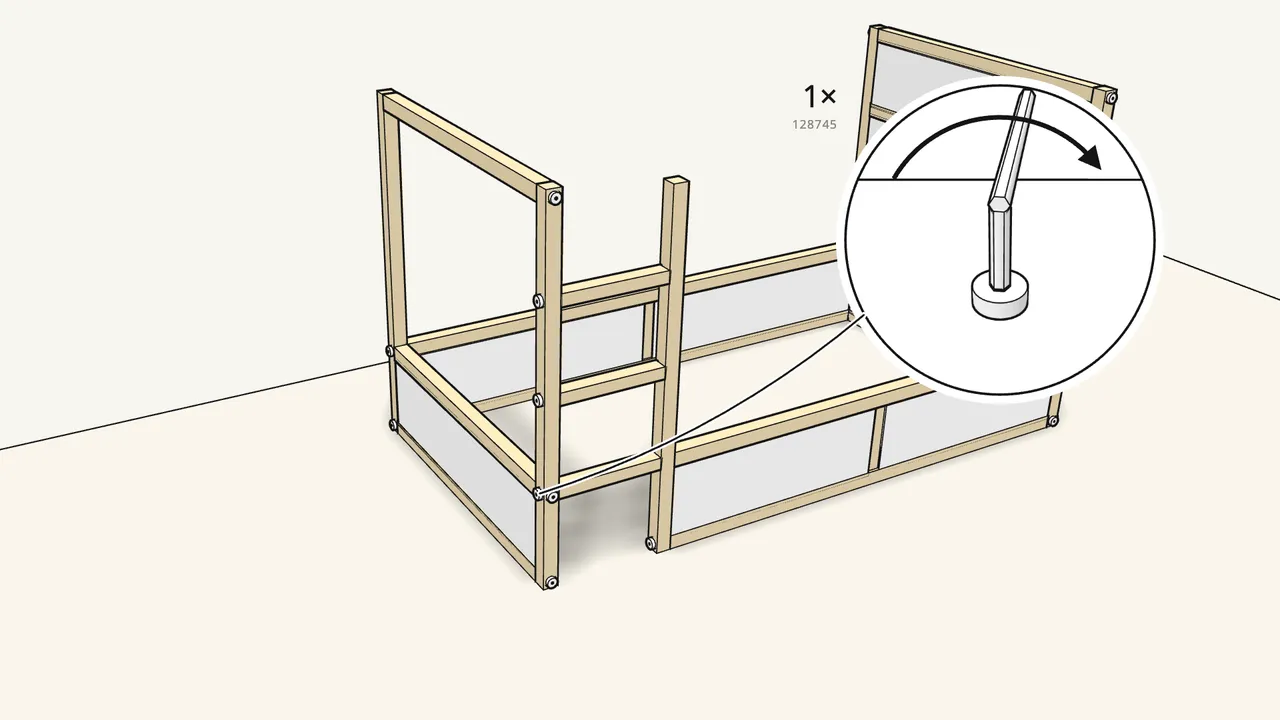
Step 16 · manual step 18–19
Add the third rung and fix it with 1 screw.
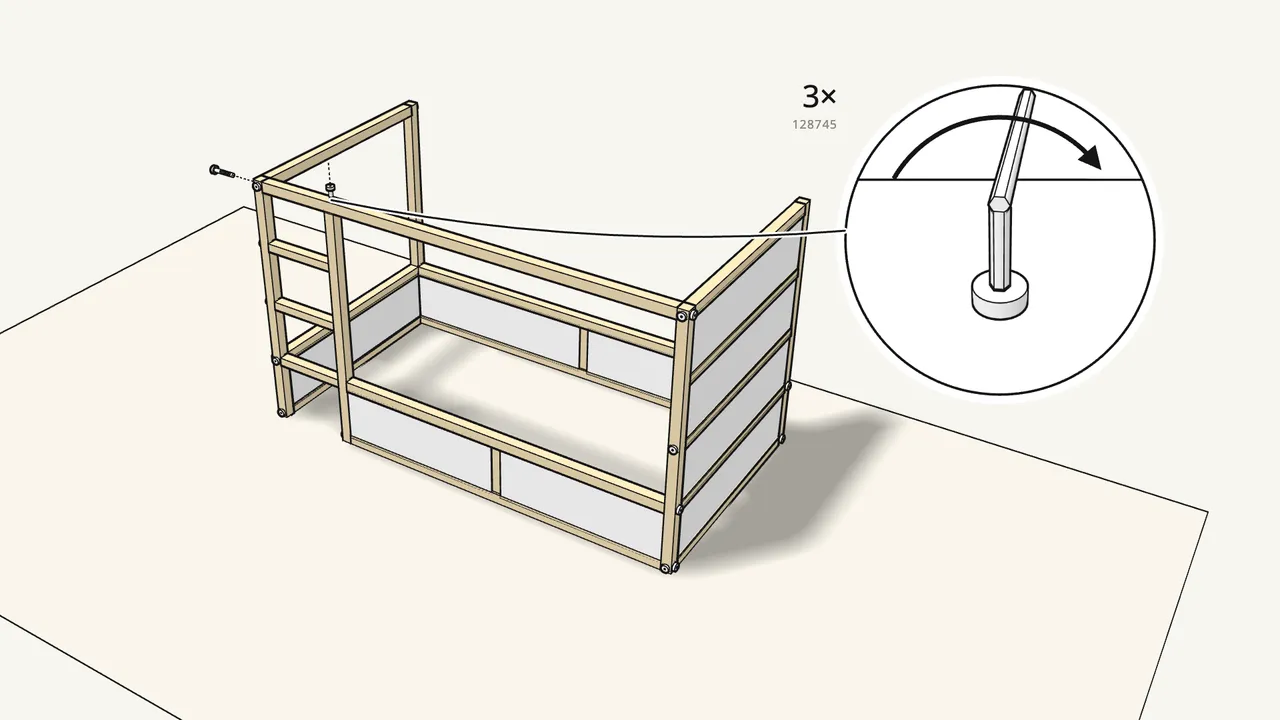
Step 17 · manual step 20–21
Place the front floor rail on top and screw it in place.
3 screws (128745): both ends and down into the ladder post.
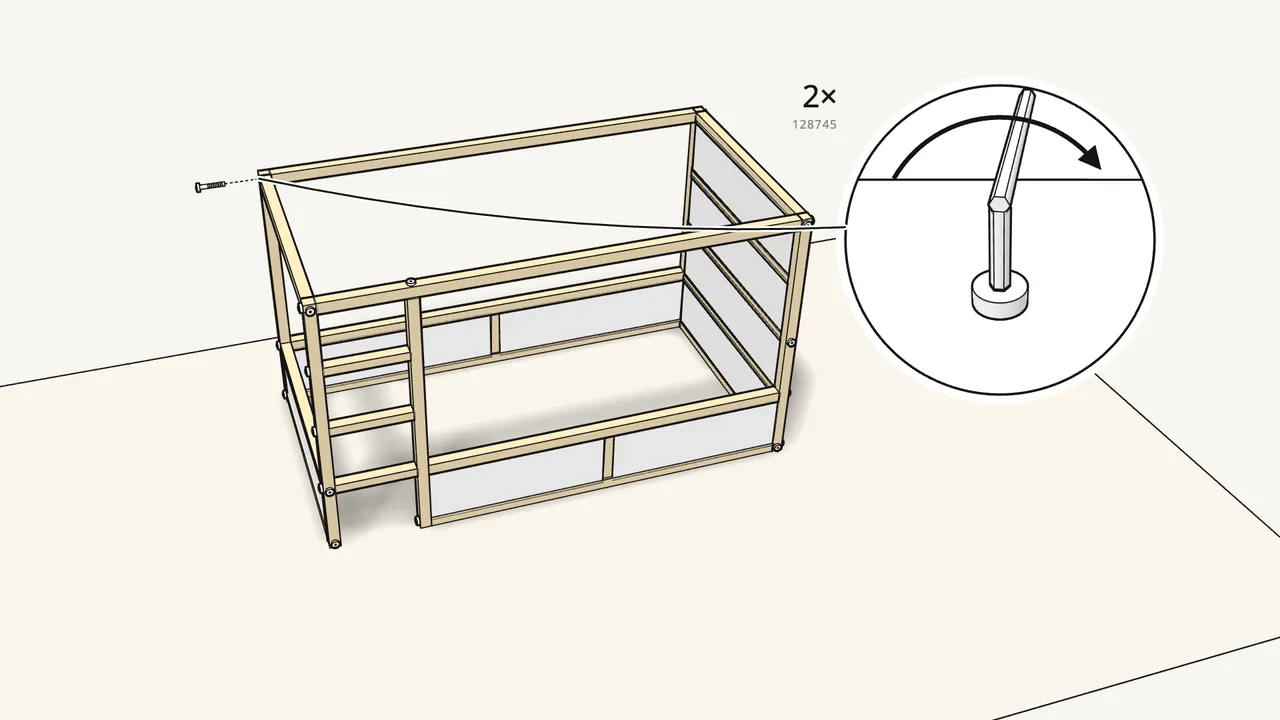
Step 18 · manual step 22–23
Add the back floor rail the same way — 2 screws.
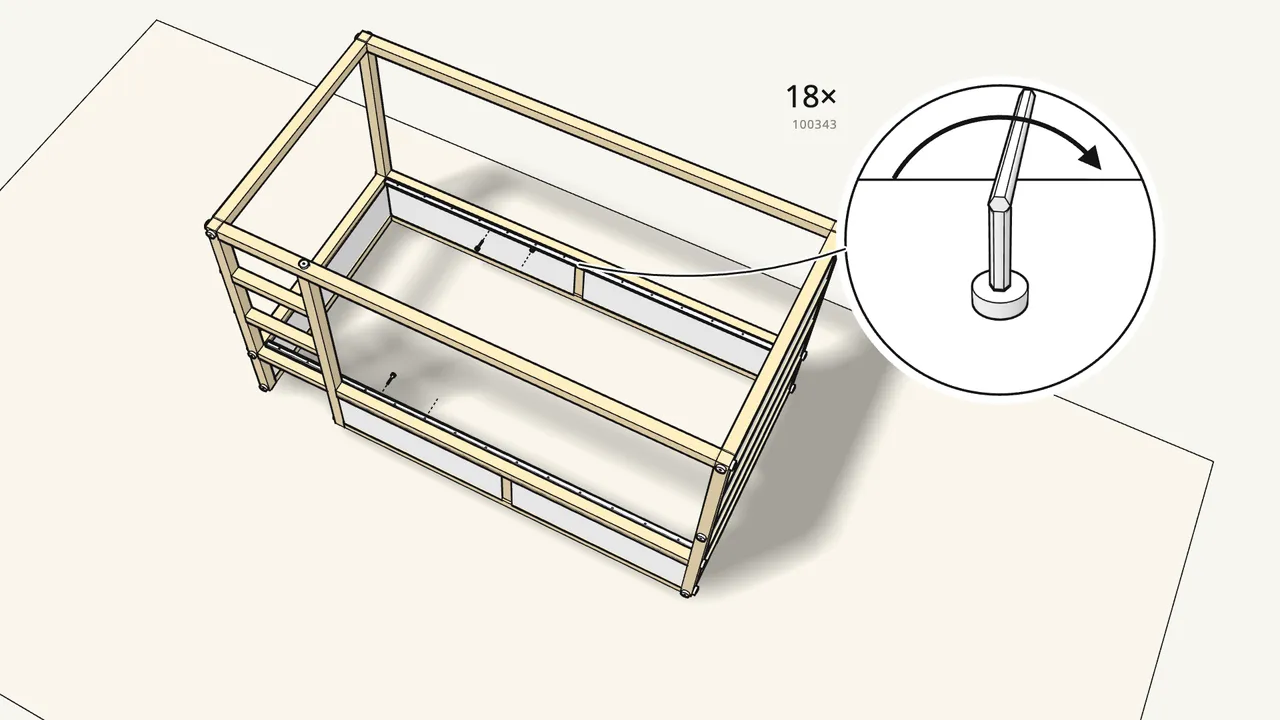
Step 19 · manual step 24
Screw the two metal slat rails (147717) inside the side panels.
18 screws (100343) with key 100092 — check the rail direction shown in the manual.
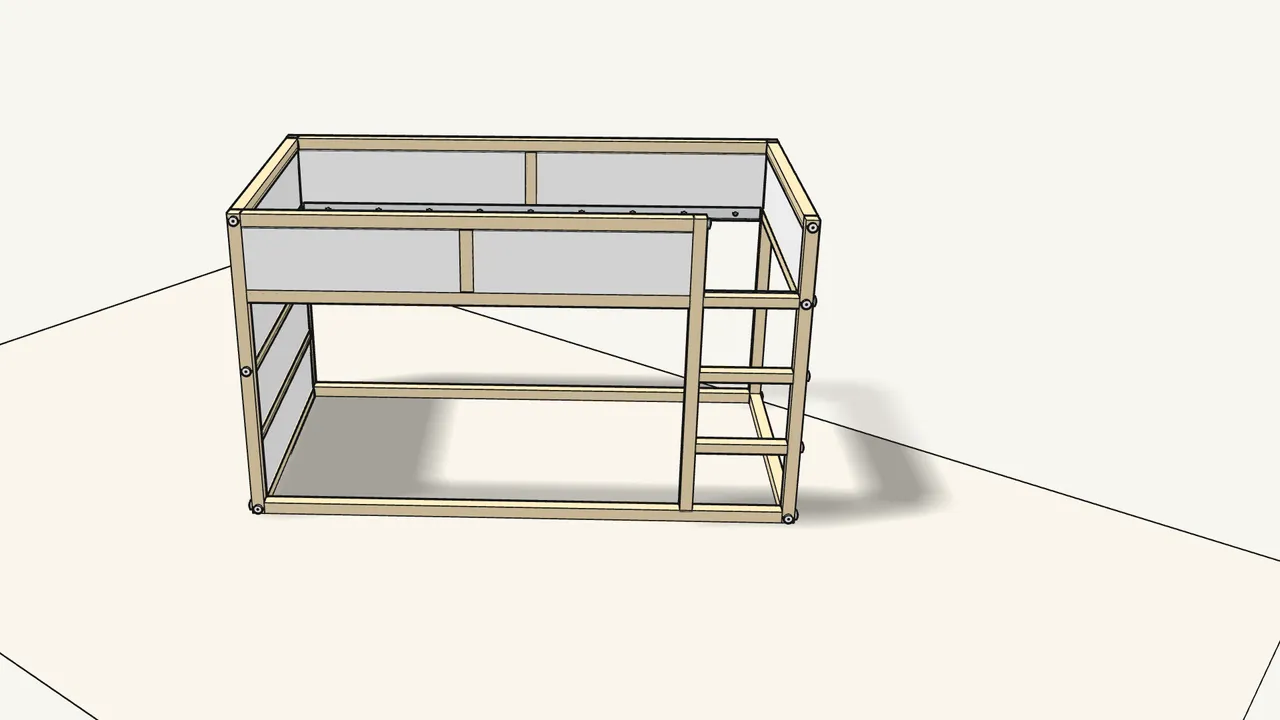
Step 20 · manual step 25
Turn the bed over, then turn it around.
Get help — it’s big. The side panels now form the top guard rails.
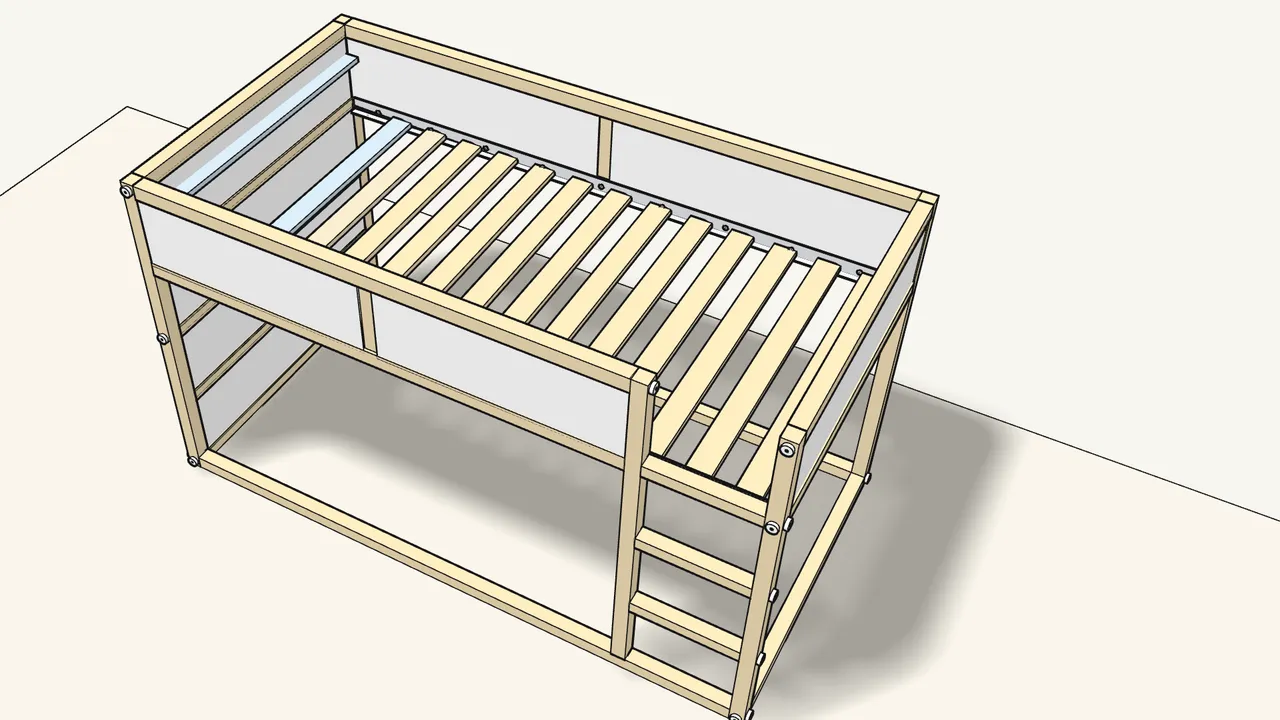
Step 21 · manual step 25
Lay the slatted base on the rails and unroll it.
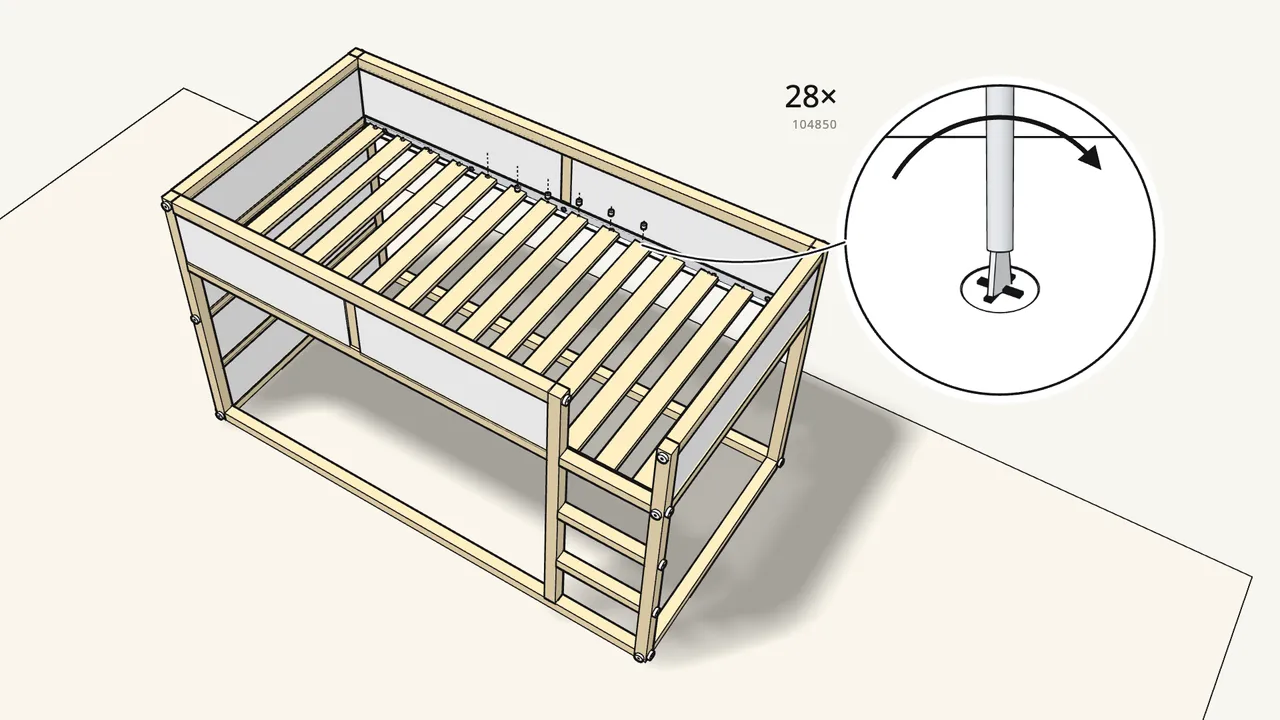
Step 22 · manual step 26
Fix each slat end: plug (105160) from below, pin (104850) from above.
28 of each — press the pin in until it clicks.
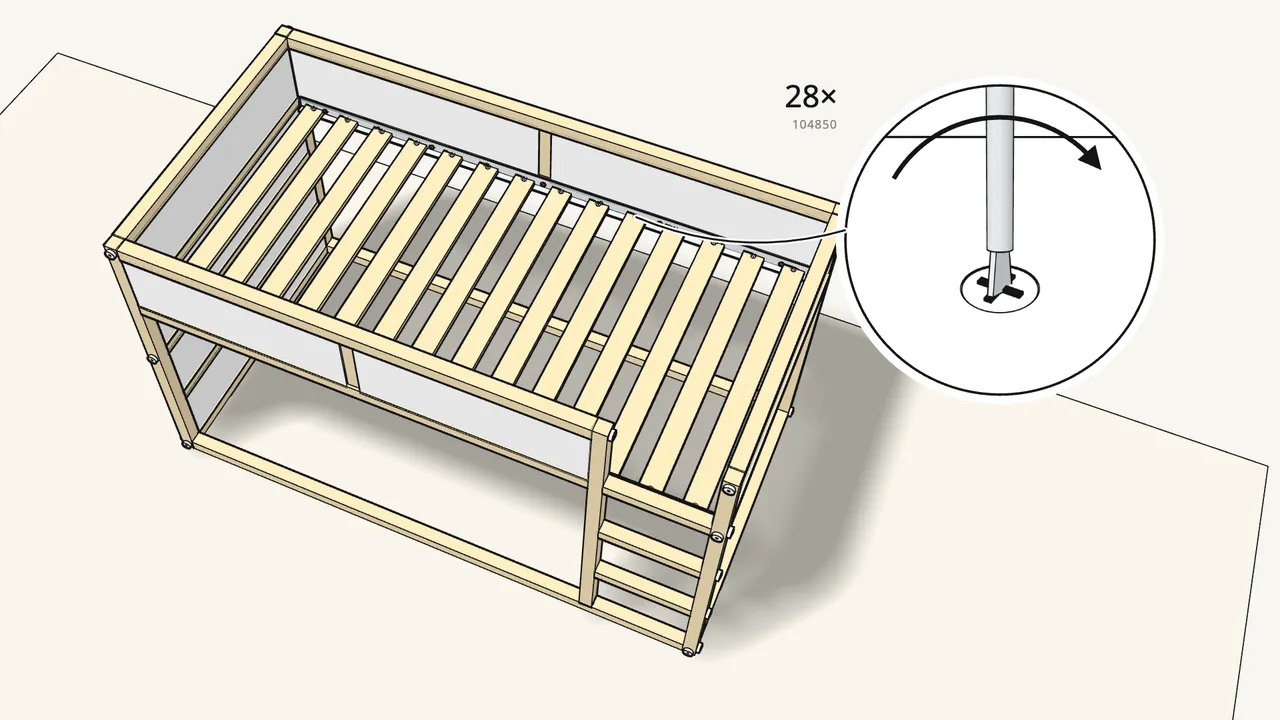
Step 23 · manual step 27
Turn all 28 pins to lock them.
Use key 100002, as shown in the manual.
Tips & safety
- High bed: only for children 6 years and older. The manual marks the high position with a 6+ warning.
- Mind the mattress height. The top of the mattress must stay below the marking on the guard rail (manual p. 21).
- Want a low bed instead? Build it the other way up: manual p. 22 (with ladder) or p. 32 (without).
Official instructions
This guide follows IKEA's official assembly instructions (AA-843436-8). Keep the printed manual to hand — if anything differs, the manual is right.